Once you have purchased the lifetime plan of Pabbly Subscriptions, you have to integrate a payment gateway, PayPal in this guide to facilitate payment collection.
Follow the below-listed steps to integrate PayPal payment gateway in your Pabbly Subscriptions account.
Note: If you want to learn about the complete working of Pabbly Subscriptions you can check the “How It Works” guide below.
https://www.pabbly.com/subscriptions/docs/how-it-works/
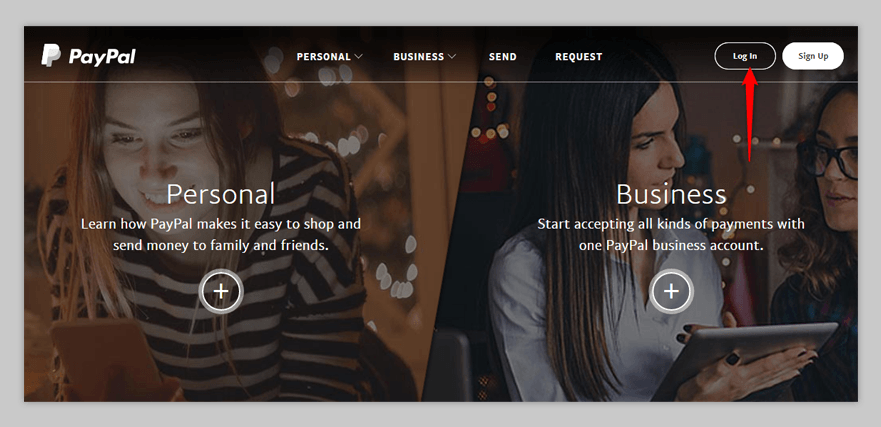
Step 1. Login To Your PayPal Account –
In order to integrate PayPal payment gateway in your Pabbly Subscriptions account, you have to log in to your PayPal account.
Step 2. Change The URL & Click On “My Account” –
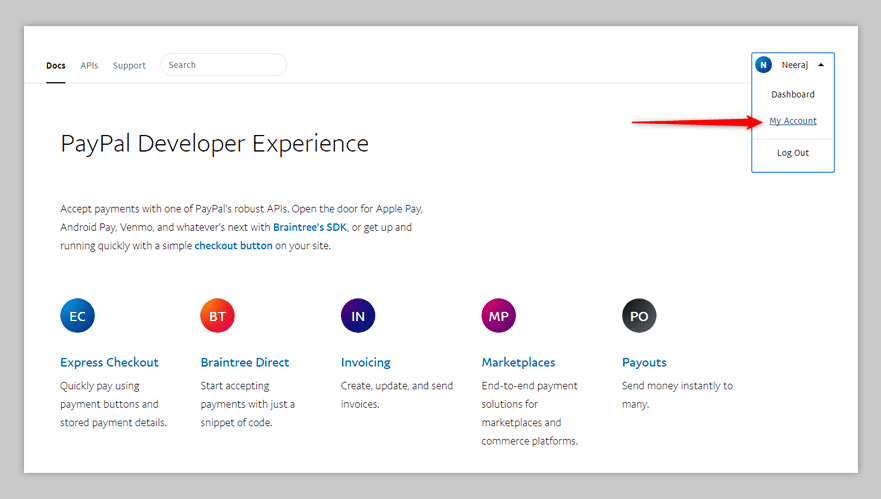
Once you have logged-in your account, you have to manually change the URL to “https://developer.paypal.com/“.
Or, simply click here – https://developer.paypal.com/
After this, you have to select the drop-down menu and click on My Account sub-menu.
Step 3. Click On “My Apps & Credentials” –
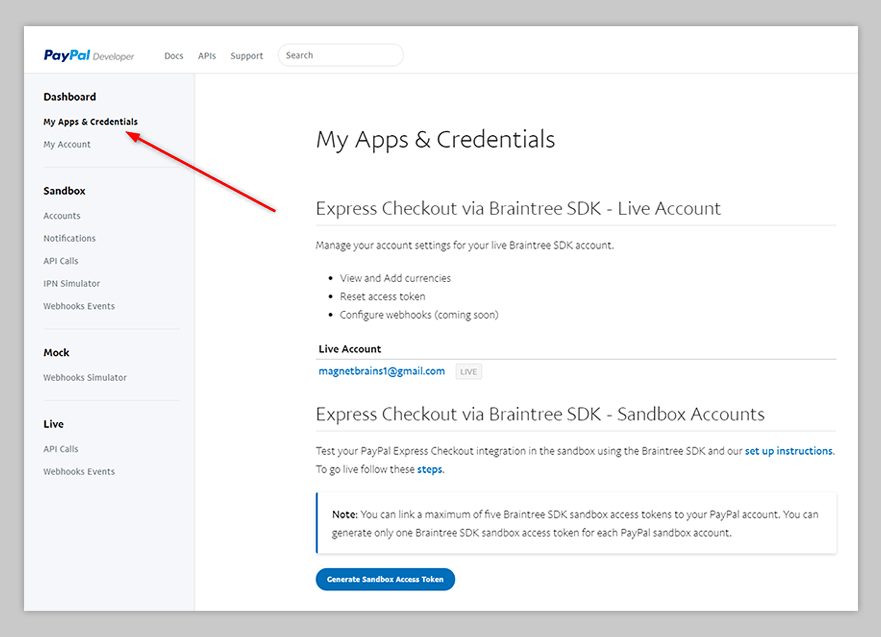
In the developer dashboard, click on “My Apps & Credentials” available in the left-sidebar.
Step 4. Move To “REST API Apps” section –
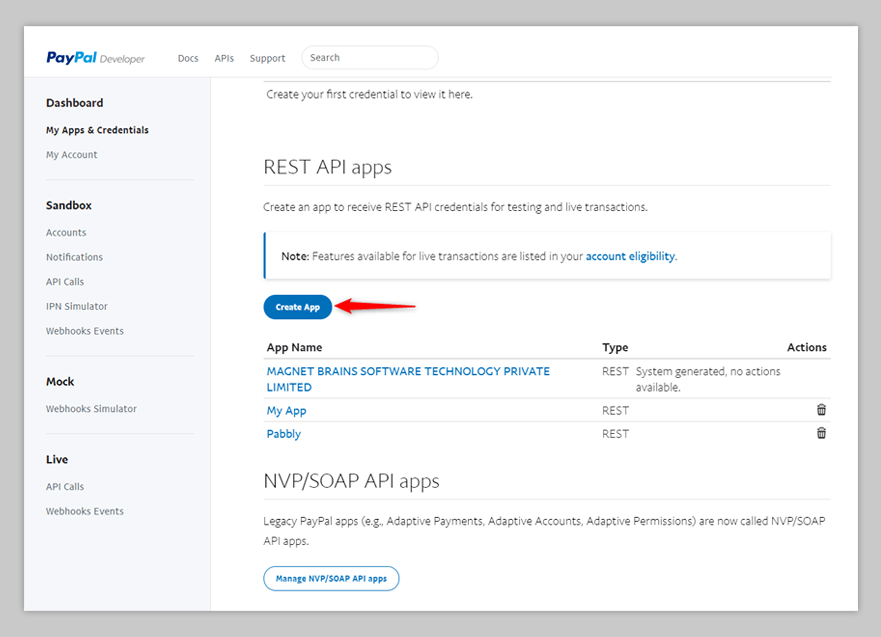
Once clicked, scroll down to the “REST API Apps” section and click on “Create App” button.
Step 5. Create New App –
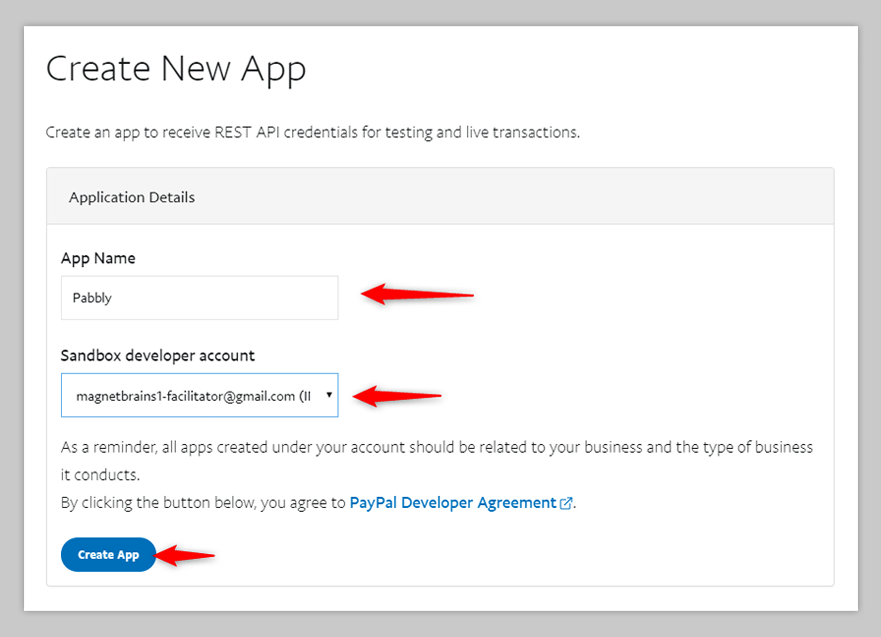
Once you click on Create App button (in step 4), a pop-up will appear on your screen, in which you have to enter application details like App Name and Sandbox Developer Account.
App Name should be the name of your application that you are creating.
Sandbox Developer Account takes your PayPal sandbox email address.
For example, If your PayPal email address is “[email protected]” then your Sandbox email address will be “[email protected]“. Clearly, all you have to do is add “-facilitator” just before the “@” symbol.
After this, click on “Create App” button.
Step 6. Generate Client ID & Secret ID For Your App –
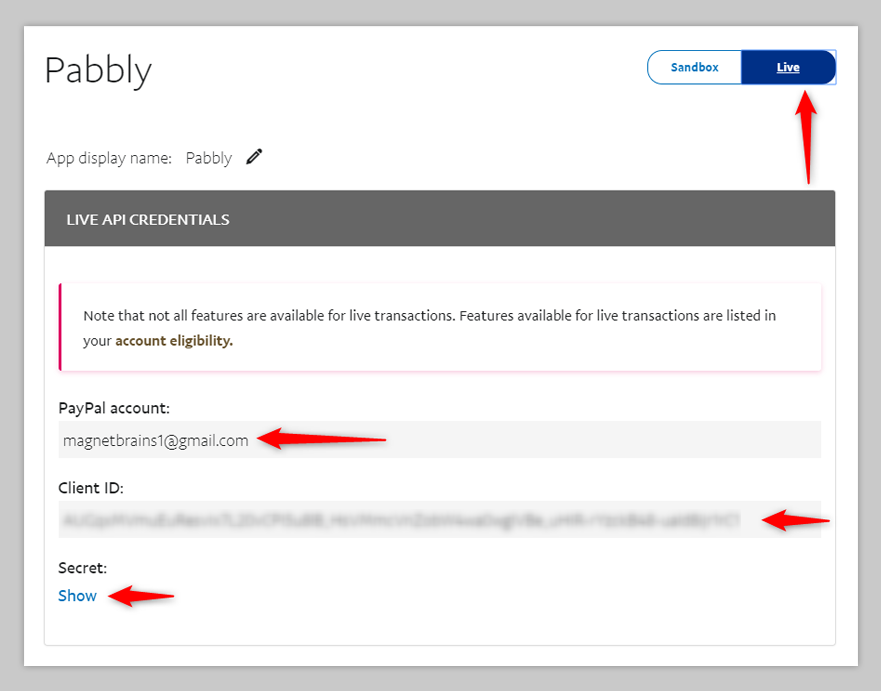
Once you have created your app by clicking the “Create App” button (from step 5), you are now required to generate Client ID & Secret ID for your app by first, click on the “Live” button.
After this, your Client ID & Secret ID will be generated automatically.
Step 7. Select App Feature Options –
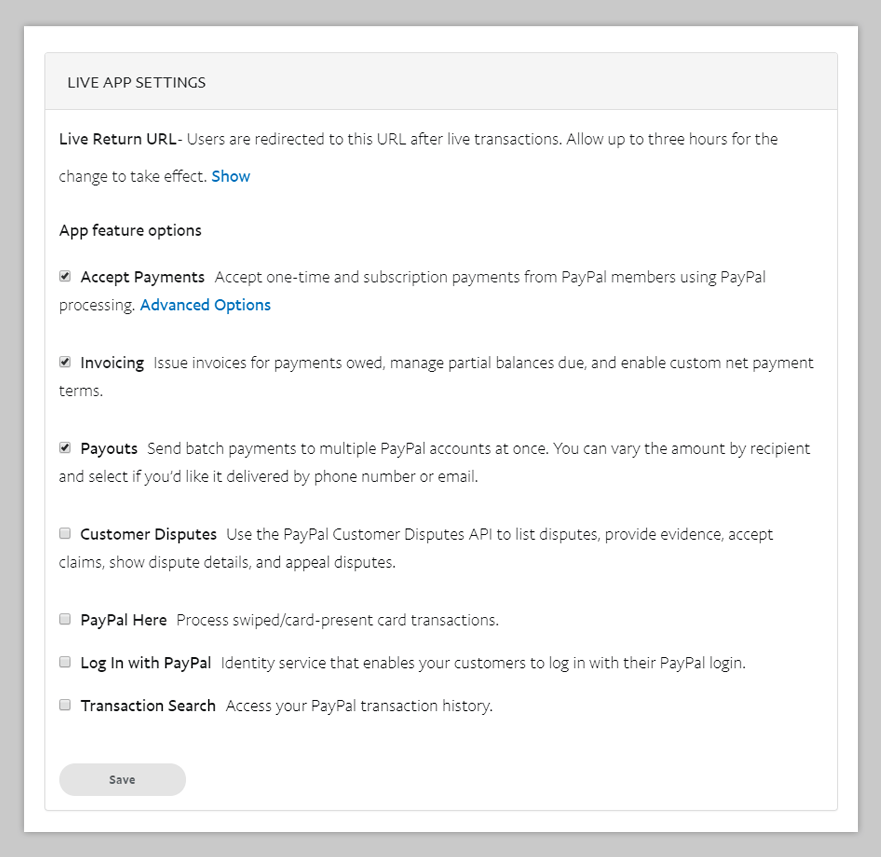
Before moving to the next step make sure to select following checkboxes (after scrolling down) to make your app fully functional –
- Accept Payments
- Invoicing
- Payouts
After this, Click on “Save”.
Step 8 – Add PayPal Client ID & Secret ID In Pabbly Account
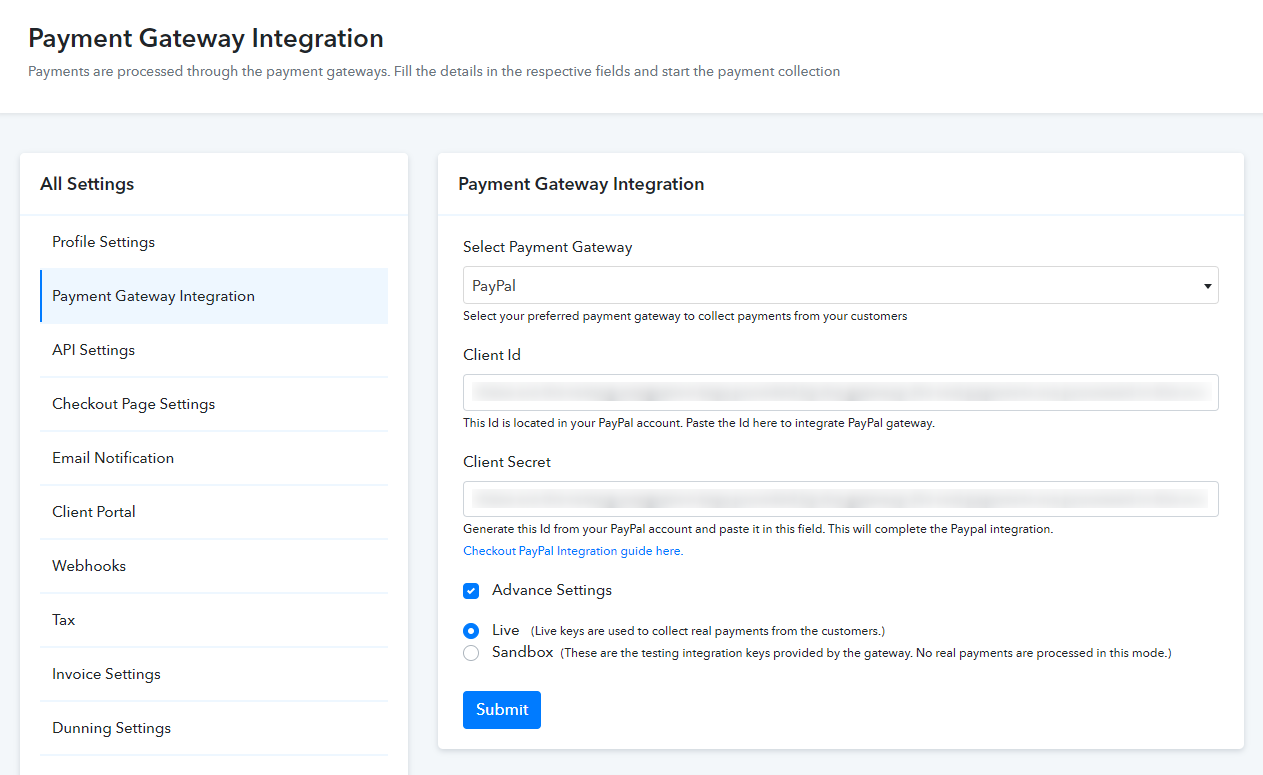
The last step involves the addition of Client ID & Secret ID in your Pabbly Subscriptions account. You are required to go to the Payment Integration settings and select the preferred Payment Gateway as PayPal from the drop-down list. After this, click on “Live “, add Client ID & Secret ID and then click on “Save“.
Now, you are all set to collect payments via PayPal Payment Gateway.
P.s: Rules of PayPal with Pabbly Subscriptions:
- PayPal refund feature is applicable for One-Time payment. In case of recurring payment, PayPal refund is not applicable.
- Coupons will work with “Forever Redemption” type. Coupons will not work with “One Time” & “Limited number of times”.
- Upgrade/downgrade of plans will not work with PayPal.


