This guide directs you, how you can set-up & use the multi-currency option for your product plans.
Using this option, you can make plan checkout pages for a specific currency. This way, you won’t need to use any conversion technique or bother your customers by paying in a different currency. Now, you can make currency-specific payment pages and your customers can easily make payments in their own currencies.
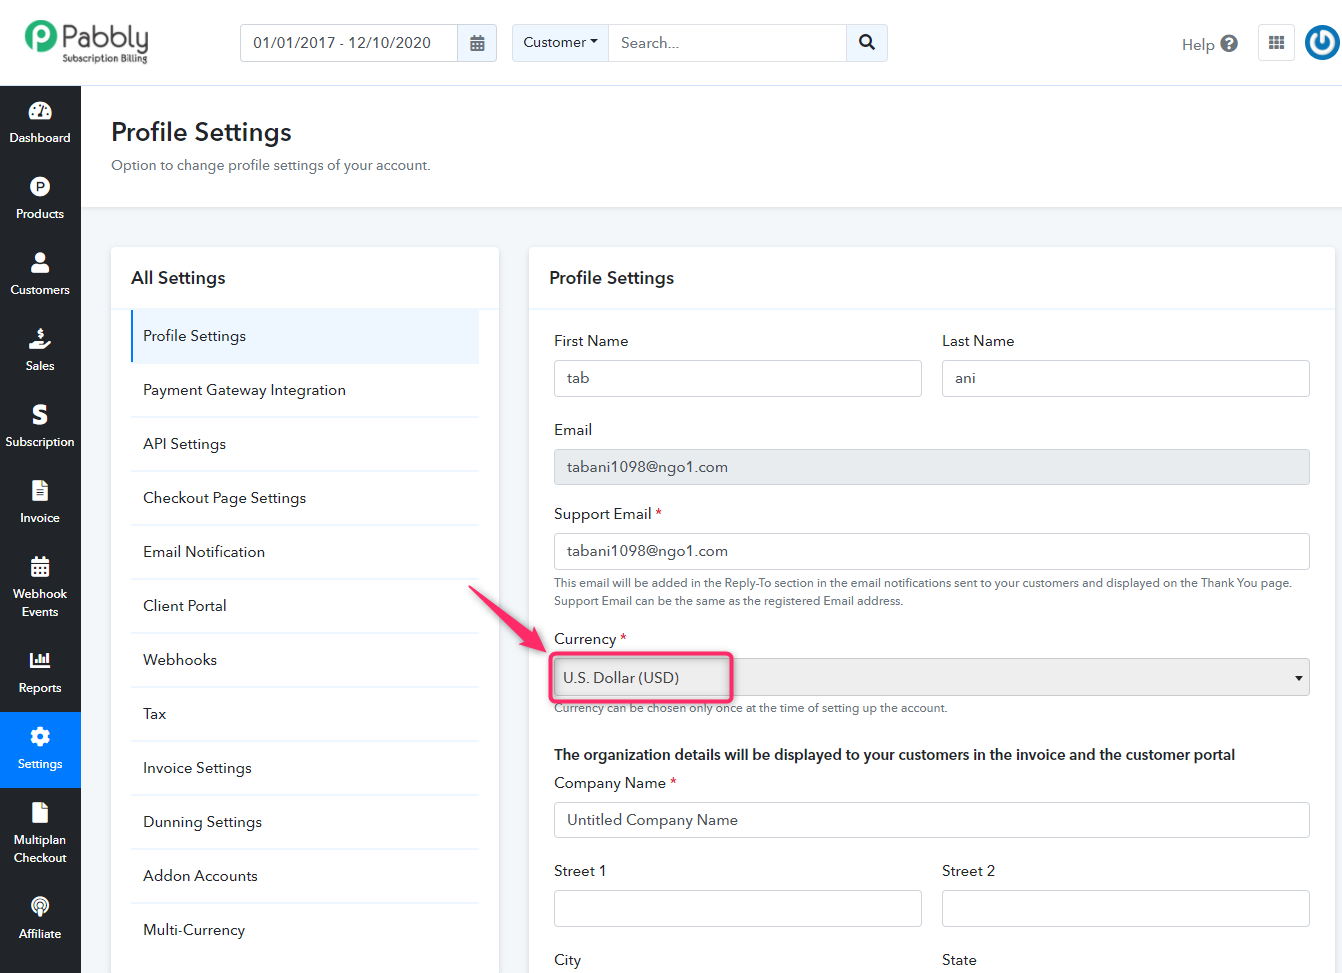
By default, the currency setting points to the currency that you’ve chosen at the time of account creation.
And with the Pabbly Subscription Billing multi-currency option you can use multiple currencies in your plans.
Well, the set-up is pretty simple and you can follow a few simple steps to make use of the multi-currency option.
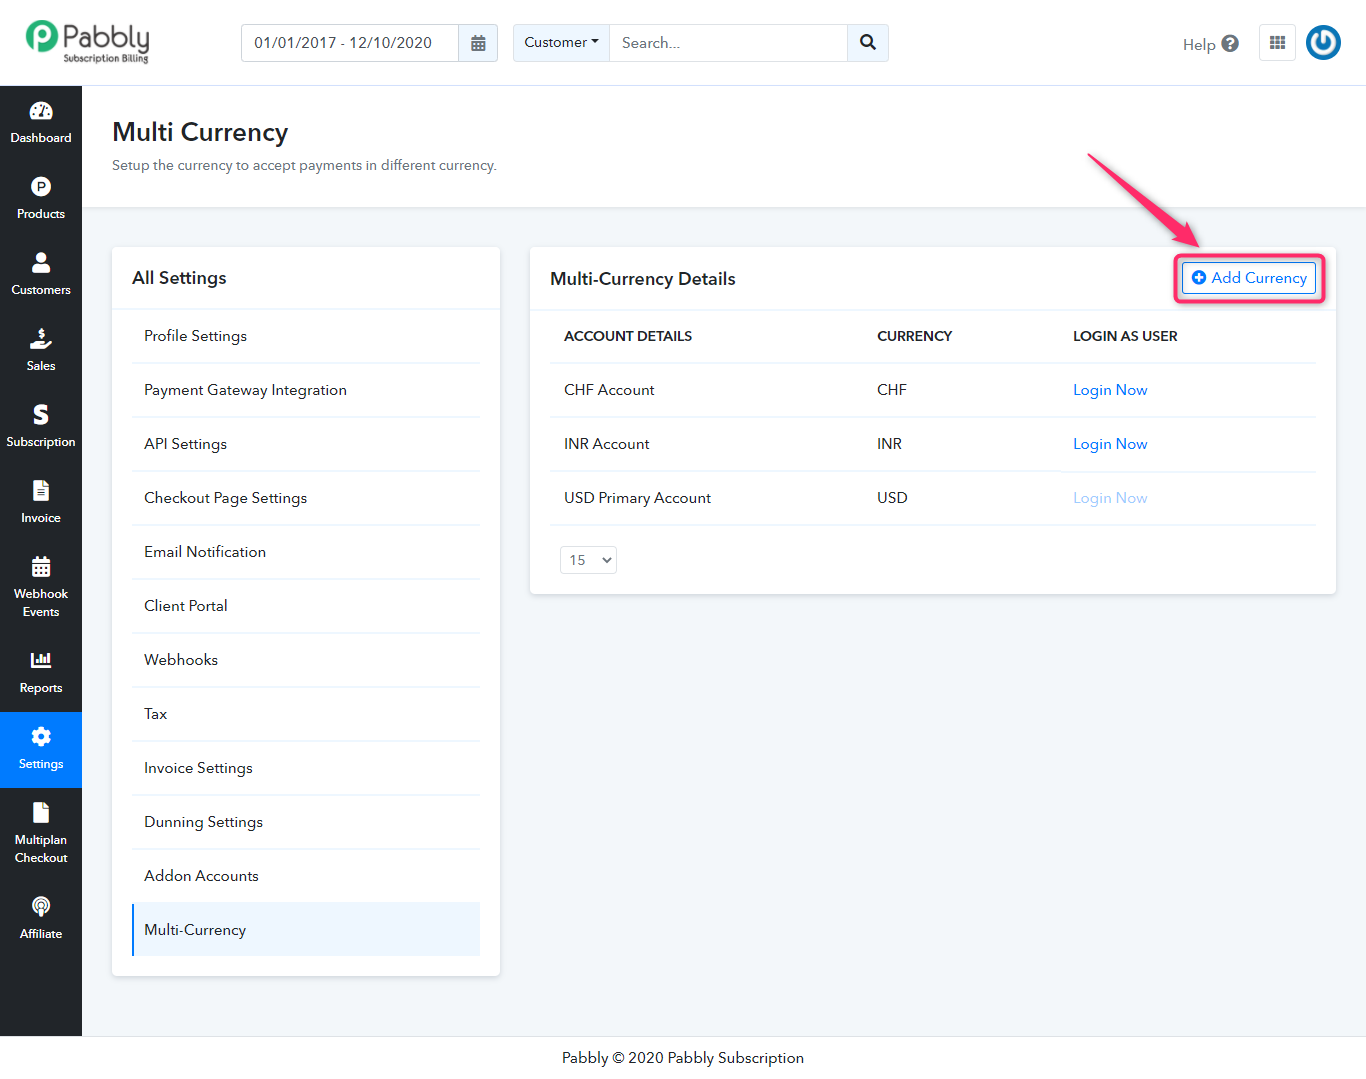
- Go to Pabbly Subscription Billing Dashboard -> Settings -> Multi-Currency

- To add a currency, click on the ‘Add Currency’ button present at the top-right corner.
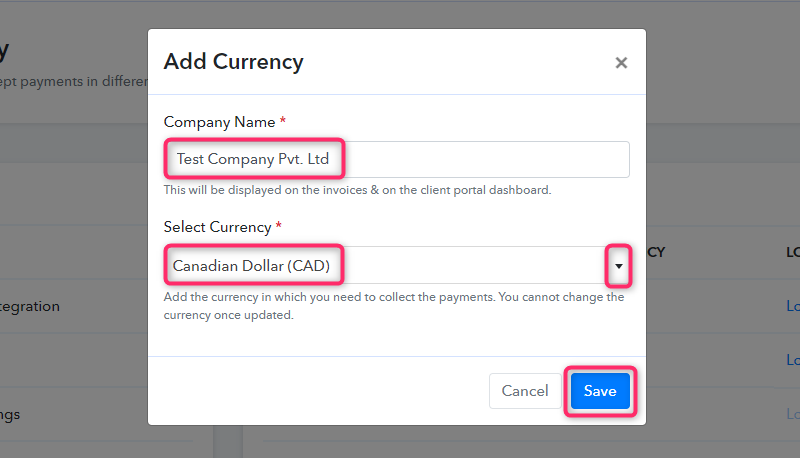
- Next, add a company name, select a currency and click on the ‘Save’ button.
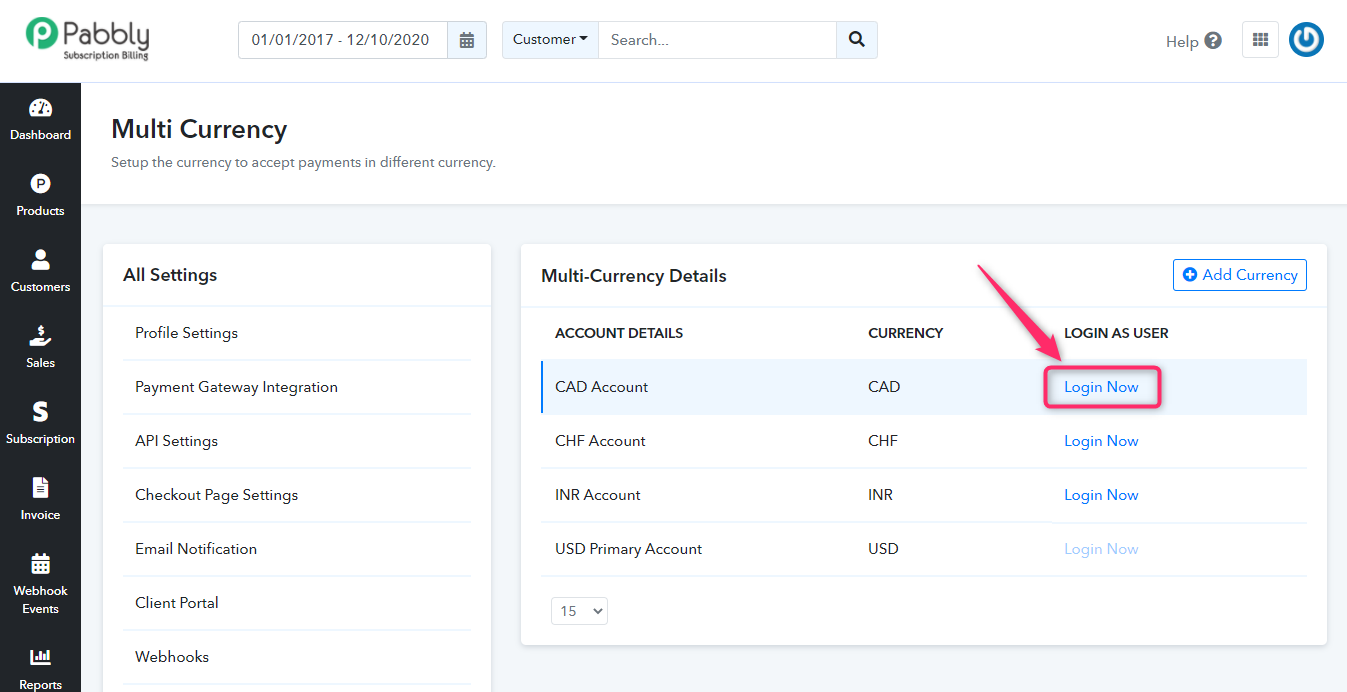
- Now, click on the ‘Login Now’ button next to the added currency.
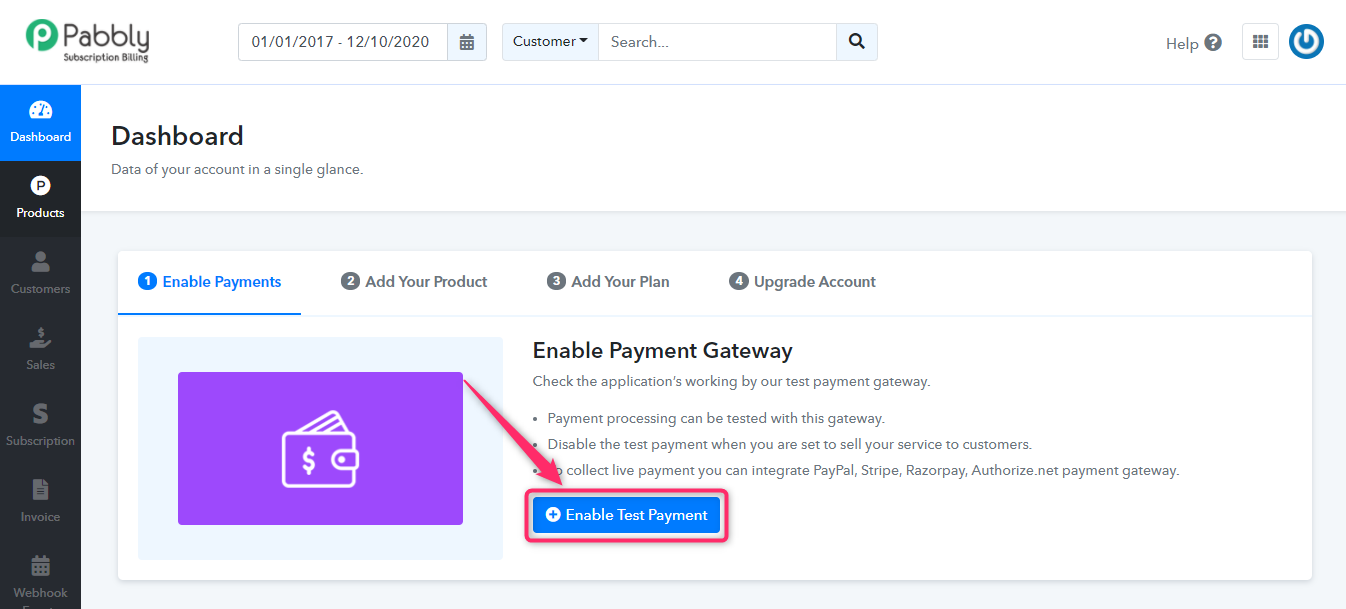
- Click on ‘Enable Test Payment’ button.
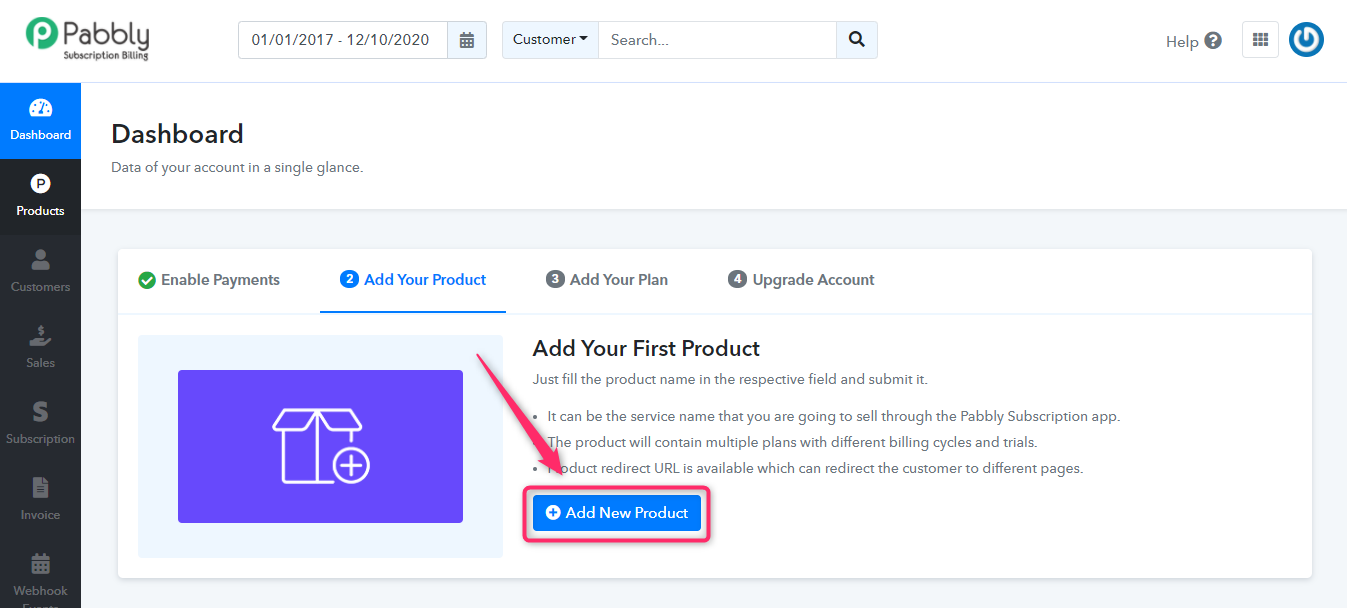
- Hit the ‘Add a product’ button.
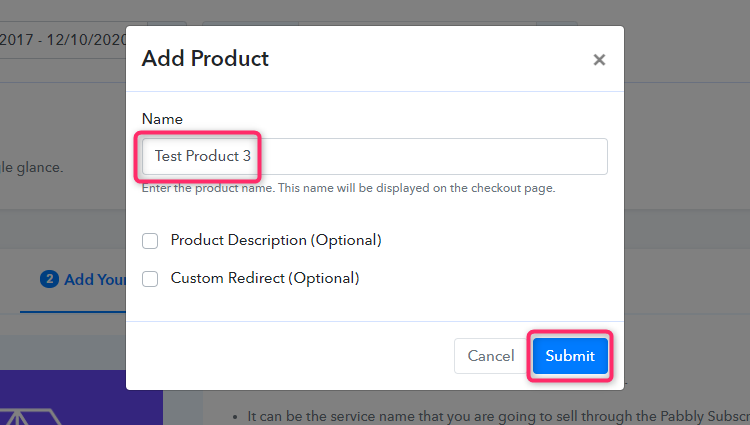
- Add and submit the product details in the next pop-up window.
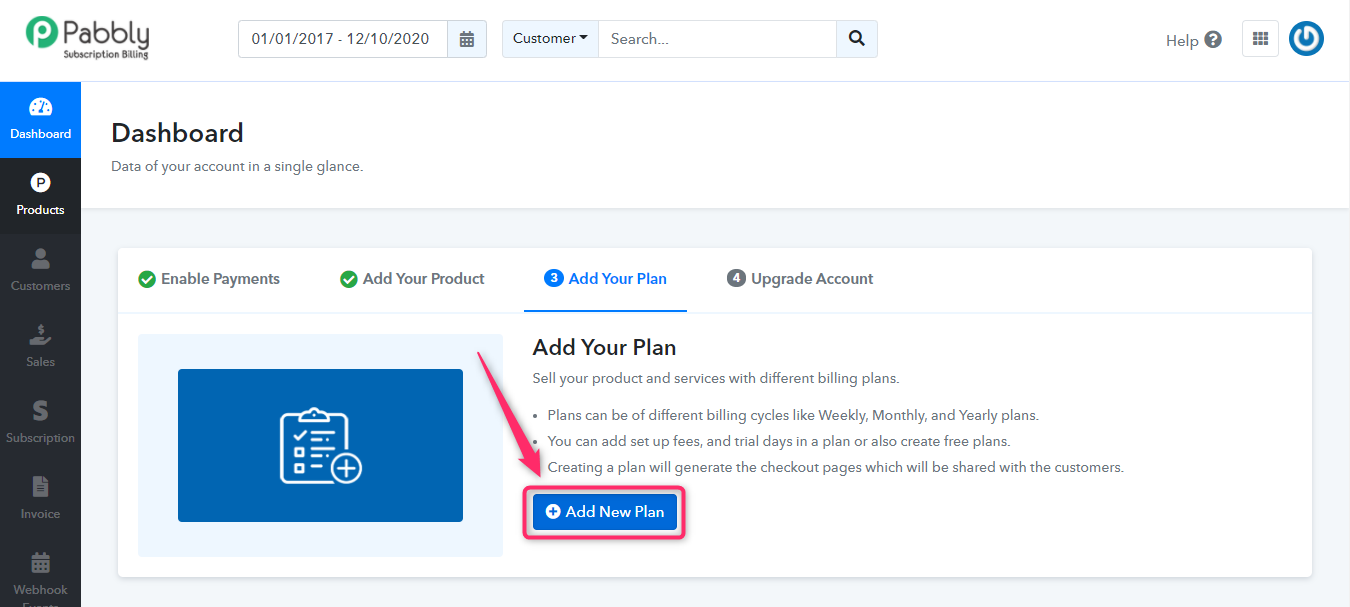
- Then click on ‘Add a Plan’.
- On the plan page. add a plan name, mention the price value and save the plan.
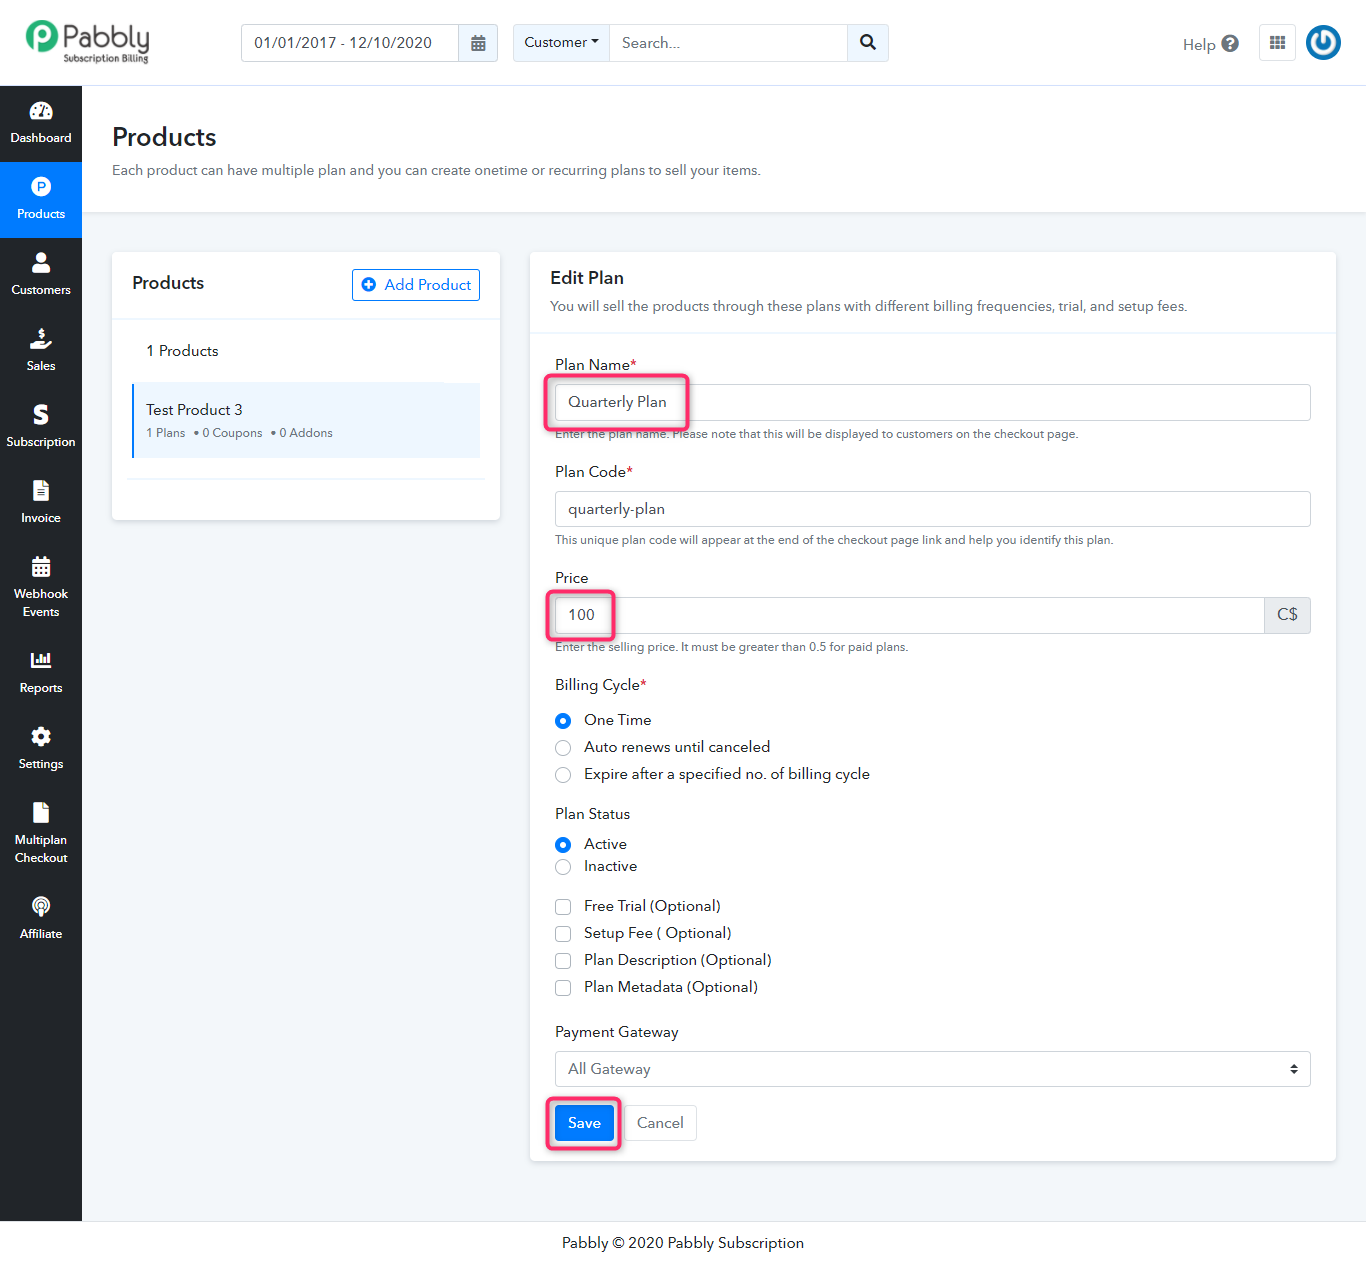
- You can see the currency value as ‘Canadian Dollar (CAD)’ of the recently created plan.
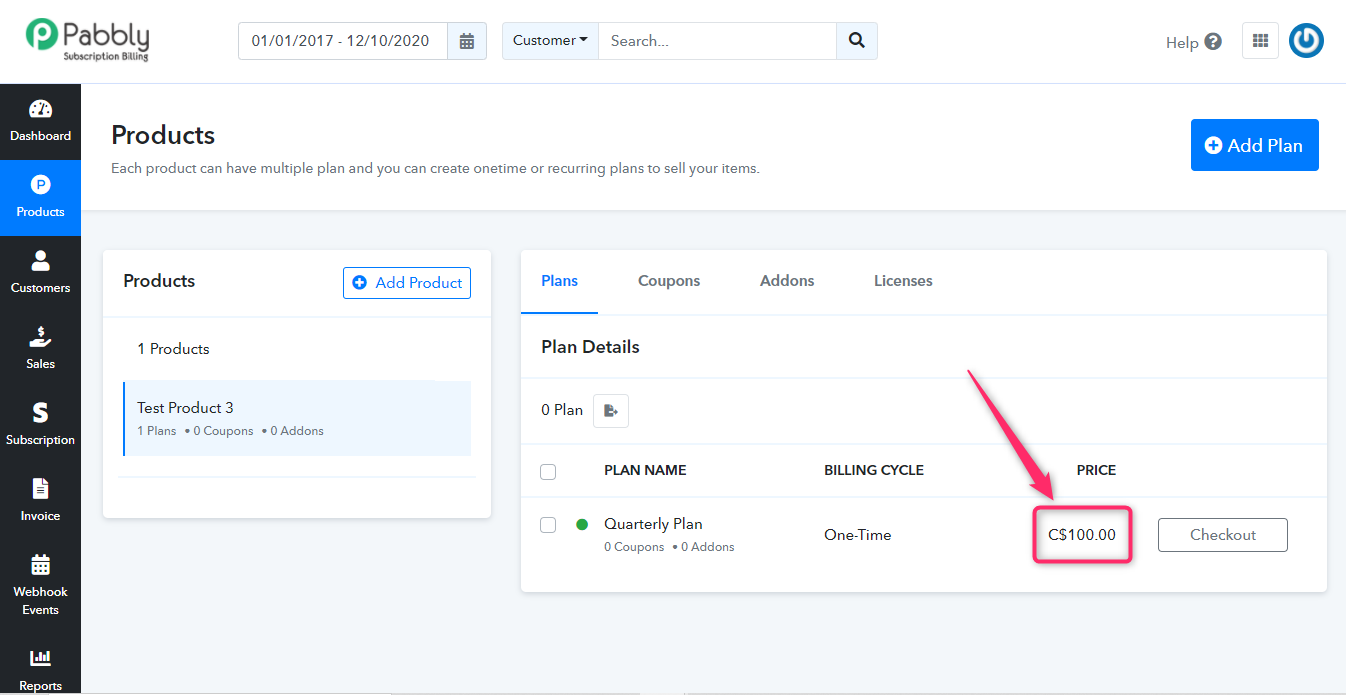
With this setting, you can add multiple plans of the same currency i.e, Canadian Dollar (CAD).
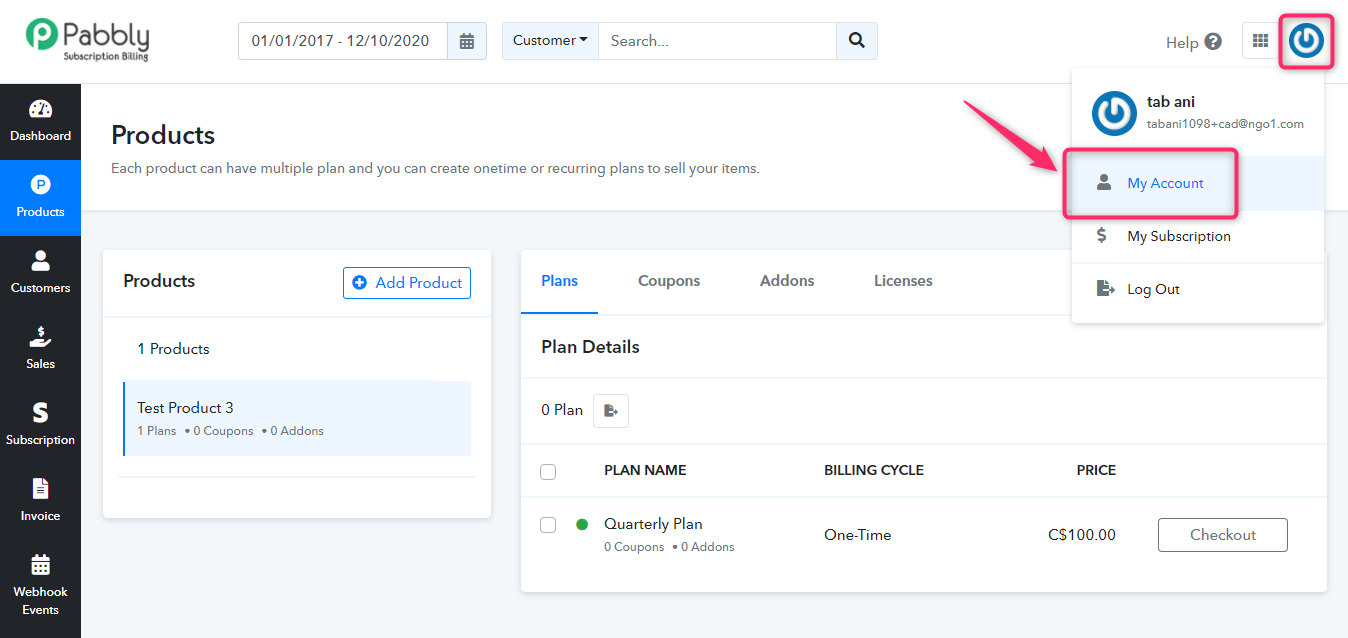
Moreover, to switch between multiple currencies go to the ‘My Account’ option and login or add dedicated currencies.
By making plans using the multi-currency option, you can offer a dedicated currency type for your customers.


