This guide explains How you can integrate payment within Pabbly Subscriptions.
With Pabbly Subscriptions, we are offering an open integrated payment API through which you can integrate any payment gateway of your choice.
There are 2 methods in which you can integrate your own custom payment gateway to Pabbly Subscriptions.
- Integration through Checkout Page.
- Integration through Pabbly Subscription API.
I will explain the integration process of adding your own custom payment gateway one by one.
1. Integration through Checkout Page –
The first way to integrate a custom payment gateway is through the checkout page.
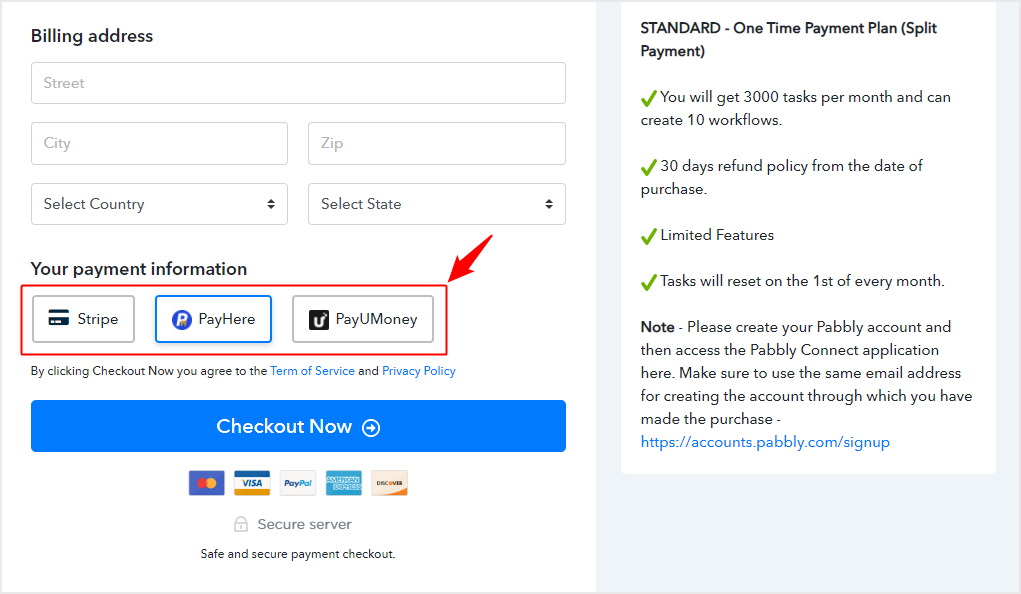
Whenever you create a product and plan within Pabbly Subscription, a checkout form for that product is automatically generated. Your customers can then fill the checkout form and choose their ideal payment gateway and do the payment.

To add your own custom payment gateway integration and do perform the payment through your custom gateway via checkout page, here is how the payment workflow takes place.
From Merchant (Sellers) end –
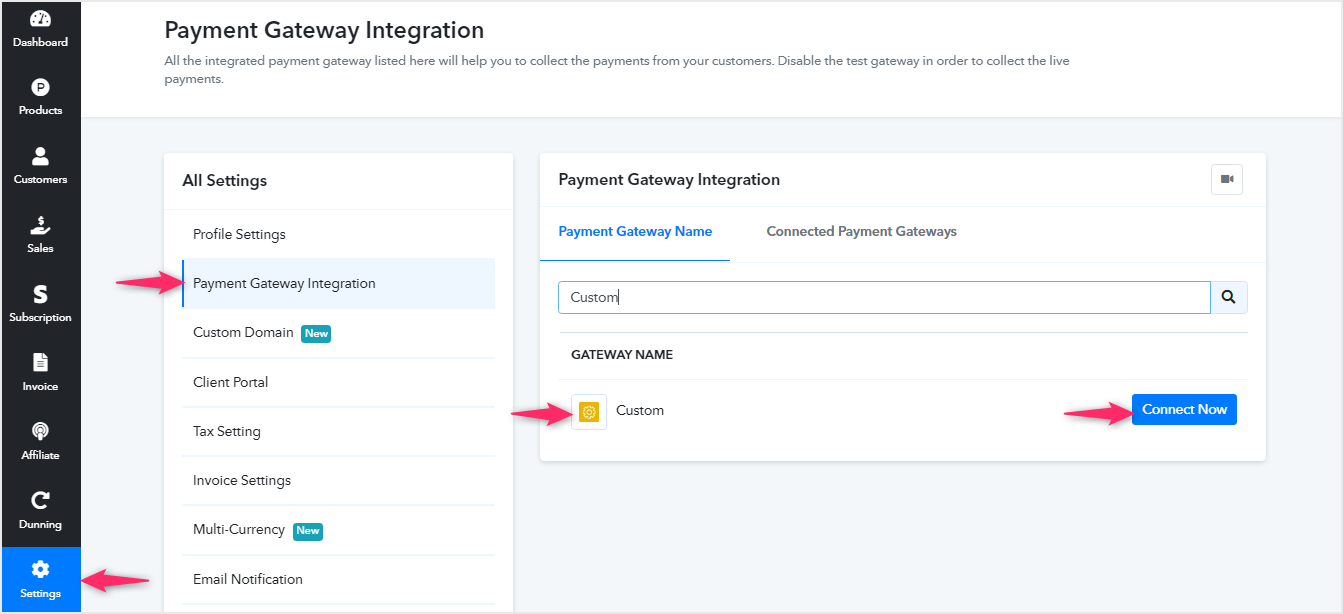
- You will add the custom payment gateway from your payment gateway settings.

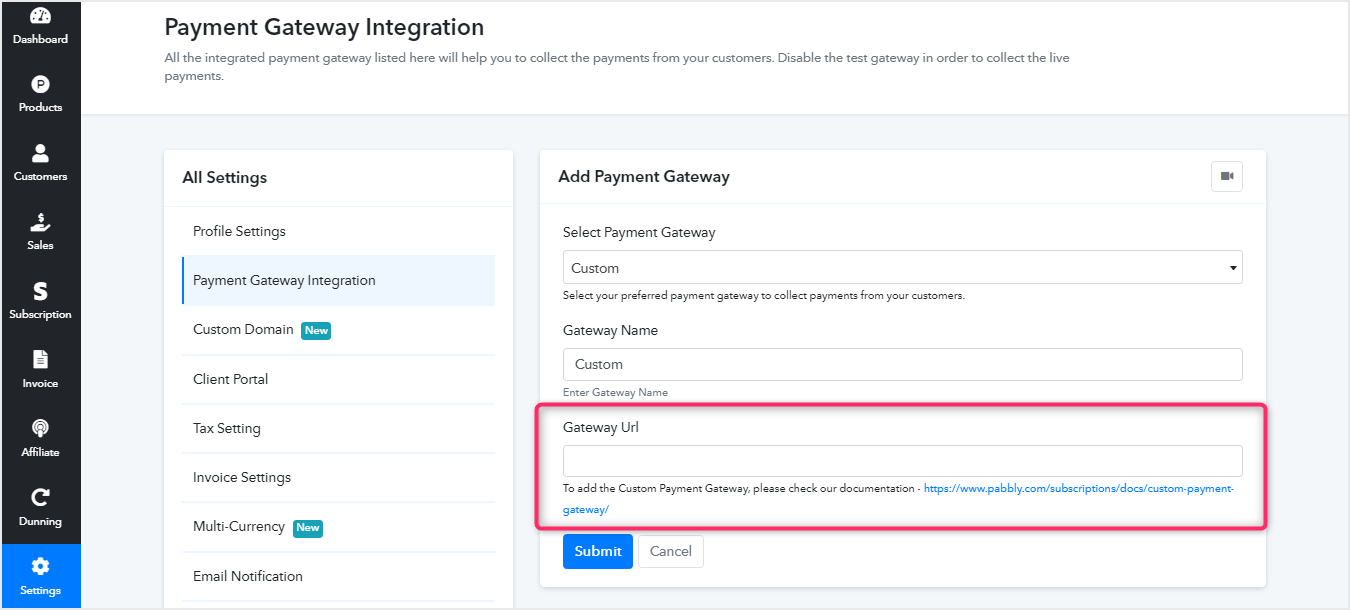
- You will add a link/URL of your own custom payment gateway integration file.

- This file will be hosted on your server for handling the payments through your own custom payment gateway.
- When your customer submits the checkout page, the process will be redirected to your gateway URL along with the checkout(hosted) page query string.
- You can then run the “Verify Hosted Page API” by passing the value of the query string from the previous step to get all the check-out page data on your custom payment gateway integration page.
Refer: https://www.pabbly.com/subscriptions/api/#section-31 - The pre-payment data includes all the essential fields to do your own processing through your gateway. It includes fields details below.
- Customers Name
- Customer Email
- Customer ID
- Product Name
- Product Price
- Invoice ID
- If you need any further customer data apart from what is provided through the “Hosted Page API”, you can also get further customer data by calling the “Get Single Customer” API. This API will fetch you data for billing address, country state, etc.
Refer: https://www.pabbly.com/subscriptions/api/#section-3 - You can then use the details fetched in the steps 6 and 7 above and process the payment through your custom payment gateway integration.
- After completion of your payment through your payment gateway, you will be notified about the payment success through your gateway.
- Once the payment processing is successful, you need to update the details of the customers and record the payment for that customer in Pabbly Subscriptions.
- Details that need to be updated are below.
- Invoice: Record the payment data for the subscription to update the invoice.
- Payment Mode: You can add your own payment mode name. For example – Authorize.net or PayPro
- Transaction Data: You can store any transaction data returned from your payment gateway within Pabbly Subscriptions.
- Payment Note: Add your own custom payment note for the payment.
- Once the payment is updated, you can redirect the customer to the Pabbly Subscriptions thank you page by using the data provided by the “Record Payment API”.
- If required you can also redirect the customers to your own custom thank you page based on the details provided by the “Record Payment API”.
- Sample code for your reference is included below.
https://github.com/MagnetBrains/pabbly-subscription-custom-gateway/blob/master/checkout-with-hostedpage.php - We have also integrated a custom payment gateway “RazorPay” by following the steps explained above. You can checkout the integration through the link below. https://github.com/MagnetBrains/pabbly-subscription-razorpay-php
From Customers end. Here is how the payment workflow happens.
- Customer will fill the checkout form.
- Customer will choose your custom payment gateway to do the payment.
- They will be redirected to your payment gateway integration page.
- They will do the payment successfully.
- They will be redirected back to the thank you page.
- At the time of recurring billing, a payable invoice will be automatically sent to your customer and they will complete the payment from their end.
2. Integration through API –
The second way to integrate a custom payment gateway is through the Pabbly Subscriptions API. The integration with API is fairly straightforward.
To add your own custom payment gateway integration and do perform the payment through your custom gateway via API, here is how the payment workflow takes place.
From Merchant (Sellers) end –
- Whenever you create a product and plan within Pabbly Subscription. You get the plan ID for each created plan.
- Plan ID can be fetched through your Pabbly Subscriptions account or it can also be fetched by running the “List All Products” and “List All Plans” or “List All Plans by Product Id” API.
Refer:
List All Products: https://www.pabbly.com/subscriptions/api/#section-14
List All Plans: https://www.pabbly.com/subscriptions/api/#section-18 - Once the details are fetched, you can then run the “Create Customer with Subscription” API to create the subscription for the customer. This API requires all the customer details including the plan id for which you want to subscribe to the customer. The initial subscription is created with “Pending” status.
Refer: https://www.pabbly.com/subscriptions/api/#section-2 - You can then capture the API response from the “Create Customer with Subscription” API and fetch data of the entire User, Customer, Product, Plan, Invoice Object.
- You can then use the details fetched in the step above and process the payment through your custom payment gateway integration.
- After completion of your payment through your payment gateway, you will be notified about the payment success through your gateway.
- Once the payment processing is successful, you need to update the details of the customers and record the payment for that customer in Pabbly Subscriptions.
- Details that need to be updated are below.
- Invoice: Record the payment data for the subscription to update the invoice.
- Payment Mode: You can add your own payment mode name. For example Authorize.net or PayPro
- Transaction Data: You can store any transaction data returned from your payment gateway within Pabbly Subscriptions.
- Payment Note: Add your own custom payment note for the payment.
- Once the payment is updated, you can redirect the customer to the Pabbly Subscriptions thank you page by using the data provided by the “Record Payment API”.
- If required you can also redirect the customers to your own custom thank you page based on the details provided by the “Record Payment API”.
- Sample code for your reference is included below.
https://github.com/MagnetBrains/pabbly-subscription-custom-gateway/blob/master/checkout-with-api.php


