The integration of Authorize.net payment gateway is now made available in Pabbly Subscriptions.
Integrating this payment gateway is a 2 step process.
- Adding the gateway integration keys
- Setting up webhooks (For Automatic recurring payment.)
Adding The Gateway Integration Keys:
For completing the first step go to –
Settings -> Payment Settings -> Choose “Authorize” from the drop-down menu -> Add the keys of your Authorize.net account -> Submit the changes.
Adding the integration keys will follow as –
- Choose ‘Authorize’ from Select payment gateways drop.
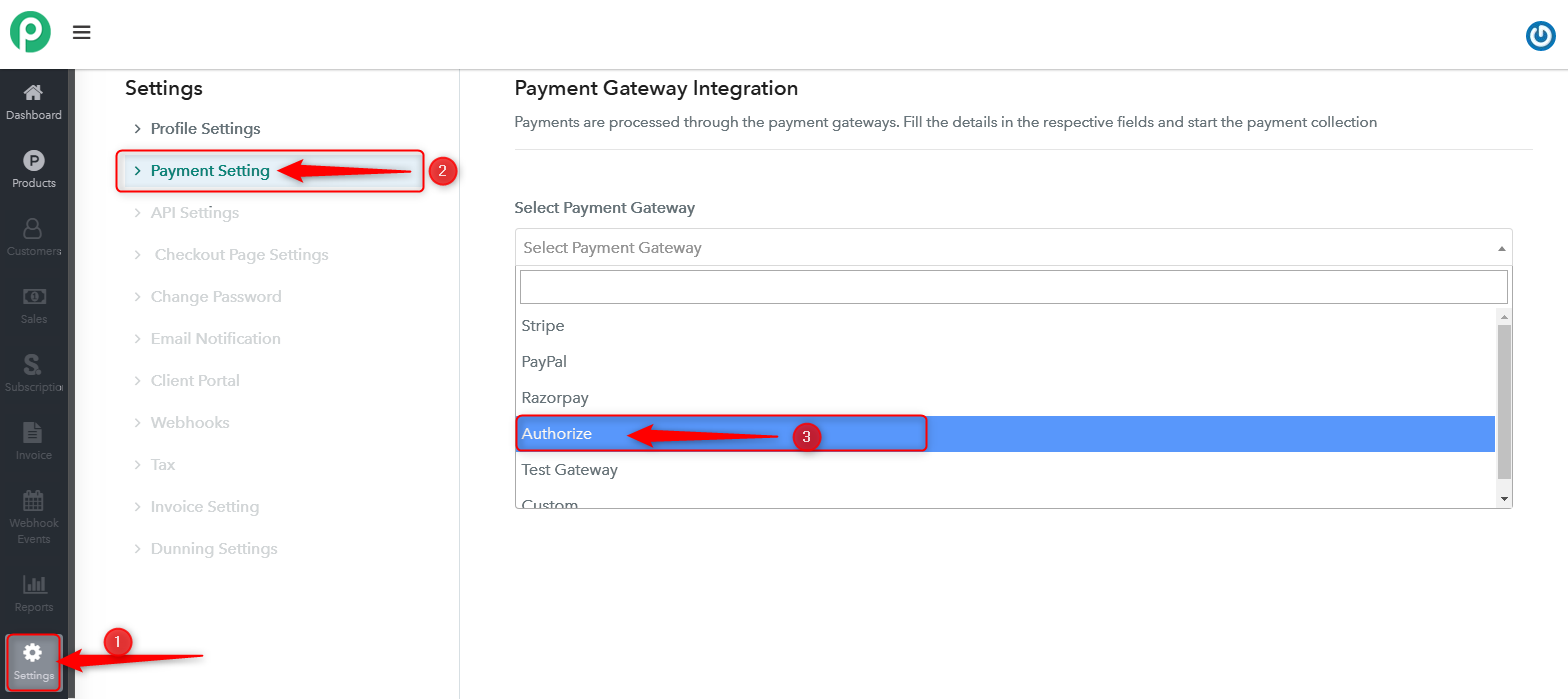
- Select ‘Authorize’ from the gateway type dropdown field.
- Fill the merchant login Id and merchant transaction keys (You will find these keys in your Authorize.net account) and choose the mode of payment gateway (Live or Sandbox).
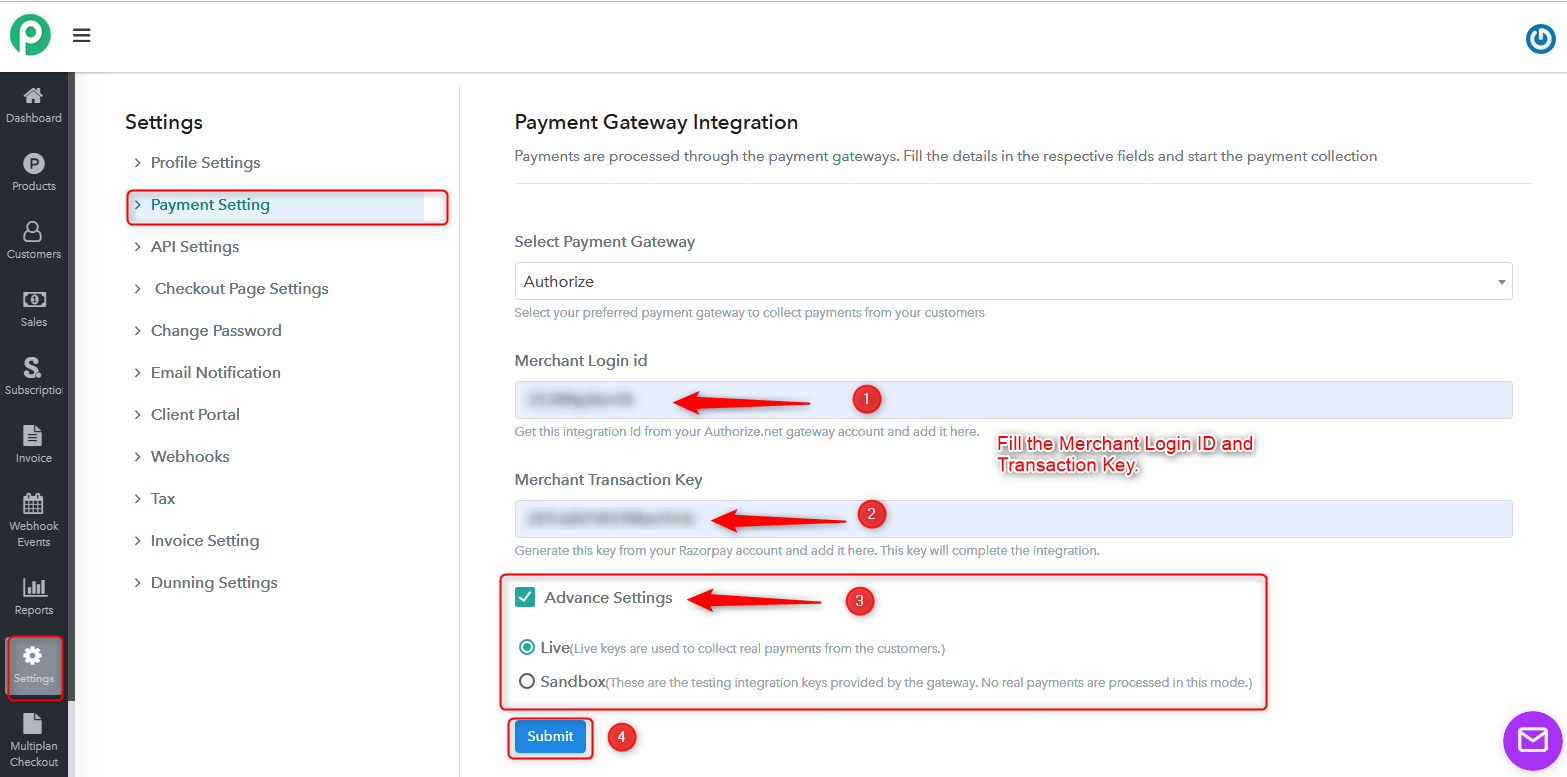
- Finally, submit the changes.
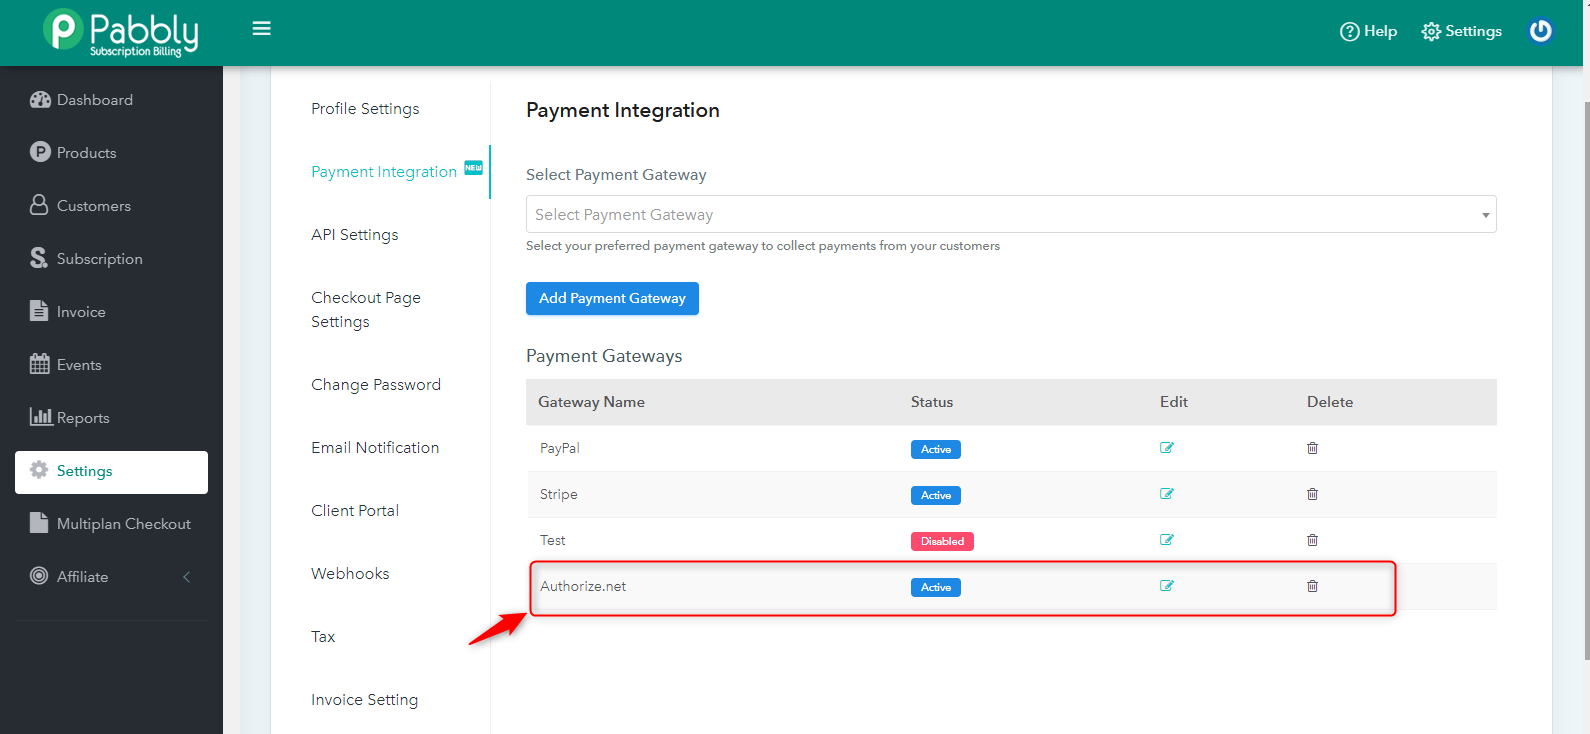
Now you can see the payment gateway is activated in your account.
And you will also get to see the Authorize.net payment option on the checkout page.
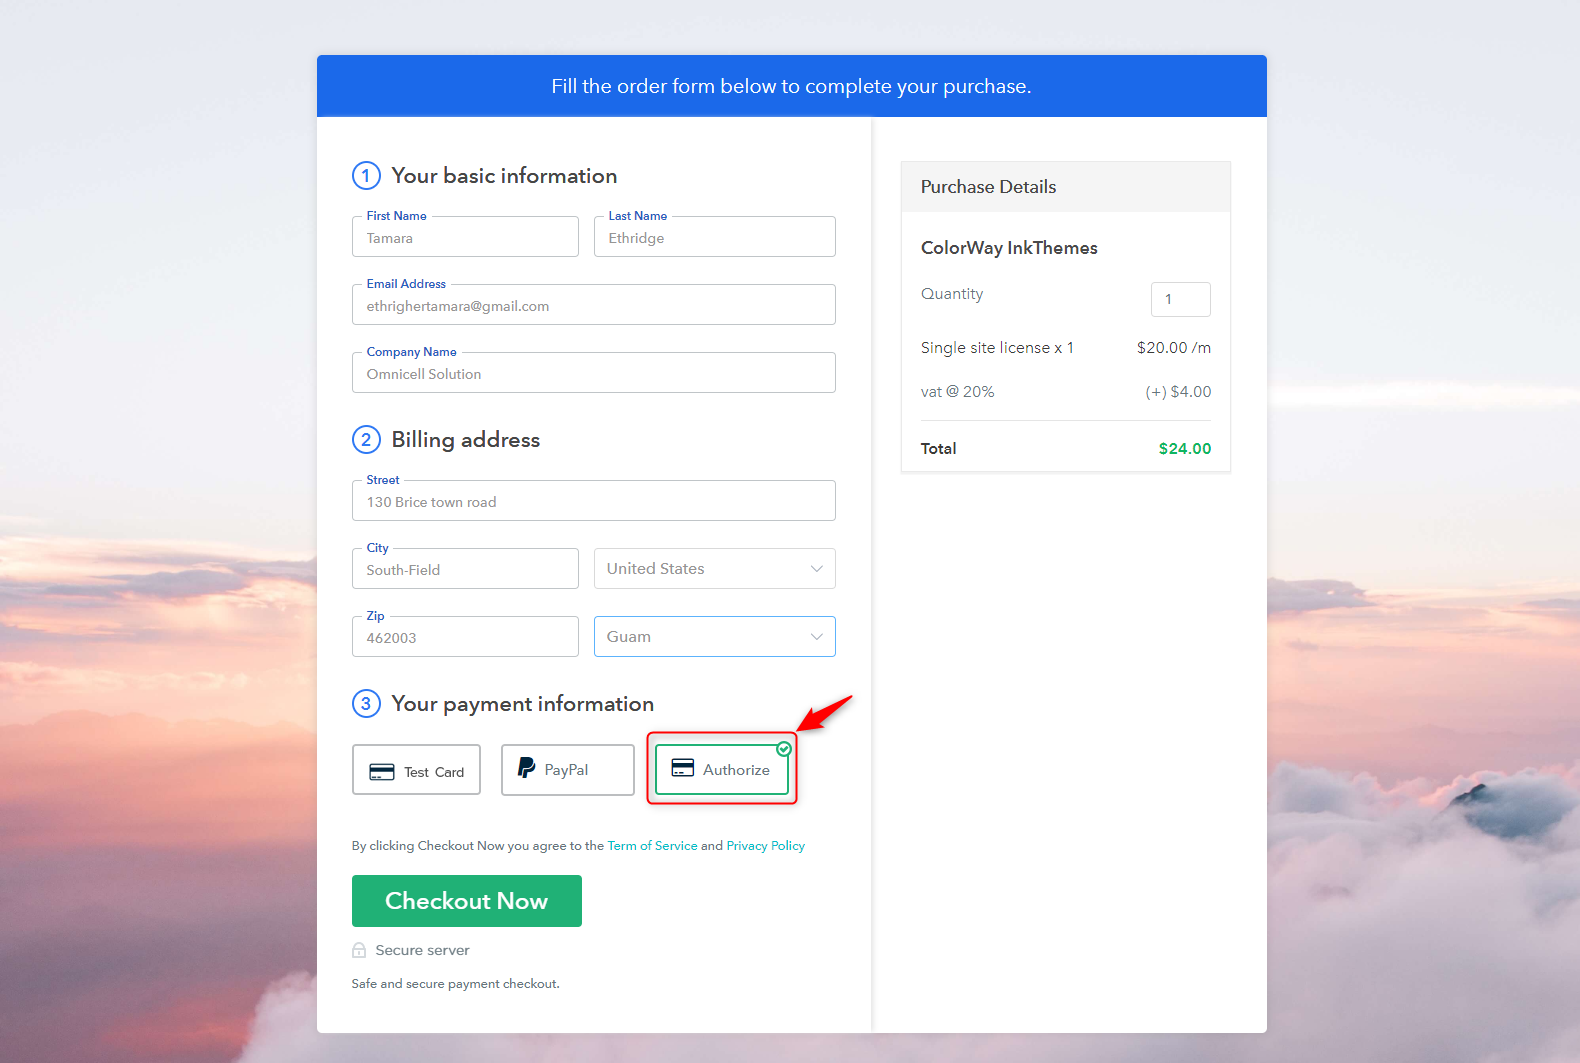
The first step of integration Authorize.net is completed. Now you are enabled to collect the payments from your customer from this payment gateway also. But the automatic recurring will not work. For charging your customer for recurring payments automatically you will need to complete the second step.
Webhook Setup:
For collecting the automatic recurring payments you will need to set up a webhook in your account.
Here is the webhook URL –
‘https://payments.pabbly.com/paymentgateway/authorizedotnet/webhook/‘
Create a new webhook in your Pabbly Subscriptions account and the above URL.
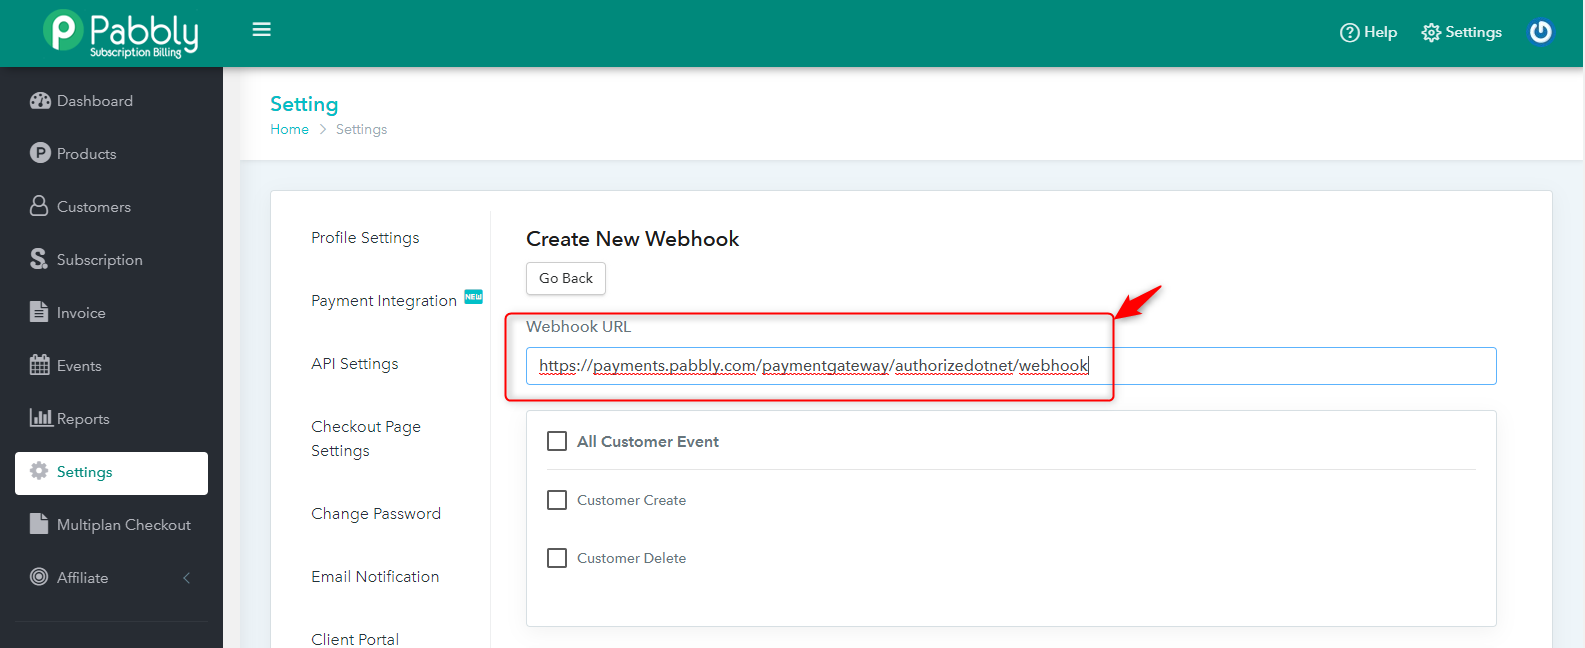
Then you need to select all the invoice event in this webhook (Create Invoice, Pending Invoice, Dunning Invoice) and click on create webhook button.
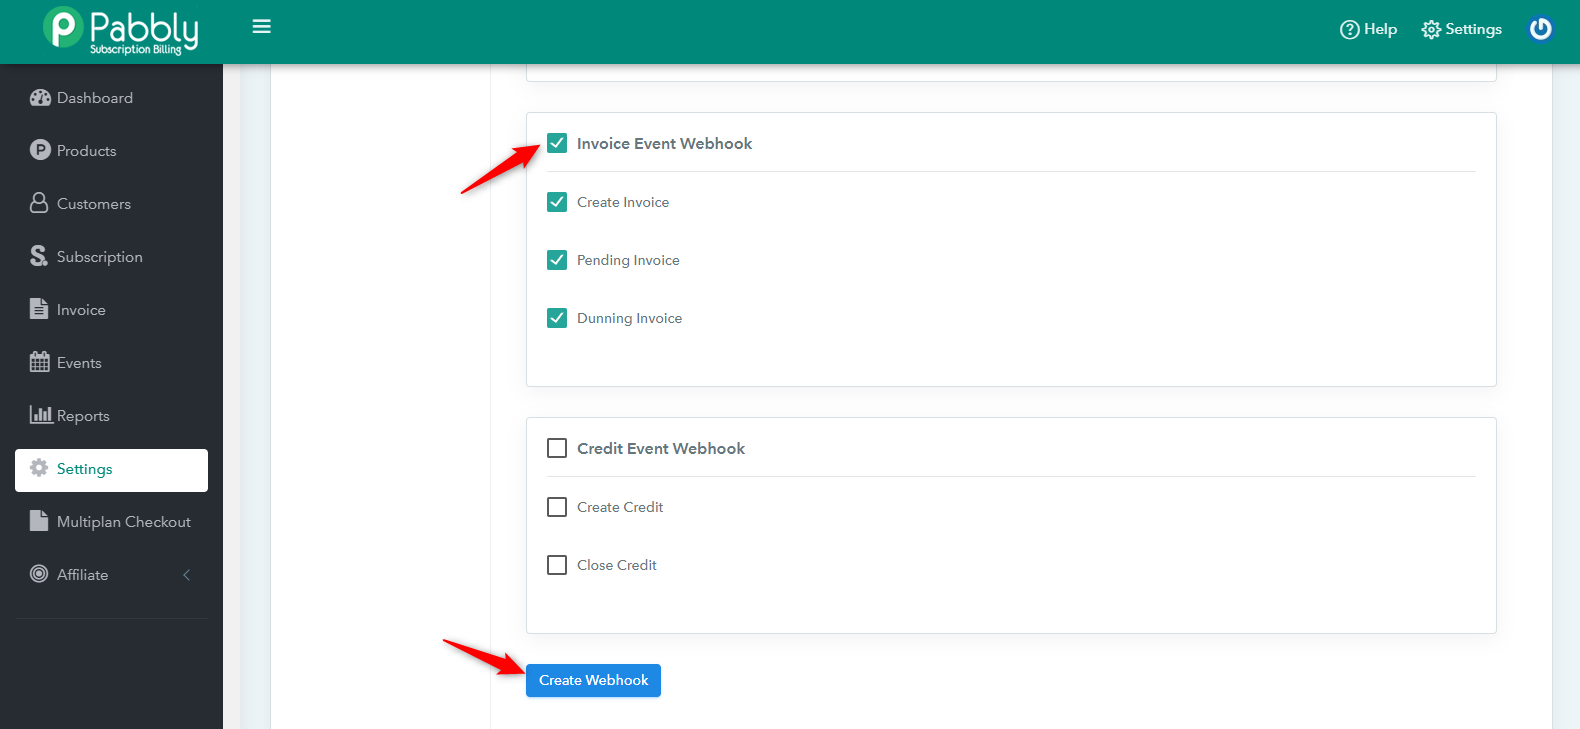
And the second step for the integration is also completed.
Now you are all set to collect payments from authorize.net payment gateway.
Login into your account and check the new integration. Contact us if you need further assistance.


