With all the selling plans in Pabbly Subscriptions you can also sell add-ons.
By this feature you can setup add-ons in different categories and different billing cycles.
The add-on feature is located in the Product section of your Pabbly Subscriptions account.
Let’s setup the add-on for our plans.
Click on ‘Add add-on’ button.
The first option you will see in the form is add-on category. You can click on the Add – Category button if you want to display category wise add-ons.
If you skip this option then the add-ons will be uncategorized. That means they will be displayed without any heading in the checkout page.
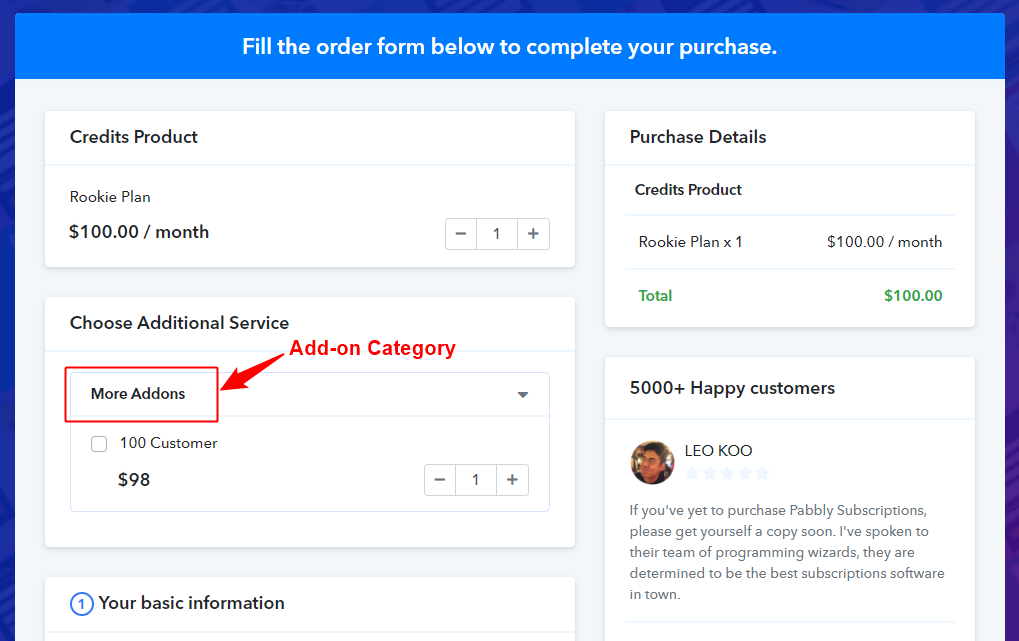
After category you will need to fill the add-on details to create one.
- Name – You can add any name for a add-on. This will be displayed on the checkout page.
- Code – It will be automatically filled. It is not shown on the front end but the add-on is processed with this code only.
- Category – All the categories that you have added above will be displayed in this field. You can choose multiple categories or single category. If you do not want to place the add-on in any category then you can choose Uncategory option.
- Price – Add the pricing of the add-on.
- Billing cycle – You can select the billing cycle of the add-on. It can be either One time or recurring payment. It is same as the plans billing cycle.
- Associate plans – You can associate this add-on with all the plans or with selected plans. If the add-on is associated with a particular plan then it will be only displayed on the checkout page of that plan.
Finally hit the submit button when all the details are added.
The add-on form creation form is almost the same as the plan creation form.
So the add-on setup is completed now for a particular product.
Now if we see the checkout page we will find the add-ons above the basic information section.
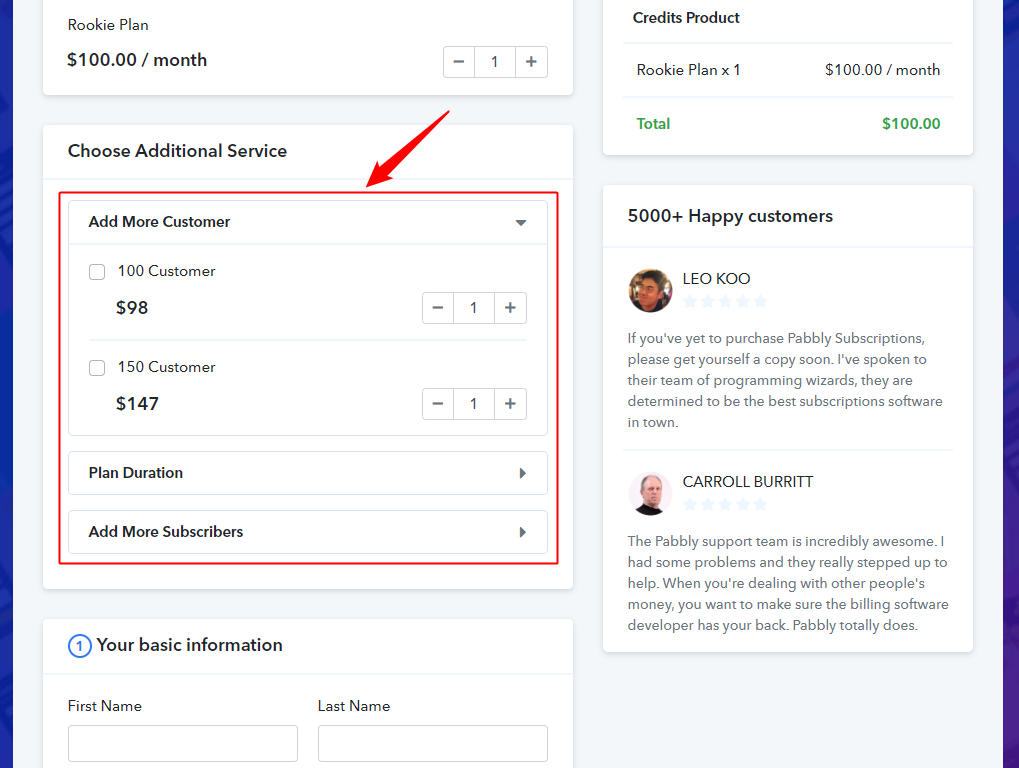
Your customer can select either all the add-ons or any particular one and then complete the payment processing.
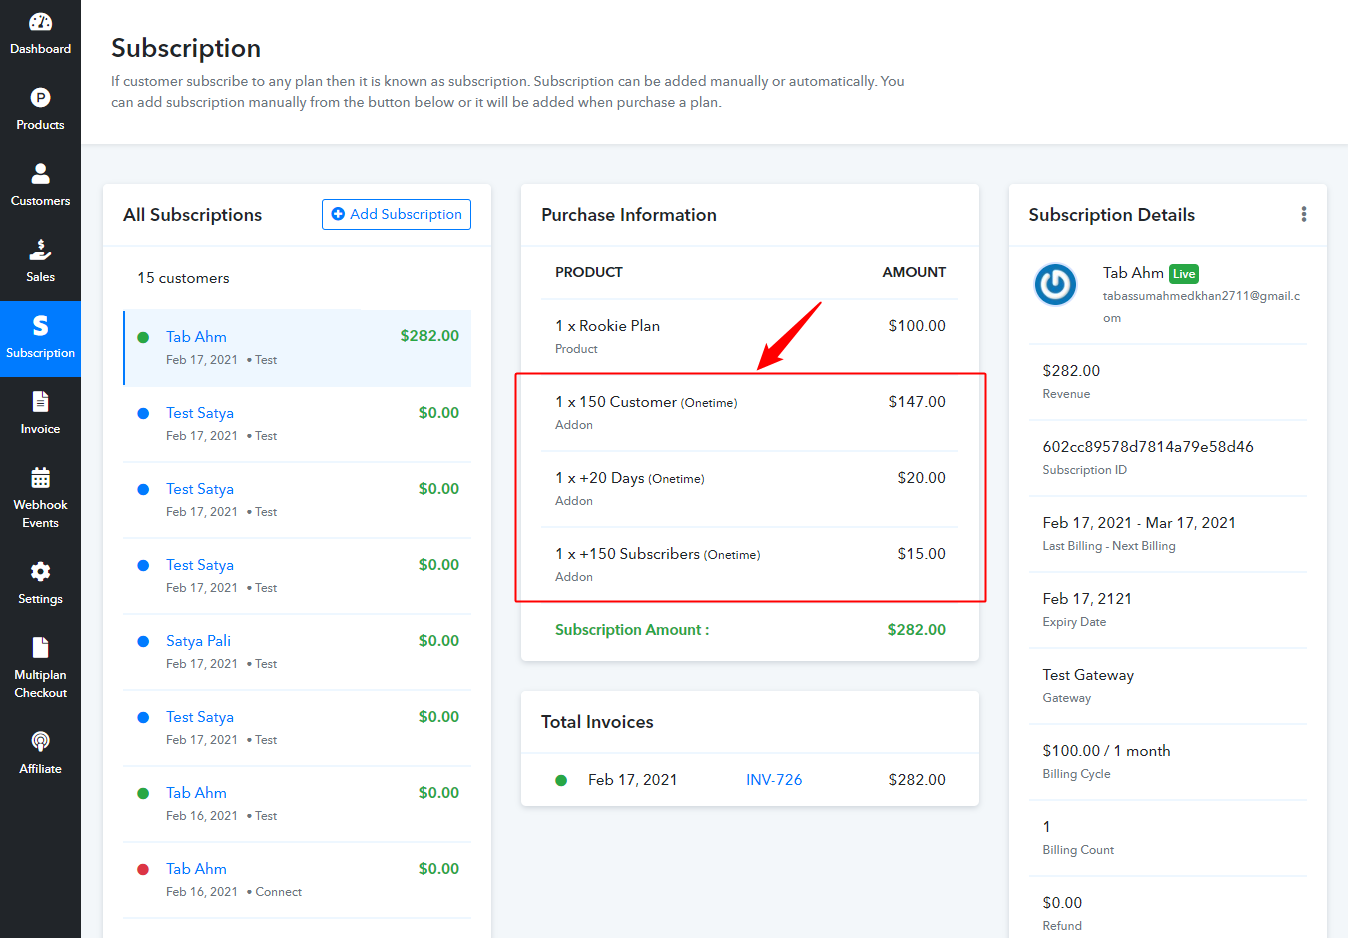
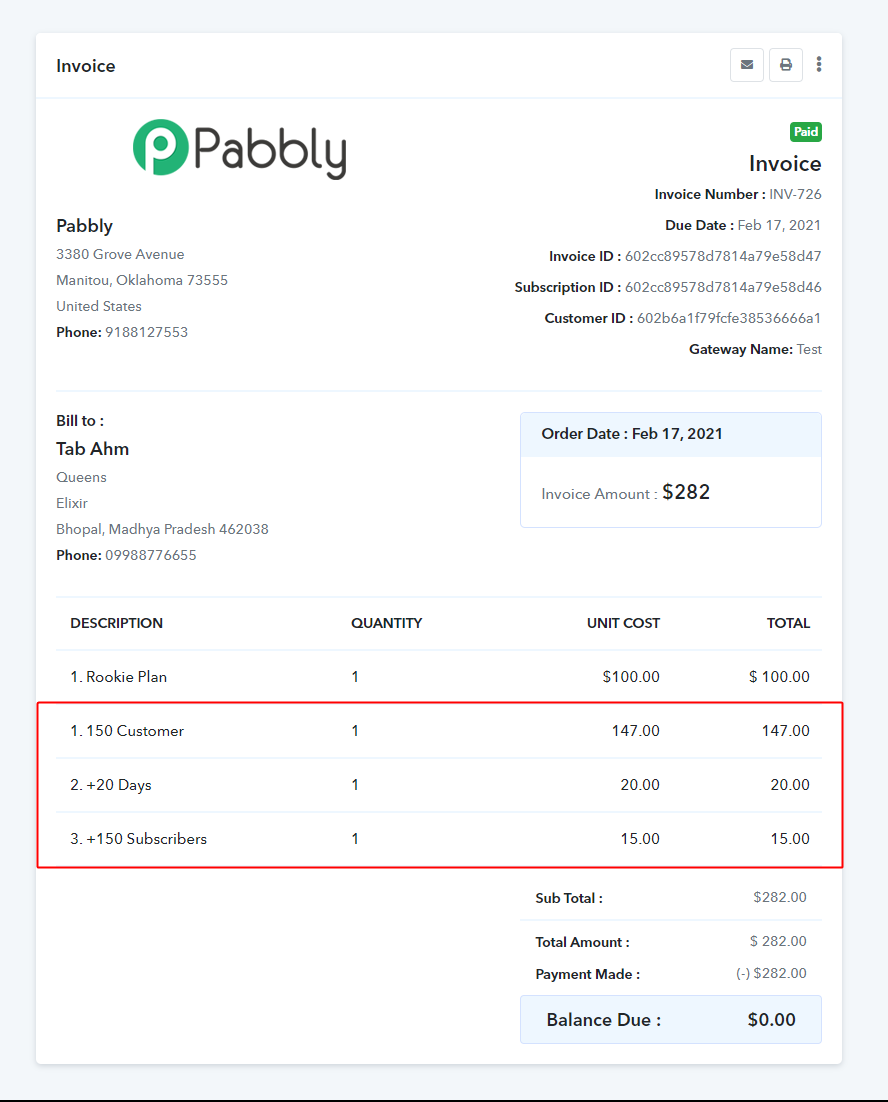
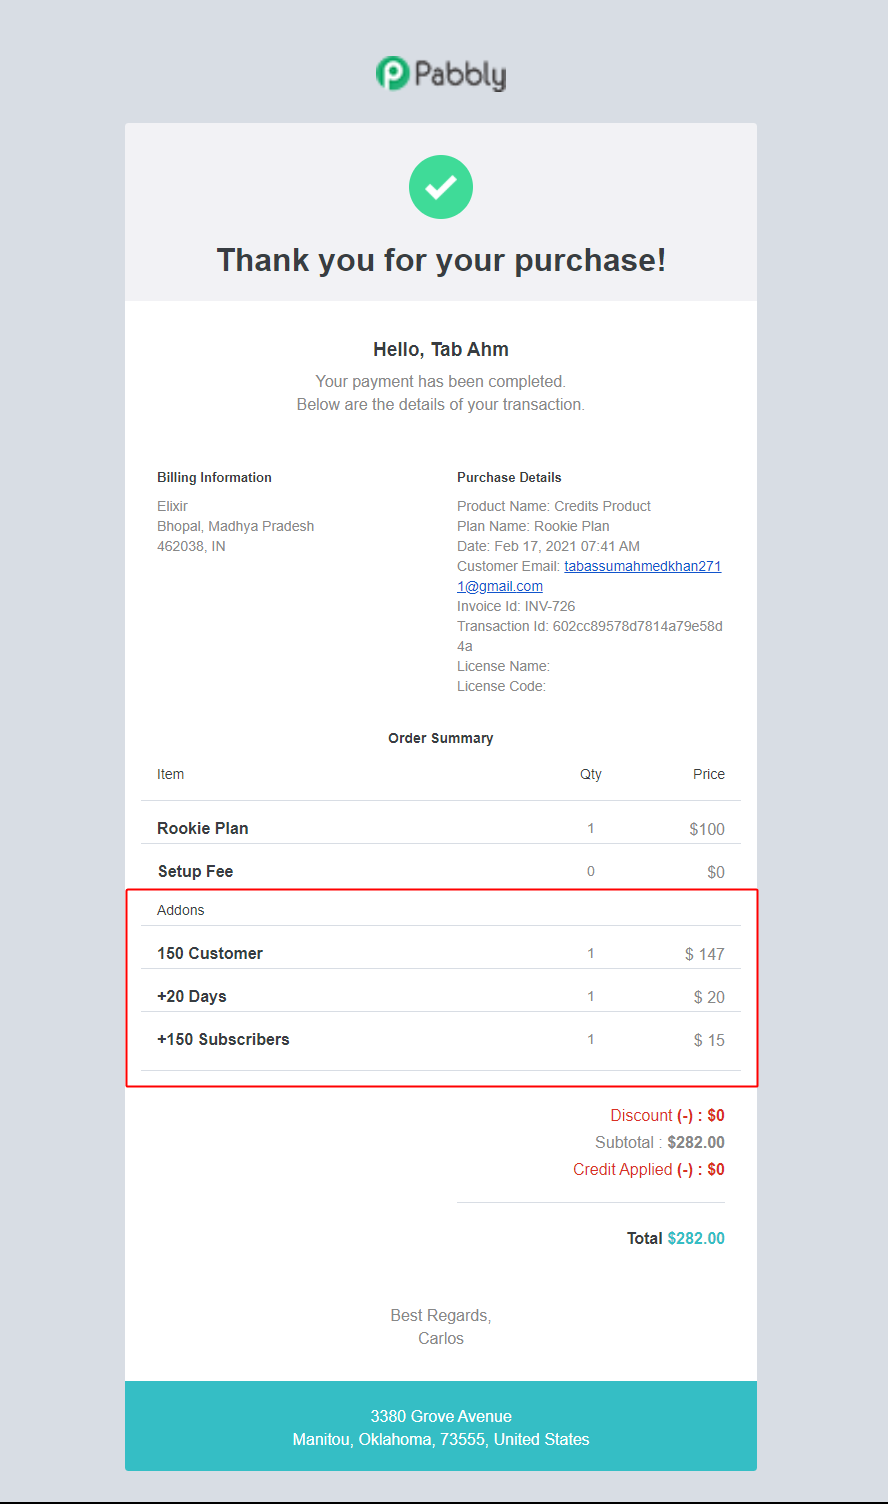
After the payment is completed you can see the add-on amount in Subscription table, Invoices and email notification.
Subscription Table –
Invoices – All the details of the add-ons are displayed in the invoices which are sent to the customers.
Email Notification – The add-on details are updated in the emails which are sent to the merchant and customers both on a successful payment.
Further, there is a small point which you will need to keep in mind when you are setting up add-ons for your product.
The billing of add-on will work according to the billing cycle of plan. Suppose you have a monthly recurring plan and a yearly add-on associated with that plan.
Then on the checkout page of monthly plan the amount of yearly add-ons will be divided by 12 (1 Year = 12 months) and that amount will be billed if the customer choose that particular add-on.
Let’s get it understood from a live example – Suppose you are selling a monthly plan – “Plan 1” of $50. You have added an add-on for this product. The add-on is of yearly billing cycle of $60. So when you open the Checkout page of Plan 1.
The plan amount will be displayed $50 and the add-on amount will be displayed $5/m (60/12 = 5).
So in case if you are using the add-on the priority will be given to the billing cycle of the plan.
The vice versa case will also work the same. Like for a Yearly plan and monthly add-on. The add-on amount will be multiplied by 12 and then displayed on the checkout page.
So this is all the information which you will need to use this feature. Please login into your account and check it for a better understanding.


