Ideal For: All wheel manufacturers, wheel dealers, car accessories traders and other merchants can use this method to sell wheels online.
Why Choose this Method for Selling Over any Other Solution?
Unlike any other solution, this method allows you to:
- List and sell your wheels for FREE. Absolutely no payment required.
- No commission deducted on sales.
- Collect payment through multiple payment modes from a single checkout page.
- Sell one time or recurring subscriptions of your wheels.
- Sell and collect payment in any currency as per your requirement.
- Give discounts on your products by offering special coupon codes.
- Add sales commission agents to help you in selling your wheels.
The oldest wheel ever found is known as the ‘Ljubljana Marshes Wheel’ form Slovenia, which is carbon dated at 3,130 BC. My point is that wheel manufacturing is perhaps the oldest industry in the world. And fast-forwarding to the 21st century, many industry leaders of wheel manufacturing world are looking forward to starting wheels business online.
Why would you like to sell wheels online?
The advantages of selling wheels online are many like clearing out excess inventory, higher global outreach, lower rent, storage and utility charges, lesser manual labor and logistics, etc.
So, the benefits are obvious but do you know how to build an e-store in the first place? Well, it is actually pretty simple, here I would like to recommend an awesome software called Pabbly Subscription Billing. It can build an e-store with unlimited products and generate unlimited revenues. Moreover, you can even create unlimited coupons, discounts for your wheels on a flat or percentage basis to entice your customers. Other features include
- Unlimited Coupons
- Unlimited Revenue
- Sharing Checkout Pages On Social Media
- Tax Management
- Multiple Payment Gateway Integration
- Revenue Tracking
Well, with these awesome features, you will definitely have an edge over your competitors. So why wait? Let’s get down to the brass tacks to start selling wheels online.
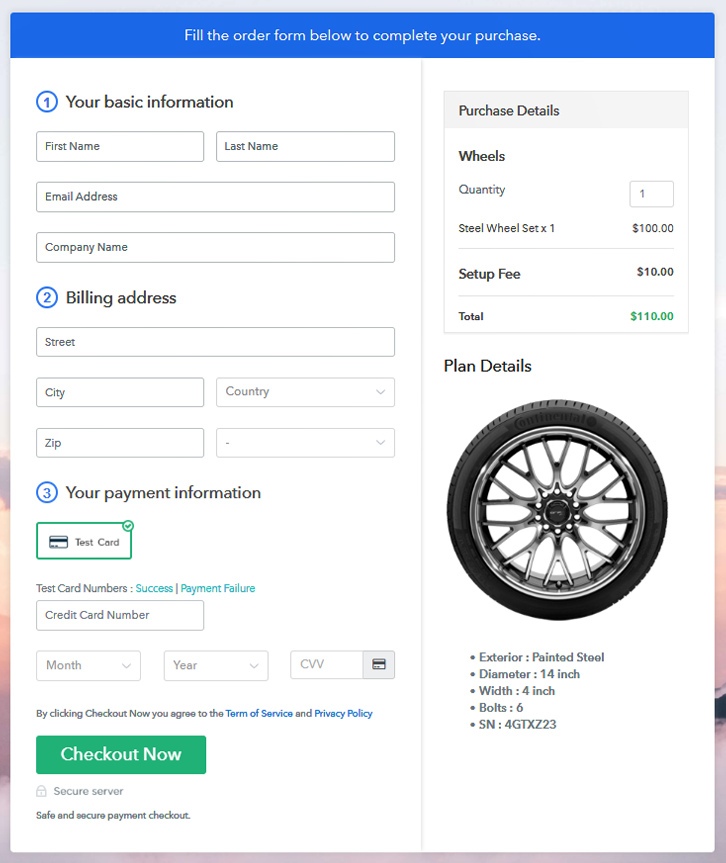
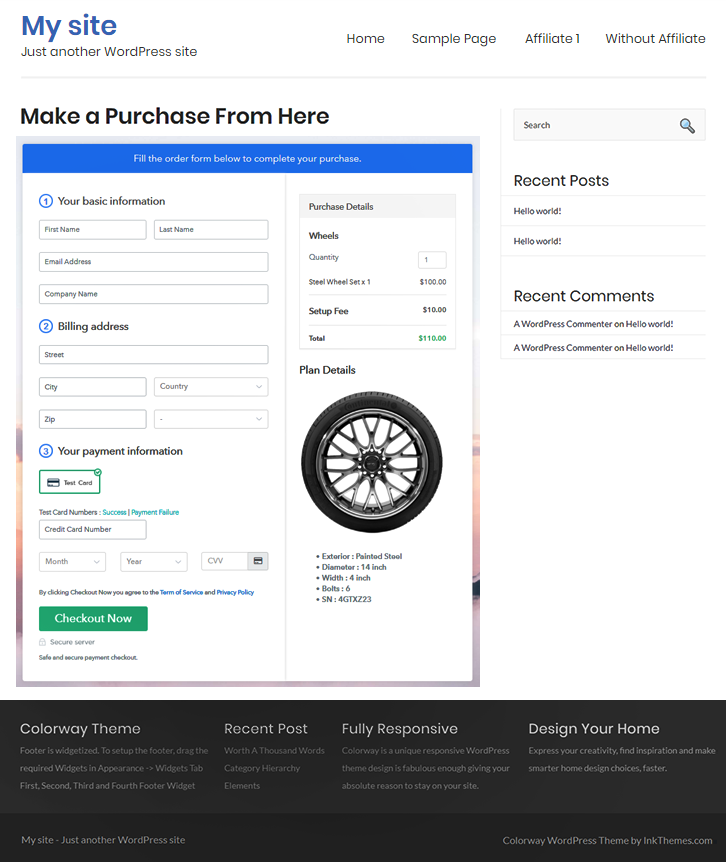
This is How your Checkout Page will Look Like After Creation
Step 1: Log in to Pabbly Subscription Billing

Use your search engines to find Pabbly Subscription Billing and here click on the button “Sign up Free“. Now, you can choose to either simply sign in through your, Gmail account or go through the whole process of filling the required fields like name, email, etc and then click the “Sign Up” button.
Sign Up For Free!
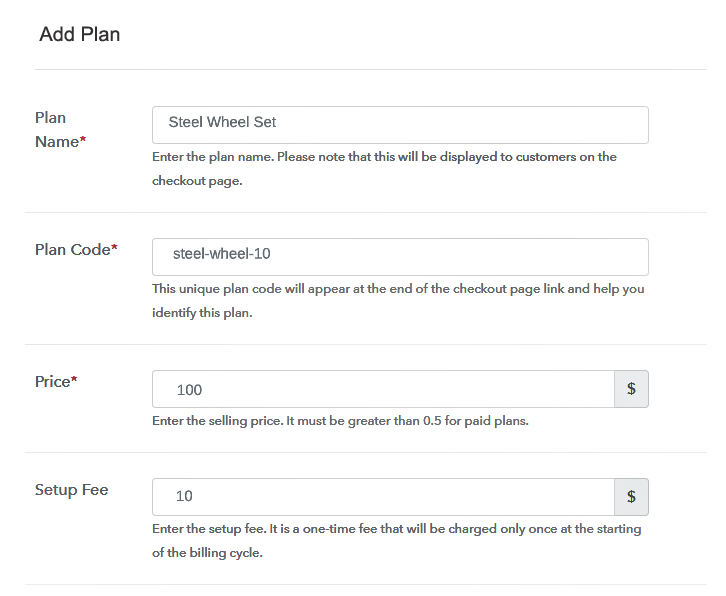
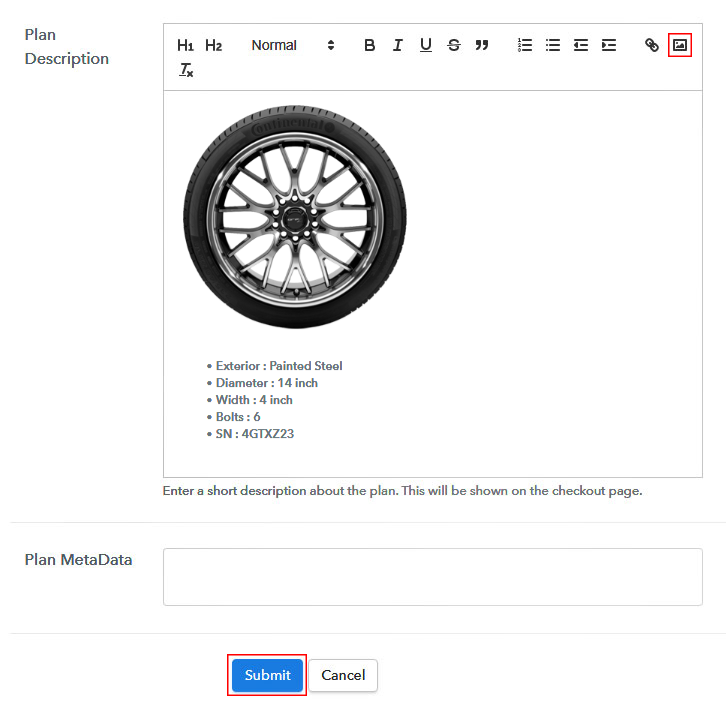
Once you sign in, you will be brought to the dashboard and here click on the “Access Now” button on the Subscription Billing option. Now, you be auto-redirected to the dialog box, and here you will have to fill in details like name, currency, and phone number. After filing in the information press “Continue” button to complete the process. Pabbly Subscription Billing provides a dummy payment gateway, where you can do preliminary tests of your customer’s payment experience in advance to prevent any glitches. To access this functionality, just click on the “Enable Test Payment” option to start testing. There are many payment gateways available for integrations like Razorpay, PayPal, Authorize.net, Stripe, etc. Below this paragraph there are integration manuals, go ahead and embed the payment gateway of your choice. Now, I am going to enabling the test payment option to continue the process. So, I am assuming, the payment gateway integration went well. Then we move on to the product part. Under the “Enable Payments” section you will find the “Add your product” click on it. This will generate a dialog box with a blue button “Add New Product”. Click on it. You have to add the required product title, in this case, it is ‘wheels. Fill up the details and your product is created. Note: Here you can add all the products related to the similar category by creating plans for each of them. Now, we are going to create plans for selling wheels online In the plan page, you will fill in details like plan name, code, price, setup fees etc. Scrolling down you will find different billing models like one-time payment, recurring, based on cycles, etc. Now, chose the billing model that suits your needs and yes you can change it anytime. Now, take some stunning images of your wheels and insert it using the upload image button. So, the image has been uploaded, then provide some useful information of your wheels like the serial number, type, diameter, etc, possibly in bullet points. Then press the “Submit” button. Moreover, using the same process, you can list more products Follow up these steps to preview checkout page: Now, copy the embed plan link to insert the checkout page on your WordPress website. Now, when the link is copied, then paste it to the text area of the editor. After pasting the code, now hit the ‘Publish’ button. Your checkout page is embedded. Note: In case you want to sell multiple products via a single checkout page, you can create a multi-plan checkout page otherwise skip this step. The wheels are perhaps the most important invention that took us from simple cave dwellers to a space-faring species. The gist is we have come a long way and with the advent of e-commerce, many merchants are placing their products on e-stores. So, let’s begin our journey with Pabbly Subscription Billing as it is perhaps the easiest and cheapest way to start selling wheels online. Yes, of course, you may have some queries about the steps mentioned above. Please, list your queries in the comment section below. We will write back to you as soon as possible.Step 2: Select Subscription Billing

Step 3: Account Setup

Step 4: Connect Payment Gateways To Sell Wheels Online

Step 5: Add Your Product


Step 6: Add Plans
(a) Select Add New Plan

(b) Specify the Plan & Pricing Details
(c) Add Image & Description
Step 7: Share your Checkout Page

Step 8: Preview Checkout Page
(a) Click on the View Button

(b) Take a Look at the Checkout Page

Step 9: Embed Checkout Page in Site & Sell Wheels Online

(a) Edit the Page & Paste the Copied Link

(b) Save & Publish the Checkout Page

(c) Check out the Final Look of your Checkout Page on WordPress Site
Step 10: Multiplan Checkout Page
(a) Click on Add Mutiplan Checkout

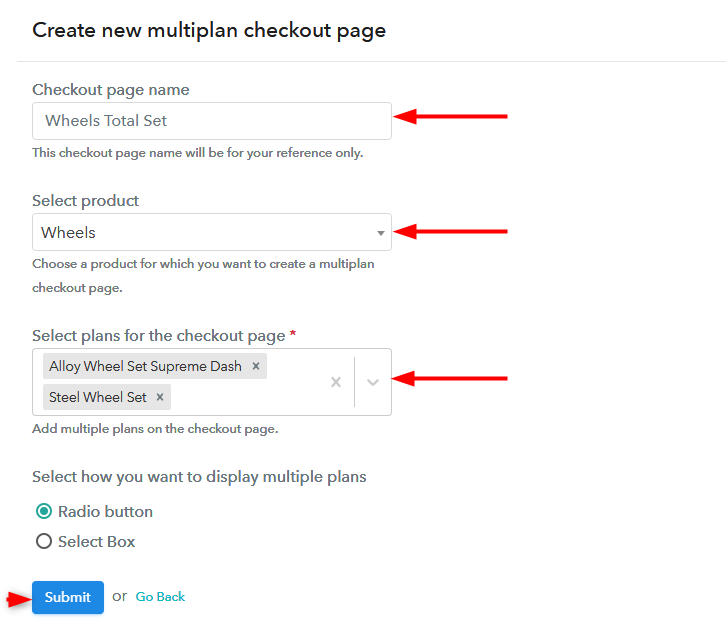
(b) Add Plans to Sell Wheels Online from Single Checkout Page
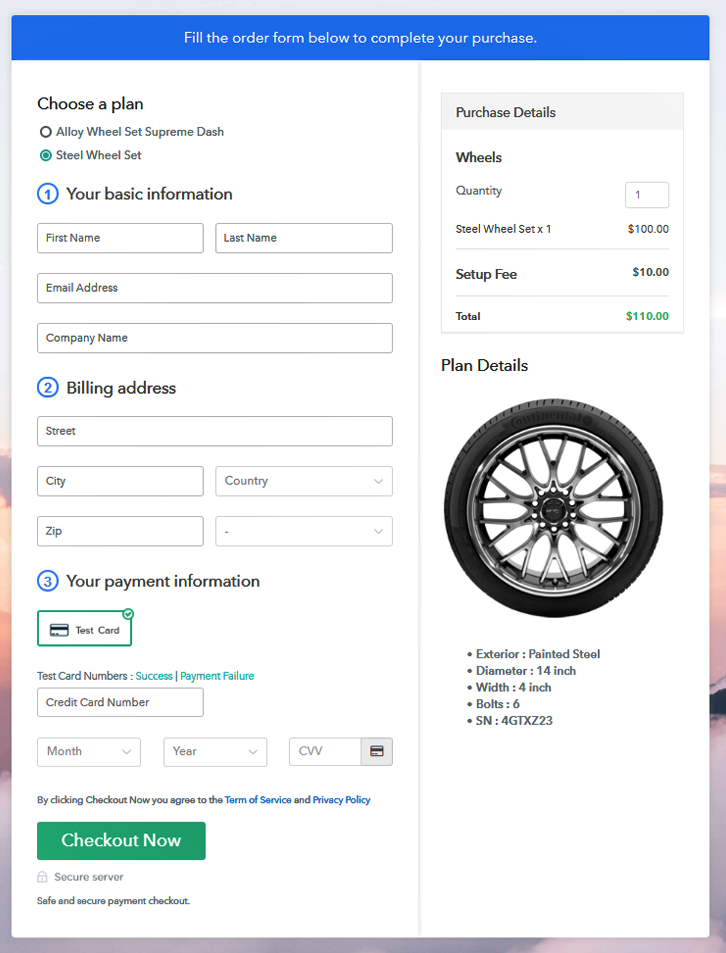
(c) Take a Look at the Checkout Page
Wrapping Up
You May Also Like To Read –


