Ideal For: All the artists, mural painters, art studios, freelance artists and other merchants can use this method to sell their wall paintings online.
Why Choose this Method for Selling Over any Other Solution?
Unlike any other solution, this method allows you to:
- List and sell wall paintings for FREE. Absolutely no payment required.
- No commission deducted on sales.
- Collect payment through multiple payment modes from a single checkout page.
- Sell one time or recurring subscriptions of your wall paintings.
- Sell and collect payment in any currency as per your requirement.
- Give discounts on your products by offering special coupon codes.
- Add sales commission agents to help you in selling your wall paintings.
Our ancestors started painting on walls as early as 40,000 BCE and in ancient Rome, wall painting was a coveted art. It was in the medieval ages especially in the Renaissance period, there was an explosion of wall paintings under Michelangelo, Vinci, Raphael, etc. Now fast-forwarding to 2022 increasingly many artists are selling wall paintings online to get better demands for their works.
Why would you like to sell wall paintings online?
The most traditional art galleries are highly localized, which means their customer traffic is restricted only to a few buyers from around the region. Furthermore, these galleries charge exorbitant rates as rent and security charges.
Now when you start selling wall paintings online, you can say goodbye to all these problems. As you will be inundated with offers from prospective buyers from around the world. Also, the transactions will be only between you and the buyer without any conflict of interest from the middleman. So now after learning the benefits, you may be excited to start wall paintings business online.
But wait! Do you know how to build an e-store to start to sell wall paintings online? Actually it is quite easy, as there are a ton of tools available online. However, here I am going to present an awesome Saas tool called Pabbly Subscription Billing that can list an unlimited number of wall paintings online on negligible commission. Furthermore, you can sell these paintings online in both offline/ online modes. Other advantages include:
- Transparent Billing
- Multiple Billing Models like Recurring, One-Time, etc
- Import/ Export Customer Data
- Custom Domains
- Multiple Payment Gateways
These listed features will give you a definite advantage over your competitors and make your business flourish. So why waste time lets, get started to build an awesome checkout page to sell wall paintings online.
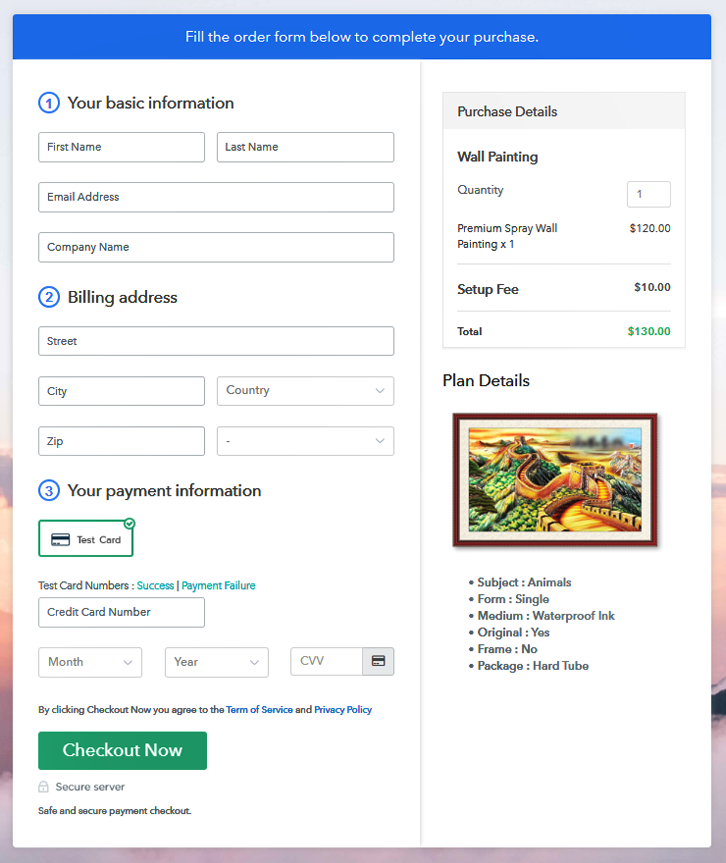
This is How your Checkout Page will Look Like After Creation
Step 1: Log in to Pabbly Subscription Billing

To begin, first search for Pabbly Subscription Billing in your browser and landing on their website click on “Sign up Free“. Either sign in using your Gmail account or fill in the required fields like name, email, etc and then click the “Sign Up” button.
Sign Up For Free!
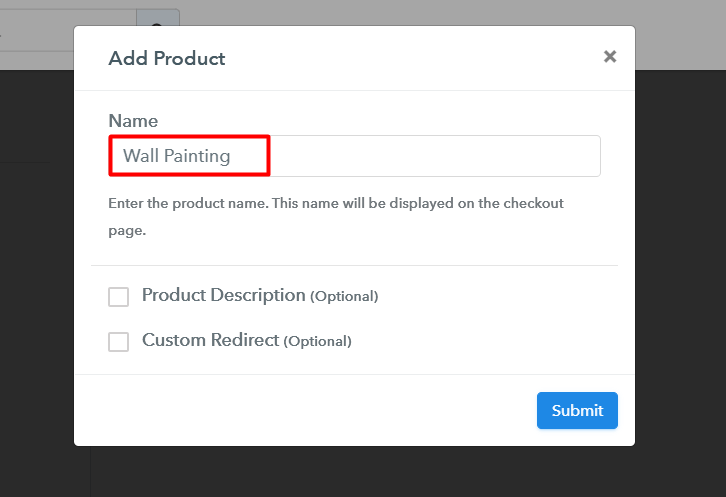
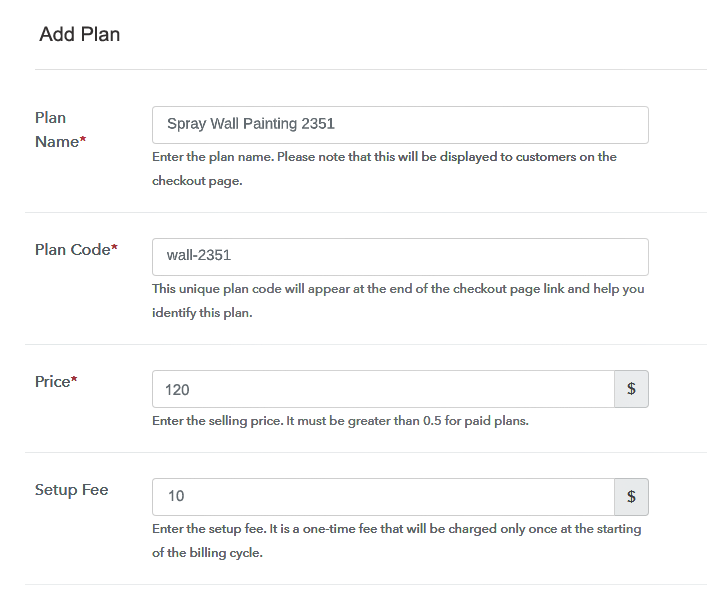
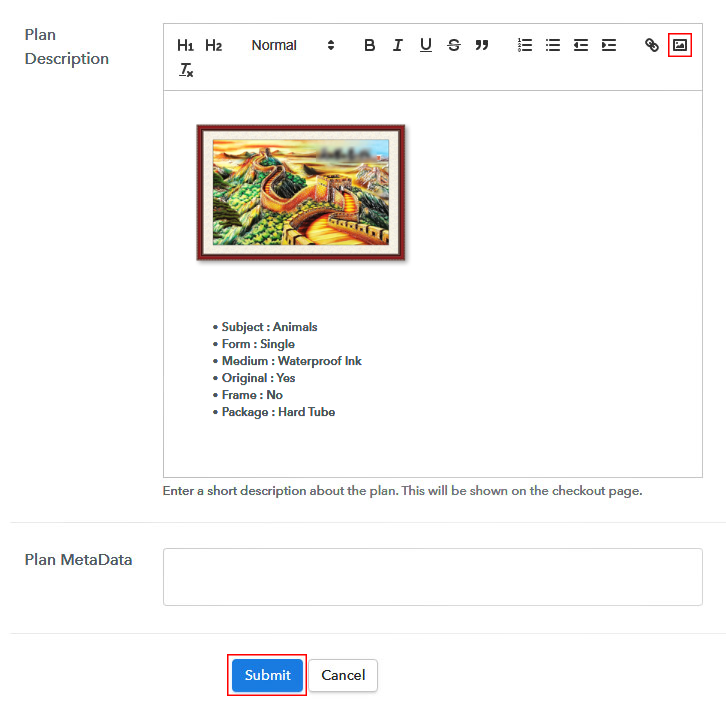
Now you will enter the dashboard, and here click on the “Access Now” button on the Subscription Billing option. A dialogue box will appear that will require you to fill the company details like name, currency, and phone number. Now, press the “Continue” button after filling in the details. In Pabbly Subscription Billing, you have access to a dummy payment gateway, where you can pre-test the workings of the payment process. This will help you to remove all the glitches beforehand. You can do this by clicking on the “Enable Test Payment” option. Moreover, Pabbly Subscription Billing, allows you to integrate with multiple payment gateways like Stripe, Razorpay, PayPal, Authorize.net, etc. For the integration of the payment gateways, there are manuals listed beneath this paragraph. But since we have to set up the payment process, we will click on the “Enable Test Payment” option. So, now we are going to add the products. Below the “Enable Payments,” you will find the section “Add your product” click on it. This will create a dialog box with a blue button “Add New Product”. Click it. This will generate a pop-up box and you have to add the required product title, in this case, it is the ‘Wall Paintings’. Fill up the details and your product is created. Note: Here you can add all the products related to the similar category by creating plans for each of them. Now, we are going to create plans to start a wall paintings business online Here you will add the details like name, code, price, setup fees, etc. Also, you can add different billing models like one-time payment, recurring, based on cycles, etc. You can change them whenever you want. Now, upload some stunning images of your wall paintings. Furthermore, add some information about the wall paintings like subject type, colors used, category, etc in bullet points or numbers and then press the “Submit” button. Also, using the same methods, you can list more products. Follow up these steps to preview checkout page: Now, copy the embed plan link to insert the checkout page on your WordPress website. Now, when the link is copied, then paste it to the text area of the editor. After pasting the code, now hit the ‘Publish’ button. Your checkout page is embedded. Note: In case you want to sell multiple products via a single checkout page, you can create a multi-plan checkout page otherwise skip this step. Congrats!! You finally created your first checkout page to sell wall paintings online through Pabbly Subscription Billing. Slowly you will fully realize the full potential of this software and its incredible feature to dominate the market in the long run. But since you are new to this endeavor, you may have some doubts regarding the steps. So drop your queries in the comment section below. We shall reply to you at the earliest. Thank YouStep 2: Select Subscription Billing

Step 3: Account Setup

Step 4: Connect Payment Gateways To Sell Wall Paintings Online

Step 5: Add Your Product

Step 6: Add Plans
(a) Select Add New Plan

(b) Specify the Plan & Pricing Details
(c) Add Image & Description
Step 7: Share your Checkout Page

Step 8: Preview Checkout Page
(a) Click on the View Button

(b) Take a Look at the Checkout Page

Step 9: Embed Checkout Page in Site & Sell Wall Paintings Online

(a) Edit the Page & Paste the Copied Link

(b) Save & Publish the Checkout Page

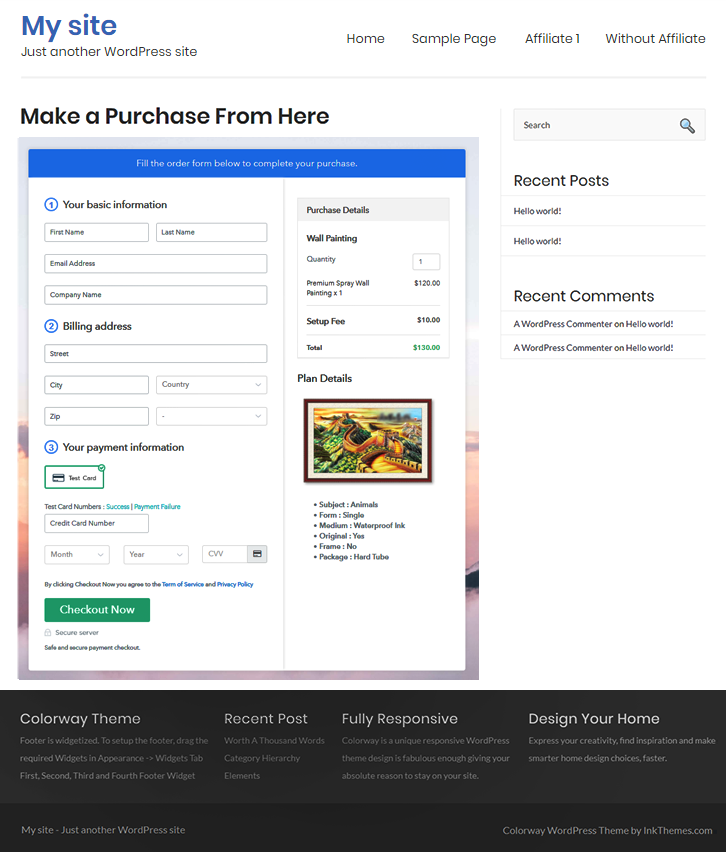
(c) Check out the Final Look of your Checkout Page on WordPress Site
Step 10: Multiplan Checkout Page
(a) Click on Add Mutiplan Checkout

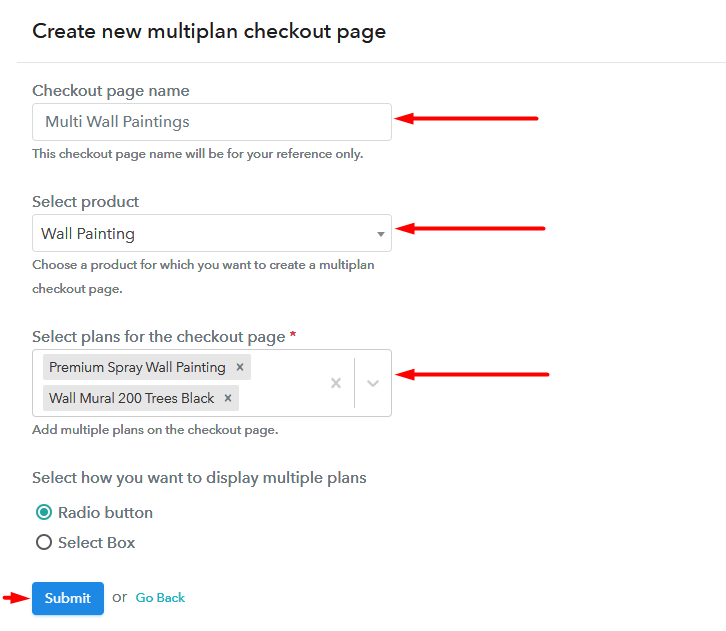
(b) Add Plans to Sell Multiple Wall Paintings Online from Single Checkout Page
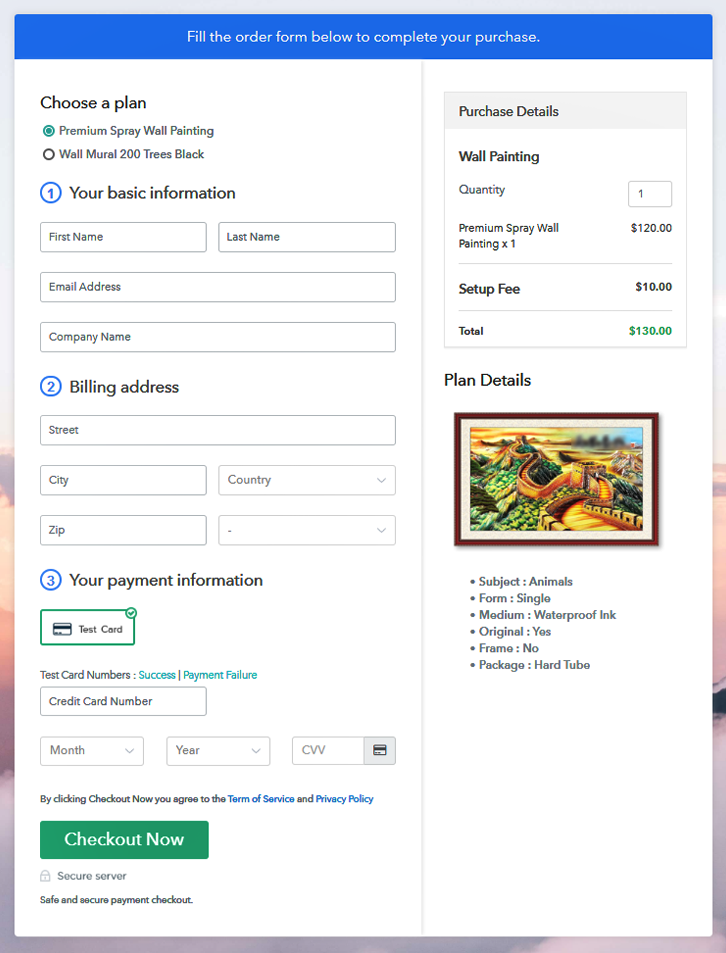
(c) Take a Look at the Checkout Page
Wrapping Up
You May Also Like To Read –


