Ideal For: All sword manufacturers, hunting lodges, weaponary shops, sword dealers, and other merchants can use this method to sell swords online.
Why Choose this Method for Selling Over any Other Solution?
Unlike any other solution, this method allows you to:
- List and sell your swords for FREE. Absolutely no payment required.
- No commission deducted on sales.
- Collect payment through multiple payment modes from a single checkout page.
- Sell one time or recurring subscriptions of your swords.
- Sell and collect payment in any currency as per your requirement.
- Give discounts on your products by offering special coupon codes.
- Add sales commission agents to help you in selling your swords.
Ever heard of the famous Arthurian legend “Those who shall pull the Excalibur sword from the stone shall rule Briton”. Well, now customers won’t have to pull any sword from any stone as you will be selling swords online.
Why would you like to sell swords online?
Nowadays, people use swords mostly in sports activities and are considered as an antique showpiece inspired from movies and TV shows. For instance, who doesn’t remember the sword of Ned Stark in Game of Thrones made of Valyrian steel. That is the reason why people search for it on many e-commerce websites like Amazon, Alibaba, and Oracle. However, swords are regarded as weapons and many e-commerce companies forbid sellers to sell swords online.
But, there is always an option of creating your own store online so that you can sell swords without any hassle. And for that here we would like to suggest you Pabbly Subscription Billing one of the best tool to build an e-store. As, it lets you create checkout pages easily that you can share on social media platforms and also embed it on your website. Here, let me tell you some other feature that it provides:
- Create Unlimited Plan and Products
- Affiliate Management Modules
- Several Payment Gateways
- Tax Management
So, without wasting any of your time, let me take you through the 10 easy steps to create your checkout page.
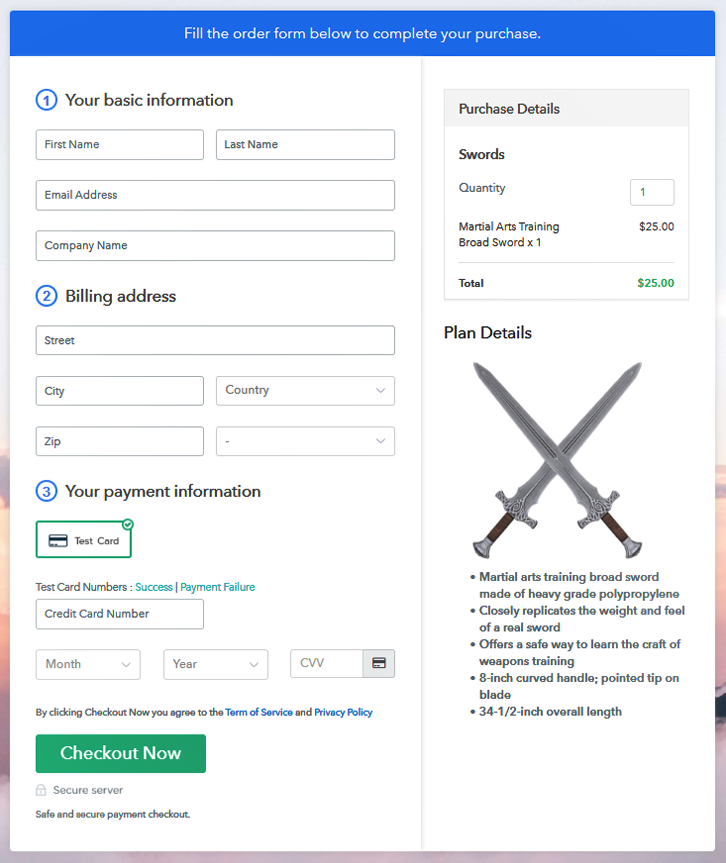
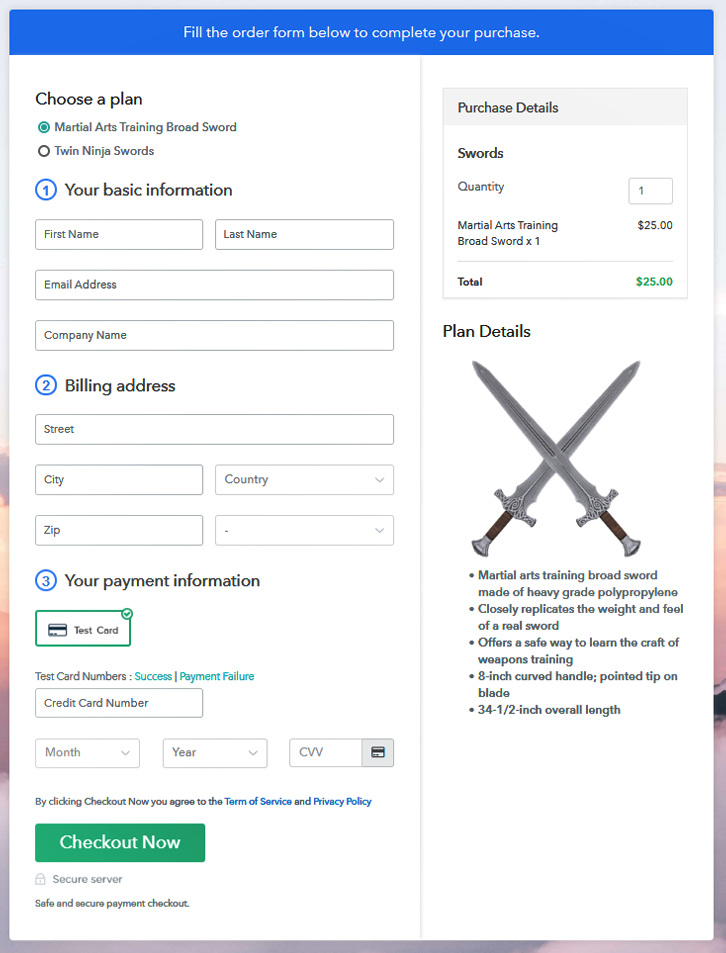
This is How your Checkout Page will Look Like After Creation
Step 1: Log in to Pabbly Subscription Billing

Go to Pabbly Subscription Billing and tap on “Sign up Free“. Here, you can either sign in via Gmail account or else you can fill out the details like name, email, etc manually. After that just click on the button named “Sign Up”.
Sign Up For Free!
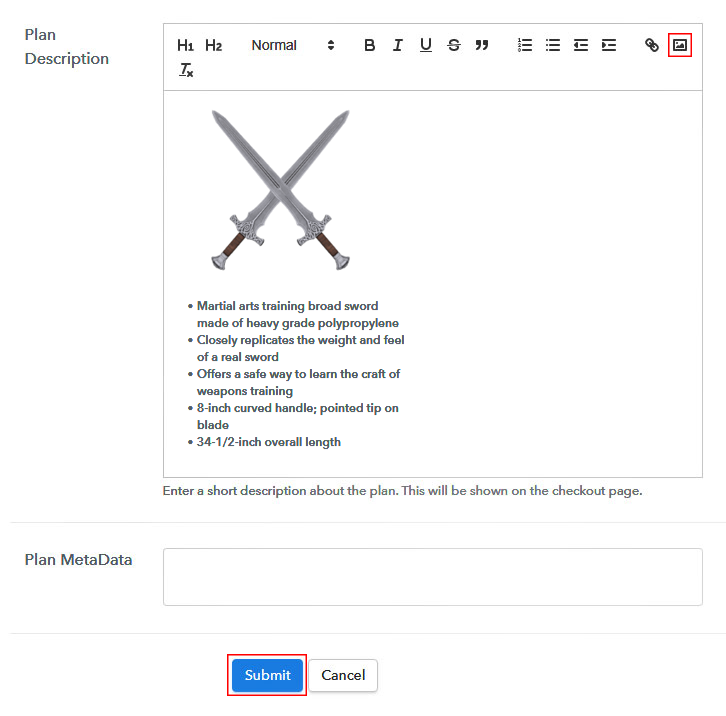
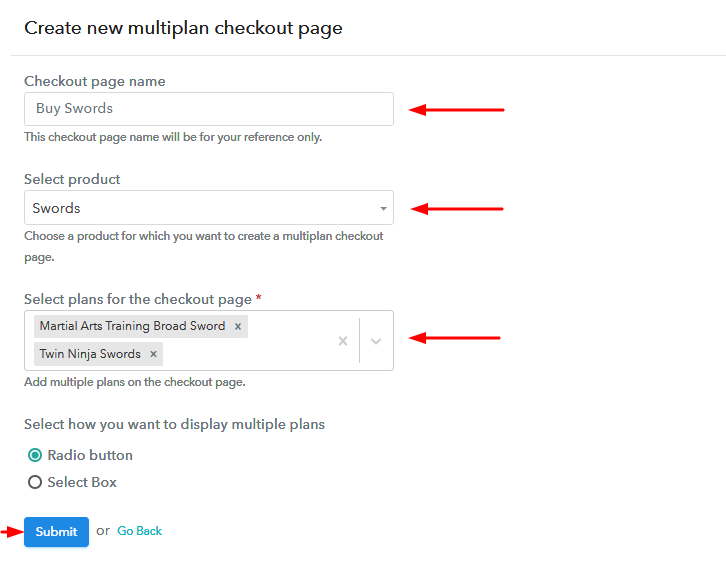
After you complete your signup, you will be redirected to the dashboard where you need to tap on the button stating “Access Now”. A dialog box will pop up asking you to fill out the company details like name, currency, phone number, etc, Once you complete filling up the details just press the blue “Continue” button in order to complete the entire process. Pabbly Subscription Billing comes with a test payment gateway in order to test the entire payment experience of the customer. For that, you just need to click on the “Enable Test Payment”option to test out this functionality. Moreover, Pabbly Subscription Billing allows you to integrate with many payment gateways like PayPal, Authorize.net, Stripe, etc. Here, you can also integrate a particular payment gateway with the help of integration guide below. For instance, here i am going to enable the test payment option to continue the process. Now, the subsequent step is to add products by clicking on the “Add your product” section. Then, just add the title of the product, like in this case I wrote Swords. Fill up the details and your product is created. Note: Here you can add all the products related to the similar category by creating plans for each of them. Now, our next step is to create plans in order to start swords business online. Once you are directed to the plan page, you need to enter the details such as plan name, code, price, setup fees, etc. Now, add images of your swords and insert them with the help of the upload image button. Consequently, provide some useful information regarding your swords such as materials used, in bullet points. After that just click on the “Submit” button. Furthermore, using the same process, you can also create several products. Follow up these steps to preview checkout page: Afterward, just copy the embed plan link in order to insert the checkout page on your WordPress website. Once you copy the link, just paste it to the text area of the editor. After pasting the code, press the ‘Publish’ button and your checkout page is embedded. Note: In case you want to sell multiple products via a single checkout page, you can create a multi-plan checkout page otherwise skip this step. That’s it! We hope this article was helpful for you so that you can start your swords business online easily. Just follow all the steps that we have mentioned above and your business is set to sell swords online. And, if you have any query don’t forget to write us in the comment section below. We will try to answer it as soon as possible. Thank You!Step 2: Select Subscription Billing

Step 3: Account Setup

Step 4: Connect Payment Gateways To Sell Swords Online

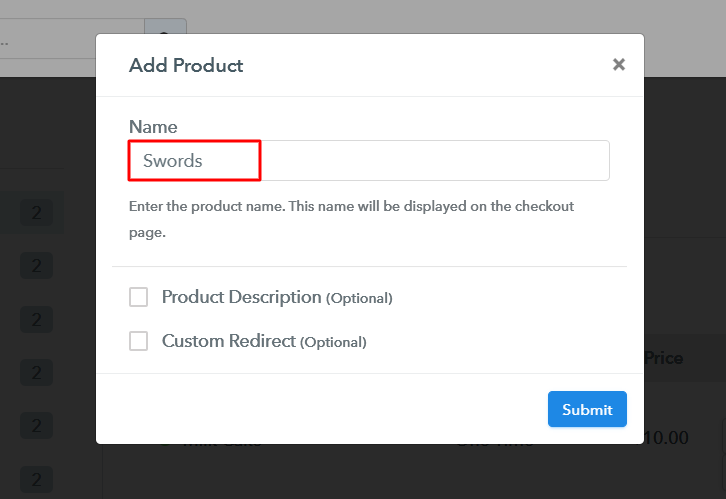
Step 5: Add Your Product

Step 6: Add Plans
(a) Select Add New Plan

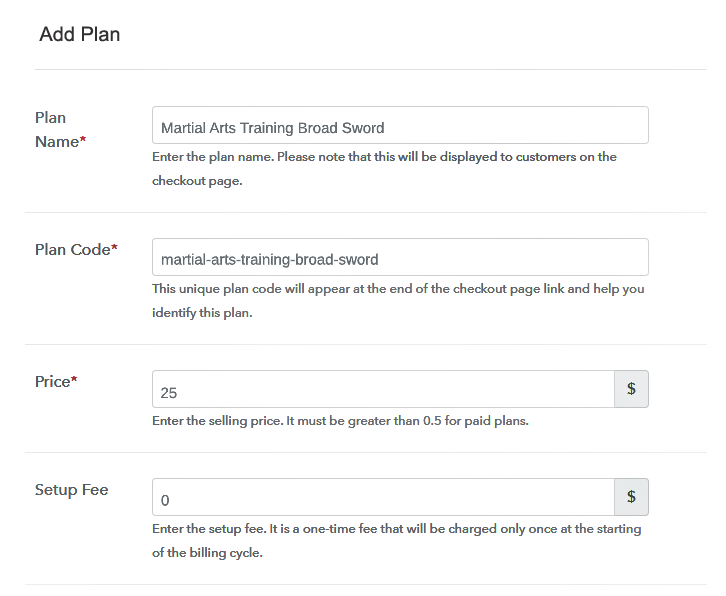
(b) Specify the Plan & Pricing Details
(c) Add Image & Description
Step 7: Share your Checkout Page

Step 8: Preview Checkout Page
(a) Click on the View Button

(b) Take a Look at the Checkout Page

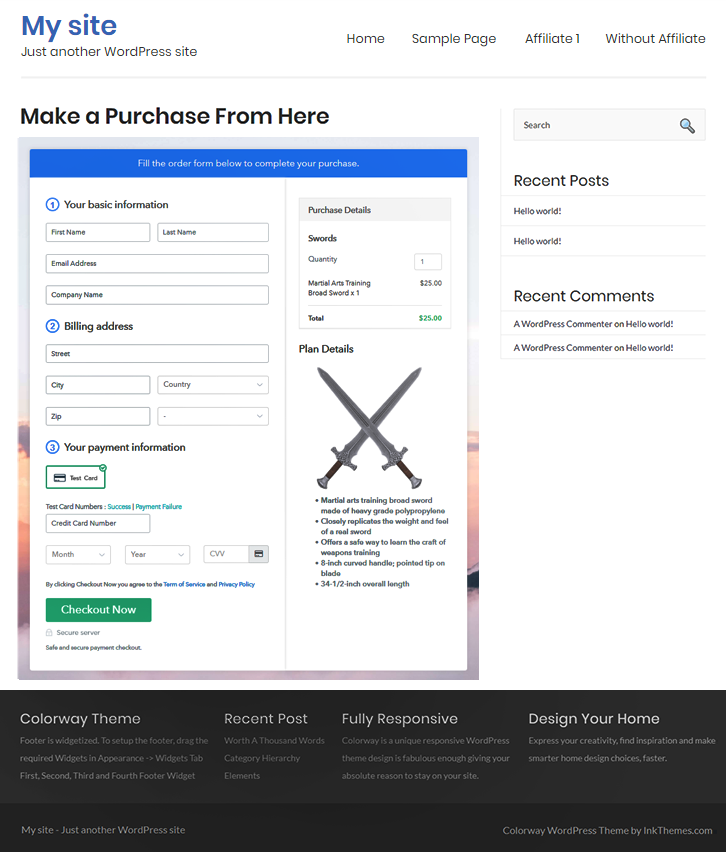
Step 9: Embed Checkout Page in Site & Sell Swords Online

(a) Edit the Page & Paste the Copied Link

(b) Save & Publish the Checkout Page

(c) Check out the Final Look of your Checkout Page on WordPress Site
Step 10: Multiplan Checkout Page
(a) Click on Add Multiplan Checkout

(b) Add Plans to Sell Swords Online from Single Checkout Page
(c) Take a Look at the Checkout Page
Wrapping Up
You May Also Like To Read –


