Ideal For: All the designers, fashion influencers, fashion content creators, boutique owners and other merchants can use this method to take their sewing patterns selling business online.
Why Choose this Method for Selling Over any Other Solution?
Unlike any other solution, this method allows you to:
- List and sell your sewing patterns for FREE. Absolutely no payment required.
- No commission on sales.
- Collect payment through multiple payment modes from a single checkout page.
- Sell one time or recurring subscriptions of your sewing patterns.
- Sell and collect payment in any currency as per your requirement.
- Give discounts on your products by offering special coupon codes.
- Add sales commission agents to help you in selling your sewing patterns.
“Sewing mends the soul” is indeed true as making something wearable out of a piece of plain cloth is not an easy job. Back in the 90s, starting your own cloth store or selling your sewing patterns online was a tough call but now the table has turned, it is way too easy to sell your sewing patterns online.
Why would you like to sell sewing patterns online?
The human mind is the hub of creativity and there is nothing wrong in flaunting your designing skills. Most of the fashion enthusiast used to sell their sewing patterns to big companies to get recognition. This was a traditional way but taking a step forward by selling it online without mediator definitely a bold move.
And in Adroit Market Research, it has been said that the industrial sewing market grows at 4.4% CAGR to hit the USD 3.05 billion by 2025 which is quite a figure. By giving all this food for thought, it won’t be too late to start selling your sewing patterns business online. Now, you must be wondering how?
Actually, there is amazing software named Pabbly Subscription Billing flourishing in the market which lets you build amazing checkout pages to sell sewing patterns online. Again, the question is why checkout pages? Because it requires minimum efforts, easy to share, and bind audience attention. Other than this, some of the perks of software are:
- Add taxation charge according to country or region
- Offer discount and coupon codes to customers
- Collect currency in both online and offline mode
Above mentioned are some of the reasons to give the software a try. Now, let’s walk you through the process of creating a checkout page using a tool.
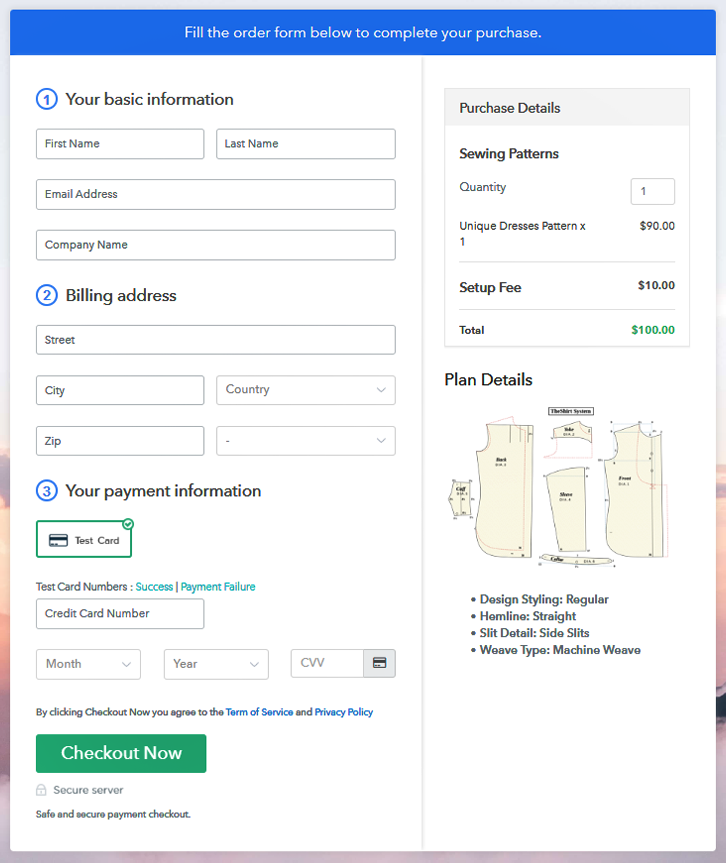
This is How your Checkout Page will Look Like After Creation
Step 1: Log in to Pabbly Subscription Billing

Start the process by visiting Pabbly Subscription Billing in your browser and then click on “Sign up Free“. Further, you can always sign in using your Gmail account or manually filled out the details.
Sign Up For Free!
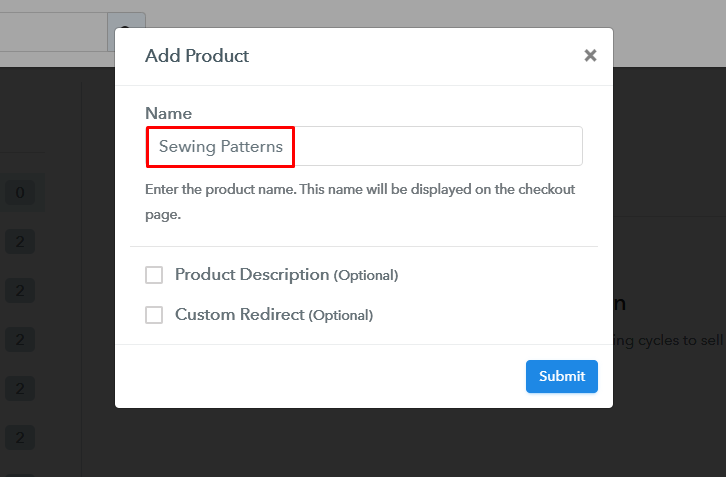
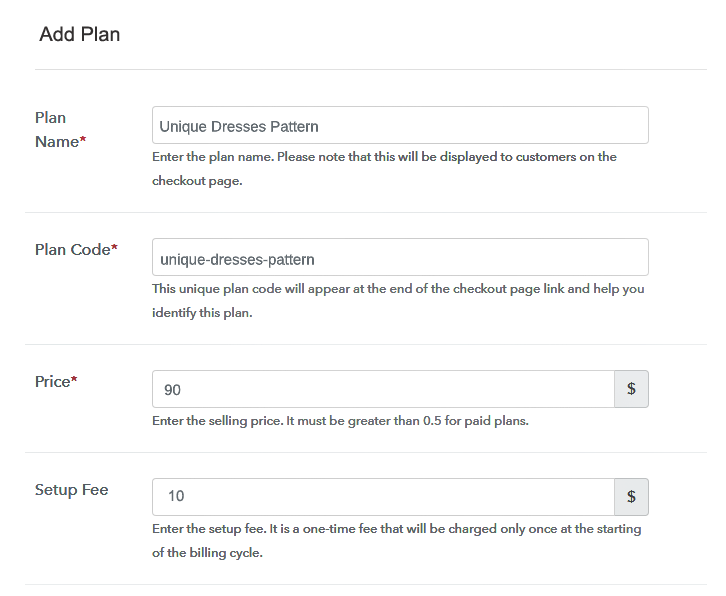
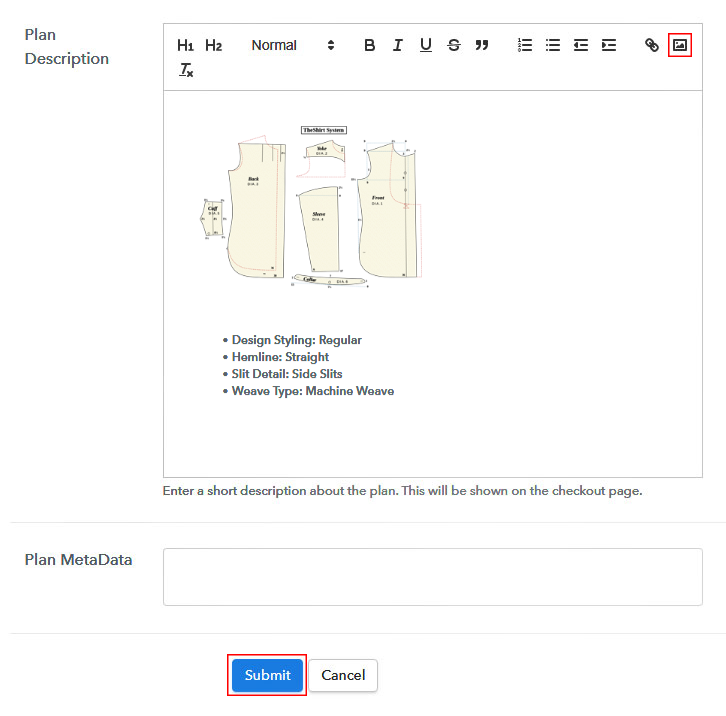
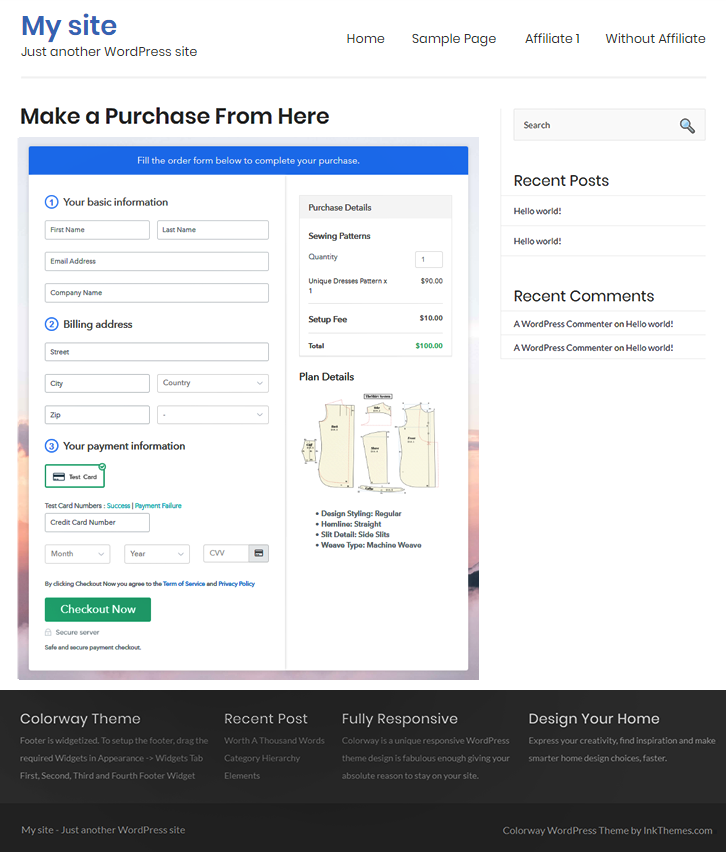
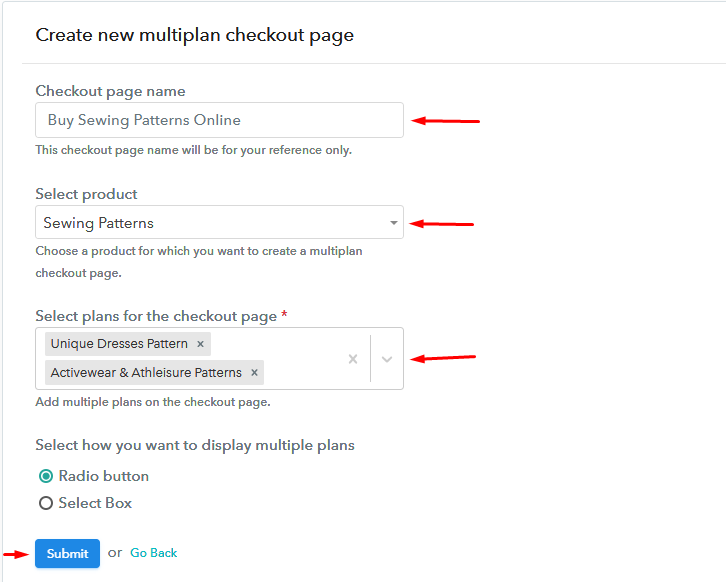
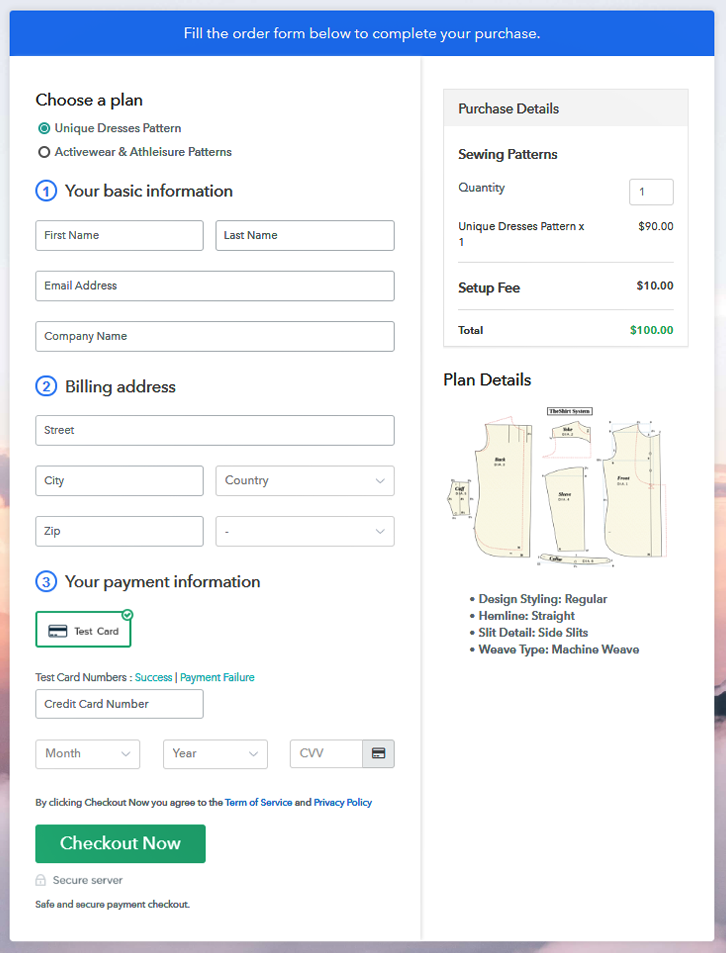
Next, after clicking on the “Access Now” button of the software, a page will open with details like company name, select currency, and phone number. Just fill out those details to continue. The next step is to make the user aware of the payment procedure. That’s why the software offers a test payment gateway, so you can learn all about the software payment procedure. Here, we are proceeding the checkout page process using a test payment gateway. Additionally, it is swamped with payment gateways like PayPal, Stripe, etc. Further, below we are mentioning the payment integration guides to help you out. Besides, add the name, which in our case is sewing patterns. Here you can specify the type like summer wears sewing patterns, ethnic wear sewing patterns, etc. Also, write a short description of the sewing pattern to grab the buyer’s attention. Afterward, click on the “Submit” button after filling the details. Note: Here you can add all the products related to the similar category by creating plans for each of them. Let’s rollout plans for different kinds of sewing patterns available in your store. The next thing to do is fill all the details like plan name, code, price, set-up fee, and much more to move on. Furthermore, it is necessary to write a brief description of sewing patterns using bullets, images, etc, to bring natural buyers to the checkout page. Following, click the “Submit” button to add sewing patterns on the checkout page. Additionally, you can add multiple plans and types of sewing patterns in your product list which you want to market online. Follow up the suggested steps to preview the checkout page: Simply copy the link and add the checkout page to sell sewing patterns online at any proper place on your WordPress site. Further, paste the plan link of sewing patterns on a text editor of the WordPress dashboard. Hit the “Publish” button, after doing changes. Note: In case you want to sell multiple products via a single checkout page, you can create a multi-plan checkout page otherwise skip this step. Alright! We are at the end of this blog with the conclusion that most of the designers are making living out of selling sewing patterns online. And, taking a step in the digital world won’t hurt you, unlikely it will boost your income. As you have already noticed above that starting the sewing pattern business online is pretty much easy using Pabbly Subscription Billing. So, don’t cage yourself up, try out this software and let us know your reaction in the comments section.Step 2: Select Subscription Billing

Step 3: Account Setup

Step 4: Connect Payment Gateways To Sell Sewing Patterns Online

Step 5: Add Your Product

Step 6: Add Plans
(a) Select Add New Plan

(b) Specify the Plan & Pricing Details
(c) Add Image & Description
Step 7: Share your Checkout Page

Step 8: Preview Checkout Page
(a) Click on the View Button

(b) Take a Look at the Checkout Page

Step 9: Embed Checkout Page in Site & Sell Sewing Patterns Online

(a) Edit the Page & Paste the Copied Link

(b) Save & Publish the Checkout Page

(c) Check out the Final Look of your Checkout Page on WordPress Site
Step 10: Multiplan Checkout Page
(a) Click on Add Mutiplan Checkout

(b) Add Plans to Sell Multiple Sewing Patterns from Single Checkout Page
(c) Take a Look at the Checkout Page
Wrapping Up
You May Also Like To Read –


