Ideal For: All the rim manufacturers, rim sellers, rim dealers, retail auto parts suppliers, wholesale rim dealers and other vendors can use this method to take their rim selling business online.
Why Choose this Method for Selling Over any Other Solution?
Unlike any other solution, this method allows you to:
- List and sell your rims for FREE. Absolutely no payment required.
- No commission on sales.
- Collect payment through multiple payment modes from a single checkout page.
- Sell one time or recurring subscriptions of your rims.
- Sell and collect payment in any currency as per your requirement.
- Give discounts on your products by offering special coupon codes.
- Add sales commission agents to help you in selling your rims.
Rims are the crucial elements of the vehicle. With almost every second household owns a vehicle, starting rims selling business online is not a bad idea. Yet, the most asked question!
Why would you like to sell rims online?
According to Zion Market Research, the global tire market is expected to attain $211.5 billion by 2024. Not, to forget, rims are an essential element of tires. So, it is most likely that in the coming days’ demands of rims will increase. And, it would be best to keep all this in mind and you should start selling rims online now.
We understand how much overwhelming can be a process of starting a new business and that’s why we would like to suggest Pabbly Subscription Billing software. The tool lets you create amazing checkout pages for selling rims online in a blink of an eye. Not just this, it is abundant with features, some of it are mentioned below:
- Add multiple products and plans in a single checkout page
- Collect any currency without any boundation
- Track the payment status
- Generate professional invoices
The above reasons are enough to trust the software and now we are going to show you how to sell rims online using the checkout page.
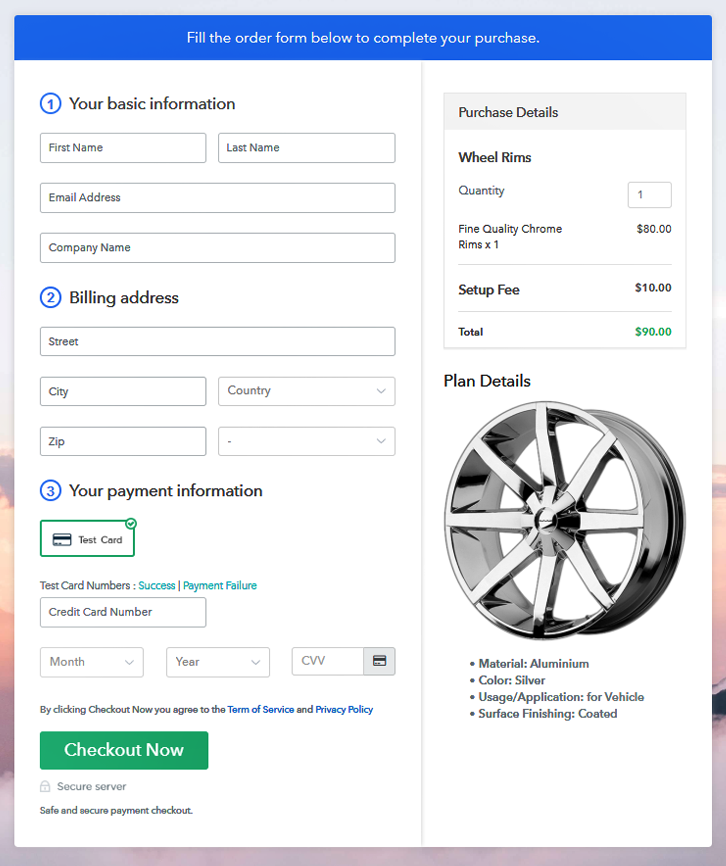
This is How your Checkout Page will Look Like After Creation
Step 1: Login to Pabbly Subscription Billing

Visit to the Pabbly Subscription Billing site and click on the “Sign Up Free” button. Then, log into the software either using your Gmail credentials or simply create a new account.
Sign Up For Free!
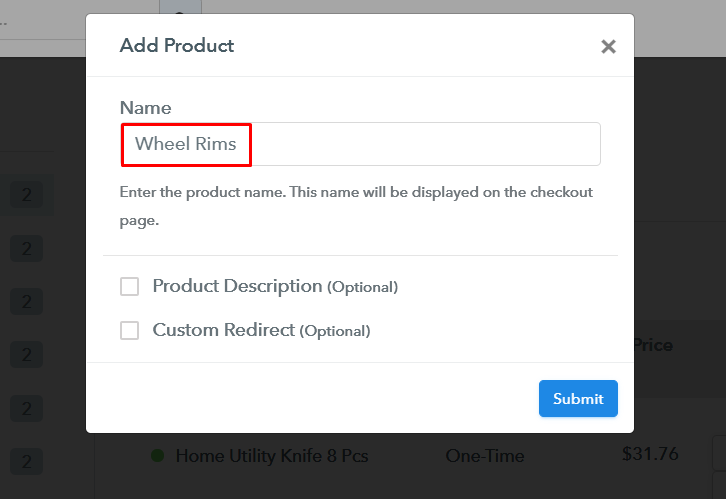
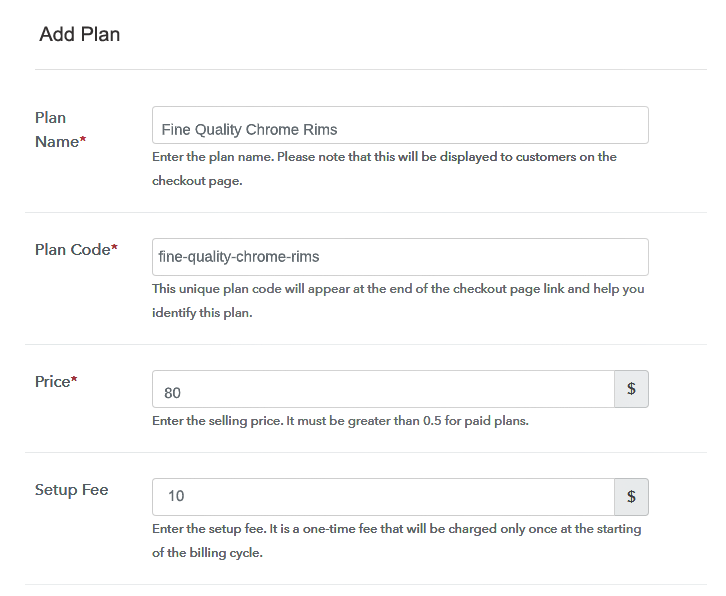
Further, click on the “Access Now” button of the software which will open the page with details like company name, select currency and phone number. Fill those information to continue. The good thing about the software is it provides the dummy payment gateway for a better understanding of the payment procedure. Here we are also enabling the “Test Payment” gateway. Moreover, it is packed with multiple payment gateways like PayPal, Stripe, etc. Below we are also mentioning the payment integration guides to help you out. Furthermore, add the product and name it which in our case is wheel rims. Here you can specify the type like 2 wheeler rims, 4 wheeler rims, etc. Also, write a short description of the product to grab the buyer’s attention. Just fill out those details and click on the “Submit” button. Note: Here you can add all the products related to the similar category by creating plans for each of them. Now, let’s unfold out plans for different kinds of rims available in your store. Subsequently, don’t neglect to fill details like plan name, code, price, set-up fee and much more to continue. Moreover, to attract potential buyers on the checkout page, it is vital to write a brief description of rims using bullets, images, etc. Following, click on the “Submit” button to add the product on the checkout page. Plus, you can add multiple plans and types of rims in your product list which you want to display in the online market. Follow up below mentioned steps to preview the checkout page: Next, to successfully embed the checkout page on your WordPress site, copy the plan link. Immediately, paste the plan link on a text editor of the WordPress dashboard. Further, make sure to hit the “Publish” button. Note: In case you want to sell multiple products via a single checkout page, you can create a multi-plan checkout page otherwise skip this step. Alright! let’s cut to the chase that rims selling business is profitable and having an online presence of your business is a need of an hour. All the mentioned steps are easy and time-saving. So, we already have thrown the ball in your court and it’s your decision to give this amazing software a try. Let us know if you have any problem, we are here to help you.Step 2: Select Subscription Billing

Step 3: Account Setup

Step 4: Connect Payment Gateways To Sell Rims Online

Step 5: Add Your Product

Step 6: Add Plans
(a) Select Add New Plan

(b) Specify the Plan & Pricing Details
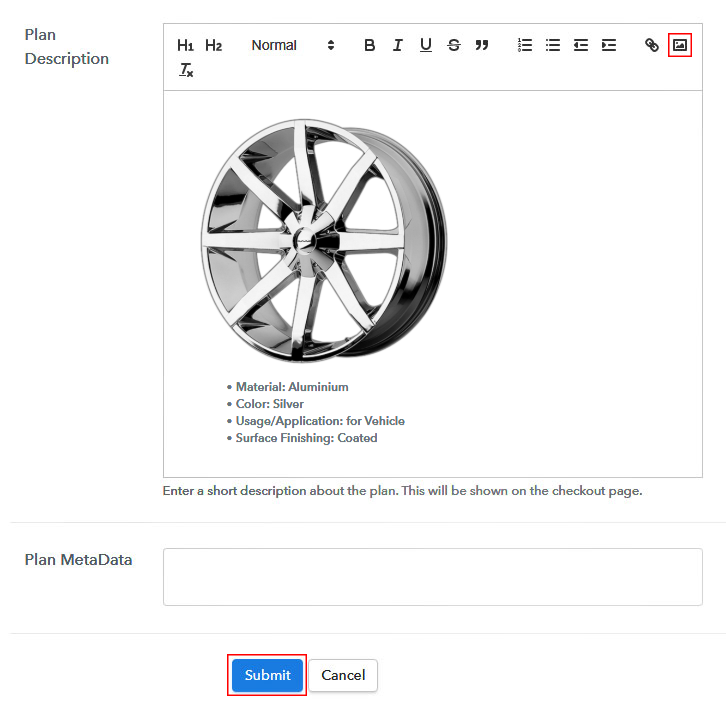
(c) Add Image & Description
Step 7: Share your Checkout Page

Step 8: Preview Checkout Page
(a) Click on the View Button

(b) Take a Look at the Checkout Page

Step 9: Embed Checkout Page in Site & Sell Rims Online

(a) Edit the Page & Paste the Copied Link

(b) Save & Publish the Checkout Page

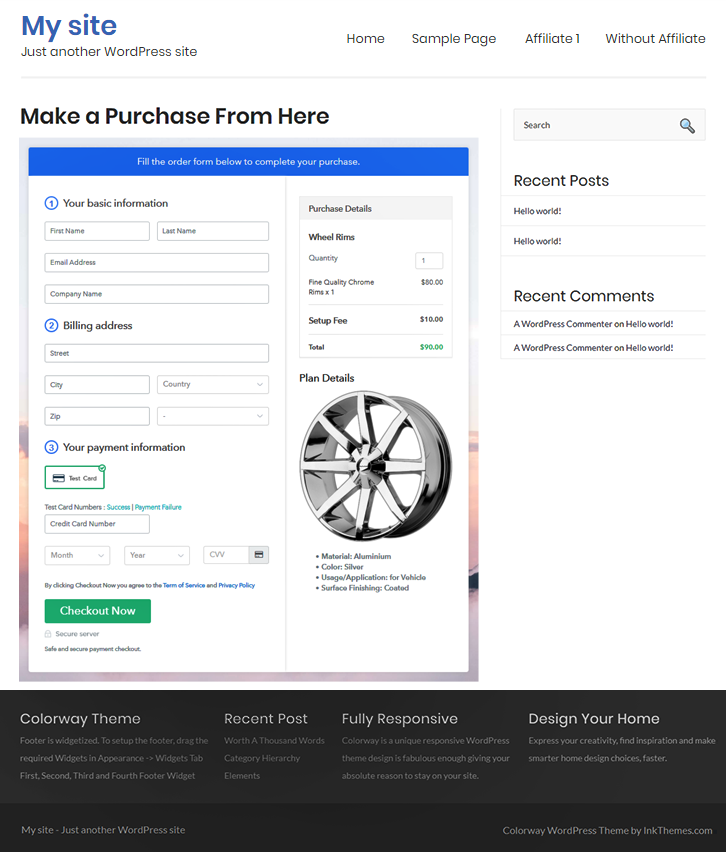
(c) Check out the Final Look of your Checkout Page on WordPress Site
Step 10: Multiplan Checkout Page
(a) Click on Add Mutiplan Checkout

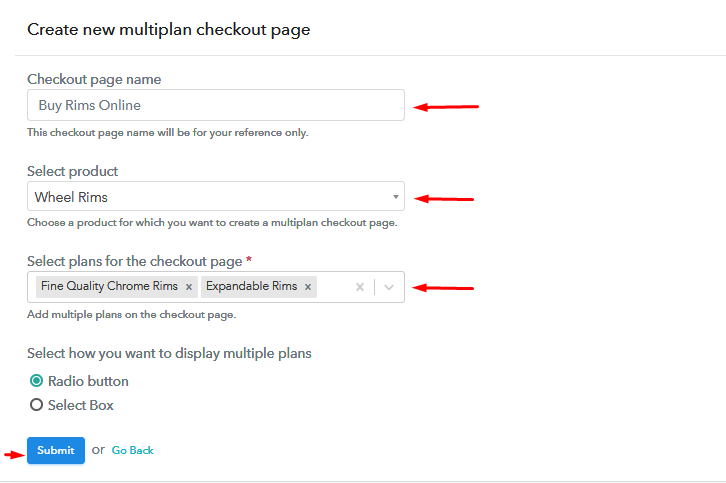
(b) Add Plans to Sell Multiple Rims from Single Checkout Page
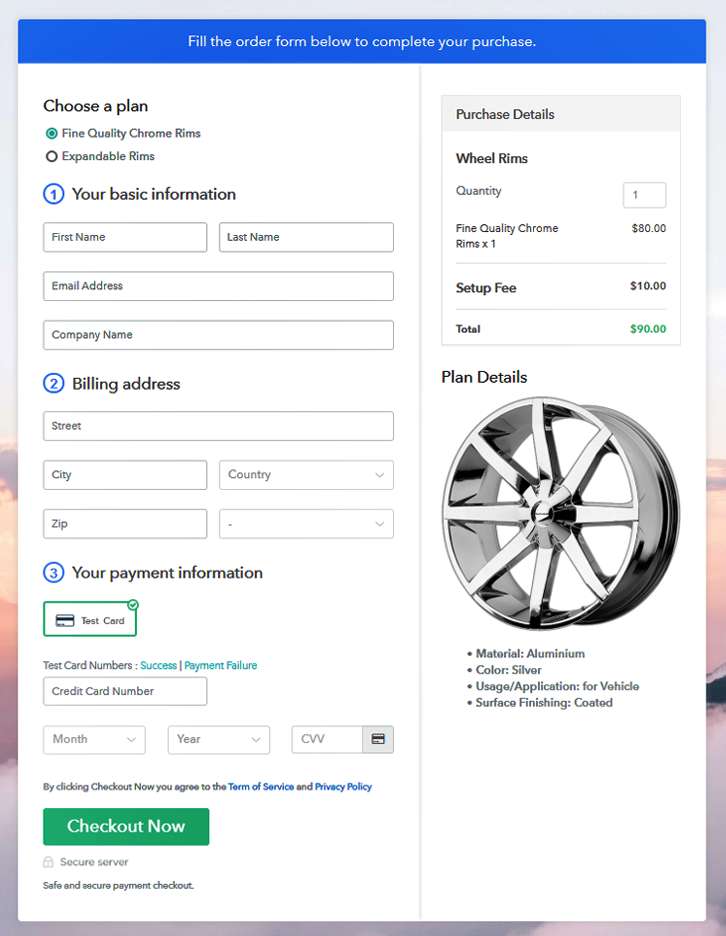
(c) Take a Look at the Checkout Page
Wrapping Up
You May Also Like To Read –


