Ideal For: All the jelly beans owners, gift stores, jelly beans manufacturers, jelly beans sellers and other merchants can use this method to sell jelly beans online.
Why Choose this Method to Sell Jelly Beans Online?
Unlike any other solution, this method allows you to:
- List and sell your fresh jelly beans for FREE. Absolutely no payment required.
- No need to pay commission on any of your sale.
- Multiple payment options like PayPal, Credit Card, etc to collect payment from a single place.
- Sell one time or recurring subscriptions of your jelly beans.
- Collect payments & sell products in any currency as per your requirement.
- Give discounts on your products by offering special coupon codes.
- Add sales commission agents to help you in selling jelly beans.
Jelly Beans are loved by all, and did you know that on average the world consumes 4.4 billion jelly beans every month. And each region of the world has demand for a particular flavor. For instance, Asians prefer the lemon-lime flavor, for Australians, it is bubble gum, in the Middle East it is berry blue and Europeans love their rich tutti-fruity flavors. Now, as a seller, such demands according to regional varieties can only be met if you start selling jelly beans online.
Obviously, the internet offers a variety of tools to sell jelly beans online. But many of these software either require good technical skills or charge some commissions based on profits. That is why in this article we will introduce an awesome Saas tool called Pabbly Subscription Billing to sell jelly beans online. The immediate benefit is there are no ridiculous percentage cuts and the software can be navigated even by a kid. Some other useful features of this software are
- Generate Unlimited Revenues
- Versatile Checkout Pages to List and Sell Products
- Get Payments in Offline/Online Modes
- Multiple Billing Models
- Custom Domain
So, let’s get started to build our first checkout page with Pabbly Subscription Billing to start selling jelly beans online.
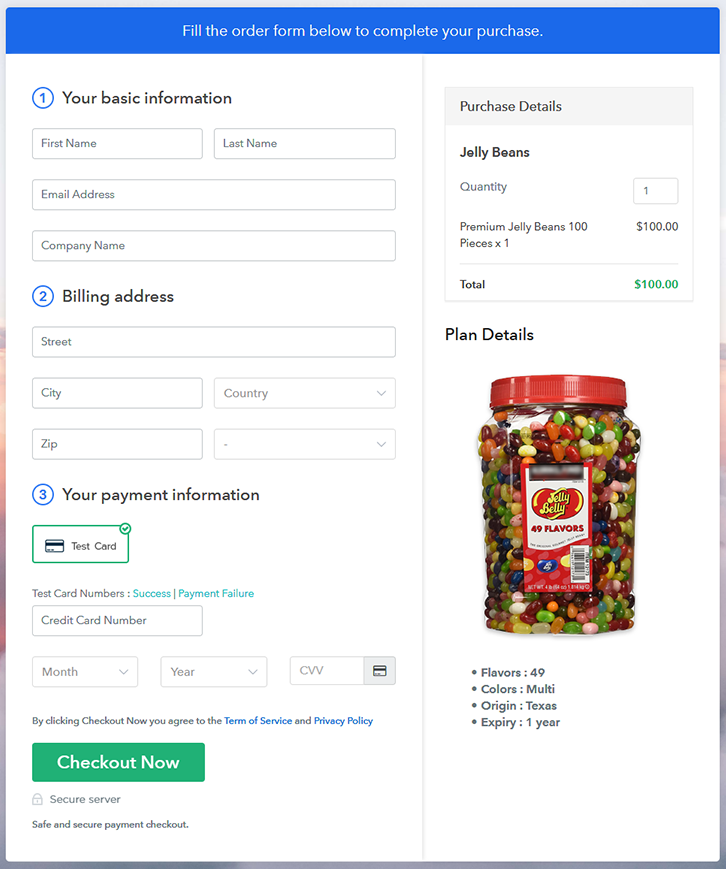
Final View of Checkout Page for your Jelly Beans Selling Business
Step 1: Log in to Pabbly Subscription Billing

First to start the process look for the website Pabbly Subscription Billing in your search engine. Here click on the “Sign up Free“ button. You can either manually fill all the information or simply sign in using your Gmail account.
Step 2: Select Subscription Billing

Step 3: Account Setup

Click on the “Access Now” button of the software, a page will redirect with fields like company name, select currency, and phone number. Just fill out those details to continue creating a checkout page for jelly beans.
Step 4: Connect Payment Gateways & Start Jelly Beans Selling Business Online

To prevent glitches during transactions, Pabbly Subscription Billing provides a dummy payment gateway where you can beta test the entire payment experience of the customer in advance.
Payment gateways such as Razorpay, Stripe, and many more can be easily integrated using Pabbly Subscription Billing. There is an integration guide for each of them below this para. But I am going ahead to enable the test payment option to continue the process.
- PayPal integration guide
- Stripe integration guide
- Razorpay integration guide
- Authorize.net integration guide
Step 5: Add Product for your Jelly Beans

I am hoping that the payment gateway integration went well, so let’s start adding the products. Below the “Enable Payments” segment there is the “Add your product” section click on it. This will generate a dialog box with a blue button “Add New Product”. Click on it.
You have to add the required product title, in this case, it is ‘jelly beans’.
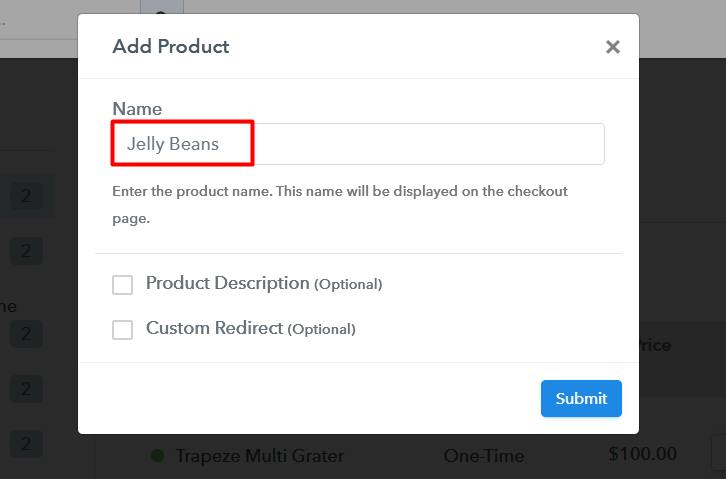
Fill out all the details like the name of the product and voila your product is created.
Note: Here you can add all the products related to the similar category by creating plans for each of them.
Step 6: Add Plans
Now let’s create plans for different kinds of costumes available in your store.
(a) Select Add New Plan

(b) Specify the Plan & Pricing Details
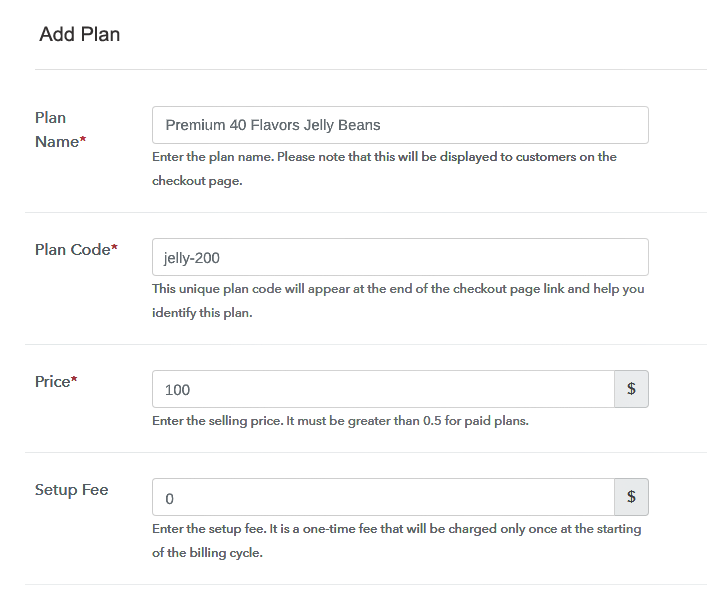
In the plan page, fill in information like plan name, code, price, setup fees, etc. Moreover, while coming down you will find different billing models like one-time payment, recurring, based on cycles, etc. Now, choose the one that interests you the most. Furthermore, you can change it any time you want.
(c) Add Image & Description of Jelly Beans
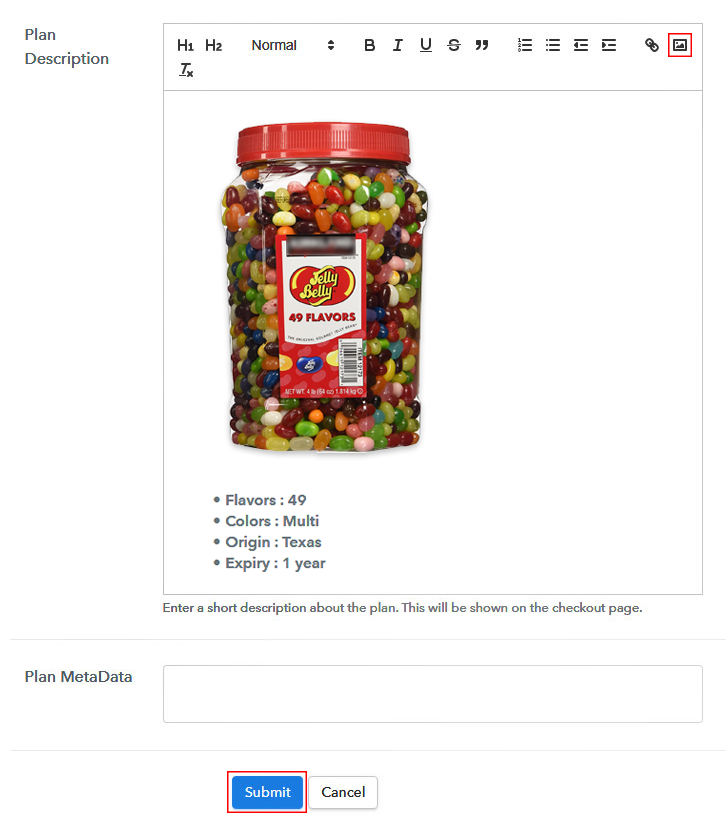
By clicking the image button you can upload some good images of jelly beans.
Now give some description about the jelly beans like pieces per package, colors, flavors, etc and then press the “Submit” button.
You can list many more products by using the same process.
Step 7: Share your Checkout Page

- Also, to create more awareness about your products you can share your checkout page on Twitter & Facebook by just pressing the respective buttons.
- Moreover, share the checkout pages on email and SMS.
- Furthermore, you can build buttons on your webpage and paste the checkout links on it. Or you can place it on any anchor text on your website, so the users will be redirected to the checkout page.
Step 8: Preview Checkout Page
Follow up the recommended steps to preview the checkout page:
(a) Click on the View Button

(b) Take a Look at the Checkout Page

Step 9: Embed Checkout Page in Site & Sell Jelly Beans Online

Also, just copy the link and add the checkout page to sell the Jelly Beans online at any suitable place on your WordPress site.
(a) Edit the Page & Paste the Copied Link

Further, paste the plan link of the jelly beans on a text editor of the WordPress dashboard.
(b) Save & Publish the Checkout Page

Next, click the “Publish” button, after making changes.
(c) Check out the Final Look of your Checkout Page on WordPress Site
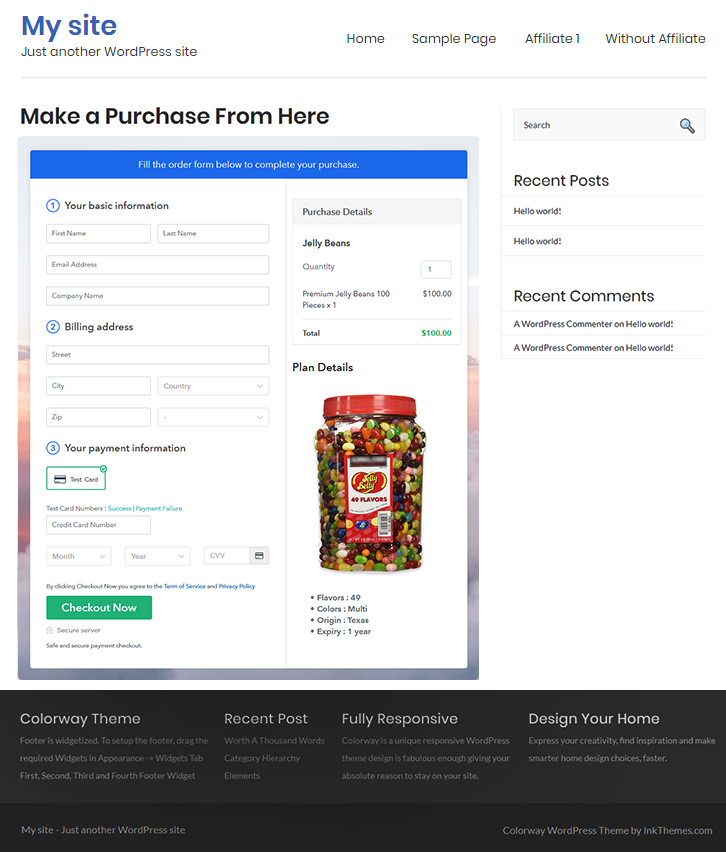
Step 10: Multiplan Checkout Page
Note: In case you want to sell multiple products via a single checkout page, you can create a multi-plan checkout page otherwise skip this step.
(a) Click on Add Mutiplan Checkout

(b) Add Plans to Sell Multiple Jelly Beans Online from Single Checkout Page
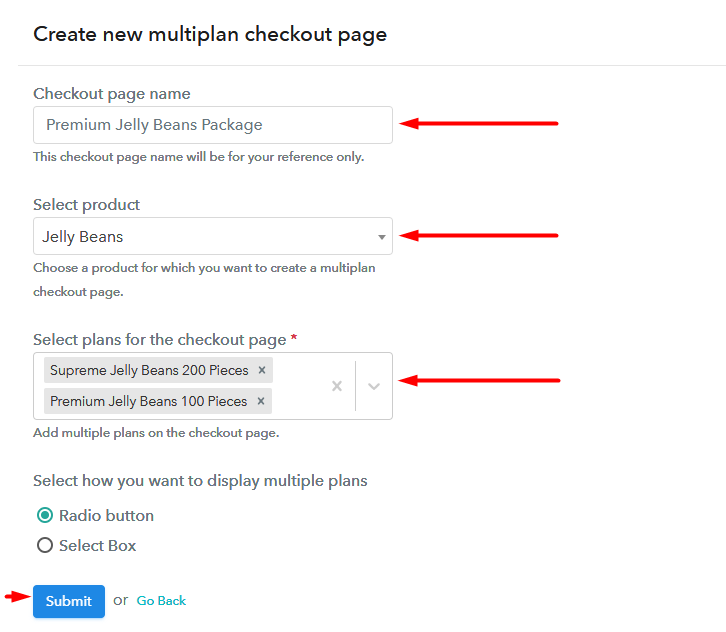
(c) Take a Look at the Checkout Page
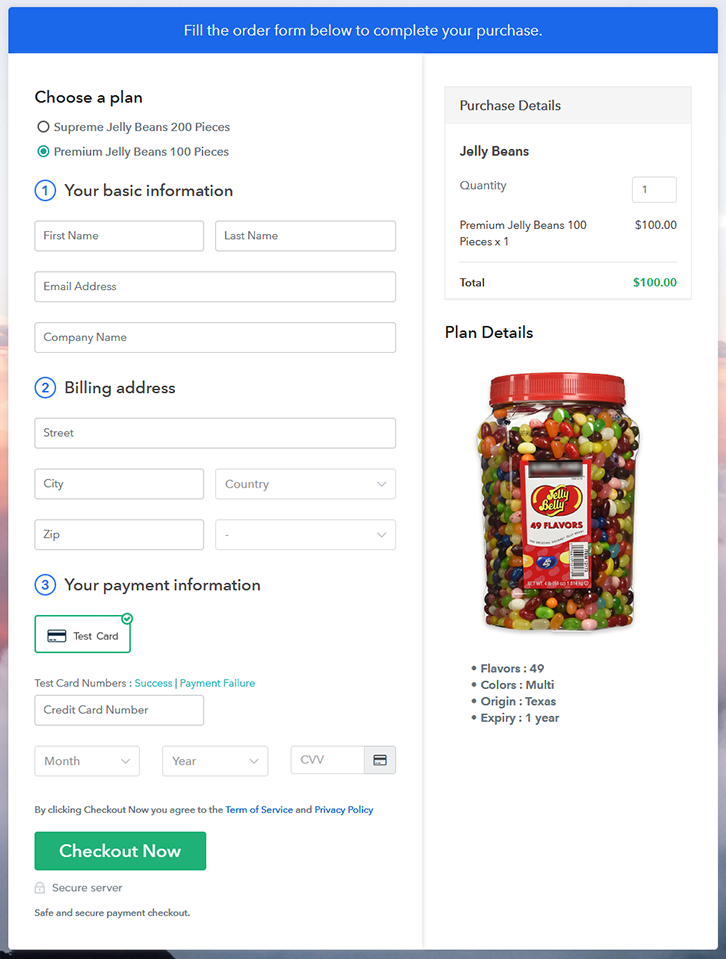
Wrapping Up
You are awesome!! Because you created your first checkout page to sell jelly beans online. However, don’t restrict yourself to these checkout pages. Go ahead and have some fun exploring the features of Pabbly Subscription Billing. It may take some time to master these features but in the long run, they will be extremely beneficial for you. Thank You !!


