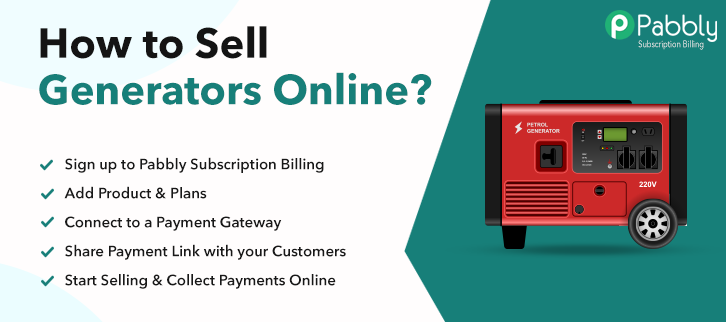
Ideal For: All the generator manufacturers, generator sellers, generator suppliers, generator traders and other merchants can use this method to sell their generators online.
Why Choose this Method for Selling Over any Other Solution?
Unlike any other solution, this method allows you to:
- List and sell your generators for FREE. Absolutely no payment required.
- No commission deducted on sales.
- Collect payment through multiple payment modes from a single checkout page.
- Sell one time or recurring subscriptions of your generators.
- Sell and collect payment in any currency as per your requirement.
- Give discounts on your products by offering special coupon codes.
- Add sales commission agents to help you in selling your generators.
Generators are most probably used for providing electricity in places where power cut is the main issue. It works as a power backup that can be used in the time of emergencies to run electric equipment. That is the main reason why generators never go out of business. And to provide such products on their doorstep can be a very good initiative to increase sales of your business. Hence, you might be searching for ways to sell generators online.
Why would you like to sell generators online?
Generators are life saviors during the time of emergencies as you never know when an environmental crisis arrives. Hence, selling generators online in this digital age would be like upsurging business sales. And to do so, a specific tool is required that can help you to start your generator business with all the online marketing needs.
Therefore, we would like to recommend you Pabbly Subscription Billing which is a perfect tool through which you can create checkout pages for selling goods online. Hence, let me tell you some of the significant features that it offers:
- Collect payment online using several payment gateways
- And, create unlimited plans and products
- Also, you can offer infinite coupons and discounts to your customers
- Besides, it also enables you to add tax and delivery charges
Not only that, but it also allows you to share the checkout page on different social media platforms or websites. Now, without any further due, let me take you through the 10 easy steps that you need to follow for creating checkout pages online.
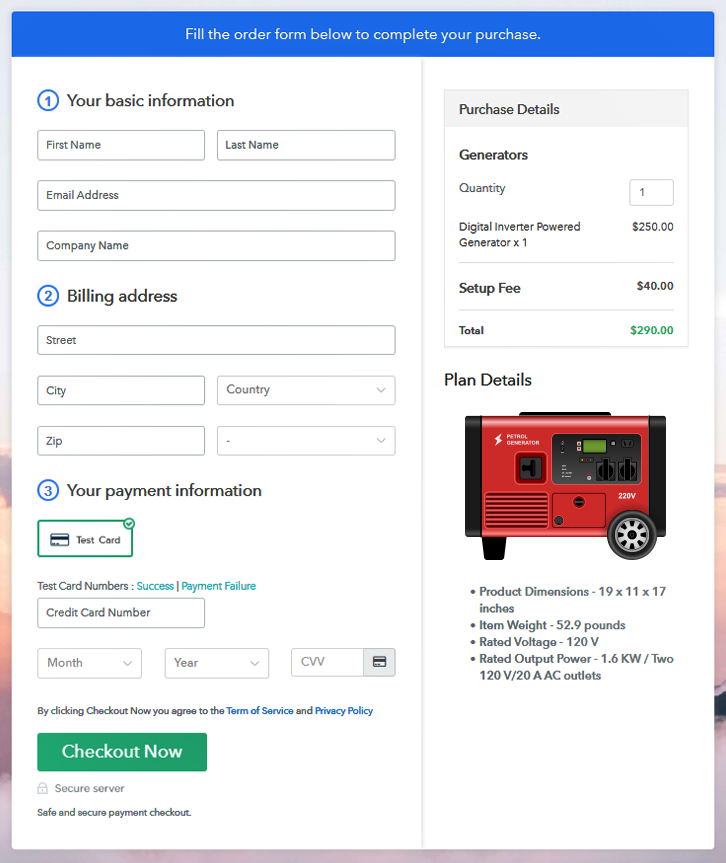
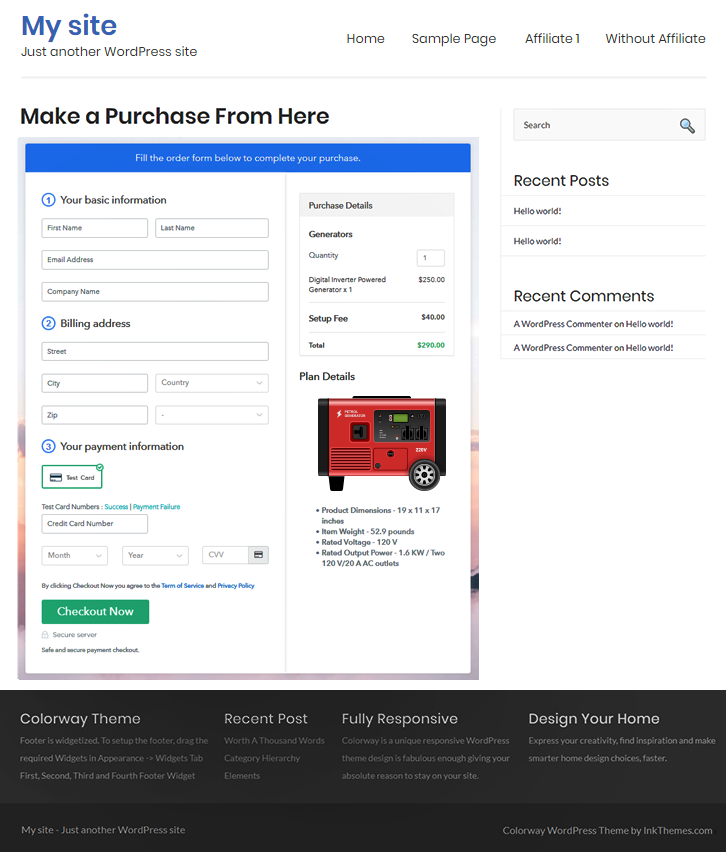
This is How your Checkout Page will Look Like After Creation
Step 1: Log in to Pabbly Subscription Billing

First of all, you need to go to Pabbly Subscription Billing and just tap on the button “Sign up Free“. Subsequently, now you are supposed to fill out the fields on their sign-up page either by filling up the details manually or else via Gmail account.
Sign Up For Free!
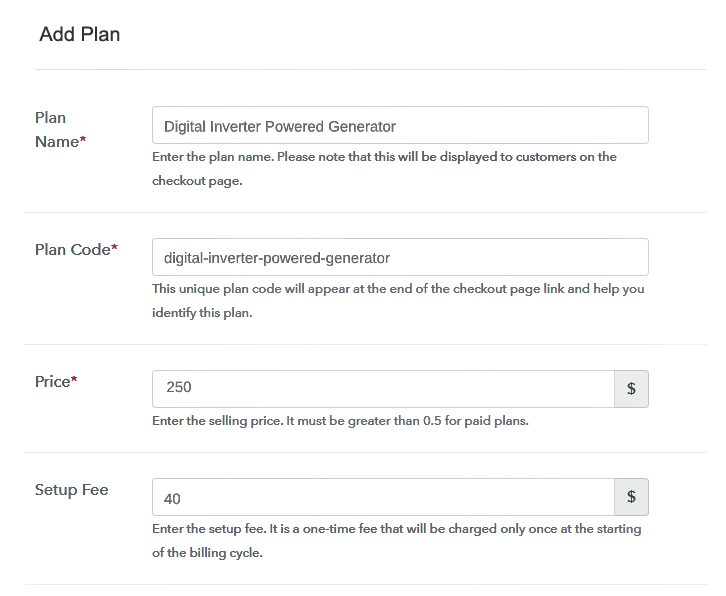
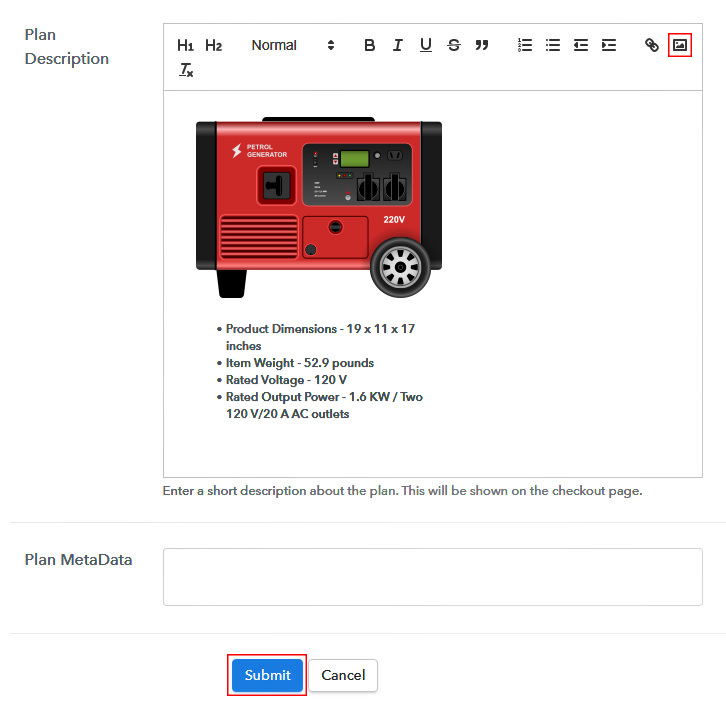
The next step is to fillup the company details like name, currency, and phone number. Then, you need to tap on the button named as “Continue” so that you can complete the whole process. The subsequent step is to connect with the test payment gateway. As, it will provide a guidance to the users that how payment gateways work. Besides, Pabbly Subscription Billing offers numerous payment gateways such as PayPal, Stripe, Razorpay, etc. For instance, here i am explaining the payment process using the test payment gateway. Furthermore, you can also connect with other payment gateways with the help of their guide given below. Once you complete embedding the payment gateway, your next step is to add products. All you need to do is click on the button named as “Add New Product”. That will open a dialog box where you are supposed to fill out the details of the generator. Just enter the whole details and your product is created. Note: Here you can add all the products related to the similar category by creating plans for each of them. Now, create plans for the generators that you want to sell online. Once you complete the previous step, another thing you are required to do is provide the specifications of the plan by entering details such as name, code, price, setup fees, billing cycle, etc. After that, simply add the image of the generator that you wish to sell online. Then, specify the details of the product in bullet points like weight, dimension, voltage, etc. Subsequently, when you finish entering the details all you need to do is tap the button entitled “Submit”. Follow up these steps to preview checkout page: Just copy the embed link in order to insert the checkout page on your WordPress website. Thereafter, just copy the link & paste it to the text area of the editor. Consequently, tap the button labeled ‘Publish’ after pasting the code & your checkout page is embedded. Note: In case you want to sell multiple products via a single checkout page, you can create a multi-plan checkout page otherwise skip this step. Voila! Your checkout page is now ready to share online on social media platforms and websites. We hope now your query on “How to Sell Generators Online?” is resolved via this article. All you need to do is just follow the above-mentioned step and you are ready to start your generators business online. So, gear up and start selling generators online to increase sales of your business by using Pabbly Subscription Billing.Step 2: Select Subscription Billing

Step 3: Account Setup

Step 4: Connect Payment Gateways To Sell Generators Online

Step 5: Add Your Product


Step 6: Add Plans
(a) Select Add New Plan

(b) Specify the Plan & Pricing Details
(c) Add Image & Description
Step 7: Share your Checkout Page

Step 8: Preview Checkout Page
(a) Click on the View Button

(b) Take a Look at the Checkout Page

Step 9: Embed Checkout Page in Site & Sell Generators Online

(a) Edit the Page & Paste the Copied Link

(b) Save & Publish the Checkout Page

(c) Check out the Final Look of your Checkout Page on WordPress Site
Step 10: Multiplan Checkout Page
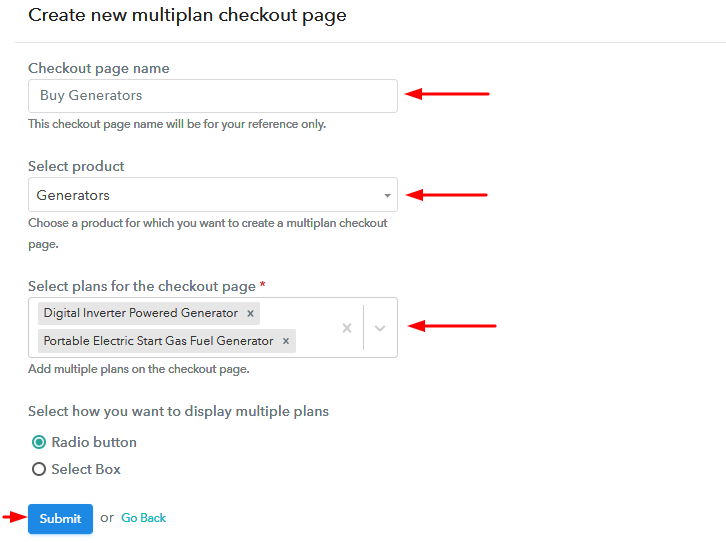
(a) Click on Add Mutiplan Checkout

(b) Add Plans to Sell Multiple Generators from Single Checkout Page
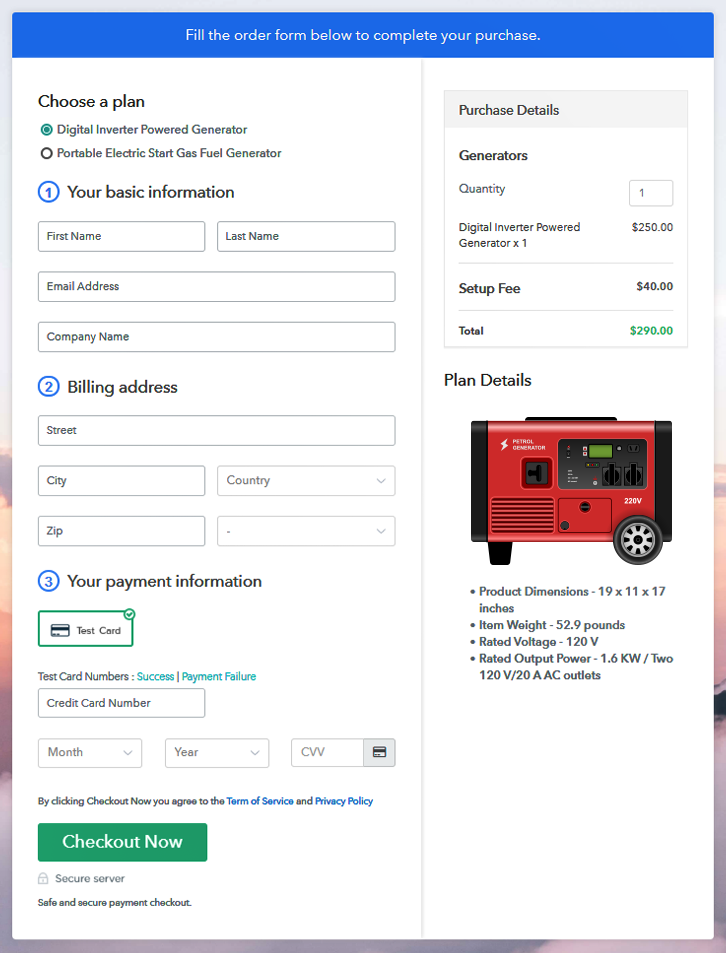
(c) Take a Look at the Checkout Page
Wrapping Up
You May Also Like To Read –


