Ideal For: All chocolate manufacturers, cocoa farmers, home chocolate makers, confectionaries, gift shops and other merchants can use this method to sell chocolate online.
Why Choose this Method for Selling Over any Other Solution?
Unlike any other solution, this method allows you to:
- List and sell your chocolate for FREE. Absolutely no payment required.
- No commission deducted on sales.
- Collect payment through multiple payment modes from a single checkout page.
- Sell one time or recurring subscriptions of your chocolate.
- Sell and collect payment in any currency as per your requirement.
- Give discounts on your products by offering special coupon codes.
- Add sales commission agents to help you in selling your chocolate
Chocolate is known as the “Food Of Gods” and human have been cultivating cocoa and consuming chocolates since 4000 BC. But with the explosion of the internet, many retailers are actively seeking to start selling chocolates online.
Why would you like to sell chocolates online?
It is obvious, isn’t it? If you start selling chocolate online, you will be inundated with offers from the global audience. Well, I did some research and found out that the market size of the chocolate industry in the United States is above $19 billion and two-thirds of the revenues were from online sales. And these days every major chocolate company like FerreroGroup, Mars Inc, and The Hersheys have made their presence online.
Moreover, there are other benefits of selling chocolates online like, higher marketing returns, a 24×7 online open shop, lower logistic cost, no rent or utility bills, lesser employees’ salaries, etc.
Alright, now that I have mentioned the benefits, let me ask you how would you like to set up an online store to sell chocolates? Well, there is an awesome online service called Pabbly Subscription Billing, that can build an e-store in minutes. You can list an unlimited number of products and the customers can purchase these products in any currency they want. There are some other benefits of using Pabbly Subscription Billing over others like:
- Unlimited Product Listing And Plans
- Easy Invoicing
- Product Trails
- Sales Analytics
- Tax Management
- Multiple Payment Gateways
- Affiliate Management
- Customer Data Import/ Export
- Coupon Management System
- Unlimited Integrations
These features will give you a definite competitive advantage over other sellers. So why wait let’s set up a kickass e-commerce store to start selling chocolates online.
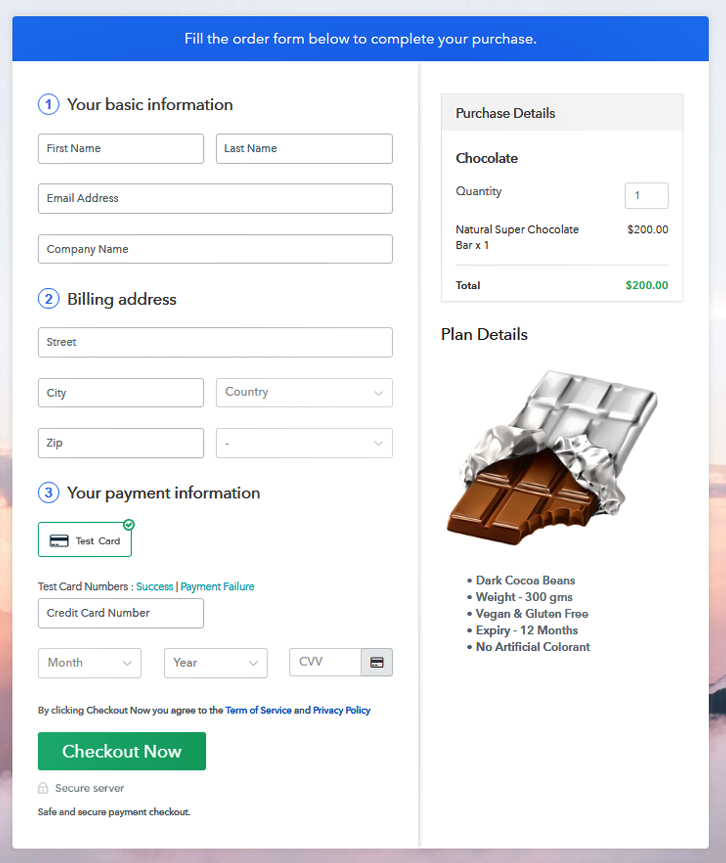
This is How your Checkout Page will Look Like After Creation
Step 1: Log in to Pabbly Subscription Billing

Browse Pabbly Subscription Billing in your search engine and when you land on their website click on the button “Sign up Free“. Now you can either, simply sign in through your, Gmail account or fill in the required fields like name, email address and finally press the “Sign Up” button.
Sign Up For Free!
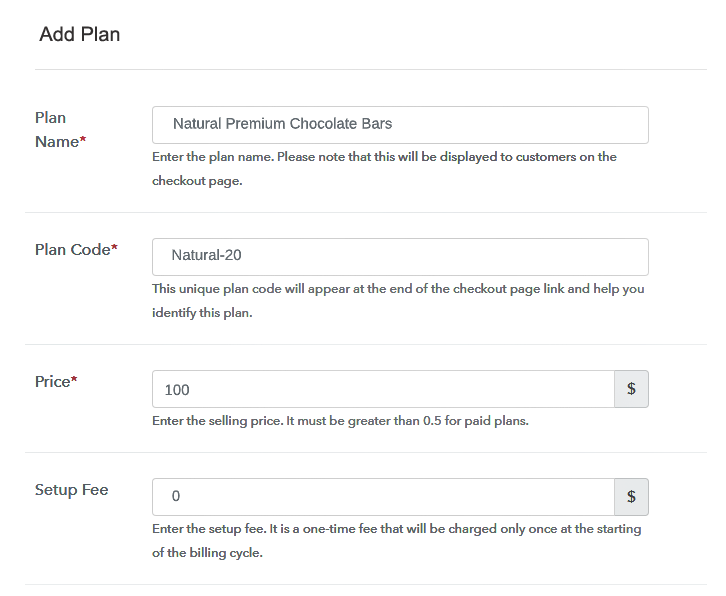
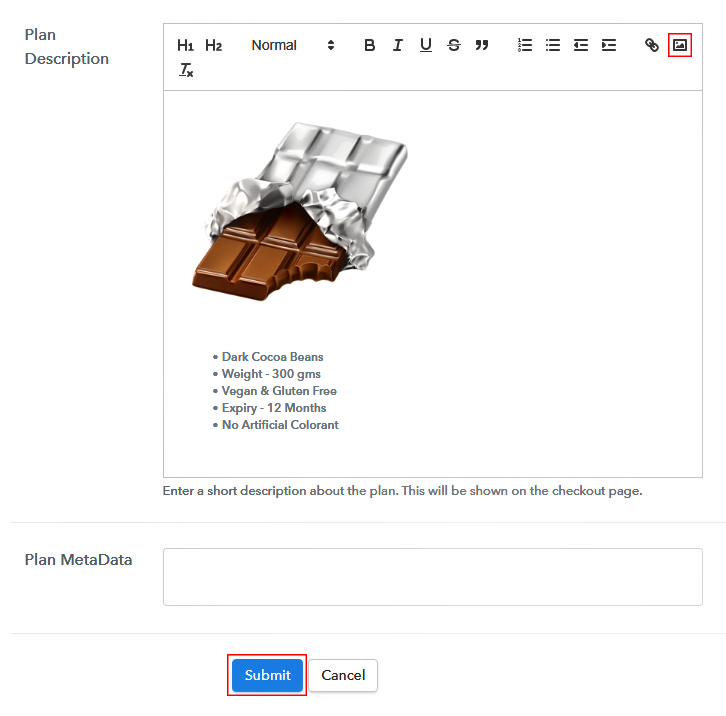
Now that you have entered into the dashboard, click on the “Access Now” button on the Subscription Billing option. Here in this dialog box, you will have to fill the company details like name, currency, and phone number. After filing in the details press the “Continue” button to complete the process. To rein in your customer’s attention, it is better that you provide a seamless payment experience for them without any glitches. Pabbly Subscription Billing understands this and that is why it provides a dummy payment gateway where you can beta test the whole payment experience of a customer beforehand. Just click on the “Enable Test Payment” option to start testing. Furthermore, with Pabbly Subscription Billing, you can easily integrate multiple payment gateways like Razorpay, PayPal, Authorize.net, etc. There are anchor links listed below, which provide a complete integration guide for each of them. But, I am going ahead, by enabling the test payment option to continue the process. Now, I am assuming that you have easily integrated your preferred payment gateway, so let’s move on to add products. Beneath the “Enable Payments” you will find the section “Add your product” click on it. This will generate a dialog box with a blue button “Add New Product”. Click on it. A pop up will be immediately generated and you will have to fill the required product titles like chocolate. Then tick on the individual checkboxes if you want to add product description and custom redirect. Fill up the details and your product is created. Note: Here you can add all the products related to the similar category by creating plans for each of them. Now, we are going to create plans for selling chocolate online, directly from your desktop. After finishing these steps, you will be directed to the plan page, here you have to fill in details like plan name, code, price, setup fees. Coming down to the section below you will find different billing models like one-time payment, recurring, based on cycles, etc. Now click on the preferred billing model and yes at any point of your business you can change it. Take some fine pictures of your chocolates and insert it here using the upload image option. Now after inserting the image, start describing the product details like total number, type of chocolates, packaging, etc and then press the “Submit” button. Likewise, following the same method, you can add multiple products, one at a time. Follow up these steps to preview checkout page: Now, copy the embed plan link to insert the checkout page on your WordPress website. Now, when the link is copied, then paste it to the text area of the editor. After pasting the code, now hit the ‘Publish’ button. Your checkout page is embedded. Note: In case you want to sell multiple products via a single checkout page, you can create a multi-plan checkout page otherwise skip this step. Nowadays everyone has got one mobile device connected to the internet in their hands. So it will be utterly foolish if you didn’t sell chocolates online. Besides, selling any product through Pabbly Subscription Billing is perhaps the cheapest and easiest method available on the internet. So hurry up!! Even though these steps are very easy and many merchants are actively using them to sell their products. Some of you might have doubts, so please leave your queries in the comment section below. Thank you.Step 2: Select Subscription Billing

Step 3: Account Setup

Step 4: Connect Payment Gateways To Sell Chocolate Online

Step 5: Add Your Product


Step 6: Add Plans
(a) Select Add New Plan

(b) Specify the Plan & Pricing Details
(c) Add Image & Description
Step 7: Share your Checkout Page

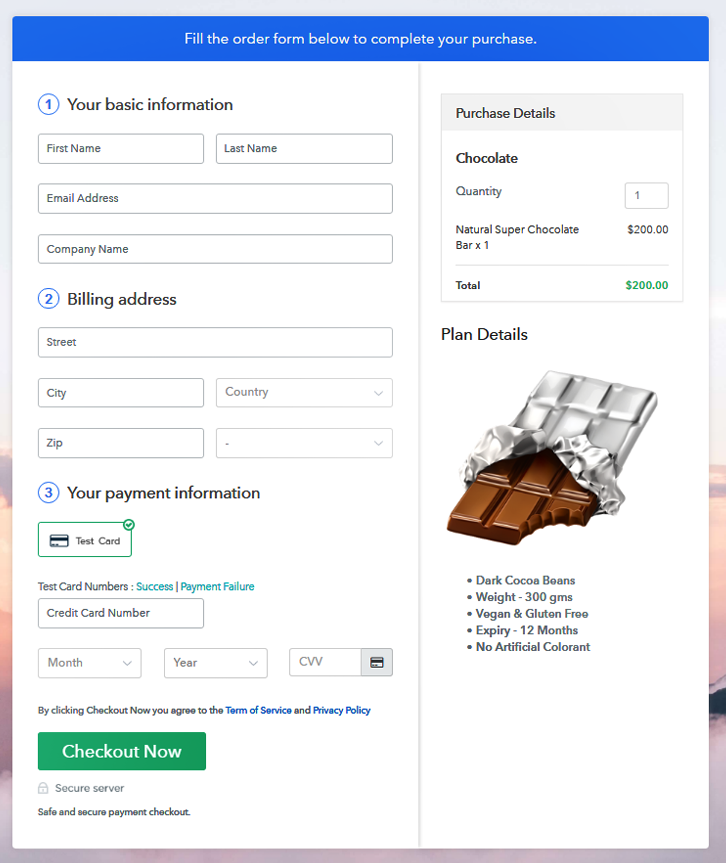
Step 8: Preview Checkout Page
(a) Click on the View Button

(b) Take a Look at the Checkout Page
Step 9: Embed Checkout Page in Site & Sell Chocolate Online

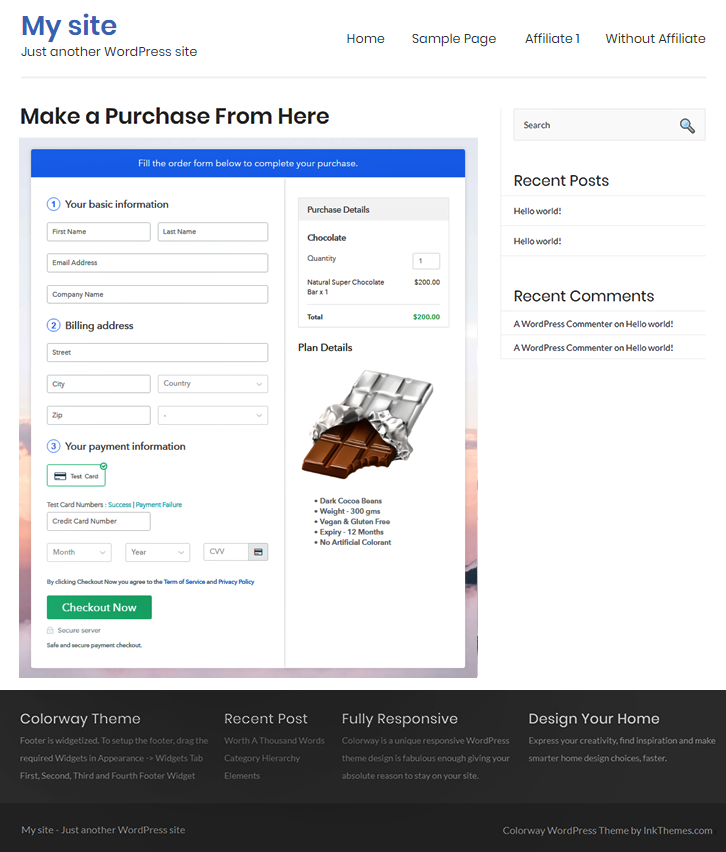
(a) Edit the Page & Paste the Copied Link

(b) Save & Publish the Checkout Page

(c) Check out the Final Look of your Checkout Page on WordPress Site
Step 10: Multiplan Checkout Page
(a) Click on Add Mutiplan Checkout

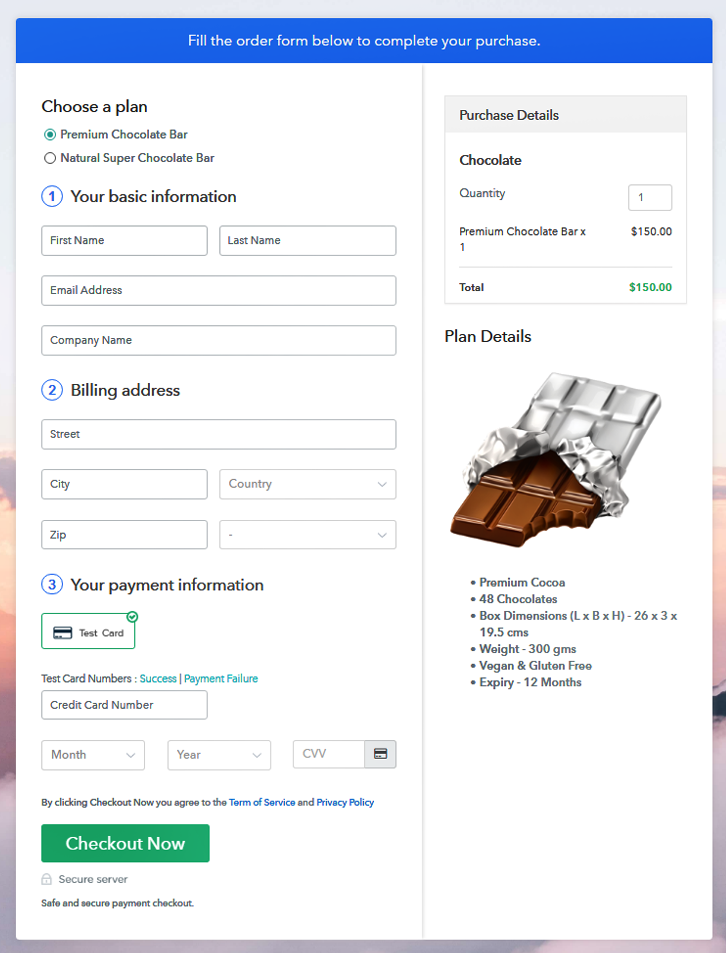
(b) Add Plans to Sell Chocolate Online from Single Checkout Page

(c) Take a Look at the Checkout Page
Wrapping Up
You May Also Like To Read –


 Get my lifetime Pabbly Subscription Billing account now!