Ideal For: All the ayurveda stores, cosmetic shops, medical stores, cottage industries, MSMEs, balm manufaturers, pharmaceuticals and other merchants can use this method to sell balms online.
Why Choose this Method for Selling Over any Other Solution?
Unlike any other solution, this method allows you to:
- List and sell the balms for FREE. Absolutely no payment required.
- No commission deducted on sales.
- Collect payment through multiple payment modes from a single checkout page.
- Sell one time or recurring subscriptions of your balms.
- Sell and collect payment in any currency as per your requirement.
- Give discounts on your products by offering special coupon codes.
- Add sales commission agents to help you in selling your balms.
‘Balm’ is a generic term used for topical medications for lips, skin, forehead to get relief from pain, rashes, dryness, acne, spores, etc. These ointments were used as early as 3500 BCE in Indian, Chinese, and Mediterranean civilizations. Now in the 21st century with the advent of the internet, many manufacturers are increasingly selling balms online to get better demands.
Why would you like to sell balms online?
When you start selling balms online, your products will be discovered by customers from around the world. This, in turn, ensures competitive pricing between customers thus building up higher profits for you. Besides you can save plenty, in rent & utilities, licensing fees, middleman commission, and more.
Now there are many tools available to sell balms online, but here I am going to recommend awesome software i.e. Pabbly Subscription Billing. This software allows you to build inventories of unlimited products and sell them in both offline/online modes using its awesome checkout pages. More benefits are listed below:
- Unlimited Revenues
- Custom Domains
- Create Unlimited Plans, Coupons & Discounts
- Auto Email Alerts on Transaction Failure/ Completion
- Import/ Export Customer Data
- Automatic Reattempts on Card Declines
- Revenue Analytics
- Tax Management
With the features mentioned above, you will have an upper hand over your competitors. So why wait, let us create an awesome checkout page to start your balm business online.
Note: Pabbly Subscription Billing doesn’t encourage selling unlicensed balms or any other medicinal products, unapproved by FDA or equivalent regulatory agencies.
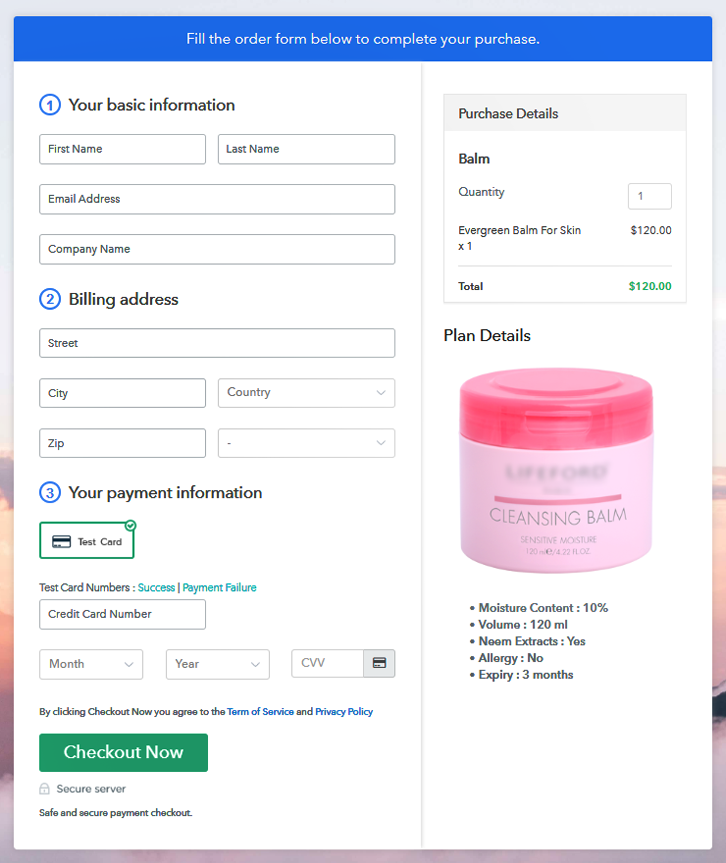
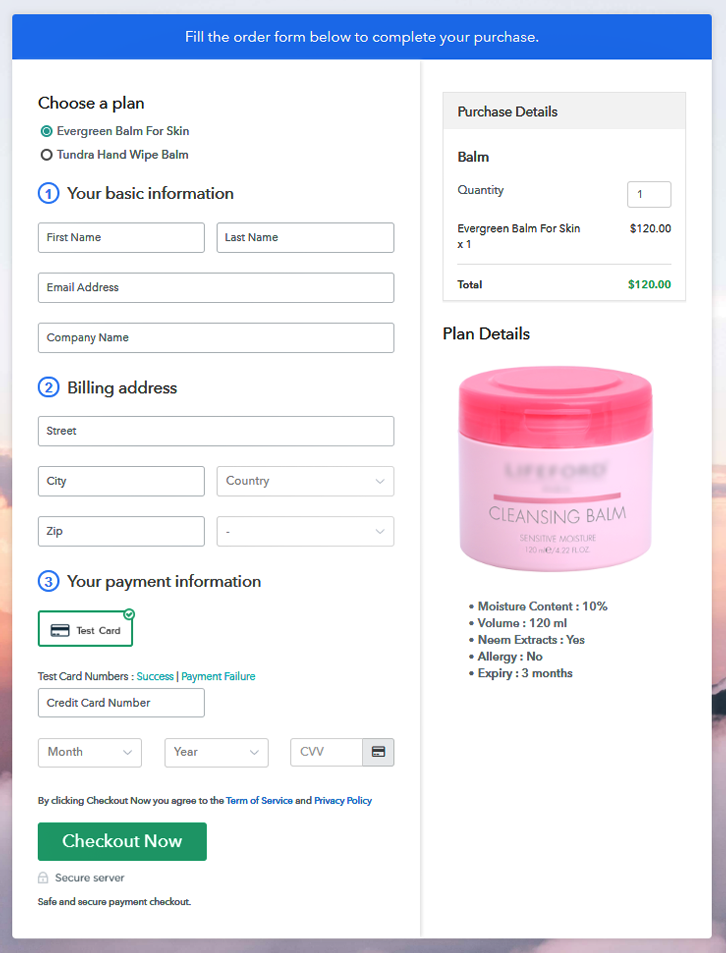
This is How your Checkout Page will Look Like After Creation
Step 1: Log in to Pabbly Subscription Billing

Browse for Pabbly Subscription Billing in your search engines and on reaching their website click on “Sign up Free“. Either sign in using your Gmail account or fill in the required fields like name, email, etc and then click the “Sign Up” button.
Sign Up For Free!
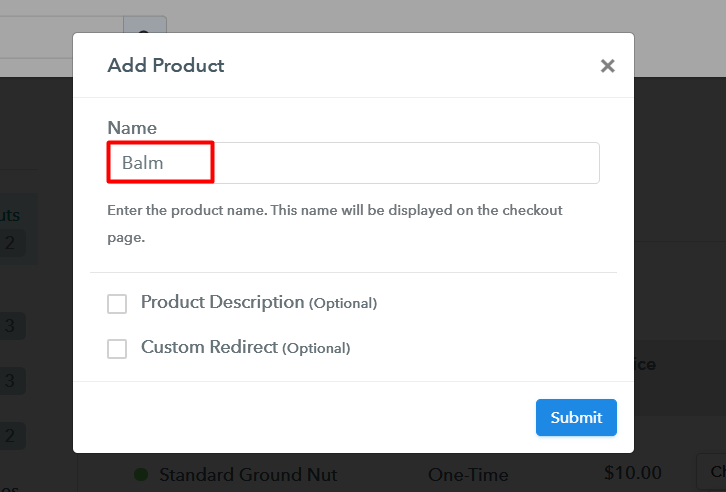
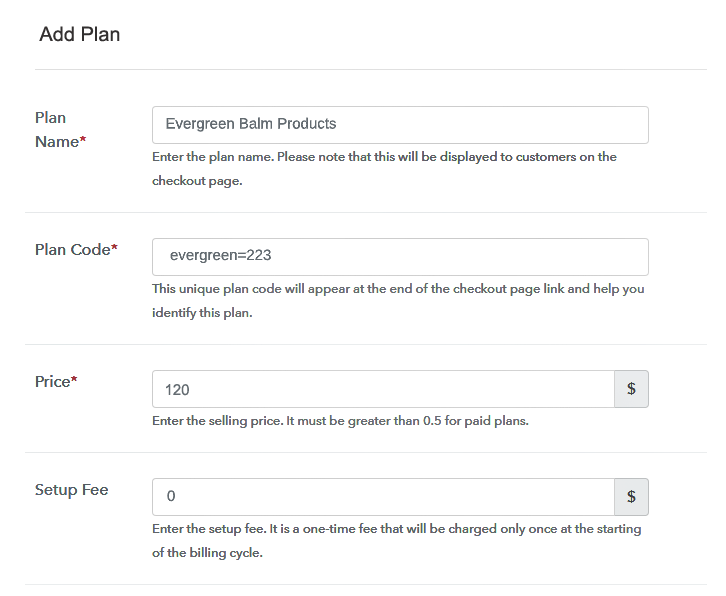
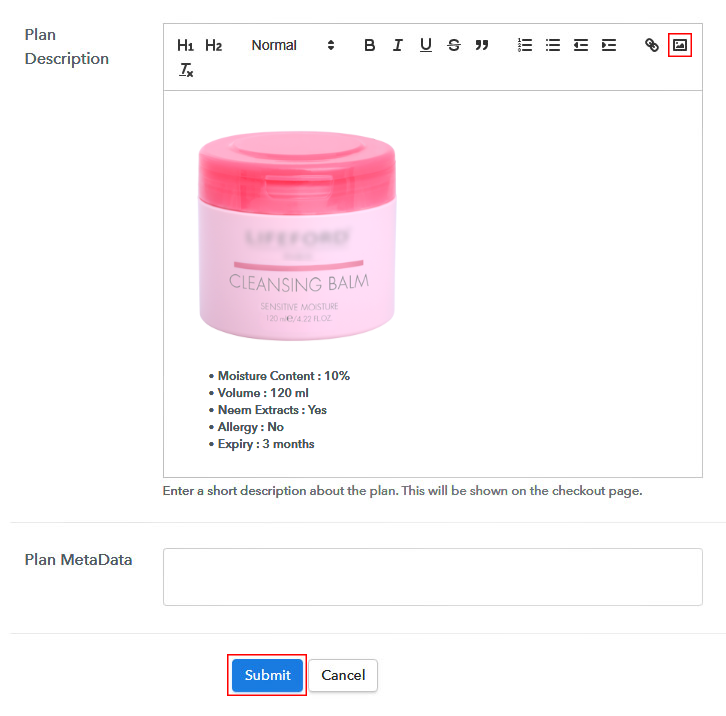
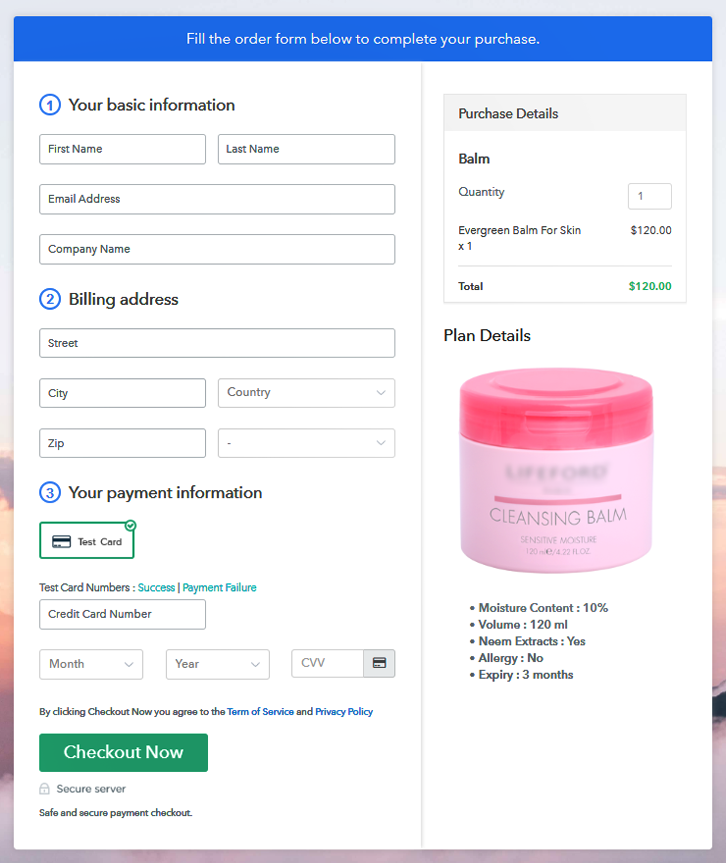
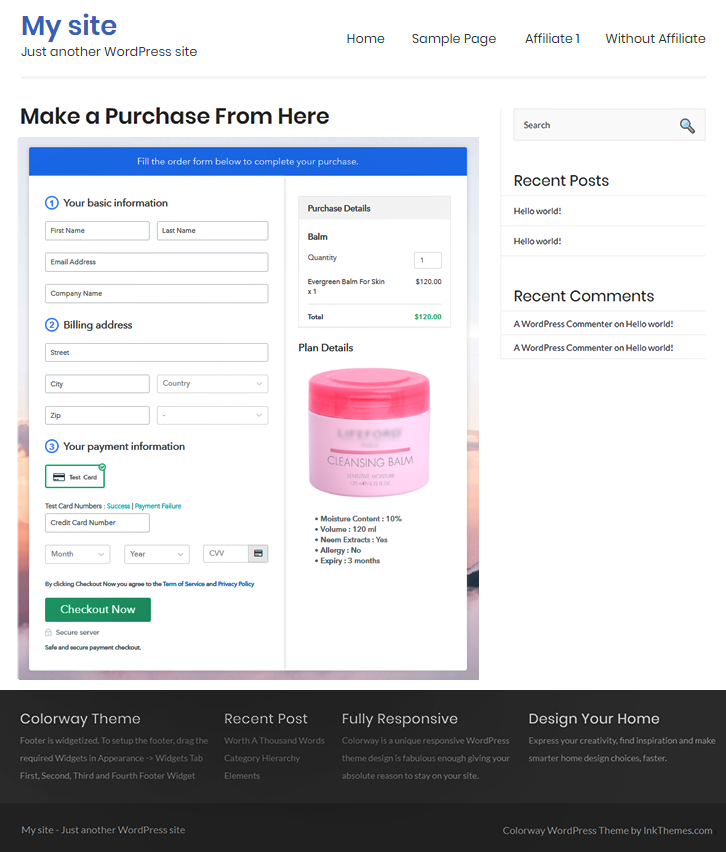
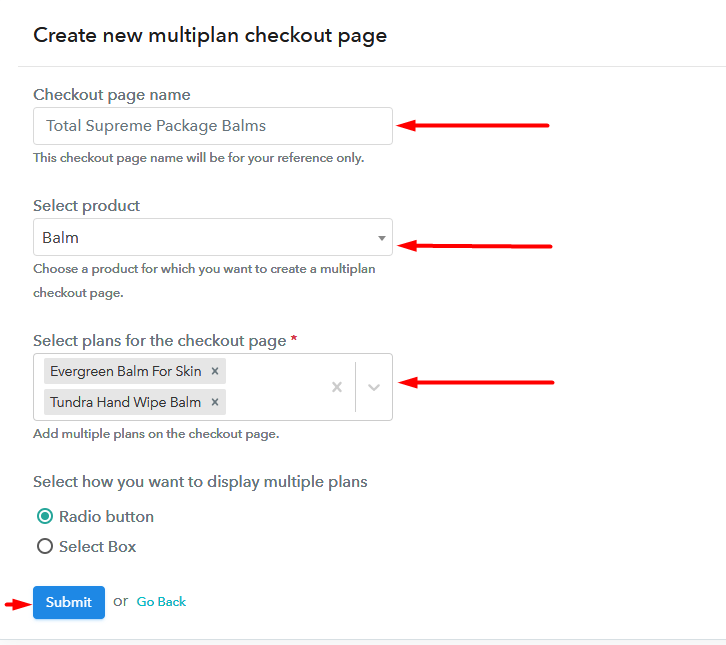
So you will enter the dashboard and now click on the “Access Now” button on the Subscription Billing option. This will generate a dialogue box that will require you to fill the company details like name, currency, and phone number. Now, you have to press the “Continue” button after filling in the details. Using Pabbly Subscription Billing’s dummy payment gateway, you can stimulate the payment experience of a customer. This makes you confident that all glitches are sorted out and the customer will enjoy a serene payment experience. You can do this by clicking on the “Enable Test Payment” option. Moreover, with Pabbly Subscription Billing, you can integrate with multiple payment gateways like Stripe, Razorpay, PayPal, Authorize.net, etc. There are manuals available for the integration of payment gateways beneath this paragraph. But since we have to set up the payment process, we will click on the “Enable Test Payment” option. After integrating the payment gateway, we are going to add the products. Below the “Enable Payments,” you will find the section “Add your product” click on it. This will create a dialog box with a blue button “Add New Product”. Click it. This will generate a pop-up box and you have to add the required product title, in this case, it is the ‘balms’. Fill up the details and your product is created. Note: Here you can add all the products related to the similar category by creating plans for each of them. Now, we are going to create plans to start a balm business online. Add details of the product related to prices like plan name, code, price, setup fees, etc. Also, you can choose for different billing models like one-time payment, recurring, based on cycles, etc. Yes, if you are not satisfied with the present billing models then you can change it at any time. Now, upload some amazing images of your balm. Moreover, add a description of the balm-like volume, extracts, allergy, etc in preferably bullet points or numerical order for easy understanding then press the “Submit” button. Furthermore, using the same methods, you can list more products. Follow up these steps to preview checkout page: Now, copy the embed plan link to insert the checkout page on your WordPress website. Now, when the link is copied, then paste it to the text area of the editor. After pasting the code, now hit the ‘Publish’ button. Your checkout page is embedded. Note: In case you want to sell multiple products via a single checkout page, you can create a multi-plan checkout page otherwise skip this step. Well, these are the simple steps to build a checkout page in Pabbly Subscription Billing to sell balms online. Although, it may look a bit overwhelming for you initially but slowly you will fully exploit its awesome features to dominate the online landscape. Also, if you have any questions related to these steps please write them in the comment section below. We will reply at the earliest. Thank You !!Step 2: Select Subscription Billing

Step 3: Account Setup

Step 4: Connect Payment Gateways To Sell Balms Online

Step 5: Add Your Product

Step 6: Add Plans
(a) Select Add New Plan

(b) Specify the Plan & Pricing Details
(c) Add Image & Description
Step 7: Share your Checkout Page

Step 8: Preview Checkout Page
(a) Click on the View Button

(b) Take a Look at the Checkout Page
Step 9: Embed Checkout Page in Site & Sell Balms Online

(a) Edit the Page & Paste the Copied Link

(b) Save & Publish the Checkout Page

(c) Check out the Final Look of your Checkout Page on WordPress Site
Step 10: Multiplan Checkout Page
(a) Click on Add Mutiplan Checkout

(b) Add Plans to Sell Multiple Balms Online from Single Checkout Page
(c) Take a Look at the Checkout Page
Wrapping Up
You May Also Like To Read –


