Searching for ways to Integrate ThriveCart with Automizy using Pabbly Connect? Then, you don’t have to look any further, as here you will get a step by step guide to do so.
In this blog, we are going to integrate Thrivecart with Automizy so that whenever there is a new sale inside Thrivecart, its lead will automatically get updated inside Automizy contact list.
So, here we will be using external software i.e, Pabbly Connect which is an integration software. With the help of this software, you will be able to bind two different software through a single interface. And what amazing is that you don’t need any coding skills to do that.
Why Choose This Method Of Integration?
In contrast with other integration services-
- Pabbly Connect does not charge you for its in-built apps like filters, Iterator, Router, Data transformer and more
- Create “Unlimited Workflows” and smoothly define multiple tasks for each action
- As compared to other services which offer 750 tasks at $24.99, Pabbly Connect proffers 50000 tasks in the starter plan of $29 itself
- Unlike Zapier, there’s no restriction on features. Get access to advanced features even in the basic plan
- Try before you buy! Before spending your money, you can actually signup & try out the working of Pabbly Connect for FREE
Not only that, but one can also bind unlimited premiums apps & removes all time-consuming work. One of the best thing that makes it stand alone in the crowd is its interface, that can be easily operated by anyone without any coding skill. Besides, it is packed with features such as filters, path routers, etc for hassle-free data transmission.
Here, in this article, we will understand how one can integrate ThriveCart with Automizy using an automation tool i.e Pabbly Connect. All you need to do is follow the steps below and your automation is set. So, without wasting any of your time, let me take you through the steps.
Step 1: Sign up to Pabbly Connect

The initial step is to sign up to Pabbly Connect which will further help in the ThriveCart integration process. However, either you can enter all the details manually or else sign-up via your Gmail account.
Try Pabbly Connect for FREE
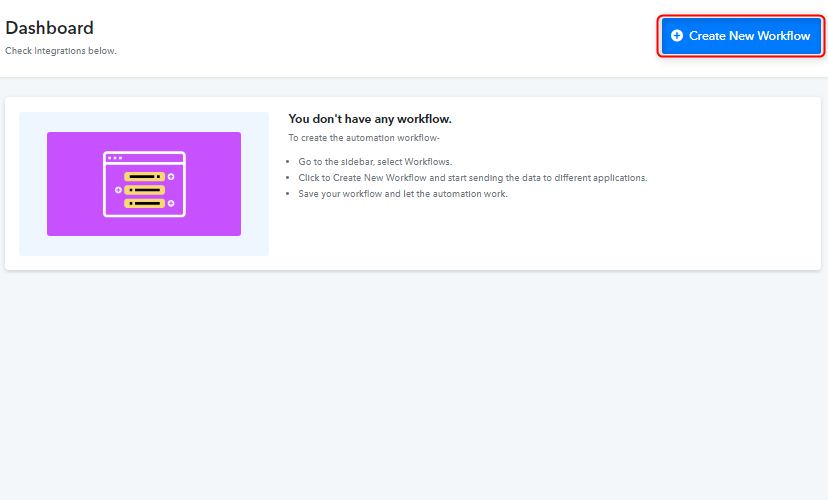
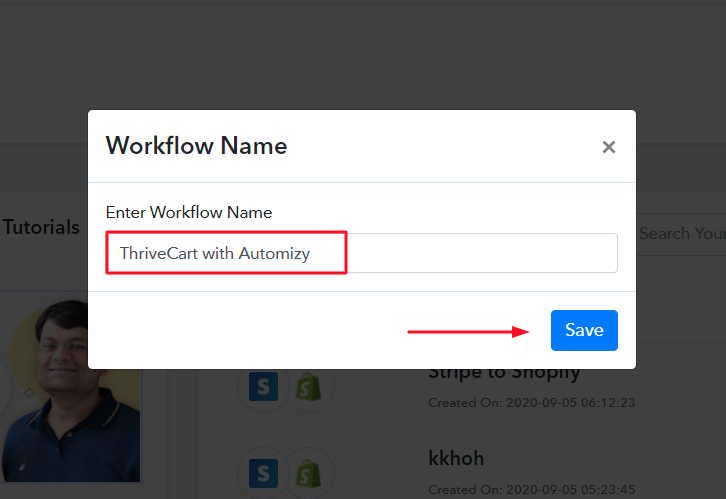
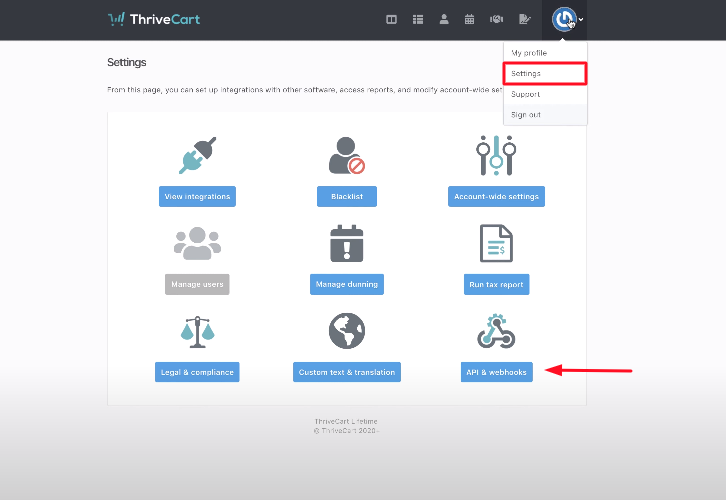
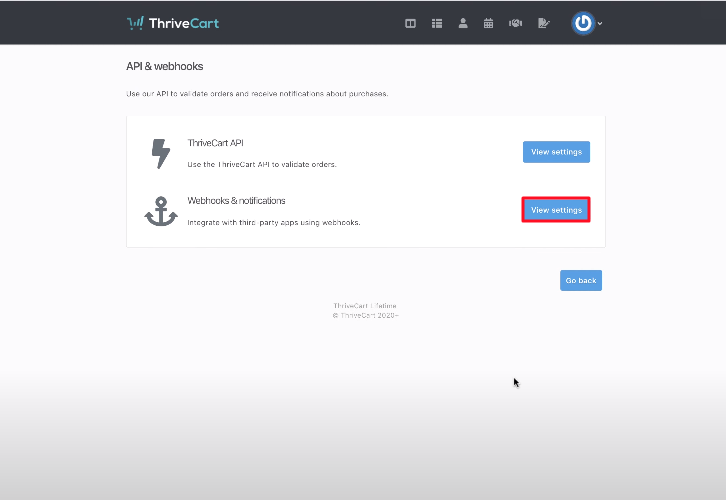
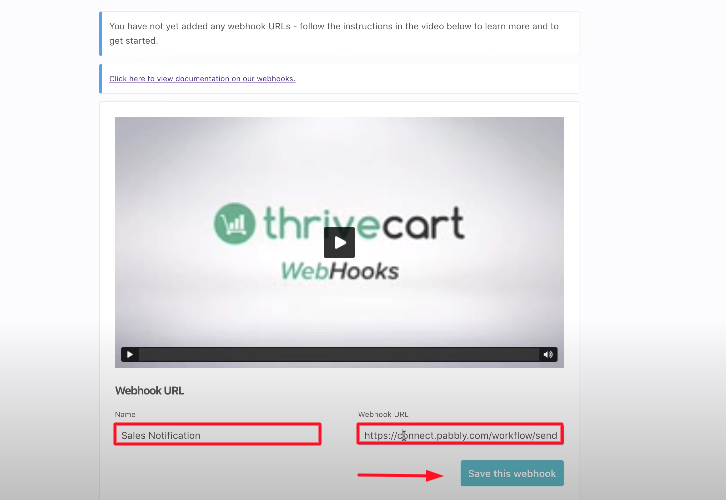
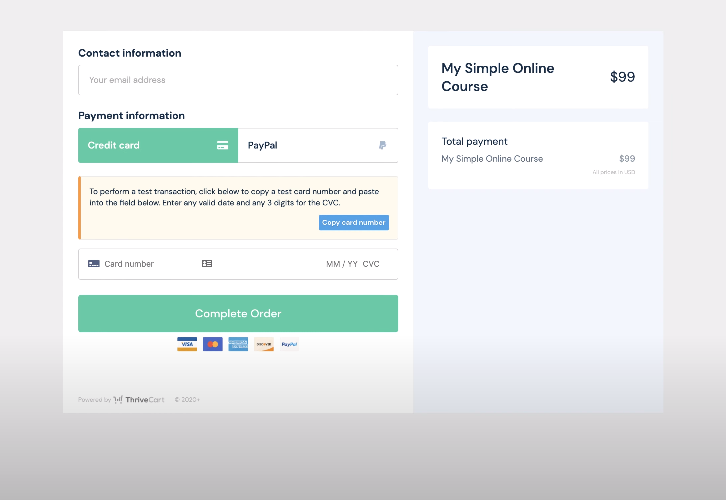
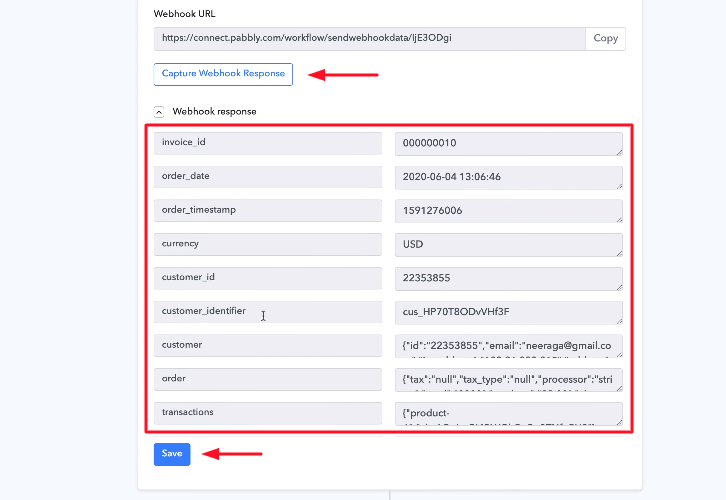
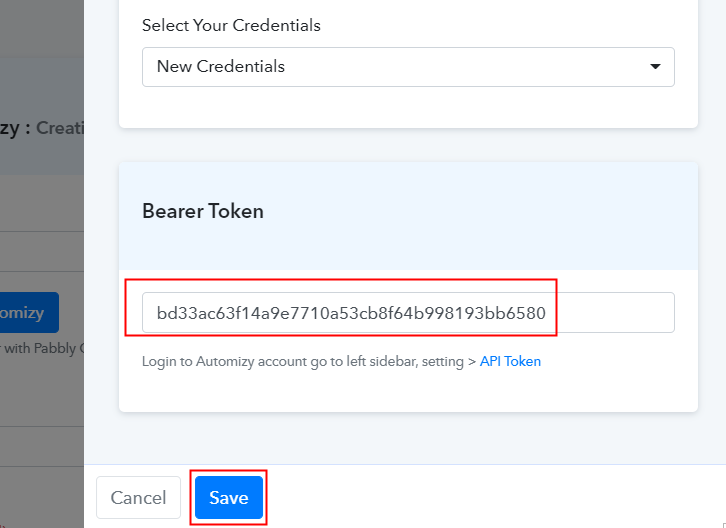
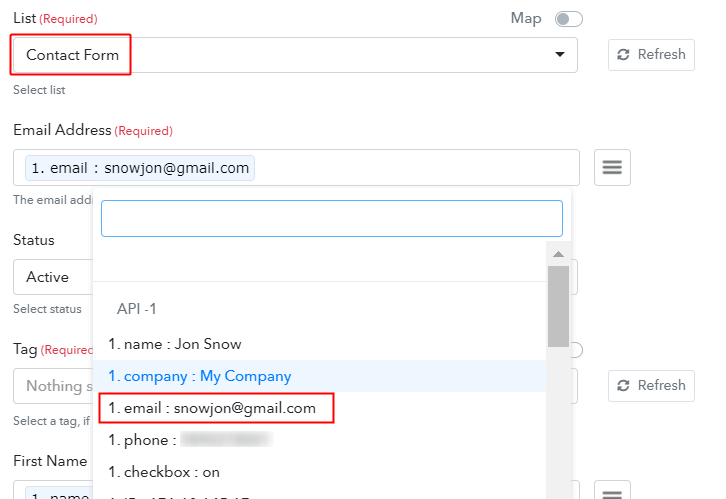
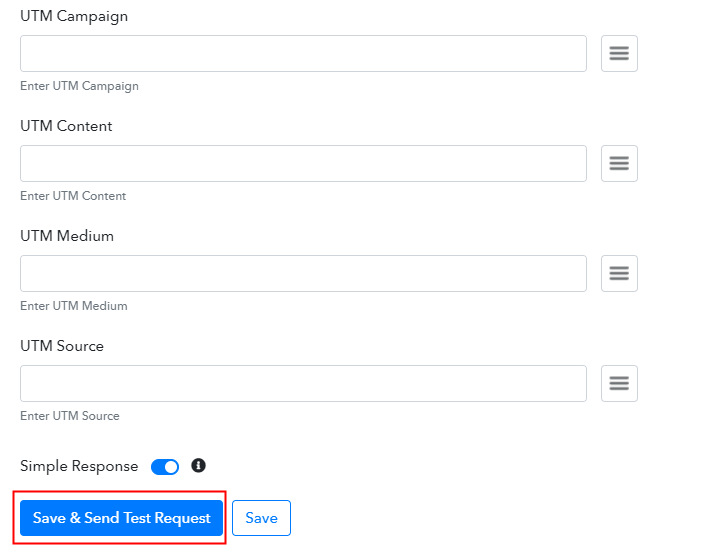
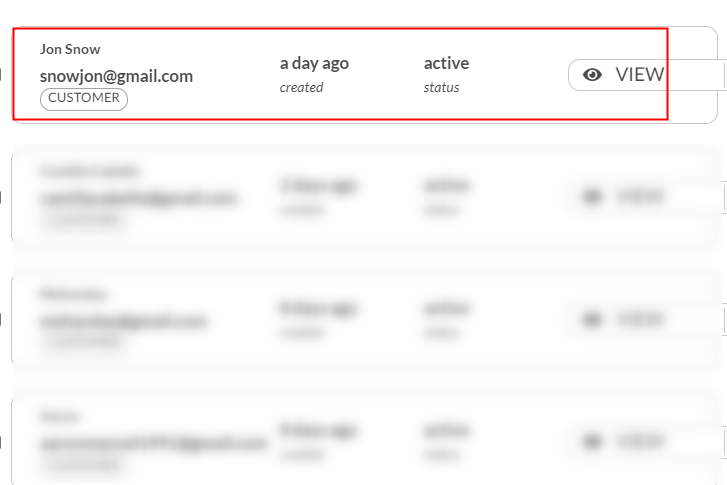
Once you complete the sign-up process, you just need to access Connect (a service of Pabbly for automated integration & data transmission). Now, start with creating a workflow for your project by clicking on the ‘Create New Workflow’ button. Consequently, its time to add the name of the workflow that is “ThriveCart with Automizy”. Even though, you can change the name of your workflow whenever you want to as per your requirements. After creating the workflow, the subsequent step is to select the application that you wish to integrate, i.e, “ThriveCart” and also choose the method i.e, “New Sales”. Then, the next step is to copy the webhook URL. With the help of this trigger, we can initiate the process of automation and integrated the first service with Pabbly Connect for data transferring. Hence, the next step is to go the app which is in this case is ThriveCart. In order to connect with ThriveCart, the following step is to paste the copied Webhook URL in your form builder dashboard. After entering the ThriveCart dashboard, the initial step is to create a sales form. And later, you need to go to the settings by pressing the “Settings” button. Then, simply hit the “App & Integration” button. Afterward, you need to press the “View Setting” button of the Webhook option. Once you reach the Webhook settings, now you need to name the workflow & paste the URL copied from Pabbly Connect. Just press the button stating “Save the webhook”. Following the earlier step, now its time to test the form, and to do that, you need to fill all the details of the sales form which you have recently created in the ThriveCart Account. Once you complete filling the form, simply press the button named “Capture Webhook Response”. After that, it will automatically capture all the responses that you have filled in the ThriveCart sales form. Then, just click on the “Save” button. Afterward, its time to set a trigger, select the action for your trigger. For this, you have to choose the application you want to integrate. Subsequently, just click on the “+” icon to add an action for your trigger. Here you need to select “Automizy” from the dropdown. After that, select the “Creating a Contact on a List” option. After making all the necessary changes, you need to press the “Connected with Automizy” button. Moreover, it will ask for “Bearer Token”, for which you have to visit the Automizy account. In order to copy the “Bearer Token”, first of all, you have to log in to your Automizy account. Once you login to your Automizy account, now just select the “Setting” option. Furthermore, press the API token option. Consequently, the API token option will open up the tab with the “New API key” option, just press on it which will generate the key. Simply copy your generated key & close the pop-up window. Now you need to paste the copied API token, just go back to the “Pabbly Connect” dashboard. And later press the “Connected with Automizy” button, the page will open with the option “New Credentials”. Below on this page, you will see the option of “Token”, just paste your copied token there, and click on the “Save” button. Next, its time to select the list from the dropdown in which you want your subscribers to get added. Next, just add the required field from drop-down like for the email field, select the email option, and for the name field select the name option. Once you make all the changes, simply save the setting and then “Send Test Request” to test the process. Conclusively, when you check the subscriber list in Automizy, your response will appear there. Therefore,in the same manner, all the form submissions will automatically get added to your subscriber list after that simple procedure. Alright! Now you know how to easily integrate ThriveCart with Automizy using Pabbly Connect software. Apart from the automation task, it also provides you several features such as filters, path routers, and many more for easy data transmission. Besides, you don’t need to have any coding skills for operating this amazing software. So why wait anymore? Get your access by creating a free account. And, in case you have any queries regarding software, simply write to us in the comment section below. We will get back to you ASAP. Thank You!!Step 2: Access Pabbly Connect

Step 3: Create a WorkFlow for ThriveCart Integration
(a) Start with a New Workflow
(b) Name the Workflow
Step 4: Setting Trigger to Integrate ThriveCart with Automizy

Step 5: Paste the Webhook URL in ThriveCart
(a) Go to Setting
(b) Select Webhook Option
(c) Paste the Webhook URL
(d) Fill-up the Sales Form
Step 6: Test the Submission in Pabbly Connect Dashboard
Step 7: Set Action to Integrate ThriveCart & Automizy
(a) Select Application you Want to Integrate
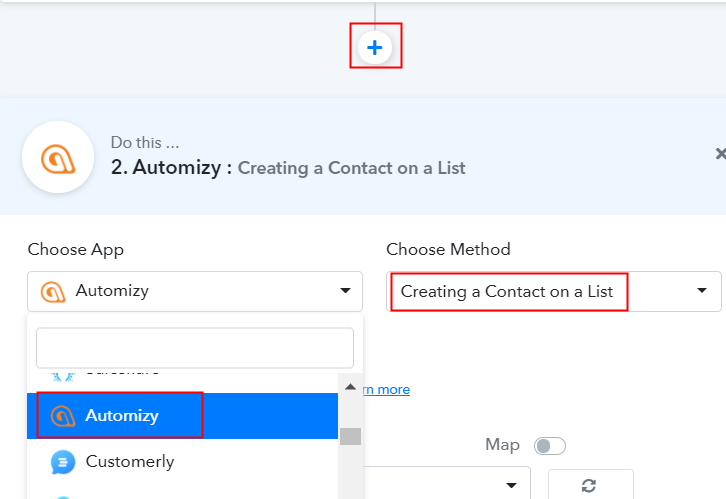
(b) Click the Connect Button
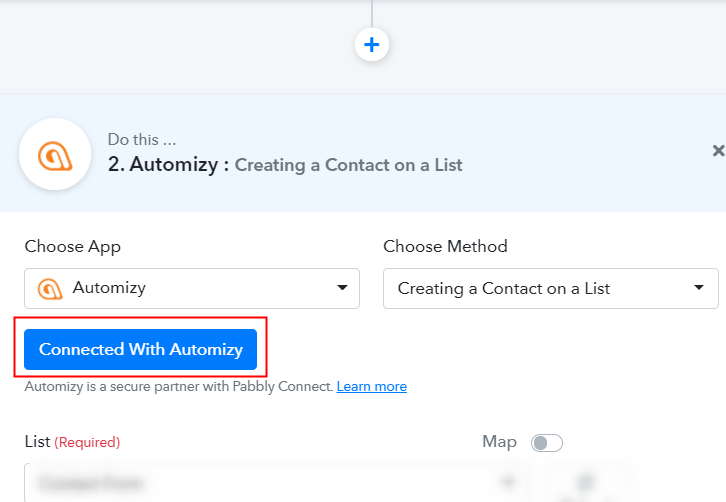
Step 8: Connecting Automizy to Pabbly Connect
(a) Click on Setting
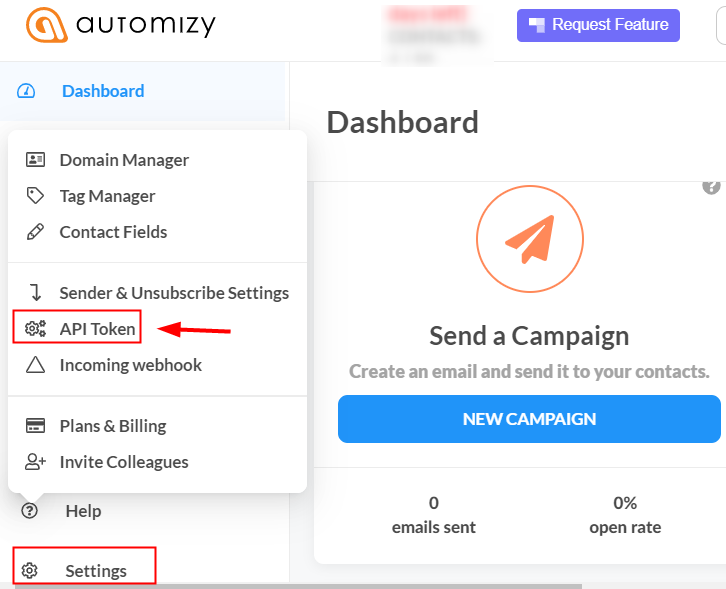
(b) Copy API Token
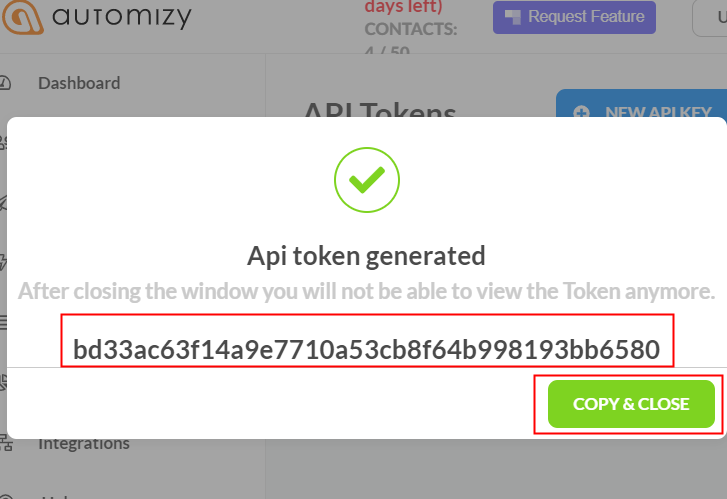
(c) Paste API Token in Pabbly Connect Dashboard
(d) Add Field Data
(e) Save and Send Test Request
Step 9: Check Responses in Automizy Dashboard
Conclusion –
You May Also Like To Read –


