In this blog, I’ll explain the step by step procedure to integrate ManyChat with Slack. ManyChat is a tool to build messenger bots and Slack is a chat room app. And anyone willing to integrate these two services must be trying to send data from ManyChat bot to a Slack chat room.
We’ll be going to accomplish the integration using Pabbly Connect service. This service allows us to create a workflow with instant triggers and multi-step calls to automate the process. The procedure will take a few minutes and provide a real-time message on Slack, every time the ManyChat bot brings data.

I’m using the simplest example to give an idea of the integration of ManyChat with Slack. Moreover, you can also make use of the formatters, filters, routers etc that came along with Pabbly Connect.
Now, let’s get started with the step by step procedure to integrate ManyChat with Slack using Pabbly Connect.
Step 1: Sign up to Pabbly Connect

Firstly, visit the Pabbly official website and click on the ‘Sign-Up Free‘ button. On the signup page, either use your existing Google account or manually fill out the registration form details to get in.
Step 2: Access Pabbly Connect

After signing up successfully, click the ‘Access Now’ button that is present in the ‘Connect’ Pabbly application window.
Step 3: WorkFlow for ManyChat with Slack Integration
(a) Click over the Create New Workflow Button

Start with creating a workflow to integrate ManyChat with Slack and for this hit the ‘Create New Workflow’ button.
(b) Name the Workflow
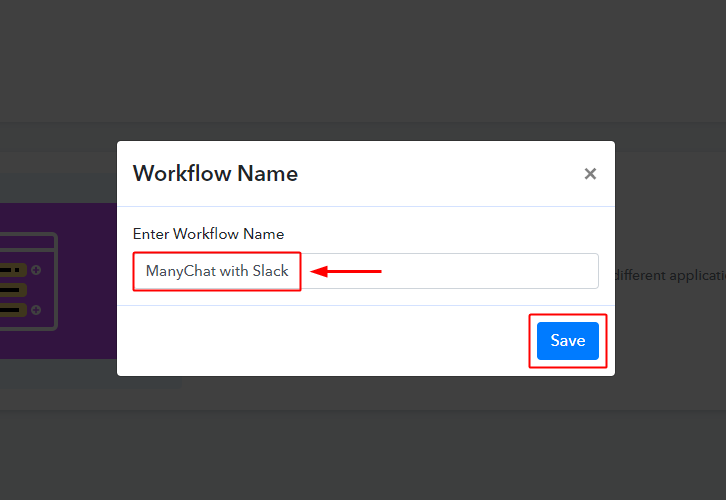
Name the Workflow as per your need (for instance: ManyChat with Slack’) and hit the ‘Save’ button.
Step 4: Set-up A Trigger to Integrate ManyChat with Slack
(a) Select Application to Integrate as ManyChat
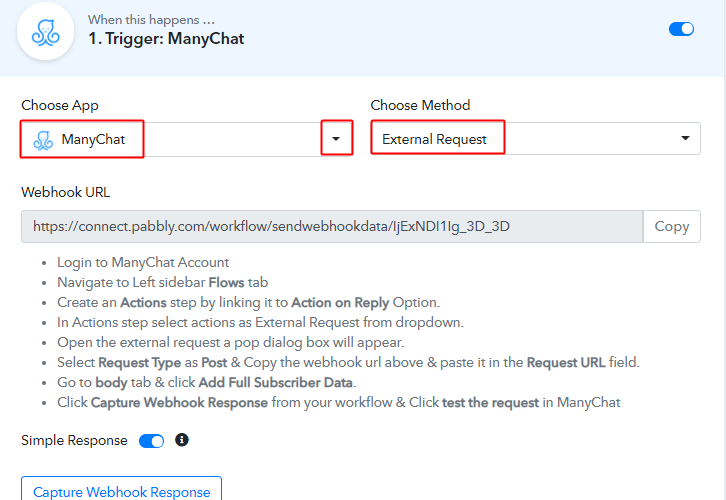
After naming and creating a workflow, a trigger window becomes visible. You have to select the ‘ManyChat’ app from the drop-down values of the field named ‘Choose App’.
Make sure the method here is ‘External Request’.
Step 5: Create a Flow on ManyChat
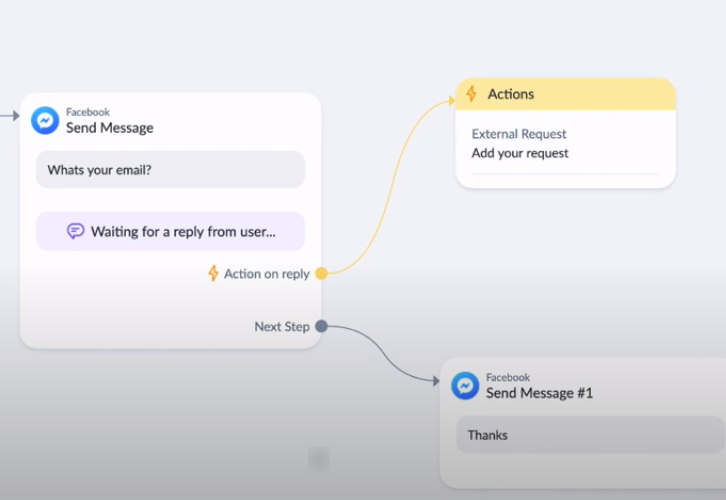
To attach the Pabbly Connect trigger with a ManyChat bot, we’ve to paste the Pabbly Webhook URL in a bot’s action. So, first, create a chat flow and if you already have one then skip this step.
For instance, in the above flow, I’m asking for a user email and if the user fills out an email then I’m going to perform an action.
(a) The Condition Step
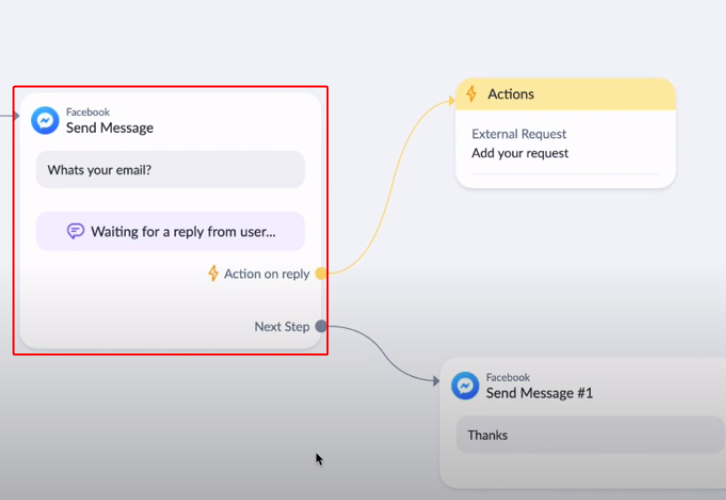
I’ve taken a ‘Send Message’ as content on the condition step.
(c) ManyChat Condition Settings
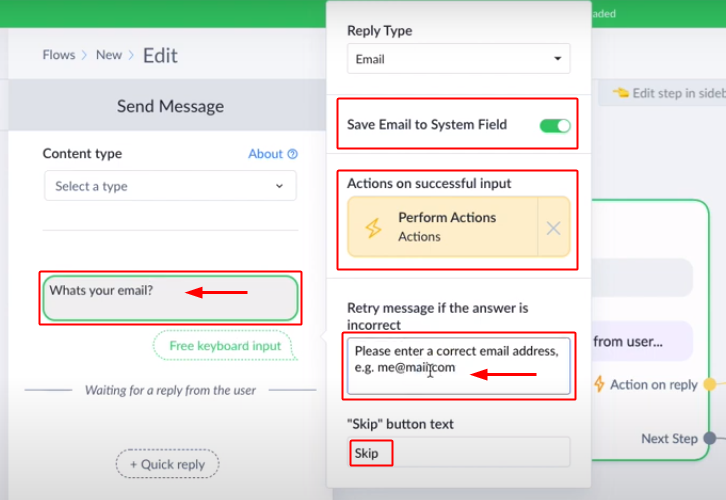
Inside the condition, I’m asking for writing an email from the customer. If the customer provides one then going to save it else an error message will be sent. Also, I’m including a ‘Skip’ button to the flow as if the customers simply want to skip this.
(d) Go to your ManyChat Action
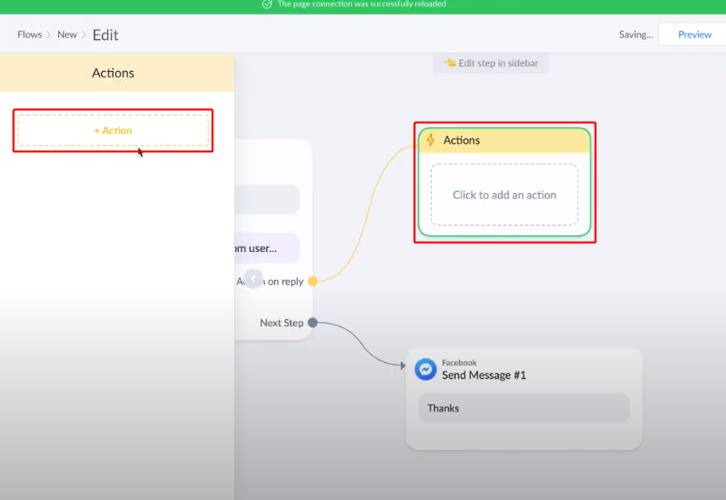
In the action step (when a customer submits an email) as we want to send the customer’s response forward, we are going to do some settings.
For that, click on action.
(e) Select Action as External Request
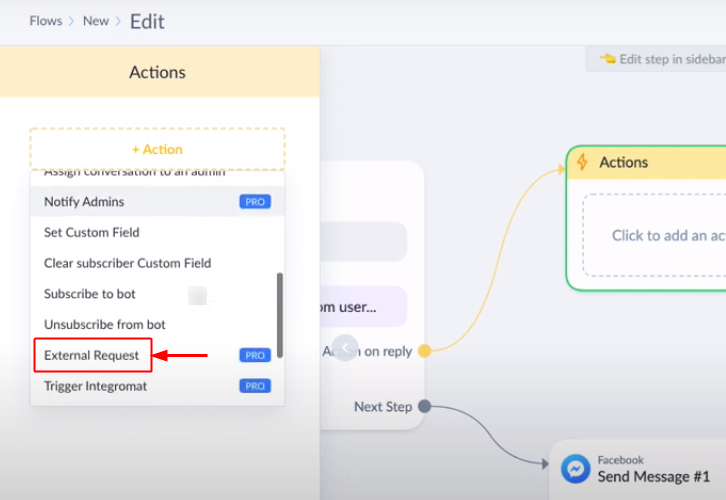
When you click on the ‘+Action’ button a drop-down will open up. Select the ‘External Request’ option from the drop-down.
(f) Click on Add Your Request
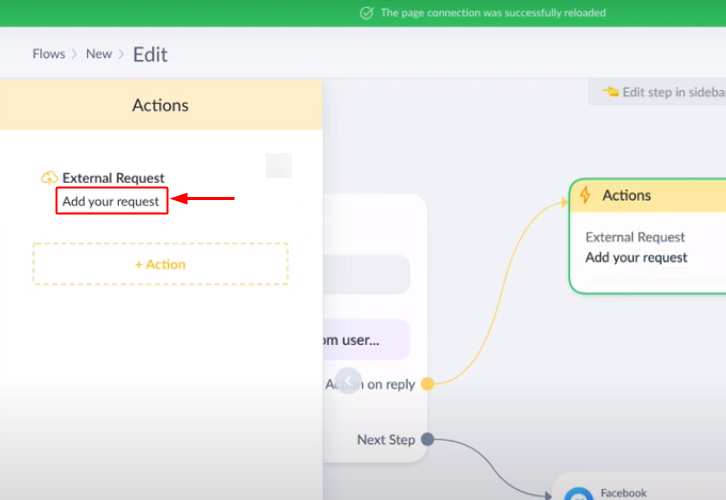
After selecting the ‘External Request’ option a text i.e, ‘Add your request’ will become visible. Simply click over it and a window will pop open.
(g) Go back to Pabbly Connect & Copy Webhook URL
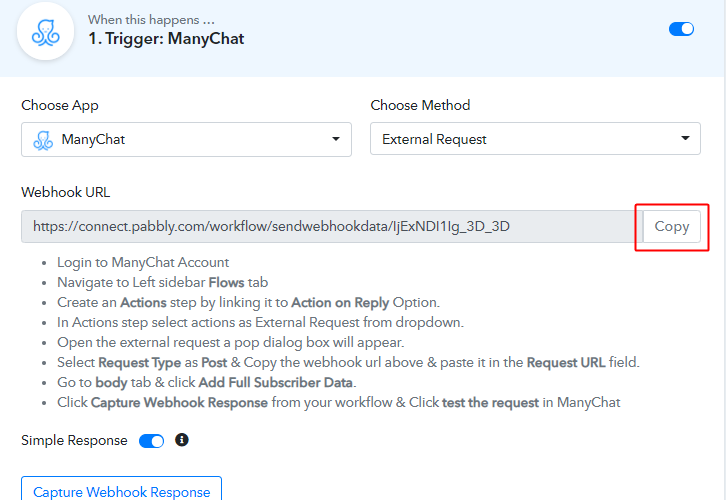
(h) Paste the Copied Webhook URL form Pabbly to ManyChat Action
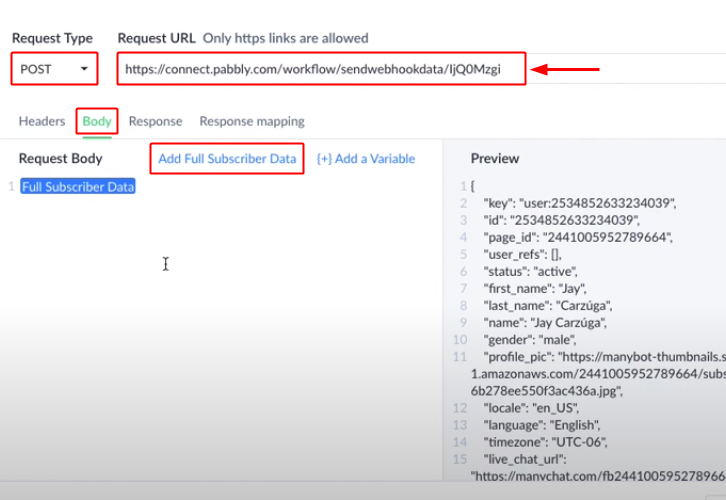
Paste the copied Webhook URL from Pabbly Connect in the Request URL field for this window. Make sure the Request type is POST here.
After that click the option ‘Body’ from the menu given below and then click over ‘Add Full Subscriber Data’.
We are sending the full subscriber data here, but we can also choose to add selective variables too.
Step 6: Test the Trigger Request’s Working
(a) Click the Test the Request Button
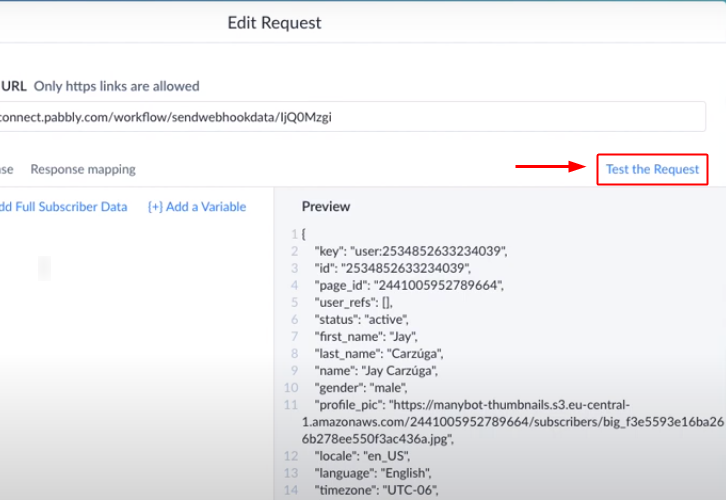
Hit the ‘Test the Request’ button present at the right of the pop-up window.
(b) Check the Response
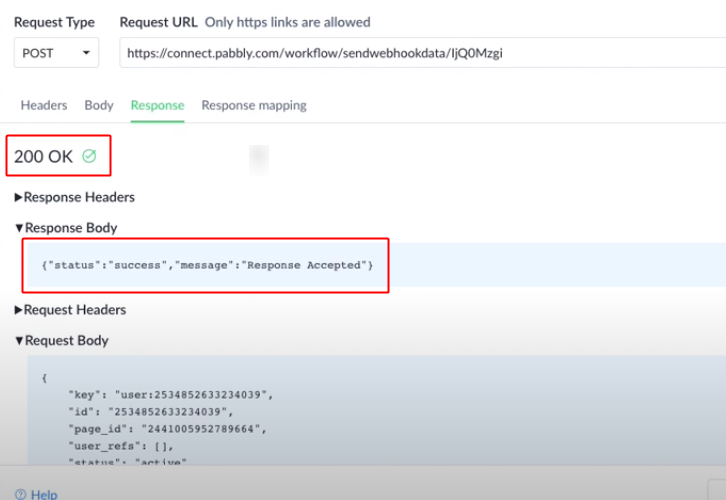
Check for the success of your action after the test request. Make sure there will be no errors.
(c) Capture the Webhook Response in Pabbly Connect
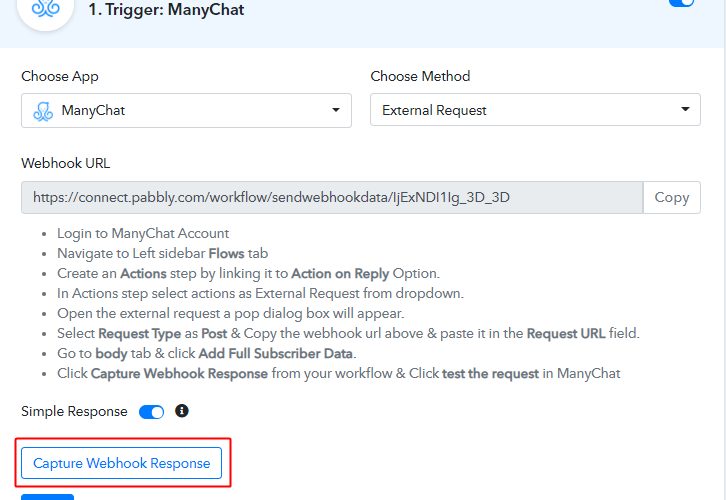
Now, go back to the Pabbly Connect trigger and strike the ‘Capture Webhook Response’ button.
(d) Check the Response in Pabbly Connect
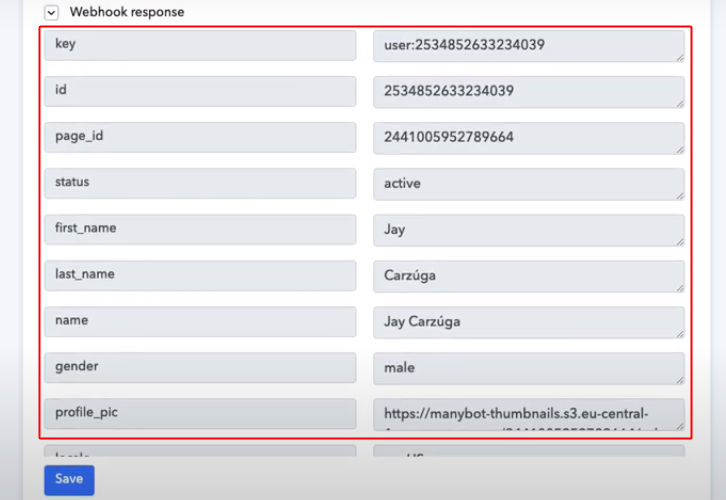
Check the response of the trigger that all the values sent from ManyChat are received successfully on Pabbly Connect.
Step 7: Set-up An Action to Integrate ManyChat with Slack
(a) Select the Application to Integrate as Slack
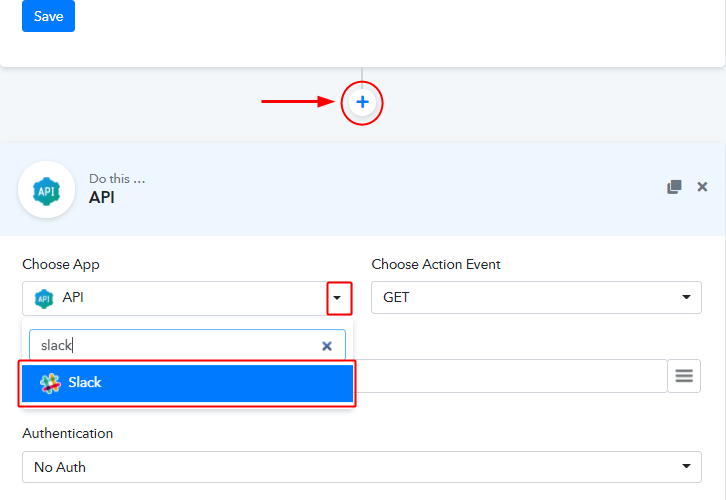
Click the ‘+’ button next to the trigger window.
Select ‘Slack’ app from the Choose App field drop-down.
(b) Select the Method for Slack Integration
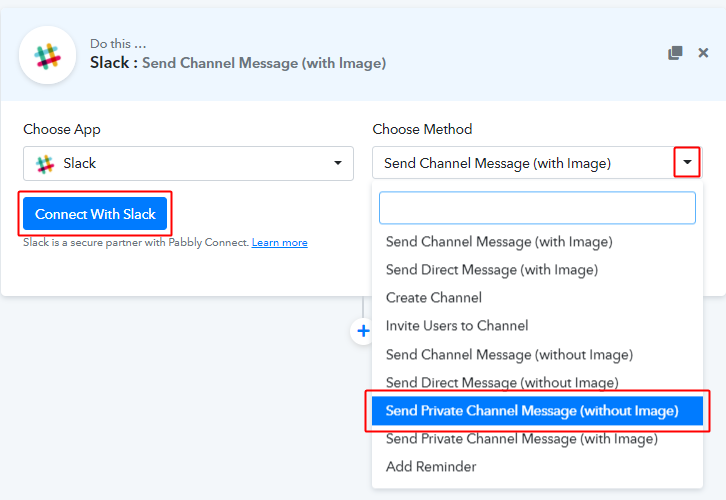
Select the method as ‘Send Channel Message (without image). Remember, you can also select other methods available as per your choice in your workflow.
Lastly, hit ‘Connect with Slack’.
(c) Authorize your Slack Account
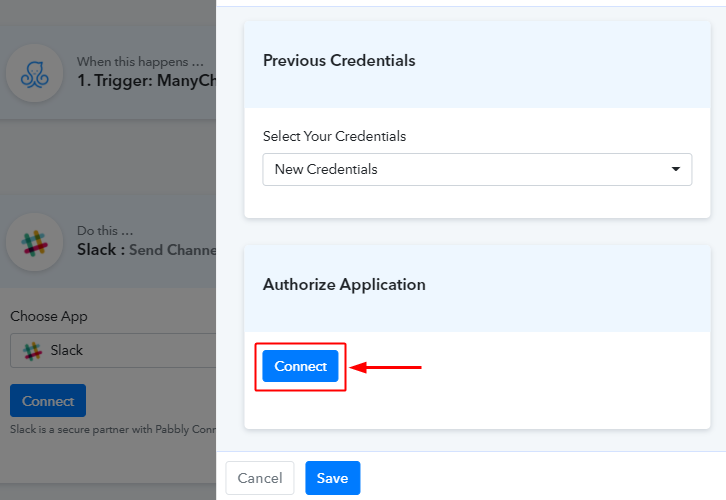
When you hit connect, the system will ask you to authorize an account. So, simply allow your Pabbly Connect and slack account authorization.
Step 8: Map the Values that you Wanna Send to Slack
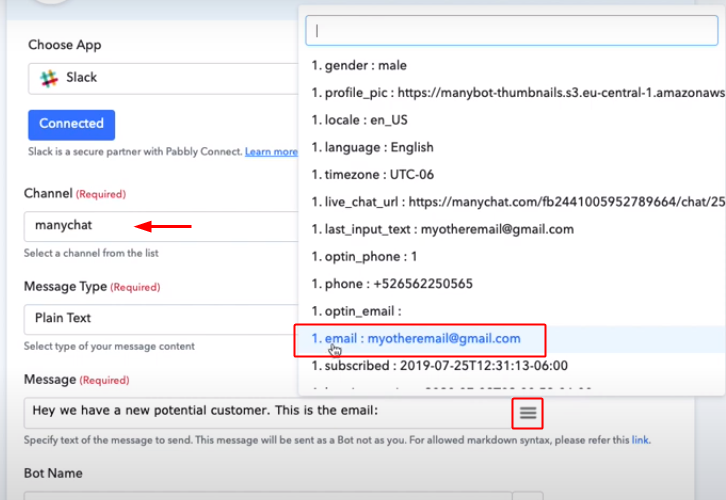
Once you authorize your slack account, all the channels get populated automatically. Select the Channel in which you want to send the message.
Under the Message field, write down the messenger that you want to send. You can customize the message as per your choice and can make use of any information that you have gathered from Manychat as well.
To insert data that we’ve gathered from ManyChat, simply put your cursor to a destined position and then click the menu icon (three verticle line) next to the writing field and click over the value that you want to use in the message.
Step 9: Save the Action
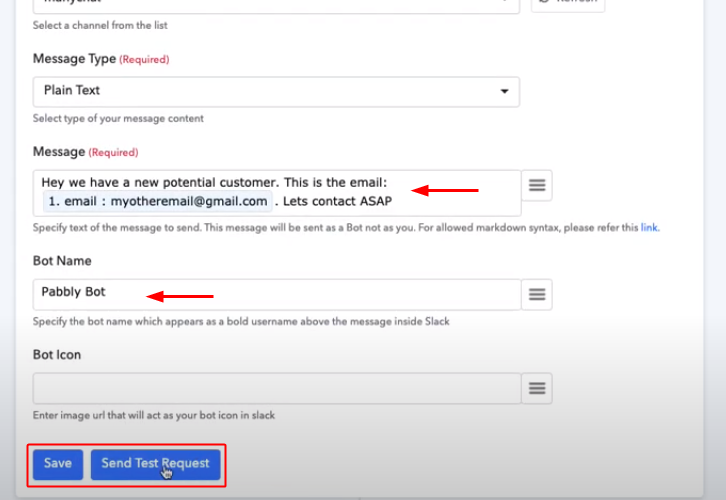
Save & Send Test Request, after completing the message write-up and other field details.
Step 10: Check Response on Slack
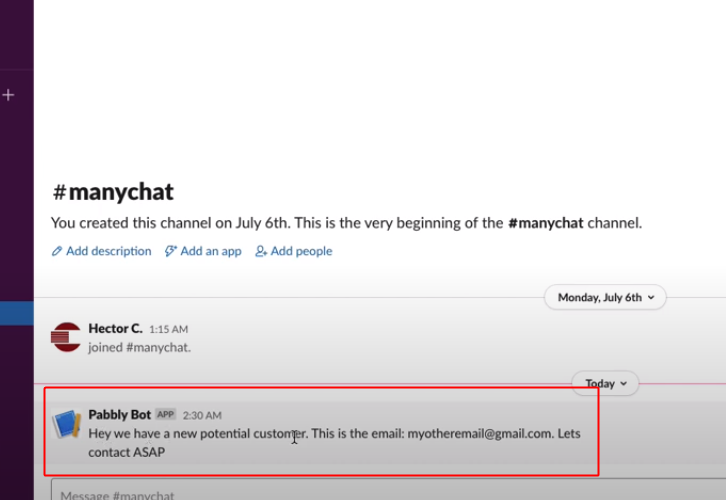
Finally, check the response of the workflow on your Slack chat room that you have selected.
Wind-Up
Well, this is ‘How to integrate ManyChat with Slack using Pabbly Connect. Consequently, after completing this procedure, you will end up getting messages of your potential customers from your ManyChat bot to your Slack chat room automatically. Most importantly, the procedure is very easy to implement and you don’t need any coding skills to carry these simple steps.
For any further queries, do comment below.


