Are you stressing yourself to find a way to create Zendesk Sell lead from new Google Sheets rows? If yes, then here in this blog, we will walk you through the process of Google Sheets and Zendesk Sell integration via Pabbly Connect.
Pabbly Connect is an amazing integration and automation software, which allows you to integrate two or more applications to automate all the projects. You just have to do the integration once and then everything will be automatically managed by Pabbly Connect.
Why Choose This Method Of Integration?
In contrast with other integration services-
- Pabbly Connect does not charge you for its in-built apps like filters, Iterator, Router, Data transformer, and more
- Create “Unlimited Workflows” and smoothly define multiple tasks for each action
- As compared to other services which offer 750 tasks at $24.99, Pabbly Connect offers 50000 tasks in the starter plan of $29 itself
- Unlike Zapier, there’s no restriction on features. Get access to advanced features even in the basic plan
- Try before you buy! Before spending your money, you can actually signup & try out the working of Pabbly Connect for FREE
Before we bounce straight into the integration process, let us get a smidgen of information about both services. Primarily Google Sheets is an online spreadsheet app that lets you create and format spreadsheets and work with other people. On the other hand, Zendesk Sell is a sales CRM software tool that enhances productivity and processes for sales teams.
After integrating these services, you can easily add new Google Sheets entries to Zendesk Sell as leads automatically. Moreover, we’ve embedded a video below to assist you with this automation process-
Besides, if you want to save some time in making this automation from scratch, we have attached a template for the same. Just simply click on the below image to get started quickly and in case you are looking for more apps/integrations, simply visit the Marketplace.
Hence, without further delay, let’s follow the step by step procedure to integrate Google Sheets and Zendesk Sell.
Step 1: Sign up to Pabbly Connect
Initiate the process to create Zendesk Sell lead from new Google Sheets rows by visiting the website of Pabbly Connect and then click on the ‘Sign-Up Free‘ button. On the registration page, either signup using an existing Gmail account or manually fill out the form.
Try Pabbly Connect for FREE
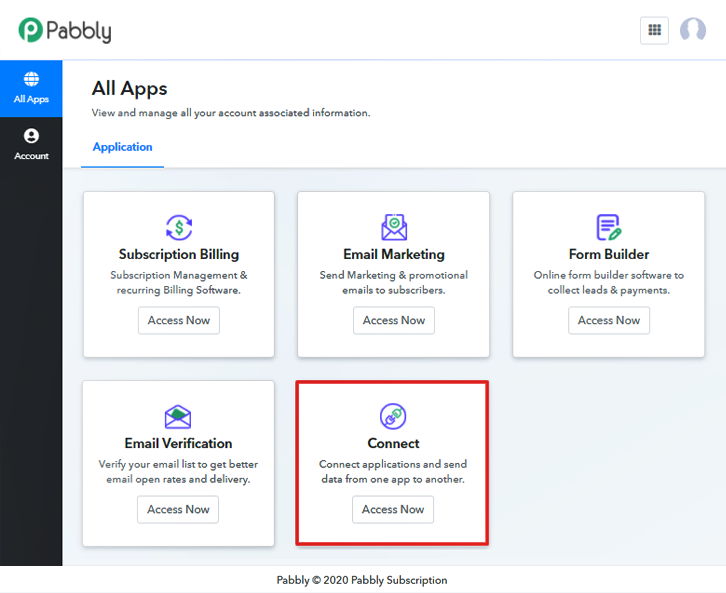
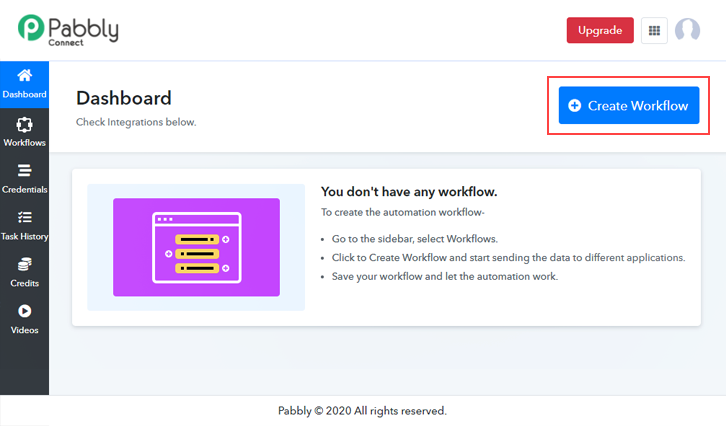
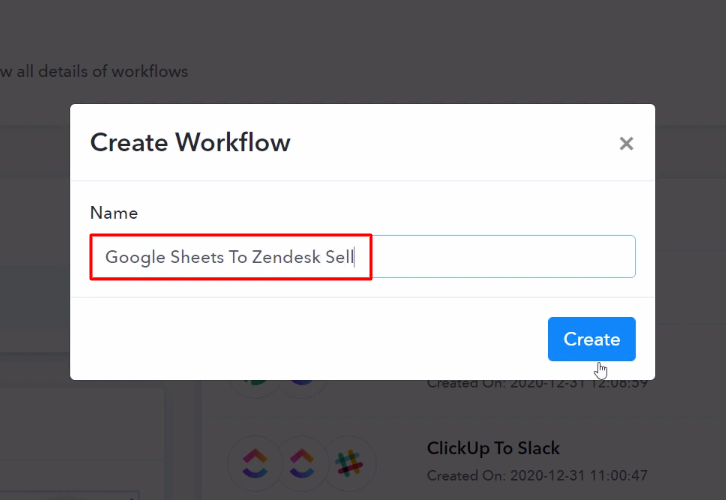
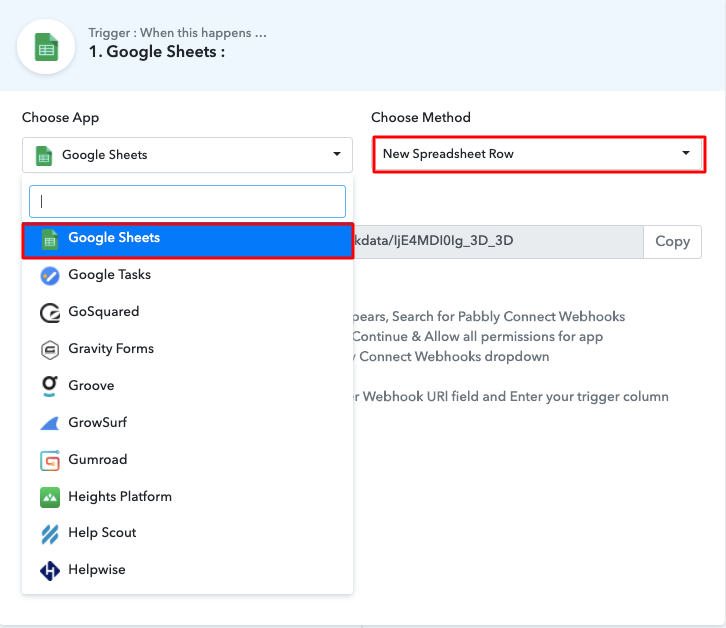
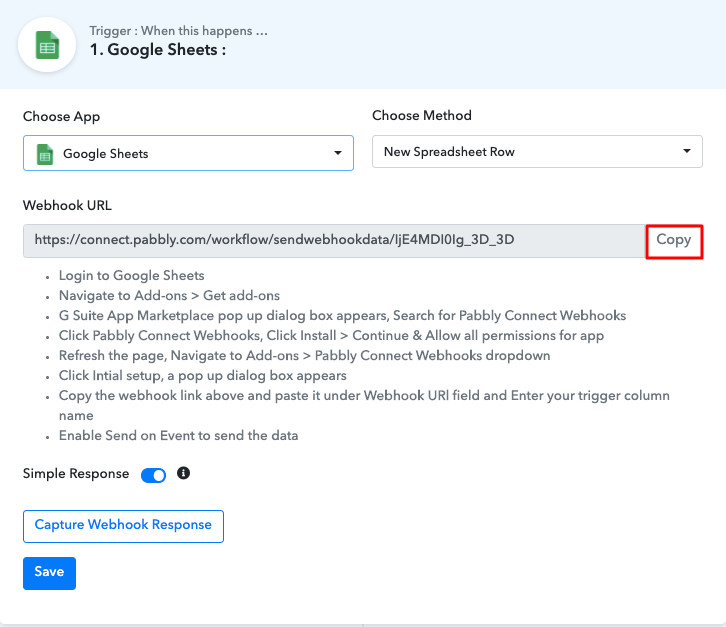
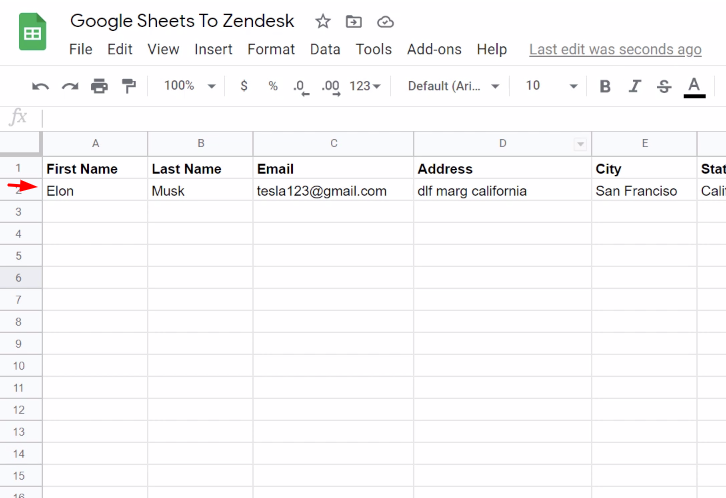
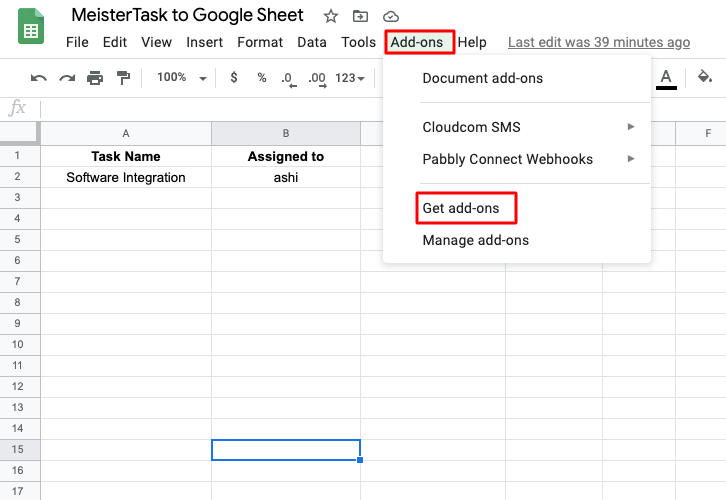
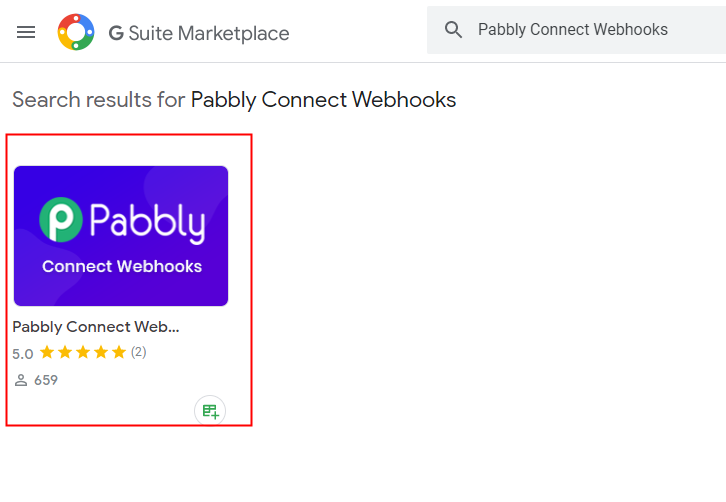
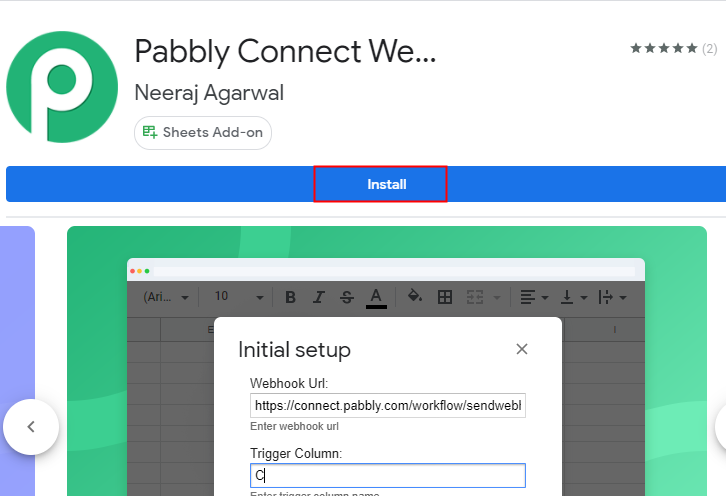
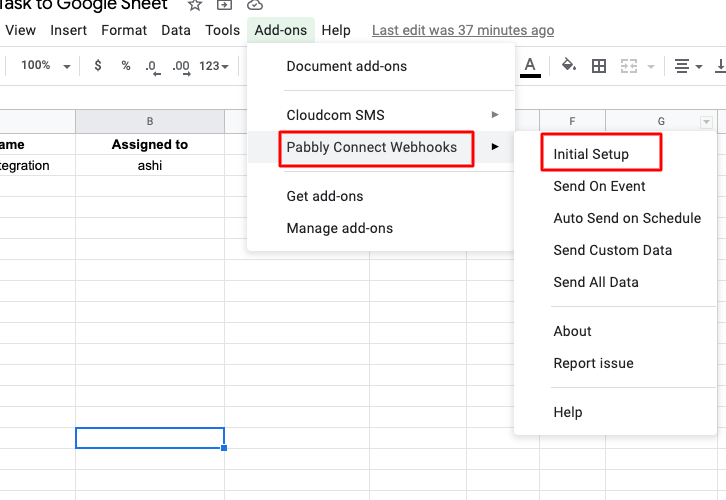
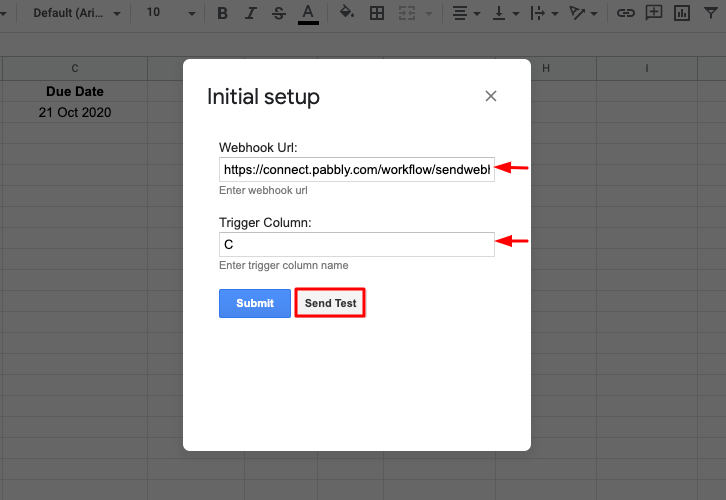
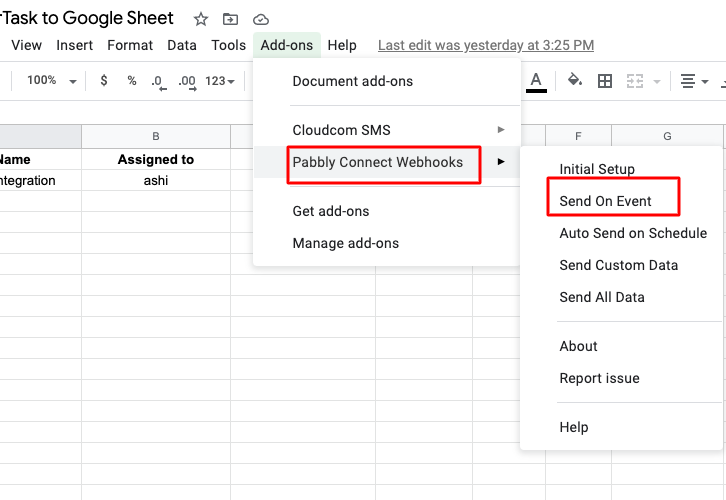
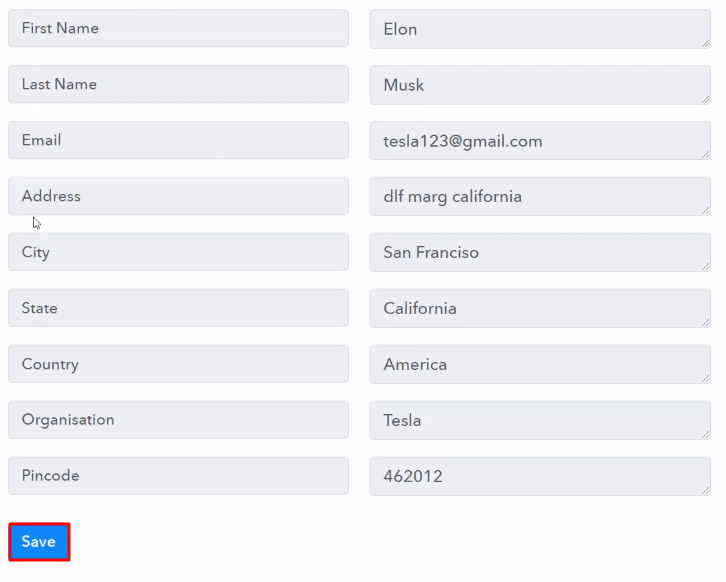
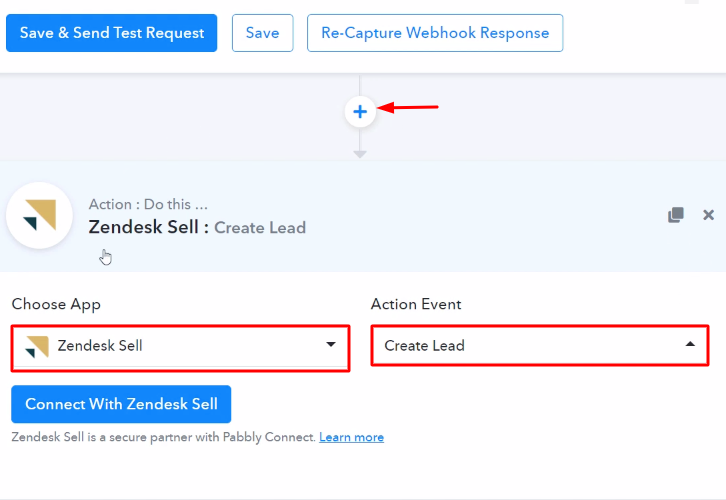
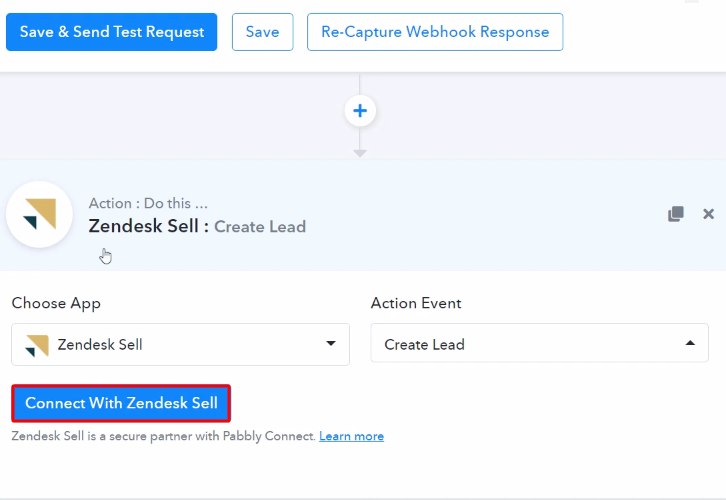
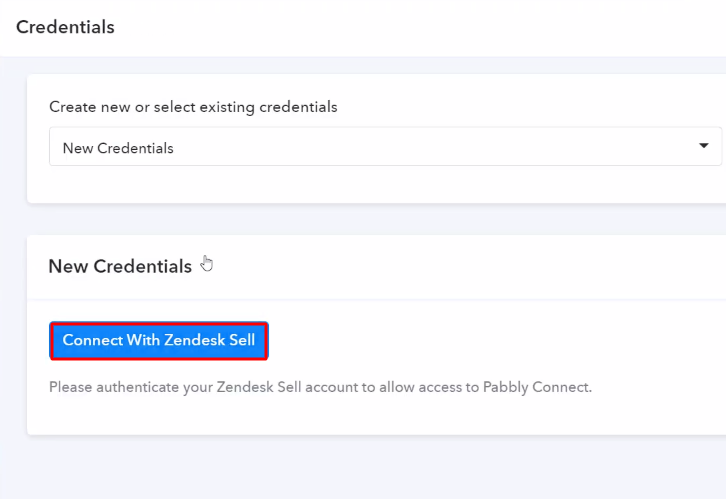
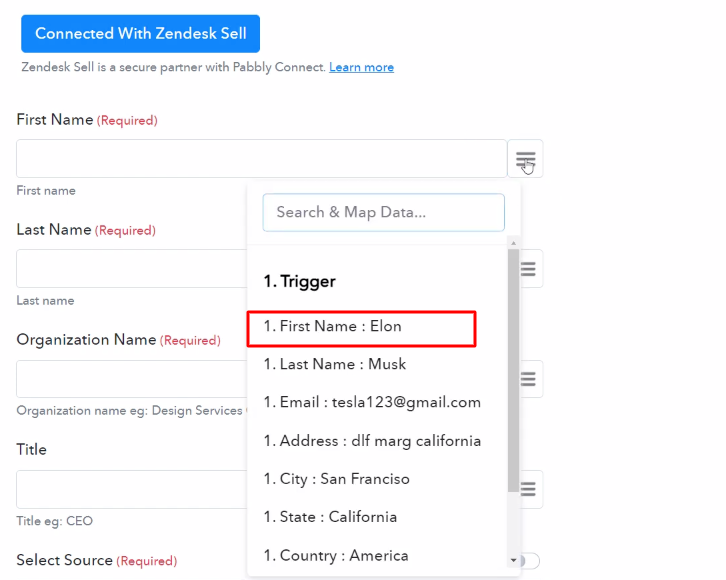
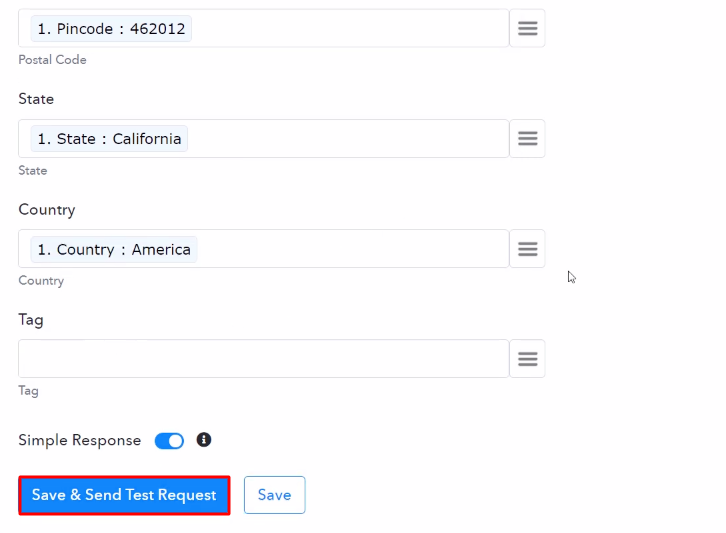
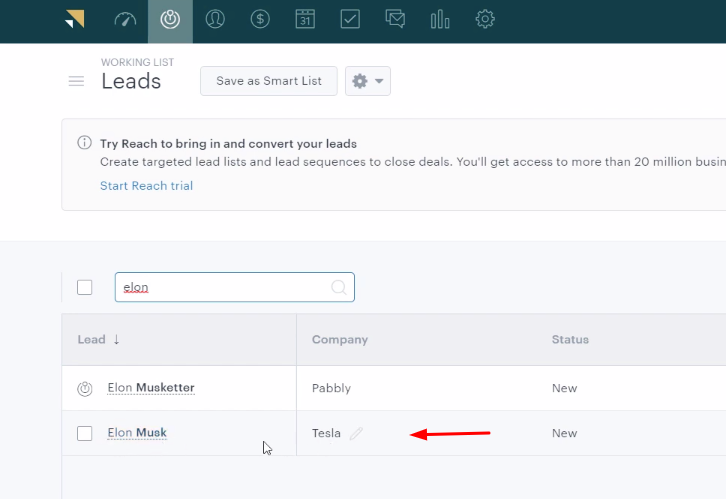
Once you have completed the signup process, click on the Connect section in the dashboard to access Pabbly Connect. Start with creating a workflow for your project by clicking on the ‘Create Workflow’ button. Now, you need to name the workflow just like in the above-shown image. I named the workflow as ‘Google Sheets to Zendesk Sell’, you can obviously name the workflow as per your requirements and needs. After naming your workflow, you have to select the application you want to integrate. Sign up for a free account now to integrate thousands of apps. Now, you have to select the application that you want to integrate. In this case, we are choosing ‘Google Sheets’ for integration. After selecting the application select ‘New Spreadsheet Row’ in the choose method section. After selecting the application, now you have to copy the webhook URL just like in the above-shown image to take further the integration process. To connect with Google Sheets, you have to paste the copied Webhook URL in your Google Sheets Add-ons section. Add the data in your Google Sheets that you wish to transfer to Zendesk Sell as leads. After adding the data into a spreadsheet that you want to integrate, click in the add-on section, and then click on the ‘Get add-ons’ button to download the ‘Pabbly Connect Webhook’. Now, on clicking ‘Get Add-ons’, a new window will pop-up. Here in the search bar type Pabbly Connect Webhooks. Next, simply click on the install option and within seconds it will get installed into your Google Sheets. Now, when you click on add-ons, Pabbly Connect Webhook will appear there. Just click on it and then select ‘Initial Setup’ to paste the copied Webhook URL. After selecting the ‘Initial Set-up’ paste the copied webhook URL. Once you have pasted the URL, now you have to mention the trigger column and then click on the ‘Send Test’ button but before hitting the button, click on ‘Capture Webhook Response’ in Pabbly Connect. This is the additional step you have to do, to ensure that every time new data added to the sheet it will automatically be added in Zendesk Sell as leads. For this, all you have to do is click on the ‘Send on Event’ in the ‘Add-On’ option. As soon as you click on the ‘Send Test’ in Google Sheet and ‘Capture Webhook Response’ in Pabbly Connect the entry will appear on the Pabbly Connect dashboard. Then, click on the ‘Save’ button. In this step, we will be adding an action for your trigger to complete this integration process. Now in this step, click on the + button below and choose ‘Zendesk Sell’ and in the method section select ‘Create Lead’. After choosing the application click on the ‘Connect with Zendesk Sell’ button to move forward. To connect Zendesk Sell with Pabbly Connect, you need to authorize the application. For that, you need to log into your Zendesk Sell account. When you click on the ‘Connect’ button, a window will slide in from the right, here you have to again click on the ‘Connect with Zendesk Sell’ button and then grant the permission to integrate your Zendesk Sell account with Pabbly Connect. Once you are connected with your Zendesk Sell account, now you have to add all the field’s data like name, email, etc. Map up all the fields quickly. Once you are done mapping up all fields click on the ‘Save & Send Test Request’ button. Here, you can see the integration was successful and the entry from the Google Sheets has been added to the Zendesk Sell as a Lead automatically. We hope, now we have answered all your questions about the automation process. Here, through this blog, we learned ‘How to Create Zendesk Sell Lead from New Google Sheets Rows’ All you have to do is follow all the above-mentioned steps & you can easily connect Google Sheets to Zendesk Sell. Using this automation, one can easily avoid monotonous work. And in such cases, software like Pabbly Connect is a real time-saver that lets you connect unlimited premium apps. So, don’t wait anymore. Go and get your access by signing up for a free account. In case of any doubts or suggestions, please drop your comments below. We will try to get back to you as soon as possible.Step 2: Access Pabbly Connect
Step 3: Workflow for Google Sheets with Zendesk Sell Integration
(a) Create New Workflow
(b) Name the Workflow
Step 4: Setting Triggers for Google Sheets with Zendesk Sell Integration
(a) Select Application you want to Integrate
(b) Copy the Webhook URL
Step 5: Connecting Google Sheets to Pabbly Connect
(a) Add Data to Google Sheets
(b) Click on Add-ons
(c) Find Pabbly Connect in G Suite Market Place
(d) Install Pabbly Connect
(e) Press Initial Setup In Google Sheets
(f) Paste the Webhook URL
(g) Click Send On Event In Google Sheets
Step 6: Test the Submission in Pabbly Connect Dashboard
Step 7: Setting Action for Google Sheets with Zendesk Sell Integration
(a) Select Application you want to Integrate
(b) Click on Connect Button
Step 8: Connecting Zendesk Sell to Pabbly Connect
(a) Authorize Application
(b) Map the Fields
(c) Send a Test Request
Step 9: Check Response in Zendesk Sell Dashboard
Conclusion –
You May Also Like to Read –


