Are you in search of a way to create EngageBay contact from new Shopify customer? If yes, then your search ends here, as we have the perfect solution for your problem called Pabbly Connect.
But before we get into the integration process, let’s discuss a little bit about the software that we are about to integrate. As we all know, Shopify is an e-commerce platform that offers you to create a website and use their shopping cart solution to sell, ship, and manage your products. On the other hand, EngageBay is an all-in-one CRM and marketing automation platform built for small businesses and startups.to acquire, engage, nurture web visitors and convert them to customers.
Therefore, integrating these two services can help you import all the Shopify customers to EngageBay as contacts in real-time. This way you can keep all your customers updated about all the latest updates and news. Hence, you don’t have to worry about doing redundant work & can ultimately save a lot of time and effort.
Why Choose This Method Of Integration?
In contrast with other integration services-
- Pabbly Connect does not charge you for its in-built apps like filters, Iterator, Router, Data transformer, and more
- Create “Unlimited Workflows” and smoothly define multiple tasks for each action
- As compared to other services which offer 750 tasks at $24.99, Pabbly Connect offers 50000 tasks in the starter plan of $29 itself
- Unlike Zapier, there’s no restriction on features. Get access to advanced features even in the basic plan
- Try before you buy! Before spending your money, you can actually signup & try out the working of Pabbly Connect for FREE
Now, to combine these two services, we are using an amazing tool named Pabbly Connect. It is one of the best integration and automation tools that can help you integrate unlimited premium applications, set unlimited triggers & actions, create infinite workflows, and so much more.
Besides, to do so, you don’t even need to have any coding skills. Just integrate it once and relax, it will handle all the workload afterwards. Moreover, you can access all the features even in its free plan. All you need to do is go to the Marketplace and look for the apps you use to get started.
Hence, here we will learn how to connect Shopify and EngageBay in real-time. Moreover, we have a template for this integration that can assist you to get started quickly. Hit the Use Workflow button below to get started.
Thus, without taking any more of your time, let’s begin to integrate Shopify with EngageBay.
Step 1: Sign up to Pabbly Connect
Initiate the process to create EngageBay contact from new Shopify customer by clicking on the “Sign Up Free” icon on the Pabbly Connect home page. Next, either manually fill-up all the details or sign up using your Gmail account.
Try Pabbly Connect for FREE
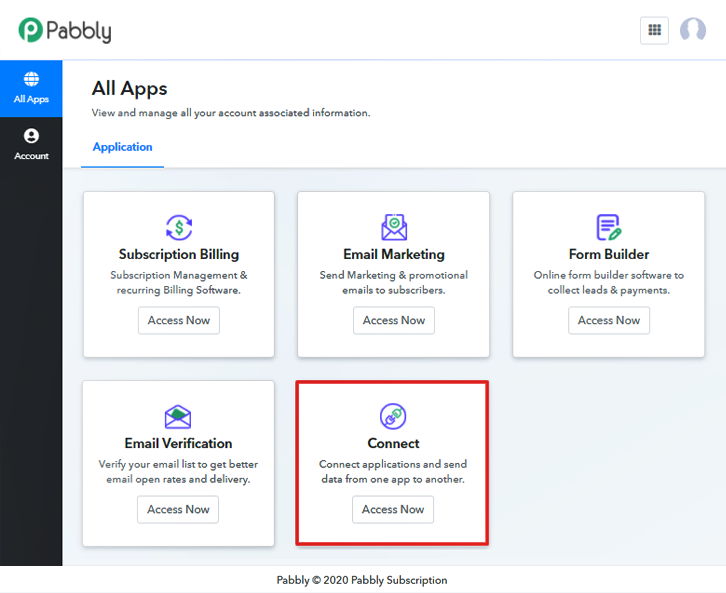
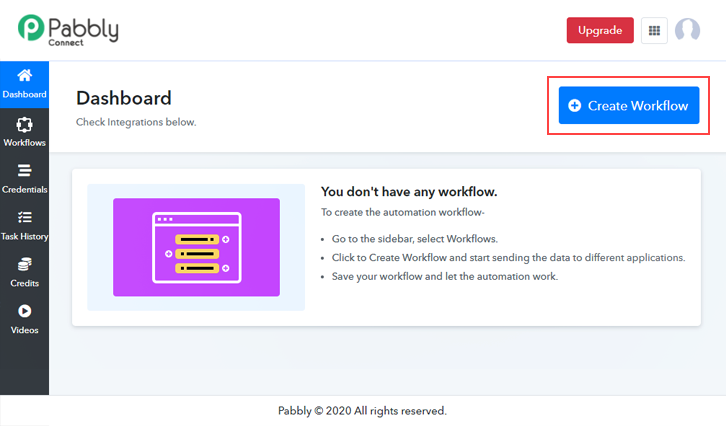
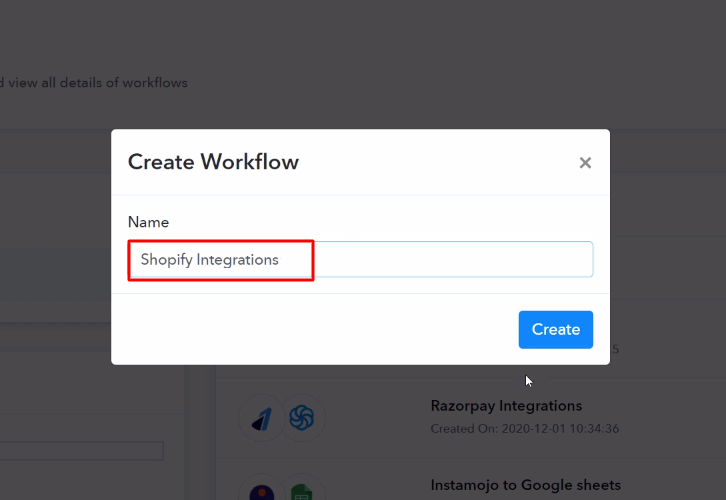
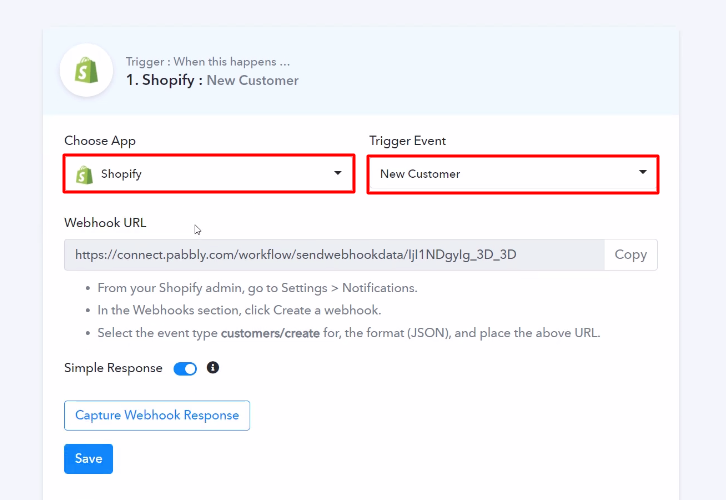
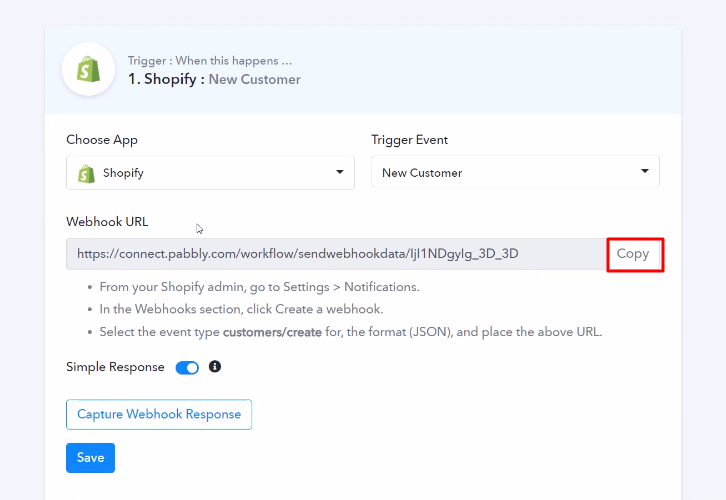
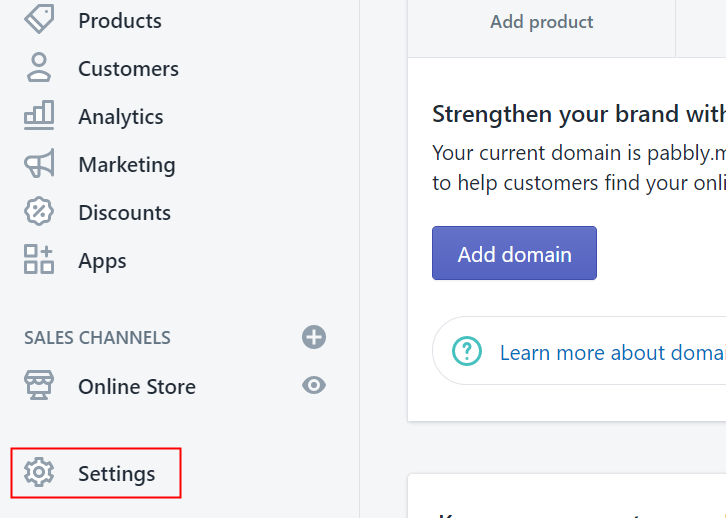
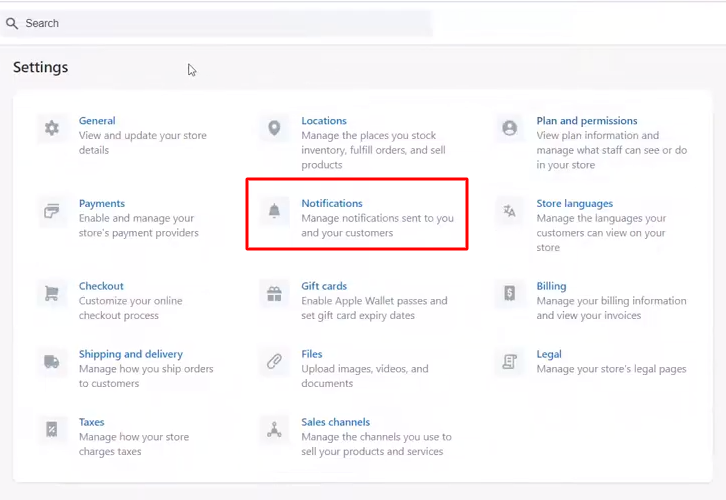
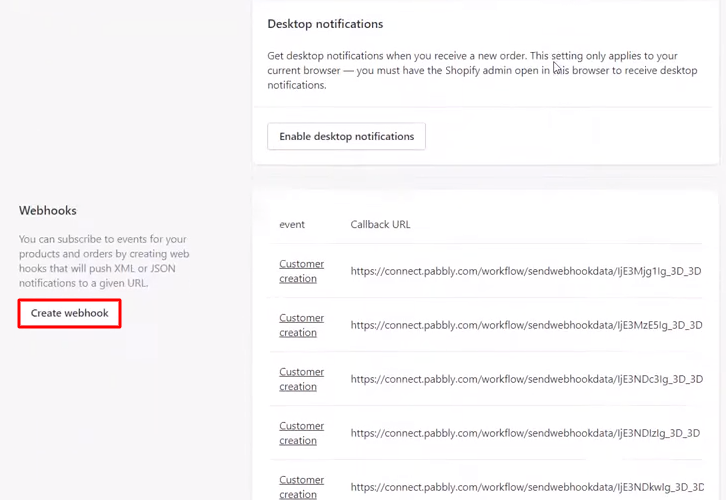
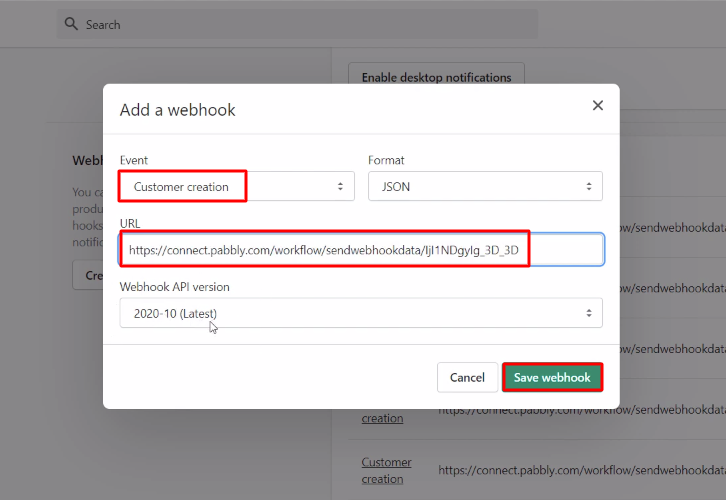
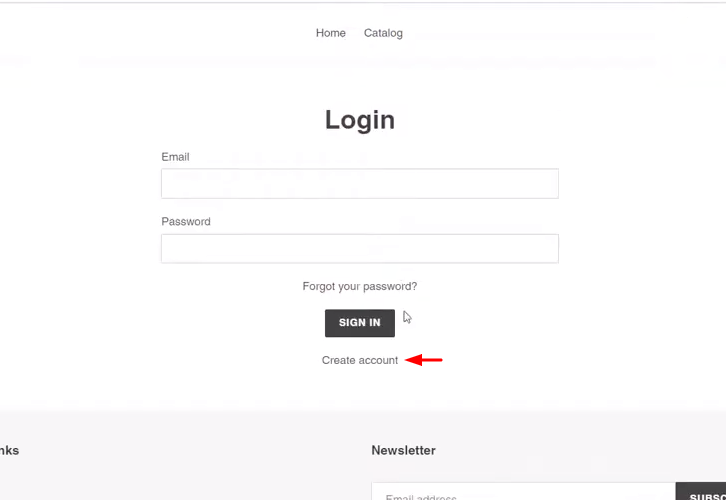
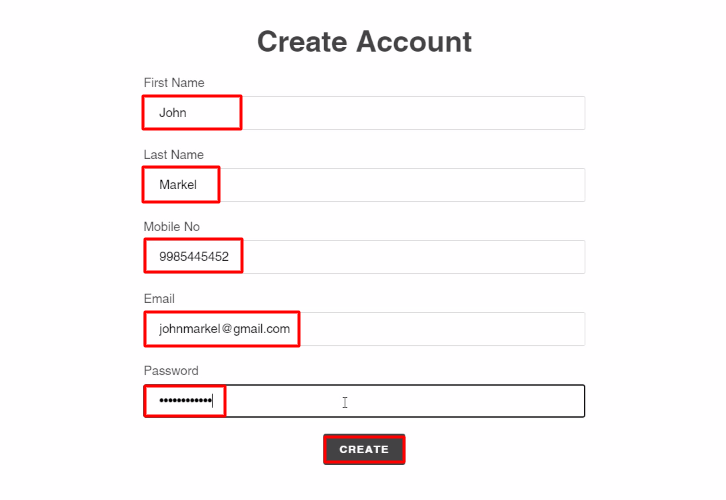
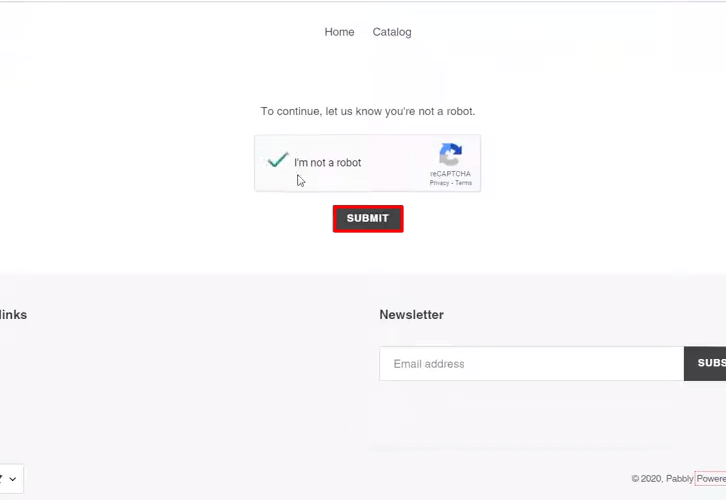
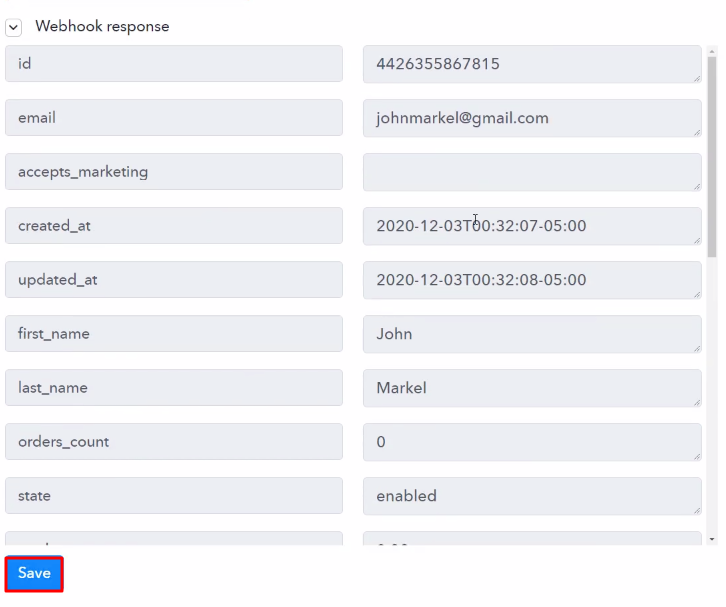
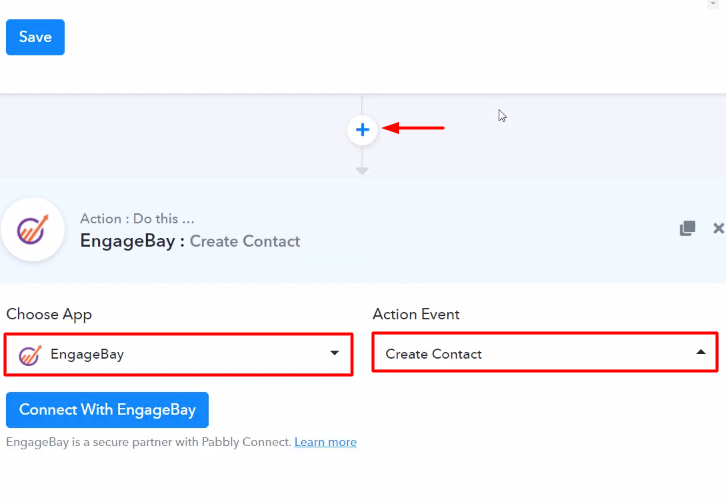
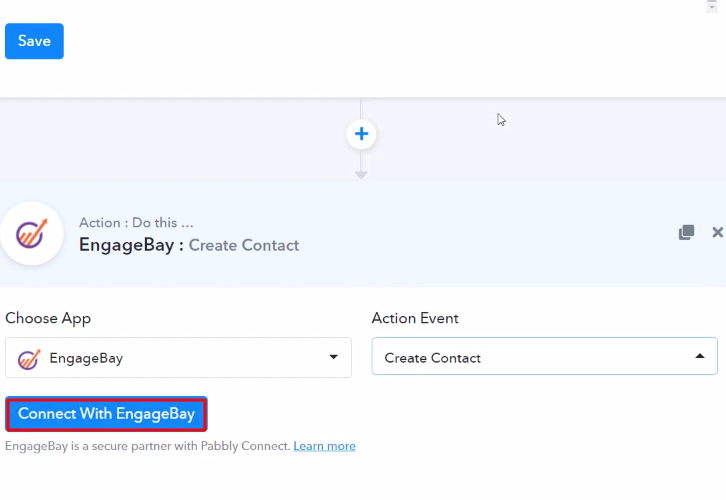
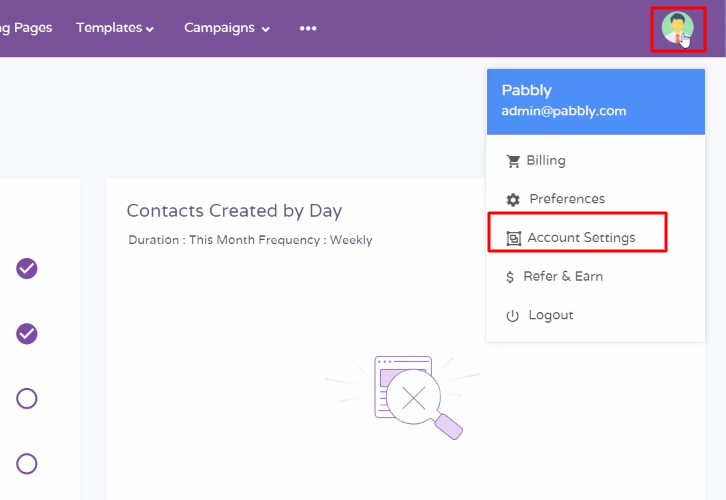
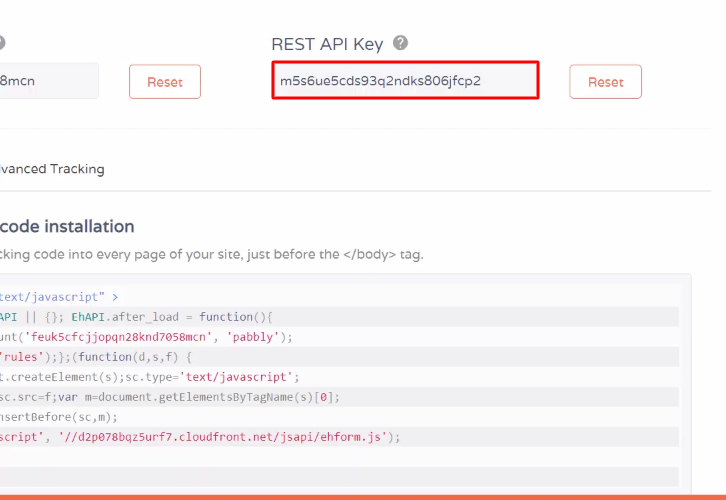
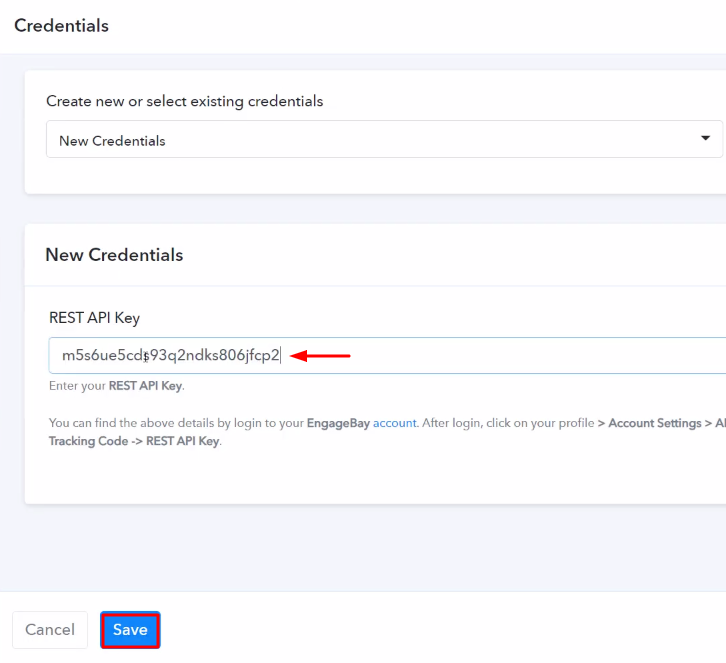
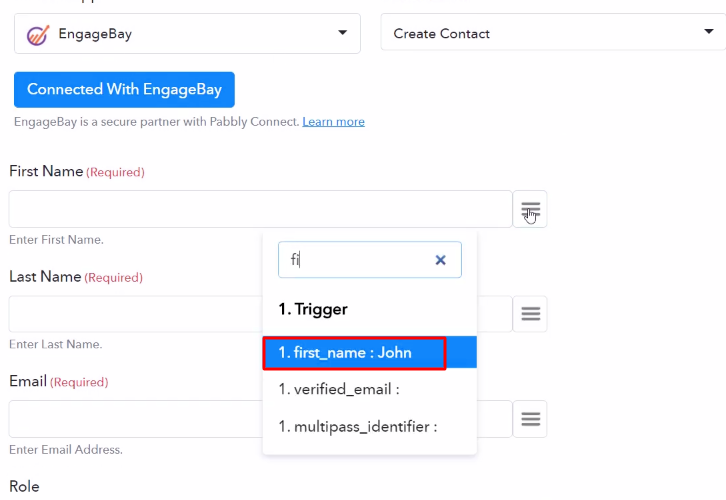
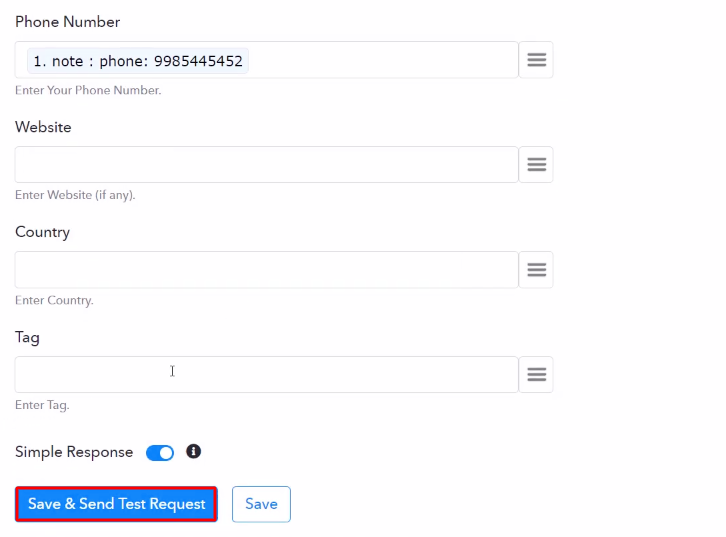
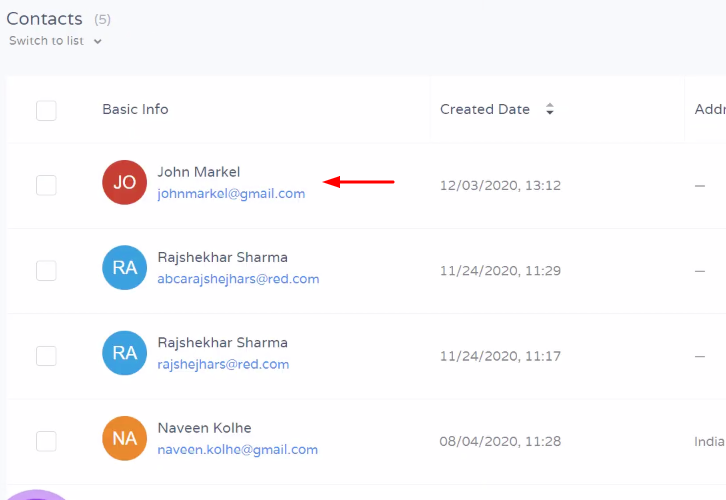
Next, after logging into the account, click on the “Access Now” button of the Connect section in the dashboard. Start with creating a workflow for your project by clicking on the ‘Create Workflow’ button. Now, you need to name the workflow just like in the above-shown image. I named the workflow as “Shopify Integrations”, you can obviously name the workflow as per your requirements. As soon as you are done with naming your workflow, you will have to select the application you want to integrate. Pabbly Connect allows you to integrate unlimited premium applications, create your free account now. Now, you have to select the application that you want to integrate. In this case, we are choosing “Shopify” for integration. In the method section, select “New Customer”. After selecting the application, now you have to copy the webhook URL just like in the above-shown image to take further the integration process. To connect Shopify with Pabbly Connect, you have to paste the copied webhook URL in the software. For that, you have to log in to your Shopify account. After logging into your Shopify account, click on the “Settings” option given at the bottom of the screen. Next, you need to click on the “Notifications” option given among several other options. Now, just scroll down and then click on the “Create Webhook” button to paste the copied webhook URL. A dialogue box will appear on your screen, here select “Customer Creation” in the event section and then paste the copied webhook URL. After making all the changes click on the “Save Webhook” button. To check this integration, we will capture the data from Shopify, and for that, we will create a dummy customer on Shopify. To add a customer, first, you have to open the online store page of Shopify in the new tab and then click on the “Create Account” option. In this step, now you have to add all the required details of the customer like name, email, etc, and hit the “Create” button. Next, simply click on the captcha checkbox and then click on the “Submit” button. But before clicking on the button, click on the “Capture Webhook Response” in Pabbly Connect to capture the data. Once you click on the “Capture Webhook Response” in Pabbly Connect and “Submit” in Shopify, the customer info will appear on the Pabbly Connect dashboard. Then, click on the “Save” option. To make this Shopify-EngageBay integration work, you have to choose the action for your trigger. Now in this step, click on the + button below and choose the application that you want to integrate. Here we will choose “EngageBay” to integrate and in the method section select “Create Contact”. After choosing the application click on the “Connect with EngageBay” button to move forward. To combine Pabbly Connect and EngageBay, you have to enter the API key of your EngageBay account in the Pabbly Connect dashboard. For this, you have to log in to your EngageBay account. To get the API key click on the profile icon in your EngageBay dashboard and then click on the “Account Settings” option. Next, click on the given “API & Tracking Code” option to get the API Key. Now, simply copy the given API key to move further with the integration process. After copying the API key, now paste it into the Pabbly Connect dashboard and then click on the “Save” button. After connecting with your EngageBay account, map all the fields quickly like name, email, etc. Once you are done adding up all field data click on the “Save & Send Test Request” button. Here, you can see that integration was successful and the customer has been added to the EngageBay account as a contact automatically from Shopify. Hopefully, here we have mentioned all the important steps to create EngageBay contact from new Shopify customer using the software Pabbly Connect. Now you know how easy it is to integrate Shopify and EngageBay. One can connect unlimited apps within minutes using this software. Not to forget, it doesn’t cost you a dime to create an account and you can work on it without coding skills. So, it is high time to give Pabbly Connect a try. Get your access by signing up for a free account. For any doubts or suggestions, please drop your comments down below.Step 2: Access Pabbly Connect
Step 3: Workflow for Shopify with EngageBay Integration
(a) Start with a New Workflow
(b) Name the Workflow
Step 4: Setting Trigger for Shopify with EngageBay Integration
(a) Select Application you Want to Integrate
(b) Copy the Webhook URL
Step 5: Connecting Shopify to Pabbly Connect
(a) Click on Shopify Settings
(b) Click on Notifications
(c) Click on Create Webhook
(d) Paste the Webhook URL
Step 6: Add a Sample Customer
(a) Click on Create Account
(b) Add Details
(c) Click Submit Button
Step 7: Test the Response in Pabbly Connect Dashboard
Step 8: Setting Action for Shopify with EngageBay Integration
(a) Select Application you Want to Integrate
(b) Click the Connect Button
Step 9: Connecting EngageBay to Pabbly Connect
(a) Click on EngageBay Account Settings
(b) Click on API & Tracking Code
![]()
(c) Copy the API Key
(d) Paste the API Key
(e) Map the Fields
(f) Send Test Request
Step 10: Check Response in EngageBay Dashboard
Conclusion –
You May Also Like to Read –


