Are you curiously want a way through which you can easily create ClickUp task from new Calendly invitee? If yes, then stay with us as in this blog we will guide you to the step by step procedure to integrate Calendly and ClickUp using Pabbly Connect.
Basically, Pabbly Connect is an automation and integration tool which allows you to transfer data between numerous application in a few clicks.
But before getting into the whole procedure let’s first understand a bit about the services that are involved in the workflow. Calendly is an automated scheduling tool used by business personalities to book meetings, schedule events, and much more in advance. Whilst, ClickUp is an all-in-one cloud-based project management tool that offer features like reminders, goals, calendars, chat, scheduling, assigned comments, custom views, & more.
Why Choose This Method Of Integration?
In contrast with other integration services-
- Pabbly Connect does not charge you for its in-built apps like filters, Iterator, Router, Data transformer, and more
- Create “Unlimited Workflows” and smoothly define multiple tasks for each action
- As compared to other services which offer 750 tasks at $24.99, Pabbly Connect offers 50000 tasks in the starter plan of $29 itself
- Unlike Zapier, there’s no restriction on features. Get access to advanced features even in the basic plan
- Try before you buy! Before spending your money, you can actually signup & try out the working of Pabbly Connect for FREE
Since there is no direct integration between both of these software. Thus, integrating these two services via Pabbly Connect can help you in such a way that whenever a new invitee is created in Calendly then automatically create a task in ClickUp.
You can also refer to the below video to easily understand the workflow-
Furthermore, we’ve attached a predefined template for this integration to help you begin the integration more-quickly. You can strike the ‘Use Workflow’ button below to get started. Also, you can go to the Marketplace & look for more apps/integrations.
Apart from this integration, Pabbly Connect offers using many remarkable features even in the free plan such as routers, formatters, instant triggers, multi-step calls & support thousands of app integrations.
Now, let’s dig into the step by step procedure to integrate Calendly and ClickUp automatically.
Step 1: Sign up to Pabbly Connect
Visit the official website of Pabbly Connect & then hit the ‘Sign-Up Free‘ button. Next, on the registration page signup using an existing Google account or manually fill the form.
Try Pabbly Connect for FREE
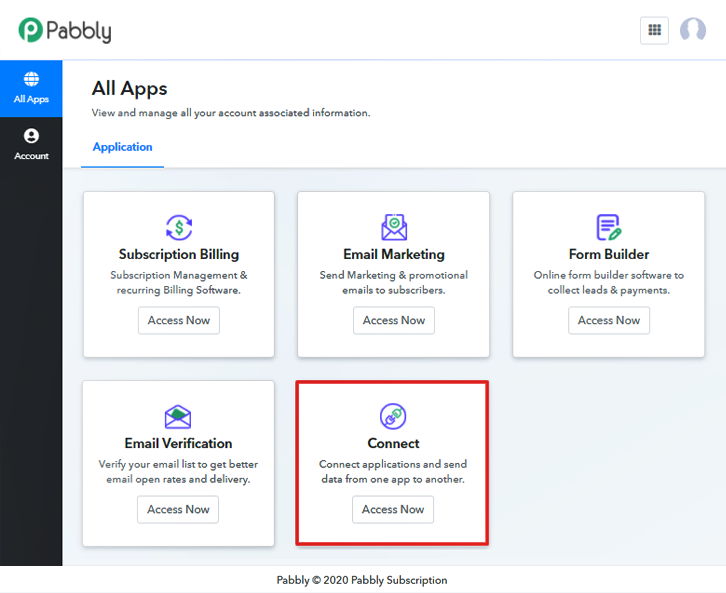
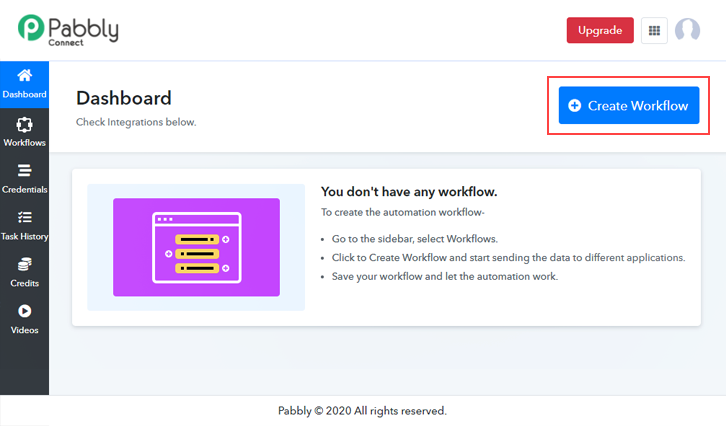
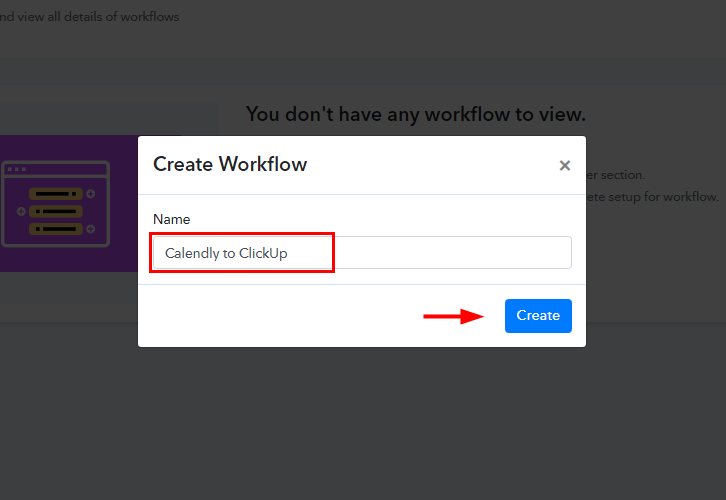
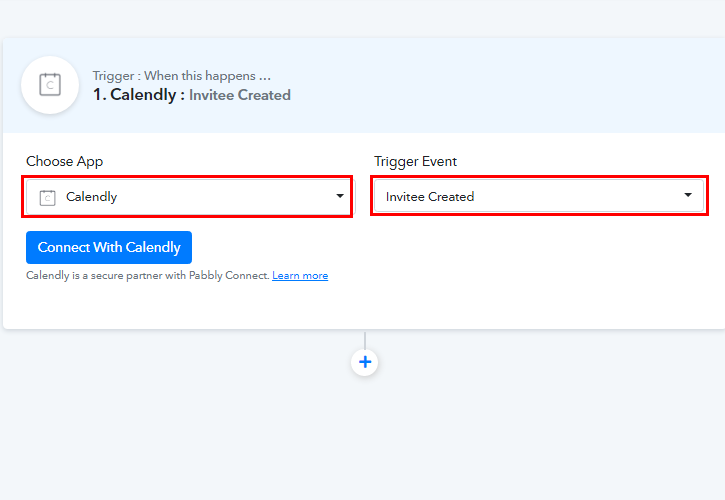
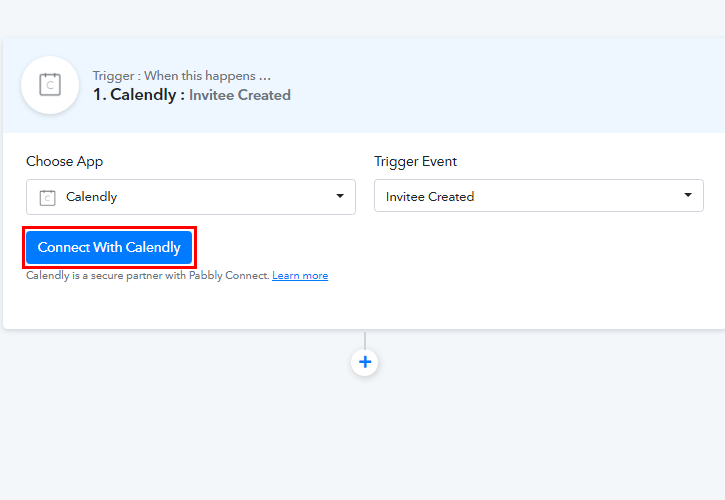
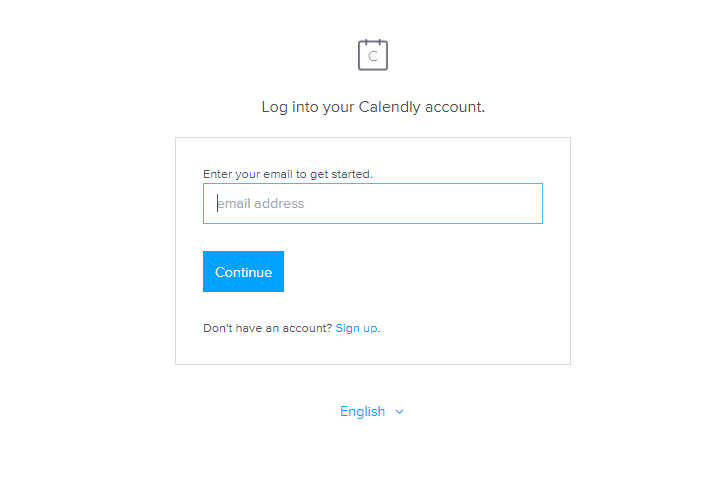
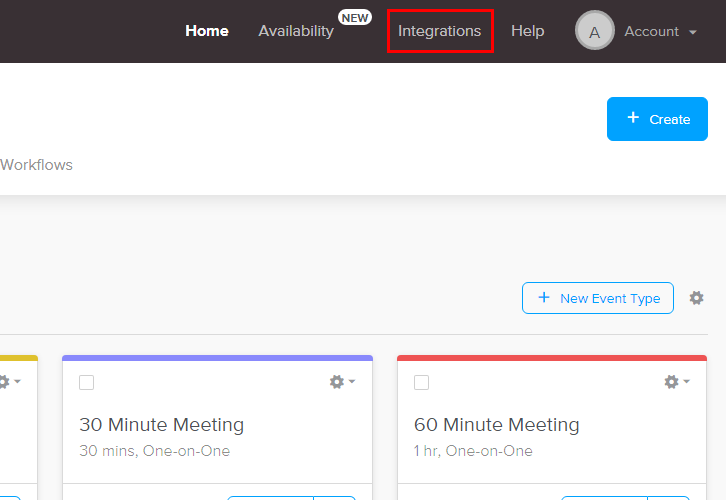
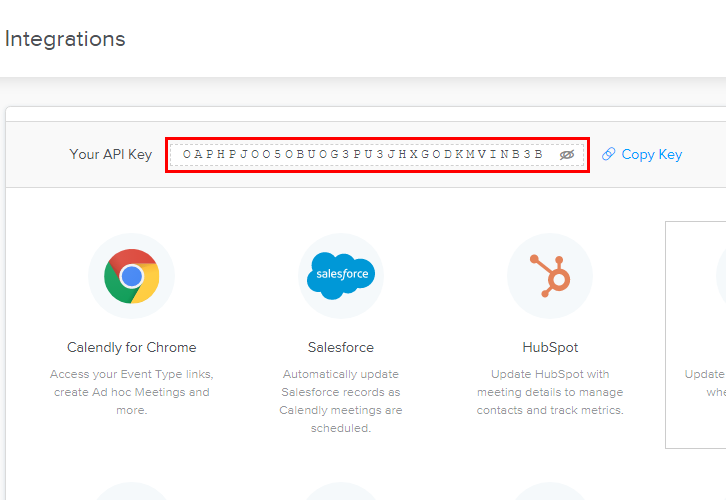
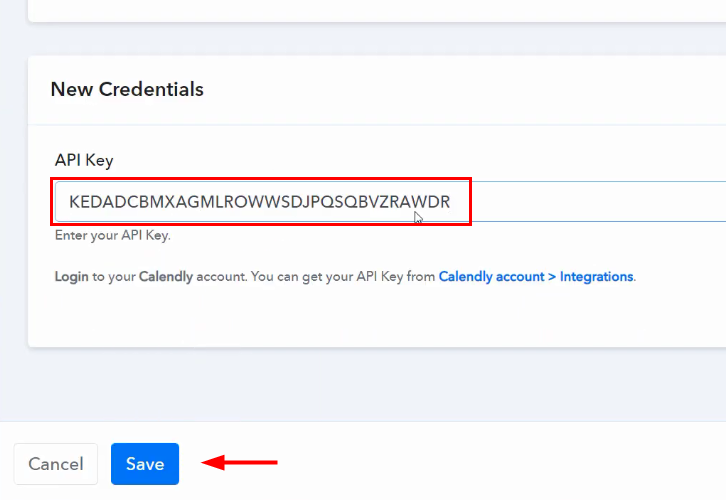
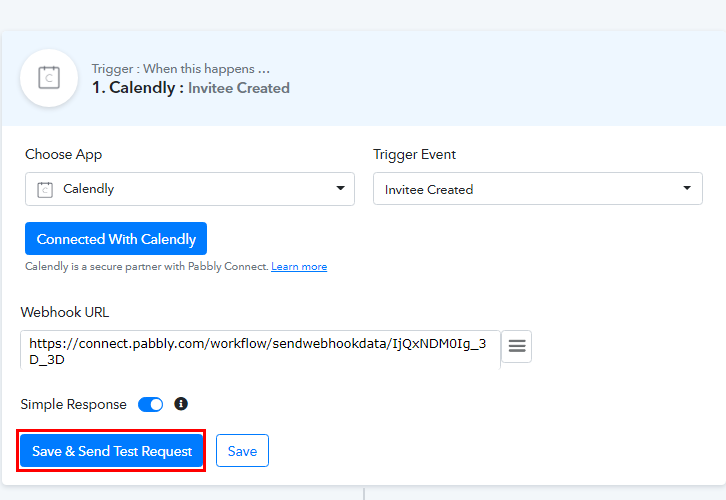
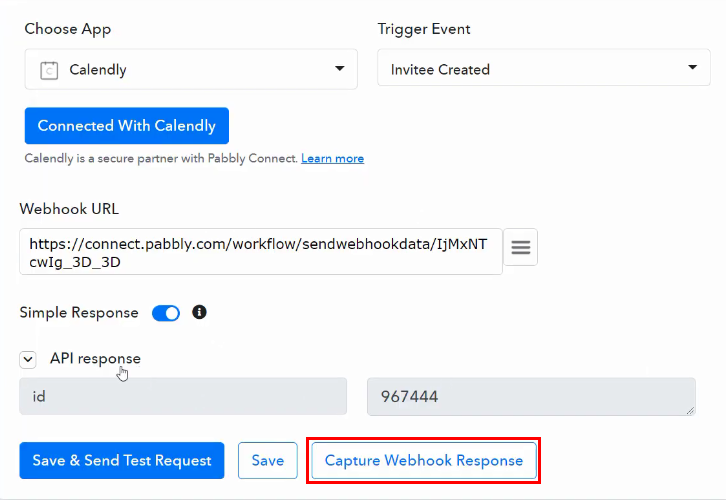
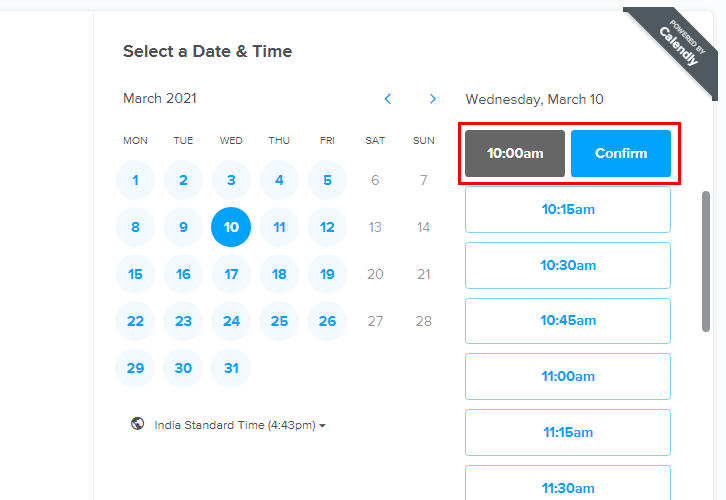
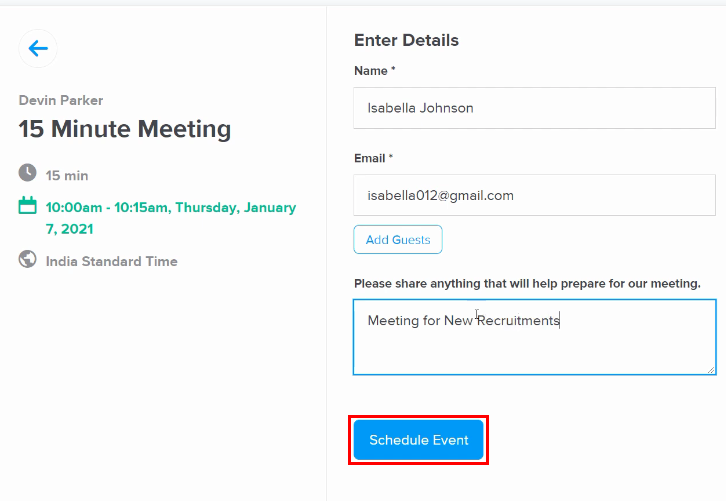
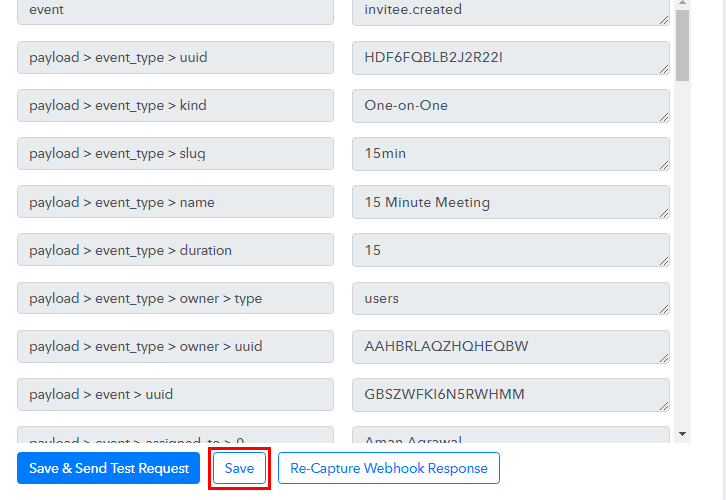
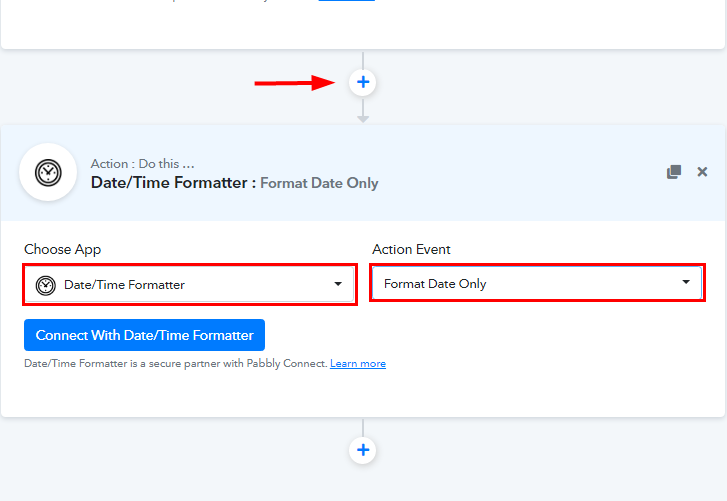
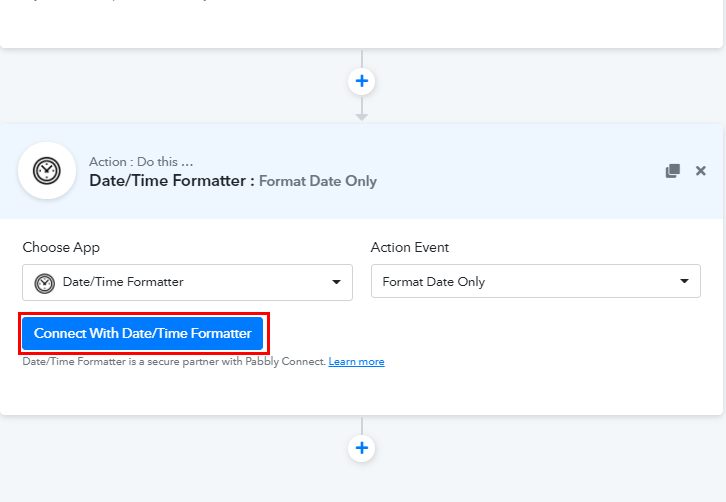
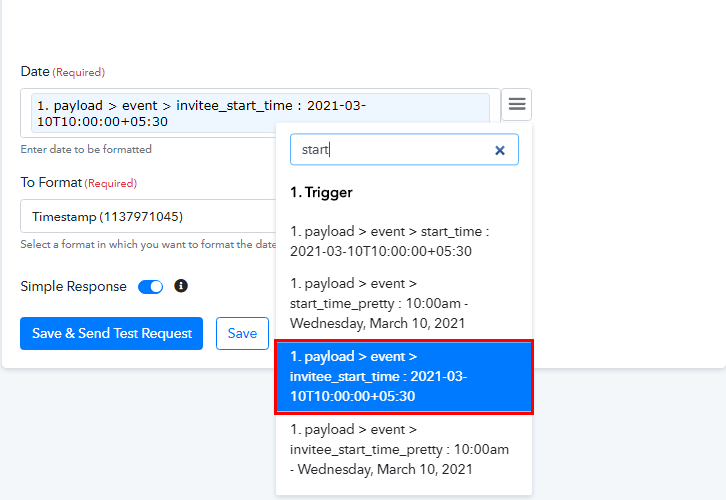
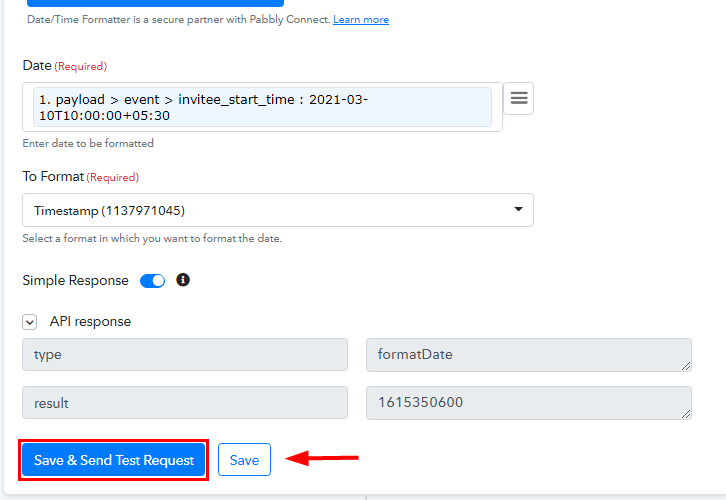
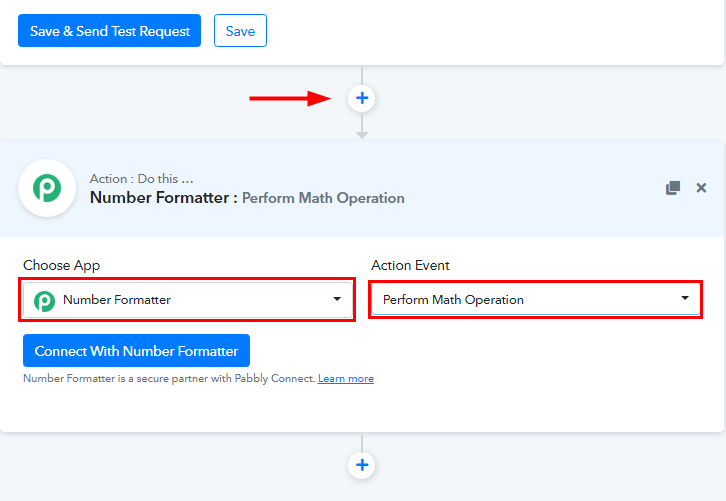
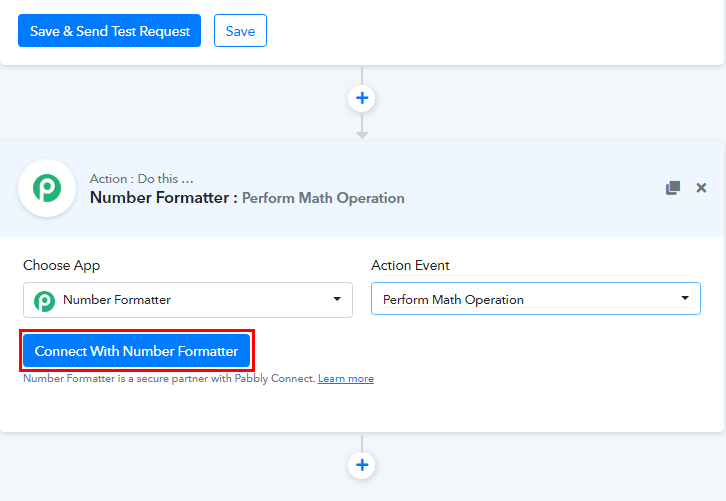
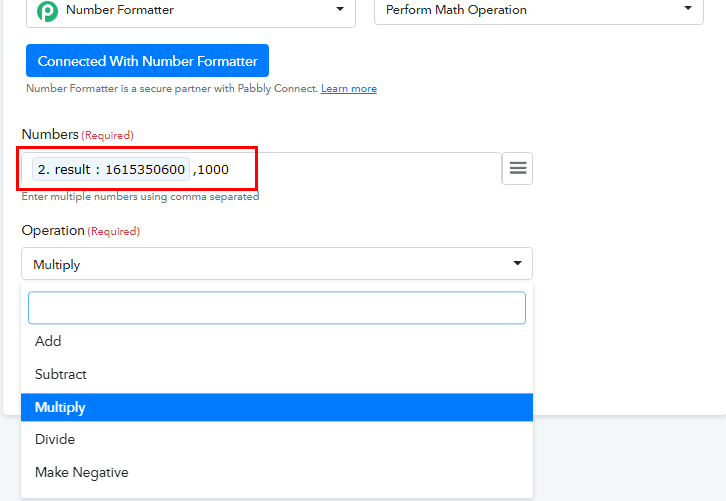
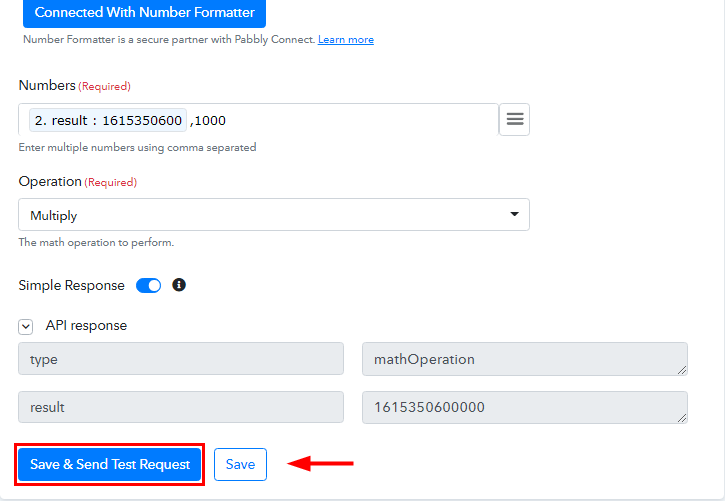
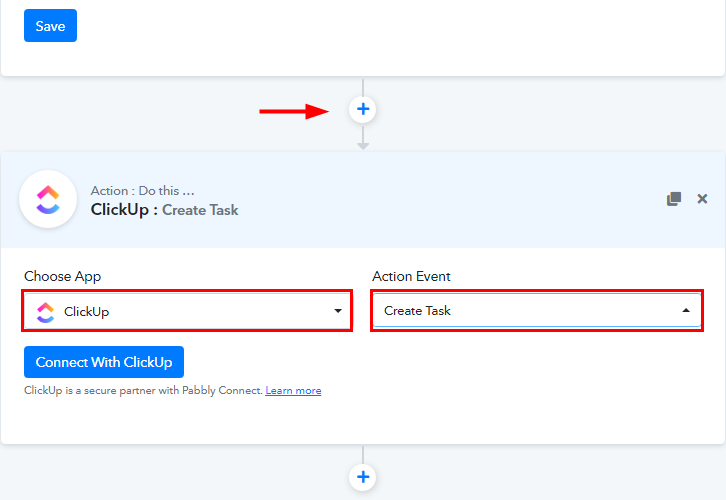
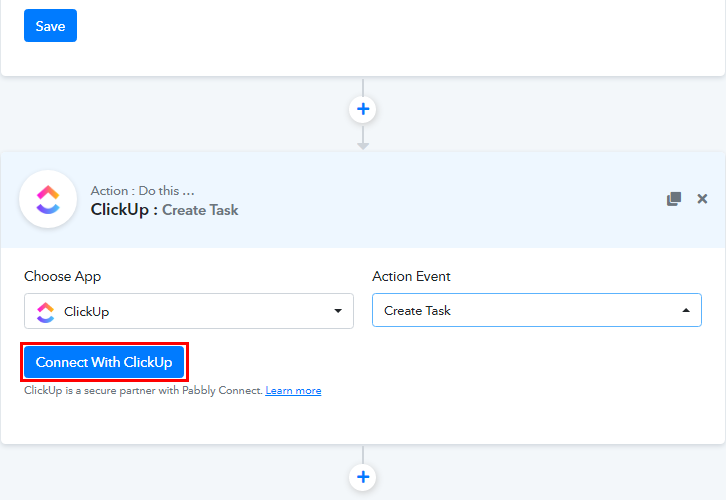
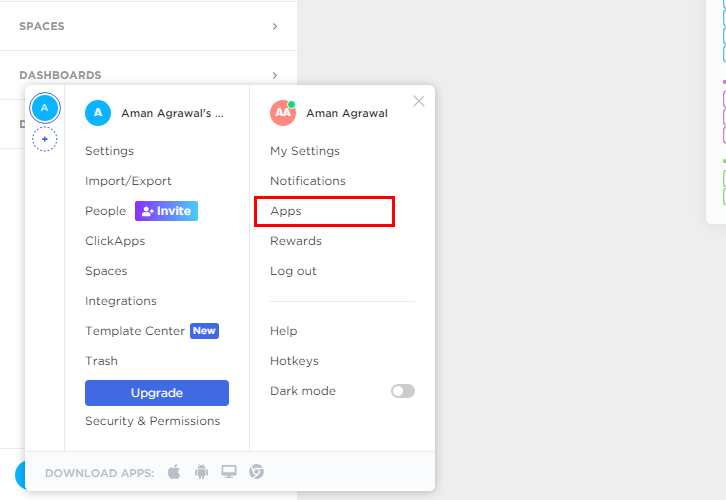
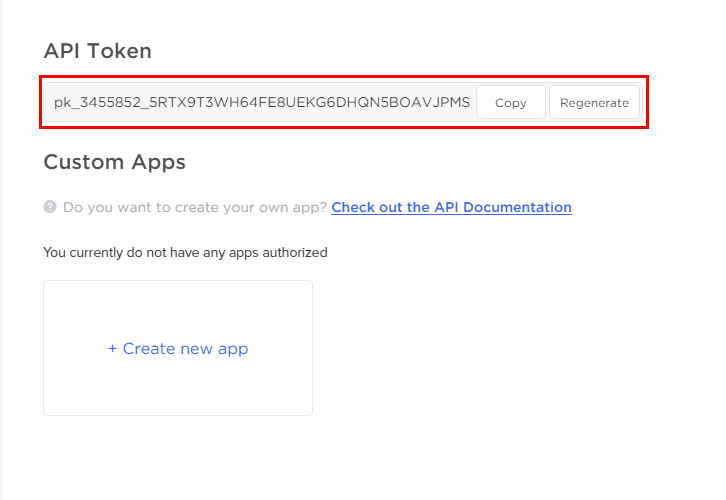
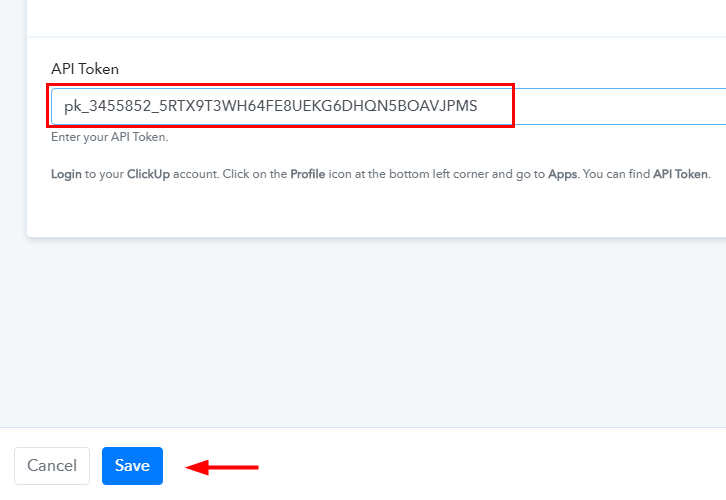
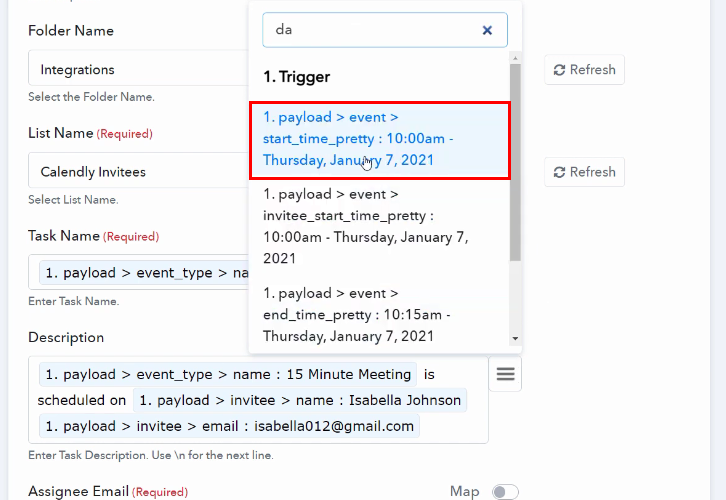
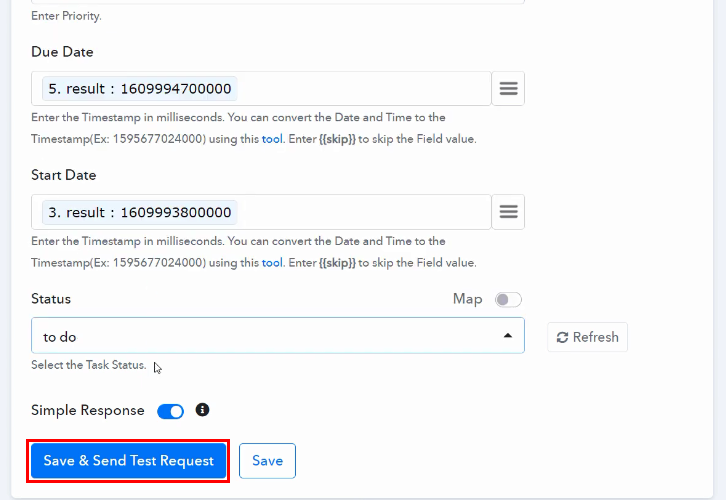
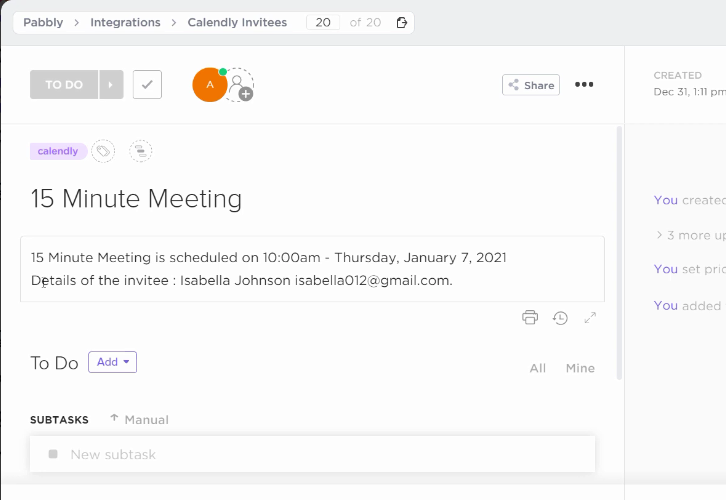
After signing up successfully, click the ‘Access Now’ button as shown in the above image. Start with creating a workflow to create ClickUp task from new Calendly invitee & to do this push the ‘Create Workflow’ button first. Now, you need to name the workflow just like in the above-shown image. I named the workflow ‘Calendly to ClickUp’, you can obviously name the workflow as per your requirements. As soon as you are done naming the workflow, you will have to select the application you want to integrate. Pabbly Connect allows you to connect unlimited premium apps, create your free account now. Now, you have to select the application that you want to integrate. In this case, we are choosing ‘Calendly’ for integration. In the method section, select ‘Invitee Created’. After selecting the application, now you have to click on the ‘Connect with Calendly’ button just like in the above-shown image to take further the integration process. In order to connect Calendly to Pabbly Connect, you gotta copy the API key for which you have to log in to your Calendly account. Once you are logging to your Calendly account, tap on the ‘Integrations’ option at the top. Further, it will give you two options either copy the API key appearing on the dashboard or regenerate the key as per your need. Simply copy the key. Now, move back to the Pabbly Connect dashboard and paste the copied API Key. Further, click on the ‘Save’ button. Once you clicked on the Save button, you will see ‘Save and Send Test Request’ button, click on it and you will get the details of the last created invitee but we don’t need it. So, we will create a new meeting. Now, we have to create a test meeting to check whether the integration is capturing data or not. After you got the response, you will see ‘Capture Webhook Response’ button click on it to get the response for the newly created invitee. Furthermore, go to the Home page of your Calendly account and start to create a new appointment by clicking on the mentioned time as shown in above image. For instance, we have created an appointment for a 15-minute meeting. Promptly, you will be redirected to a new page where you have to select the date and time slot for your meeting. At last, click on ‘Confirm’ button. Now, you have to provide a name, email and note for your meeting. Finally press ‘Schedule Event’ tab. Go back to the Pabbly Connect dashboard to see the API response of newly created appointment. Then, to continue the workflow, click on the ‘Save’ button. Subsequently, the date we got from the above response is not in the correct format. So, to get the date in the correct format we have to set up Date/Time Formatter. Next, in order to format the date, simply tap on the (+) button and then, select Date/Time Formatter’ in choose app, and in the action event select ‘Format Date Only’. Promptly, click on the ‘Connect With Date/Time Formatter’ button. Now, you have to map the field to make the date in a proper format. In the Date field, map ‘start_time’, and from ‘To Format’ field choose ‘Timestamp’. Once you are done mapping all the details, hit the ‘Save and Sent Request’ to get the API response. Finally, ‘Save’ the response. Subsequently, as we can see in the above response, the captured data is not in the correct format (milliseconds). So, to get the date in the correct format we have to set up a Number Formatter. Now, to format the date, just hit the (+) button and then, select Number Formatter’ in choose app, and in the action event select ‘Perform Math Operation’. Once you select the application, press the ‘Connect With Number Formatter’ button. Later on, you have to map the field to set the date in a proper format. In the Numbers field map the result which you got from Date/Time Formatter response and select Operation as ‘Multiply’ (as shown in above image). Once you are done mapping all the details, hit the ‘Save and Sent Test Request’. Soon, you will get the API response and the date is in the proper format now. Lastly, hit the ‘Save’ button. Hence, we are done setting up the Date/Time and Number Formatter to change the start date. Now, in order to change the due date in a proper format (milliseconds), do follow the above same procedure. Simply, map the ‘end_time’ instead of ‘start_time’ in the Date/Time Formatter and in the Number Formatter choose the result accordingly. Promptly, in order to create a task in the ClickUp account, you have to choose an action for your integration. Next, click on the ‘+’ icon to add an action for your trigger. Here we are going to select ‘ClickUp’ from the drop-down and choose method as ‘Create Task’. Now, click on the ‘Connect with ClickUp’ button. Eventually, when you click on the ‘Connect with ClickUp’ button, a window will slide from right. Here you have to paste the API Token and for that, you need to log in to your ClickUp account. Now, to get the API token, go to your ClickUp dashboard and then click on your profile button present at the left bottom corner. From the menu that pops out click on the ‘Apps’ option. Next, click on ‘Copy’ button and copy the API token. Get back to the Pabbly Connect window and paste the copied API token. Promptly, map all the data in their respective fields such as task name, description, tags, etc. After you are done mapping all the fields, click on the ‘Save and Send Test Request’ button to get the API response. Eventually, when you check your ClickUp dashboard, a new task has been created automatically. This is a one-time setup, to auto-create the ClickUp task whenever a new invitee is created in Calendly. That’s it! Now you know the step by step procedure of ‘How to create ClickUp task from new Calendly invitee’. Just follow all the step by step procedure mentioned above & your Calendly to ClickUp integration is all set. So, what’s stopping you now! Go and catch your deal by signing up for a free account. For further questions, comment below.Step 2: Access Pabbly Connect
Step 3: Workflow for Calendly with ClickUp Integration
(a) Start with a New Workflow
(b) Name the Workflow
Step 4: Setting Trigger for Calendly to ClickUp Integration
(a) Select Application you Want to Integrate
(b) Click Connect Button
(c) Login to Calendly Account
(d) Click on Integrations
(e) Copy the API Key
(f) Paste the API Key
(g) Save and Send Test Request
Step 5: Create a Test Meeting
(a) Capture Webhook Response
(b) Go to Home Page
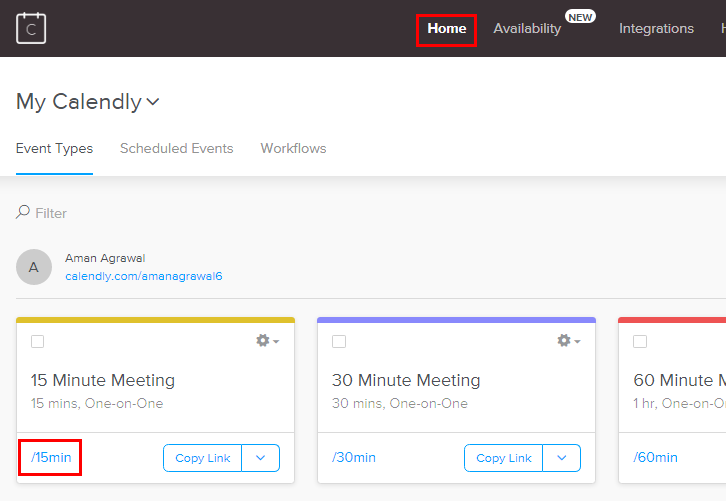
(c) Schedule Meeting
(d) Enter Meeting Details
(e) Test the Response
Step 6: Setting Date/Time Formatter for Calendly to ClickUp Integration
(a) Select Application to Format Date
(b) Connect with Date/Time Formatter
(c) Map the Fields
(d) Save and Sent Test Request
Step 7: Setting Number Formatter for Calendly to ClickUp Integration
(a) Select Application to Format Number
(b) Connect with Number Formatter
(c) Map the Fields
(d) Save and Sent Test Request
Step 8: Setting Action for Calendly to ClickUp Integration
(a) Select Application you Want to Integrate
(b) Click on Connect Button
Step 9: Connecting ClickUp to Pabbly Connect
(a) Go to Your ClickUp Profile
![]()
(b) Click on Apps
(c) Copy the API Token
(d) Paste the API Token
(e) Map the Fields
(f) Save and Send Test Request
Step 10: Check Response in ClickUp Dashboard
Conclusion –
You May Also Like To Read–


