Do you want to notify your team members about the new Shopify orders?
Then there is Good News for you! This can be done in automation using Pabbly Connect. In this article, I’ll walk you through a simple step by step procedure to notify your team members on Telegram whenever a new Shopify order is received. The best part here is we don’t need to have any coding or programming knowledge to automate the task.
So basically, Pabbly Connect works as a bridge between these two services to automate a repetitive task in real-time. Moreover, you can integrate any number of software together to create limitless workflows. Most importantly, this would be just a single-time procedure after that, all the Telegram messages will be sent automatically for every new order.
Why Choose This Method Of Integration?
In contrast with other integration services-
- Pabbly Connect does not charge you for its in-built apps like filters, Iterator, Router, Data transformer and more
- Create “Unlimited Workflows” and smoothly define multiple tasks for each action
- As compared to other services which offer 750 tasks at $24.99, Pabbly Connect offers 50000 tasks in the starter plan of $29 itself
- Unlike Zapier, there’s no restriction on features. Get access to advanced features even in the basic plan
- Try before you buy! Before spending your money, you can actually signup & try out the working of Pabbly Connect for FREE
Before getting onto the procedure first, let’s discuss the services that we are going to integrate for automation. Shopify is an online store builder software. Whereas, Telegram is a messaging app used for video calling, VoIP (Voice over Internet Protocol), file sharing and more.
By integrating Shopify with Telegram I’m going to automatically send Telegram messages for new Shopify orders. This way, whenever your Shopify receives a new order, a Telegram message will be sent to your team instantly.
You can also check out this video to visually follow this automation.
Additionally, the template for this integration is also linked below, it can help you get started more quickly. You can simply, click on the image given below to use the workflow. Also, you can visit go to the Pabbly Connect Marketplace for more integrations and apps.

Now, buckle up and discover the Shopify and Telegram integration.
Step 1: Sign up to Pabbly Connect

Start the procedure to notify your team members about new Shopify orders automatically by visiting the Pabbly Connect website. Simply, click on the ‘Sign-Up Free‘ button here. Next, either use your existing Google credentials for a direct sign-up or simply make a new registration by filling the form.
Step 2: Access Pabbly Connect

After logging in, click on the ‘Access Now’ button of the software ‘Connect’ amongst all the Pabbly applications.
Step 3: Workflow for Shopify and Telegram Integration
(a) Start with a New Workflow

Further, start with creating a workflow for Shopify to Telegram integration & to do this click the ‘Create Workflow’ button available on the top-right of the screen.
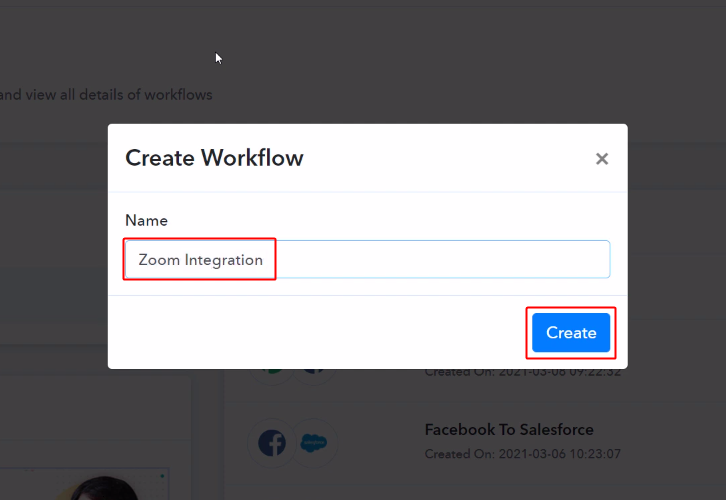
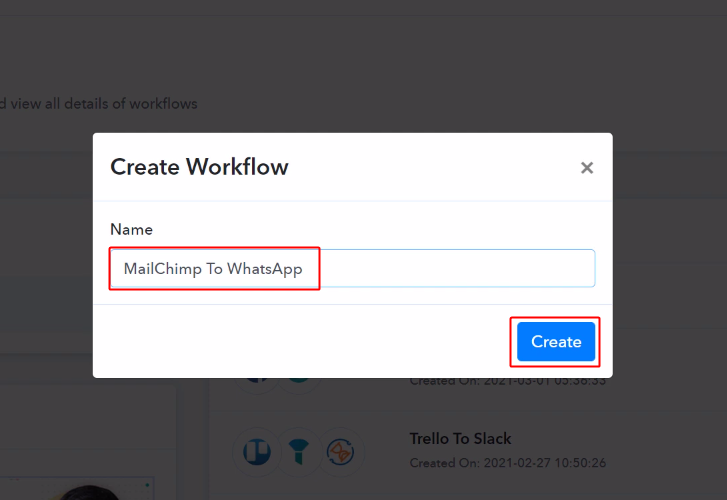
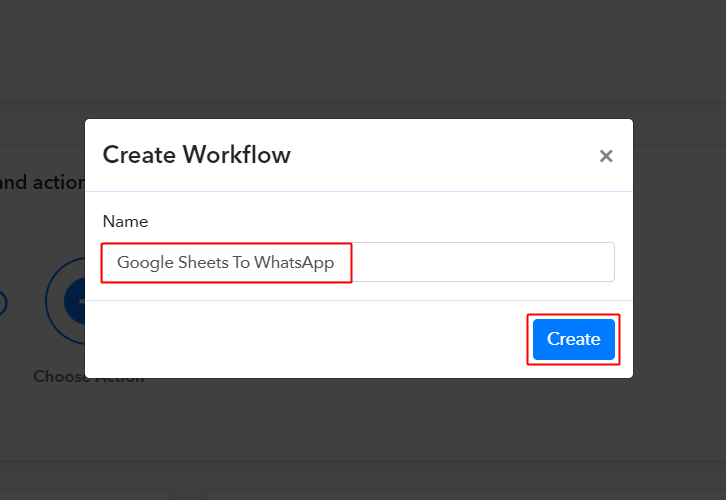
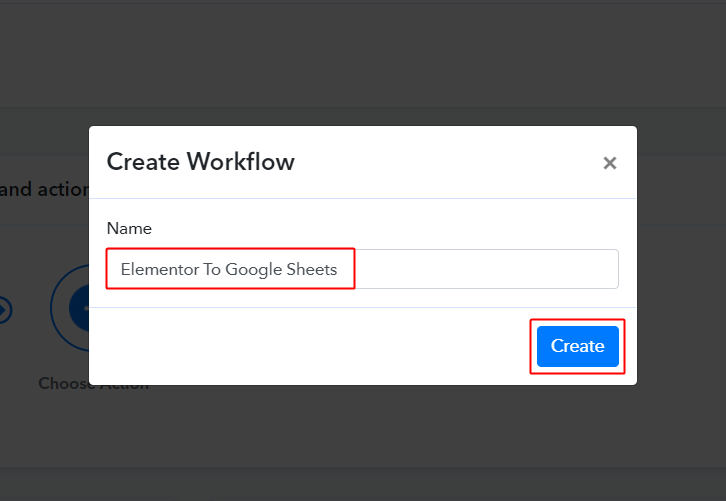
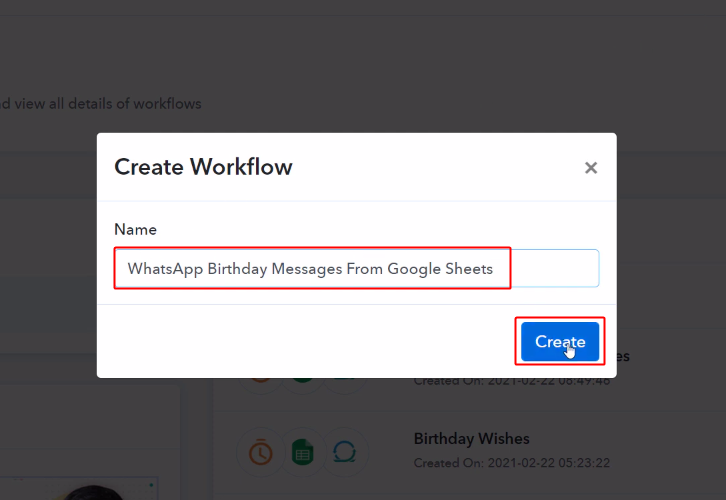
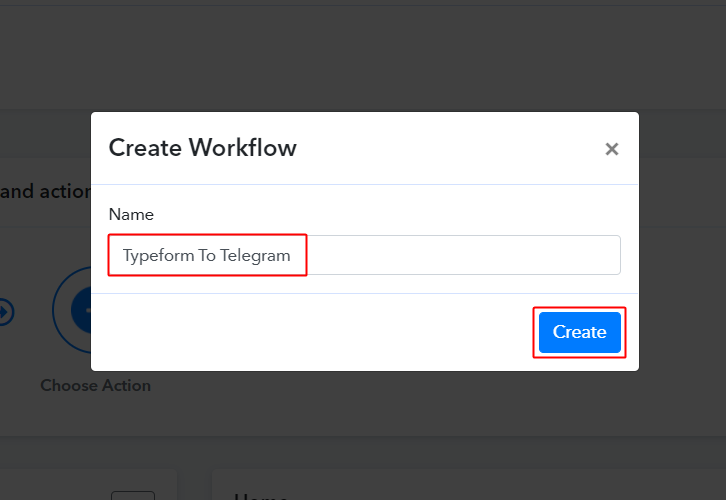
(b) Name the Workflow
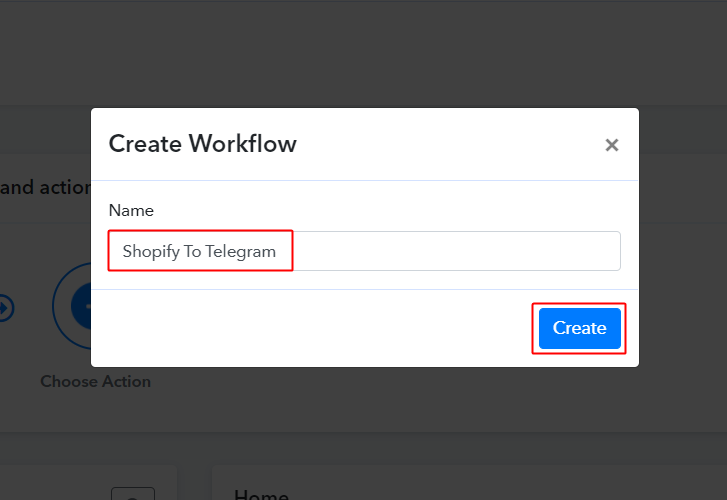
Give a name to the workflow for example Shopify To Telegram. Then, click on the ‘Create’ button.
Step 4: Setting Trigger for Shopify to Telegram Integration
For trigger set up, you’ll need to set a condition on the new Shopify orders and the respective action using Pabbly Connect.
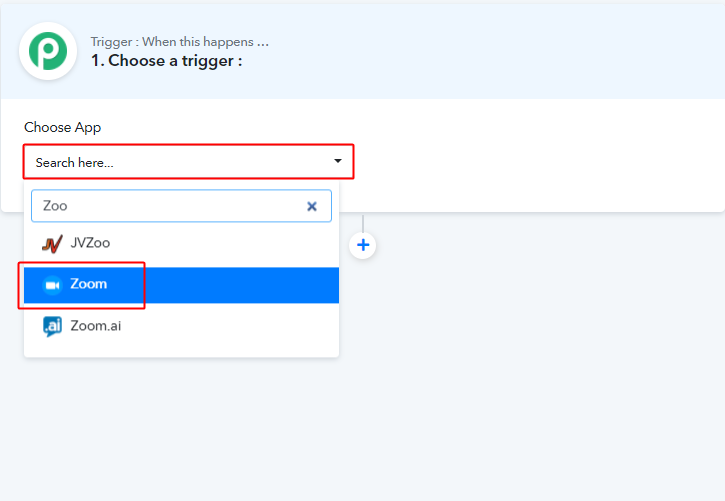
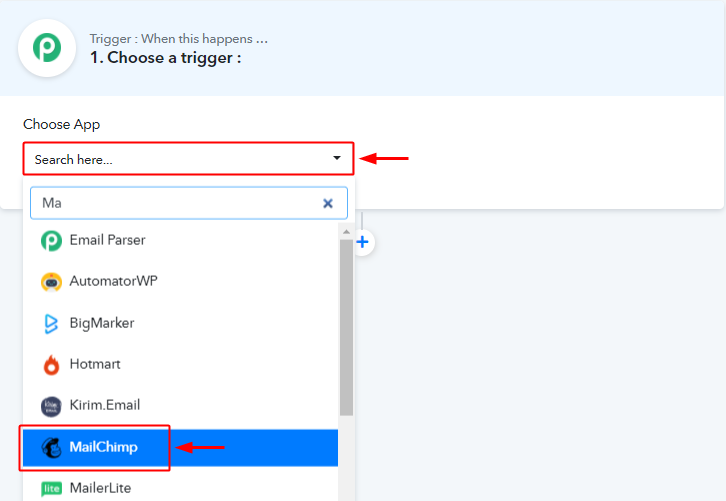
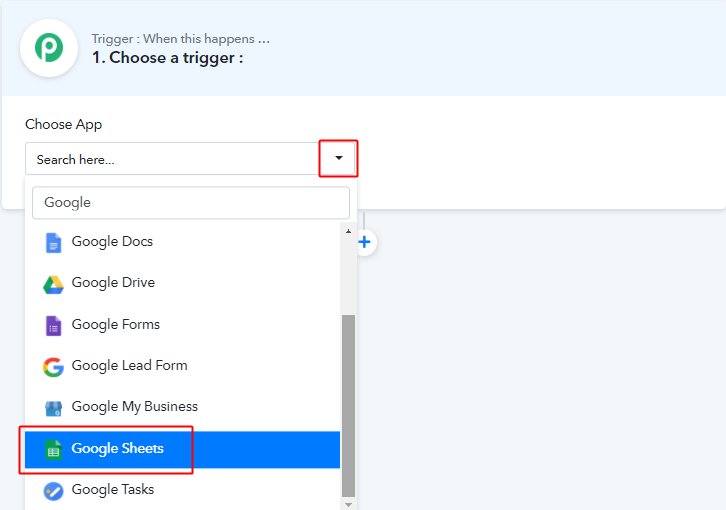
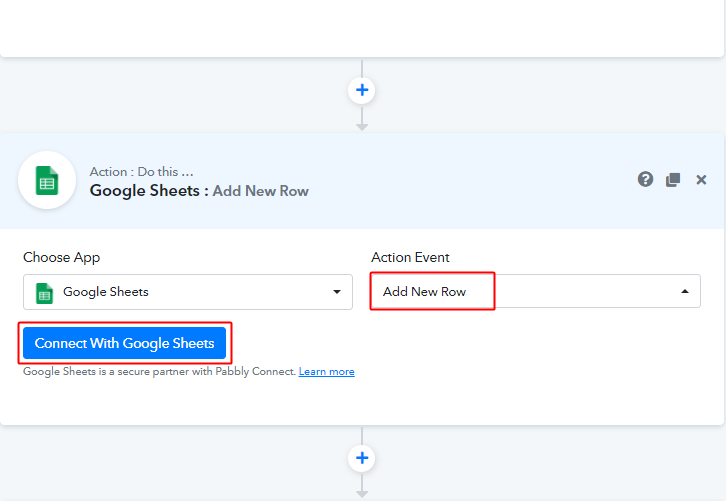
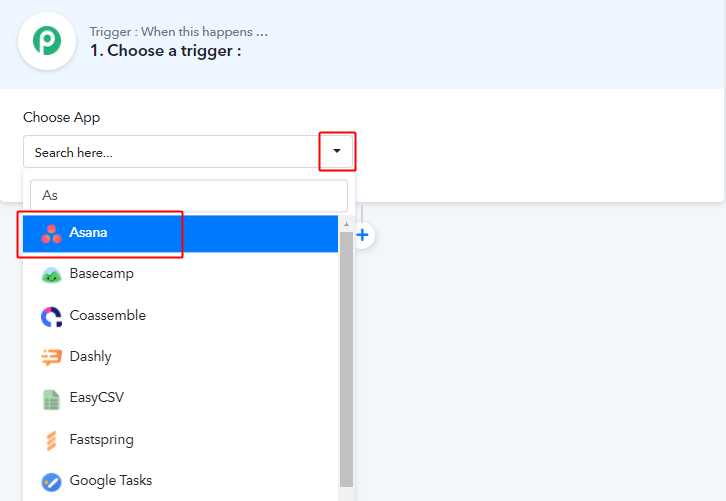
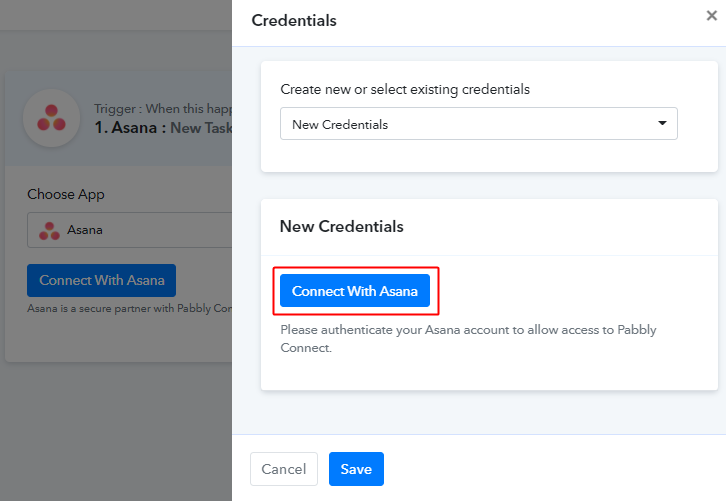
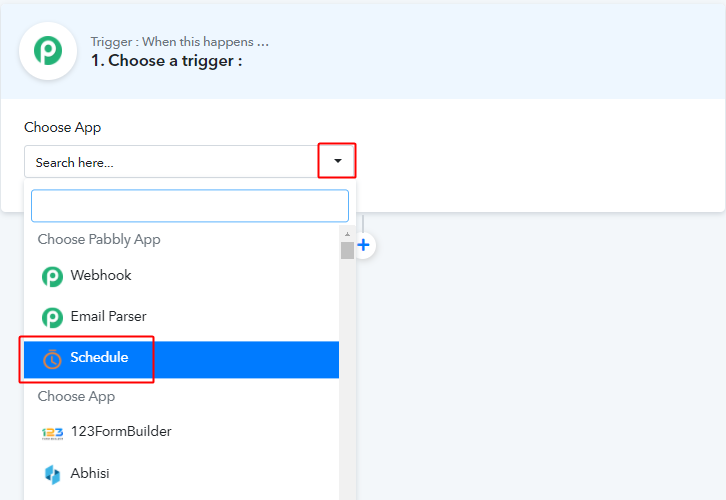
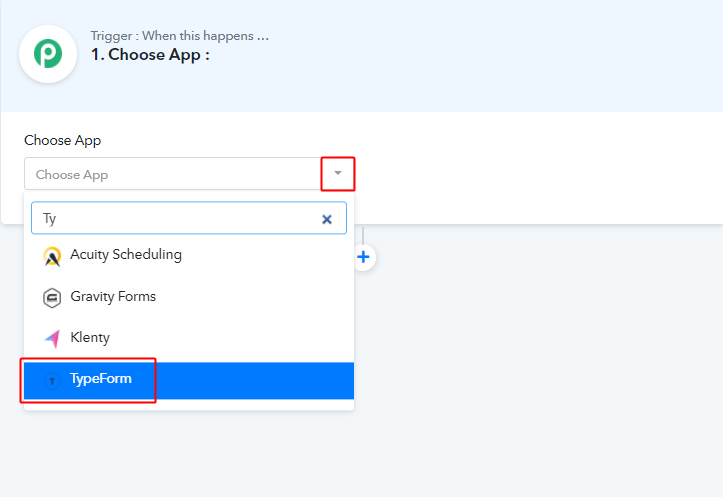
(a) Select Application you want to integrate
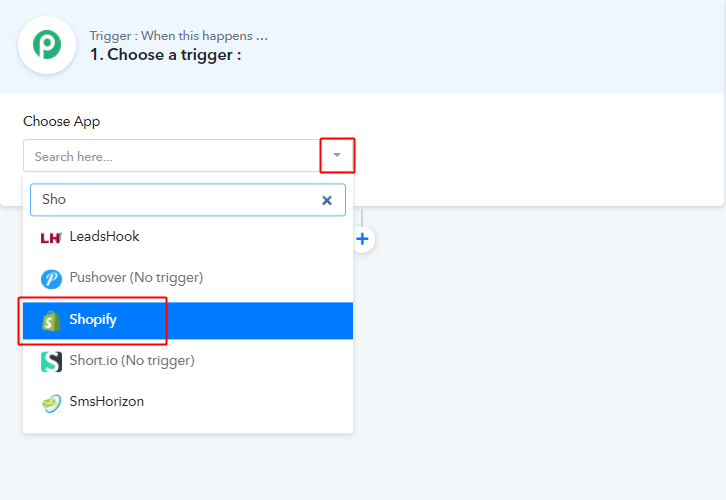
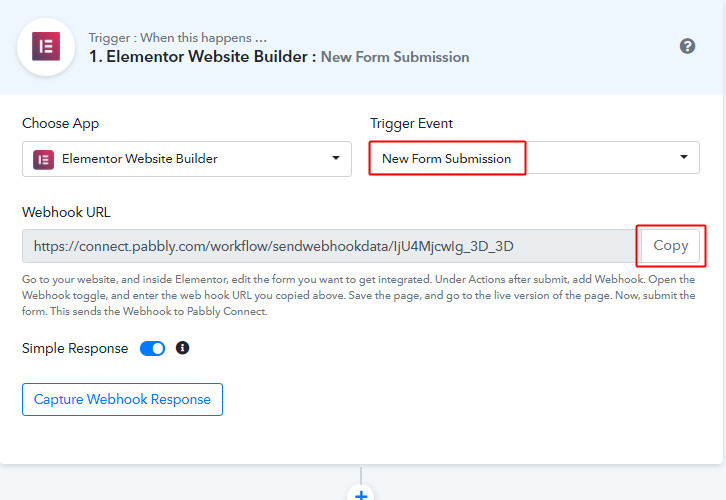
When you are done with naming the workflow, a page opens up asking for the trigger condition.
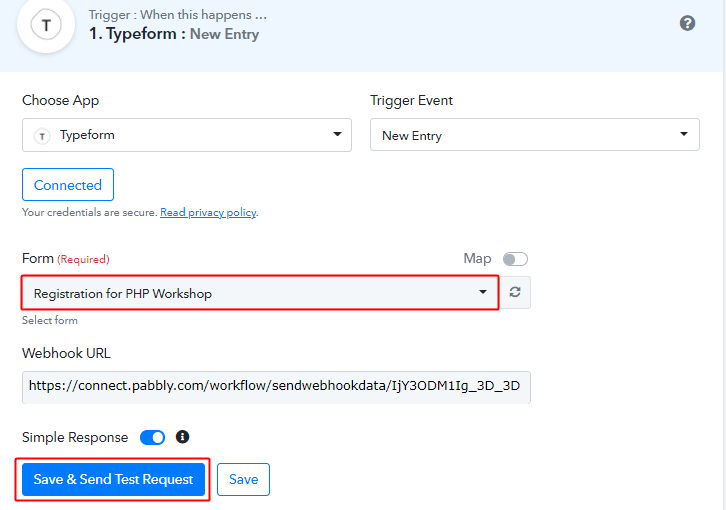
Pick the ‘Shopify’ app from the ‘Choose App’ drop-down choices.
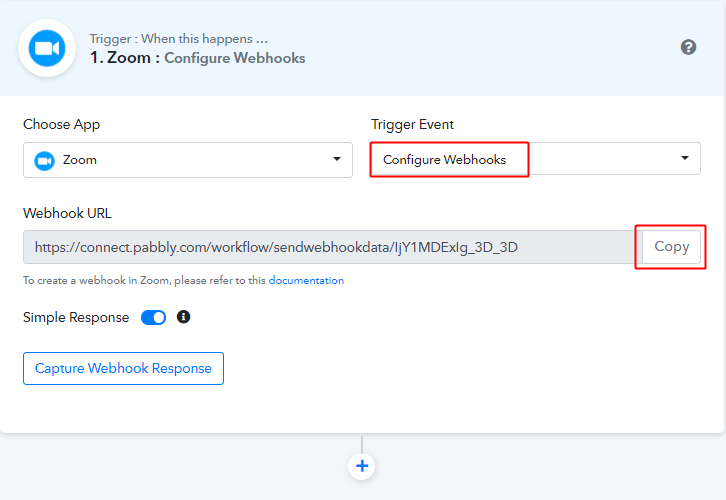
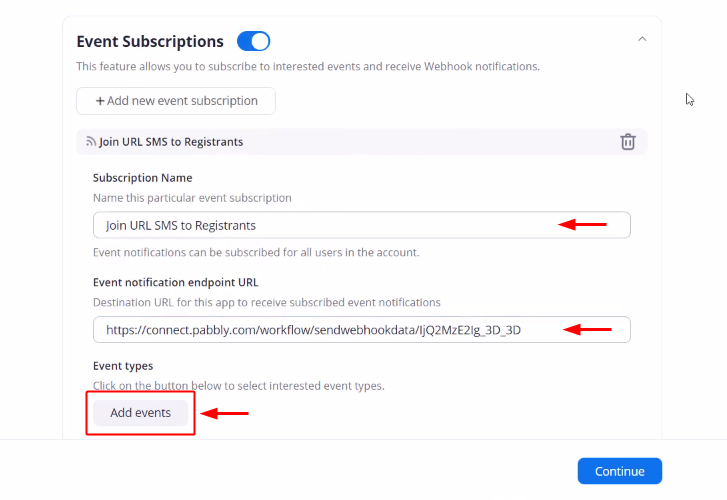
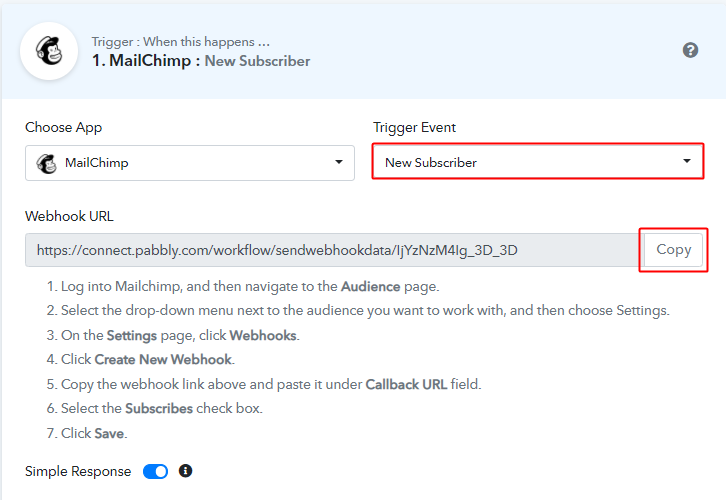
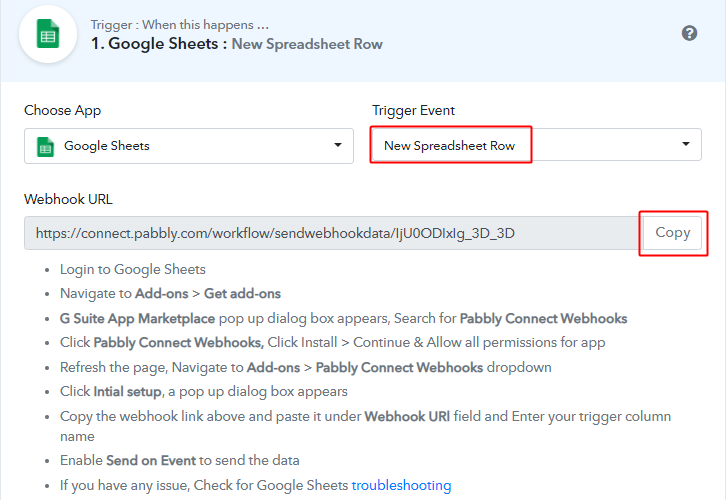
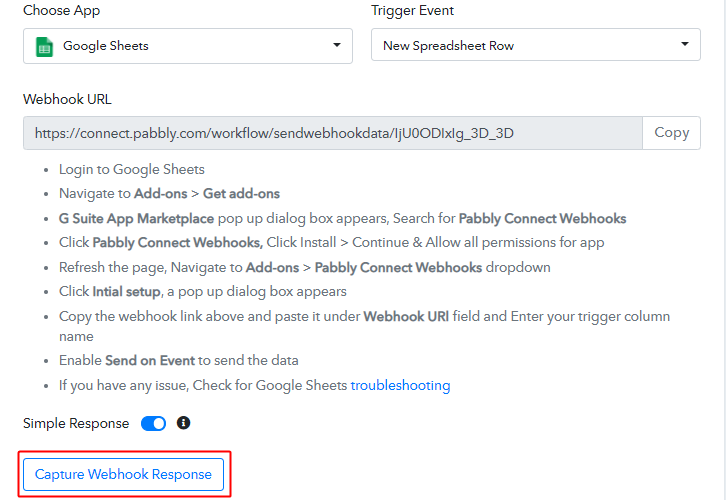
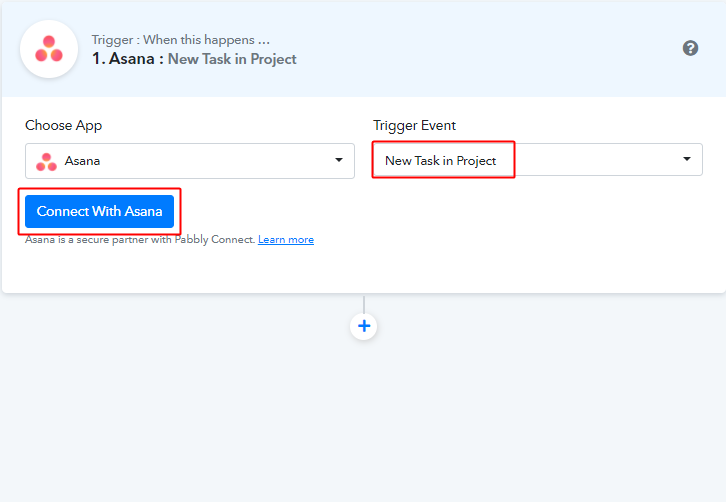
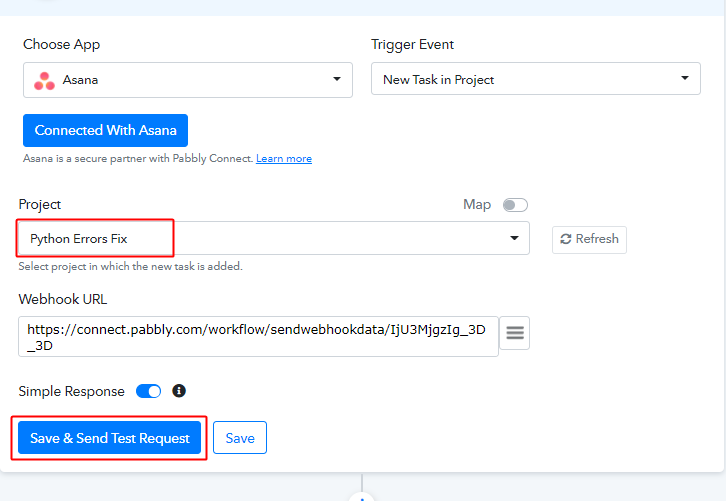
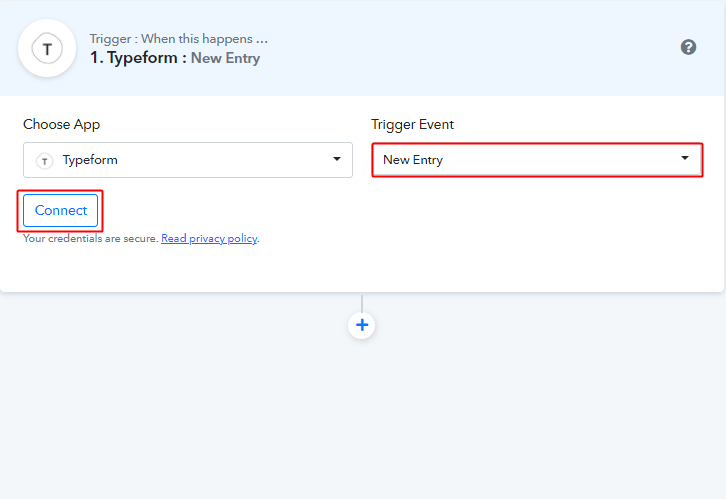
(b) Select Event & Copy Webhook URL
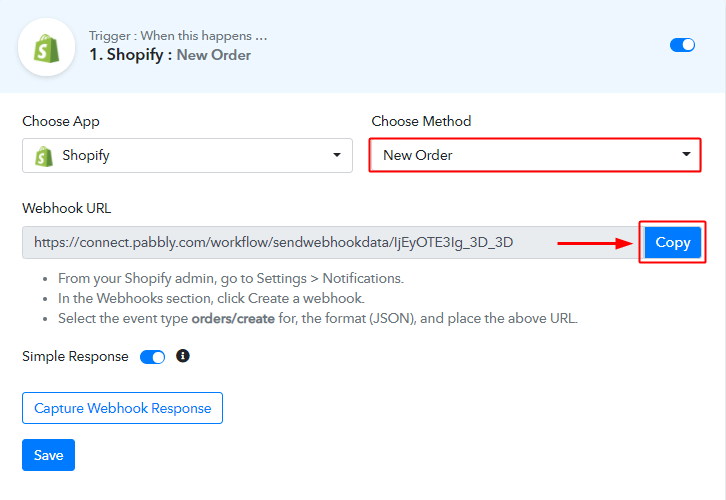
Select the event as ‘New Order’ & then click on ‘Copy’.
Step 5: Connecting Shopify to Pabbly Connect
(a) Go to Your Shopify Settings
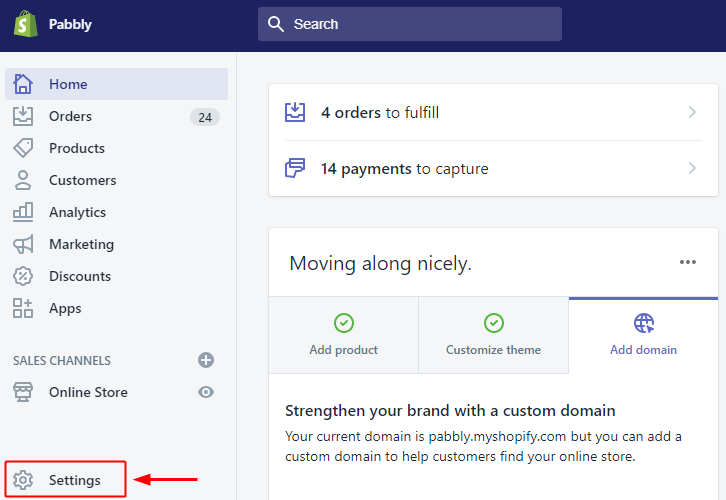
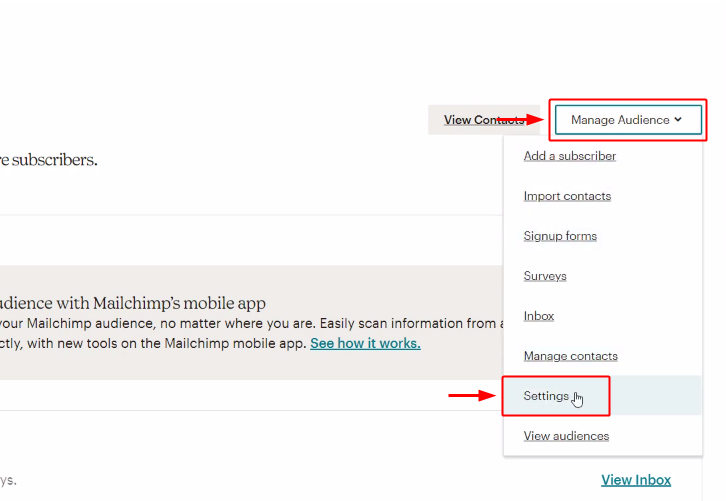
After successfully logging into your Shopify store, click the ‘Settings’ option available at the bottom left corner in the left-vertical menu.
(b) Select Notification Option
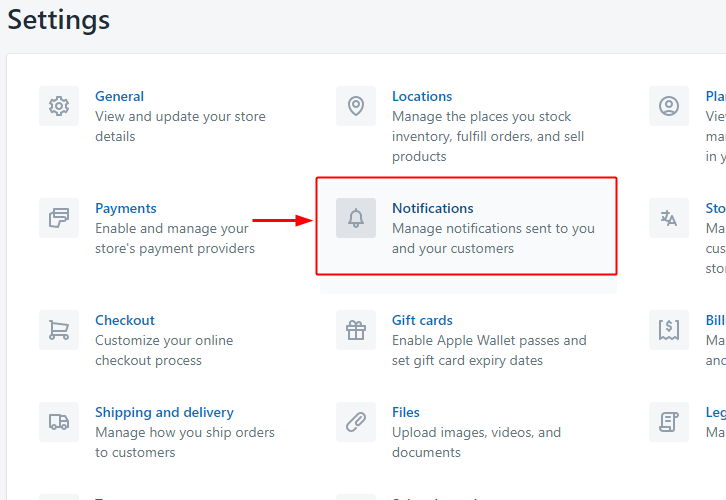
From all the Shopify settings, select the notification option.
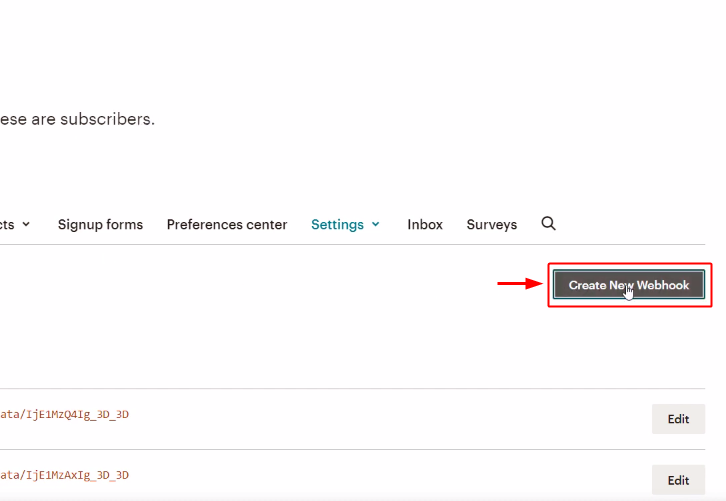
(c) Click the Create Webhook Button
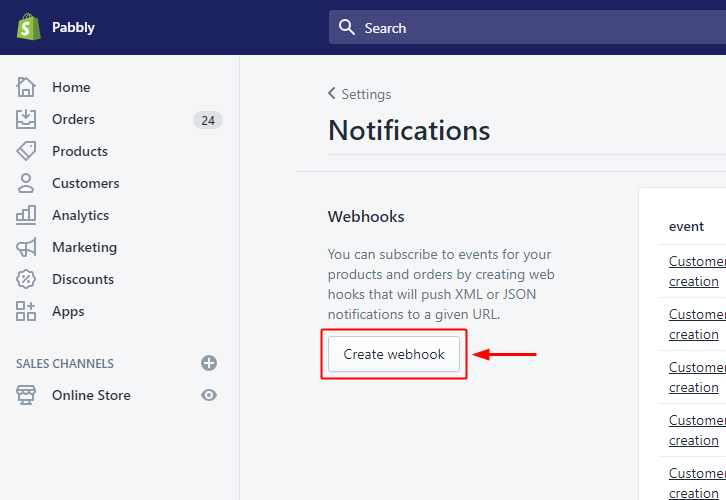
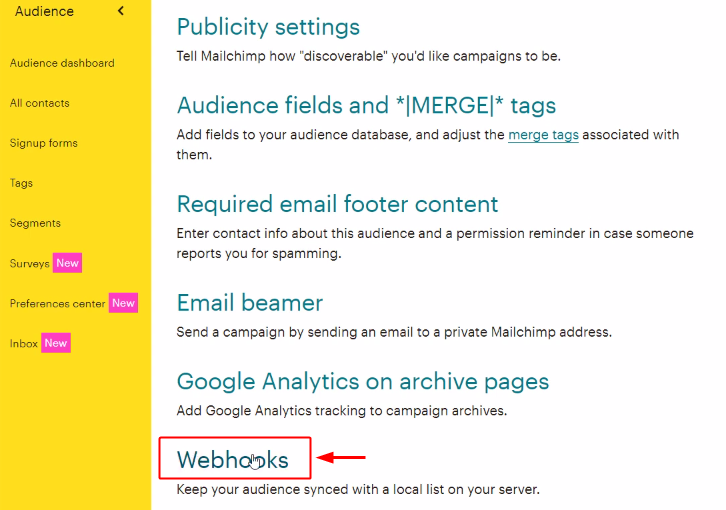
On the next page, head directly to the bottom of the page on the ‘Webhooks’ section & click on ‘Create Webhook’.
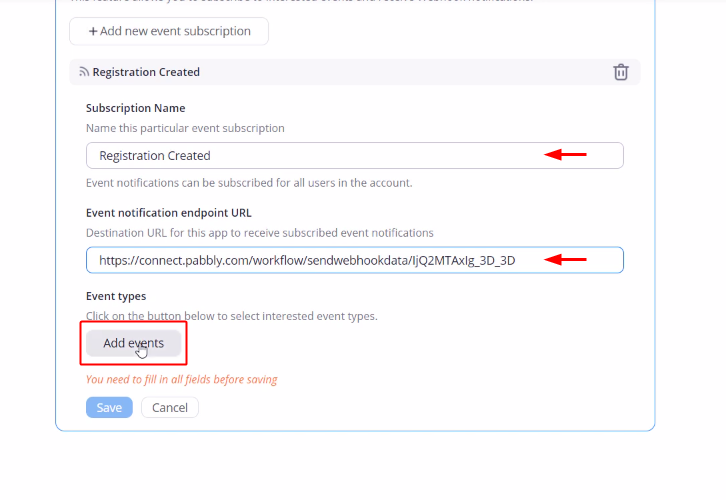
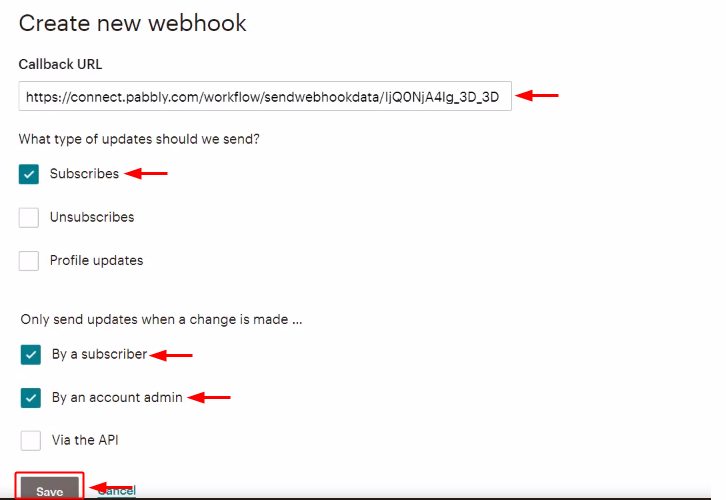
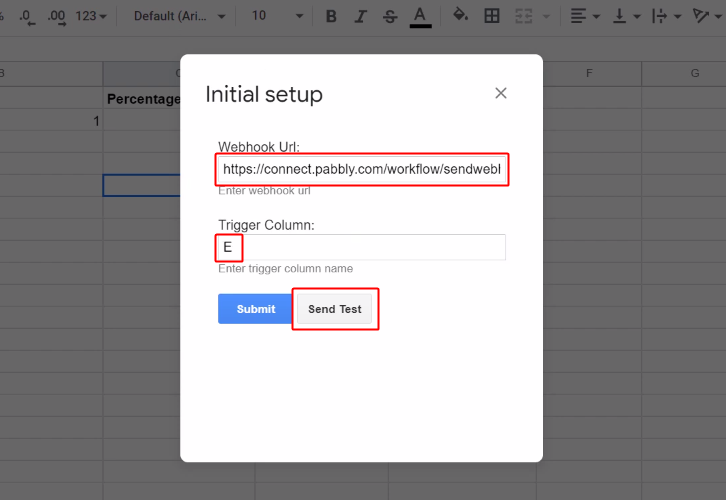
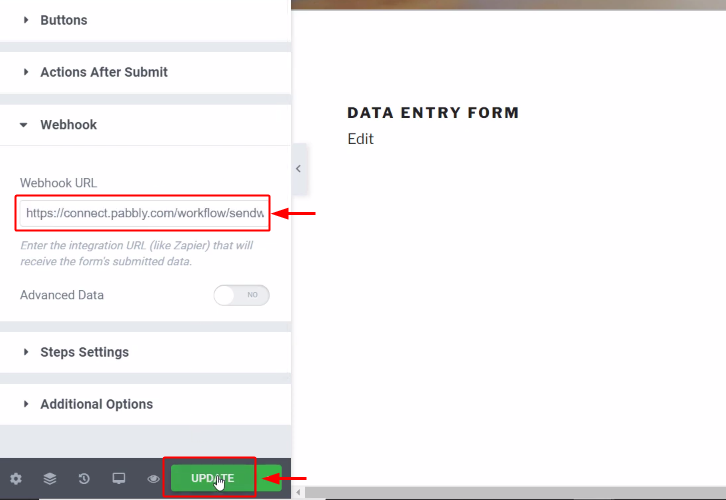
(d) Select Event & Paste Webhook URL
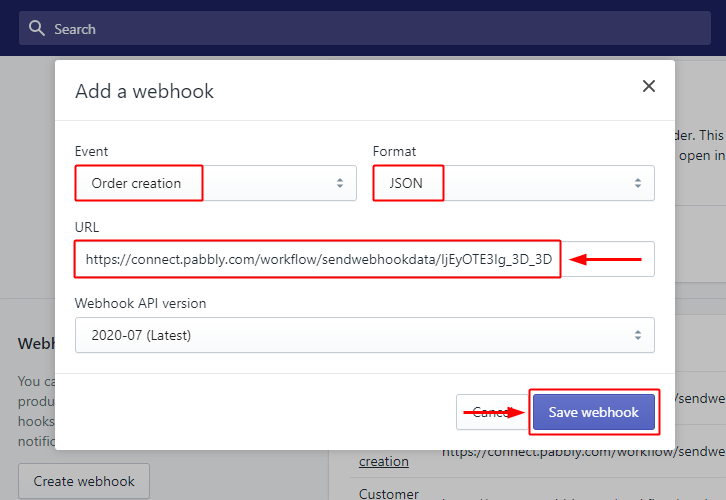
Next, select the Event as ‘Order Creation’, Format as ‘JSON’ and pasted the copied Webhook URL. Lastly, click on ‘Save Webhook’.
Step 6: Test the Response in Pabbly Connect Dashboard
As we can see, we are done setting up the trigger for the Shopify and Telegram integration. So, let’s test the Shopify trigger by making a test order.
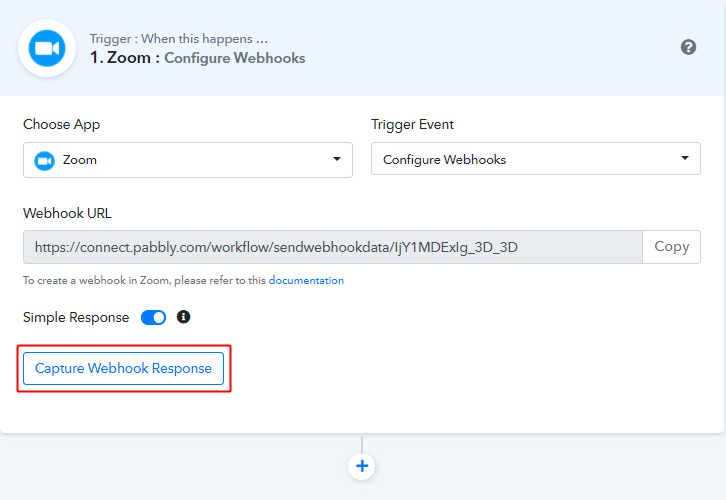
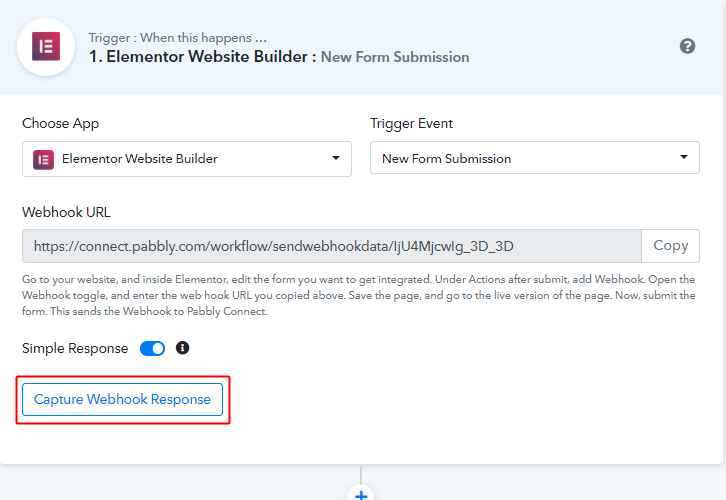
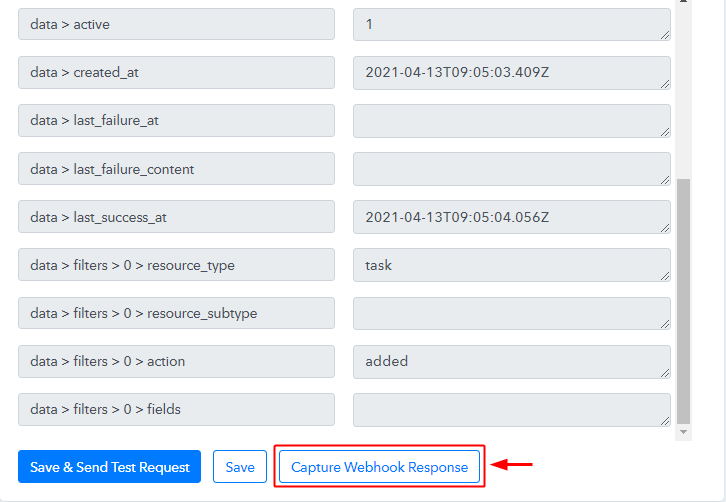
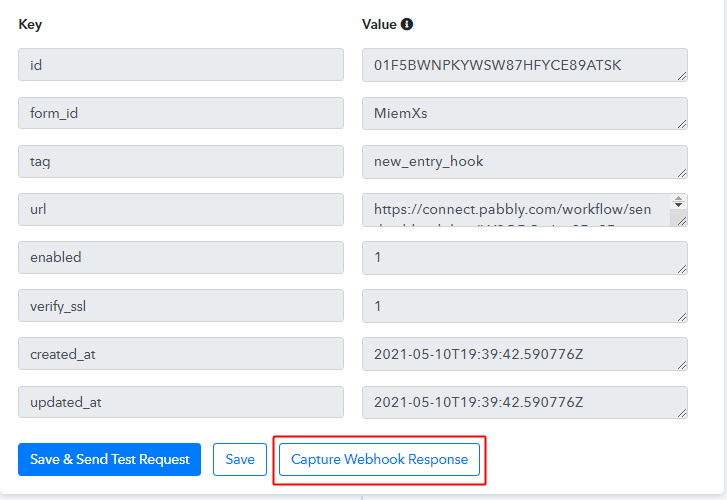
(a) Capture Webhook Response
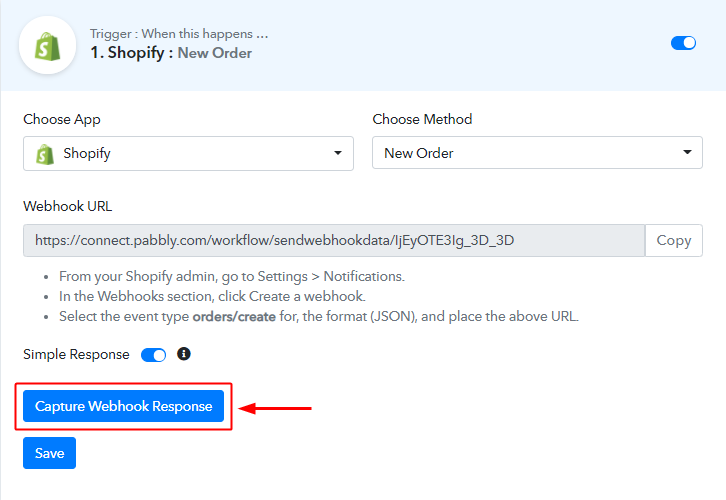
The first thing to do is, click on the ‘Capture Webhook Response’ button available in the Pabbly Connect trigger window.
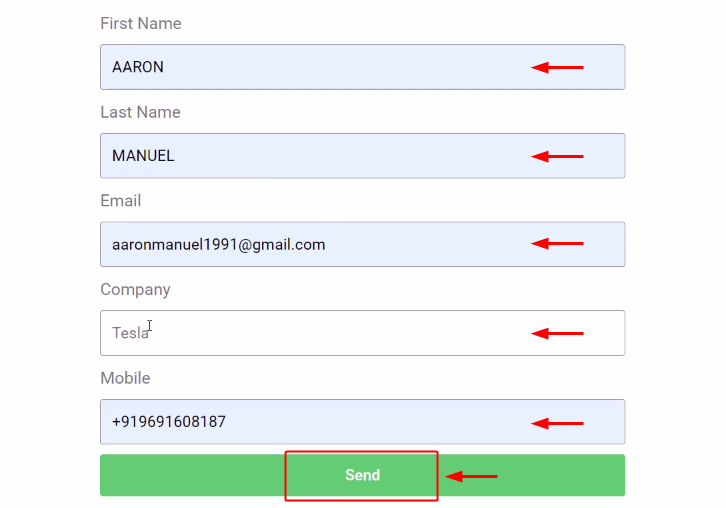
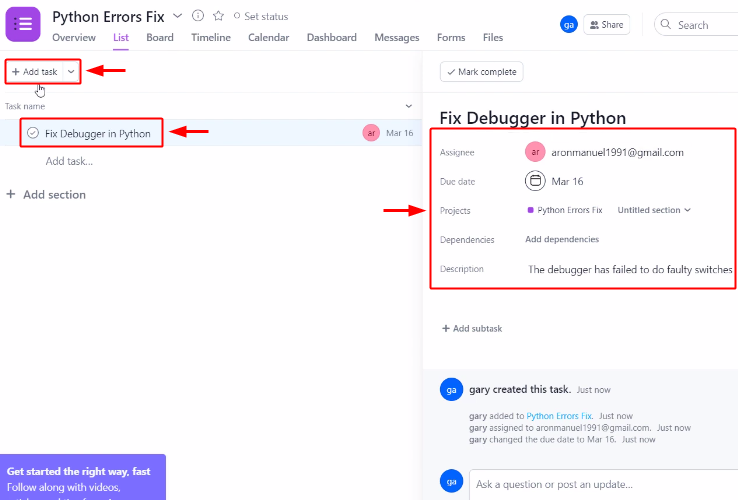
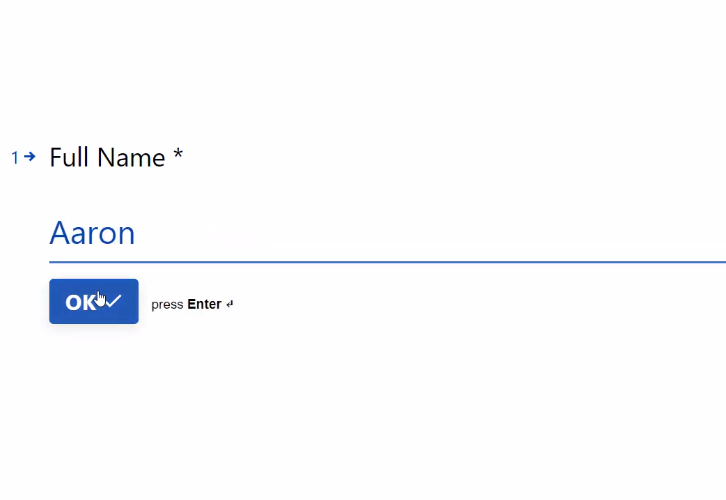
(b) Place an Order on Your Shopify Store
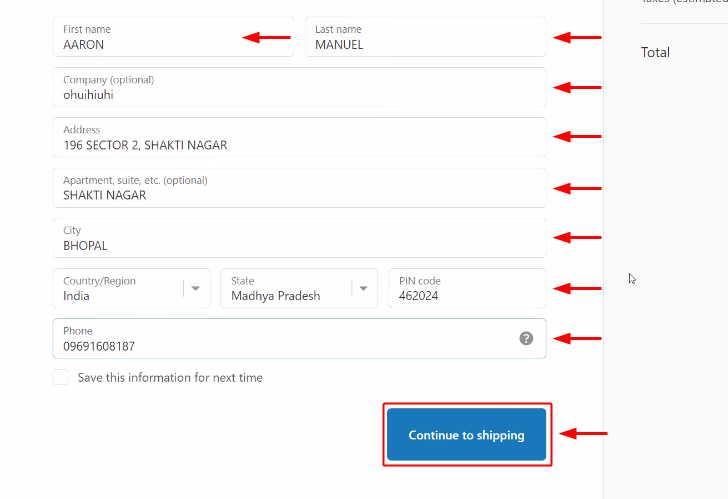
Now, go back to the Shopify store and make a test order for any product. Remember to complete the order until your order is confirmed.
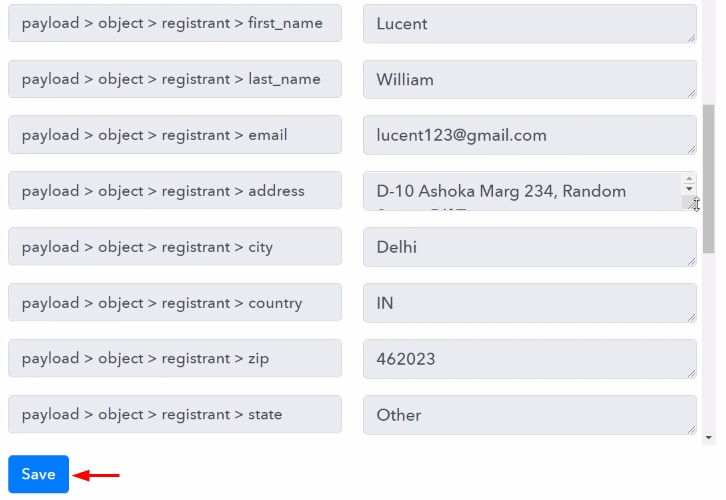
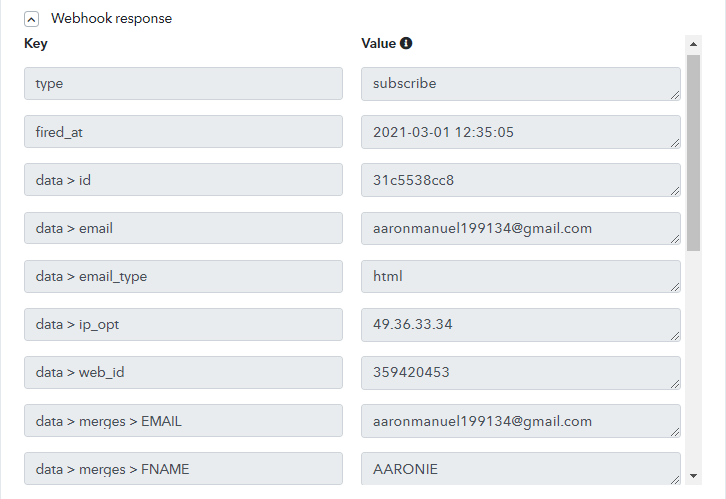
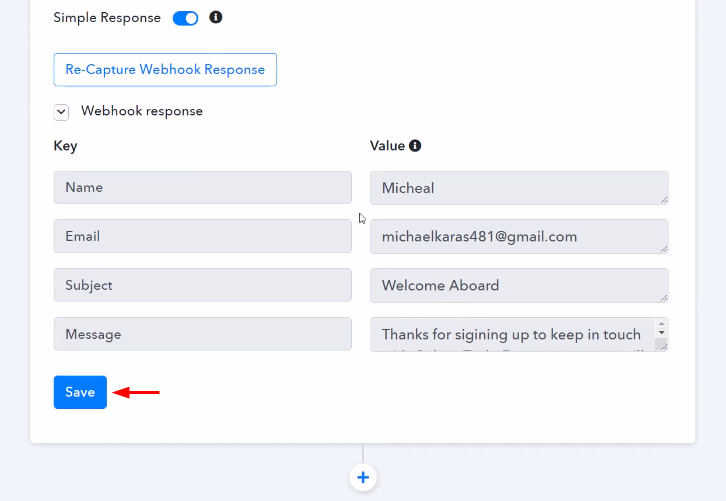
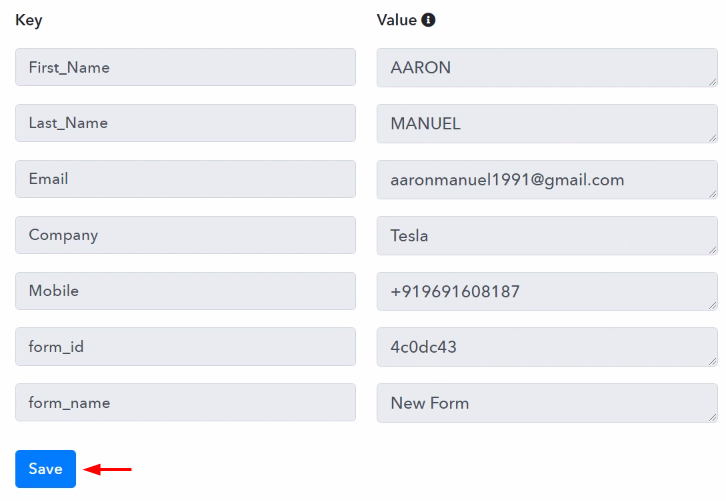
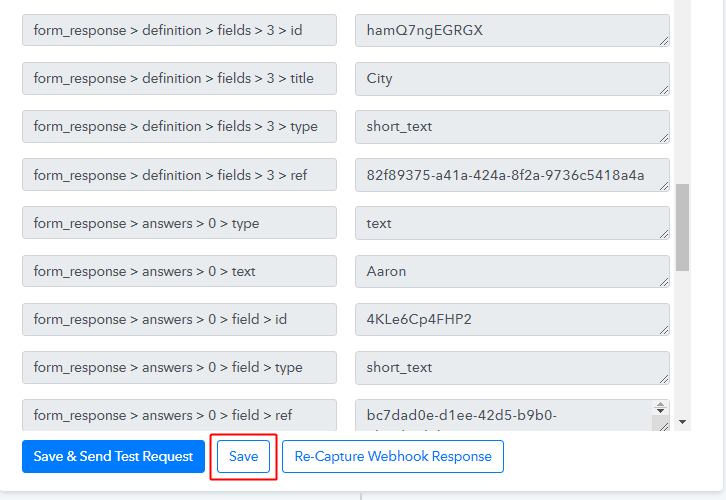
(c) Check and Save the Trigger API Response
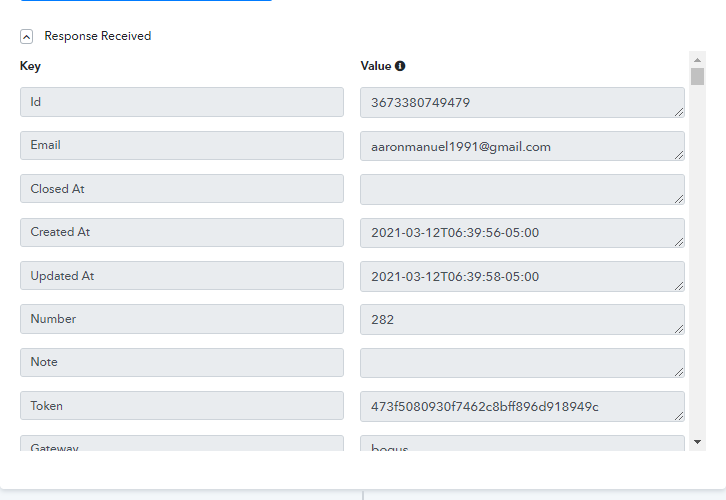
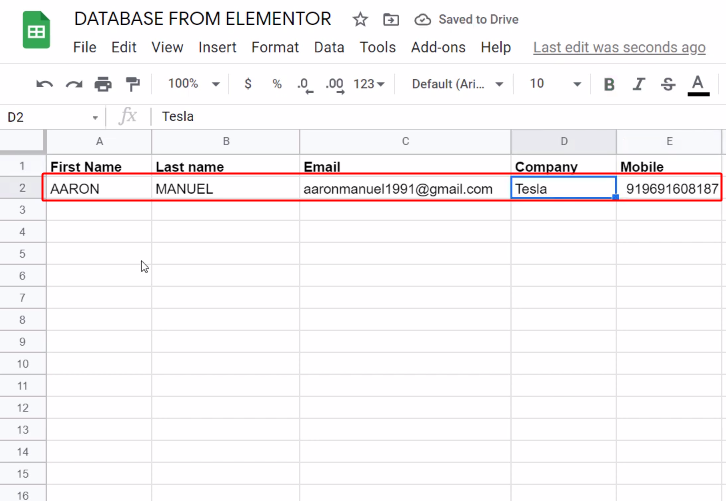
Check the Shopify trigger API response for the entered order entries.
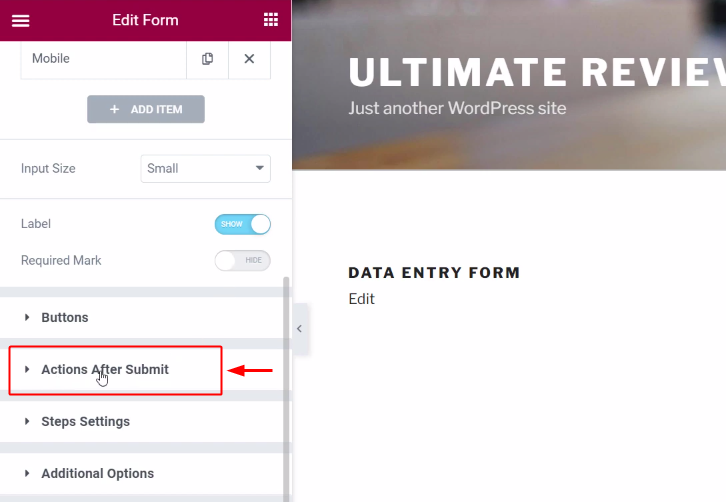
Step 7: Setting Action for Shopify to Telegram Integration
Now, we have gathered the Shopify order data. So, let’s perform the Telegram action step. After that, a message will be delivered automatically whenever a new order is made.
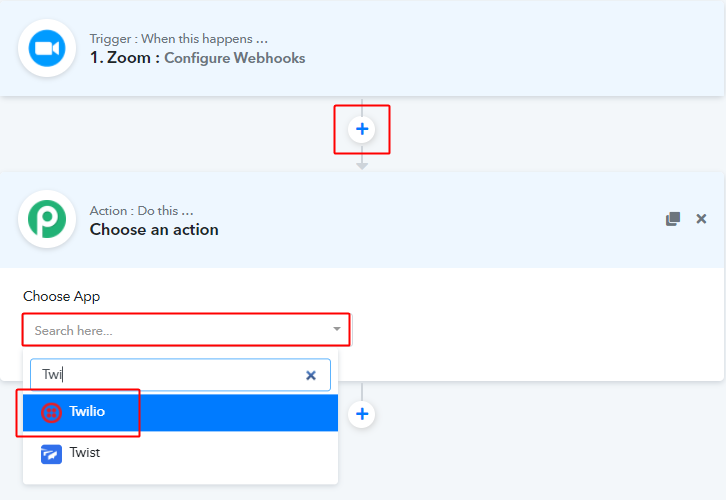
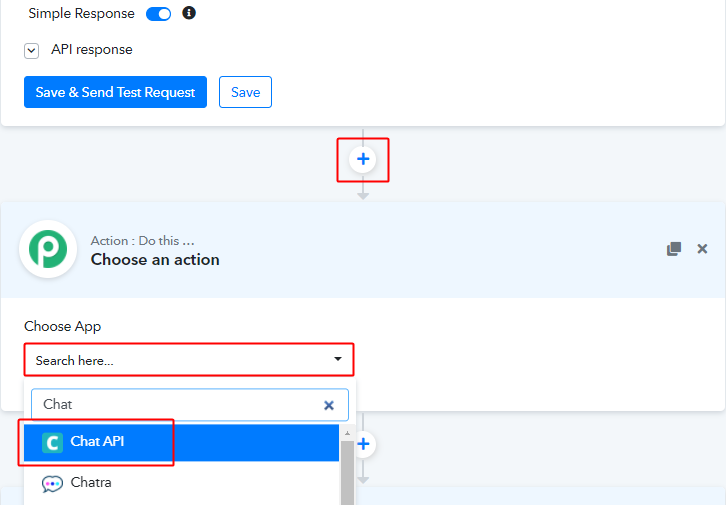
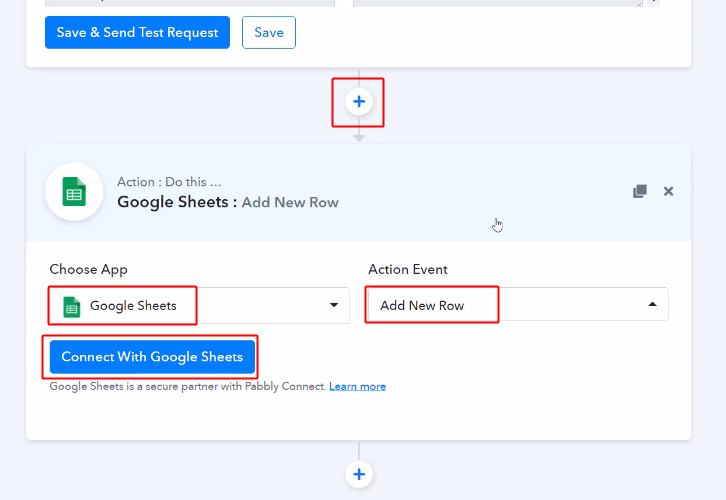
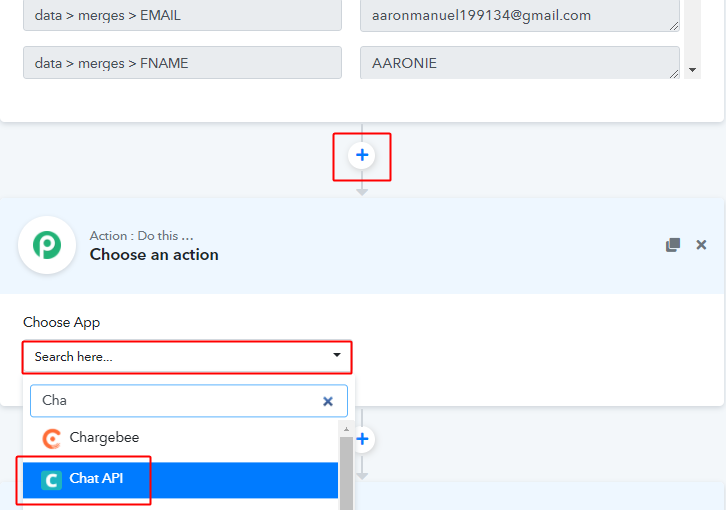
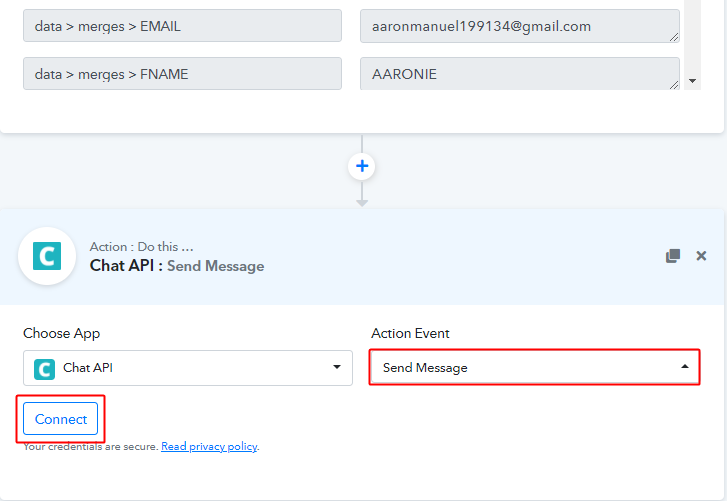
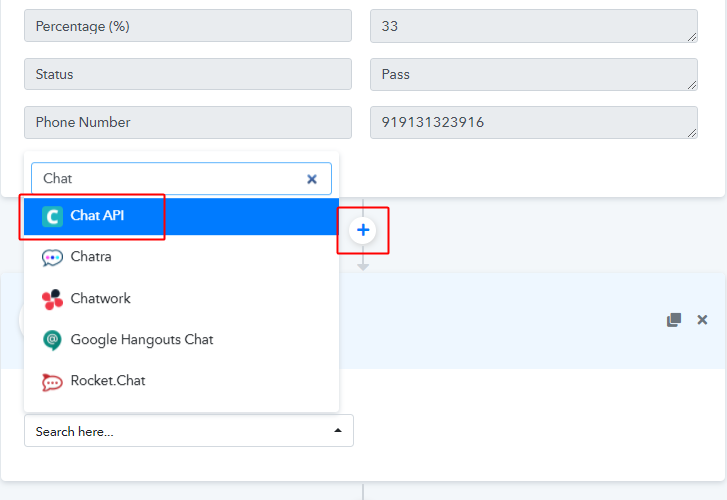
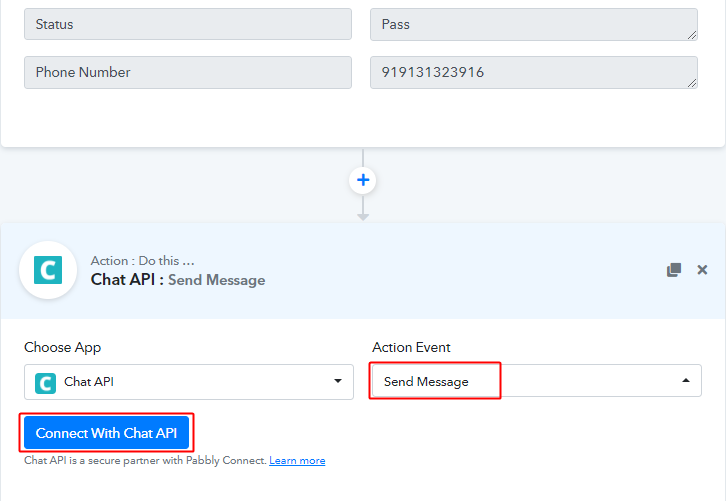
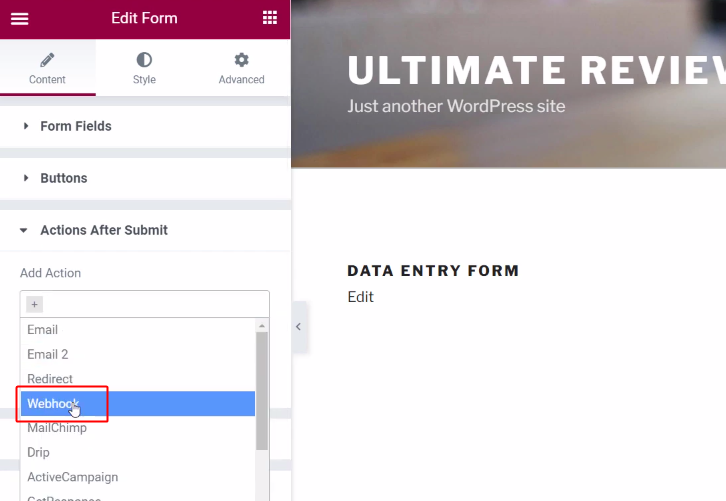
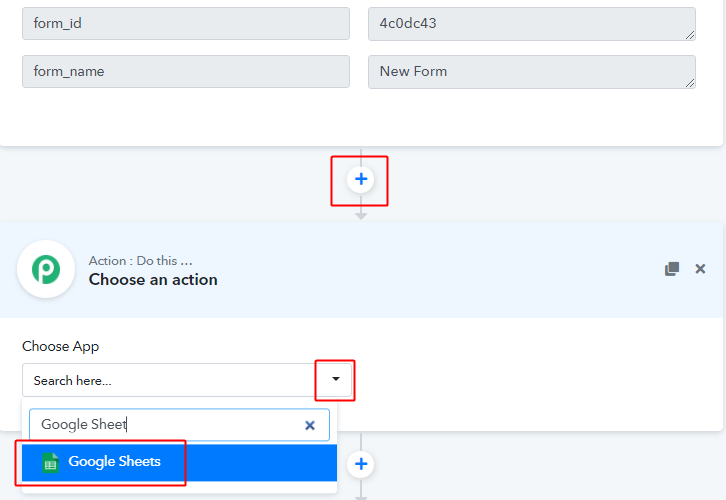
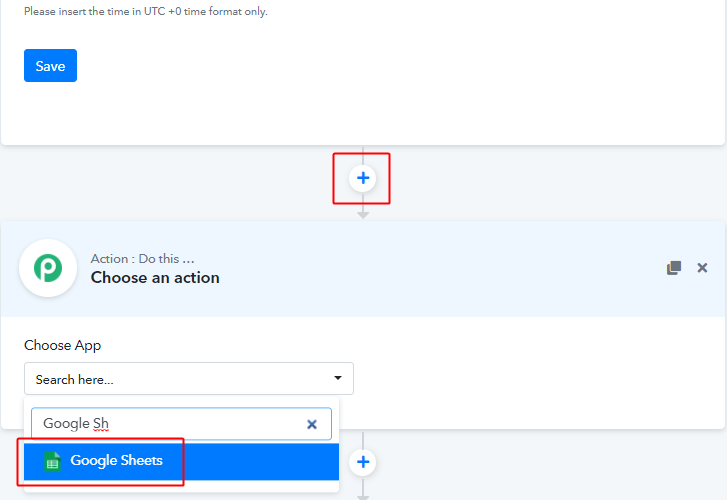
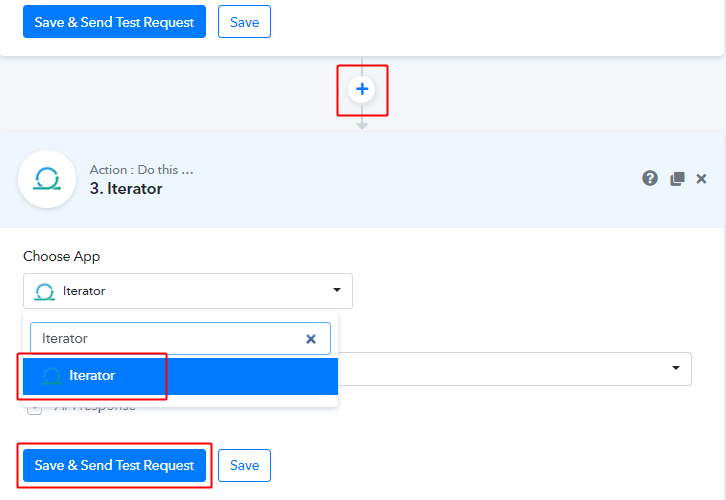
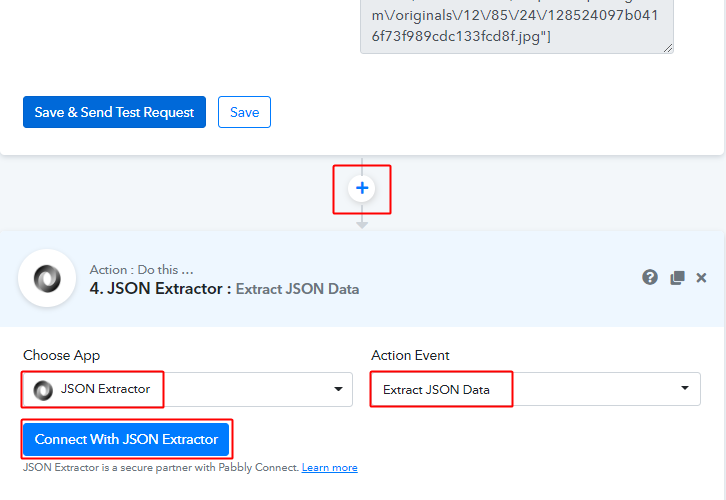
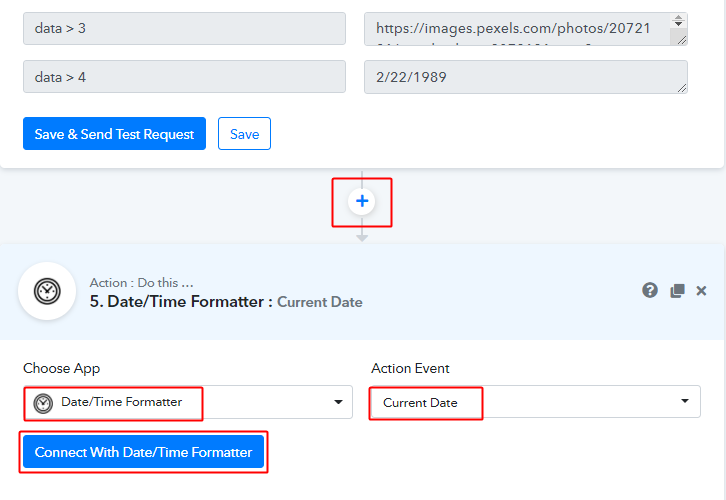
(a) Select Application you want to Integrate
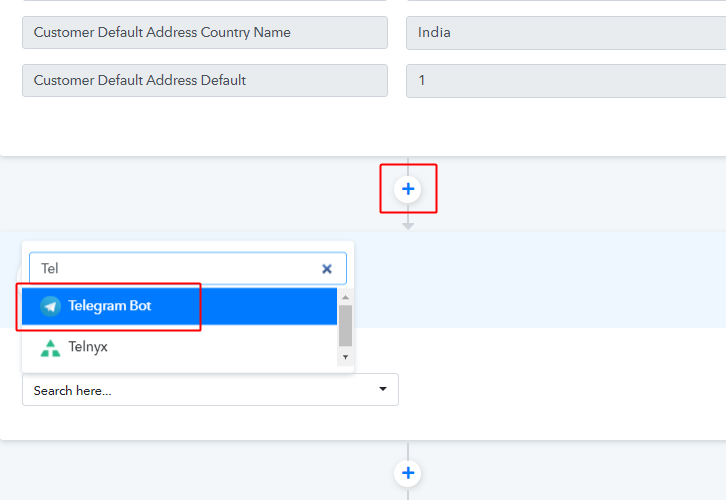
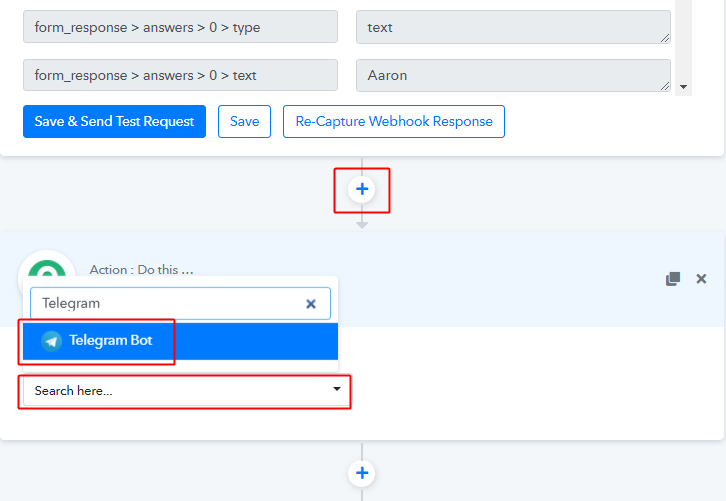
Click on the plus button available next to your Shopify trigger window.
Select the app to integrate as ‘Telegram Bot’.
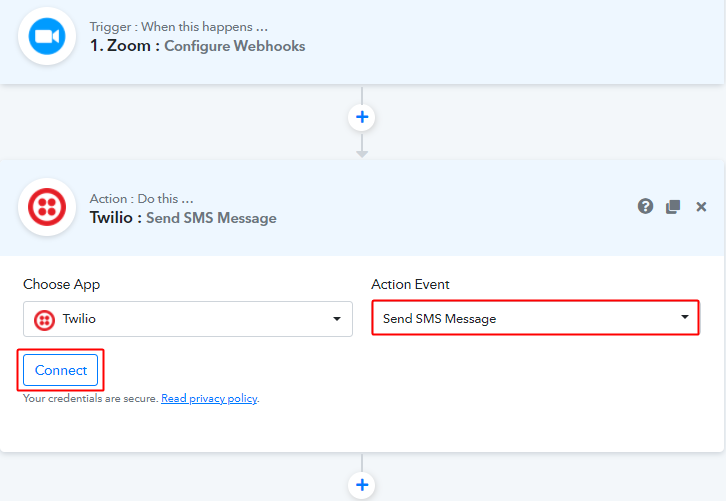
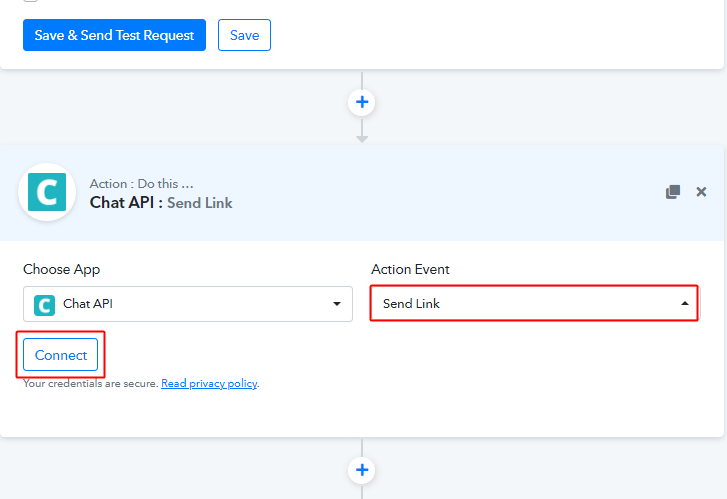
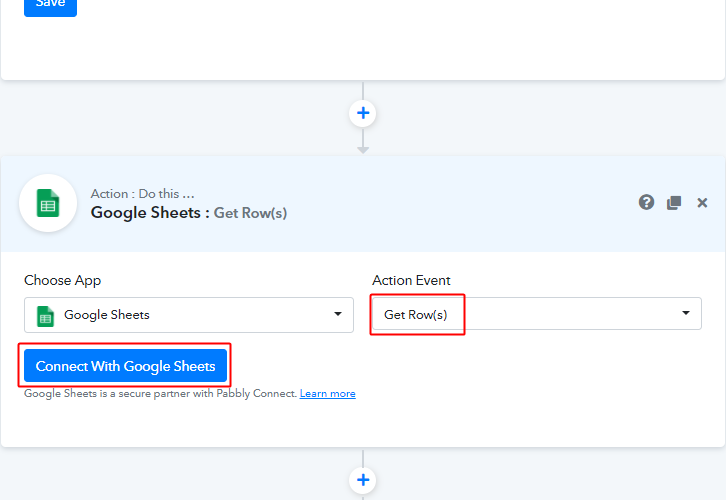
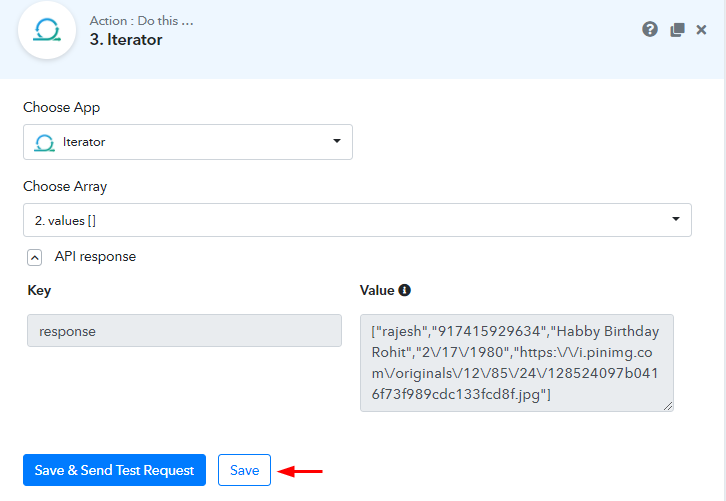
(b) Select Event & Connect with Telegram
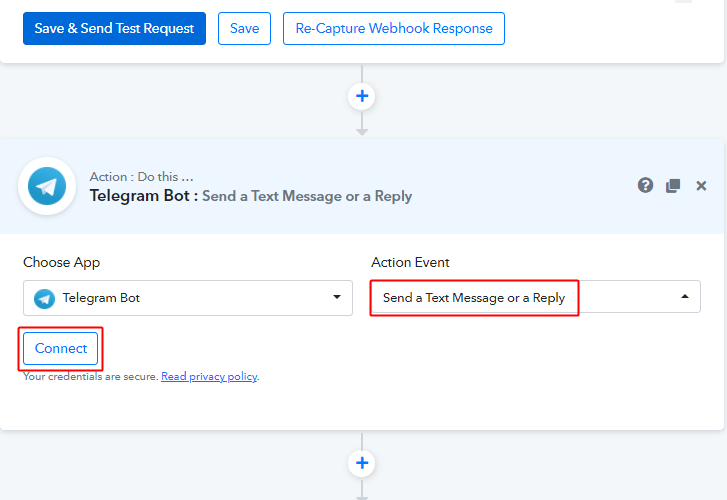
Next, select the action event as ‘Send a Text Message or a Reply’.
Lastly, click the ‘Connect’ button.
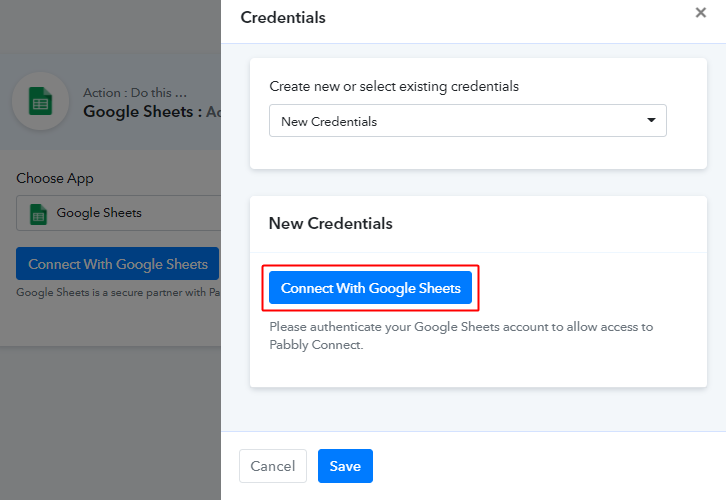
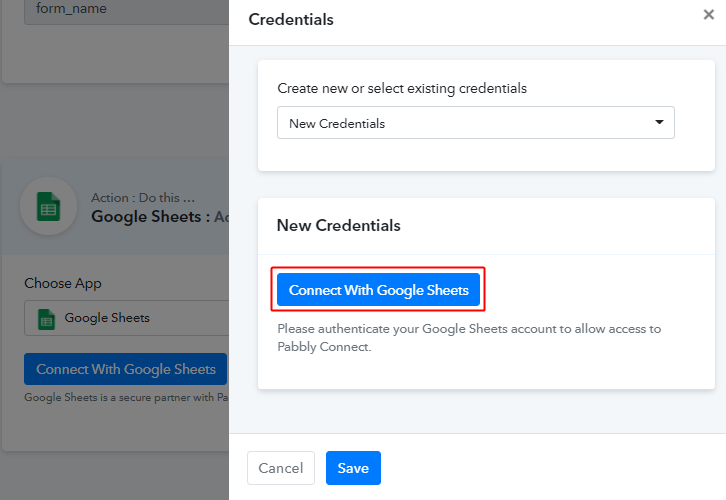
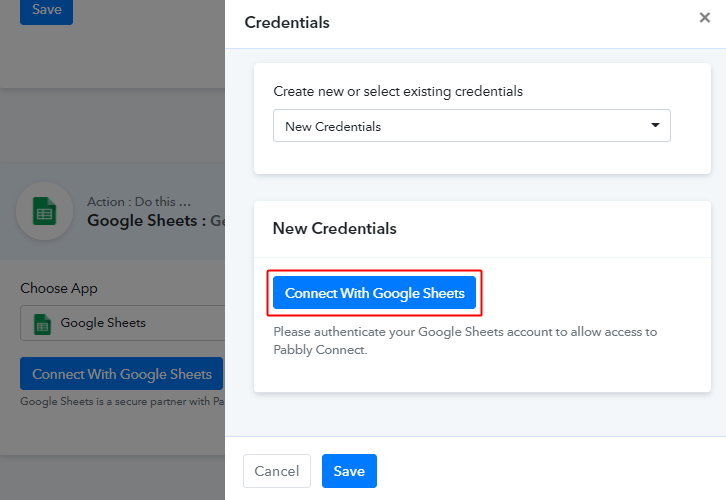
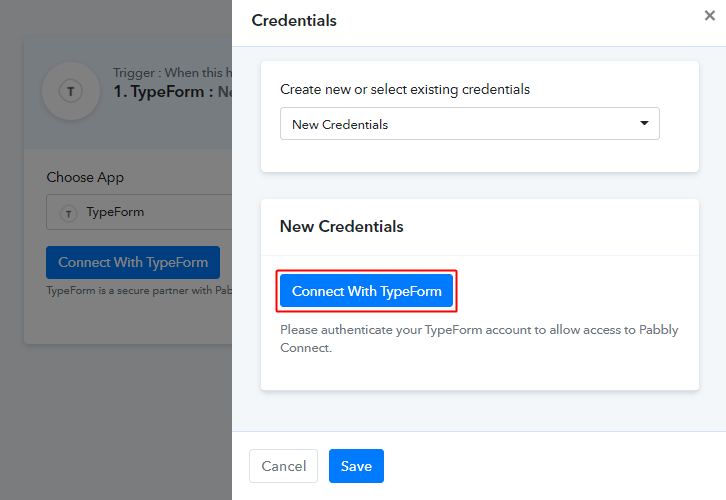
Step 8: Connecting Telegram to Pabbly Connect
Our next step is to establish a connection between Telegram and Pabbly Connect. For this first, sign in to your Telegram account.
(a) Click on the BotFather Link
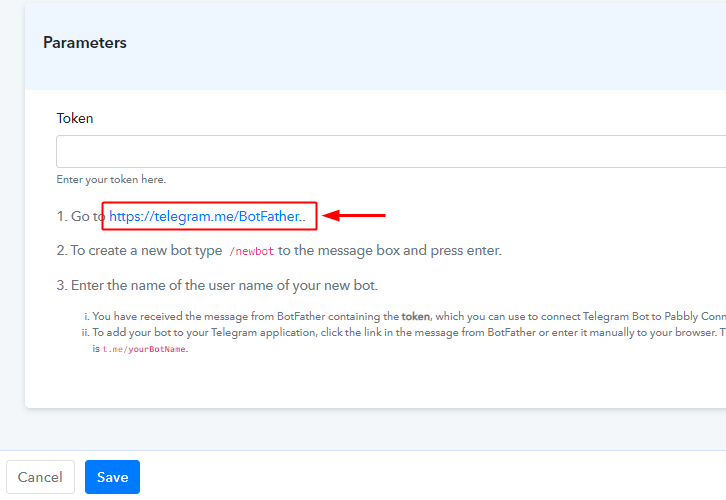
In the connection window that slides in from the right, click on the given BotFather link. You can also type ‘BotFather’ in your Telegram App search to access BotFather.
(b) Click Start on BotFather Chat
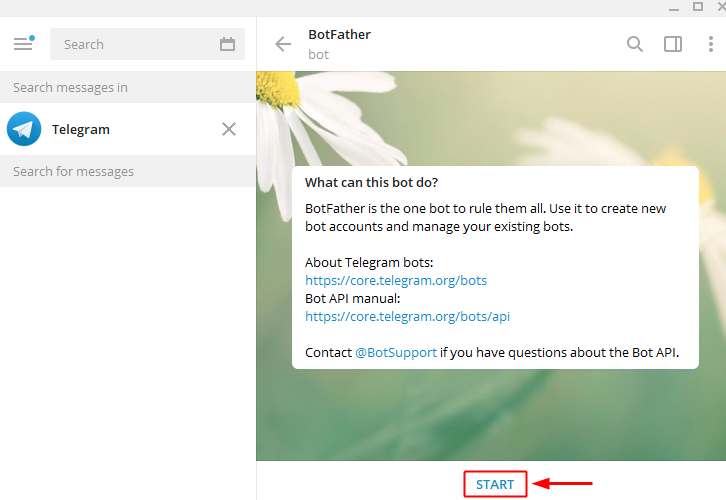
Next, in the BotFather chat window, click the ‘START’ button.
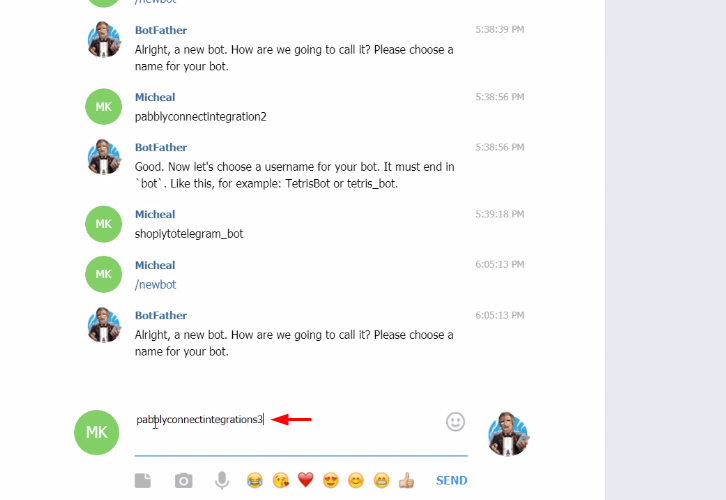
(c) Create a New Bot
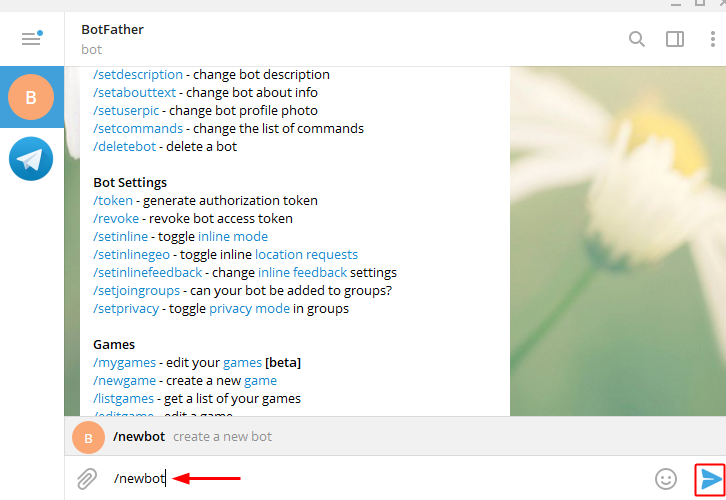
Create a new bot by typing ‘/newbot’ command and then hit enter or click on the send icon.
(d) Name Your Created Bot
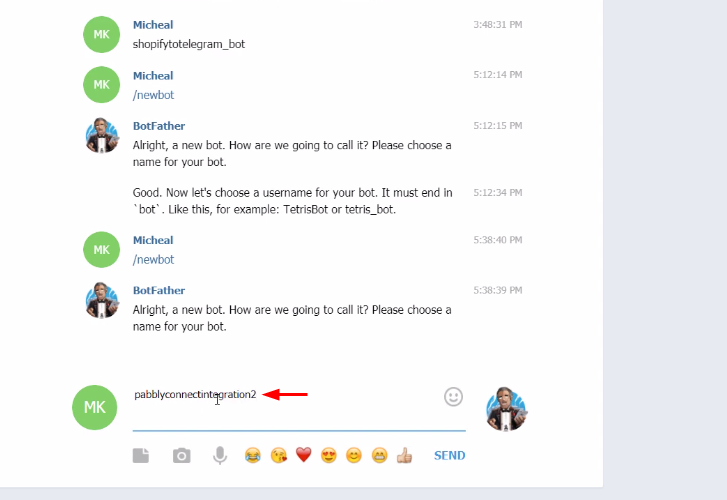
Next, it’ll ask you for a bot name. So, type a bot name that you want to assign to the recently created bot & then click ‘Send’.
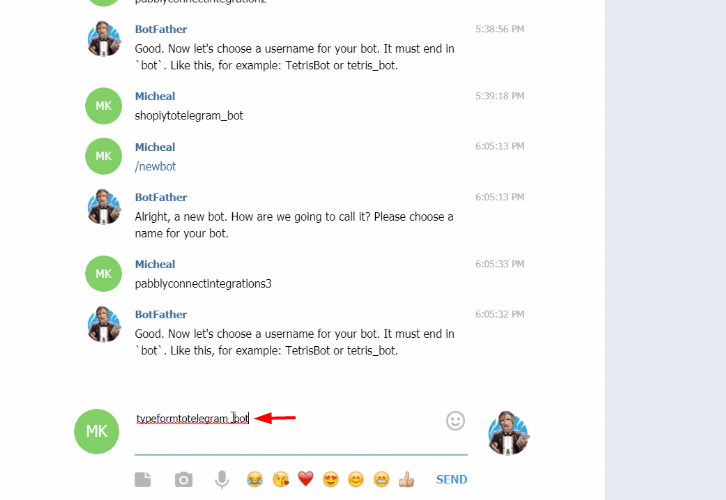
(e) Enter a Bot Username
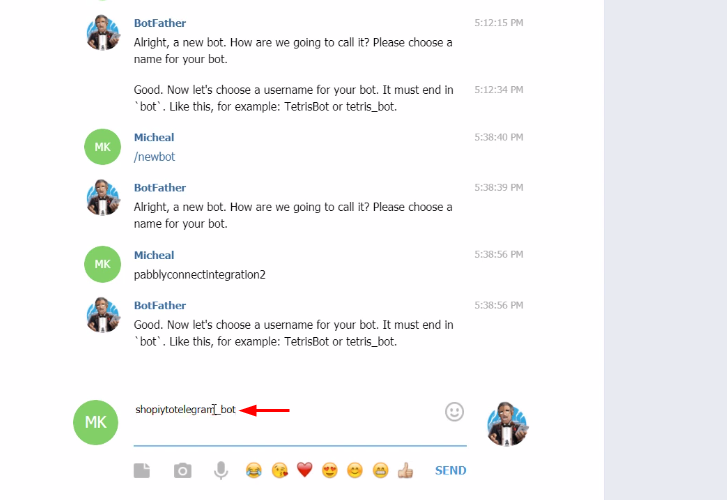
Lastly, enter a username for the created bot. The username must end with the suffix ‘bot’.
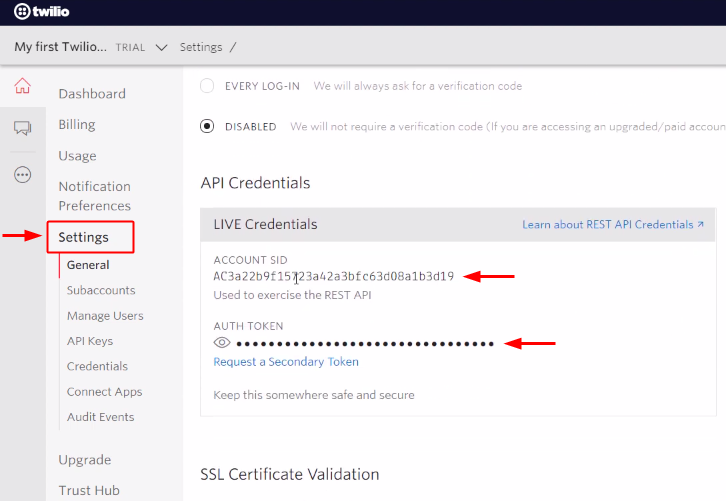
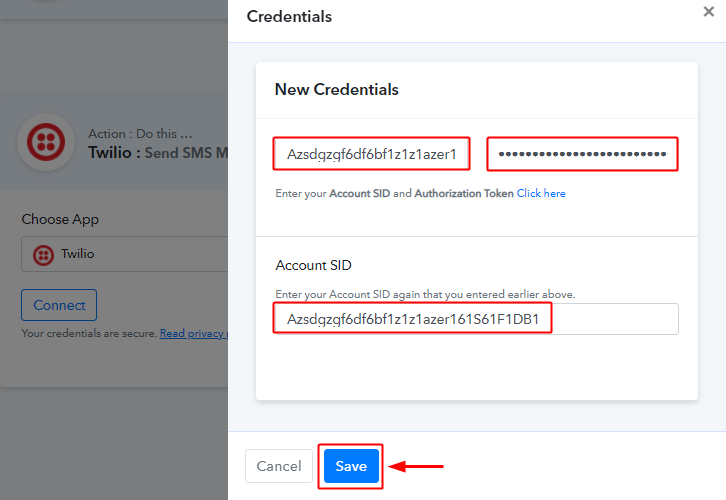
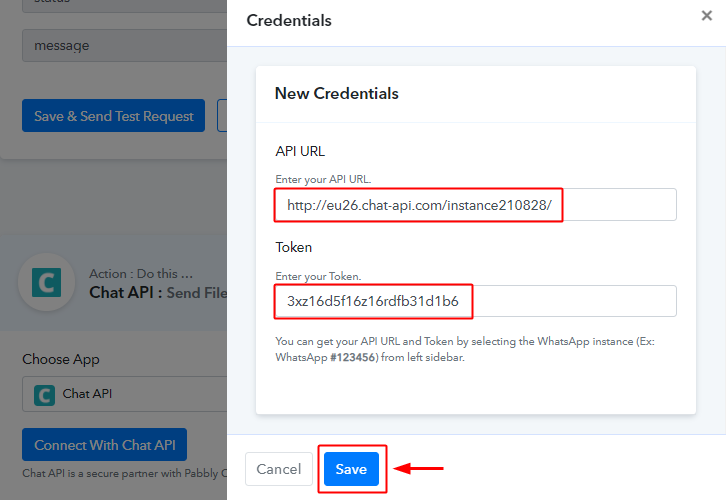
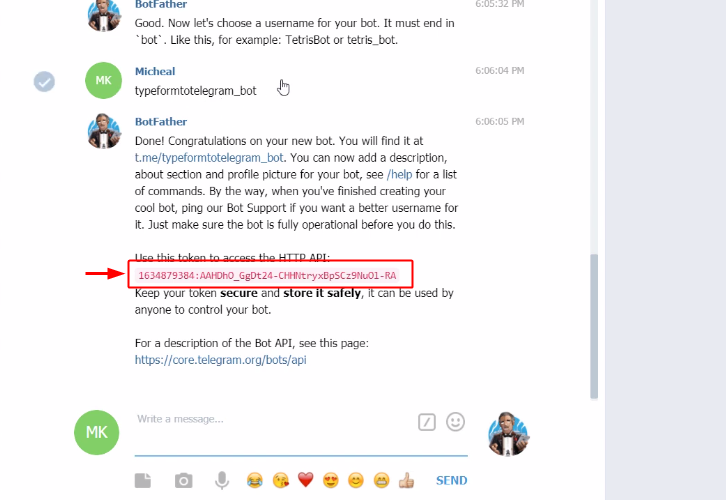
(f) Copy the Token
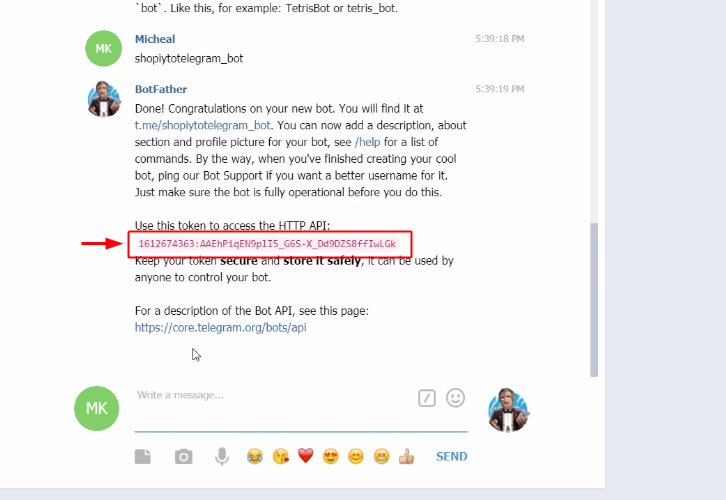
You’ll get a token for the created bot, simply select & copy the token.
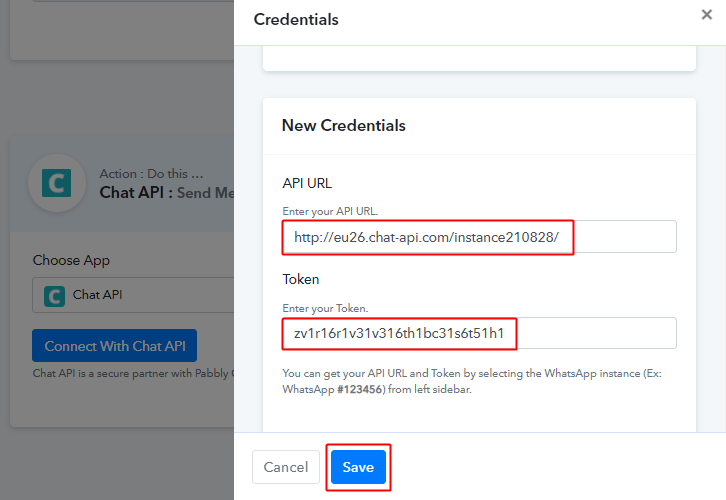
(g) Paste the Token
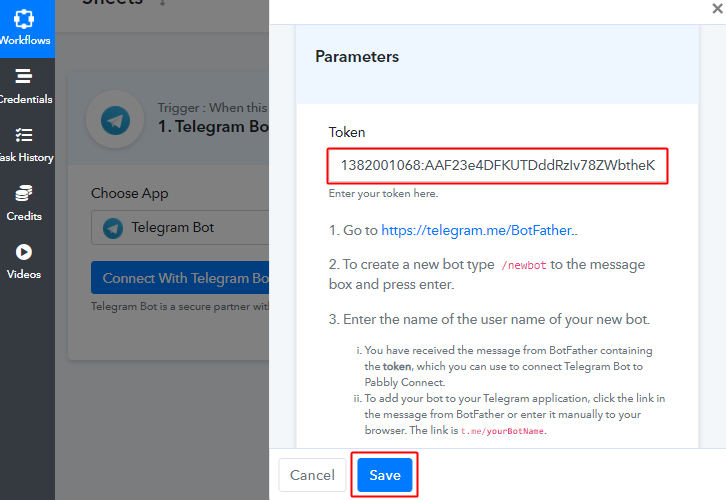
Paste the copied token in the Pabbly Connect connection window and then click ‘Save’.
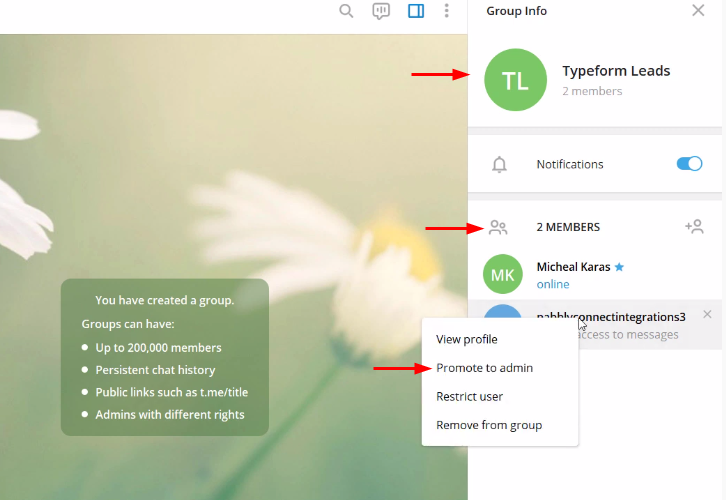
(h) Create Telegram Group
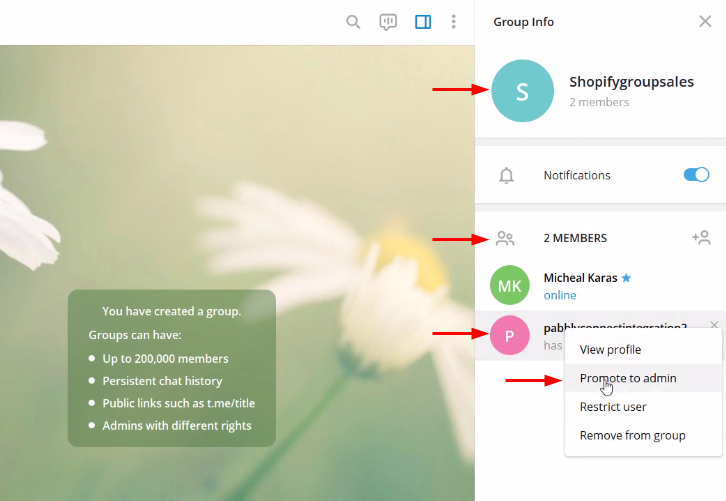
Now, create a group on your Telegram account and add members as well as the created bot to the group. Lastly, promote the bot to admin privilege.
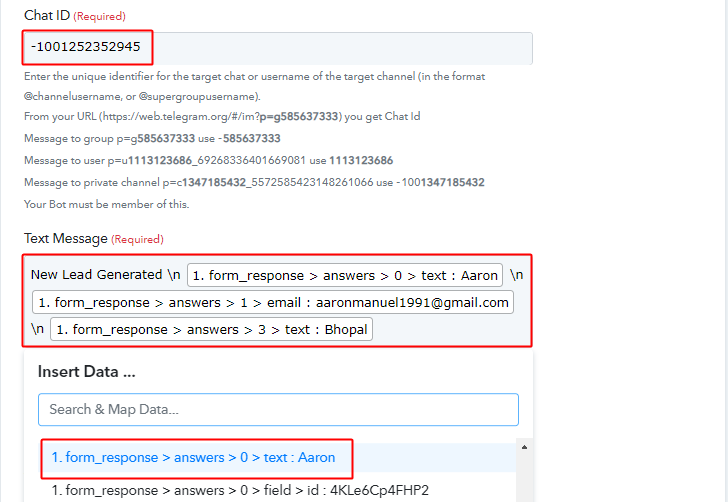
(i) Copy Chat ID
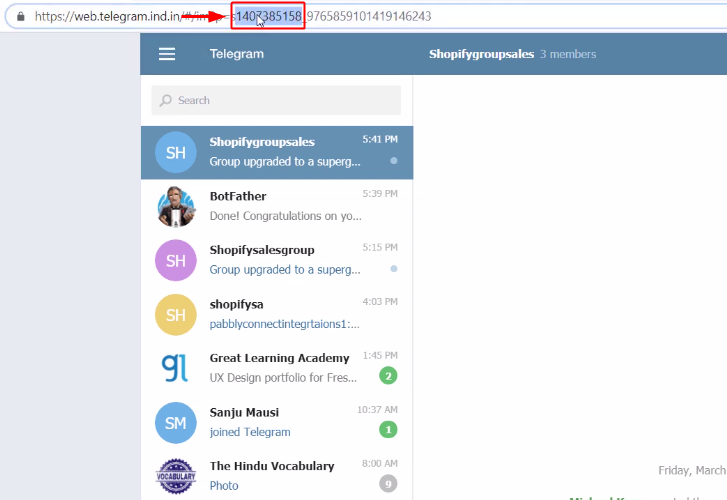
In the URL, the digit sequence after ‘=’ to ‘-‘ is the chat ID. Copy these digits. To know more about the Chat ID, you can read the help text given below the Telegram action ‘Chat ID’ field.
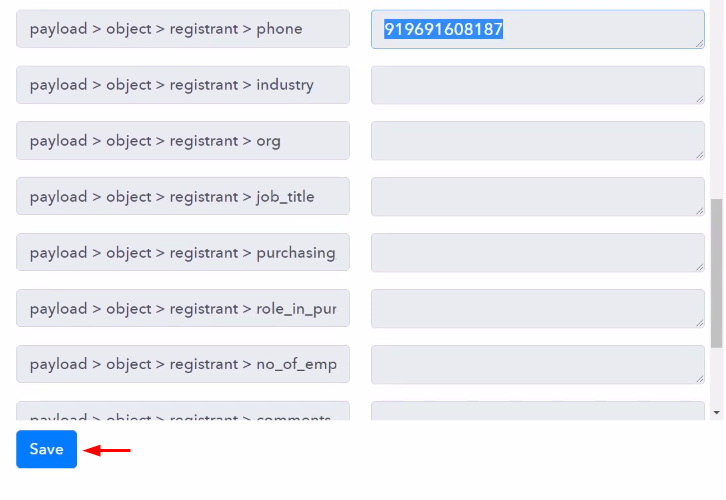
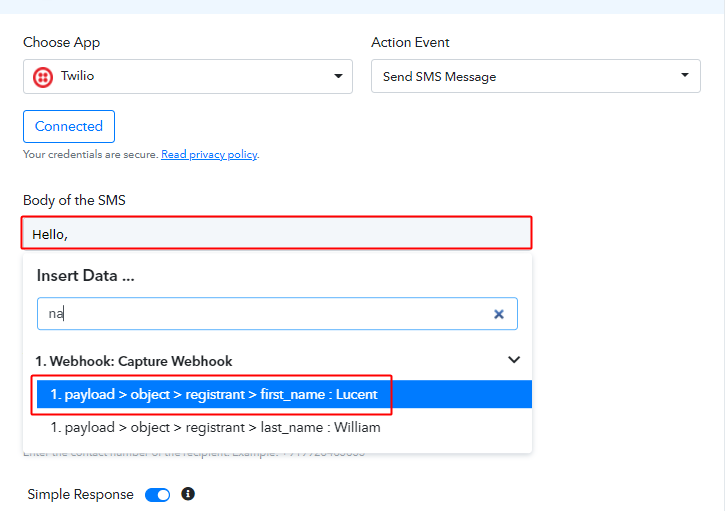
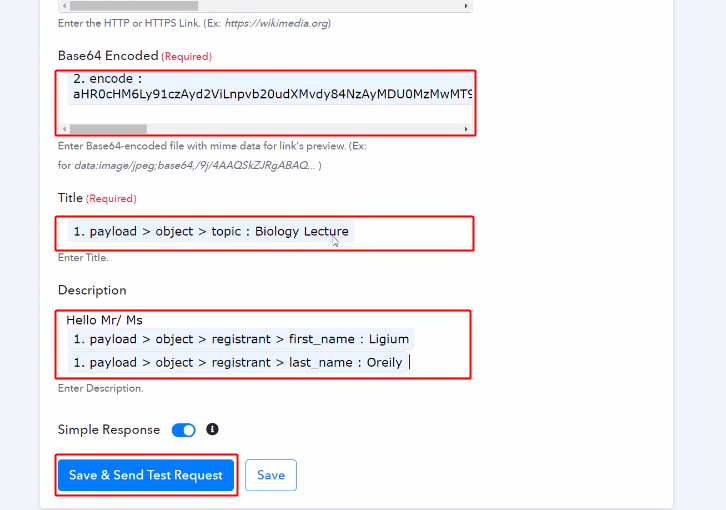
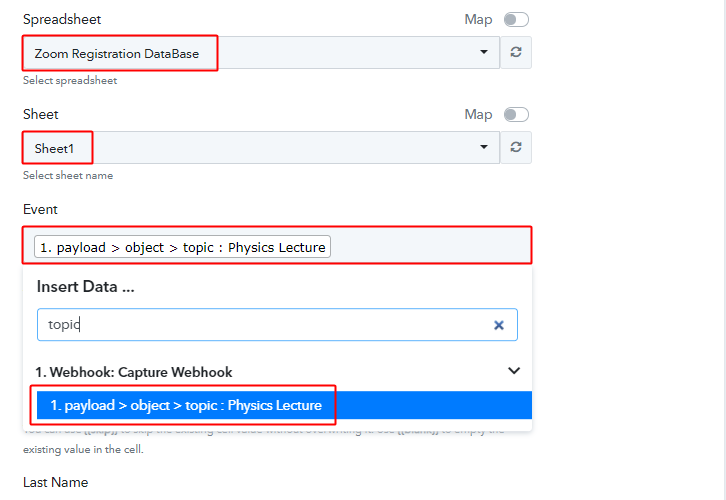
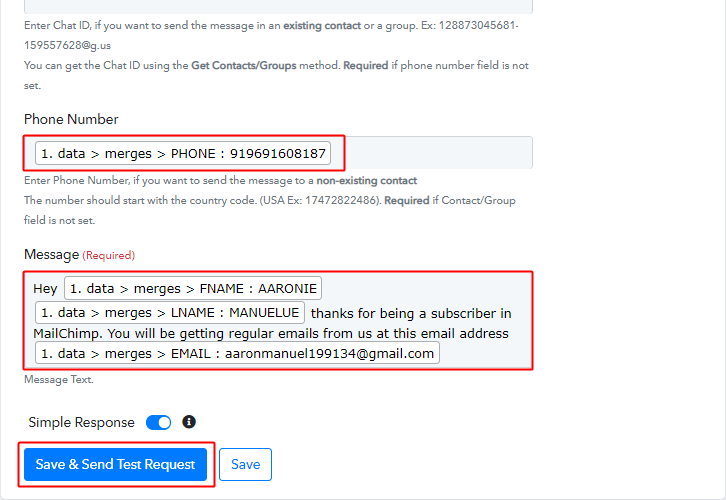
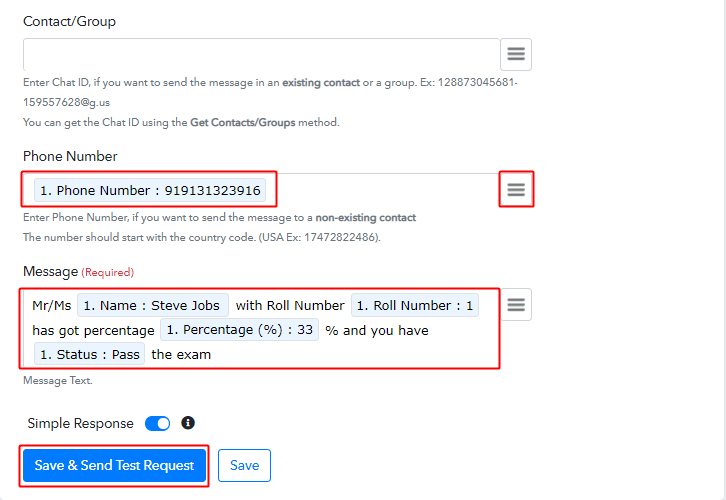
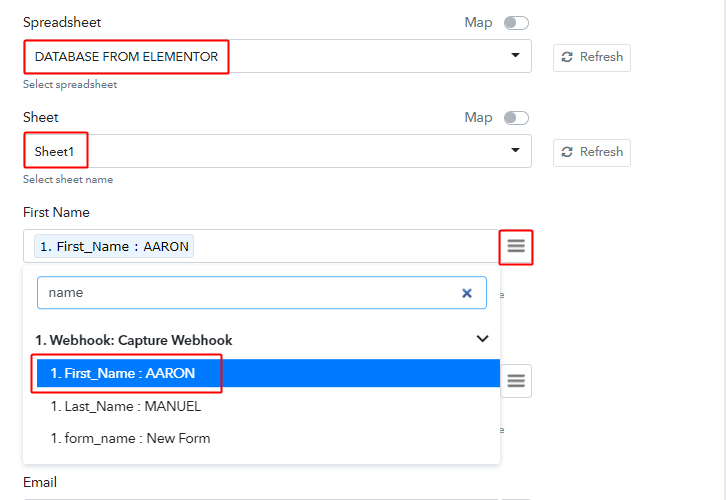
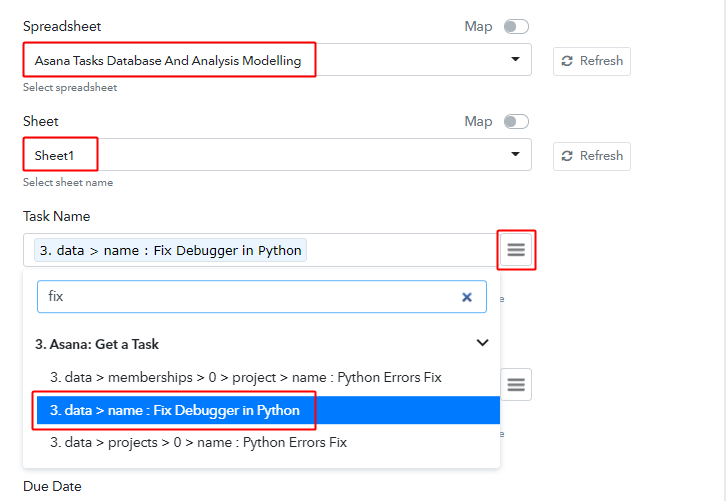
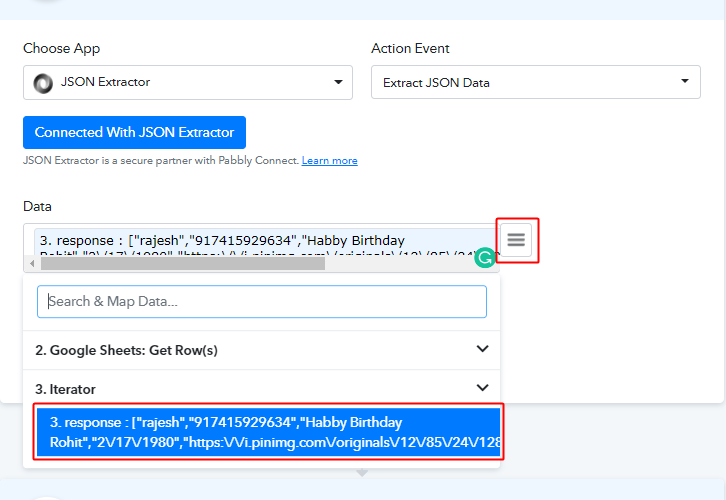
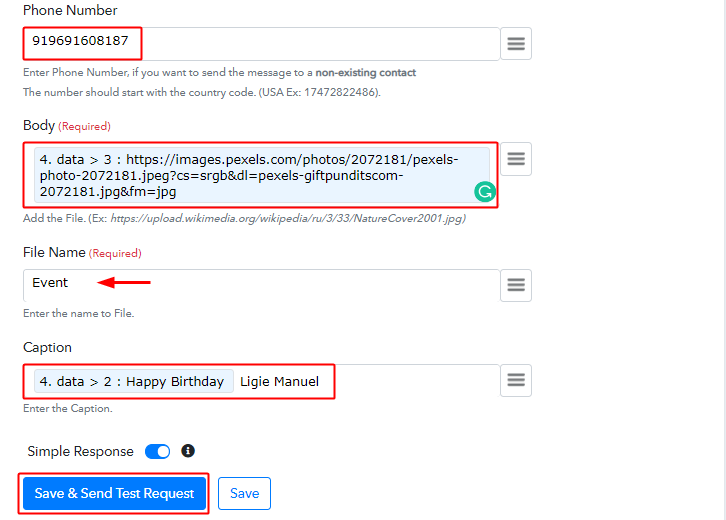
(j) Paste Chat ID & Create Message
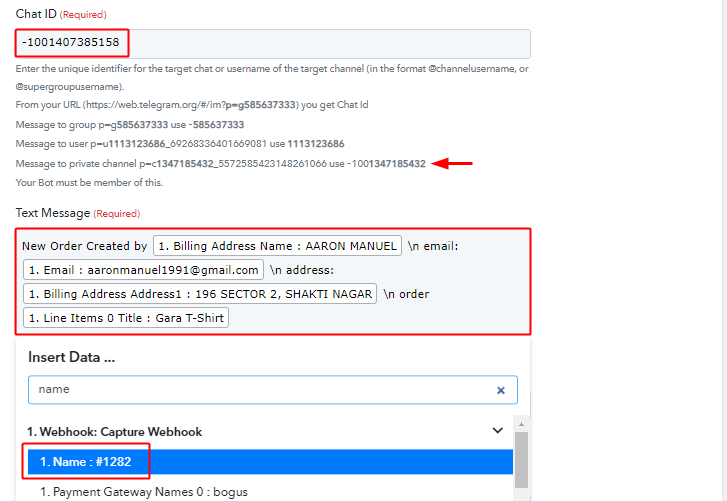
Now, paste the Chat ID with the prefix ‘-100’ for a private channel message.
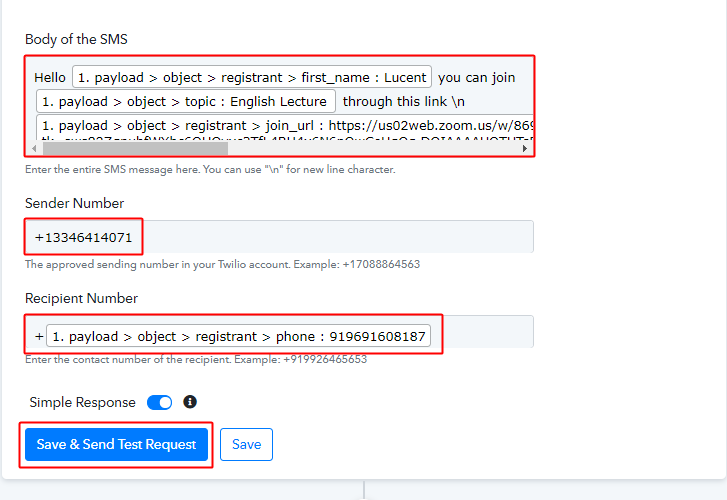
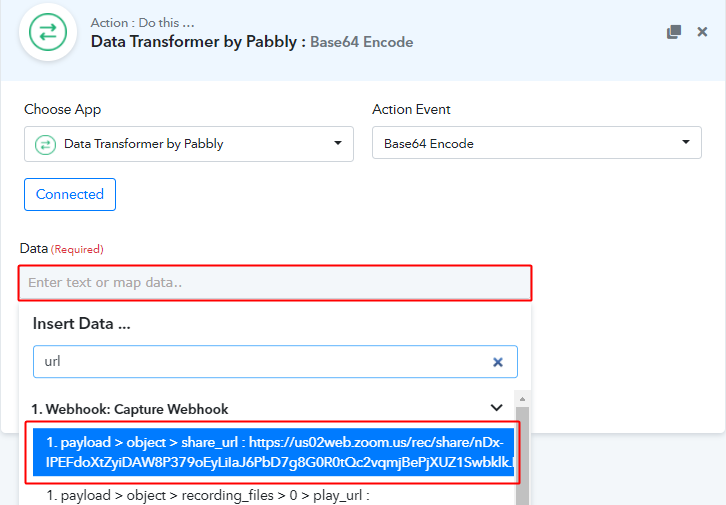
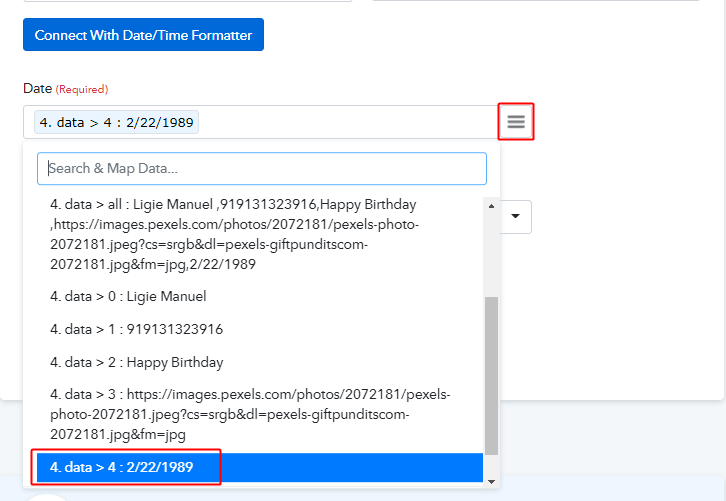
Also, draft a message by combining the trigger response and plain text. To use the response values, simply place your cursor in the ‘Text Message’ field and select the value from the gathered trigger response.
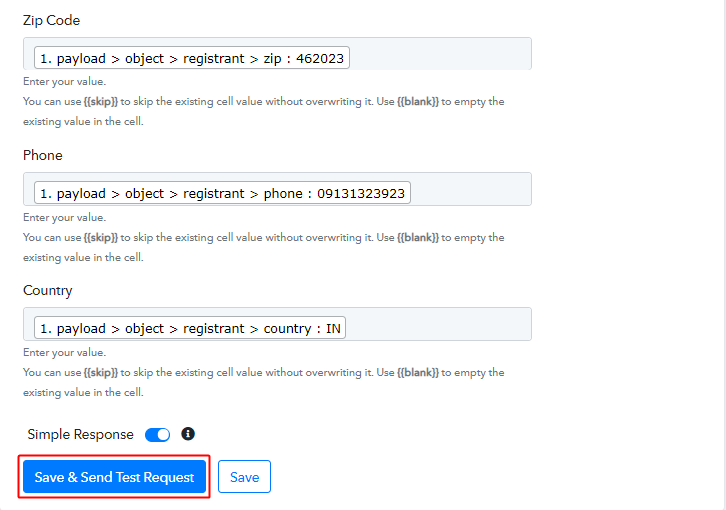
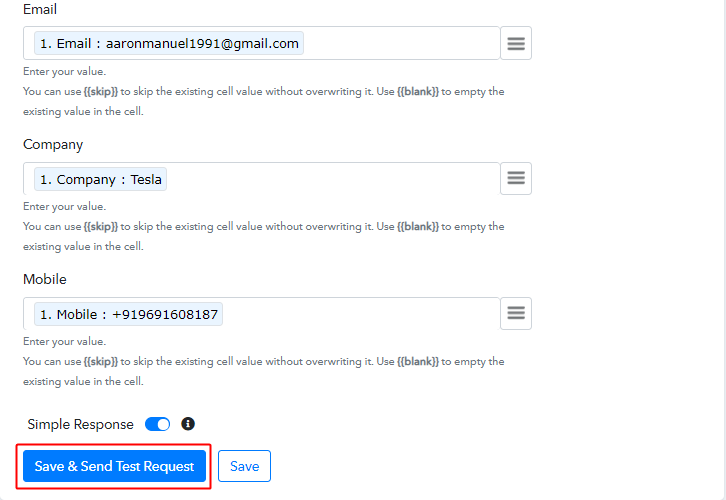
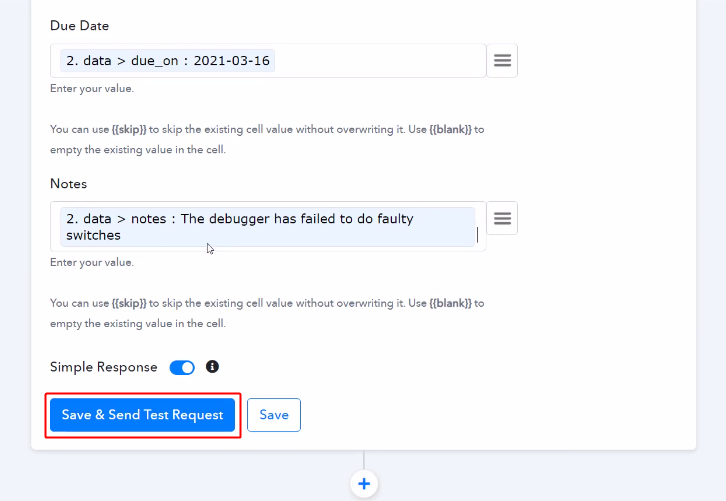
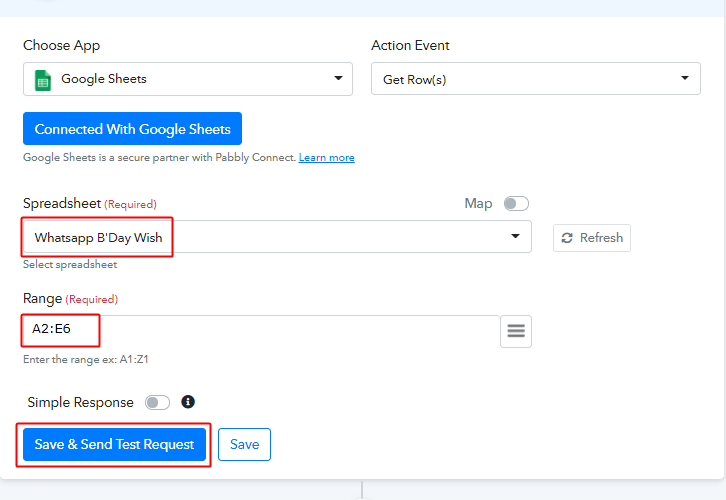
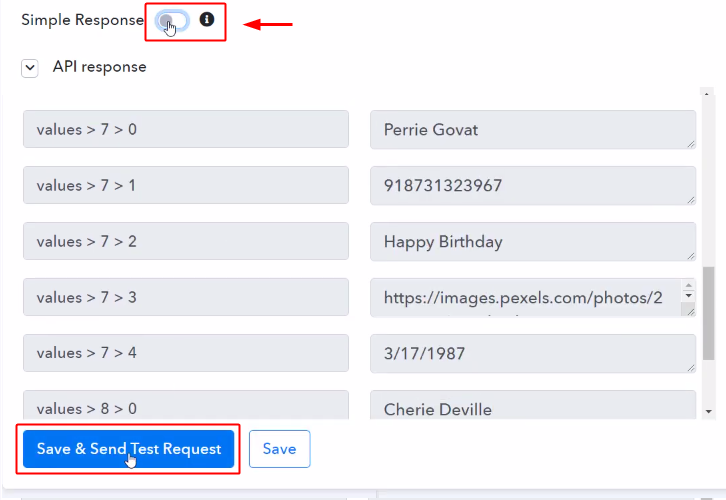
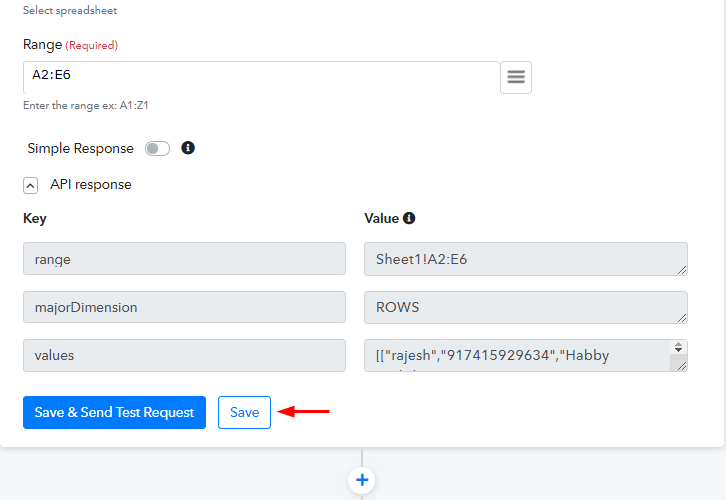
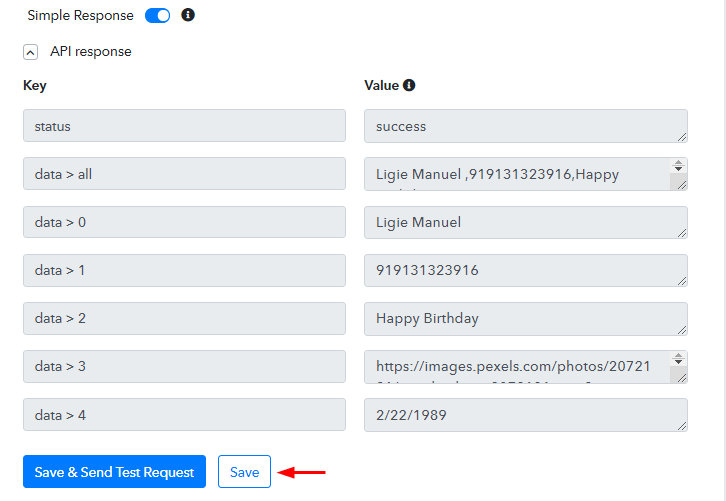
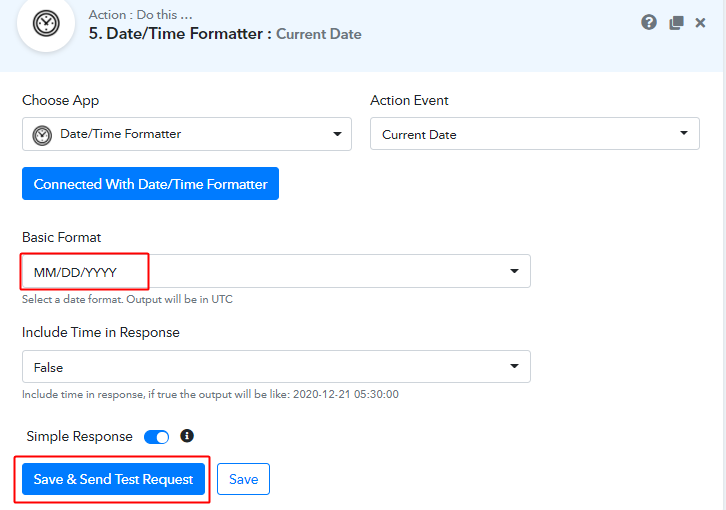
(k) Send Test Request
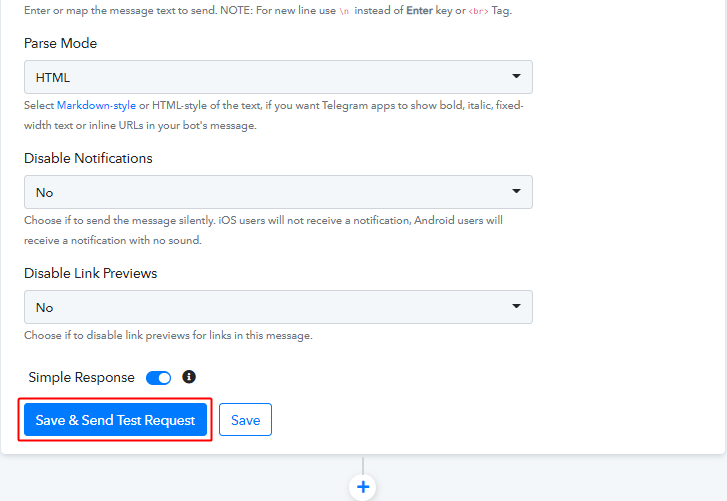
Now, click on ‘Save & Send Test Request’.
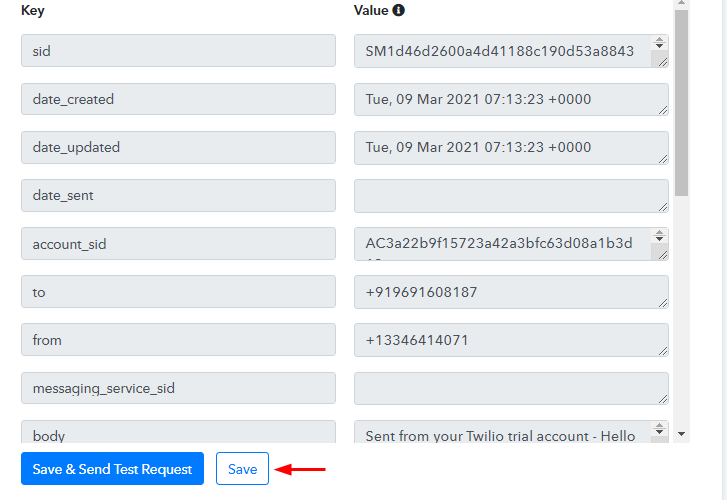
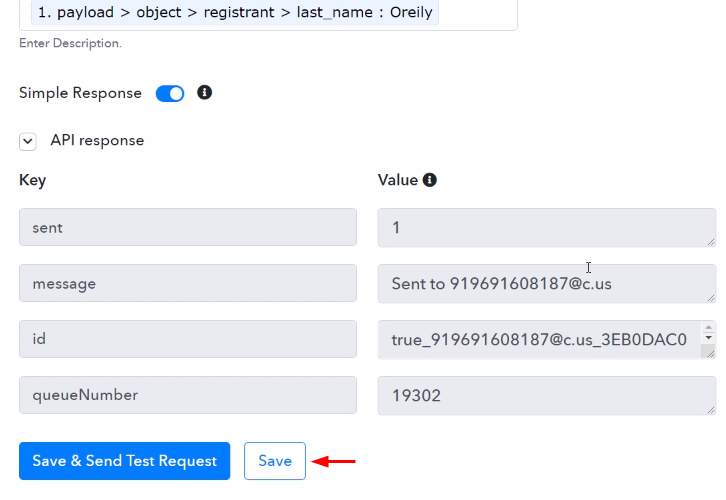
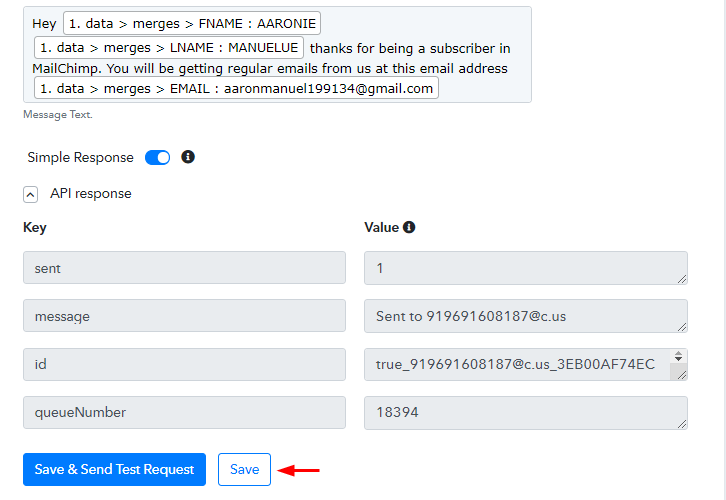
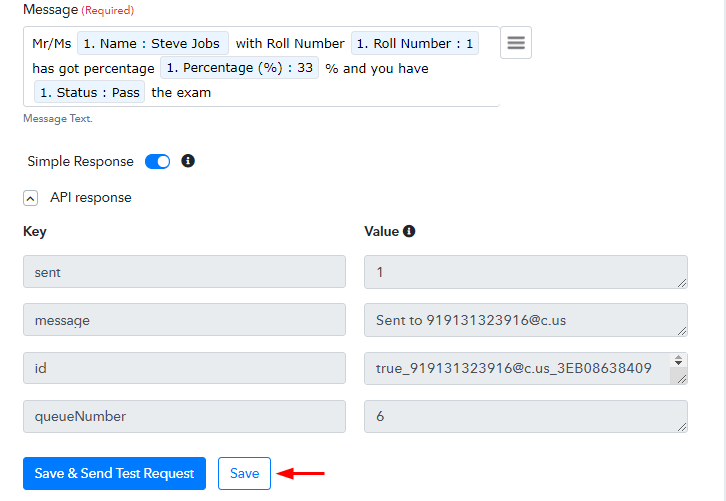
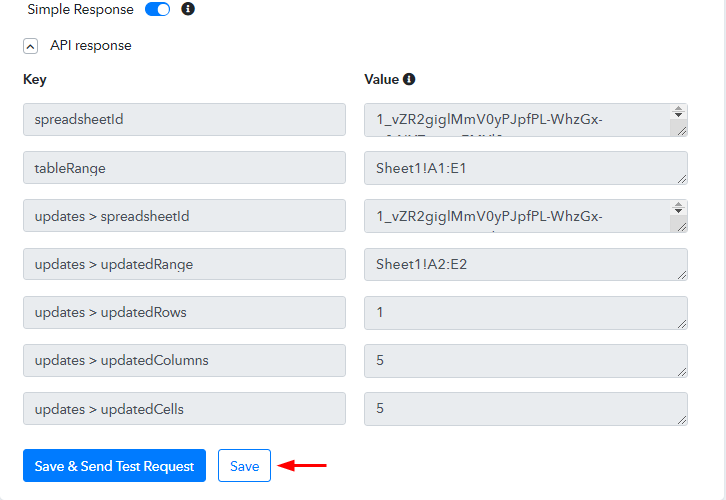
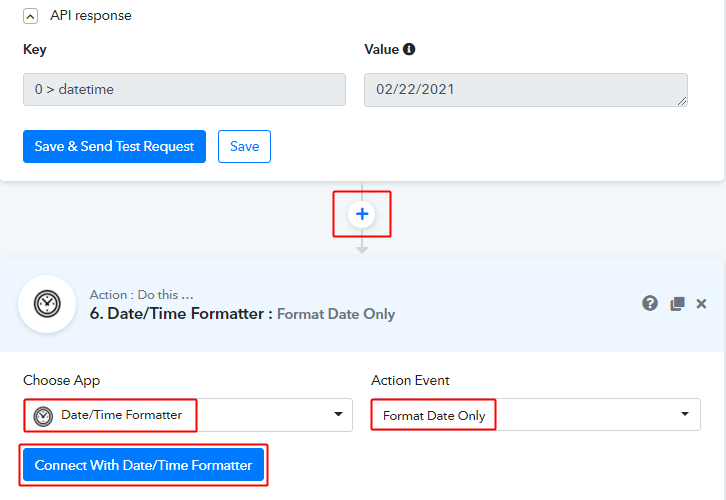
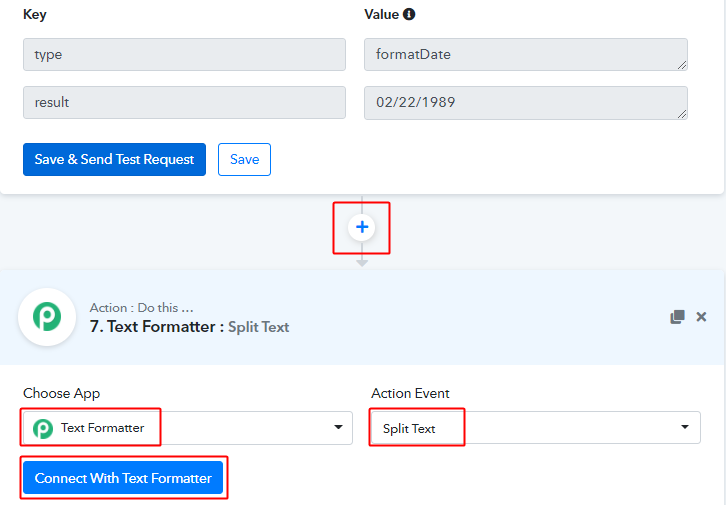
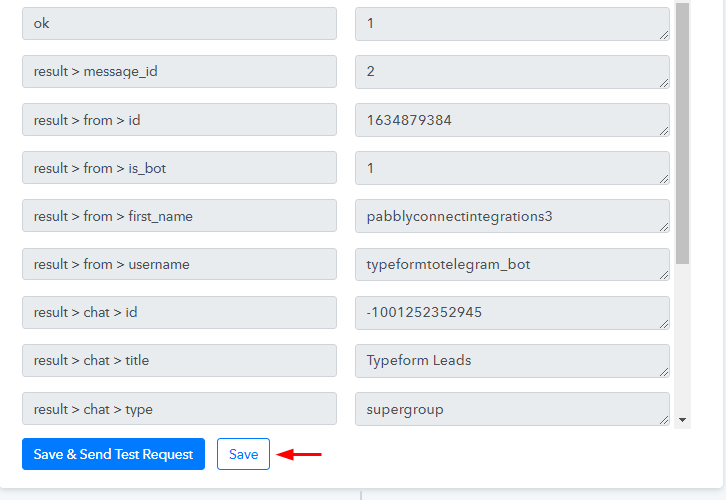
(l) Check & Save the Action Response
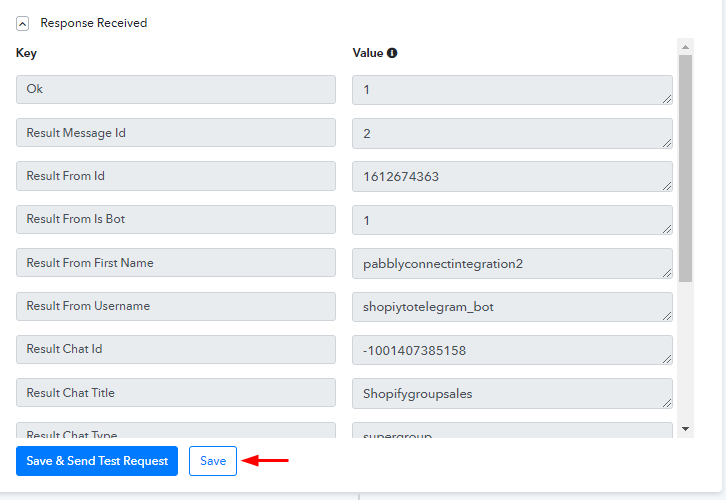
Certainly, you can check the Telegram API response in the action window. And, if there’s been some error while sending the data then the window will start showing you an error. Finally, save the action API’s response.
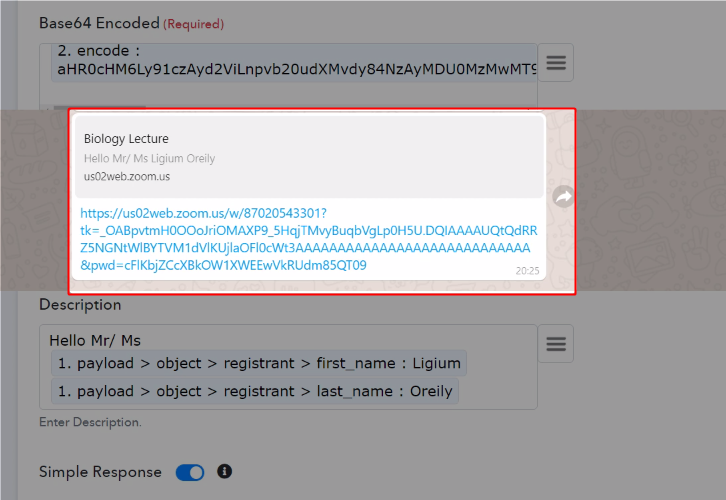
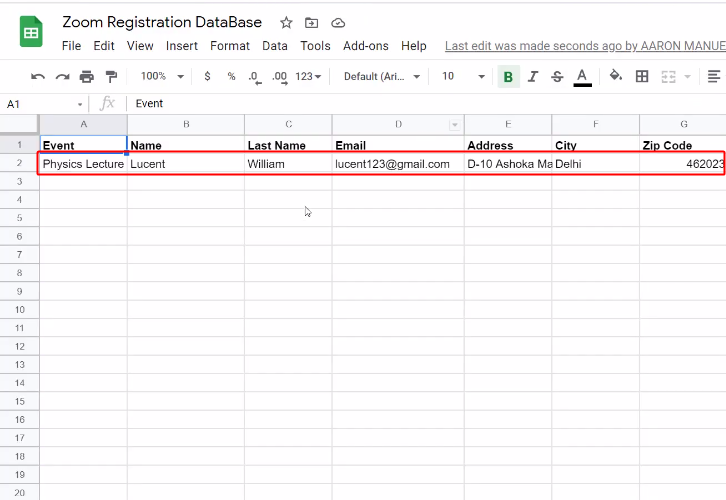
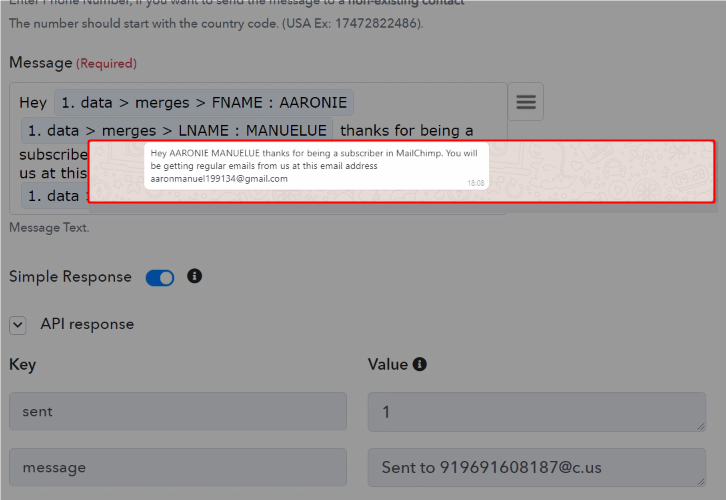
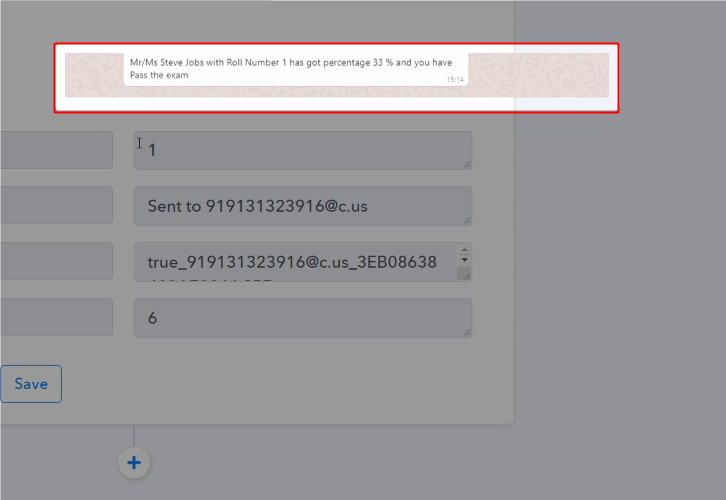
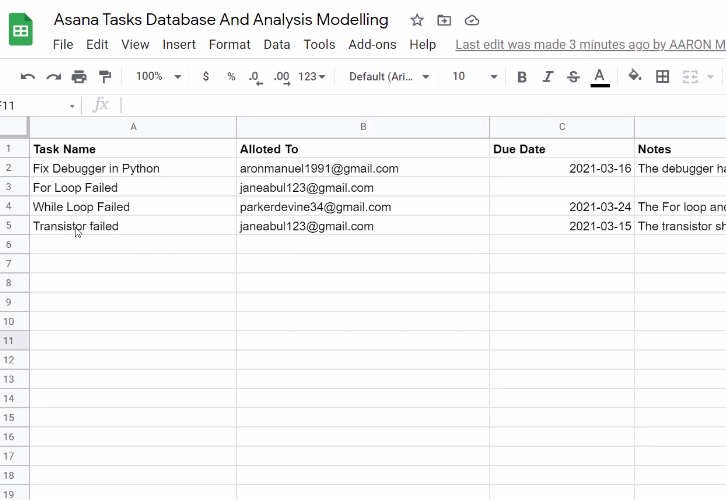
Step 9: Check Response in WhatsApp
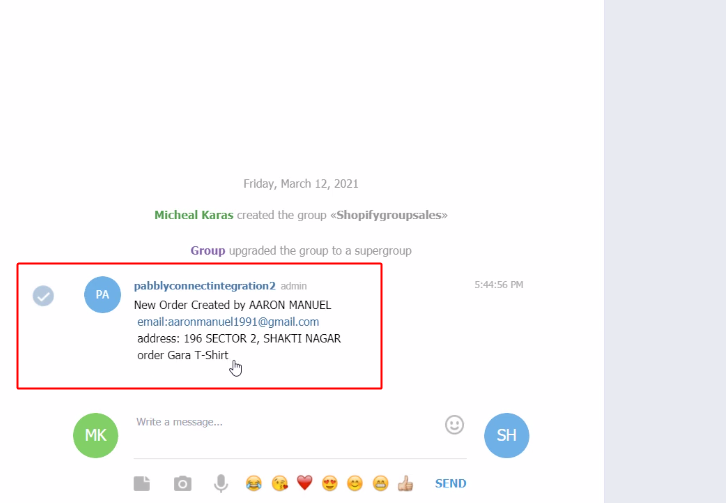
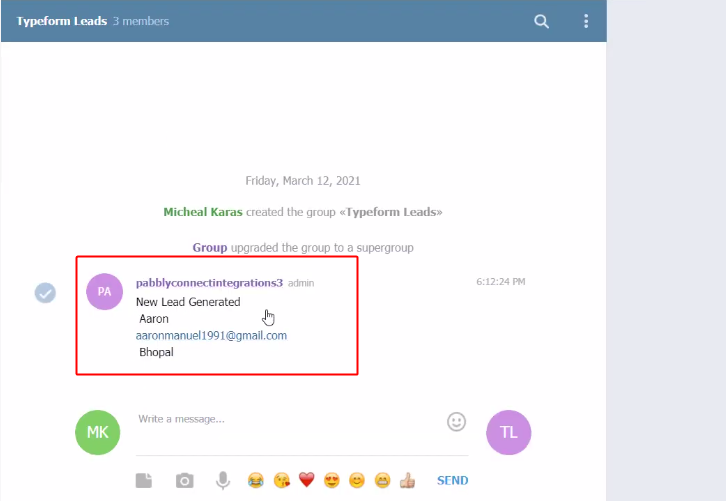
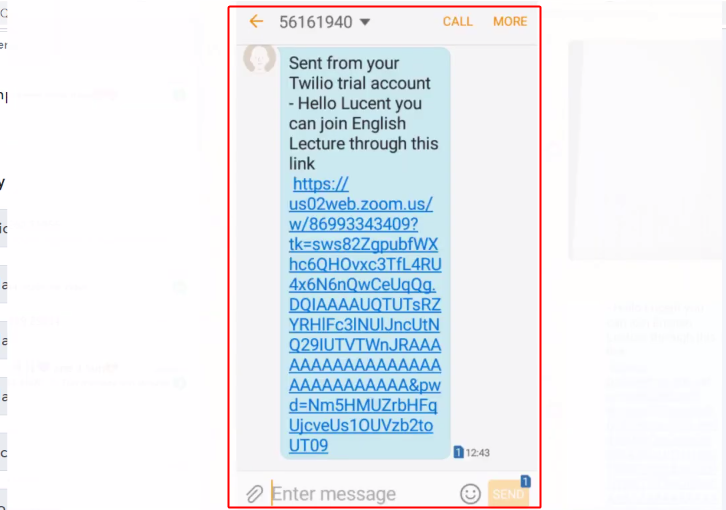
Lastly, check the Telegram message on the connected group. Also, make another test order on your Shopify shop to test the workflow.
Conclusion –
This was all about ‘How to notify your team members about new Shopify orders’. Consequently, after completing the step by step procedure, you will end up sending a message notification for every new Shopify order to your Telegram group automatically.
Meanwhile, you can also grab Pabbly Connect for FREE with all its premium features.
Also, leave a comment about this automation in the comment section below.


 Certainly, you can check the Telegram response in the action window. And, if there’s been some error while sending the data then the window will start showing you an error.Finally, save the action API’s response.