Are you looking for a way to create WooCommerce order from successful Stripe payment?
Well, if your answer is yes, then do follow this blog and automate your task without implementing a single line of code manually.
Transferring data between services could be too difficult and time-consuming. So, here we are using Pabbly Connect to do this in a few minutes.
Let’s first know a little bit about the services that are involved in this use-case. Stripe is a payment infrastructure for all kinds of businesses. You can easily accept payments and manage payouts via Stripe. On the other hand, WooCommerce is a WordPress plugin that helps websites to sell goods online. Small as well as big shop owners can use it to create & manage their online stores.
By connecting these two software you will auto-create WooCommerce order from successful Stripe payment. Moreover, we have also attached a video tutorial for this integration, have a look at it-
Plus, we’ve attached a template for this integration to assist you better and get your job done more efficiently. You can just press the ‘Use Workflow’ button below to get started. Additionally, you can go to the Marketplace & look for more apps/integrations.
So, let’s get started to plan & follow the step by step process to integrate Stripe and WooCommerce.
Step 1: Sign up to Pabbly Connect

Begin the process to create WooCommerce order from successful Stripe payment by pressing the ‘Sign Up Free‘ button on the Pabbly Connect home page. Then, either manually fill-up all the details or sign up using your Gmail account.
Try Pabbly Connect for FREE
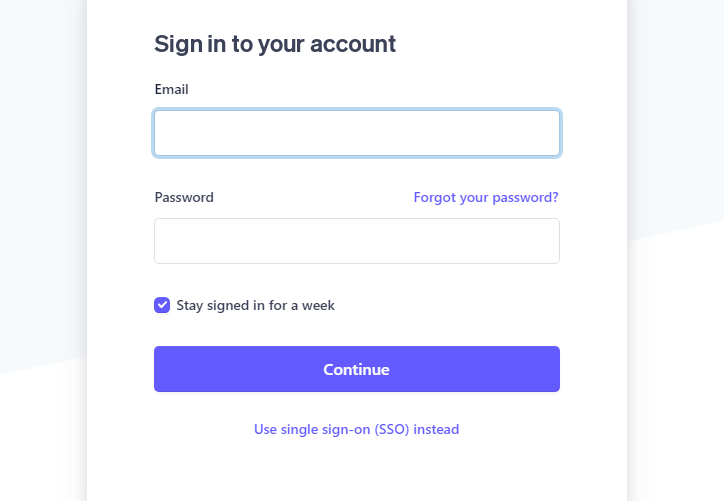
Step 2: Access Pabbly Connect

Later, after logging into the account, press the ‘Access Now’ button of the Connect section in the dashboard.
Step 3: Workflow for Stripe to WooCommerce Integration
(a) Start with a New Workflow

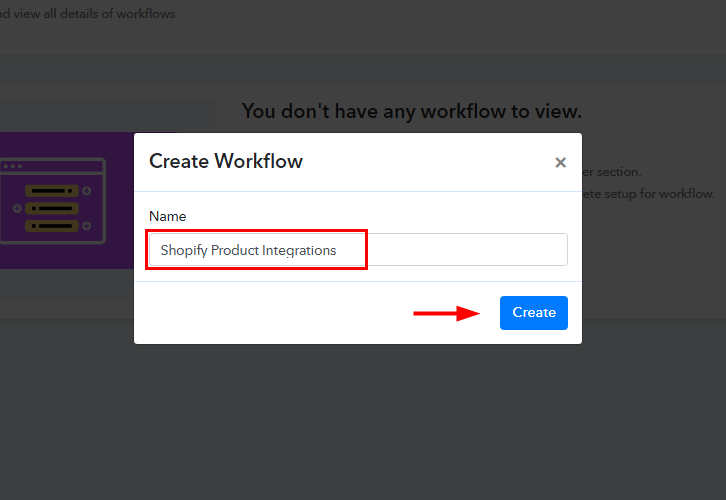
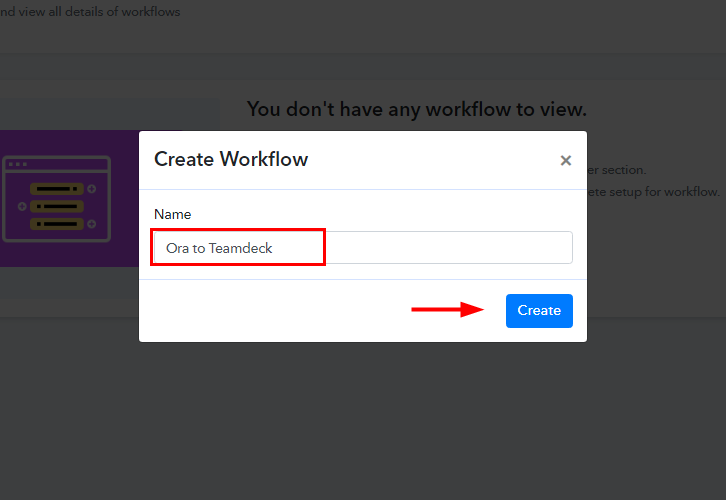
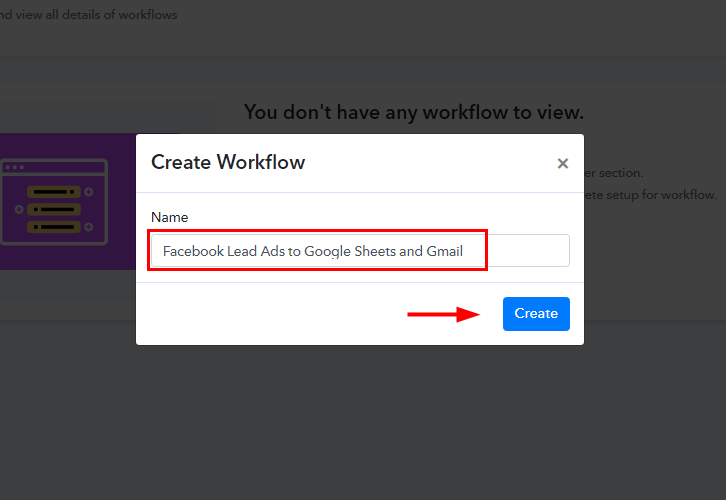
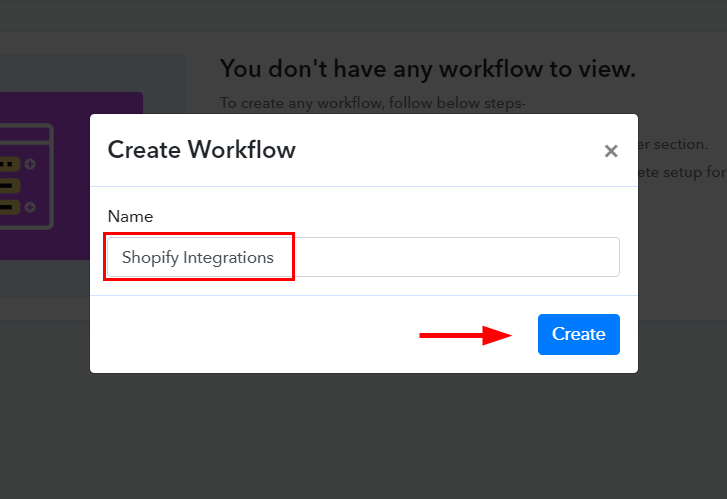
Begin by creating a workflow for your project by pressing the ‘Create Workflow’ button.
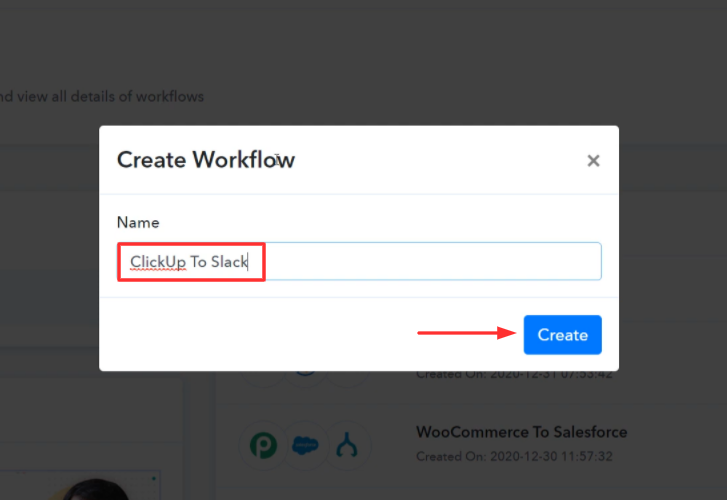
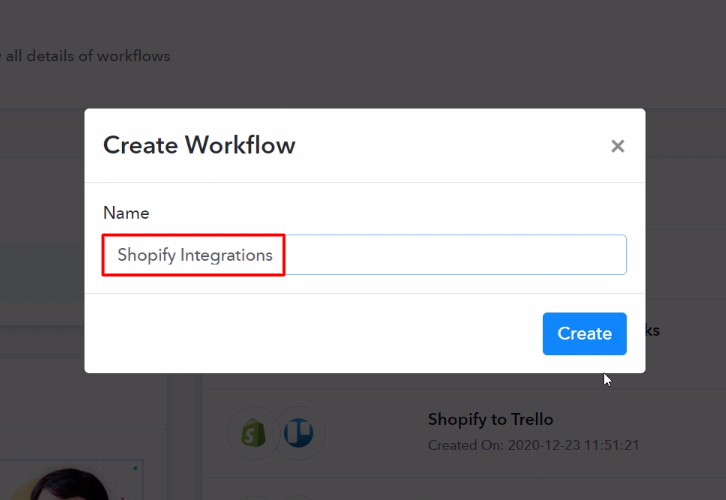
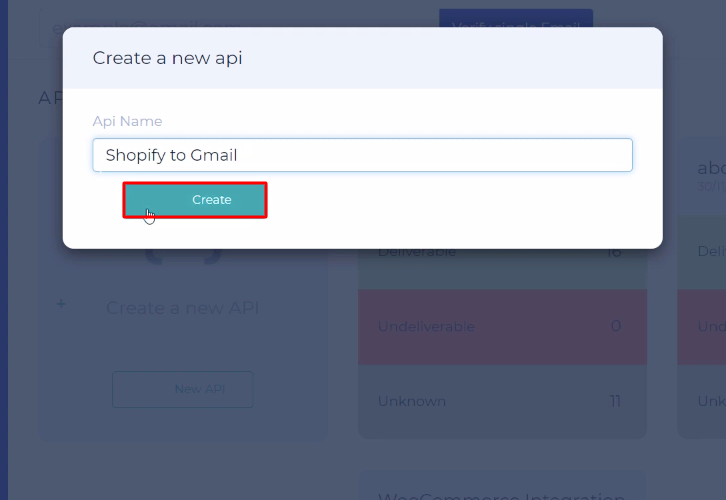
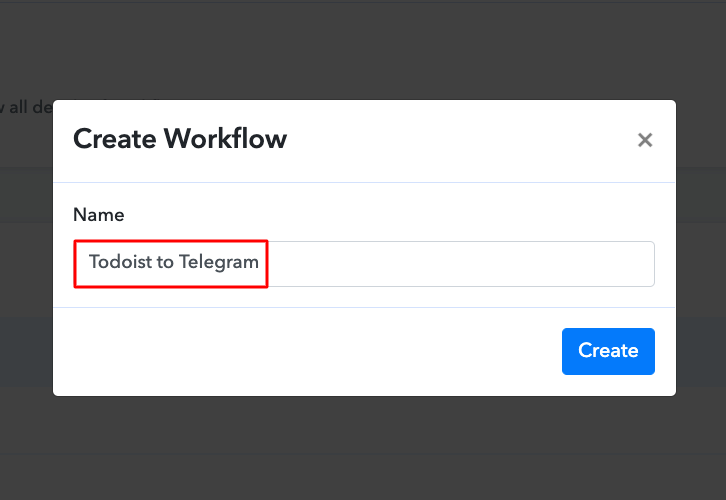
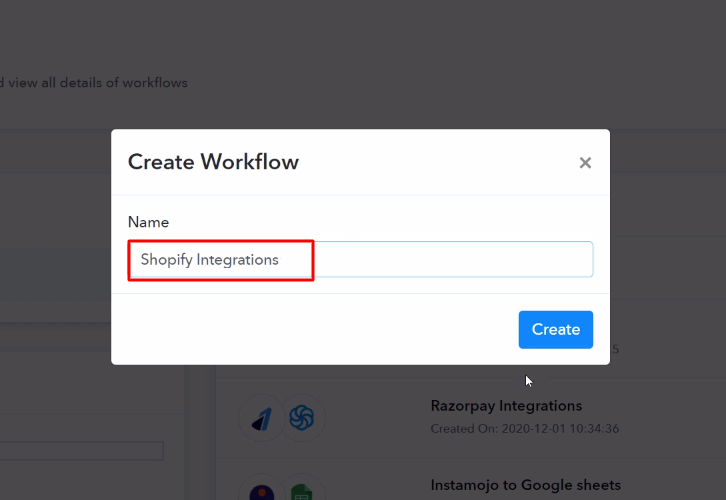
(b) Name the Workflow

Promptly, name the workflow just like in the above-shown image. I named the workflow ‘Stripe to WooCommerce’, you can obviously name the workflow as per your requirements. Then, click on ‘Create’ button.
Step 4: Setting Trigger for Stripe with WooCommerce Integration
After naming your workflow, select the application you want to integrate. Pabbly Connect allows you to integrate many premium applications, create your free account now.
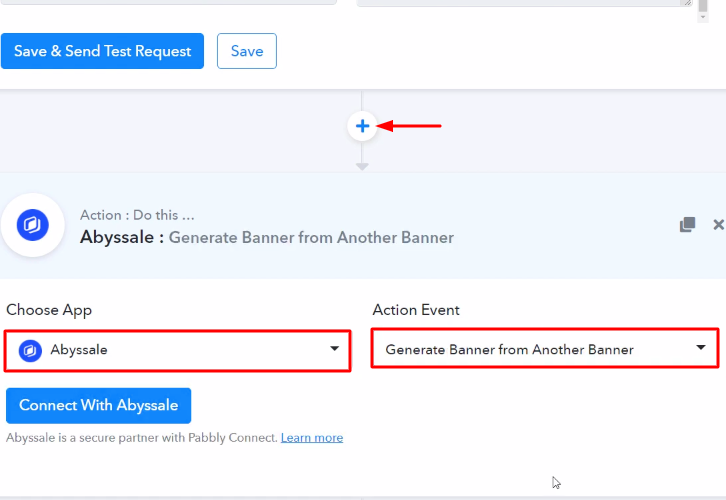
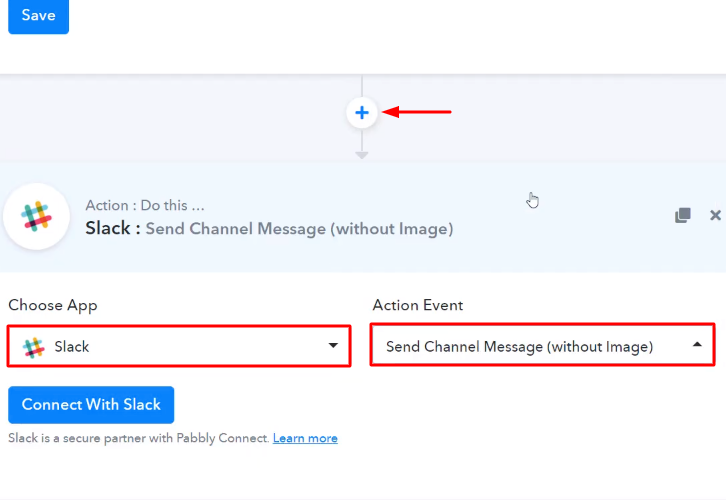
(a) Select Application you Want to Integrate
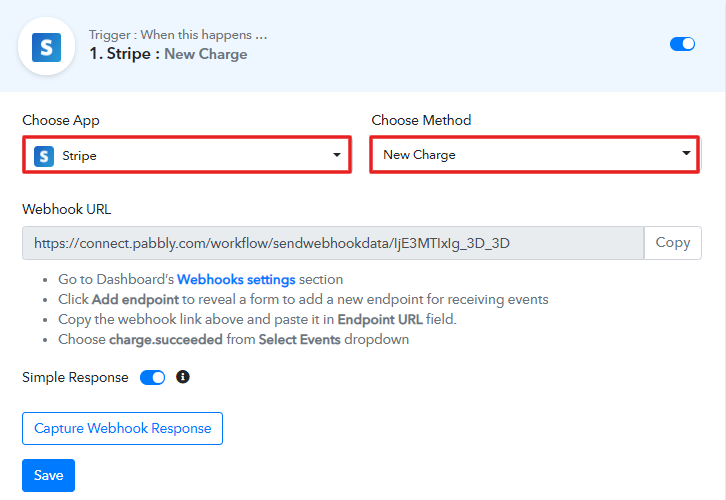
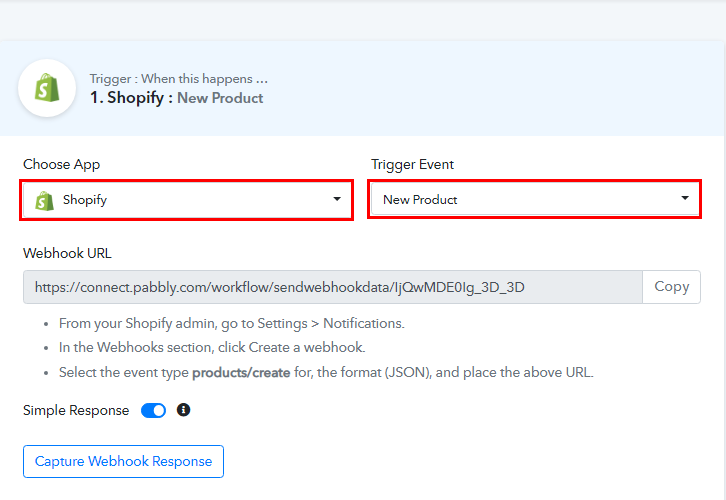
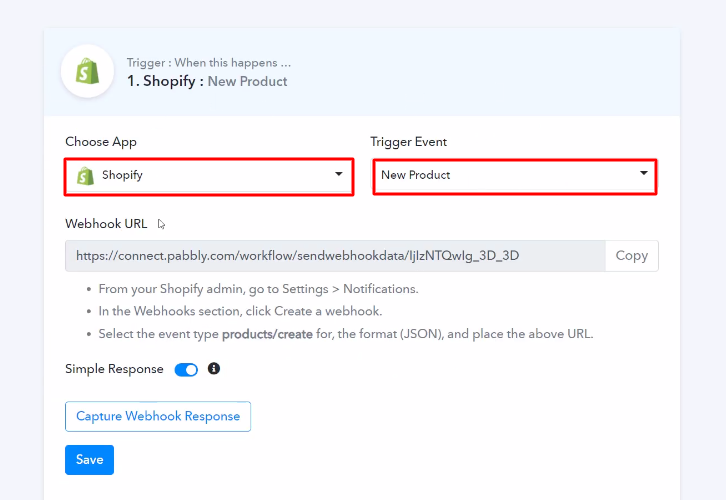
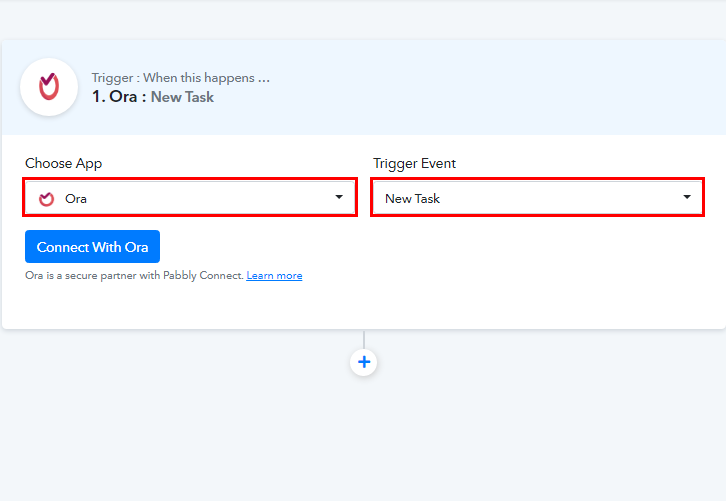
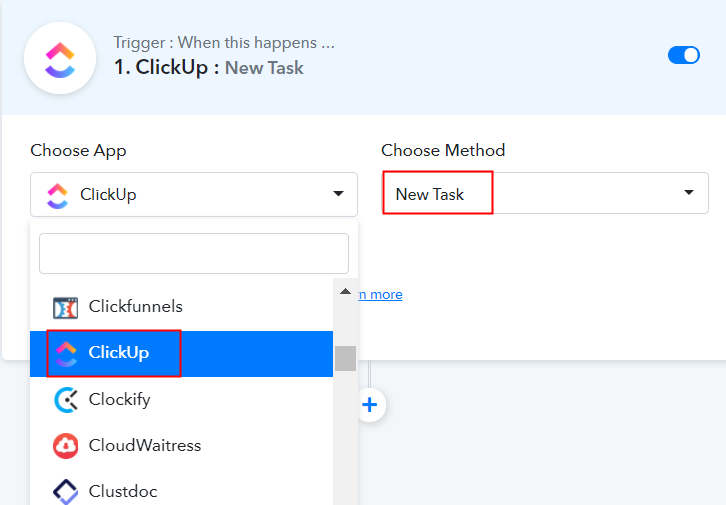
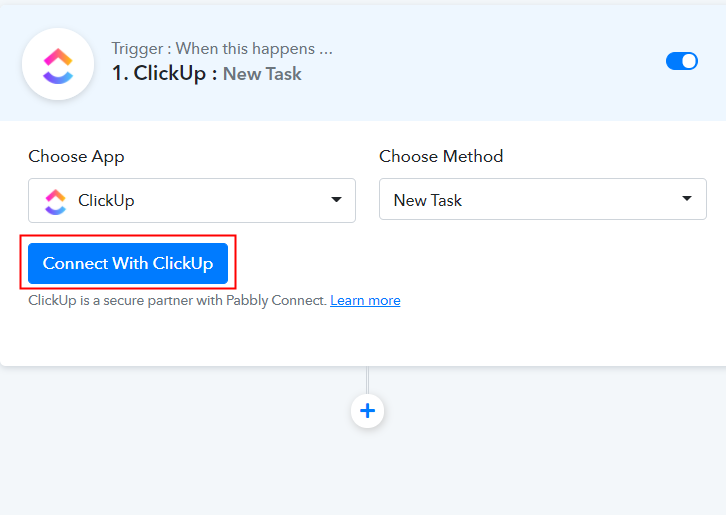
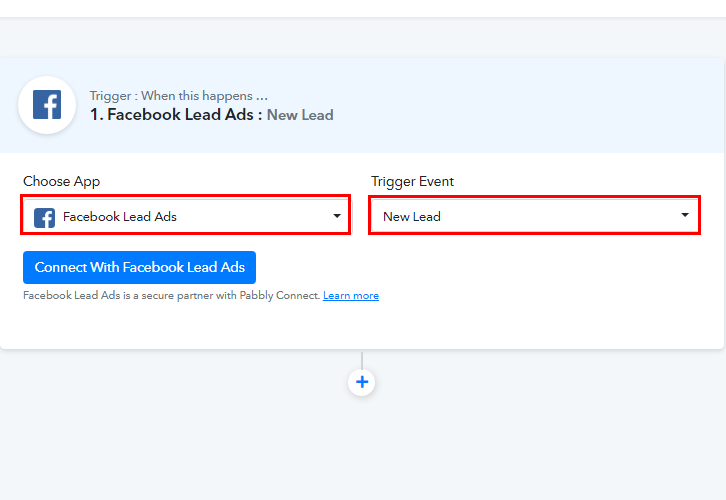
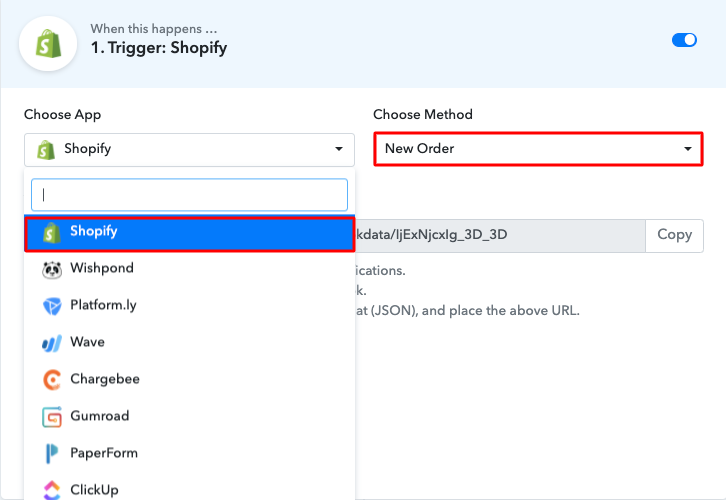
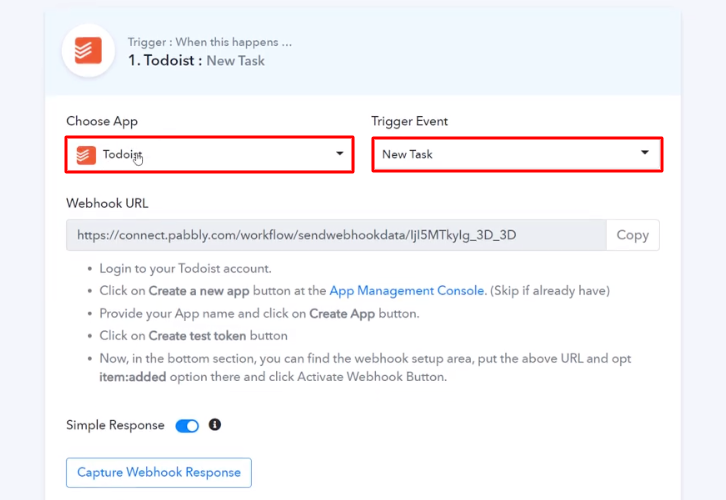
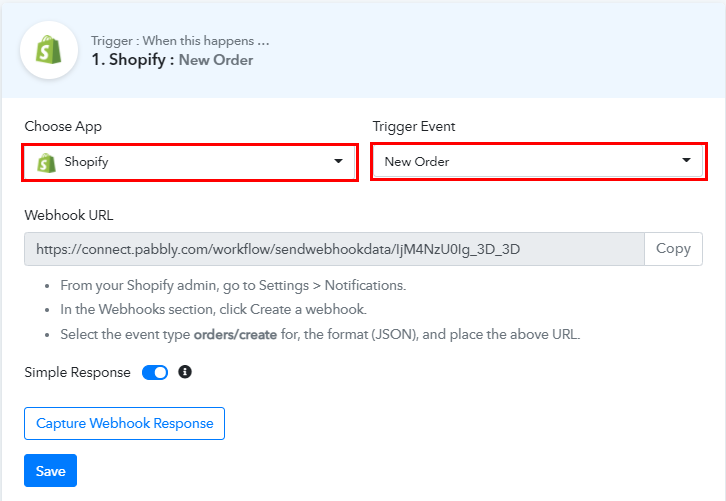
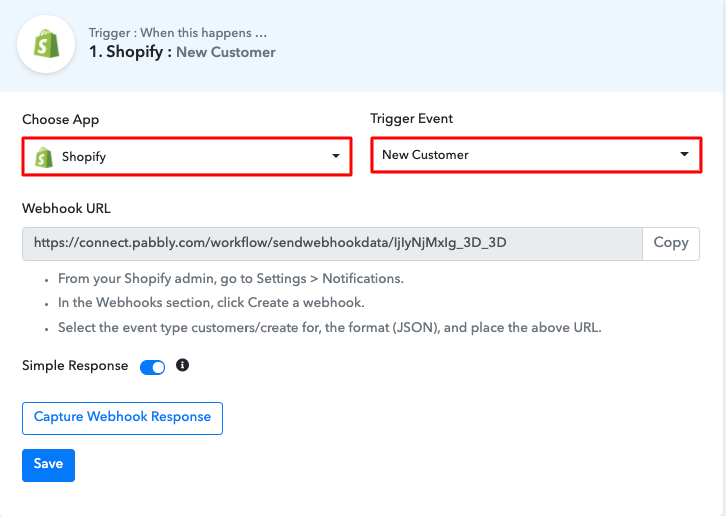
When you click on the create button to generate the workflow, a page containing the trigger window will open up.
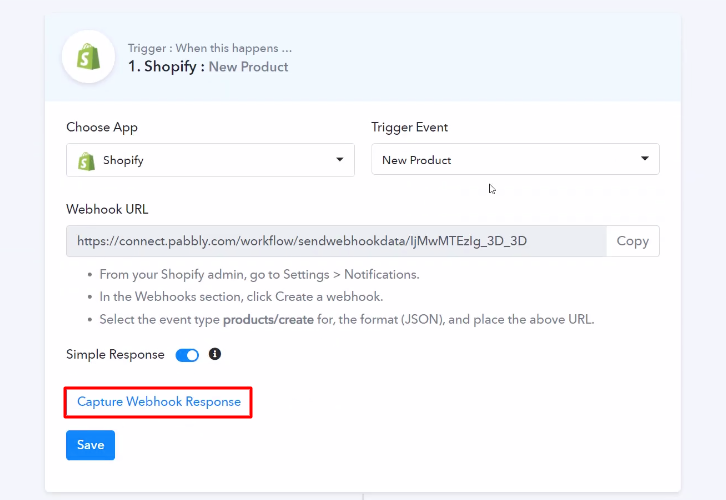
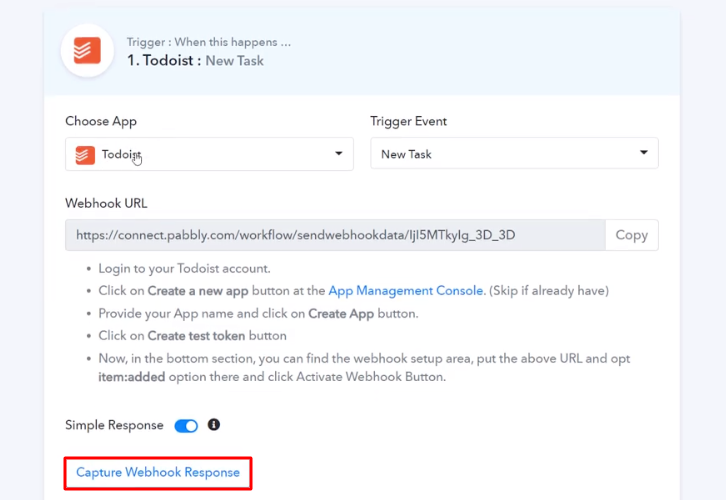
Select the ‘Stripe’ app from the ‘Choose App’ field and choose method as ‘New Charge’.
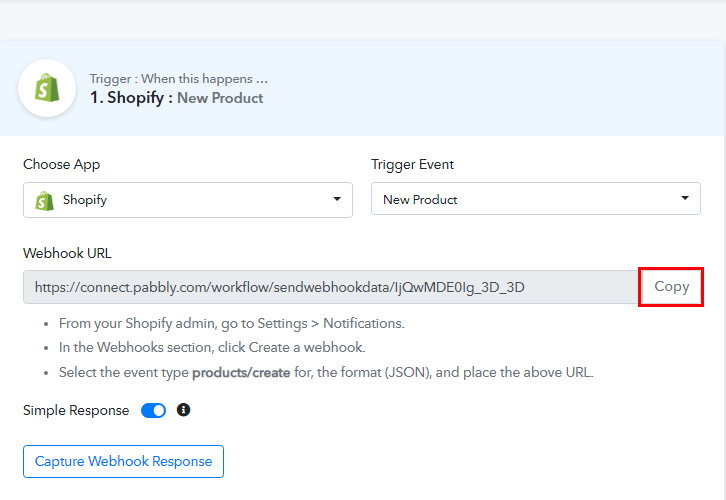
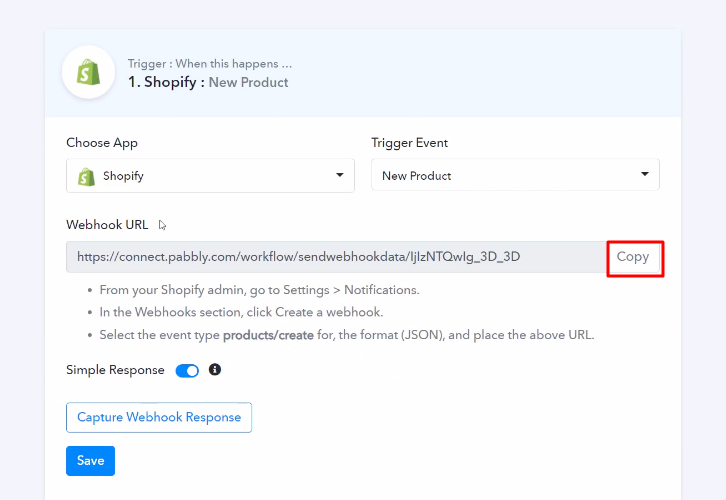
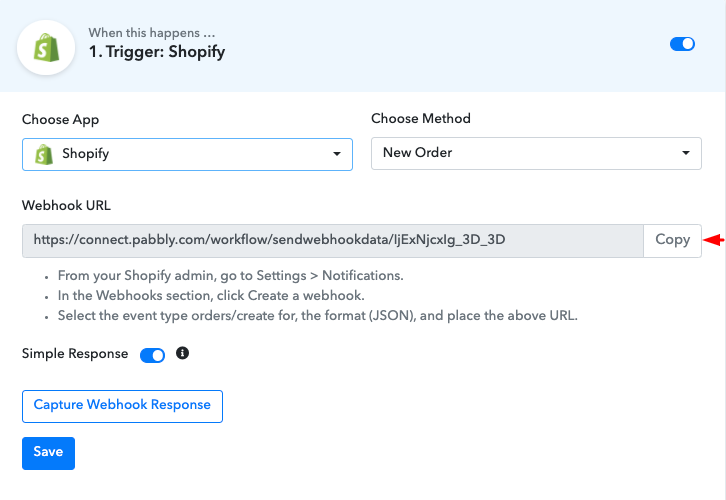
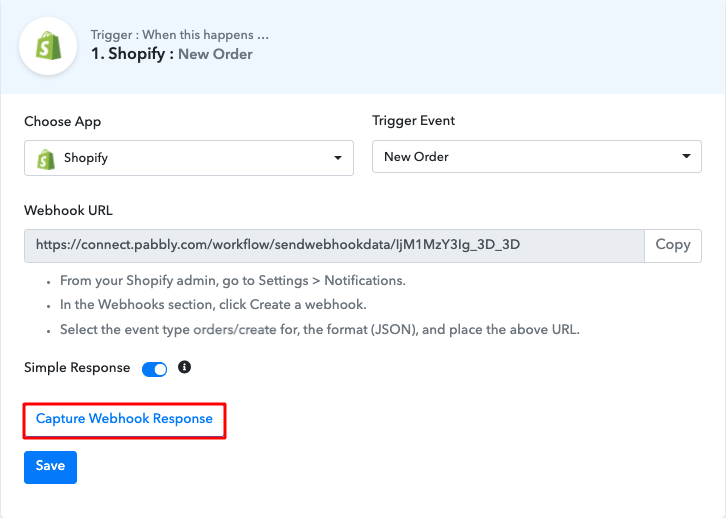
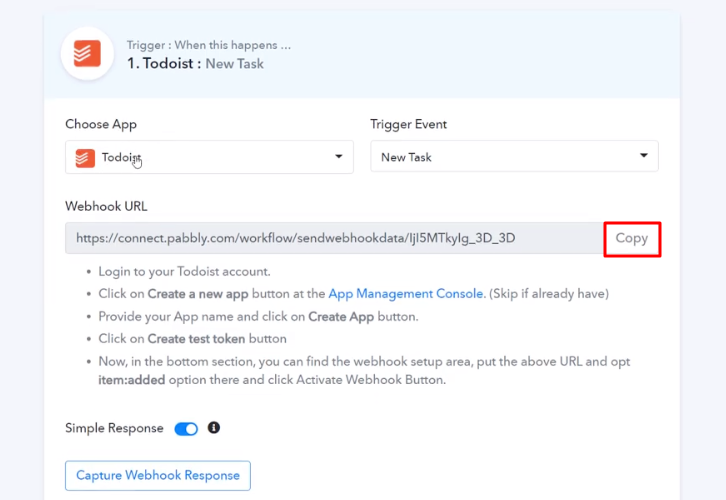
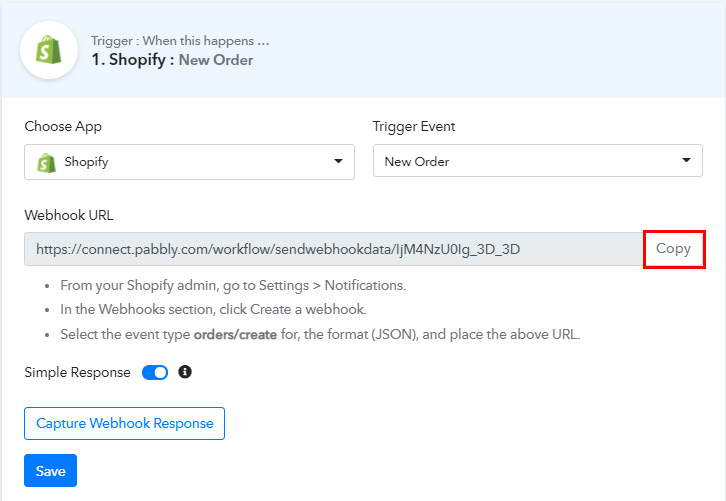
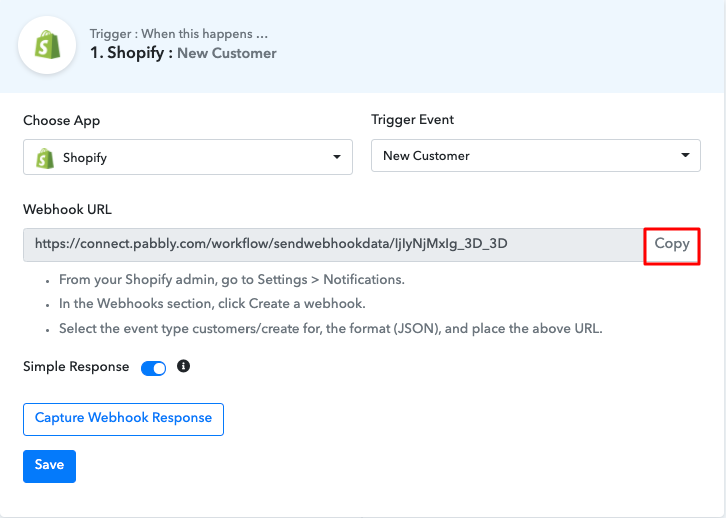
(b) Copy Webhook URL

Then, copy the webhook URL that is appearing on the dashboard.
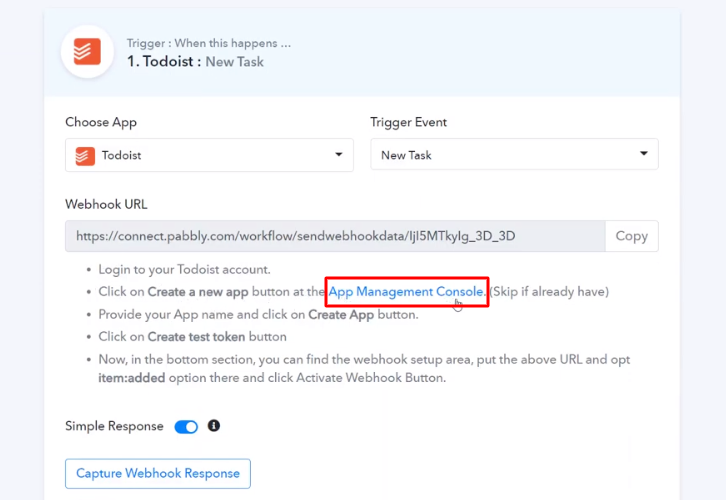
(c) Connecting to Stripe
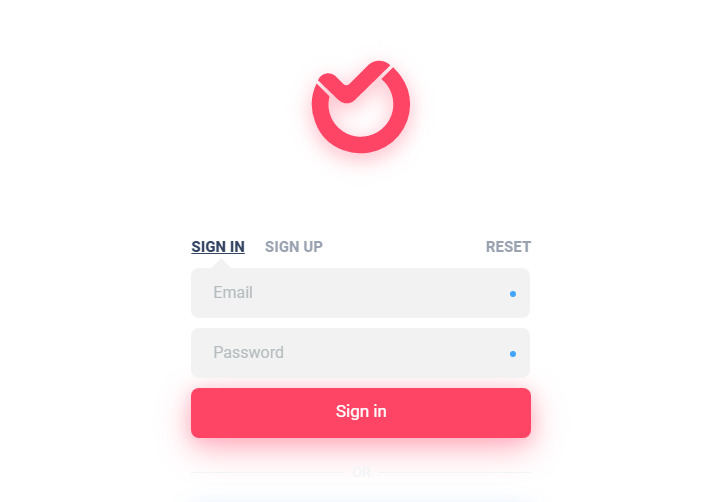
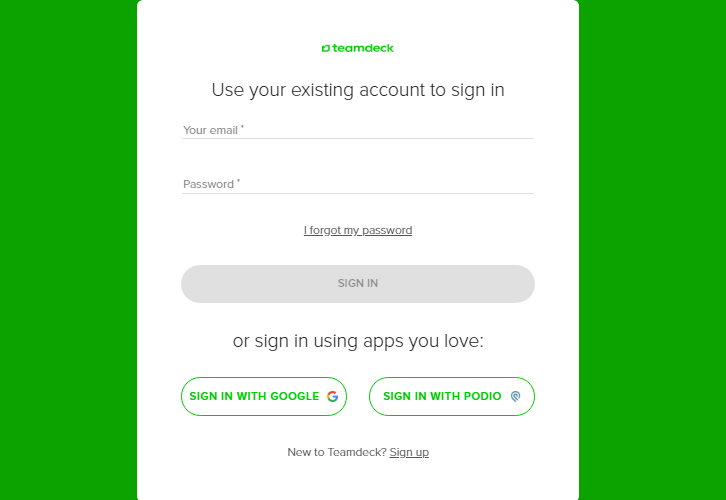
Nevertheless, to automatically create WooCommerce order from successful Stripe payment, you gotta paste the copied Webhook URL in the software. Hence for that, you have to log in to your Stripe account.
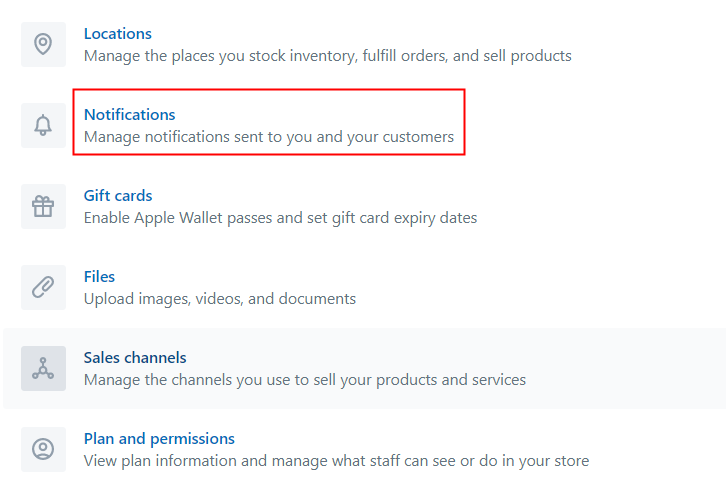
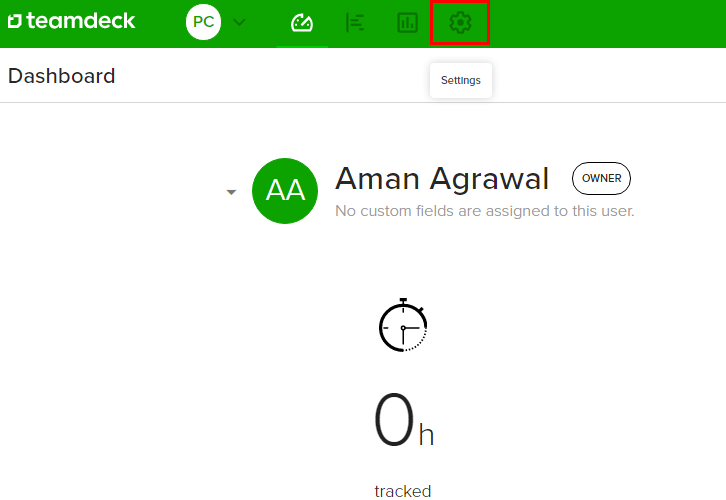
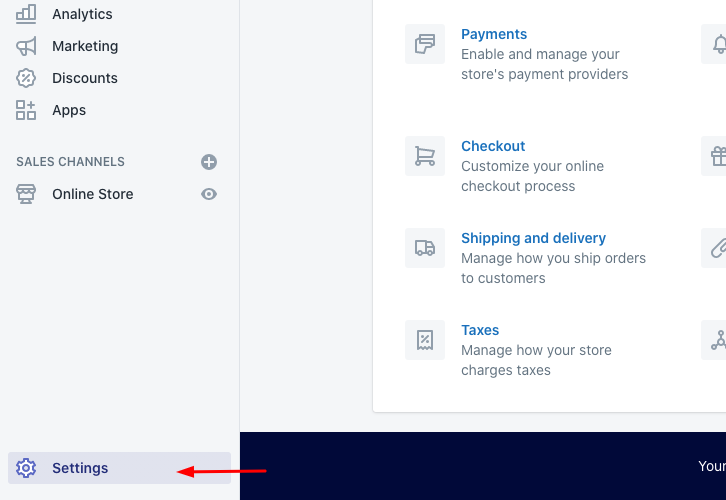
(d) Go to Stripe Developers Section
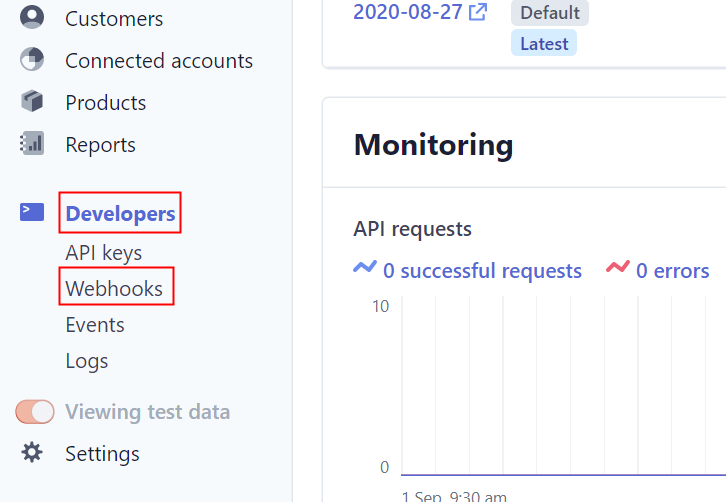
After logging into the Stripe account, go to the ‘Developer’ section on the left of the dashboard. Next, click on the ‘Webhooks’ option.
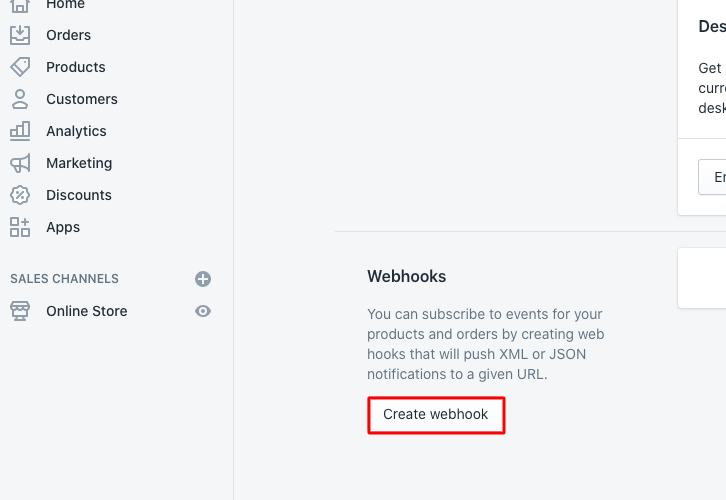
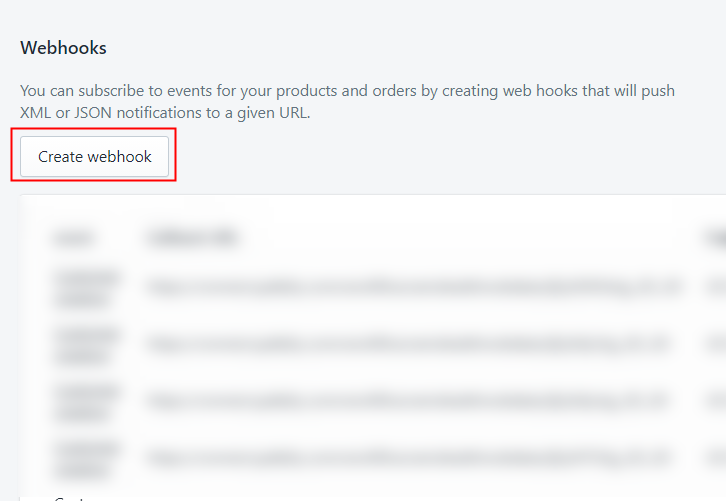
(e) Click on Add Endpoint
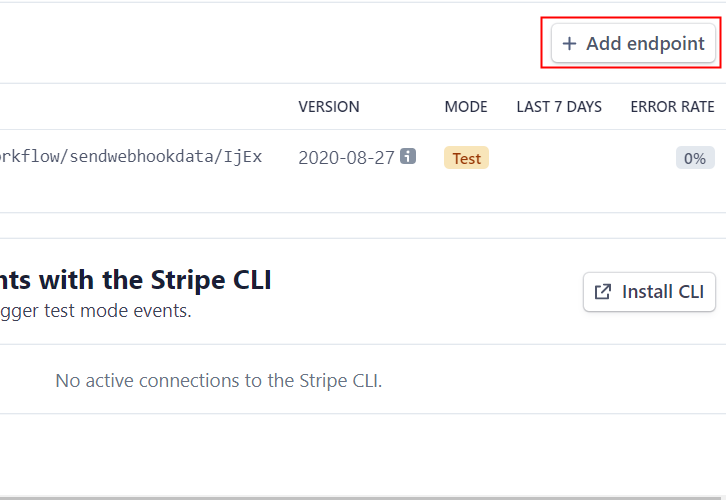
Later, when you click on ‘Webhooks’, an endpoint tab will open up, just hit the ‘Add Endpoint’ option to paste the Webhook URL.
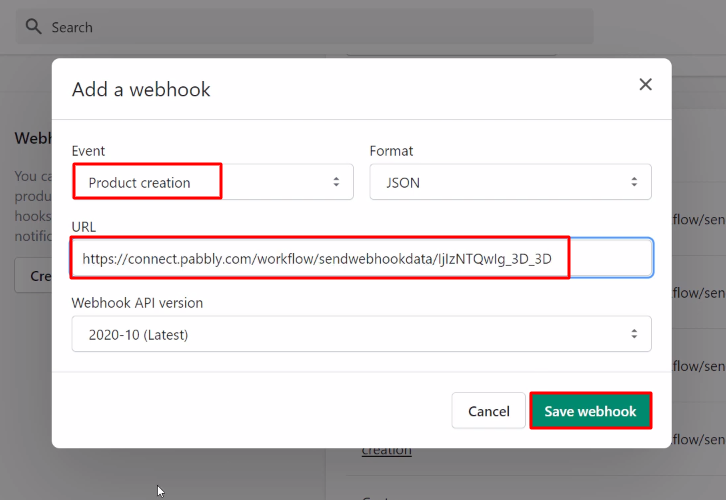
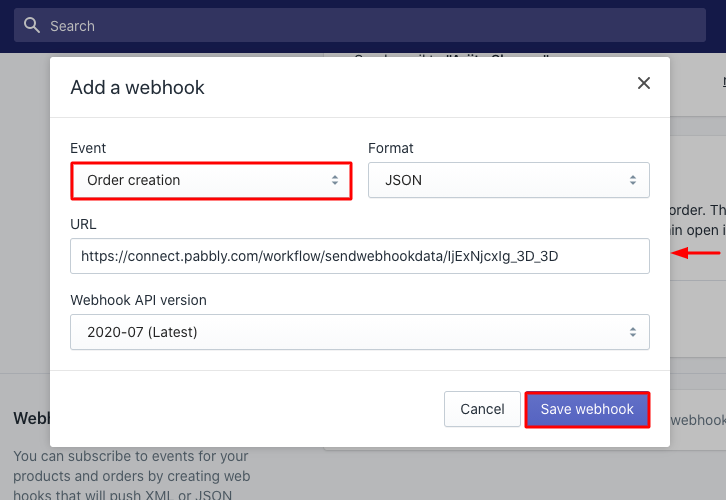
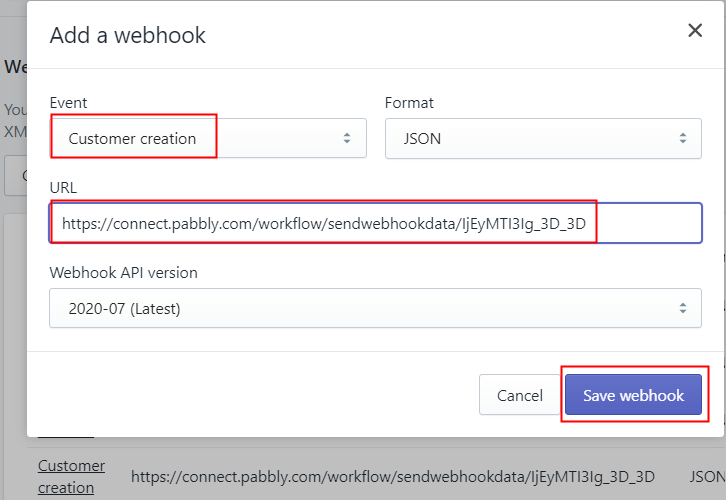
(f) Paste the Webhook URL
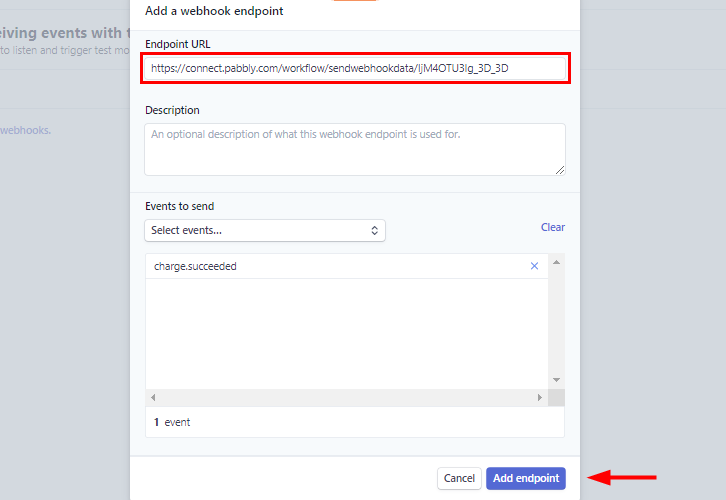
After you click on the ‘Add Endpoint’ button, a window will open up with certain options. Just paste the copied webhook URL in the ‘Endpoint URL’ section.
Further, make sure that you have to select ‘charge.succeeded’ in the ‘Event to Send’ field. Conclusively, hit ‘Add Endpoint’ to save the webhook.
(g) Click on Payment Option
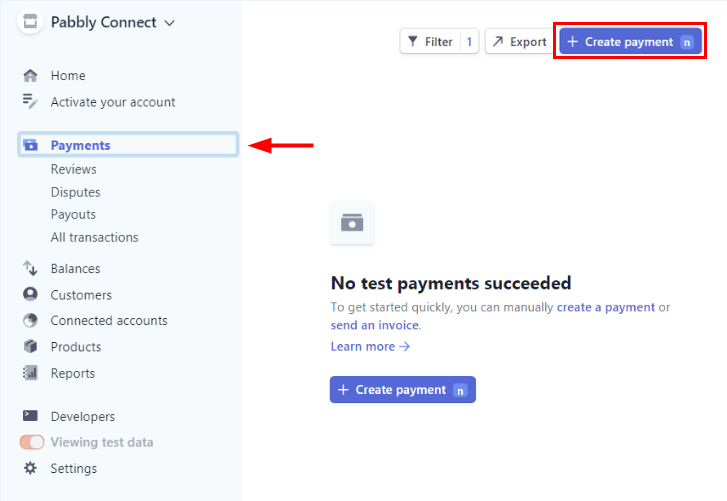
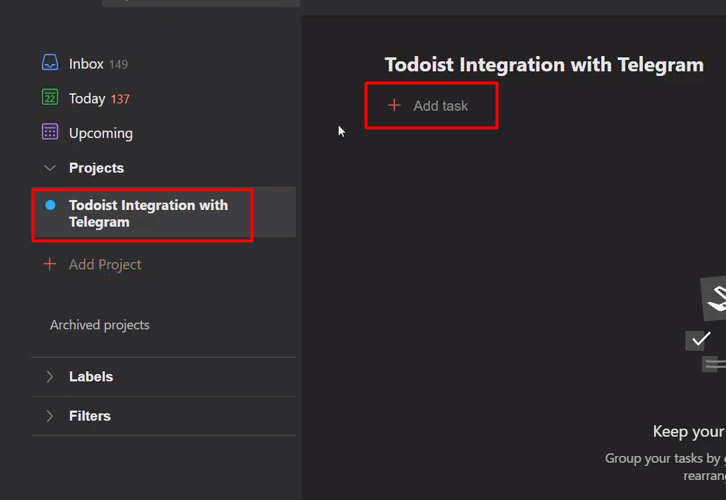
Subsequently, just go to the ‘Payment’ section on the left of the dashboard, then hit the ‘Create Payment’ button to add payment.
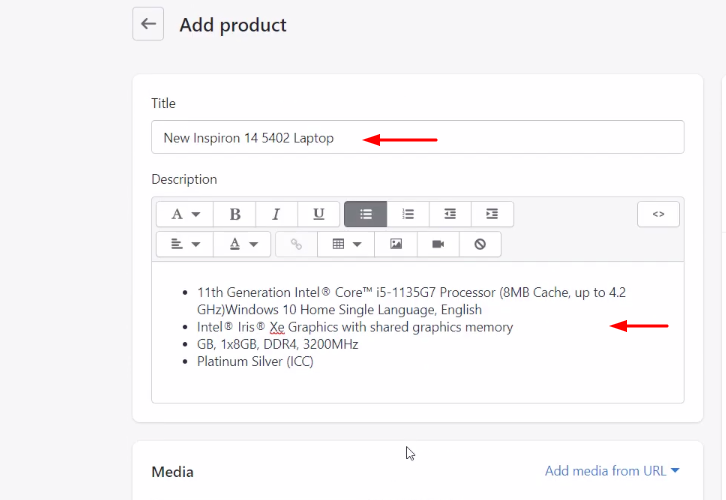
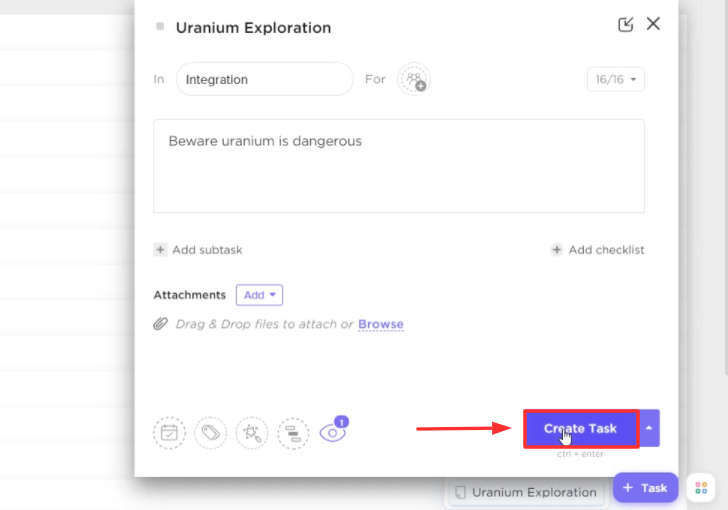
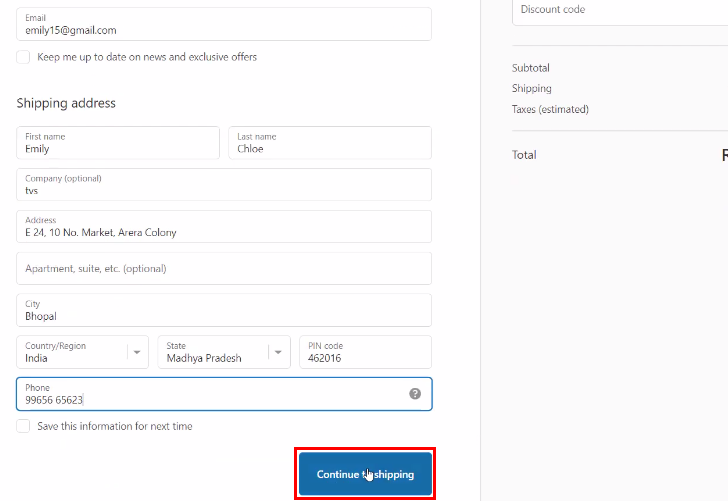
(h) Add Payment
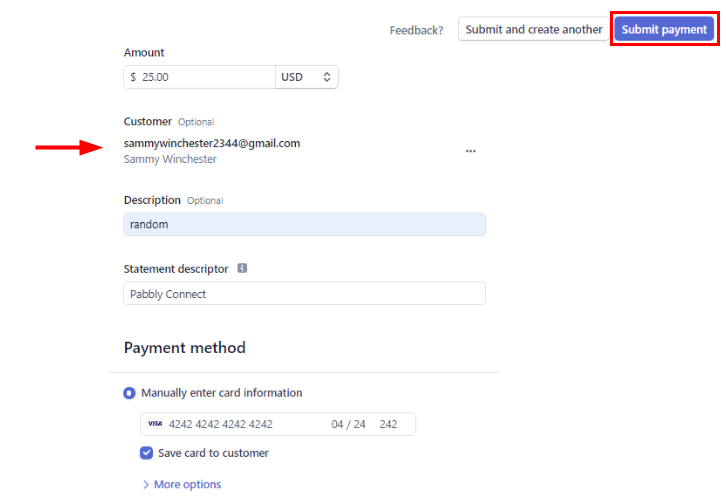
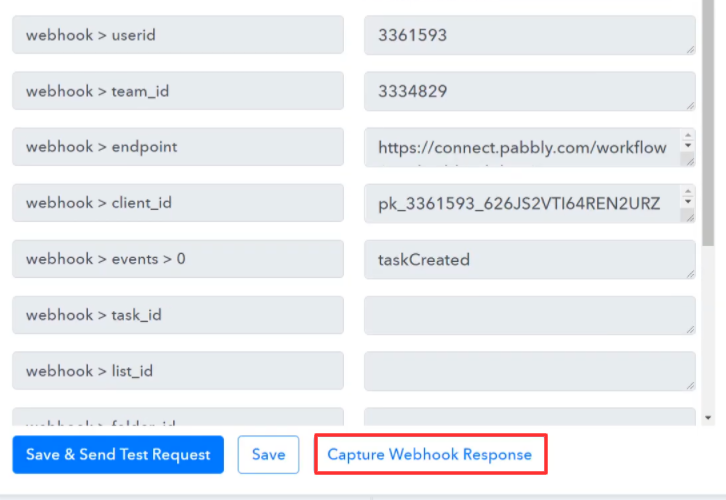
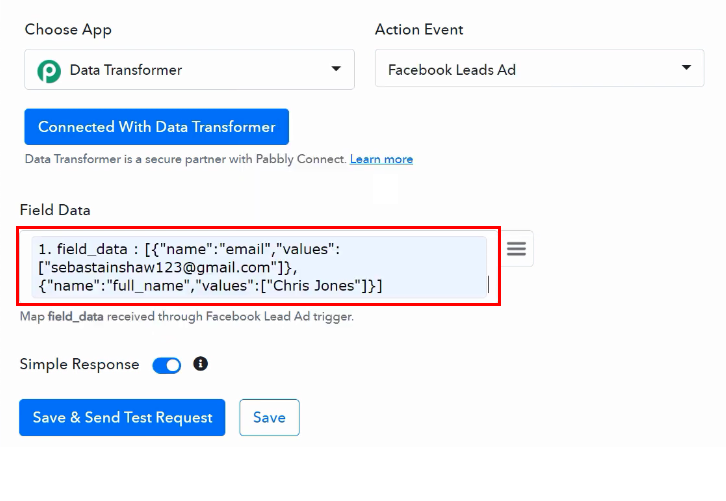
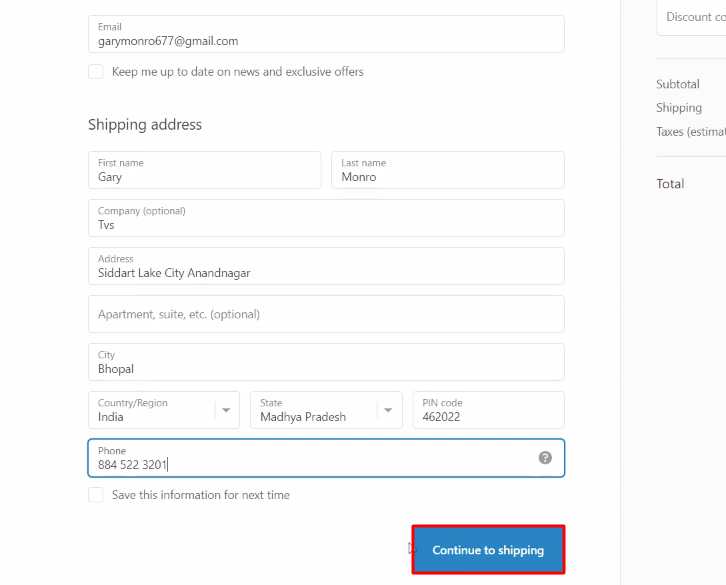
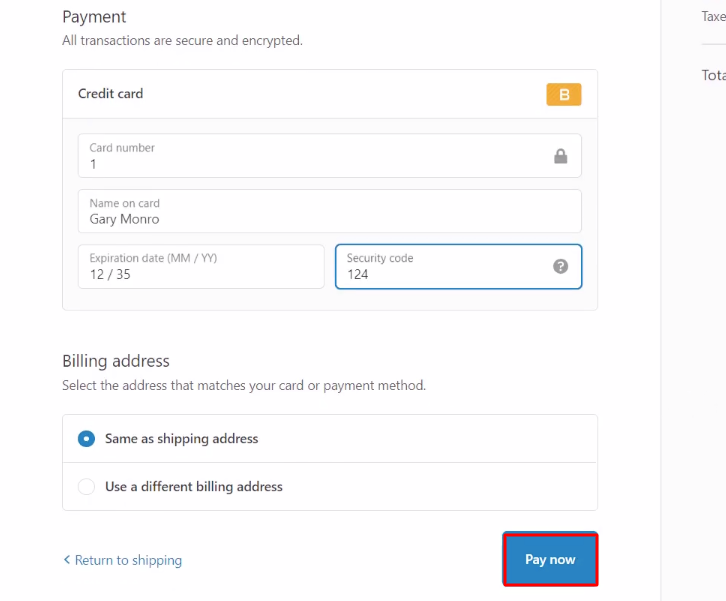
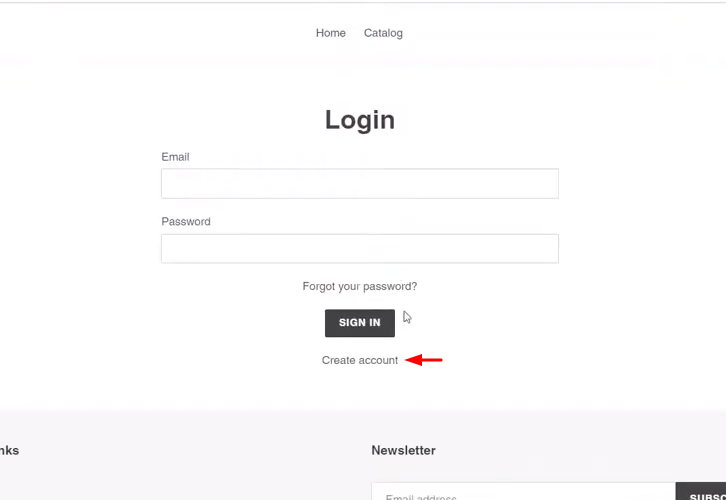
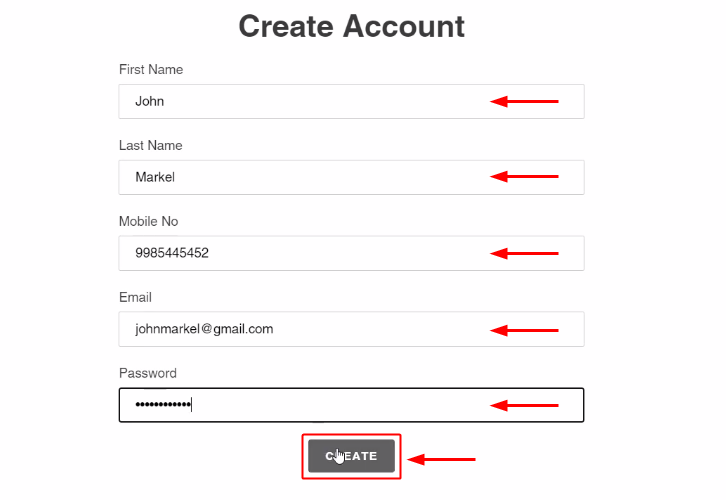
Once you hit the ‘Create Payment’ button, a window will pop-up. Just enter all the required details like amount, card details, and also add your existing WooCommerce customer details to make an order. And finally, click on ‘Submit Payment’ button. But before you do that, you have to click ‘Capture Webhook Response’ in the Pabbly Connect window.
After this, some questions will arise in your mind that, what if we don’t have any customers in WooCommerce, and why we need to add details of an existing customer in Stripe? Well, in the upcoming steps we will answer to all your questions.
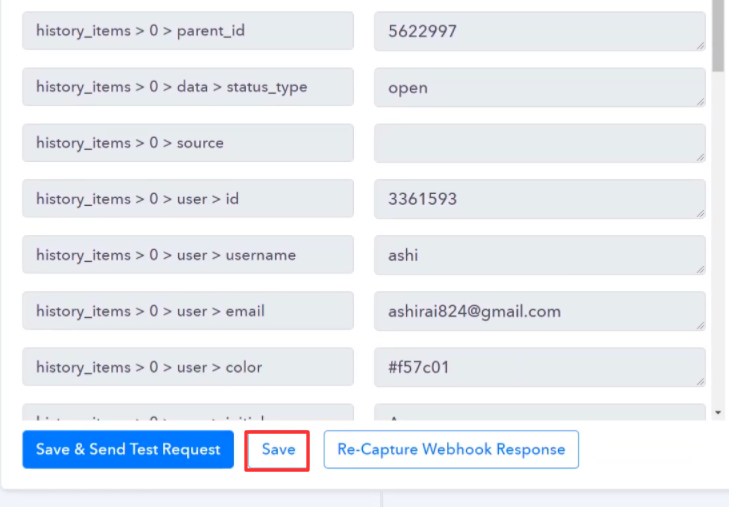
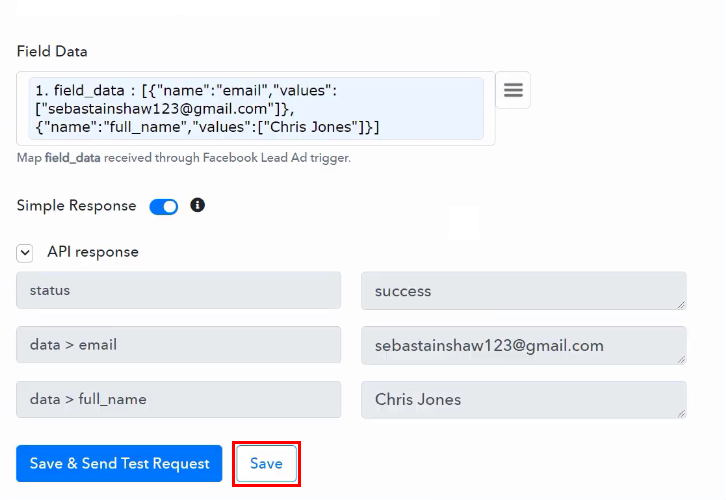
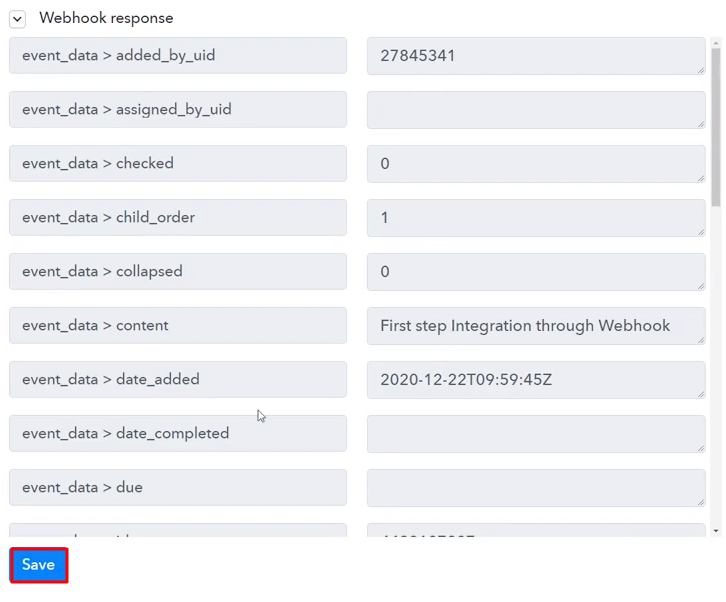
(i) Save the response in Pabbly Connect
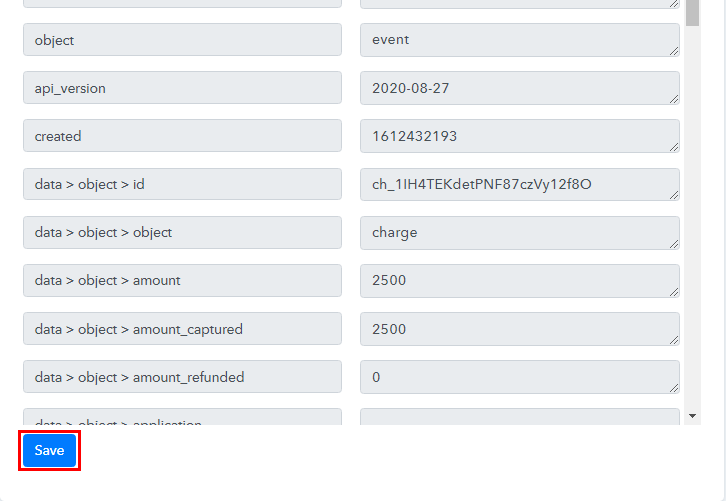
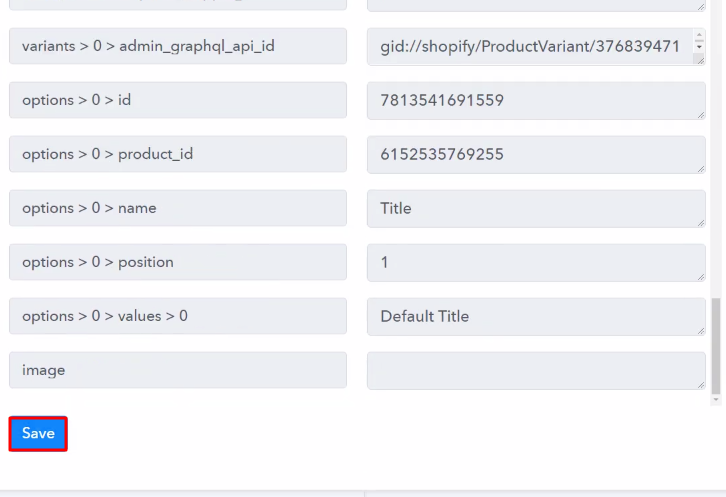
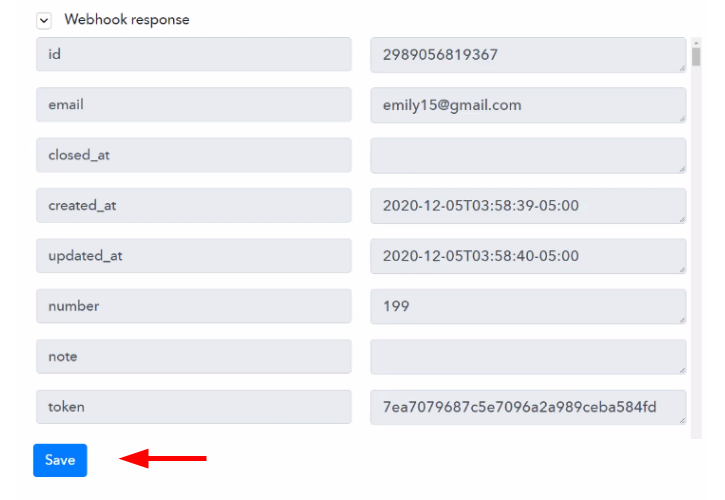
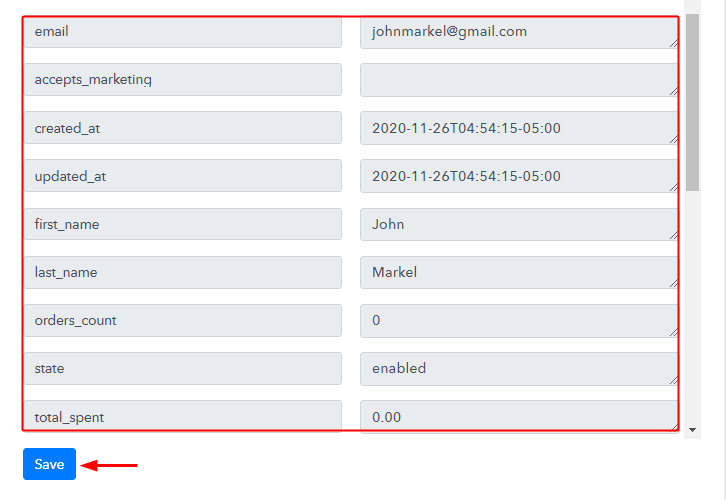
Once you tap on the ‘Submit Payment’ option, the entry will appear on the ‘Pabbly Connect’ dashboard. Then hit the ‘Save’ option.
Step 5: Setting Action for Stripe to Retrieve Customer Info
As you can see, from the above API response that the name, email, and address info of customer is not showing because Stripe only provides charge related info like credit card details, amount, etc.
So, to get the name, email, and address info of customer we need to add an action step.
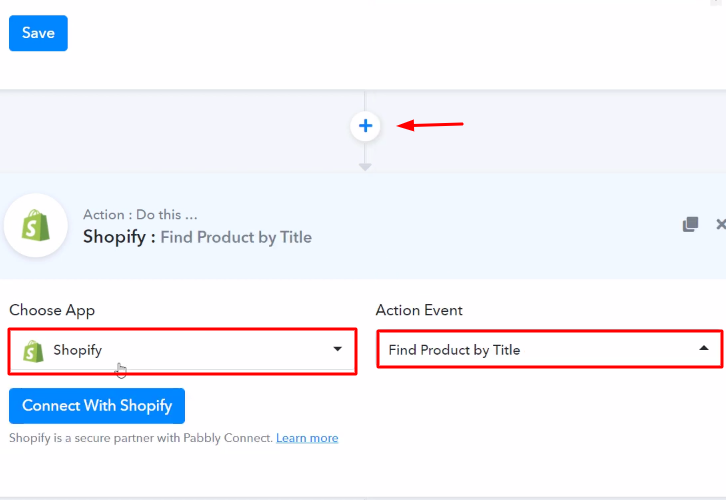
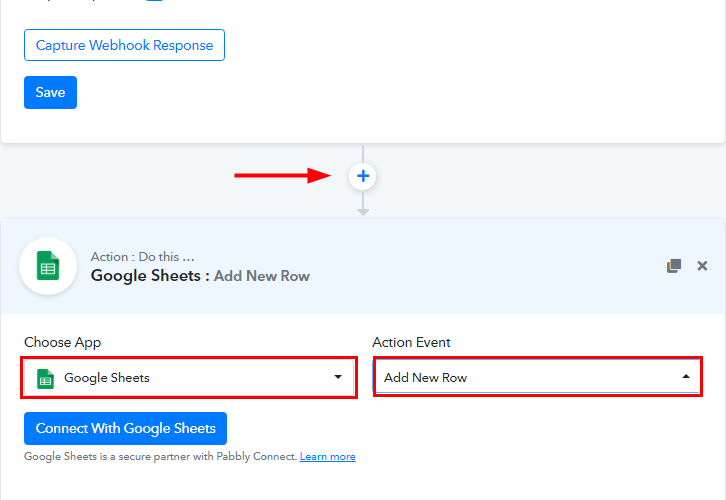
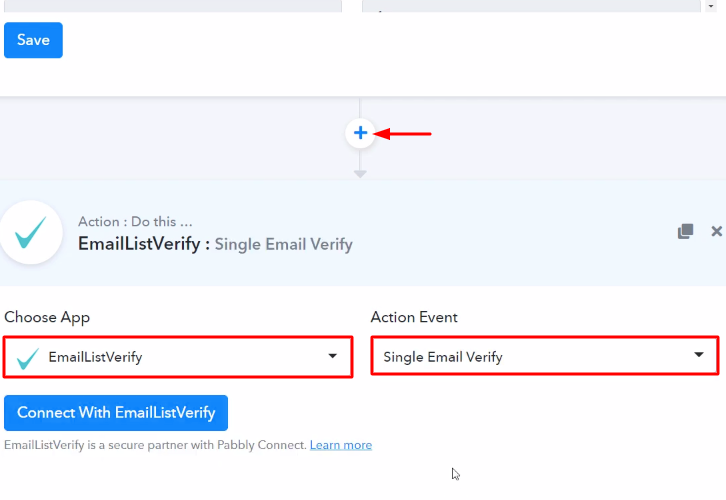
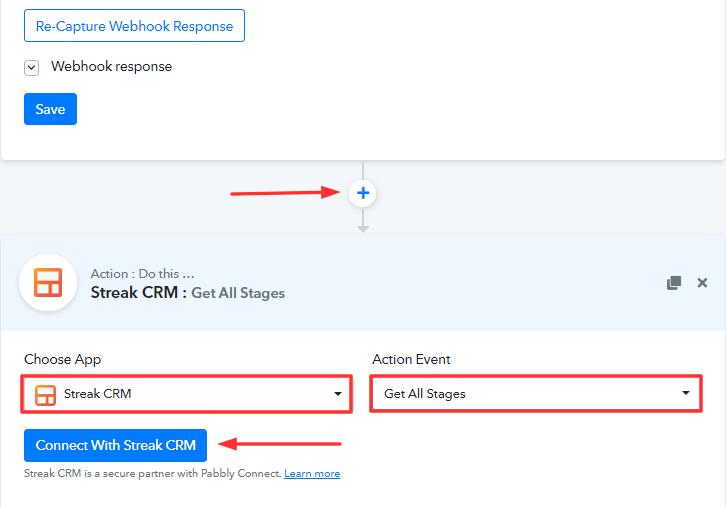
(a) Select Application you Want to Integrate
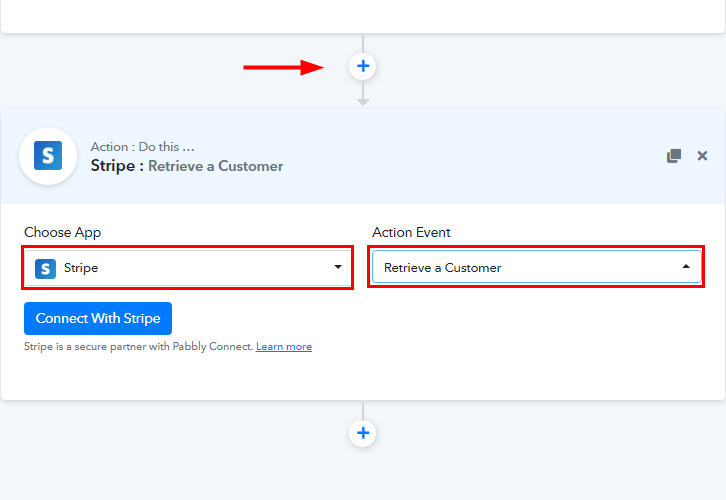
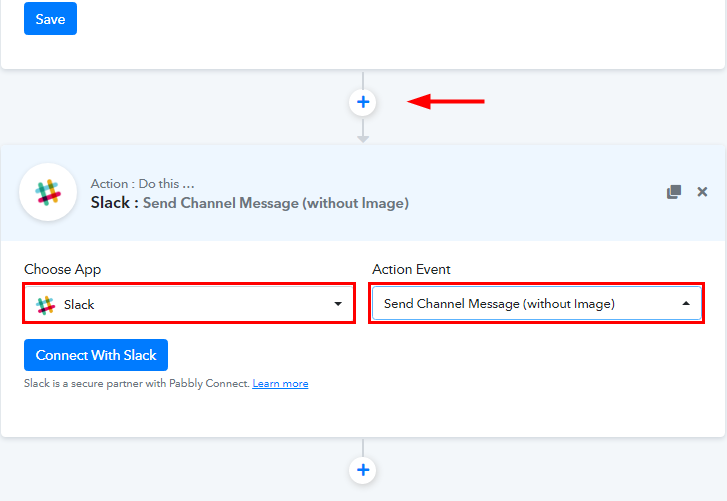
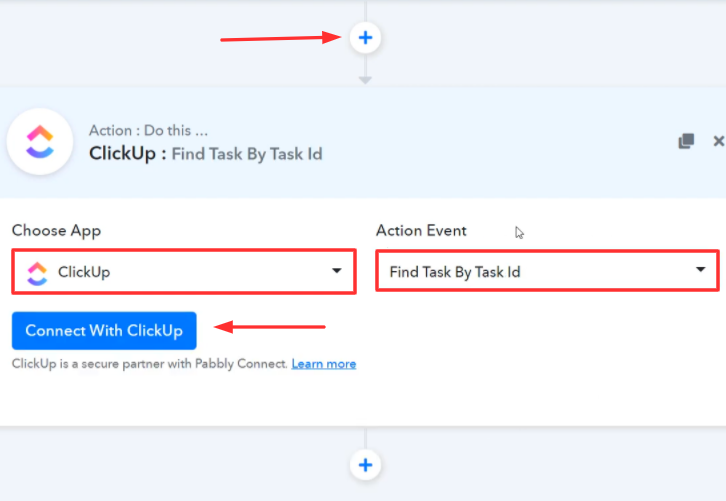
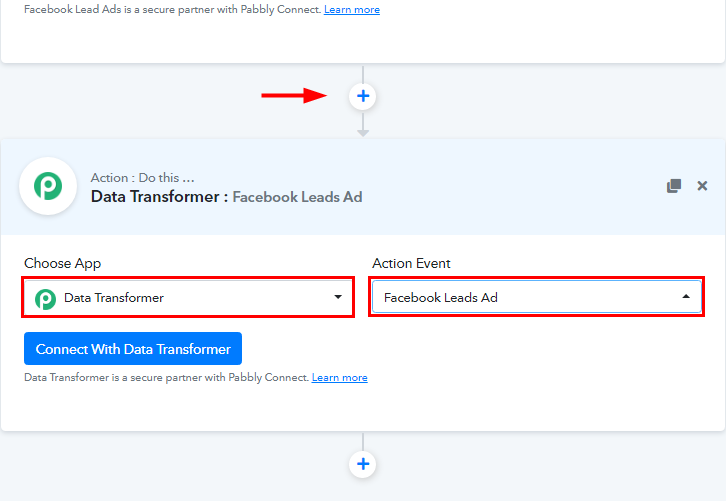
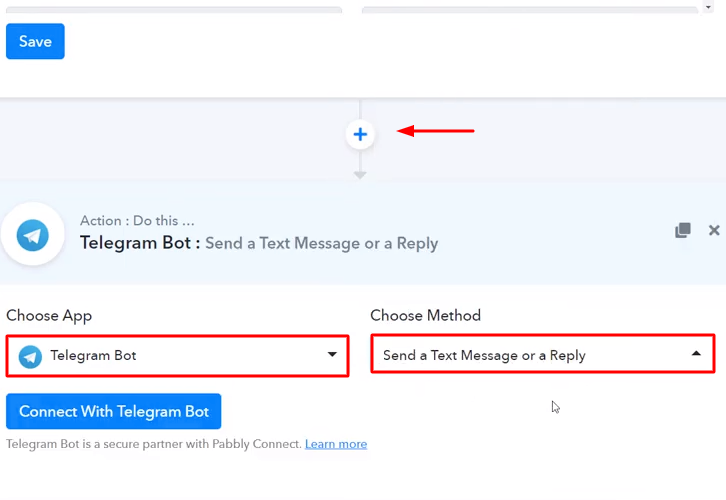
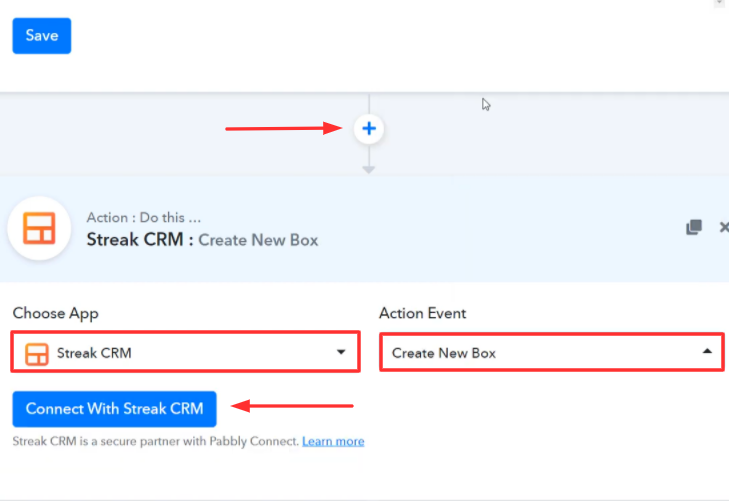
Now hit the (+) icon to select the application you want to Integrate. Then, choose the app as ‘Stripe’ from the drop-down and select ‘Retrieve a Customer’ as action event.
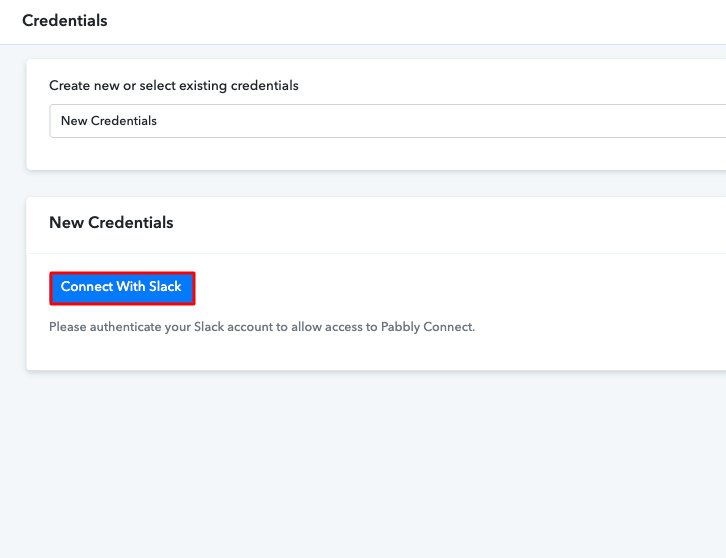
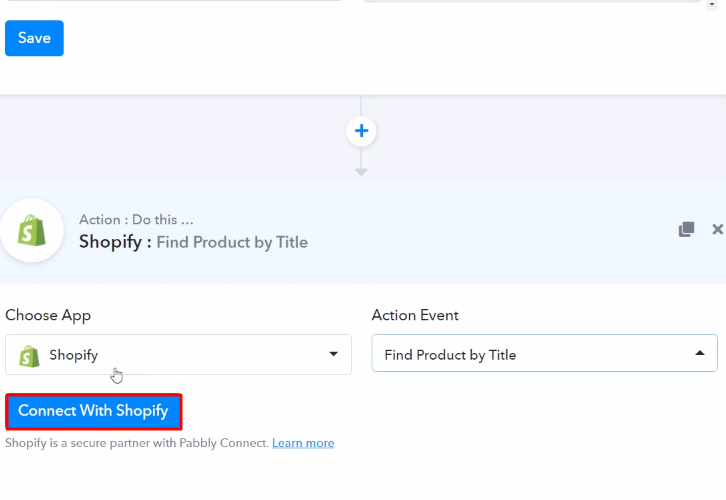
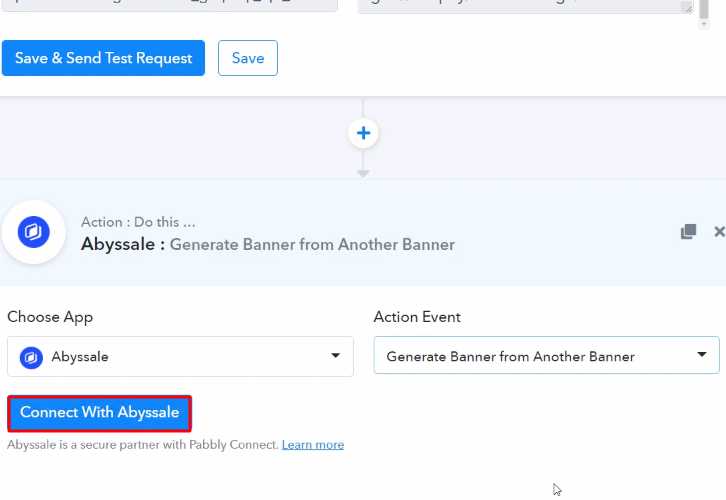
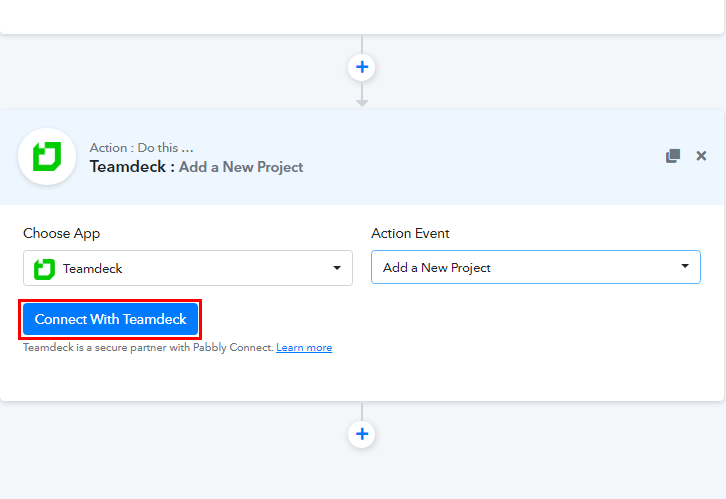
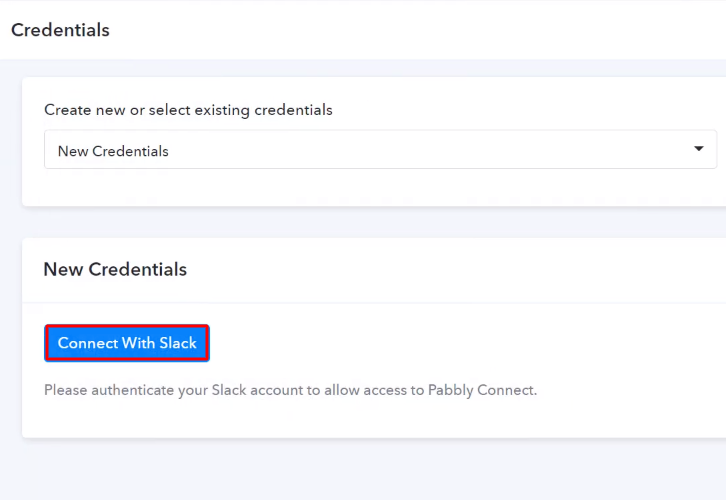
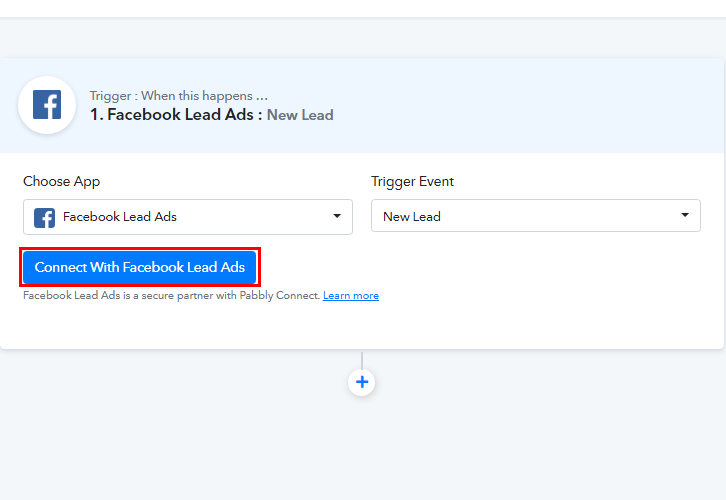
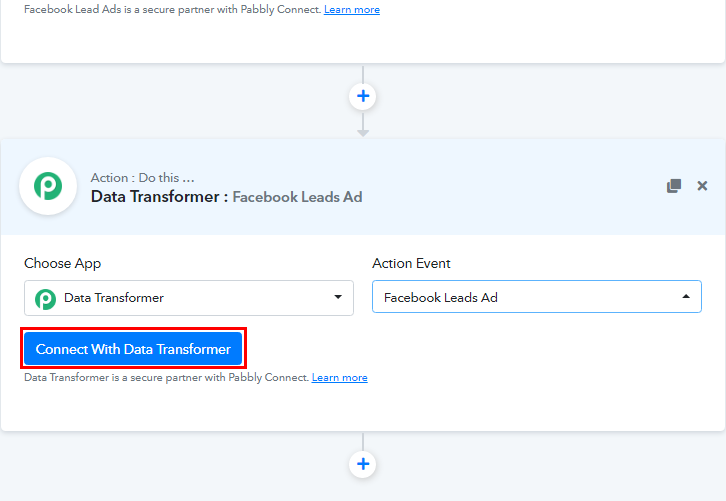
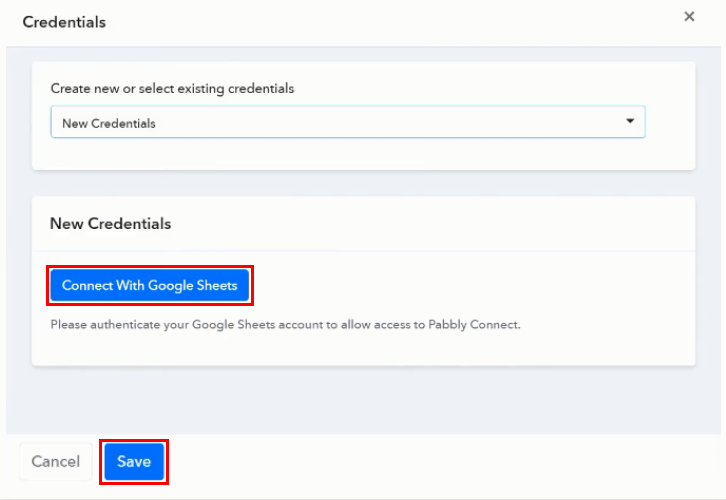
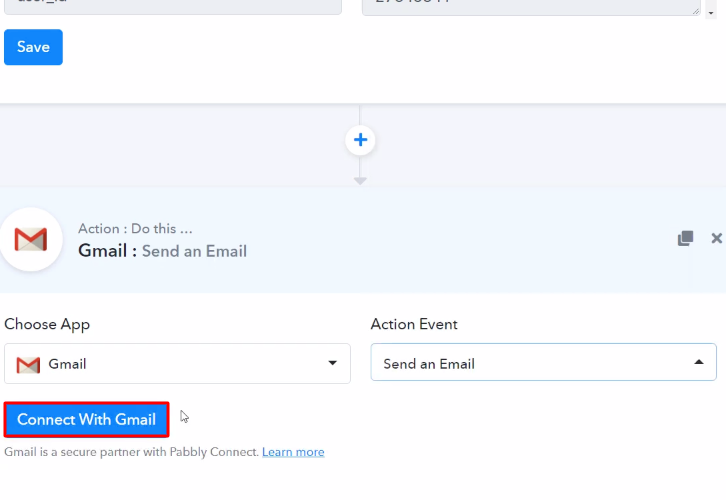
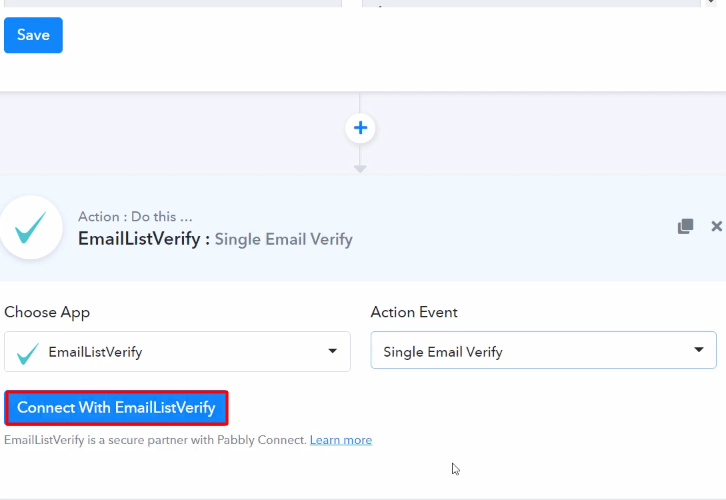
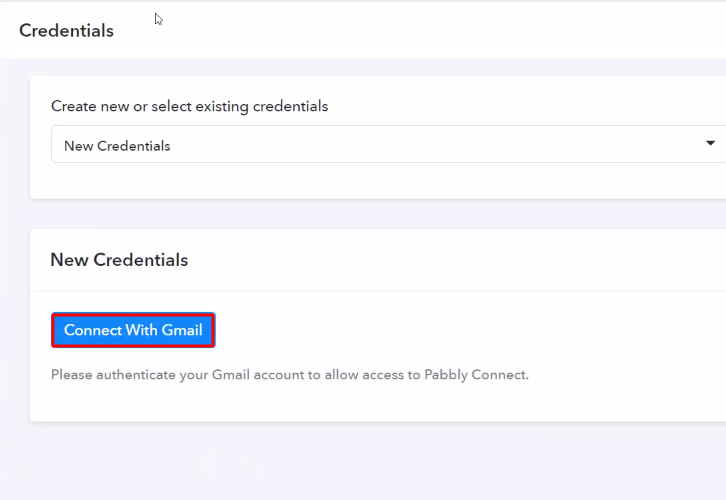
(b) Click the Connect Button
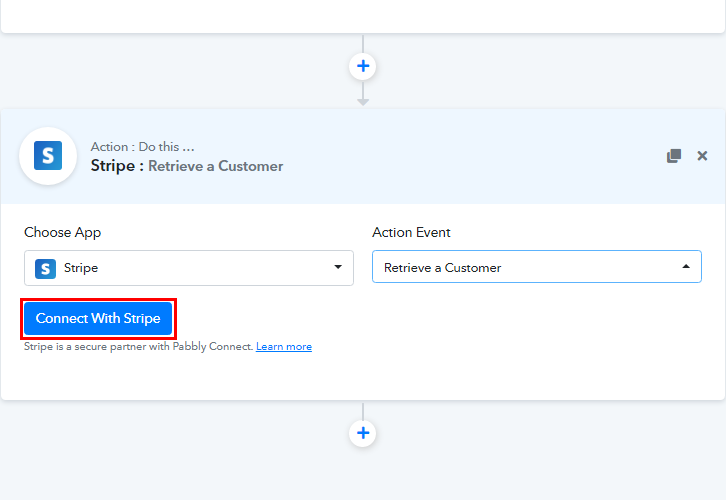
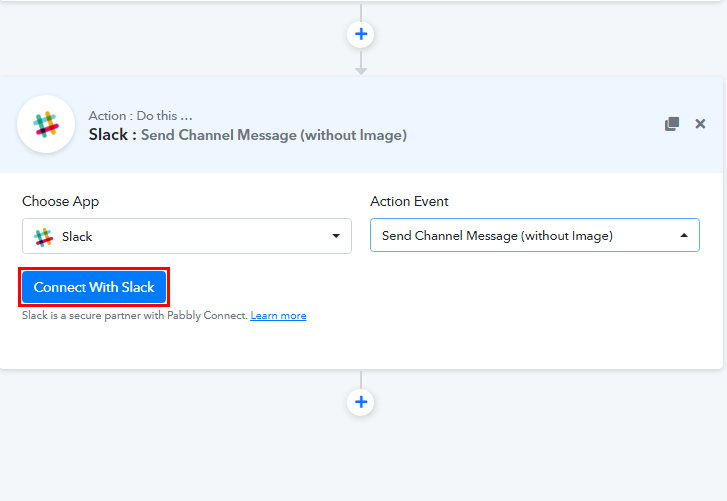
Promptly, click on ‘Connect with Stripe’ button to move forward.
(c) Connecting Stripe for Action
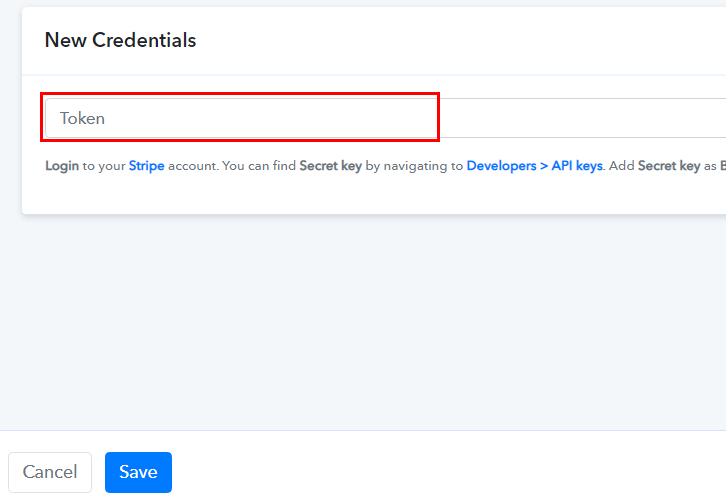
To connect Stripe for action step we have to paste the ‘Token’ in the Pabbly Connect window.
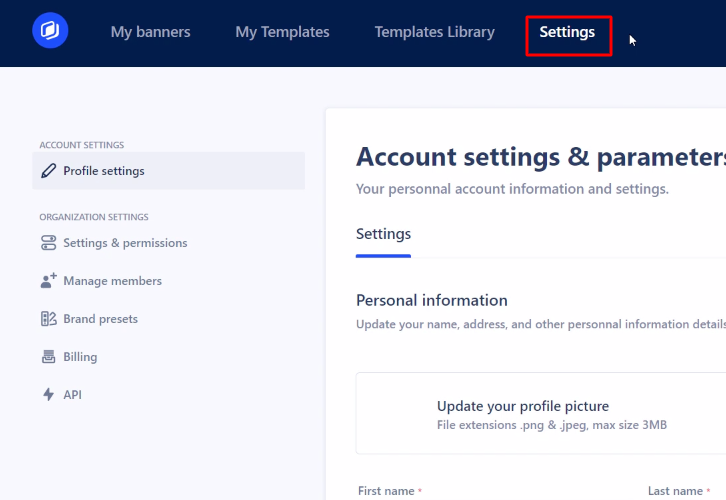
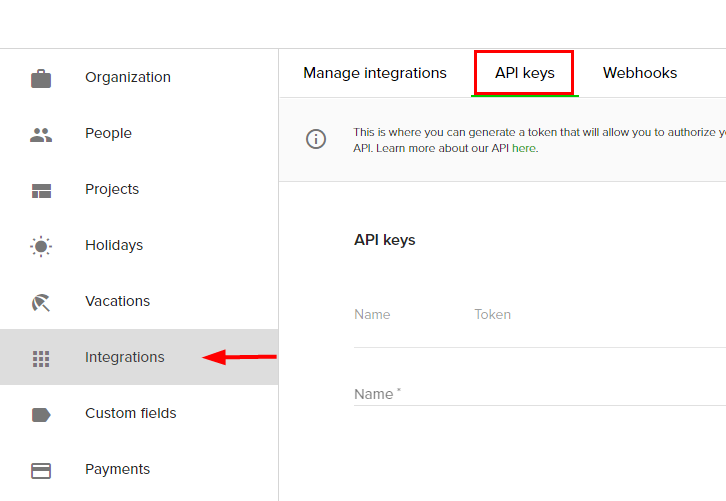
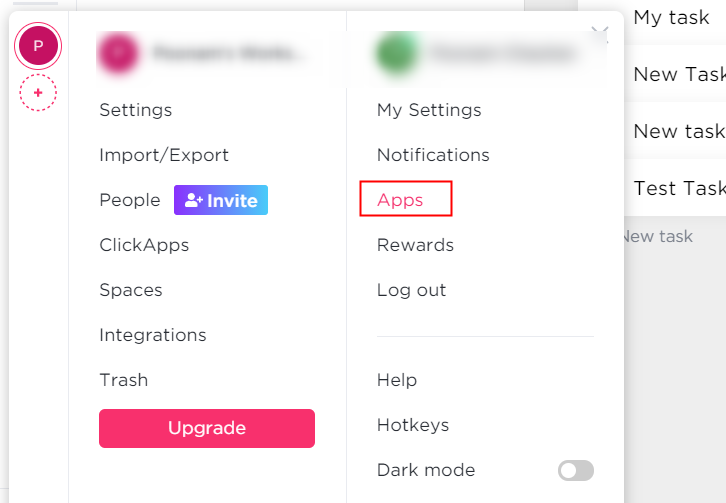
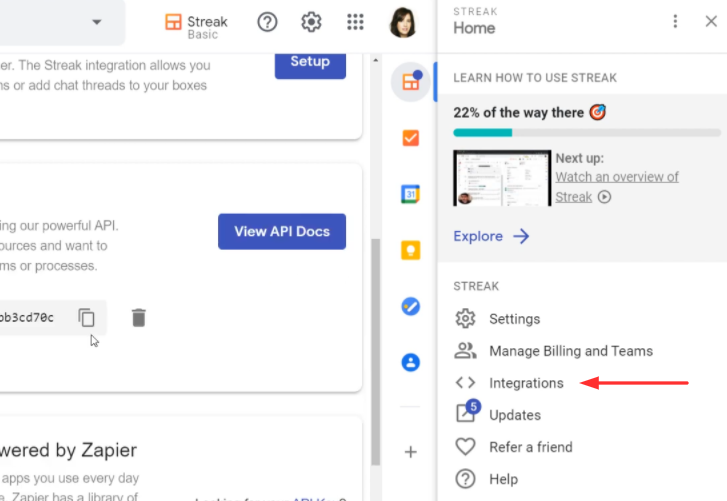
(d) Go to Developer Section
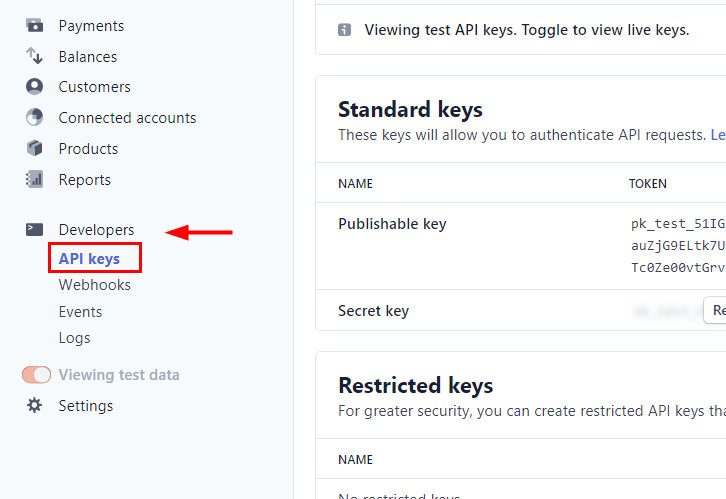
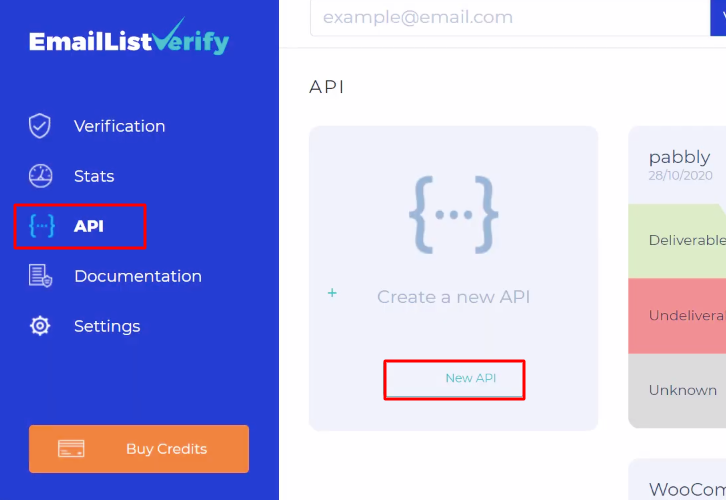
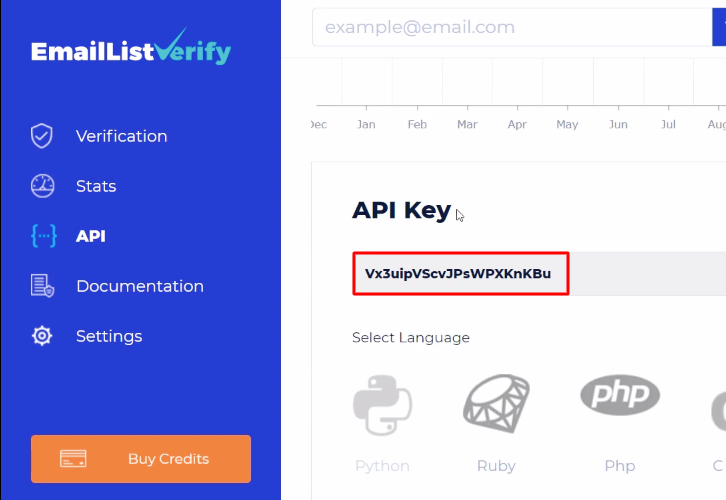
Go to the ‘Developer’ section on the left of the dashboard. Next, click on the ‘API Keys’ option.
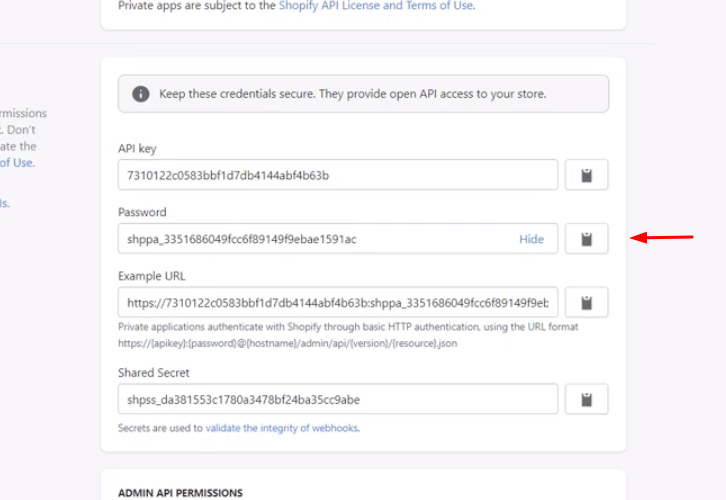
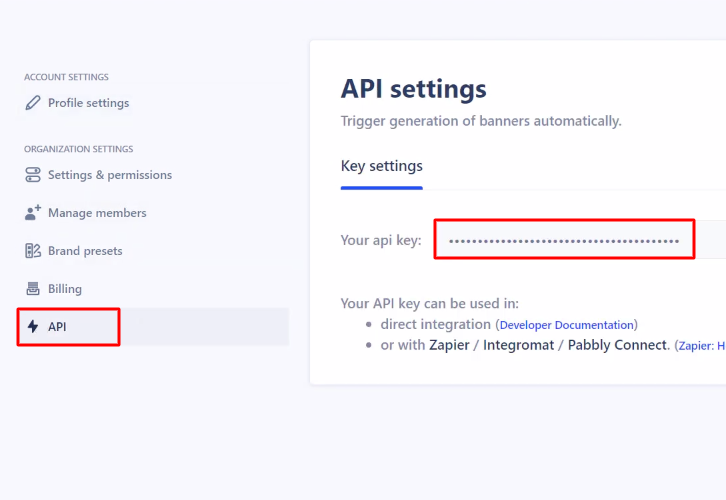
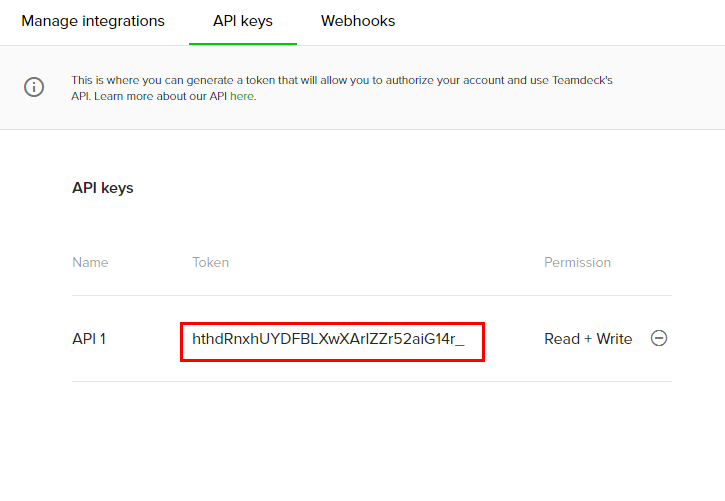
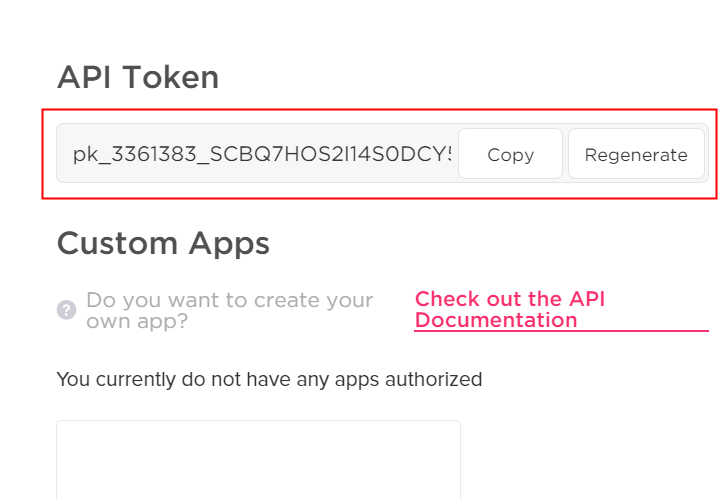
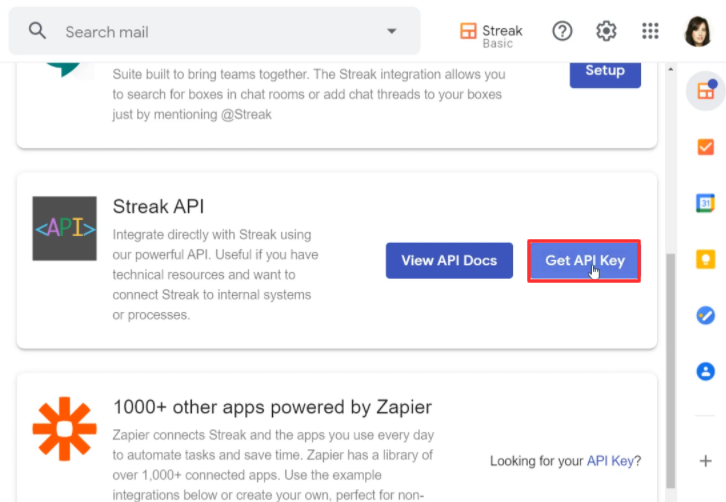
(e) Copy Secret Key
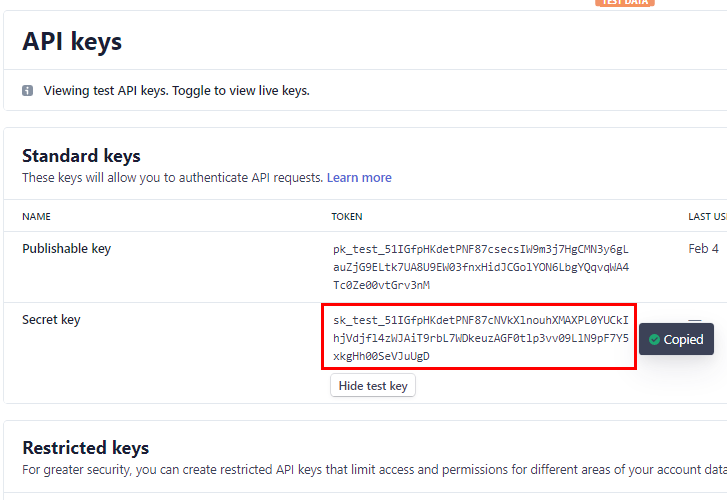
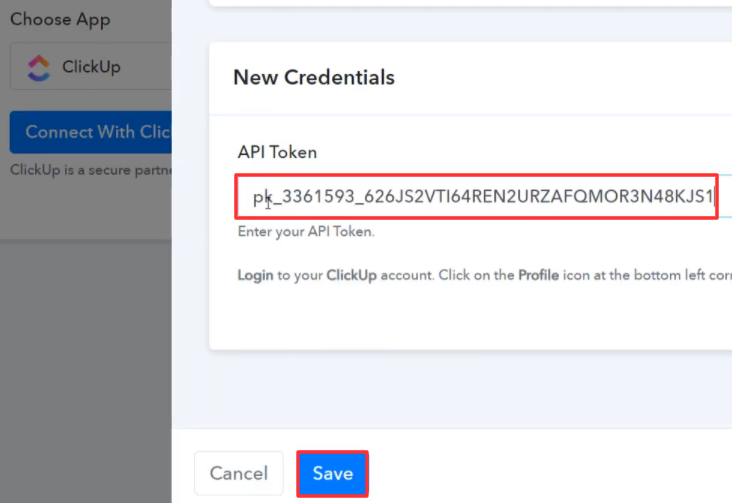
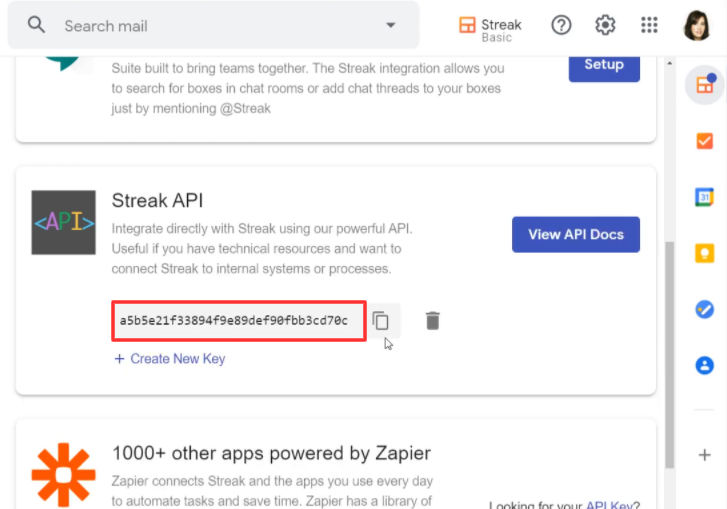
After hitting the ‘API Keys’ option you will see the Secret Key (token), copy it.
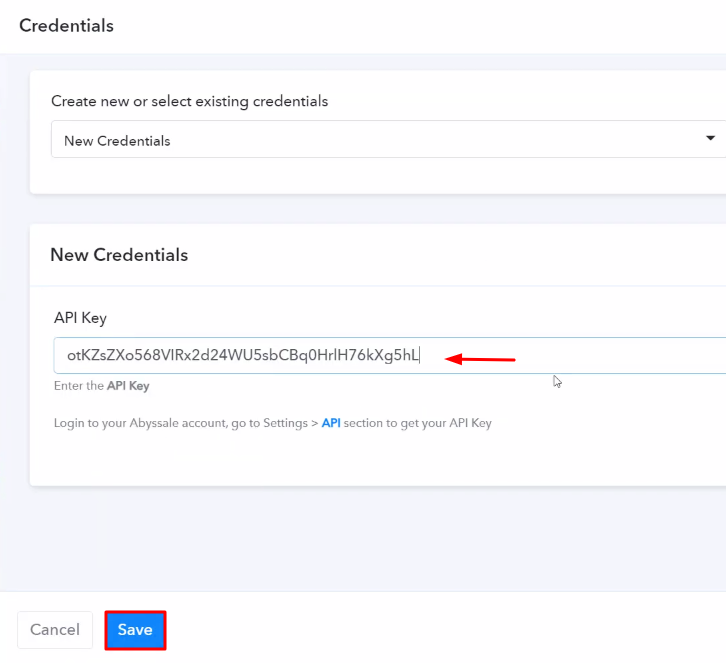
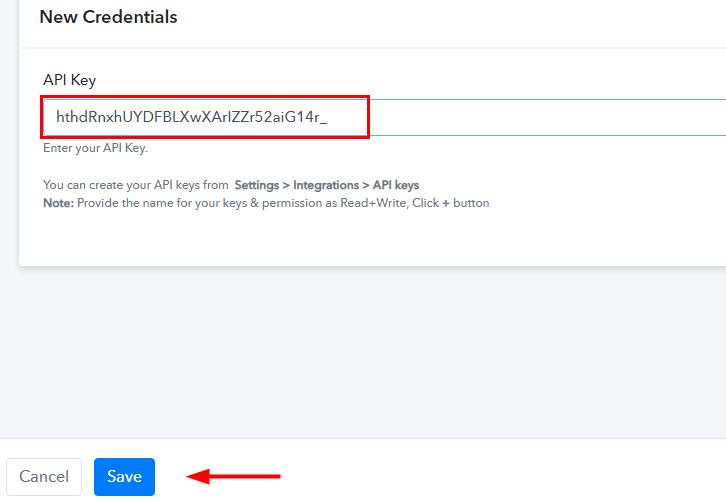
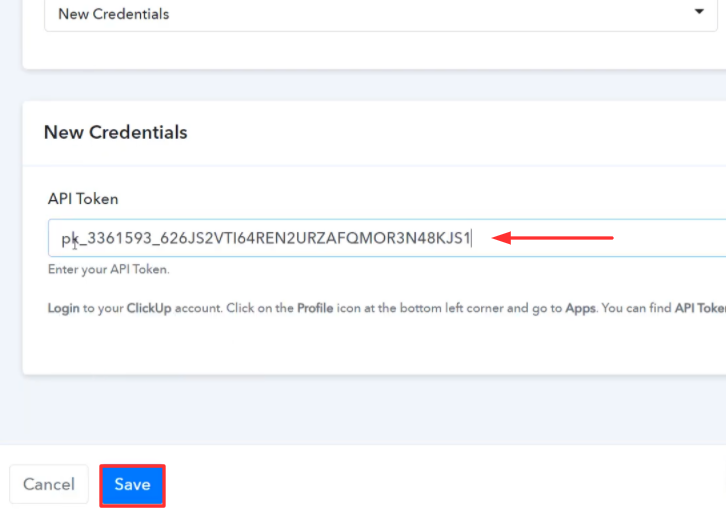
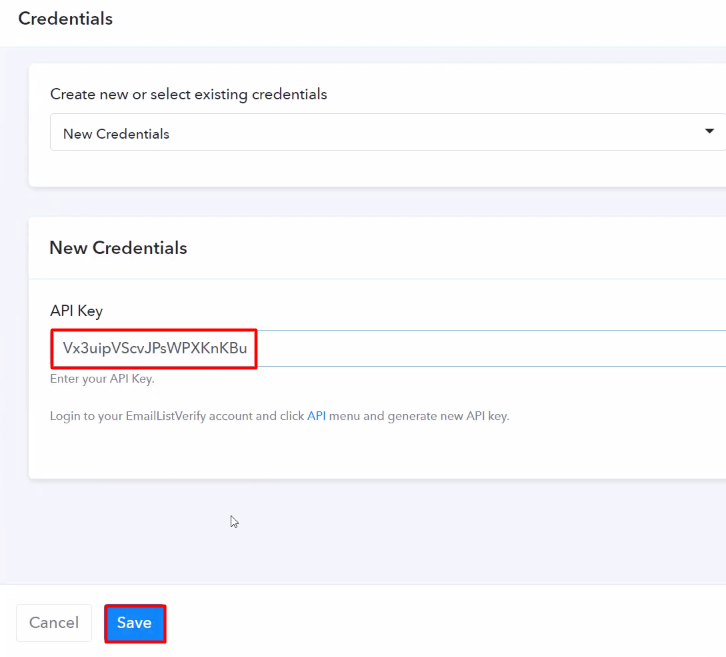
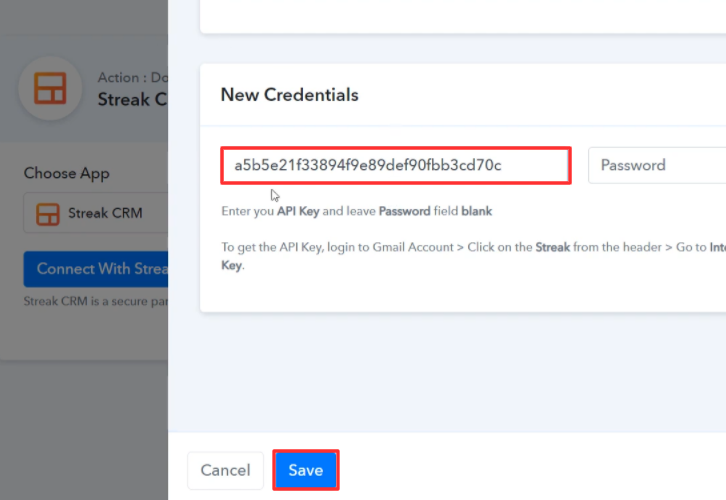
(f) Paste Secret Key
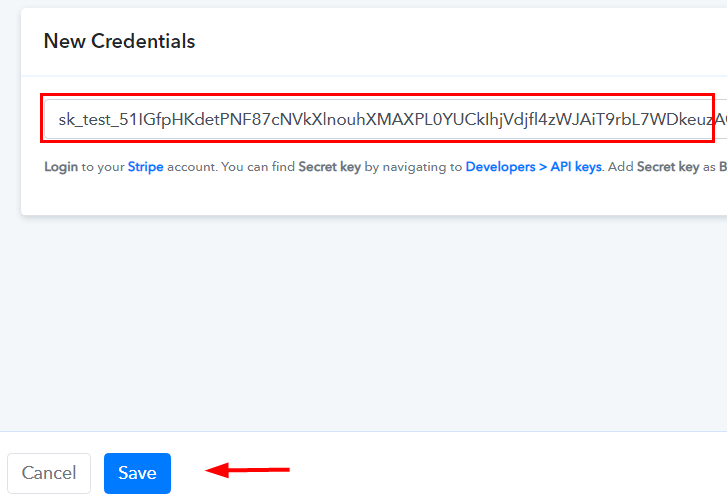
Paste the Secret Key in the Token field in Pabbly Connect window, and click on ‘Save’ button.
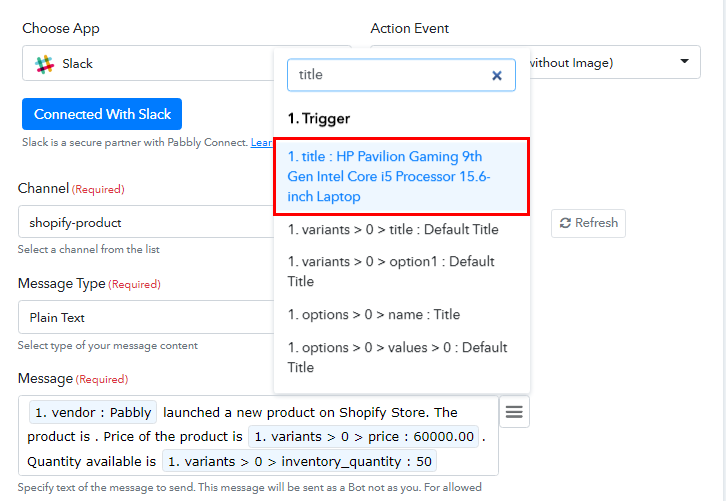
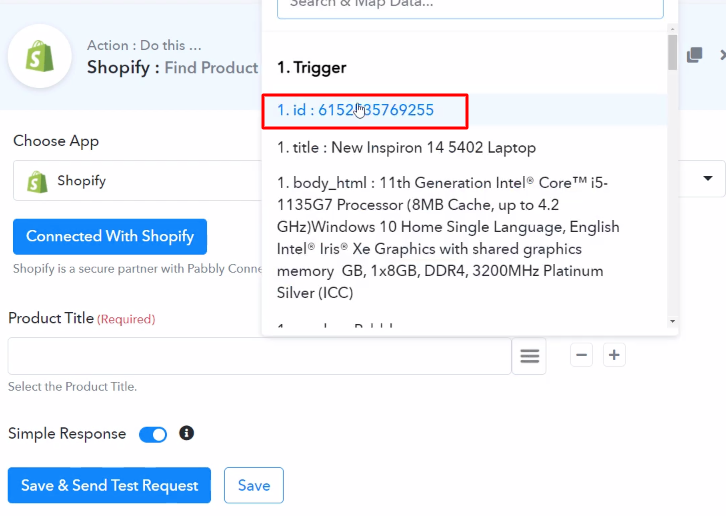
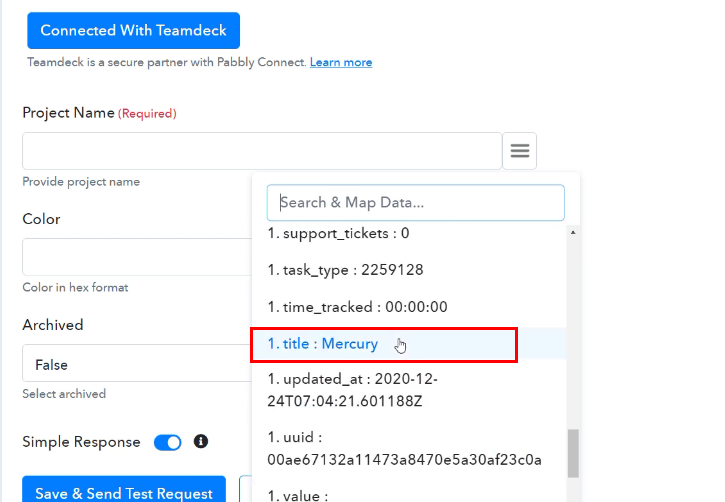
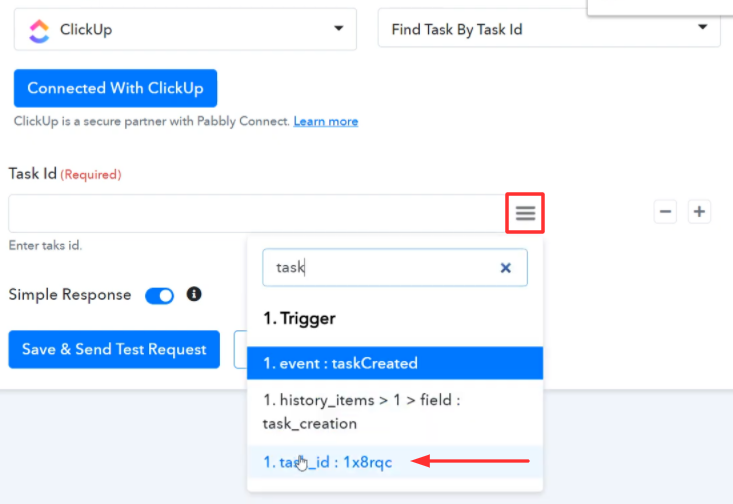
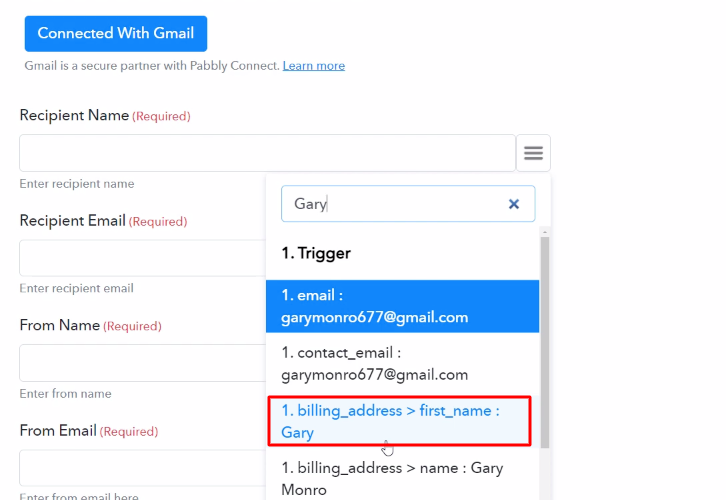
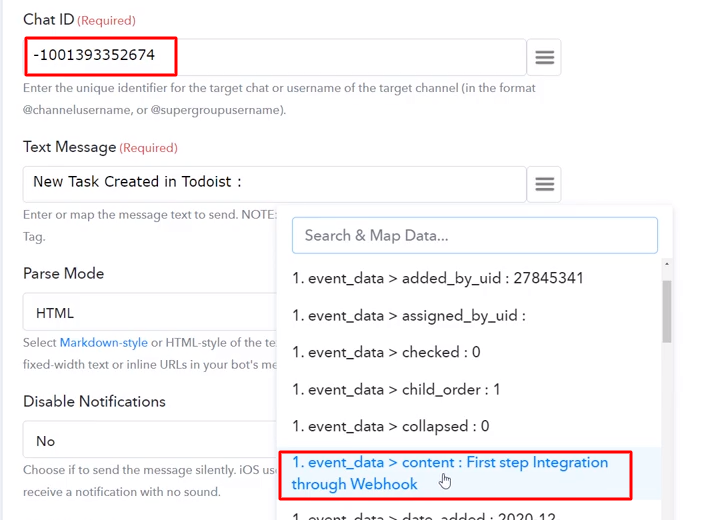
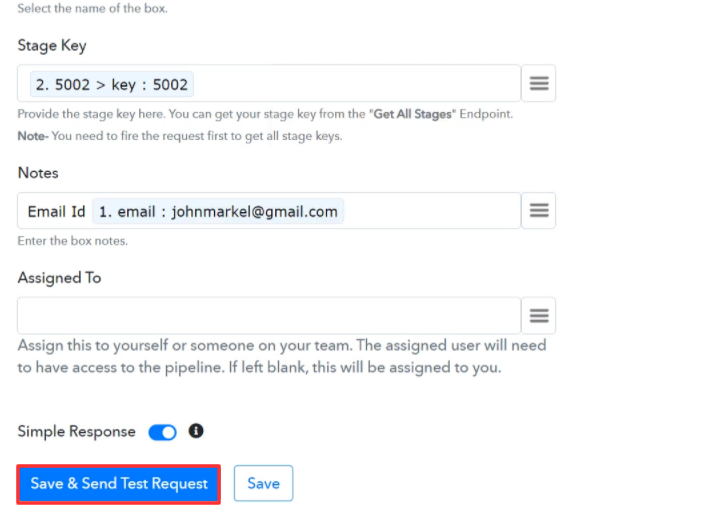
(g) Map the Field
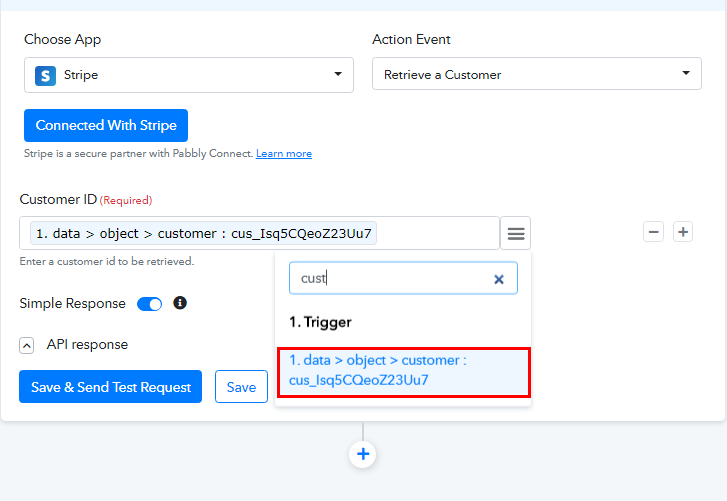
Map the customer ID from the above API response.
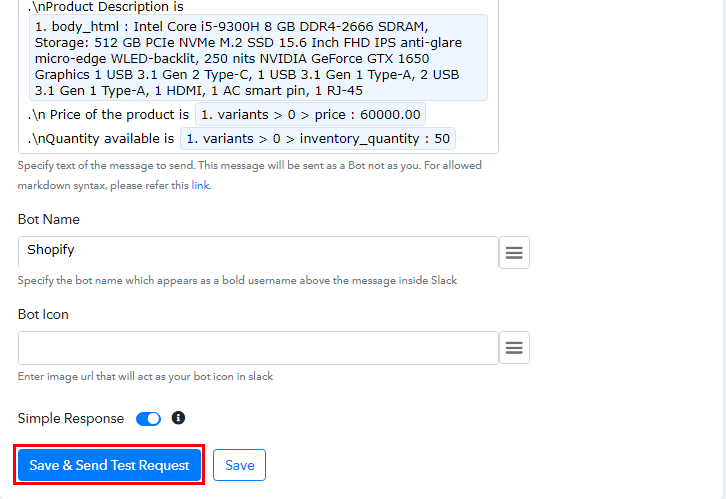
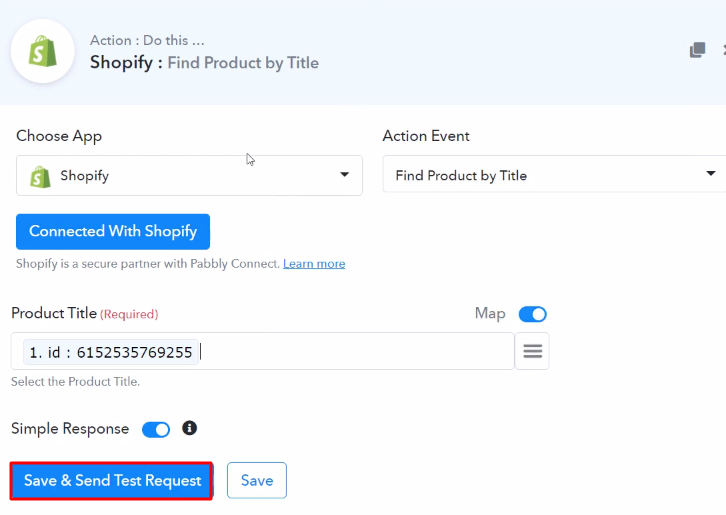
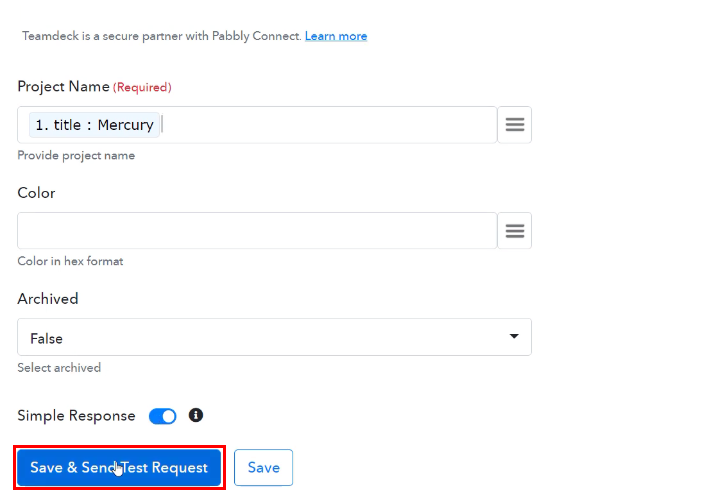
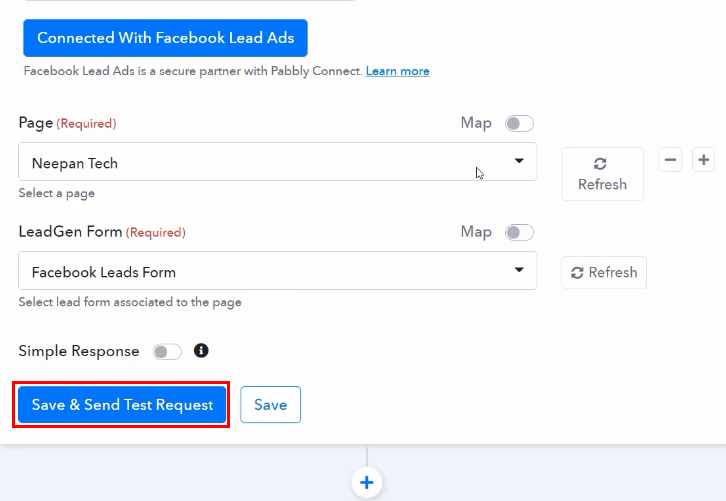
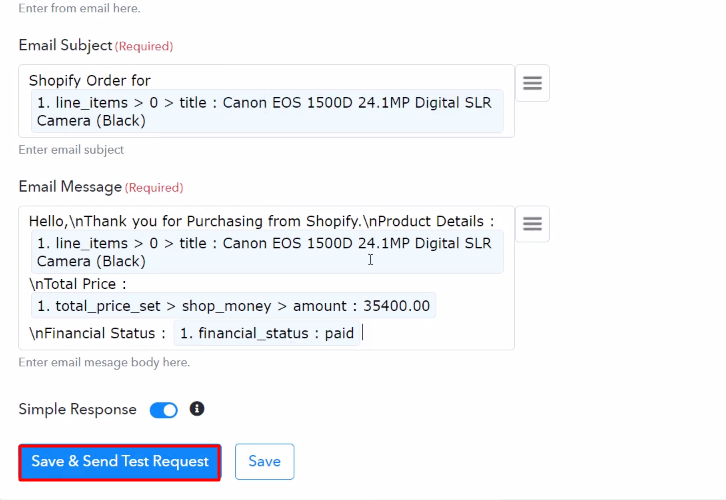
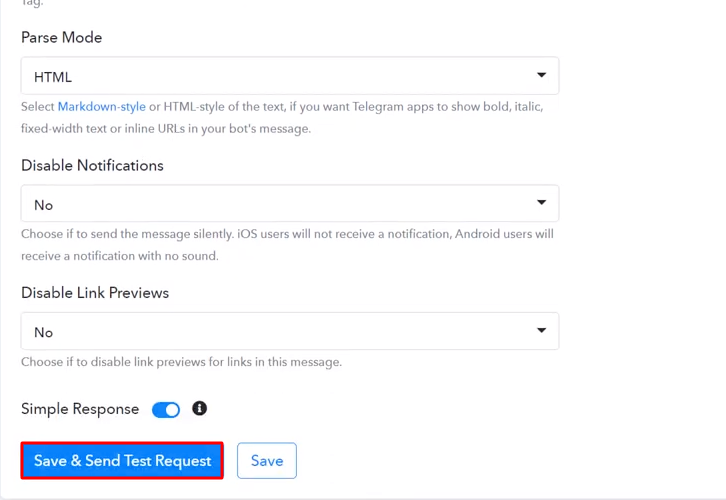
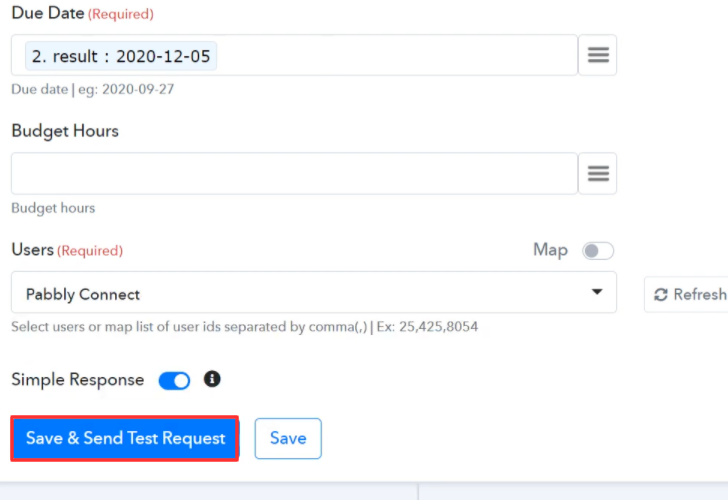
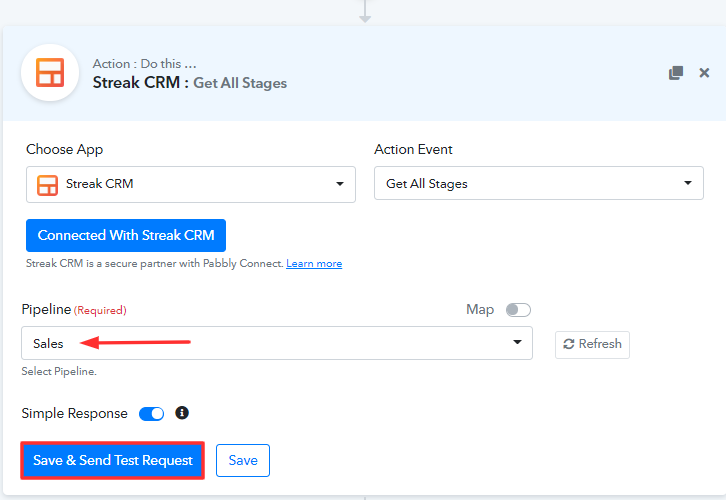
(h) Save and Send Test Request
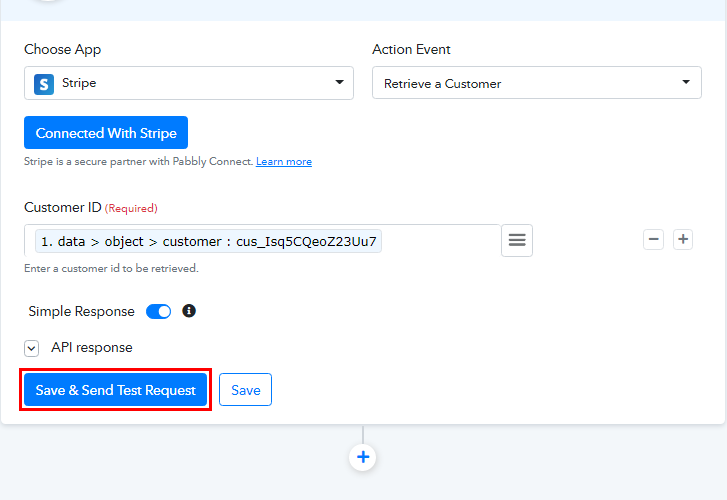
After you map the customer ID, click on the ‘Save and Send Test Request’ button.
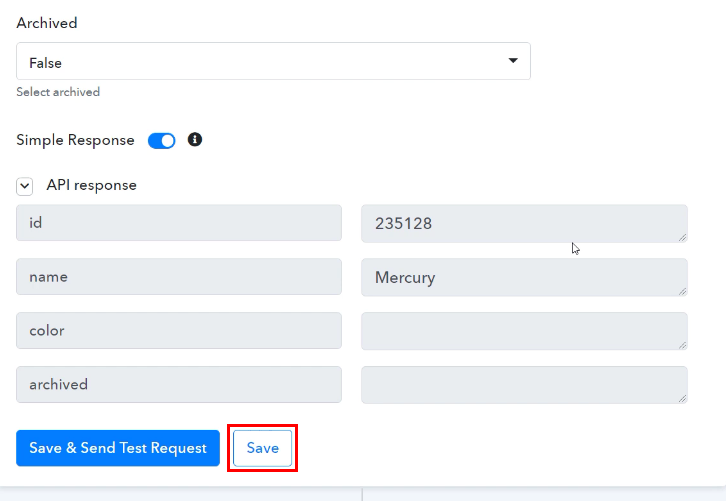
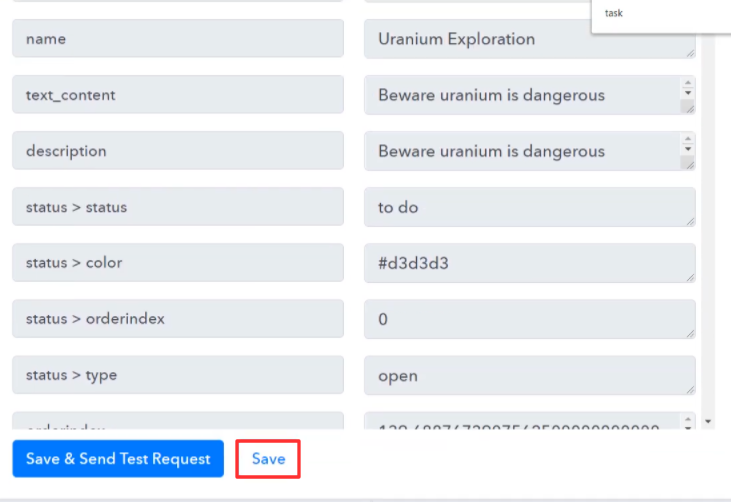
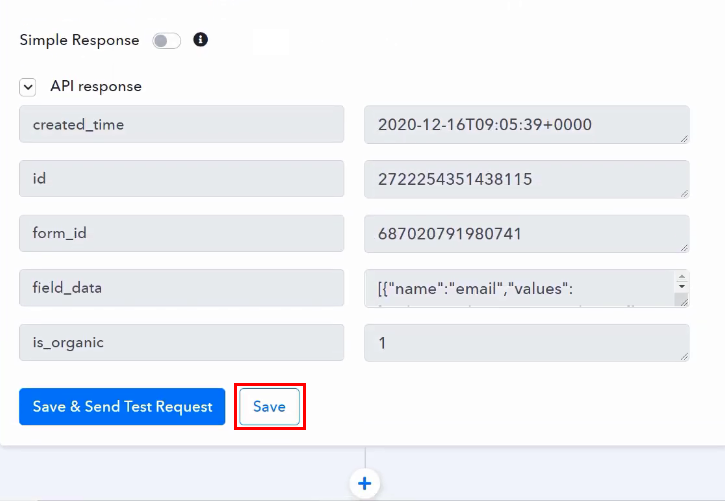
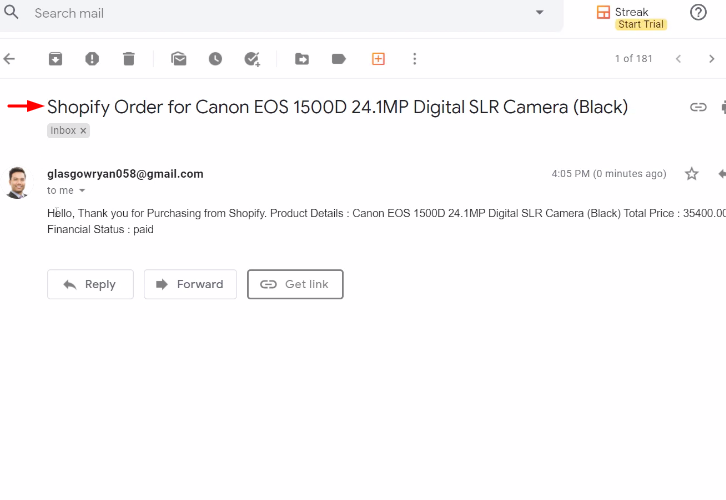
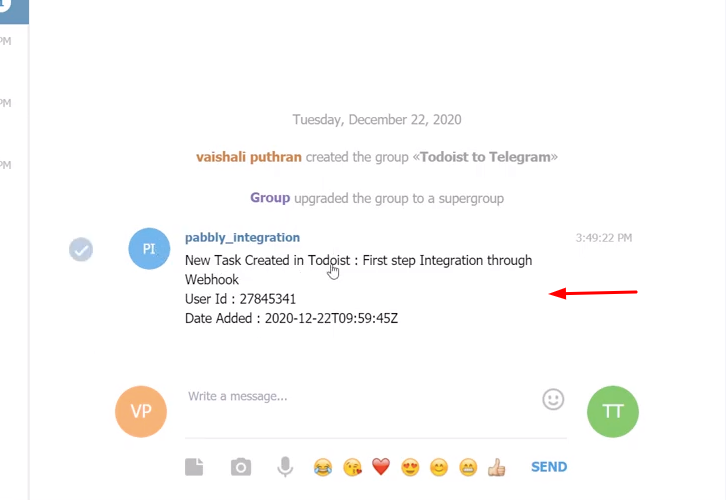
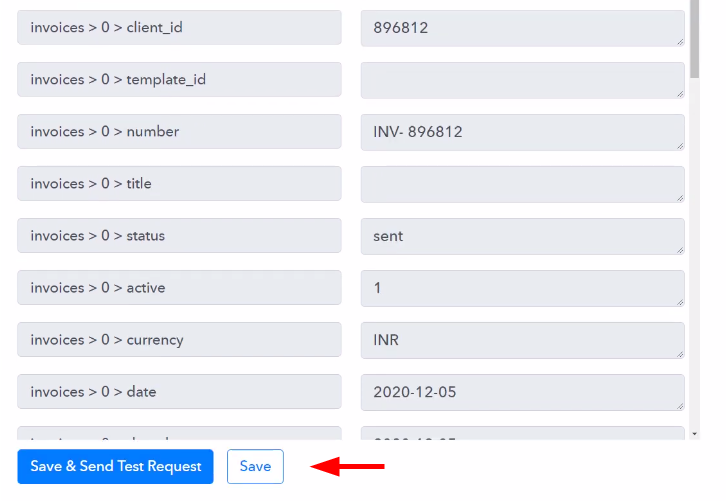
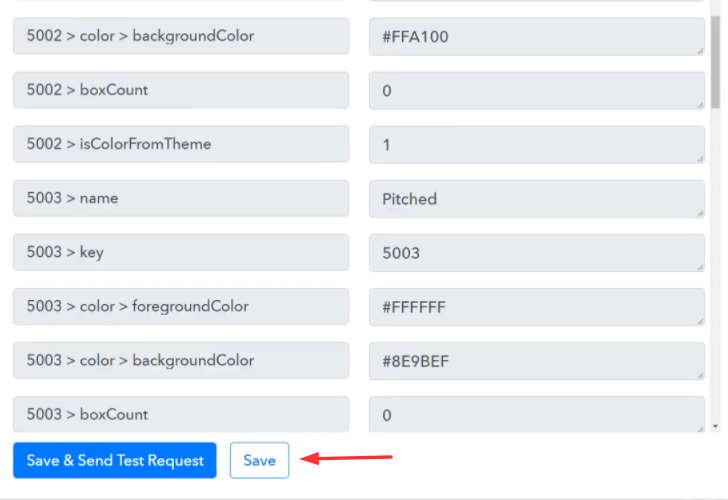
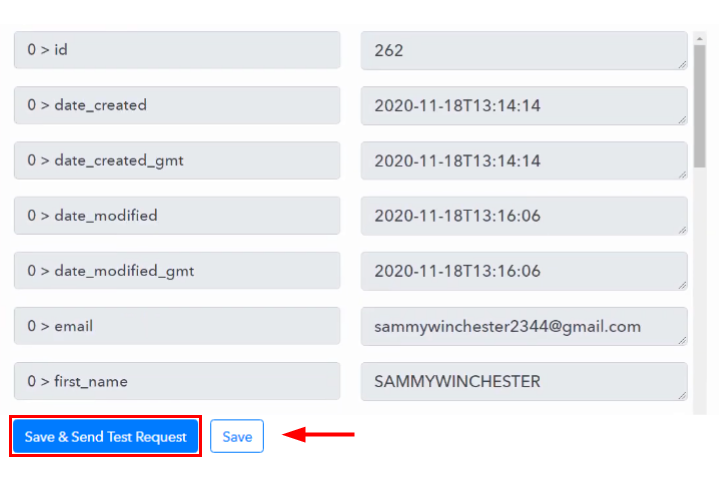
(i) Check and Save Response
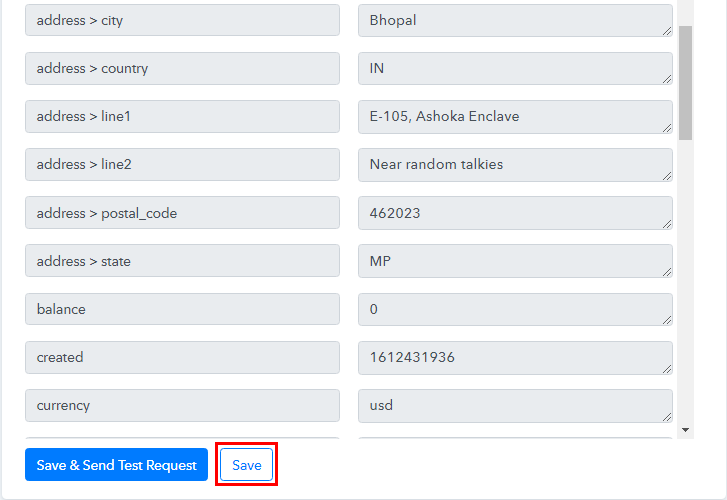
Next, you will get the API response showing customer data we have entered in Stripe like name, email, address, etc. Finally, click on ‘Save’ button.
Step 6: Setting Action for API
As you can check from the trigger response that we have got the charged amount in wrong format (decimal is not included). So, to get it in the right format we need to add another action step.
(a) Select Application you Want to Integrate
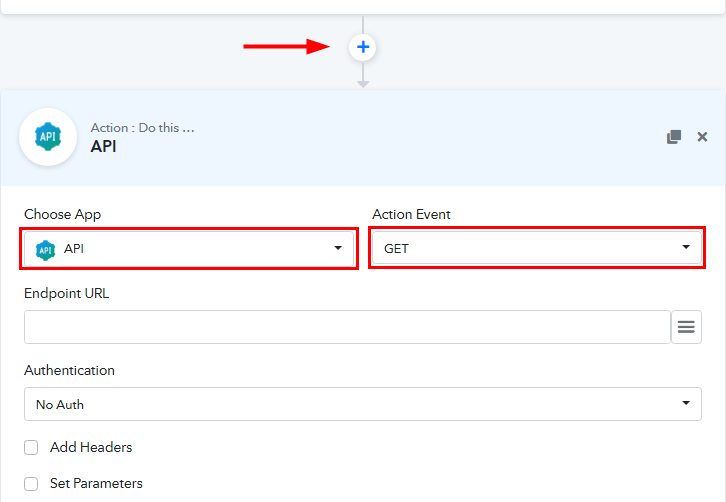
Subsequently, hit the (+) button and select ‘API’ from choose app and action event as ‘GET’.
(b) Enter Endpoint URL

Following that, you have to paste the Endpoint URL to make the API interaction with other software possible.
We provide you the endpoint URL, so just paste it ‘https://forms.pabbly.com/api/trim_amount’.
(c) Set Parameters
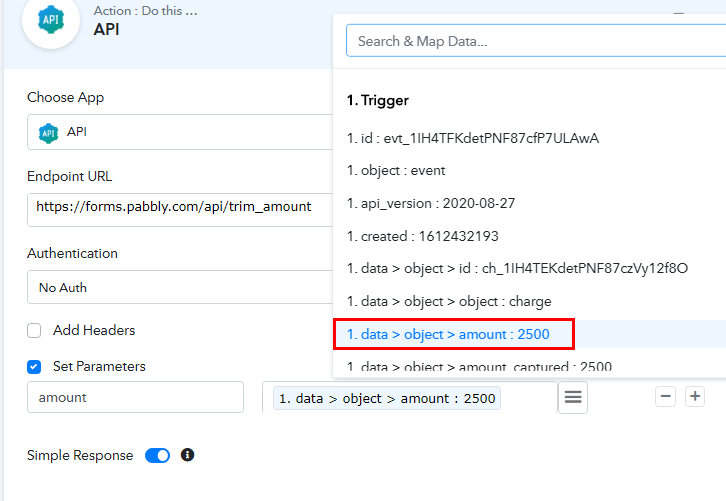
Promptly, check the box of set parameters check box. Enter ‘amount’ in the first field and map the charged amount(2500) in the adjacent field.
(d) Save and Send Test Request
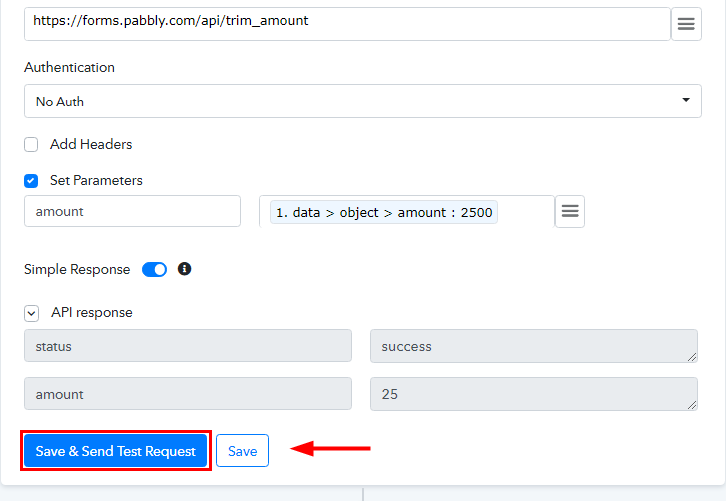
Once you are done setting the parameter, click on the ‘Save and Send Test Request’ button and you will get the API response, then save it.
Step 7: Setting Action for Text Formatter
We know that WooCommerce accepts the currency in upper case but from the trigger response, we got the currency in lower case. So to make it in the correct format we have to integrate ‘Text Formatter’ into action.
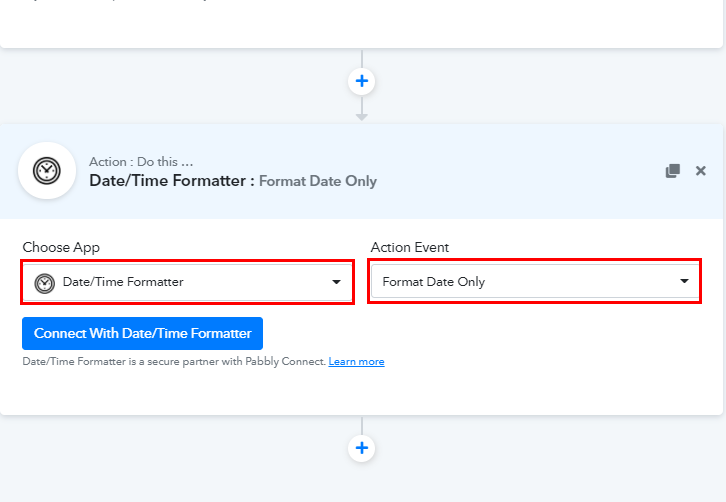
(a) Select Application you Want to Integrate
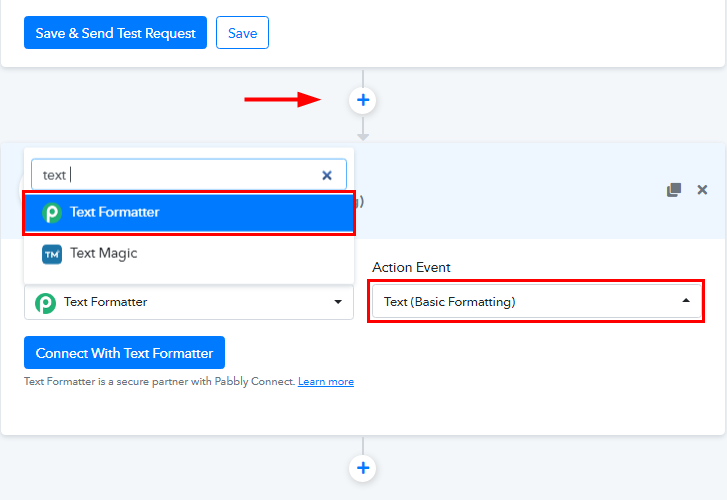
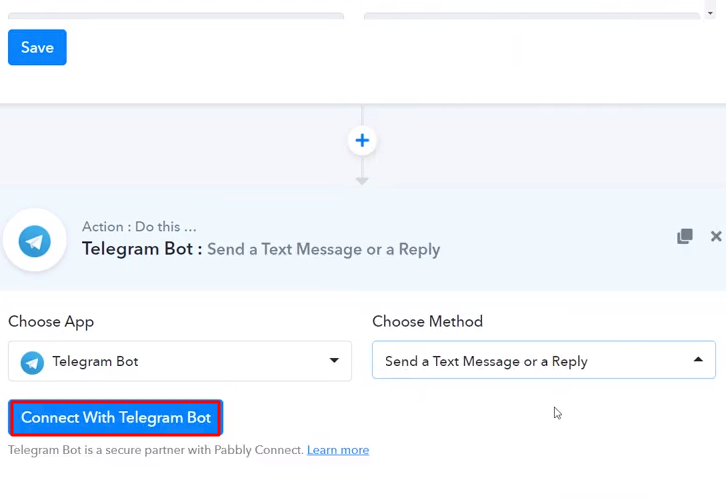
Now, click on the plus (+) button and from the choose app select ‘Text Formatter’ and choose method as ‘Text’.
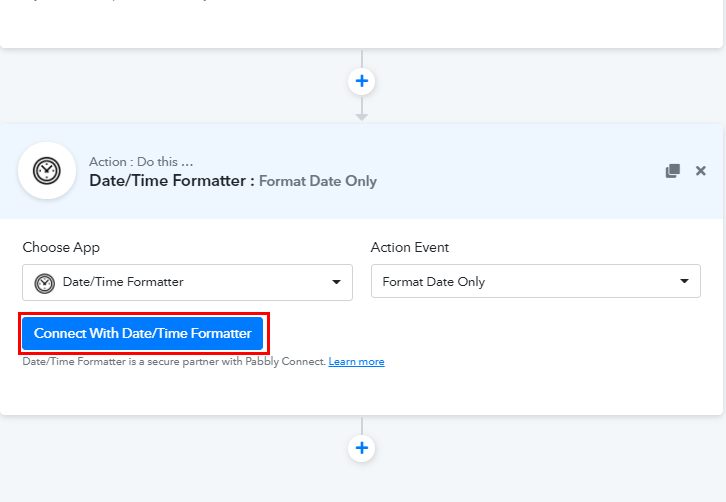
(b) Connect with Text Formatter
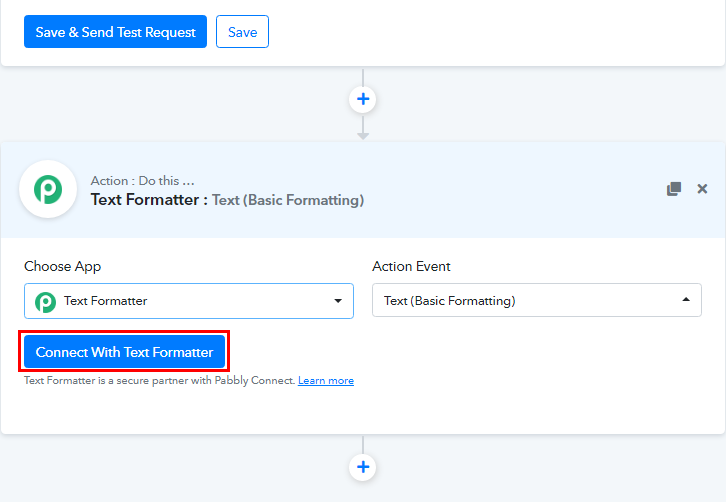
Promptly, click on the ‘Connect With Text Formatter’ button to connect it.
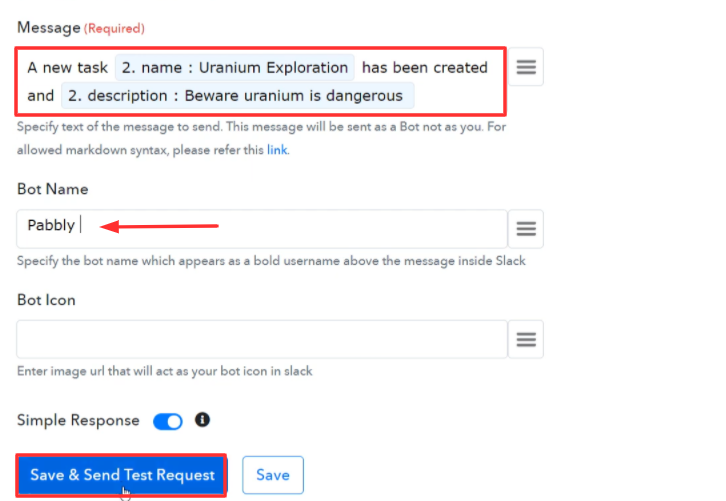
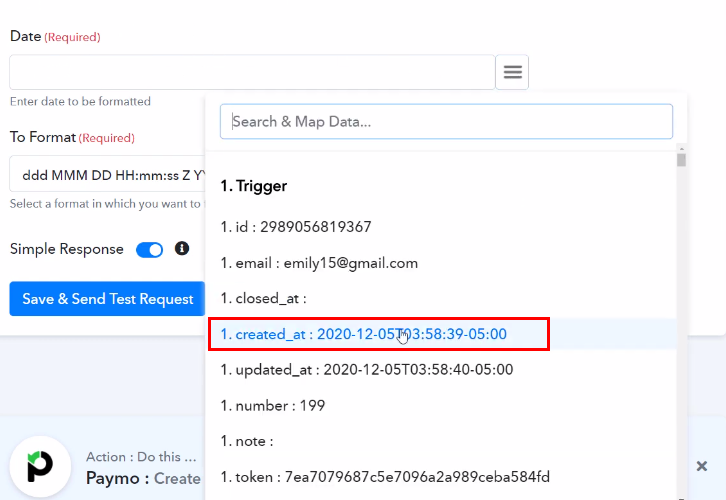
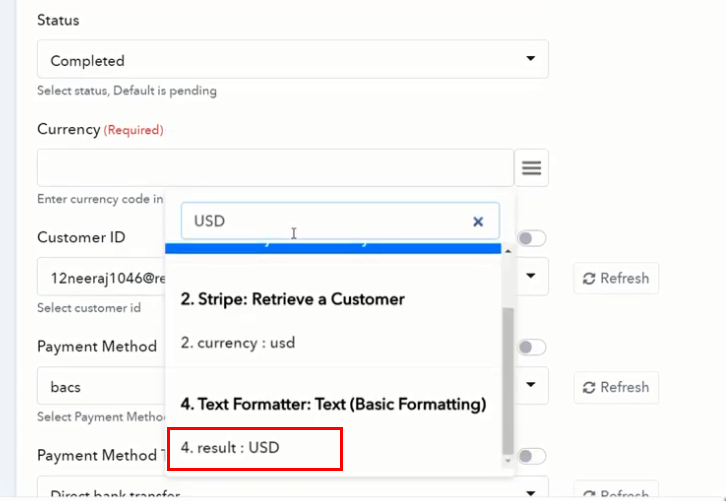
(c) Map the Field
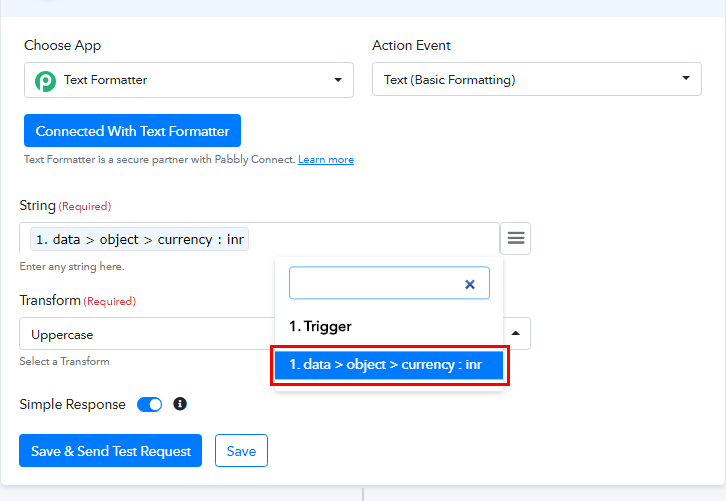
Following that, map the field to change the casing of currency. Map the currency in ‘String’ field and select ‘Uppercase’ from the Transform drop-down.
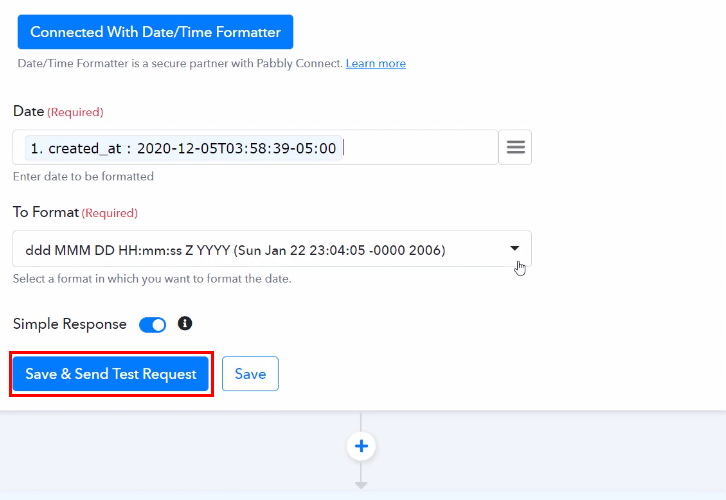
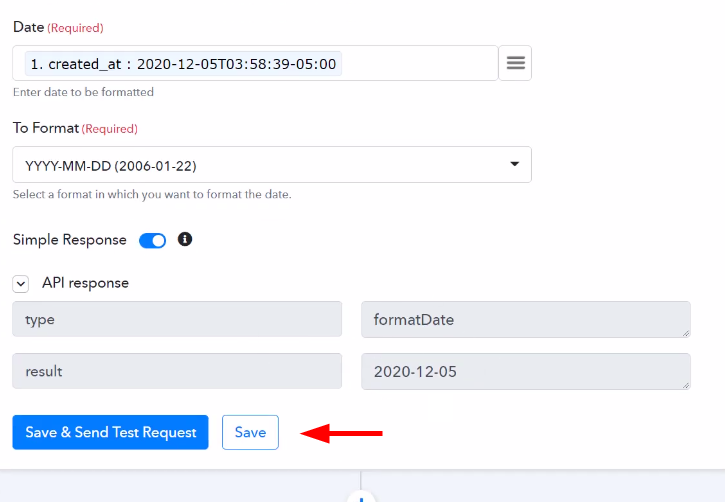
(d) Save and Send Test Request
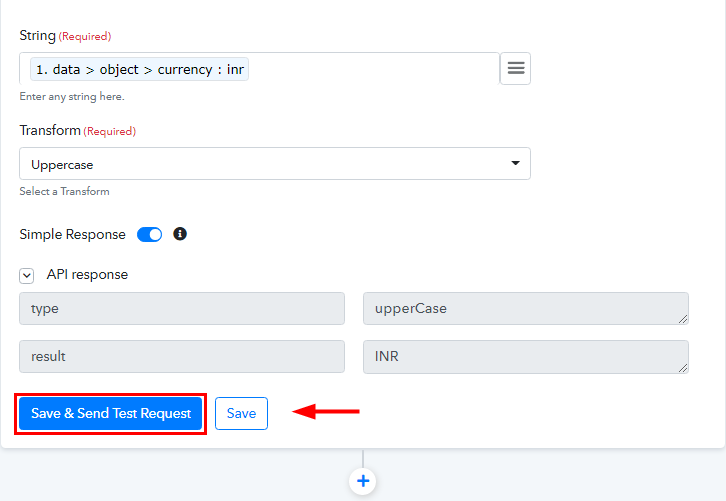
Once you are done mapping the fields, click on the ‘Save and Send Test Request’ button and you will see that the currency is now in the Uppercasing. After that, click on the ‘Save’ button.
Step 8: Setting Action for Filters
If you have multiple e-commerce platforms such as Amazon, Shopify, WooCommerce, and PayKickstart and they all are associated with a single Stripe account so in that condition we have to add ‘Filters’.
Let suppose, Stripe charge for $50 for Shopify but unfortunately, this workflow will also recognize this charge and make an order in WooCommerce. So, to avoid such mistakes we have to integrate Filter in the workflow.
(a) Select Application you Want to Integrate
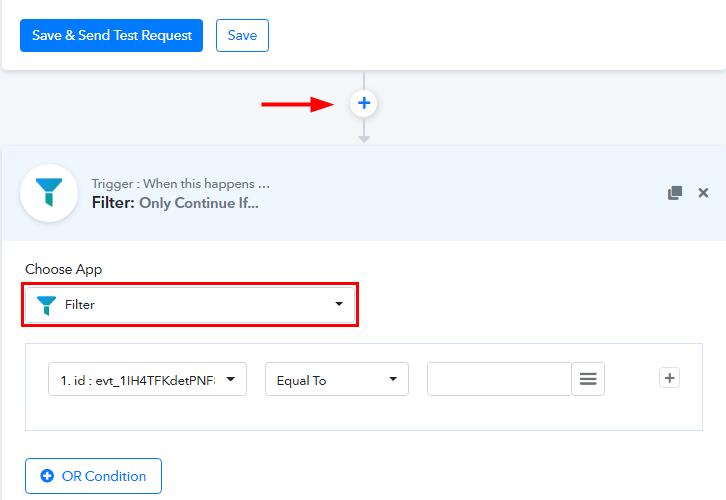
Now, click on the plus (+) button and from the choose app select ‘Filter’.
(b) Setting Conditions
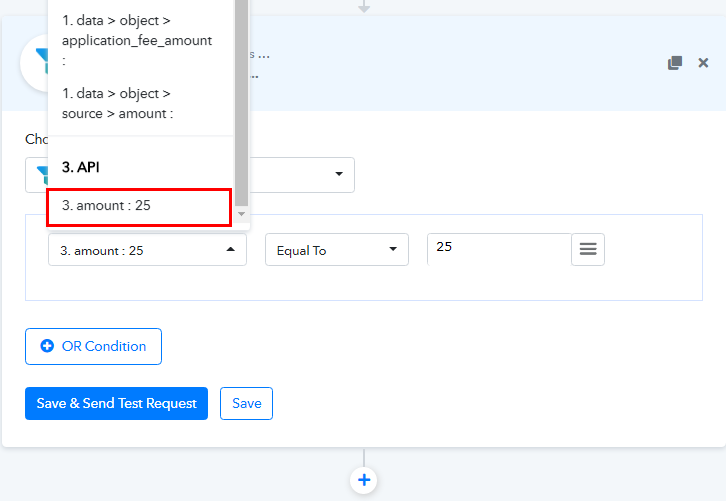
Promptly, set the condition for filter. Select amount that we get from the API action step, select condition as ‘Equal To’ and enter the exact amount (25) which you get from Stripe.
(c) Save and Send Test Request
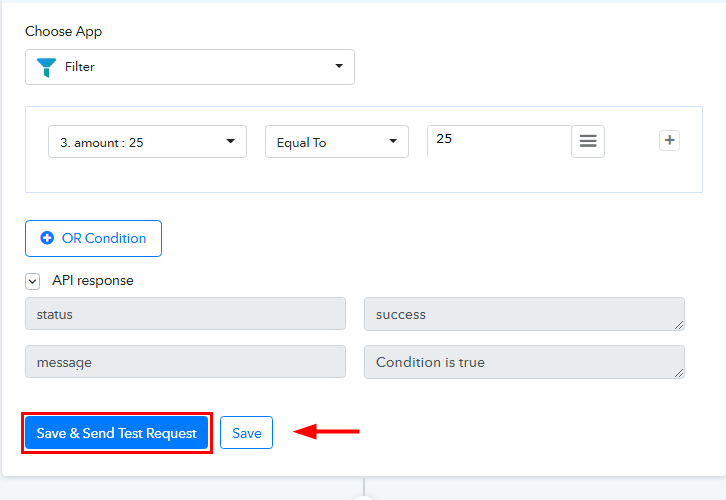
Once you are done setting the conditions, click on the ‘Save and Send Test Request’ button and you will get the API response, i.e. the condition is true. At last, click on the ‘Save’ button.
Step 9: Setting Action for WooCommerce to Retrieve Customer
In order to check whether a customer exists or not in WooCommerce, we have to retrieve the customer details by adding WooCommerce in the action step.
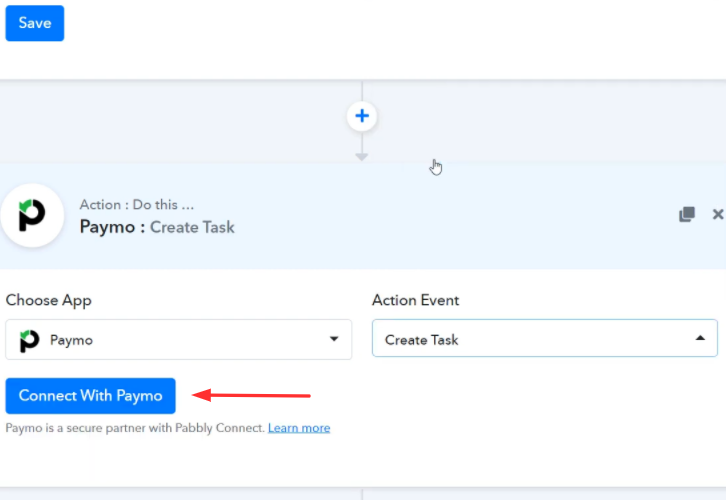
(a) Select Application you Want to Integrate
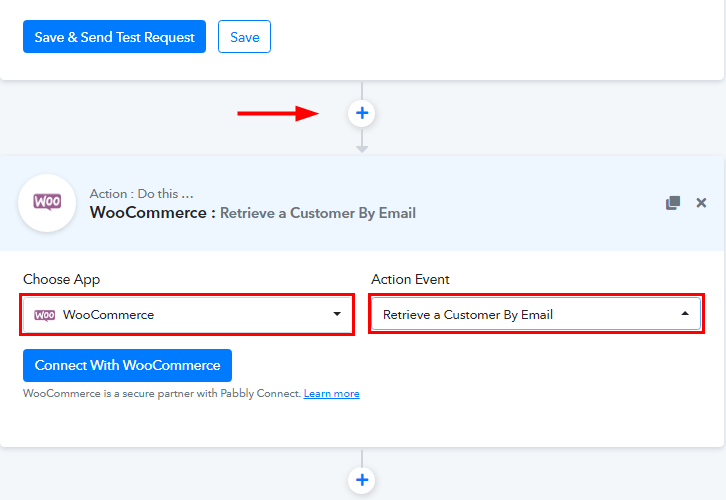
From the choose app drop-down select ‘WooCommerce’ and choose method as ‘Retrieve a Customer by Email’.
(b) Connect with WooCommerce
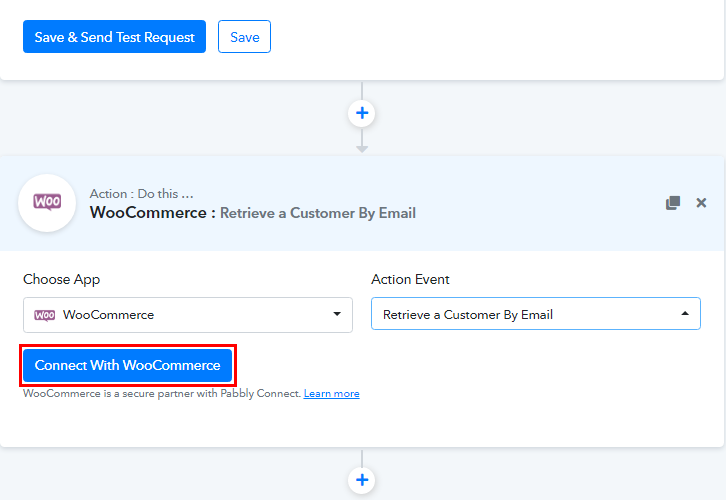
Now, click on the ‘Connect with WooCommerce’ button.
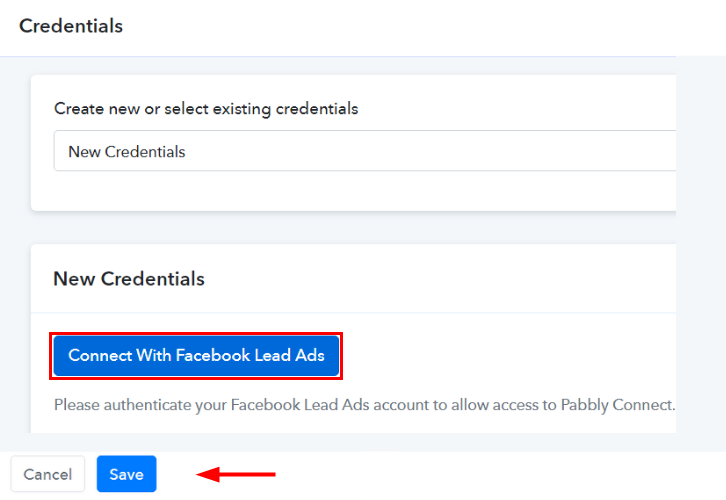
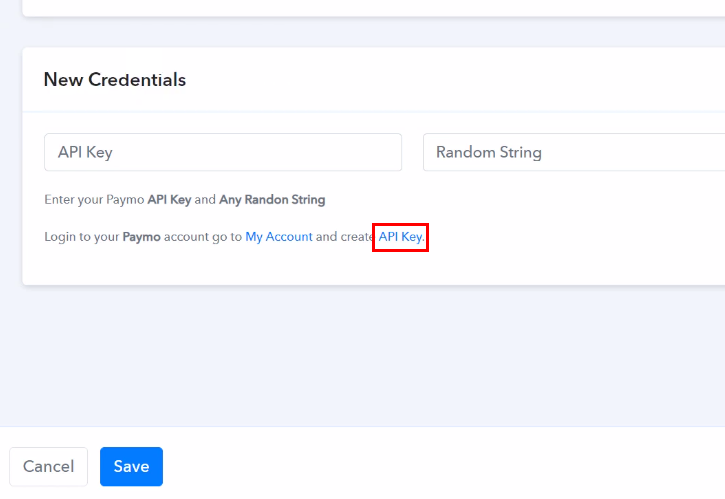
(c) Connecting WooCommerce to Pabbly Connect
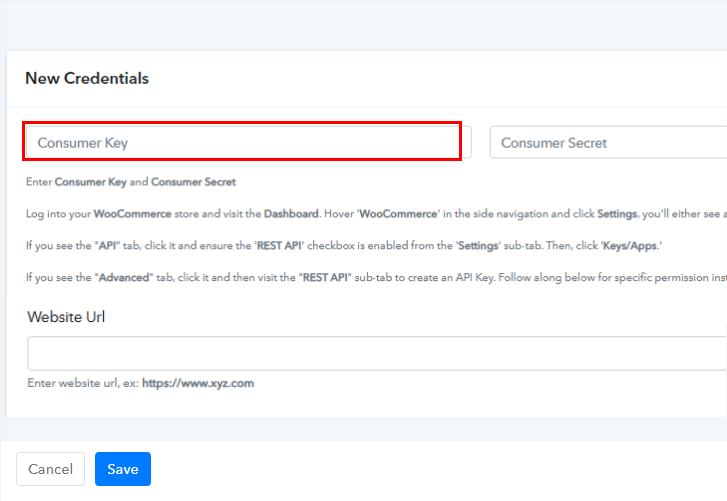
After you click on ‘Connect with WooCommerce’ button, a window will slide from the right. Here you have to enter Consumer Key, Consumer Secret and Website URL. And for that, you have to log in to your WooCommerce account.
(d) Go to WooCommerce Settings
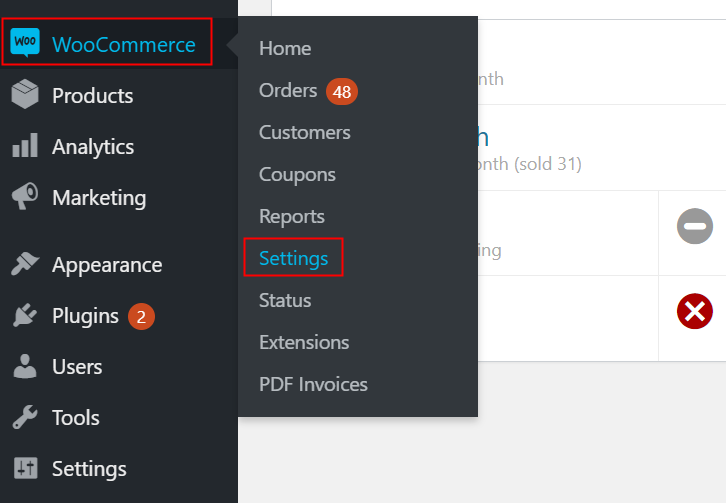
Once you are successfully logging into your WordPress account, solely go to the ‘WooCommerce’ section then there press the ‘Settings’ option.
(e) Click on Advanced Option
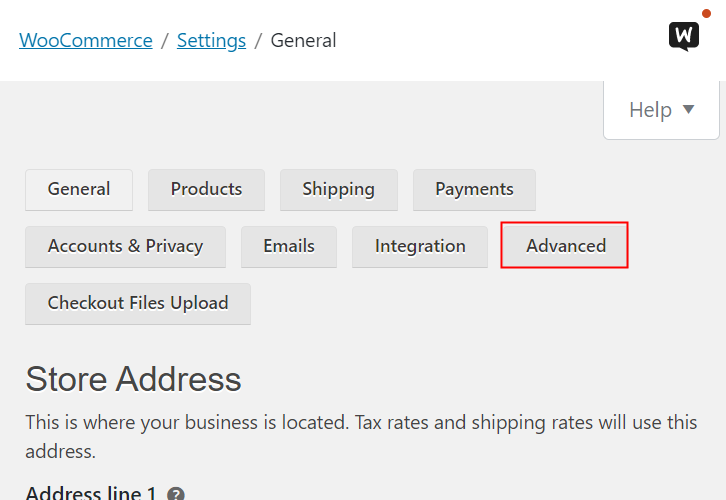
After clicking on ‘Settings’, a tab will open up with different options, here you have to select ‘Advanced’.
(f) Click on Rest API
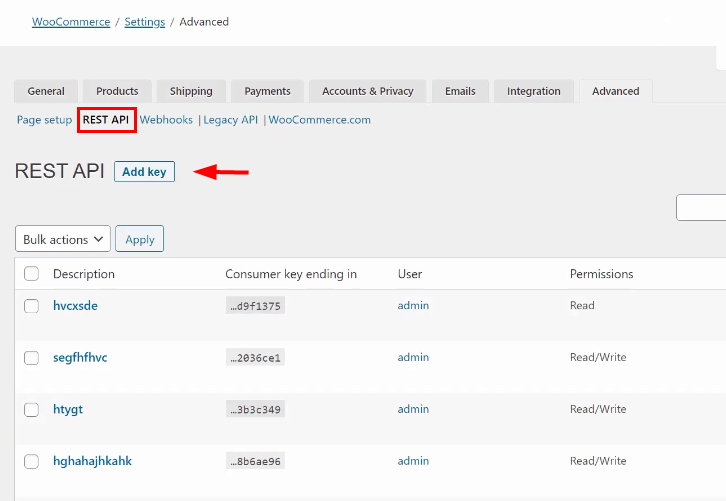
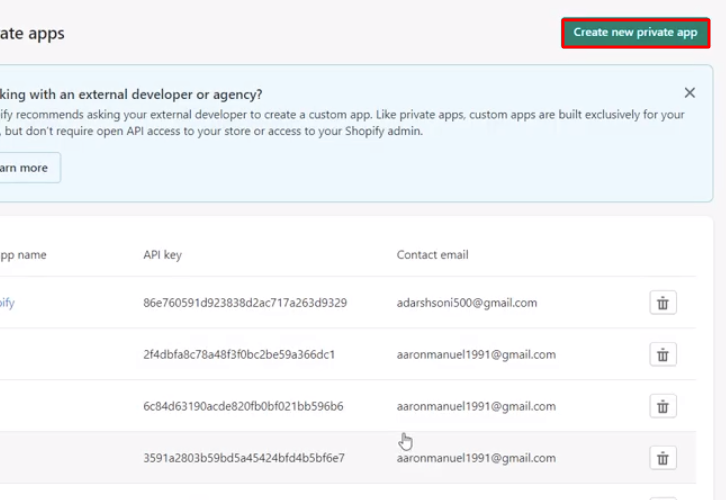
Now, click on ‘Rest API’ section, and then click on the ‘Add Key’ option.
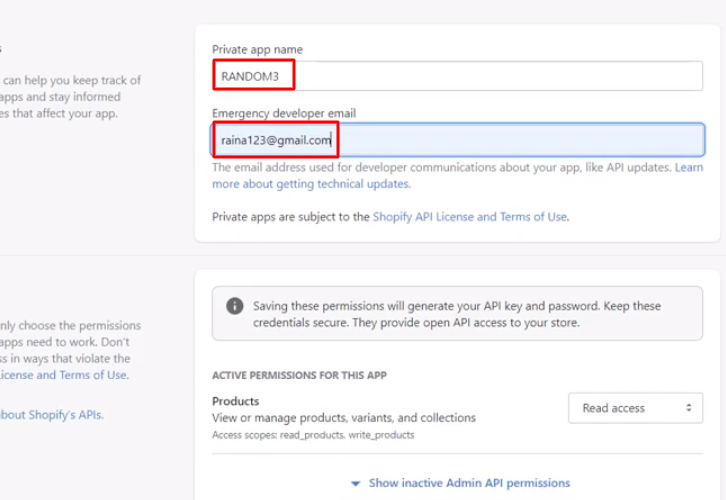
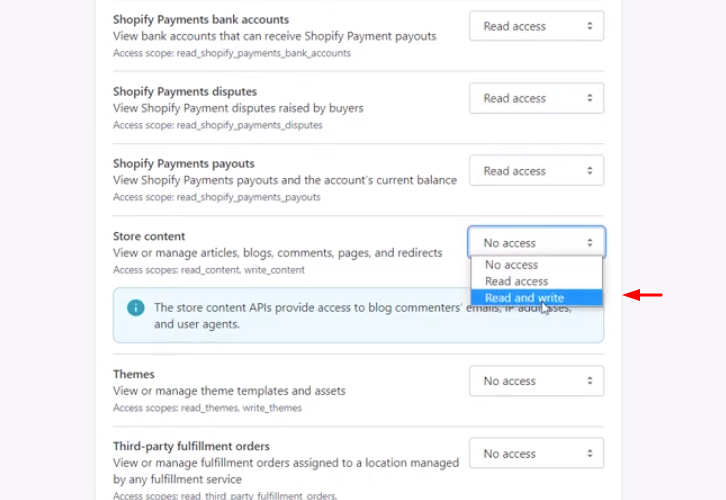
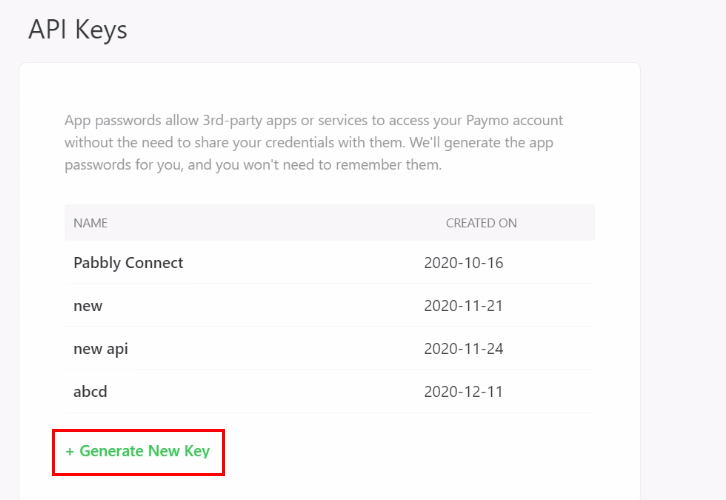
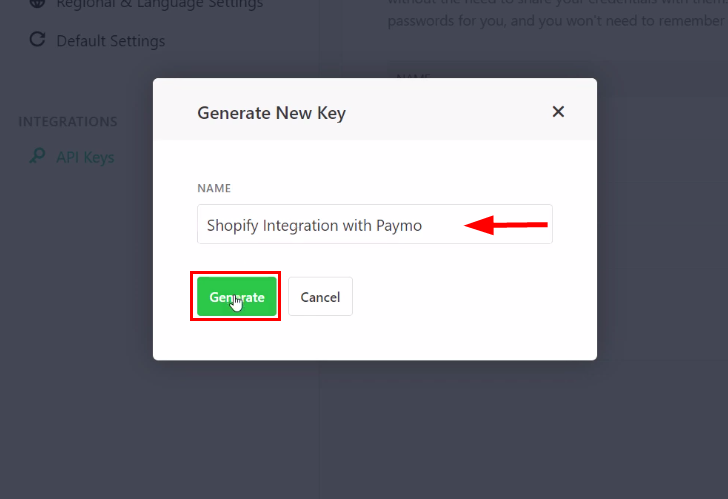
(g) Enter Key Details
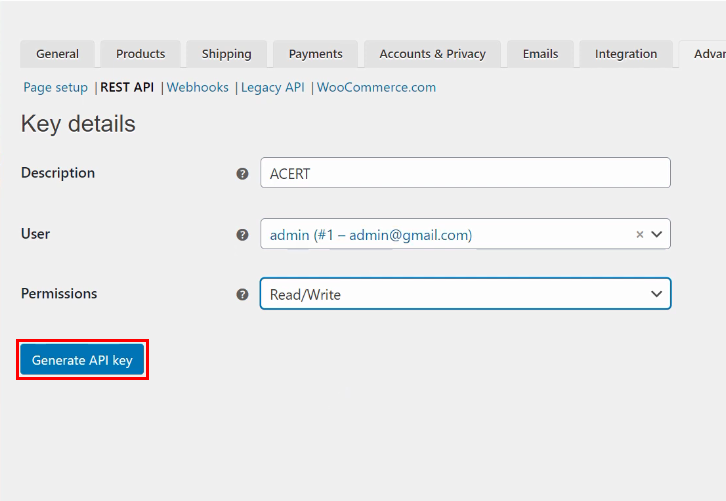
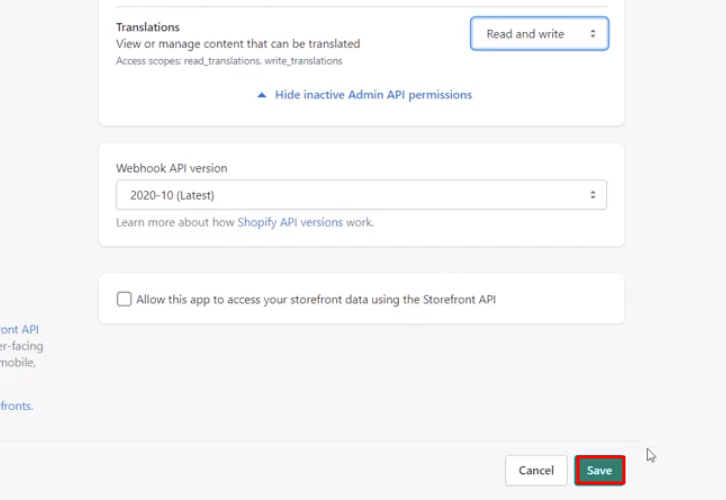
Following that, enter the key details like description, and make the permission to ‘Read/Write’. And lastly, click on the ‘Generate API Key’.
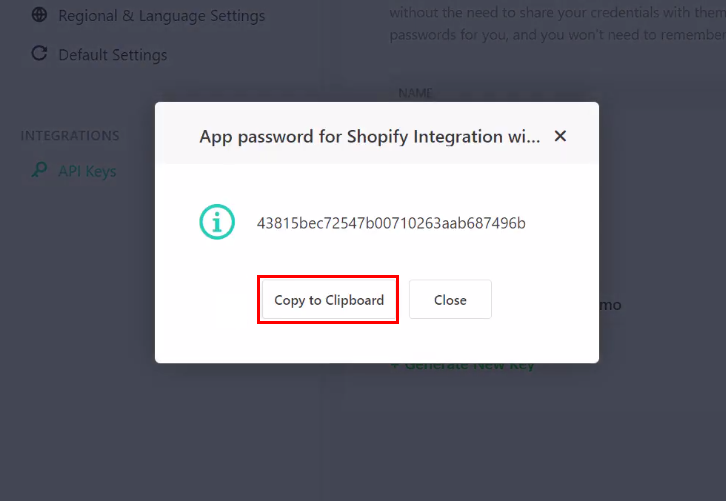
(h) Copy the Key

Once you hit the Generate API Key, you will get the consumer key and consumer secret. Copy them.
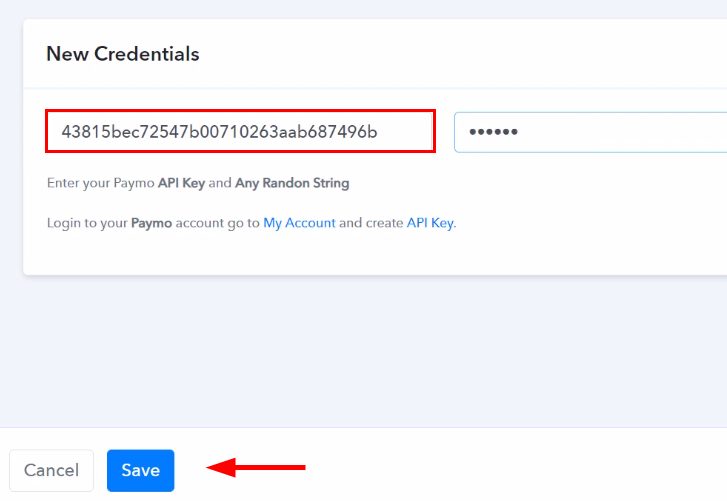
(i) Paste the Key
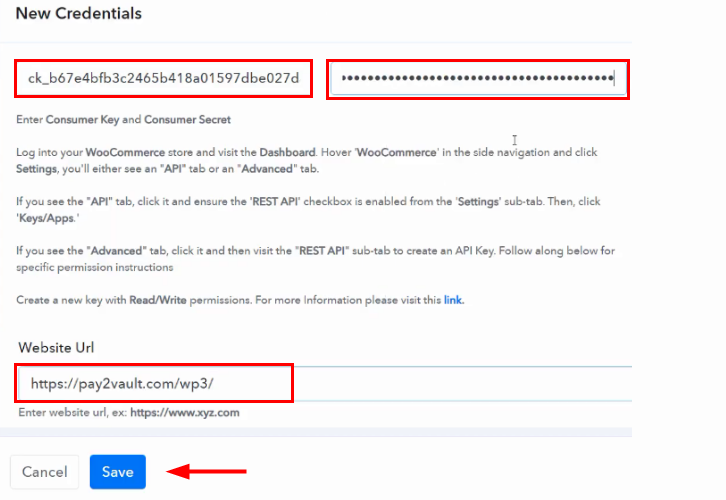
Now, paste the consumer key, secret and website URL in the Pabbly Connect window and click on ‘Save’ button.
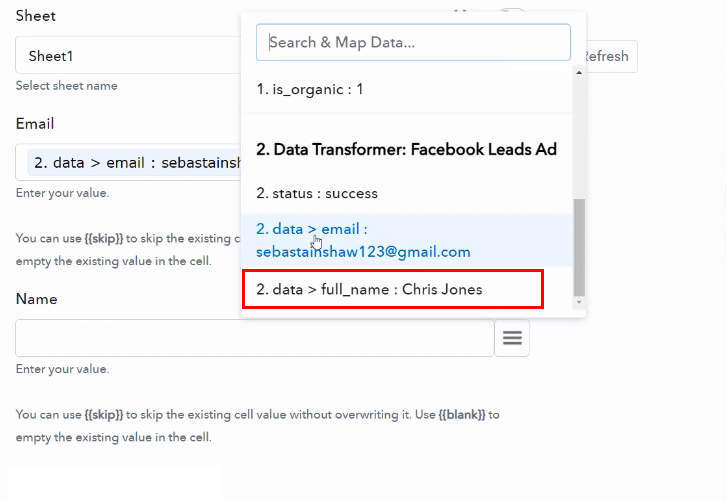
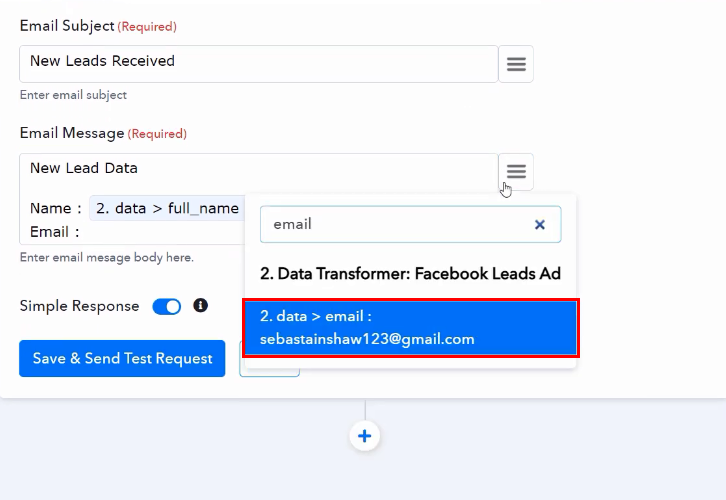
(j) Map the Fields

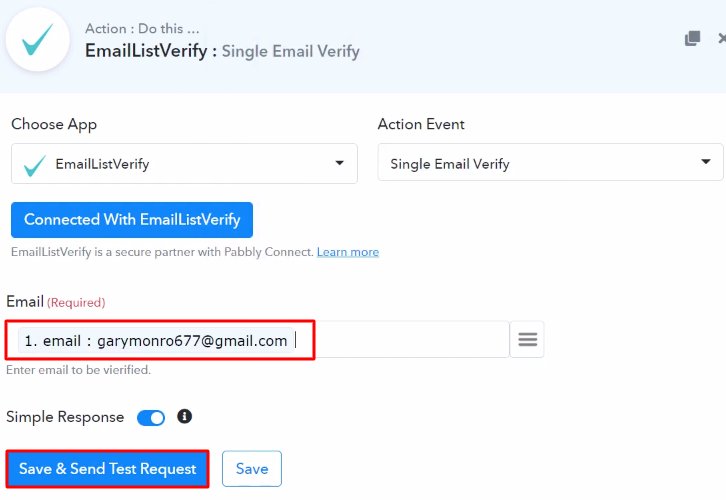
Once you click on the save button, it’s time to map the email in the email field.
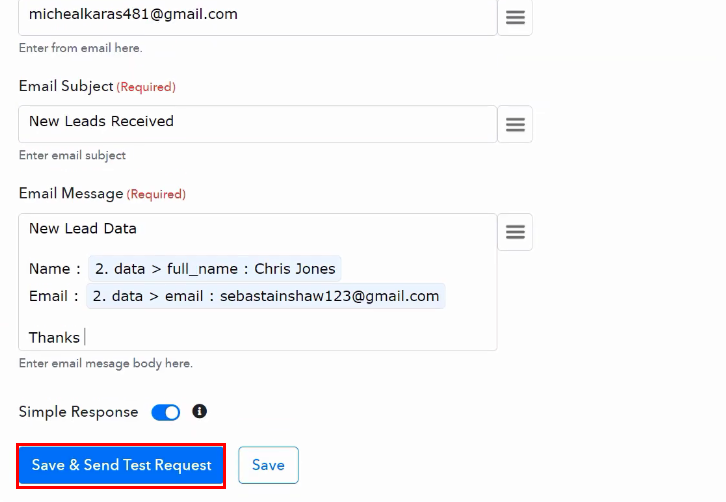
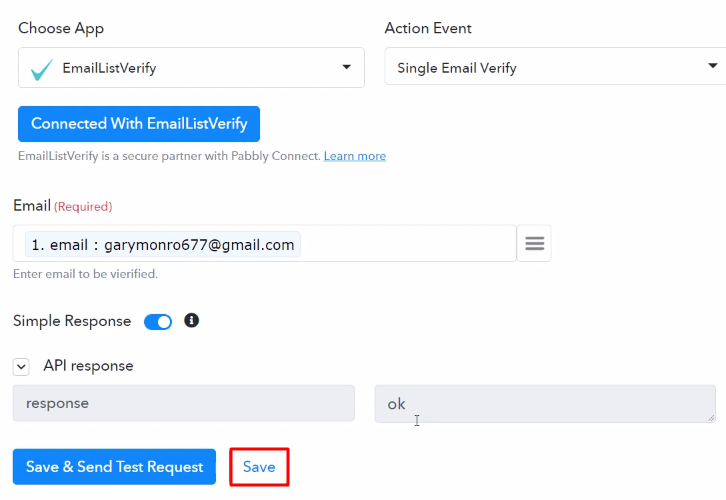
(k) Save and Send Test Request
After that, click on ‘Save and Send Test Request’ button and you will get the API response that the customer already exists in WooCommerce. Promptly, hit the ‘Save’ button. But, if the customer does not exist in WooCommerce you will get no response from API.
So, now you know why we have entered the details of an existing customer in Stripe when we were making a payment (to check for an existing customer).
Step 10: Setting Action for Router
Now, it’s time to setting router to satisfy two options from the above response, i.e to create an order to an existing customer or create a new customer and then assign an order to them.
(a) Select the Route
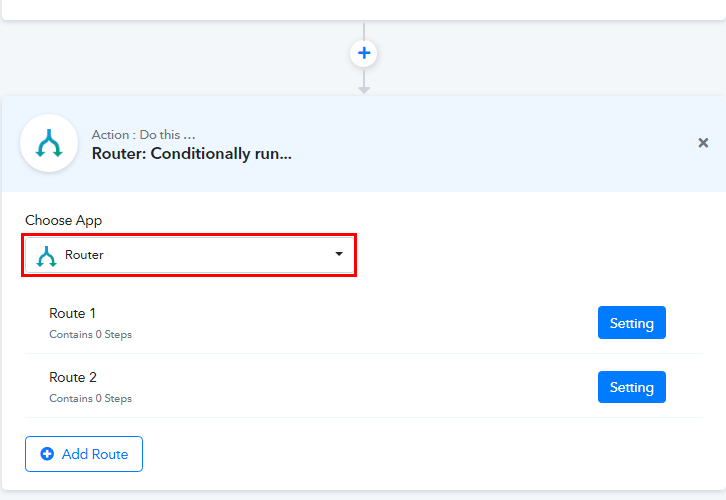
Click on the ‘+’ button below and from choose app option, select ‘Router’ for integration.
(b) Name the Route
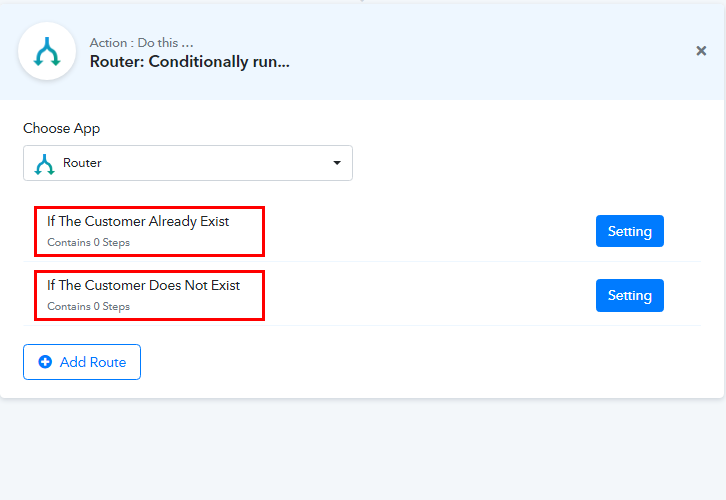
After that, we have to change the name of the route. Name ‘Route 1’ as ‘If The Customer Already Exist’ & ‘Route 2’ as ‘If The Customer Does Not Exist’ then hit the ‘Update’ button.
(c) Setting Route 1
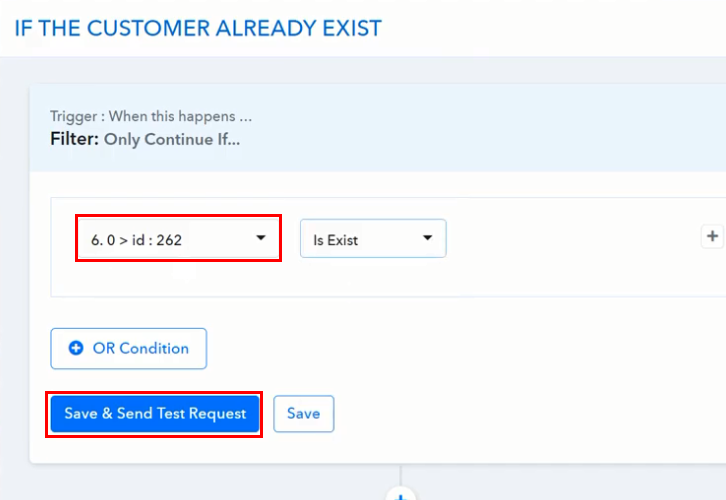
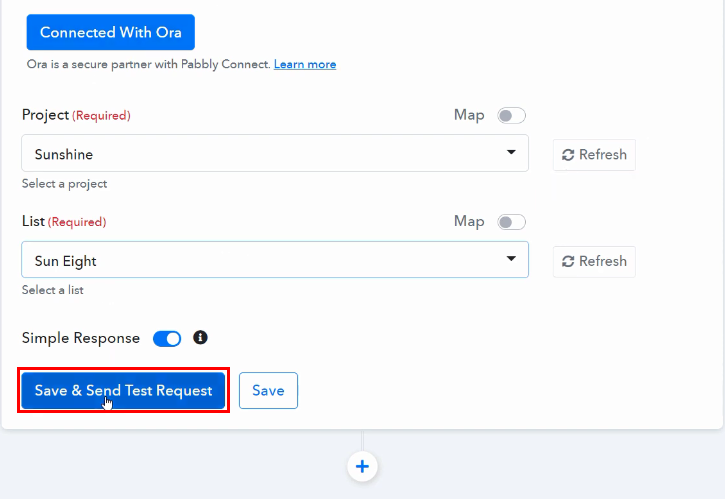
Click on the setting tab of Route 1 and a window will appear. Now, in the first section select customer ID and select the condition as ‘Is Exist’ and then hit the ‘Save & Send Test Request’ button.
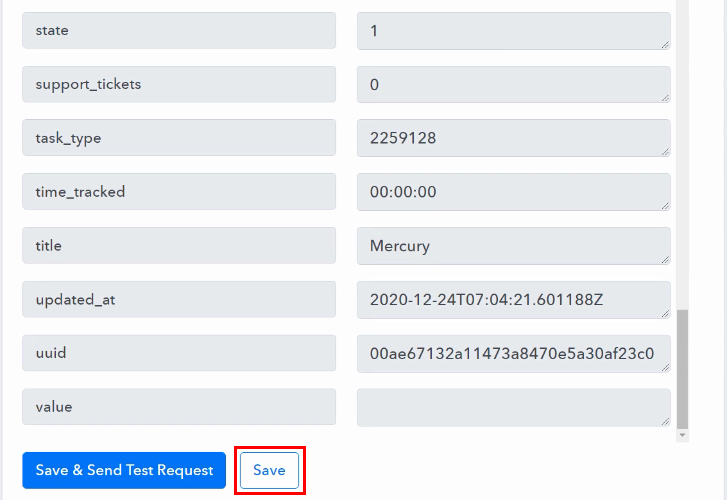
(d) Save the API Response
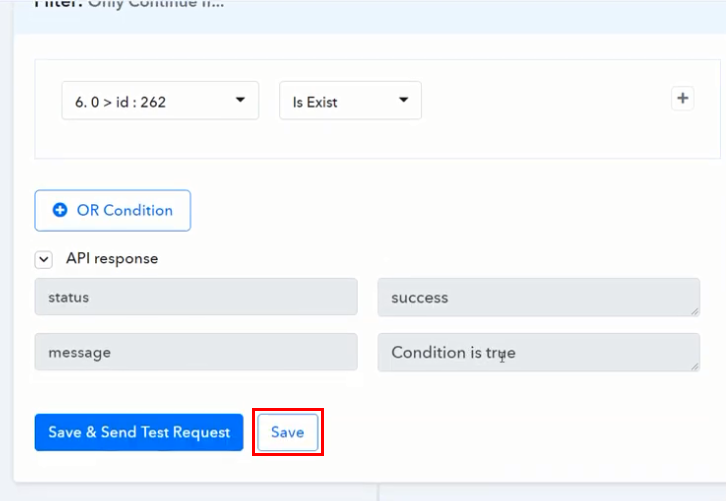
Once you click on the ‘Save & Send Test Request’, soon you get the API response that the condition is true.
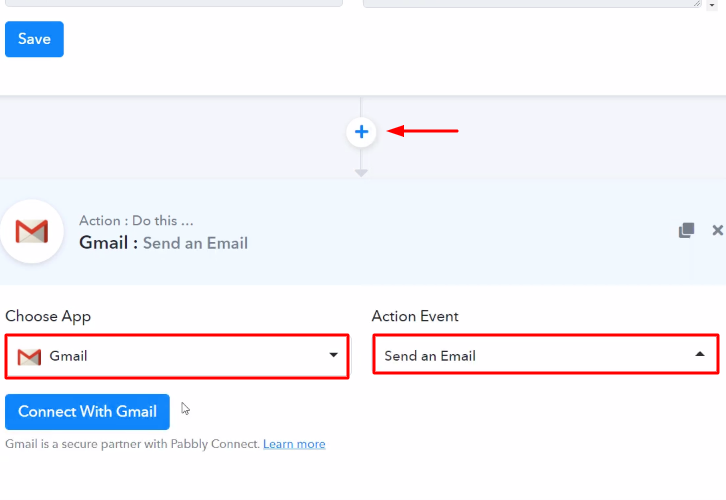
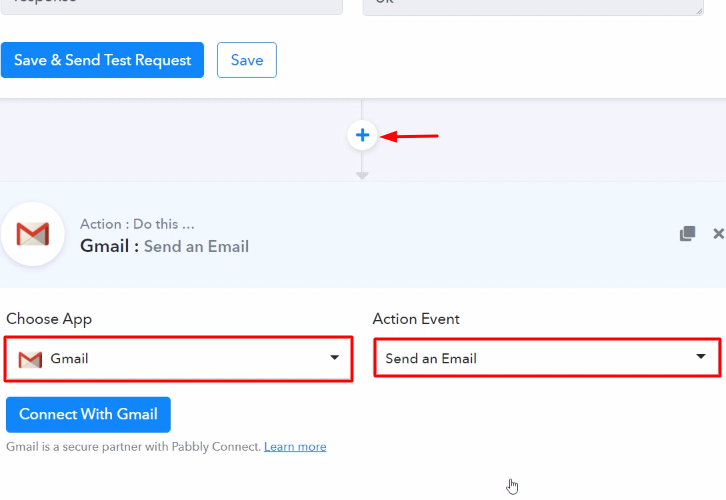
(e) Select Action for Route 1
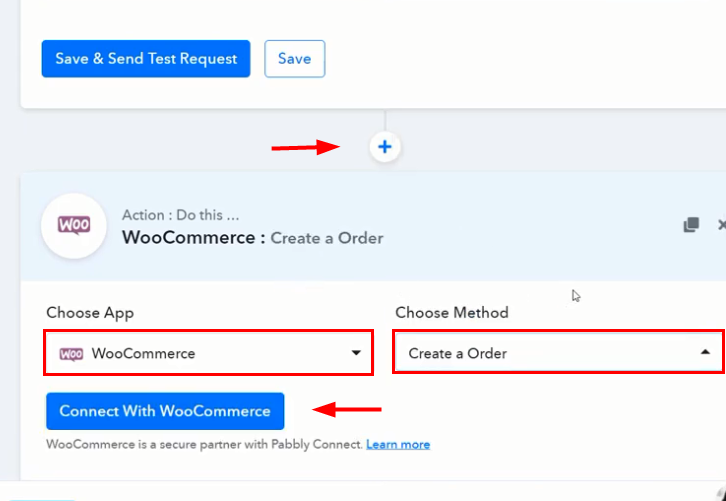
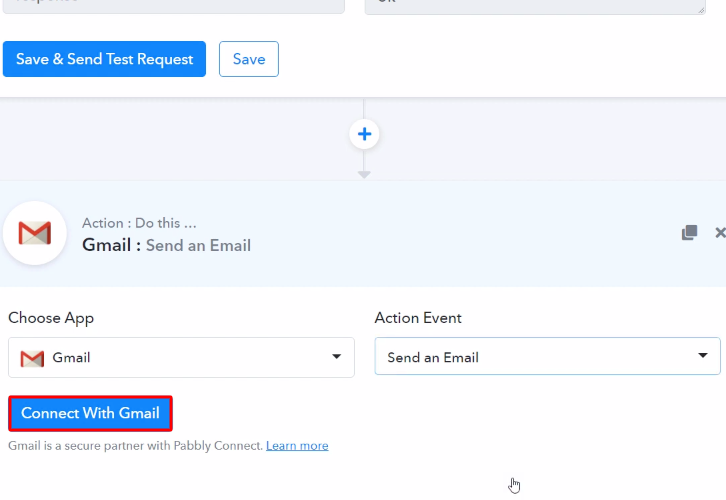
After we get a positive response. Now, we have to select an action for Route 1 integration and create an order. For that, click on the plus (+) button on Route 1 window and select ‘WooCommerce’ from choose app and choose methods as ‘Create a Order’. Then, click on the ‘Connect With WooCommerce’ button.
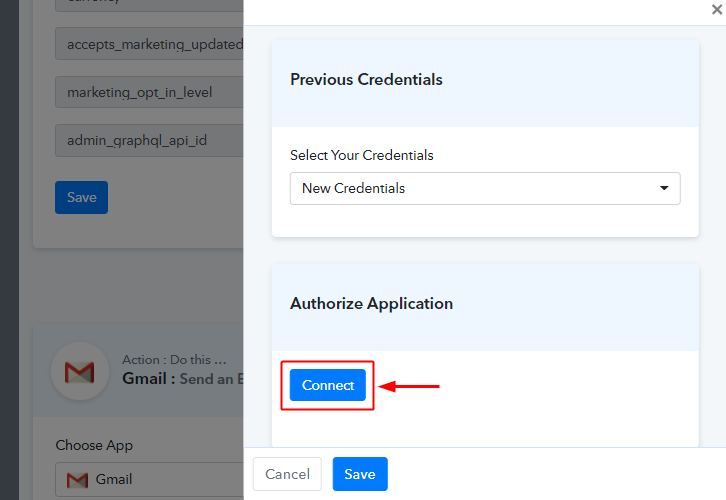
(f) Connect with WooCommerce
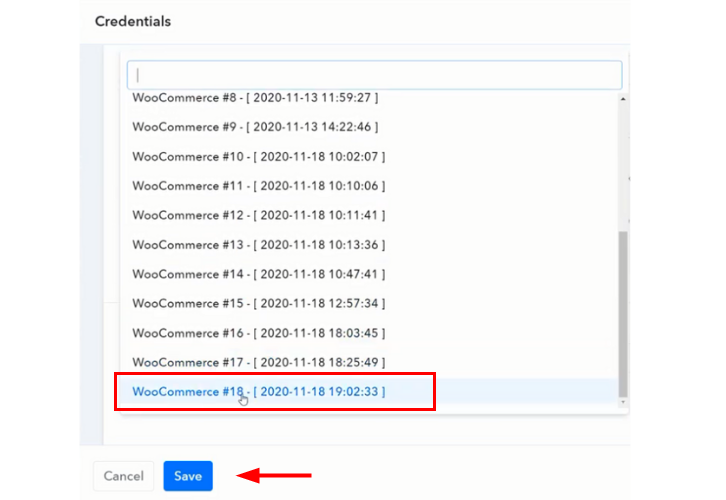
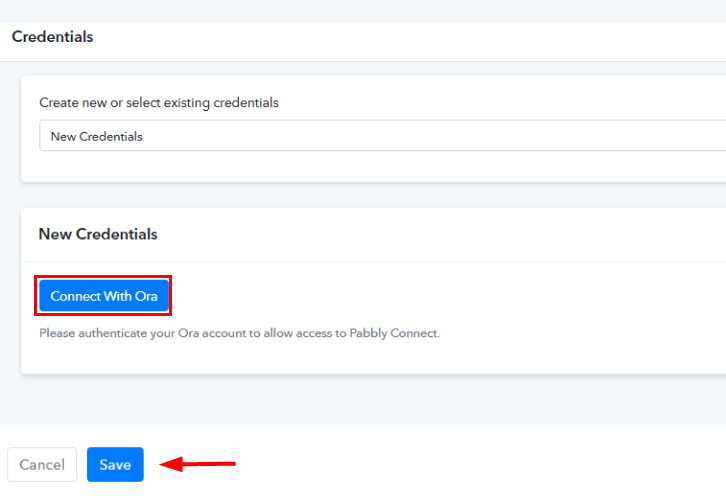
As we have already connected WooCommerce to Pabbly Connect in the above step, so just select your credentials from the credential’s drop-down and then click on ‘Save’ button.
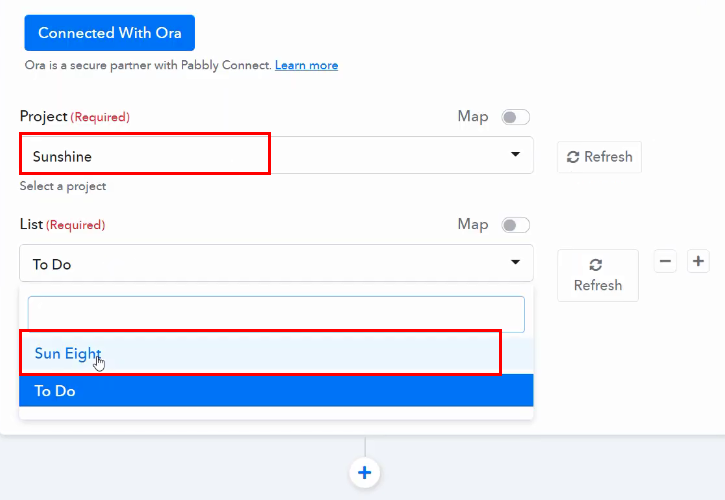
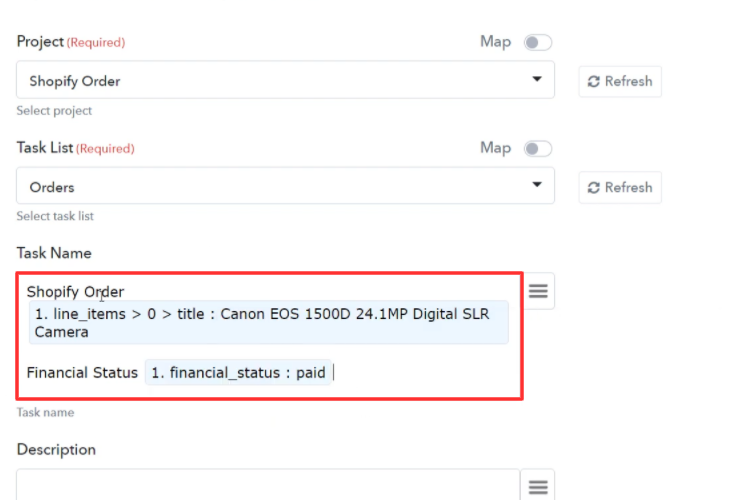
(g) Map the Fields
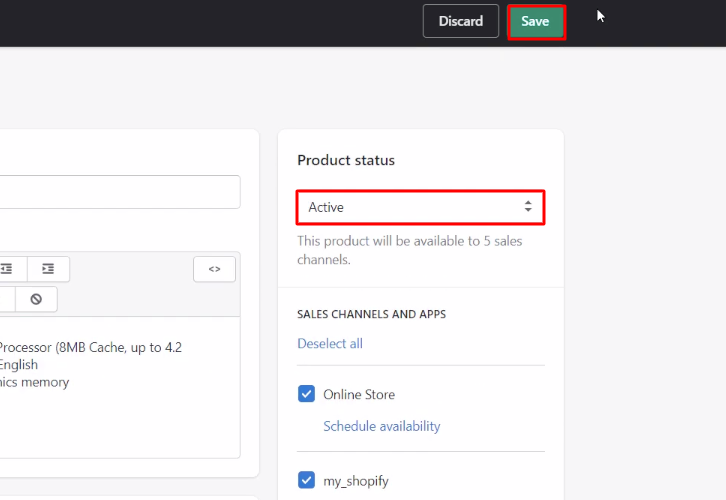
After connecting with your WooCommerce account, map all the fields like status, currency (uppercase), customer ID (toggle on the map icon) and so on.
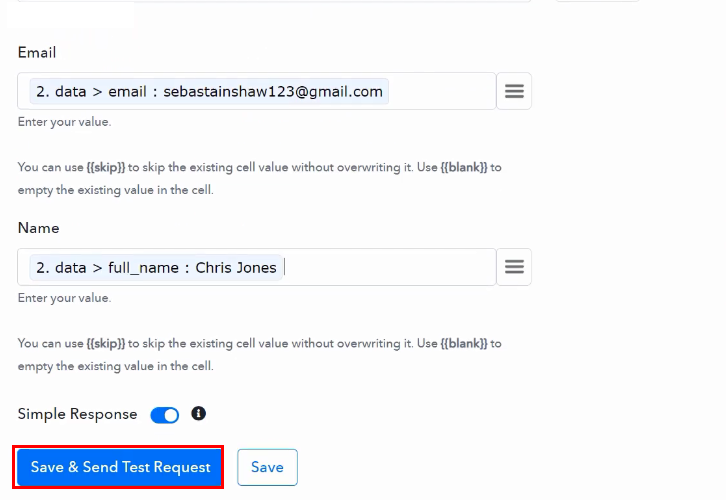
(h) Save and Send Test Request for Route 1

Once you are done mapping all the fields, click on the ‘Save & Send Test Request’ button.
(i) Check and Save API Response
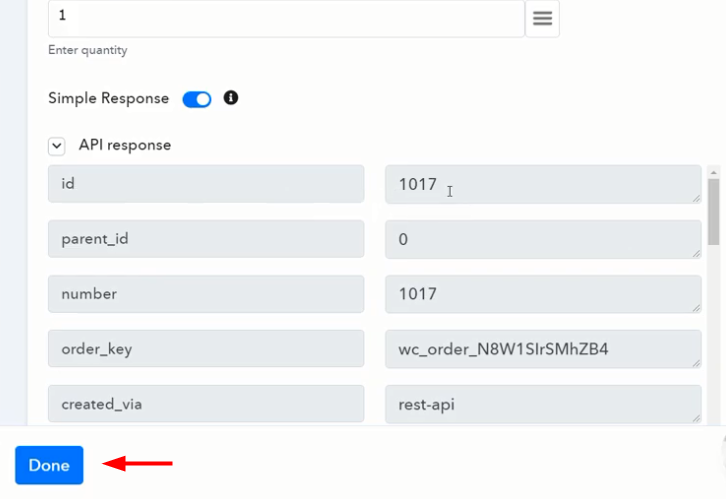
You will get the API response that the order has been created for the customer, click on ‘Save’ button and then hit the ‘Done’ button.
Hence, the Route 1 integration is completed. Now, it’s time to set up Route 2 for integration.
(j) Setting Trigger for Route 2
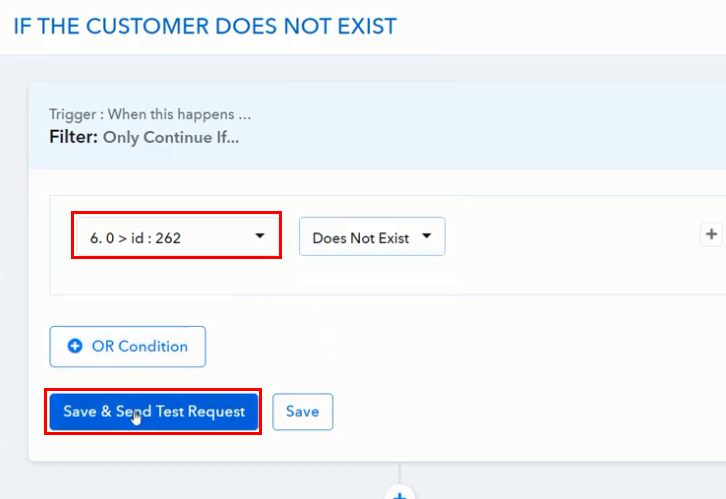
Now, to check another condition for customer ID, click on Settings button in Route 2. Then, Route 2 window will open up.
In the first section, map the same customer ID and in the second section, select ‘Does Not Exist’ option then hit the ‘Save & Send Test Request’ button.
(k) Save the API Response
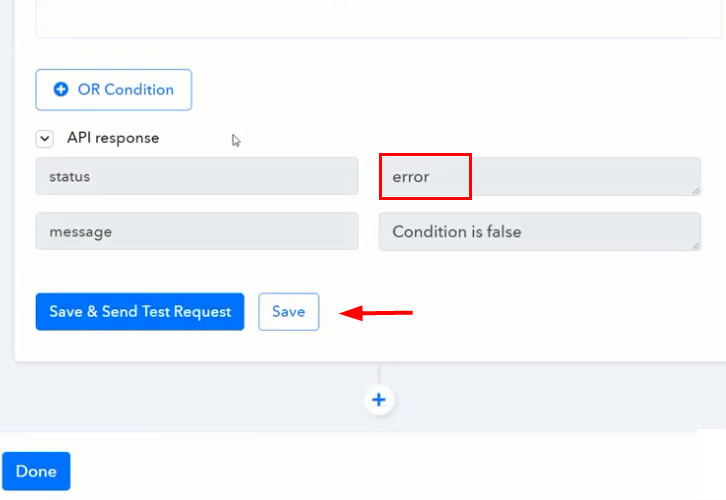
As we know that the customer already exists in WooCommerce, that’s why we get an error status in API response. Let suppose, a customer does not exist in WooCommerce so we have to create one and then assign an order to them. Next, simply hit the ‘Save’ button.
(l) Select Action for Route 2
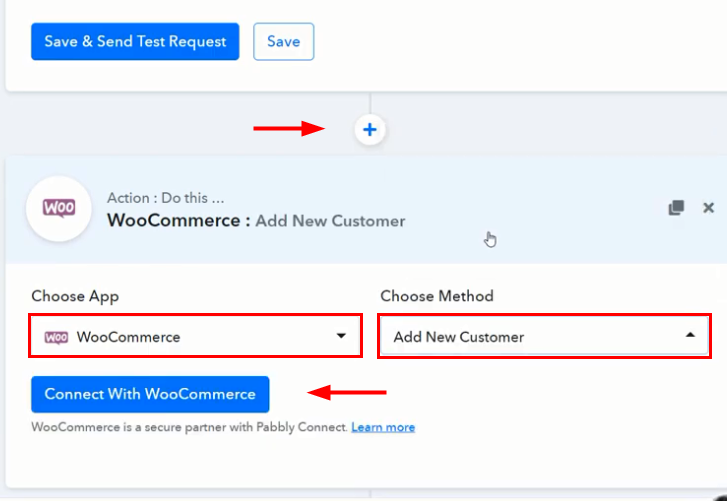
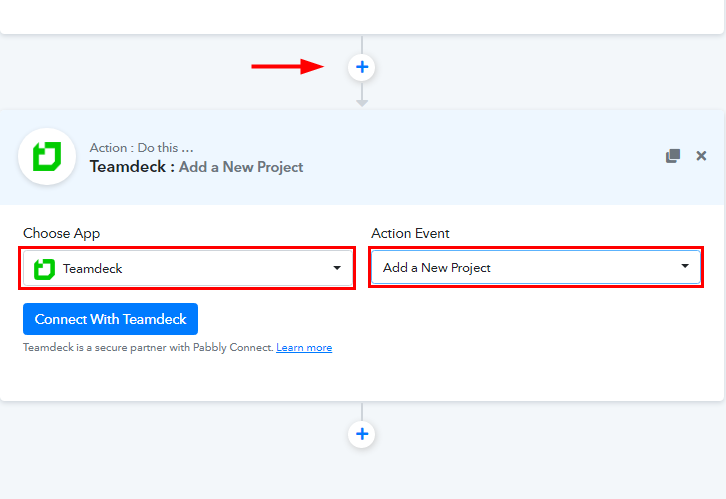
Now, we have to select an action for Route 2 integration to create a new customer. For that, click on the plus (+) button on Route 2 window and select ‘WooCommerce’ from choose app and choose methods as ‘Add New Customer’. Then, click on ‘Connect With WooCommerce’ button.
(m) Connect with WooCommerce
As we have already connected WooCommerce to Pabbly Connect in the above step, so just select your credentials from the drop-down and then click on Save button.
(n) Map the Fields
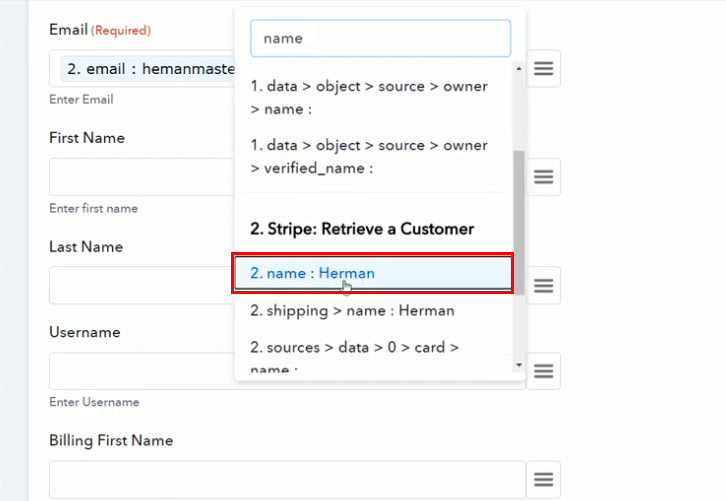
After connecting with your WooCommerce account, map all the required fields like email, first name, last name, etc.
(o) Save and Send Test Request for Route 2
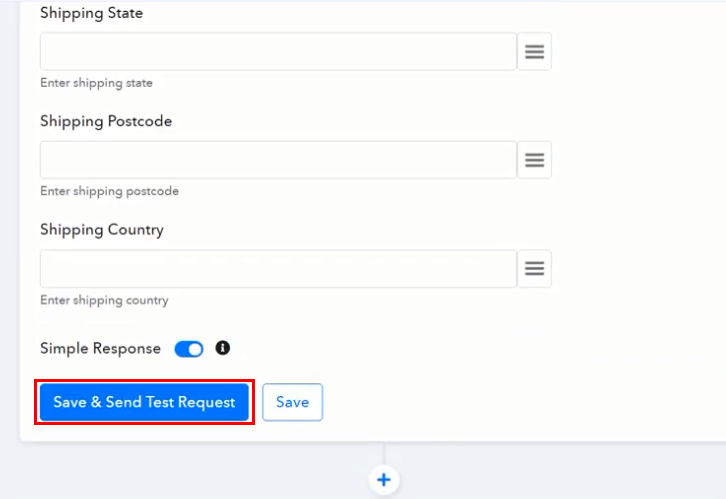
Once you are done mapping of data, click on the ‘Save & Send Test Request’ button to get the API response.
(p) Save the API Response
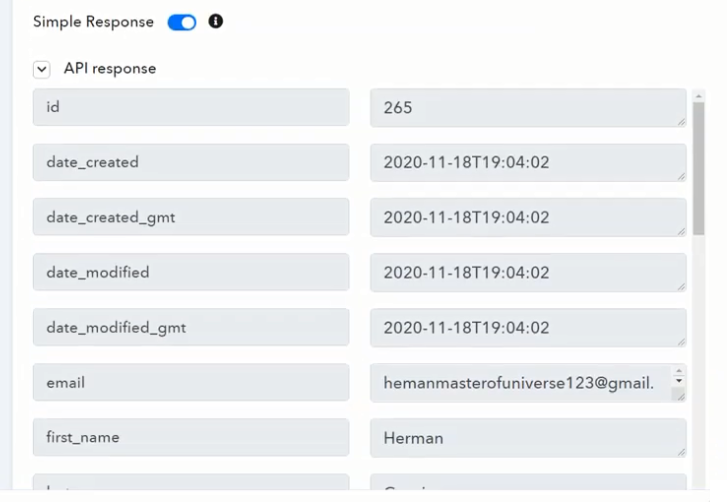
We got an API response that the customer has been created successfully and you will get the customer ID also. Just hit the ‘Save’ button.
Hence, the first action of Route 2 is completed. Now, it’s time to create an order for the newly added customer and for that we have to add another action for Route 2.
(q) Select another Action for Route 2
Now, to select another action for Route 2 integration to create an order, click on the plus (+) button on Route 2 window and select ‘WooCommerce’ from choose app and choose methods as ‘Create a Order’. And then click on ‘Connect with WooCommerce’ button.
(r) Connect with WooCommerce
Follow the same process as we did earlier to connect WooCommerce, and then click on Save button.
(s) Map the Fields
After connecting with your WooCommerce account, map all the fields like status, currency (uppercase), customer ID (toggle on the map icon) and so on.
(t) Save and Send Test Request for Route 2
Once you are done mapping, click on the ‘Save & Send Test Request’ button.
(u) Check and Save API Response
Next, you will get the API response that the order has been created for the customer, click on ‘Save’ button and then hit the ‘Done’ button.
Hence, the Route 2 integration is also completed. Now, it’s time to check for the response in WooCommerce.
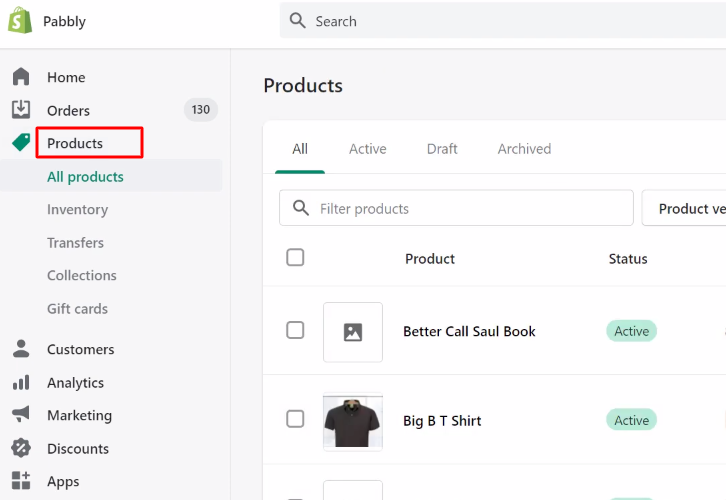
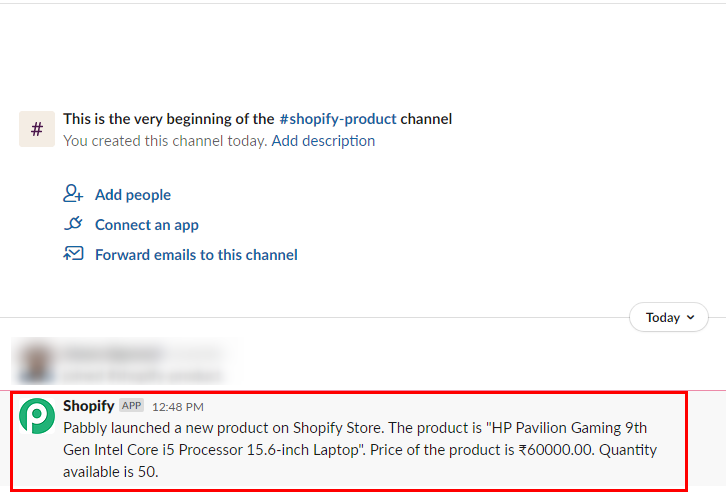
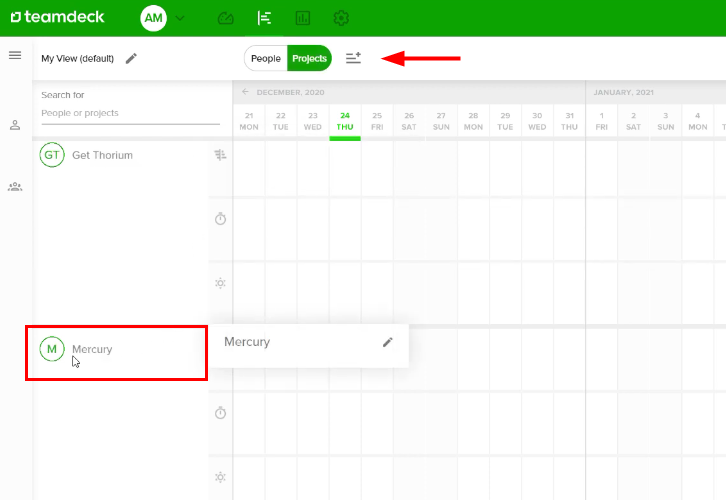
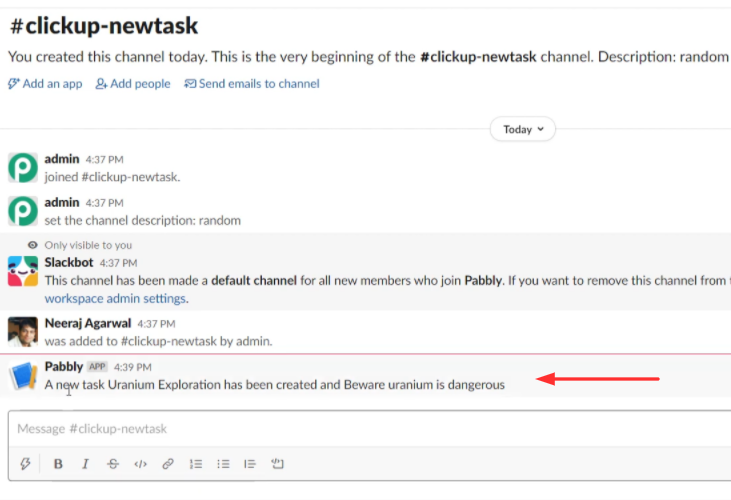
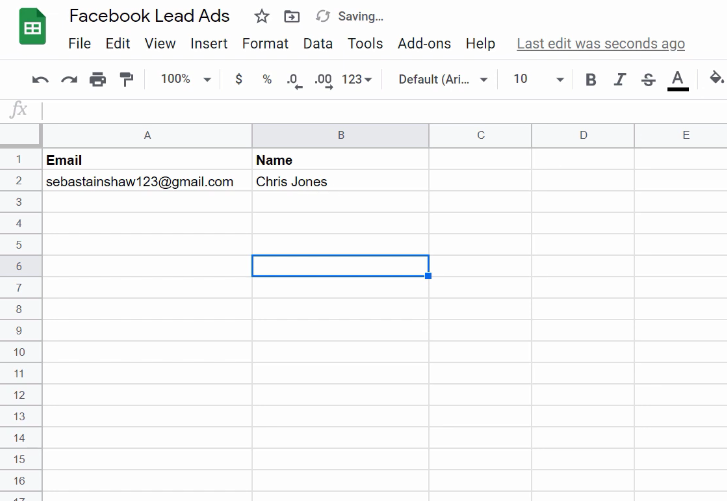
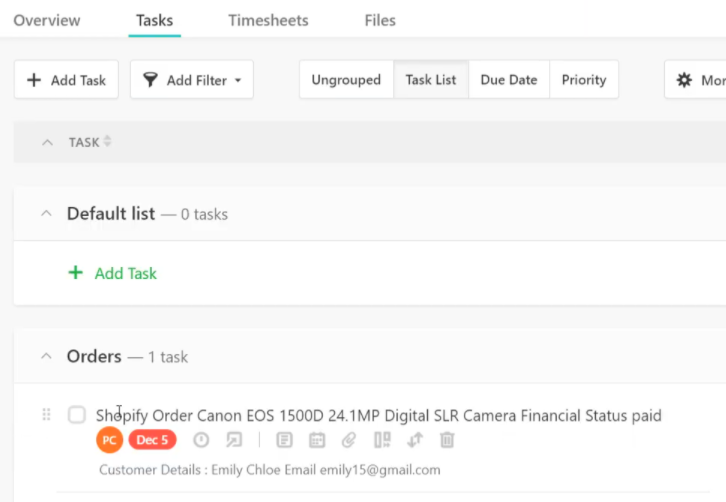
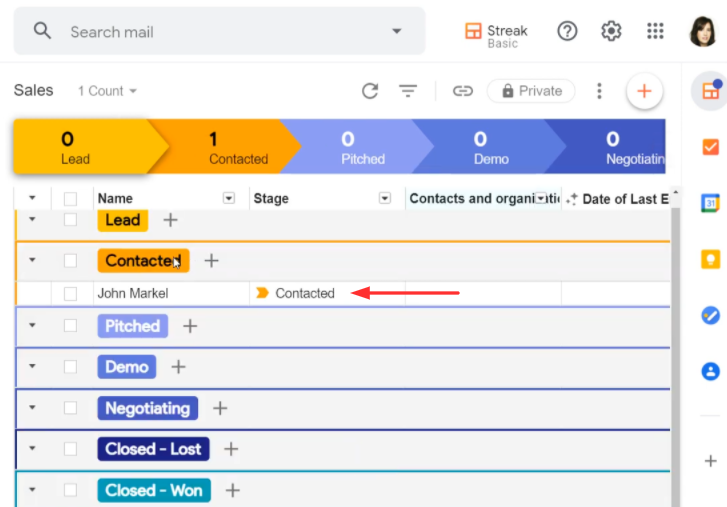
Step 11: Check Response in WooCommerce Dashboard
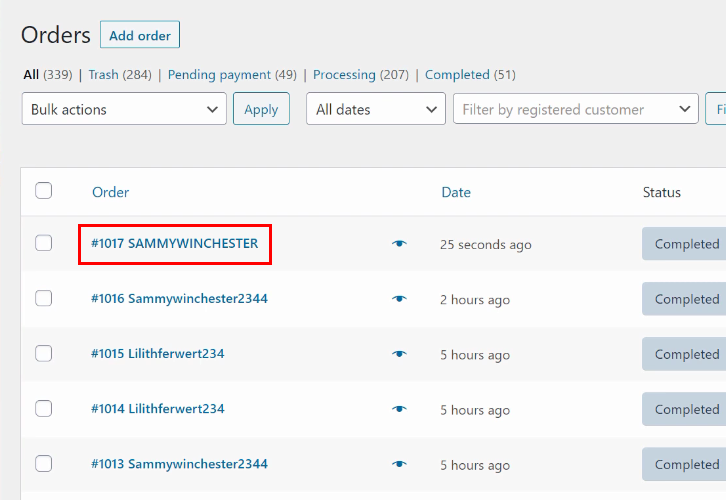
Finally, when you check your WooCommerce account, you see that an order has been created for a newly added customer automatically.
Now, whenever a successful Stripe payment occurs, an order will automatically get created in WooCommerce.
Conclusion:
In a nutshell, this was all about ‘How to Create WooCommerce Order from Successful Stripe Payment’. Consequently, after completing this step by step procedure, you will end up auto-creating WooCommerce order from successful Stripe payment via Pabbly Connect.
Meanwhile, you can grab Pabbly Connect for FREE with all its premium features.
Also, comment below your queries and suggestions.
You May Also Like To Read –