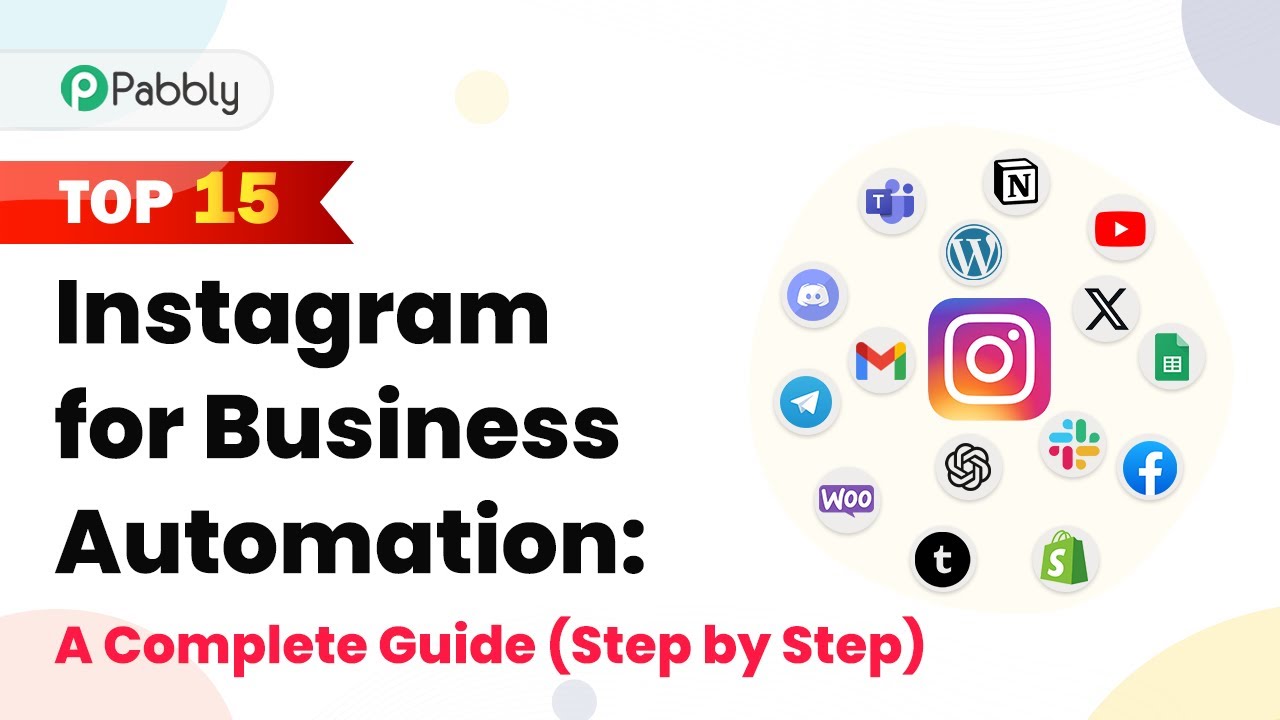
Top 15 Instagram for Business Automation: A Complete Guide (Step by Step)

Discover how to automate Instagram for business using Pabbly Connect. This step-by-step guide covers integration with various applications for seamless social media management. Explore efficient methods for automating routine tasks with clear, concise instructions suited for both newcomers and experienced professionals.

Watch Step By Step Video Tutorial Below


1. Introduction to Instagram Automation with Pabbly Connect

Instagram is a powerful platform for business promotion, boasting over 500 million daily active users. Automating your Instagram tasks can save time and enhance engagement. In this guide, we will explore how to use Pabbly Connect for Instagram automation.

By integrating various applications through Pabbly Connect, you can streamline processes like posting, scheduling, and sharing content. This tutorial will guide you through the essential steps to set up these automations effectively.


2. Setting Up Pabbly Connect for Instagram Automation

To start using Pabbly Connect, first, create an account at their website. Once you have access, navigate to the dashboard and click on the ‘Create Workflow’ button to begin.

Follow these steps to set up your workflow:

  • Click on ‘Create Workflow’ and name it appropriately.
  • Select Instagram as the trigger application and choose ‘New Media posted in my account’ as the event.
  • Connect your Instagram account by authorizing Pabbly Connect access.

This setup will allow Pabbly Connect to capture details of new posts made on your Instagram account.


3. Automating Post Sharing to Other Platforms

After connecting your Instagram account, you can automate sharing posts to other platforms, such as Twitter or Facebook. To do this, add an action step in your workflow.

Here’s how to set it up:

  • Choose the action application (e.g., Twitter) and select the action event (e.g., ‘Create Tweet with Media’).
  • Map the media URL and caption from the Instagram trigger step.
  • Test the action to ensure it posts correctly on the selected platform.

Using Pabbly Connect simplifies cross-platform sharing, allowing you to maintain a consistent online presence.


4. Scheduling Instagram Posts with Google Sheets

You can also schedule Instagram posts using Google Sheets integrated with Pabbly Connect. This allows you to manage your content calendar efficiently.

To set this up:

Create a new Google Sheet with columns for caption, image URL, and scheduled date. Connect Google Sheets to Pabbly Connect and set the trigger to ‘New or Updated Spreadsheet Row’. Add an action to publish the photo on Instagram at the scheduled time.

This method provides flexibility in managing when your posts go live, ensuring timely engagement with your audience.


5. Conclusion: Enhance Your Instagram Strategy with Pabbly Connect

By using Pabbly Connect for Instagram automation, you can streamline your social media processes, improve engagement, and save valuable time. Whether it’s scheduling posts, sharing across platforms, or sending notifications, Pabbly Connect offers a powerful solution for businesses looking to enhance their online presence.

Ensure you check out Pabbly Connect to create business automation workflows and reduce manual tasks. Pabbly Connect currently offer integration with 2,000+ applications.

Check out Pabbly Connect – Automate your business workflows effortlessly! Sign Up Free – Start your journey with ease! 10,000+ Video Tutorials – Learn step by step! Join Pabbly Facebook Group – Connect with 21,000+ like minded people!

Implement these automations today to maximize your Instagram marketing efforts and ensure a cohesive strategy across all your social media channels.
Integrating ActiveCampaign and GoToWebinar Using Pabbly Connect: A Step-by-Step Guide

Learn how to integrate ActiveCampaign and GoToWebinar using Pabbly Connect. This detailed tutorial covers all steps to automate your webinar registration process. Discover how to seamlessly connect your essential tools through accessible instructions that make powerful automation available to professionals at every skill level.

Watch Step By Step Video Tutorial Below


1. Setting Up Pabbly Connect for Your Workflow

To start integrating ActiveCampaign with GoToWebinar, you will first need to set up Pabbly Connect. Begin by signing up for a free account on the Pabbly website. Once you have signed up, log in to access the Pabbly Connect dashboard.

In the dashboard, click on the ‘Create Workflow’ button. You will be prompted to name your workflow. After naming it, click on the ‘Create’ button to load the workflow page where you will configure your trigger and actions.


2. Configuring the Trigger in Pabbly Connect

The first step in your workflow is to set up the trigger. In this case, the trigger will be a new webinar registration captured via a form. Select ‘Webhook’ as the trigger event within Pabbly Connect.

  • Choose ‘Webhook’ from the list of available triggers.
  • Copy the provided webhook URL for use in your form application.
  • Navigate to your form application (like JotForm) and paste the webhook URL in the integration settings.

Once you have set up the webhook in your form application, you can test the connection by submitting a sample form. This will ensure that the data is captured correctly in Pabbly Connect.


3. Setting Up GoToWebinar Action in Pabbly Connect

After configuring your trigger, the next step is to set up the action. In this case, you will add the registrant to GoToWebinar. Search for ‘GoToWebinar’ in the action step and select ‘Create Registrant’ as the action event.

Now, connect your GoToWebinar account by clicking on the ‘Connect’ button. You will need to provide the date and time in UTC format for the webinars you want to fetch. Make sure to convert your local time (e.g., Indian Standard Time) to UTC before entering it in Pabbly Connect.

  • Enter the start and end dates for the webinars you want to register participants for.
  • Map the form data such as first name, last name, and email address to the corresponding fields in GoToWebinar.
  • Click on ‘Save and Send Test Request’ to verify that the registration is successful.

Once the test request is successful, you will see the new registrant added in your GoToWebinar account, confirming that the integration works seamlessly through Pabbly Connect.


4. Adding ActiveCampaign Action in Pabbly Connect

Next, you will set up an action to create a contact in ActiveCampaign. Search for ‘ActiveCampaign’ in the action step and select ‘Create Contact’ as the action event. Click on the ‘Connect’ button to link your ActiveCampaign account.

You will need to provide your ActiveCampaign API URL and API key. To retrieve the API URL, visit your ActiveCampaign dashboard and copy the base URL. For the API key, navigate to the settings and find it under the Developer section.

Paste the API URL in the designated field, ensuring you remove any unnecessary slashes. Enter the API key you copied from your ActiveCampaign account. Map the relevant fields such as email address, first name, last name, and phone number from the webhook data.

After mapping the fields, click on ‘Save and Send Test Request’ to create a new contact in ActiveCampaign. This action will ensure that every new registrant is also added to your email marketing list, thanks to Pabbly Connect.


5. Finalizing the Integration Workflow

Now that you have set up both actions, it’s time to finalize your workflow. Review all the steps you have configured in Pabbly Connect to ensure everything is correctly set up.

Once you are satisfied, you can activate the workflow. This means that every time someone registers for your webinar through the form, their information will automatically be sent to both GoToWebinar and ActiveCampaign without any manual intervention.

This automation allows you to focus on your webinars while Pabbly Connect handles the data transfer seamlessly. Remember, you only need to set this up once, and it will run automatically from then on.


Conclusion

Integrating ActiveCampaign and GoToWebinar using Pabbly Connect streamlines your webinar registration process. This tutorial guides you through setting up the integration, ensuring that every registrant is captured automatically. Enjoy a hassle-free experience while managing your webinars and email marketing!

Ensure you check out Pabbly Connect to create business automation workflows and reduce manual tasks. Pabbly Connect currently offer integration with 2,000+ applications.

Integrating WooCommerce with Square Using Pabbly Connect: A Step-by-Step Guide

Learn how to integrate WooCommerce with Square using Pabbly Connect. Follow this detailed tutorial to automate customer creation for new orders. Implement the precise methodologies leading organizations use to automate repetitive tasks, illustrated with practical examples designed for immediate application.

Watch Step By Step Video Tutorial Below


1. Accessing Pabbly Connect for Integration

To begin integrating WooCommerce with Square, you need to access Pabbly Connect. First, sign into your Pabbly account. If you don’t have an account, click on the ‘Sign up for free’ button to create one. Once you are logged in, navigate to the Pabbly Connect dashboard.

On the dashboard, you will see existing workflows. To create a new workflow, click on the ‘Create Workflow’ button. In the dialog box that appears, name your workflow, such as ‘Create Square Customer for WooCommerce Order’ and click on ‘Create’.


2. Setting Up the Trigger in Pabbly Connect

In this step, you will set up the trigger application in Pabbly Connect. Since we are using WooCommerce, search for it in the trigger application section. Select ‘WooCommerce’ and then choose the trigger event as ‘New Order Created’. This event will activate the workflow whenever a new order is placed.

  • Select WooCommerce as the trigger application.
  • Choose ‘New Order Created’ as the trigger event.
  • Copy the provided webhook URL.

Next, you will connect this webhook URL to your WooCommerce account. Go to your WordPress dashboard, navigate to WooCommerce settings, and select the ‘Advanced’ tab. Click on ‘Webhooks’ and then ‘Add Webhook’. Name it, set the status to active, and select the topic as ‘Order Created’. Paste the copied webhook URL into the delivery URL field and save the webhook.


3. Capturing the Response from WooCommerce

After setting up the webhook, return to Pabbly Connect to capture the response. Click on ‘Recapture Web Response’, and then place a new order in your WooCommerce store to generate a response. Ensure that you fill in the necessary billing details during checkout.

  • Go to your WooCommerce store and add a product to the cart.
  • Proceed to checkout and complete the order.
  • Return to Pabbly Connect to see the captured response.

Once the order is placed, you will see the response in Pabbly Connect, which includes details like the first name, last name, email, and shipping address. This indicates that the webhook connection is successful and the data has been captured.


4. Setting Up the Action in Pabbly Connect

Now that you have captured the response, it is time to set up the action application in Pabbly Connect. Search for and select ‘Square’ as the action application. Choose the action event as ‘Create New Customer’. This action will create a new customer in your Square account based on the WooCommerce order details.

Next, establish a connection between Square and Pabbly Connect. Click on ‘Connect’, and if you don’t have an existing connection, select ‘Add New Connection’. You will need to provide your Square access token, which you can find in the Square Developer Dashboard under production credentials.


5. Mapping the Data in Pabbly Connect

In this final step, you will map the data from the WooCommerce order to the Square customer fields in Pabbly Connect. This involves taking the captured response data and inserting it into the corresponding fields required by Square.

Map the first name, last name, and email address from the WooCommerce response. Ensure to map the address fields, especially the address country, as it is required. Click on ‘Save and Send Test Request’ to finalize the setup.

After saving, you will receive a response indicating that the customer has been created successfully in your Square account. This confirms that the integration between WooCommerce and Square through Pabbly Connect is complete and functioning as intended.


Conclusion

In this tutorial, we detailed how to integrate WooCommerce with Square using Pabbly Connect. By following these steps, you can automate customer creation for new orders, enhancing your operational efficiency.

Ensure you check out Pabbly Connect to create business automation workflows and reduce manual tasks. Pabbly Connect currently offer integration with 2,000+ applications.

How to Create SuiteDash Contact from LinkedIn Lead Gen Form Using Pabbly Subscription Billing

Learn how to integrate LinkedIn Lead Gen Forms with SuiteDash using Pabbly Subscription Billing for seamless lead management. Master subscription management with practical techniques to handle free trials, coupon codes, and special offers that drive conversion and retention.

Watch Step By Step Video Tutorial Below


1. Accessing Pabbly Subscription Billing for Integration

To begin integrating LinkedIn Lead Gen Forms with SuiteDash, access Pabbly Subscription Billing. This platform allows you to automate the transfer of leads from LinkedIn to SuiteDash seamlessly. Start by signing up for a free account to access automation tasks.

After signing up, log in to your Pabbly Subscription Billing dashboard. Click on the ‘Create Workflow’ button to initiate the setup. You will be prompted to name your workflow. Choose a name that reflects the integration, such as ‘LinkedIn to SuiteDash Automation.’ Then click on ‘Create’ to proceed.


2. Setting Up the Trigger in Pabbly Subscription Billing

In this step, you will configure the trigger for your automation in Pabbly Subscription Billing. The trigger event will be a new response from the LinkedIn Lead Gen Form. Click on the trigger window and select ‘LinkedIn Lead Gen Forms’ as your application.

  • Choose the trigger event as ‘New Lead Gen Form Response’.
  • Click on the ‘Connect’ button.
  • Select ‘Add New Connection’ to link your LinkedIn account.

After connecting your LinkedIn account, select the specific Lead Gen Form that you want to use. Ensure you choose the correct form to capture leads accurately. This integration is crucial for automating lead management in SuiteDash.


3. Filling and Testing the Lead Gen Form

Next, you will fill out the LinkedIn Lead Gen Form to test the integration. Use the demo data to simulate a lead submission. This step is essential to verify that the data is captured correctly in Pabbly Subscription Billing.

Once you fill in the required fields such as email, phone number, first name, and last name, submit the form. Then, click on the ‘Save and Send Test Request’ button in Pabbly Subscription Billing. This action will capture the data from your form submission.

  • Ensure all fields are filled accurately to test the response.
  • Check the response section for the captured data.

Review the response data to ensure it matches the information submitted. This verification is critical for the subsequent steps in creating a contact in SuiteDash.


4. Creating Contact in SuiteDash Using Pabbly Subscription Billing

Now that you have captured the lead data, the next step is to create a contact in SuiteDash through Pabbly Subscription Billing. In the action window, select SuiteDash as your application and choose the action event as ‘Create Contact’.

To connect SuiteDash, click on ‘Connect’ and select ‘Add New Connection’. You will need to provide your SuiteDash Pabbly ID and Secret Key. These can be found in your SuiteDash account under the ‘Integrations’ section. Copy these keys into Pabbly Subscription Billing to establish the connection.

Ensure to map the lead data fields correctly. Test the connection by clicking ‘Save and Send Test Request’.

If the test is successful, a new contact will be added to your SuiteDash account. This automation allows you to manage your leads effectively without manual entry.


5. Conclusion

In this tutorial, we covered how to integrate LinkedIn Lead Gen Forms with SuiteDash using Pabbly Subscription Billing. This process automates lead management, saving you time and effort. By following the steps outlined, you can ensure that your leads are captured and organized efficiently.

Ensure you check out Pabbly Connect to create business automation workflows and reduce manual tasks. Pabbly Connect currently offer integration with 2,000+ applications.

Check out Pabbly Connect – Automate your business workflows effortlessly! Sign Up Free – Start your journey with ease! 10,000+ Video Tutorials – Learn step by step! Join Pabbly Facebook Group – Connect with 21,000+ like minded people!

Using Pabbly Subscription Billing as the integration platform allows for seamless data transfer, enhancing your business management capabilities. Start automating your lead generation today!

Integrate Agile CRM with HubSpot Using Pabbly Connect

Learn how to create Agile CRM contacts from HubSpot using Pabbly Connect. This detailed guide walks you through each step of the integration process. Transform complex automation concepts into accessible, actionable steps that eliminate unnecessary manual work while maximizing existing application capabilities.

Watch Step By Step Video Tutorial Below


1. Accessing Pabbly Connect for Integration

To start the integration process between HubSpot and Agile CRM, first, access Pabbly Connect. Open your browser and search for Pabbly.com/connect. This will take you to the landing page where you can either sign in or sign up for a free account.

If you’re a new user, click on the ‘Sign Up for Free’ button. By creating an account, you will receive 100 free tasks to explore the features of Pabbly Connect. Existing users can simply sign in to start creating workflows.


2. Creating a Workflow in Pabbly Connect

Once signed in, navigate to the ‘All Apps’ section and click on ‘Access Now’ under Pabbly Connect. This will direct you to the dashboard where you can create a new workflow. Click on the ‘Create Workflow’ button located at the top right corner.

  • Enter a suitable name for your workflow, such as ‘Create Agile CRM Contact from HubSpot CRM’.
  • Click on ‘Create’ to proceed.

After creating the workflow, you will see two windows: one for the trigger and another for the action. The trigger is set to HubSpot CRM, while the action will be set to Agile CRM, allowing you to automate the process of creating contacts.


3. Setting Up HubSpot as the Trigger Application

In the trigger window, select HubSpot CRM as your trigger application. Choose the trigger event as ‘New Contact Added’. Click on ‘Connect’ and select ‘Add New Connection’ to link your HubSpot account with Pabbly Connect.

Make sure you are logged into your HubSpot account to simplify the connection process. Once connected, select the output properties required to create a new contact, such as first name, last name, email, and phone number. After selecting these fields, click on ‘Save and Send Test Request’ to retrieve the latest contact details.


4. Configuring Agile CRM as the Action Application

Next, set Agile CRM as the action application. Choose ‘Create Contact’ as the action event. Again, click on ‘Connect’ and select ‘Add New Connection’. You will need to provide your Agile CRM login email, API key, and domain.

  • Find your API key in Agile CRM under Admin Settings > Developers and API.
  • Use the domain format: mycompany.agilecrm.com, replacing ‘mycompany’ with your actual company name.

After entering these details, click on ‘Save’. This will connect your Agile CRM account with Pabbly Connect, allowing you to map the fields from the HubSpot response to create a new contact.


5. Mapping Fields and Testing the Integration

In the Agile CRM action setup, map the fields from the HubSpot response to the respective fields in Agile CRM. This ensures that whenever a new contact is created in HubSpot, the details will automatically populate in Agile CRM.

After mapping the first name, last name, and email, click on ‘Save and Send Test Request’. You should receive a response confirming that a new contact has been created in Agile CRM with the details obtained from HubSpot.

To verify, check your Agile CRM dashboard under the contacts section. Refresh the page, and you should see the new contact listed, confirming the successful integration through Pabbly Connect.


Conclusion

This tutorial demonstrated how to create Agile CRM contacts from HubSpot using Pabbly Connect. By following the steps outlined, you can automate your CRM processes efficiently and effectively.

Ensure you check out Pabbly Connect to create business automation workflows and reduce manual tasks. Pabbly Connect currently offer integration with 2,000+ applications.

How to Add Unsubscribed User Details from ConvertKit to Google Sheets Using Pabbly Connect

Learn how to automatically add unsubscribed user details from ConvertKit to Google Sheets using Pabbly Connect. Step-by-step guide for seamless integration. Build sophisticated automated workflows in less time than you think. This guide translates complex integrations into straightforward steps for immediate implementation.

Watch Step By Step Video Tutorial Below


1. Accessing Pabbly Connect for Integration

To add unsubscribed user details from ConvertKit to Google Sheets, first, access Pabbly Connect. Open your browser and navigate to the Pabbly website.

If you are a new user, click on ‘Sign up for free’ to create an account. Existing users can click ‘Sign in’. Once logged in, select Pabbly Connect from the apps section to begin the integration process.


2. Creating a New Workflow in Pabbly Connect

In Pabbly Connect, click on the ‘Create Workflow’ button located at the top right corner. A dialog box will prompt you to name your workflow, so enter a suitable name like ‘Add ConvertKit Unsubscribers to Google Sheets’.

After naming, click ‘Create’. This opens two windows for trigger and action selection. For this integration, choose ConvertKit as the trigger application and Google Sheets as the action application.


3. Setting Up the Trigger with ConvertKit

Now, select ConvertKit as your trigger application in Pabbly Connect. Choose the ‘New Unsubscribe’ event and click ‘Connect’. You will need to create a new connection by providing your API key and API secret from your ConvertKit account.

To find your API details, log into ConvertKit, go to the settings section, and locate the API key and API secret under the ‘Advanced’ tab. Copy these details and paste them into Pabbly Connect. Click ‘Save’ and then ‘Save and Send Test Request’ to confirm the connection.

  • Log into ConvertKit and navigate to the settings section.
  • Locate your API key and API secret under the ‘Advanced’ tab.
  • Copy and paste these details into Pabbly Connect.

Once the test request is successful, proceed to manually unsubscribe a test user in ConvertKit to generate a response in Pabbly Connect.


4. Configuring Action to Add Rows in Google Sheets

After setting up the trigger, the next step is to configure the action. Select Google Sheets as the action application in Pabbly Connect and choose ‘Add New Row’ as the action event. Click ‘Connect’ and authenticate your Google account.

Ensure you are logged into your Google account to facilitate a smooth connection. Once connected, select the Google Sheet where you want to store unsubscribed user details. Map the fields for first name and email using the data received from ConvertKit.

  • Select your Google Sheet named ‘ConvertKit Subscribers’.
  • Map the first name and email fields using the data from the previous step.
  • Click ‘Save’ and send a test request to confirm the setup.

After sending the test request, check your Google Sheet to verify that the unsubscriber’s details have been successfully added.


5. Summary of the Integration Workflow

In this workflow, we utilized Pabbly Connect to automate the process of adding unsubscribed user details from ConvertKit to Google Sheets. The trigger was set to monitor new unsubscribes, while the action added a new row in Google Sheets with the relevant details.

This integration ensures that you can efficiently manage your subscriber list without manual intervention. Every time a user unsubscribes, their details are automatically logged in your Google Sheet, streamlining your workflow.


Conclusion

This tutorial demonstrated how to use Pabbly Connect to automatically add unsubscribed user details from ConvertKit to Google Sheets. With this integration, you can maintain an up-to-date record of unsubscribers effortlessly, enhancing your email management process.

Ensure you check out Pabbly Connect to create business automation workflows and reduce manual tasks. Pabbly Connect currently offer integration with 2,000+ applications.

Automate LinkedIn Leads to Salesforce with Pabbly Connect

Learn how to automate the process of adding LinkedIn leads to Salesforce campaigns using Pabbly Connect in this step-by-step tutorial. Eliminate manual repetitive tasks from your workflow. Discover proven automation methods with intuitive steps designed for efficiency-minded professionals.

Watch Step By Step Video Tutorial Below


1. Setting Up Pabbly Connect for LinkedIn Leads

To automate adding LinkedIn leads to Salesforce, you need to set up Pabbly Connect. Start by signing up for a free account on the Pabbly website. Once logged in, navigate to the dashboard.

Click on the blue button labeled ‘Create Workflow’. This action initiates the process of connecting your LinkedIn lead generation form to Salesforce. You will need to name your workflow, for example, ‘Sync LinkedIn Leads with Salesforce’. After naming, click on ‘Create’.


2. Connecting LinkedIn Lead Generation Form to Pabbly Connect

In this step, you will connect your LinkedIn lead generation form with Pabbly Connect. Select LinkedIn as your trigger application. This means whenever a lead is captured through your LinkedIn form, it will trigger the workflow.

  • Click on ‘Connect’ and then ‘Add New Connection’.
  • Authorize access to your LinkedIn account.
  • Select the lead generation form associated with your LinkedIn ad.

After successfully connecting, refresh the fields to ensure your LinkedIn account is linked properly. This setup allows Pabbly Connect to capture leads from your LinkedIn form automatically.


3. Sending Leads from Pabbly Connect to Salesforce

Now that you have connected your LinkedIn form, the next step is to send the captured leads to Salesforce using Pabbly Connect. Select Salesforce as the action application. This integration will add leads directly to your Salesforce campaign.

To do this, click on ‘Connect with Salesforce’ and authorize access. After connecting, select the campaign you created in Salesforce, ensuring it matches your LinkedIn ad campaign.

  • Choose the action event ‘Add Lead to Campaign’.
  • Map the lead details from LinkedIn to Salesforce fields.
  • Save your changes to finalize the setup.

This configuration ensures that every new lead captured through your LinkedIn form is automatically added to your Salesforce campaign by Pabbly Connect.


4. Testing the Integration with Dummy Data

To ensure everything is set up correctly, you should test the integration. Use dummy data to fill out your LinkedIn lead generation form. This step will help confirm that Pabbly Connect is capturing the lead data properly.

After submitting the form, go back to Pabbly Connect and check for the response from LinkedIn. If the data appears correctly, your integration is functioning as expected. You can now verify that the lead has been added to your Salesforce campaign.

This testing phase is crucial as it demonstrates the seamless connection between LinkedIn and Salesforce through Pabbly Connect. Make sure to check the lead details in Salesforce to confirm they match the submitted information.


5. Automation Benefits and Conclusion

With the integration set up via Pabbly Connect, your LinkedIn leads will be automatically added to your Salesforce campaigns every 10 minutes. This automation saves time and reduces manual errors, allowing you to focus on other aspects of your business.

Furthermore, Pabbly Connect provides a user-friendly interface that simplifies the entire process of integrating applications. By automating the lead capture and management process, you can ensure that no potential leads are missed.

In summary, using Pabbly Connect to automate the addition of LinkedIn leads to Salesforce enhances efficiency and provides a streamlined workflow. This integration is essential for businesses looking to optimize their lead management processes.

Conclusion

This guide summarizes the key points and helps you understand the essential features and benefits of using this tool.

Ensure you check out Pabbly Connect to create business automation workflows and reduce manual tasks. Pabbly Connect currently offer integration with 2,000+ applications.


In conclusion, this tutorial demonstrated how to use Pabbly Connect to automate the integration of LinkedIn leads into Salesforce campaigns. By following these steps, you can enhance your lead management and save valuable time.

How to Create Mailchimp Members from Microsoft Excel Rows Using Pabbly Connect

Learn how to integrate Microsoft Excel with Mailchimp using Pabbly Connect to automate member creation from Excel rows. Step-by-step tutorial included. Revolutionize your productivity approach with just a few strategic clicks. Uncover professional methods for connecting applications and creating workflows that reclaim hours of your week.

Watch Step By Step Video Tutorial Below


1. Access Pabbly Connect for Microsoft Excel and Mailchimp Integration

To create Mailchimp members from Microsoft Excel rows, you need to access Pabbly Connect. Start by signing into your Pabbly Connect account. If you are a new user, you can sign up for free and get 100 tasks to begin with.

Once logged in, navigate to the applications page. Click on the Pabbly Connect option and select Access Now to reach your dashboard. From there, you can create a new workflow by clicking on the Create Workflow button, naming your workflow appropriately.


2. Create a New Workflow in Pabbly Connect

In the workflow creation dialog, name your workflow something like Create Mailchimp Member from Microsoft Excel Row. This will help you identify it later. After naming, click on Create to proceed. using Pabbly Connect

  • Select Microsoft Excel as your trigger application.
  • Choose New Row in Worksheet as the trigger event.
  • Click on Connect to establish the connection.

After connecting, you will need to select the workbook and worksheet from your Microsoft Excel account. Ensure the workbook is set to the one where your leads are stored, which should be named Mailchimp Subscriber.


3. Test the Integration with Pabbly Connect

Once you’ve set up the connection, click on Save and Send Test Request. This will capture the details of the last row added to your Excel sheet. If successful, you will see the response indicating that the integration is working.

Verify that the data received corresponds to the new user details in your Excel sheet. This step confirms that Pabbly Connect is correctly fetching data from Microsoft Excel.


4. Set Up Mailchimp as the Action Application

Next, you need to set Mailchimp as your action application in Pabbly Connect. Select Mailchimp and choose the action event as Find a Member by Specified Email. This action will check if the email already exists in your Mailchimp account.

  • Click on Connect to link Mailchimp with Pabbly Connect.
  • Provide the API key and Data Center from your Mailchimp account.
  • Map the email ID from the response received from Excel.

After mapping, click on Save and Send Test Request. This will check if the email exists in Mailchimp. The response will indicate if the member is already present or not.


5. Finalize the Member Creation Process in Mailchimp

If the member does not exist, you can proceed to create a new member. Use the Pabbly Connect filter to ensure that the next action only executes if the member is not found. Set the condition to check if the total items returned is zero.

Next, select Mailchimp again and choose the action event Add New Member with Custom Fields. Map all necessary fields like email address, first name, last name, and mobile number from the Excel response. Finally, click on Save and Send Test Request to add the new member to your Mailchimp account.

Once the test request is successful, you can verify in your Mailchimp account that the new member has been added correctly. This completes the integration process using Pabbly Connect.


Conclusion

This tutorial has guided you through the process of creating Mailchimp members from Microsoft Excel rows using Pabbly Connect. By following these steps, you can automate your lead management effectively and efficiently.

Ensure you check out Pabbly Connect to create business automation workflows and reduce manual tasks. Pabbly Connect currently offer integration with 2,000+ applications.

How to Send WhatsApp Messages on Gravity Forms Submission Using Pabbly Connect

Learn how to automate WhatsApp messages on Gravity Forms submission using Pabbly Connect. Follow this detailed step-by-step tutorial for seamless integration. Implement the precise methodologies leading organizations use to automate repetitive tasks, illustrated with practical examples designed for immediate application.

Watch Step By Step Video Tutorial Below


1. Accessing Pabbly Connect for Integration

To automate WhatsApp messages on Gravity Forms submission, start by accessing Pabbly Connect. This platform allows you to create workflows that connect different applications seamlessly.

Once logged in, you can create a new workflow by clicking on the ‘Create Workflow’ button. Name your workflow something like ‘Send WhatsApp Message on Gravity Form Submission’ and click ‘Create’. This sets the foundation for your automation.


2. Setting Up the Trigger with Gravity Forms

In this section, you will set up the trigger to capture new submissions from Gravity Forms using Pabbly Connect. Select Gravity Forms as your trigger application and choose the event ‘New Response’.

  • Choose the correct form from your Gravity Forms list.
  • Copy the webhook URL provided by Pabbly Connect.
  • Go to your Gravity Forms, edit the form, and add the webhook URL in the settings.

After saving the settings, proceed to test the connection by submitting a dummy form. This will ensure that the data is correctly captured by Pabbly Connect from Gravity Forms.


3. Sending WhatsApp Messages via Interakt

Next, you will connect the Interakt application to send WhatsApp messages through Pabbly Connect. Select Interakt as the action application and choose the ‘Send WhatsApp Message’ action.

To configure this, you will need to provide the secret key from your Interakt account and map the data fields from the Gravity Forms submission. Make sure to include the phone number and template code for the WhatsApp message.

  • Input the full phone number or separate the country code and phone number.
  • Select the appropriate WhatsApp template that you created in Interakt.
  • Ensure that the template is approved by Facebook to avoid sending errors.

After filling in all the required fields, send a test message to verify that everything is working correctly. This step confirms that Pabbly Connect is effectively linking Gravity Forms with Interakt.


4. Finalizing the Integration Process

Once the test message is successfully sent, review your setup in Pabbly Connect. Make sure all mappings are correct, and the workflow is set to trigger on new submissions.

This integration allows for automatic replies to users who submit the Gravity Forms, enhancing user experience. You can now relax, knowing that Pabbly Connect will handle the messaging process without manual intervention.


5. Conclusion: Automate Your WhatsApp Messaging

In conclusion, using Pabbly Connect to send WhatsApp messages on Gravity Forms submission is a straightforward process. By following these steps, you can ensure that every form submission triggers an automatic WhatsApp message, keeping your users informed and engaged.

Ensure you check out Pabbly Connect to create business automation workflows and reduce manual tasks. Pabbly Connect currently offer integration with 2,000+ applications.

Check out Pabbly Connect – Automate your business workflows effortlessly! Sign Up Free – Start your journey with ease! 10,000+ Video Tutorials – Learn step by step! Join Pabbly Facebook Group – Connect with 21,000+ like minded people!

This integration not only saves time but also enhances communication efficiency. Start using Pabbly Connect today to automate your workflows and improve your business processes.

Integrating GoToTraining with Jotform Using Pabbly Connect

Learn how to integrate GoToTraining with Jotform submissions using Pabbly Connect for seamless registration automation. Build sophisticated automated workflows in less time than you think. This guide translates complex integrations into straightforward steps for immediate implementation.

Watch Step By Step Video Tutorial Below


1. Accessing Pabbly Connect for Integration

To create a seamless integration between GoToTraining and Jotform, you need to access Pabbly Connect. Start by navigating to the Pabbly Connect website to either sign in or create a new account.

If you are a new user, click on the ‘Sign Up for Free’ option. This process is quick and grants you 100 free tasks to explore the platform. Existing users can simply click on ‘Sign In’ to access their dashboard.


2. Creating a Workflow in Pabbly Connect

After signing in, locate the ‘Create Workflow’ button on the dashboard of Pabbly Connect. Clicking this button will prompt you to name your workflow. You can name it something like ‘Create Registrants in GoToTraining from Jotform Responses’.

  • Click on ‘Create’ to start the workflow.
  • You will see two windows open: one for the trigger and one for the action.

In this workflow, the trigger will be Jotform, which means that every time a new form is submitted, it will trigger an action to create a registrant in GoToTraining. This is where Pabbly Connect plays a crucial role in connecting these applications.


3. Setting Up the Trigger with Jotform

The next step is to set up the trigger application in Pabbly Connect. Select Jotform as your trigger application and choose the event as ‘New Response’. Once selected, a webhook URL will be generated for you.

Copy this webhook URL and head over to your Jotform account. Open the settings of the form you want to use, navigate to the Integrations section, and search for Webhooks. Paste the copied URL into the Webhook URL field and click on ‘Complete Integration’.


4. Testing the Integration with a Submission

Now that your Jotform is integrated with Pabbly Connect, it’s time to test the setup. Publish your form to get the sharing link, and fill out the form with test data like a first name, email, and phone number.

  • Enter a demo first name, such as ‘Demo User’.
  • Provide a dummy email address like ‘[email protected]’.
  • Submit the form.

Return to Pabbly Connect, and you will see the response containing the details you entered. This confirms that the integration is working correctly and ready for the next step.


5. Creating a Registrant in GoToTraining

For the final step, select GoToTraining as your action application in Pabbly Connect. Choose the action event as ‘Create Registrant’. Click on connect and establish a new connection with GoToTraining.

Once connected, you will need to fill out the required fields using the mapped data from the Jotform submission. This includes selecting the training session, which in this case is scheduled for Sunday, September 10, 2023. Ensure you map the first name, last name, and email correctly to create a new registrant.

After mapping the data, click on ‘Save and Send Test Request’. You should receive a response confirming the creation of the registrant. Refresh your GoToTraining account to verify that the new registrant has been added successfully.


Conclusion

In this tutorial, we demonstrated how to effectively use Pabbly Connect to integrate Jotform submissions with GoToTraining. This integration allows for automatic creation of registrants, streamlining the registration process for your training sessions.

Ensure you check out Pabbly Connect to create business automation workflows and reduce manual tasks. Pabbly Connect currently offer integration with 2,000+ applications.