Automate WhatsApp Notifications for India Mart Leads Using Pabbly Connect

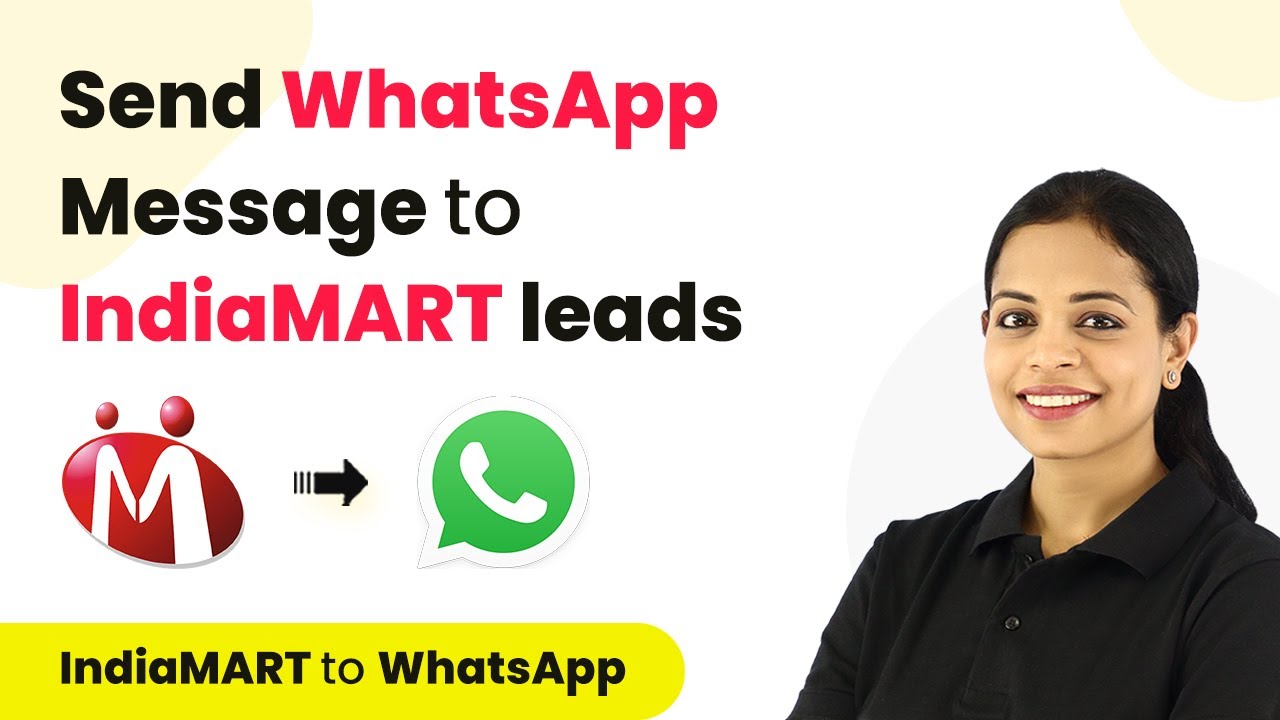
Learn how to automate WhatsApp notifications for new leads from India Mart using Pabbly Connect. Follow this step-by-step guide to streamline your communication. This comprehensive guide reveals exactly how to connect your applications and automate repetitive tasks — accessible for professionals of all technical backgrounds.

Watch Step By Step Video Tutorial Below


1. Accessing Pabbly Connect for Integration

To start automating WhatsApp notifications for new leads from India Mart, you need to access Pabbly Connect. Simply sign in if you are an existing user, or create a new account if you are a first-time user. The account setup is quick and provides you with 100 free tasks upon creation.

Once you are logged into Pabbly Connect, navigate to the dashboard. Here, you will find the ‘Create Workflow’ button on the right-hand side. Click on this button to begin setting up your integration workflow.


2. Creating Your Workflow in Pabbly Connect

After clicking ‘Create Workflow’, you will need to name your workflow. A suitable name for this integration could be ‘Send WhatsApp Message to India Mart Leads’. After naming it, click on the ‘Create’ button to proceed. using Pabbly Connect

  • Name your workflow appropriately to reflect its purpose.
  • Click on ‘Create’ to initiate the workflow setup.

Now, you will see two main events: Trigger and Action. The Trigger event will be set to India Mart, while the Action event will be set to WhatsApp. This means every time a new lead is captured in India Mart, a WhatsApp message will be sent automatically.


3. Setting Up the Trigger for New Leads

In this step, select India Mart as your trigger application. The trigger event will be ‘New Lead’. This ensures that your workflow activates whenever a new lead is recorded in India Mart.

Click on ‘Connect’ to link your India Mart account with Pabbly Connect. You will need to provide a CRM key, which can be generated from your India Mart account under the settings section. After pasting the key into Pabbly Connect, click ‘Save’.

  • Select ‘New Lead’ as the trigger event.
  • Generate and paste the CRM key from your India Mart account.

Once the connection is established, refresh the fields and click on ‘Save and Send Test Request’. This will allow you to verify that the trigger is working correctly by fetching the latest lead data.


4. Configuring the Action to Send WhatsApp Messages

Next, set WhatsApp as your action application in Pabbly Connect. The action event should be ‘Send Template Message’. Click on ‘Connect’ to link your WhatsApp account. You’ll need to provide an API key from your WhatsApp account.

After entering the API key and saving the connection, you will need to fill in the required fields such as campaign name, mobile number, and message content. Make sure to map the data from the previous step so that each new lead gets personalized messages.

Select ‘Send Template Message’ as the action event. Map the lead details such as name and subject into the message template.

Once all fields are filled, click on ‘Save and Send Test Request’ to test if the WhatsApp message is sent successfully. Check your WhatsApp to confirm that the message was received.


5. Conclusion: Successful Integration with Pabbly Connect

In conclusion, we successfully integrated India Mart with WhatsApp using Pabbly Connect. This automation allows you to send immediate notifications to new leads, enhancing your communication efficiency.

Ensure you check out Pabbly Connect to create business automation workflows and reduce manual tasks. Pabbly Connect currently offer integration with 2,000+ applications.

By following the steps outlined, you can easily replicate this process for other integrations. Pabbly Connect empowers you to automate workflows without needing coding skills, making it a valuable tool for any business.


Automate User Enrollment with Pabbly Connect: Integrating Shopify and Heights

Learn how to automate user enrollment in Heights using Pabbly Connect with Shopify. Step-by-step tutorial on setting up the integration. Master proven automation processes with practical implementation examples and strategic recommendations you can apply immediately in your workflow.

Watch Step By Step Video Tutorial Below


1. Introduction to Pabbly Connect for Shopify Integration

Pabbly Connect is a powerful integration platform that automates user enrollment in Heights whenever a purchase is made on Shopify. This step-by-step guide will take you through the process of using Pabbly Connect to set up this automation.

To get started, first, log into your Pabbly Connect account or create a free account if you are a new user. It only takes a couple of minutes to sign up. Once logged in, navigate to the dashboard where you can create your workflow.


2. Creating a Workflow in Pabbly Connect

To create a workflow in Pabbly Connect, click on the blue button labeled ‘Create Workflow’. You will need to name your workflow; for example, ‘Enroll User to Heights Course on Shopify Purchase’. This name helps you identify the workflow later.

After naming your workflow, click the ‘Create’ button. You will see two boxes labeled ‘Trigger’ and ‘Action’. The trigger signifies when an event occurs, and the action specifies what should happen as a result. In this case, we will set Shopify as the trigger application and Heights as the action application.


3. Setting Up Shopify Trigger in Pabbly Connect

For the trigger event, select ‘New Order’ from Shopify. Pabbly Connect will provide you with a webhook URL and instructions to set up the integration. Copy this URL as you will need to paste it into your Shopify settings.

Next, go to your Shopify dashboard, click on ‘Settings’, then ‘Notifications’. Here, you will find the option to create a webhook. Paste the copied URL into the webhook URL field and select the event type as ‘Order Payment’. Make sure the format is set to JSON and click ‘Save’. This step establishes the connection between Shopify and Pabbly Connect.


4. Placing a Test Order on Shopify

Now that your trigger is set up, it’s time to test the integration. Open your online store and place a dummy order as a customer. For example, you can purchase a course like ‘PHP for Beginners’. Fill in the required details such as name, email, and address, then proceed to payment.

  • Enter a dummy email address like ‘[email protected]’.
  • Use a test card number and complete the purchase.

Once the order is placed, return to your Pabbly Connect dashboard to see if the order details have been captured. You should see the payment date, amount, and customer details displayed in the response.


5. Enrolling Users in Heights via Pabbly Connect

After successfully capturing the order details, the next step is to enroll the user in Heights. In Pabbly Connect, set Heights as the action application and select the action event ‘Enroll Student for Course’. You will need to provide your Heights API key and subdomain for the connection.

Once connected, you can map the data from the Shopify order to the Heights enrollment fields. For example, map the customer’s first and last name and email address to enroll them in the course. After mapping the fields, click on the ‘Save and Send Test Request’ button. If successful, the user will be enrolled in the Heights course automatically.


Conclusion

Integrating Pabbly Connect with Shopify and Heights allows for seamless user enrollment automation. By following these steps, you can ensure that every new order results in automatic enrollment in Heights courses, enhancing your business efficiency.

Ensure you check out Pabbly Connect to create business automation workflows and reduce manual tasks. Pabbly Connect currently offer integration with 2,000+ applications.

How to Send Email Notifications to IndiaMART Leads Using Pabbly Connect

Learn how to automate email notifications for IndiaMART leads using Pabbly Connect. Follow this step-by-step guide to streamline your lead management process. Build sophisticated automated workflows in less time than you think. This guide translates complex integrations into straightforward steps for immediate implementation.

Watch Step By Step Video Tutorial Below


1. Accessing Pabbly Connect for IndiaMART Integration

To send email notifications to IndiaMART leads, you first need to access Pabbly Connect. This integration platform allows seamless automation between IndiaMART and Gmail.

Start by signing into your Pabbly Connect account. If you’re new, sign up to create an account. After logging in, you will be directed to the dashboard where you can create a new workflow.


2. Creating a Workflow in Pabbly Connect

In Pabbly Connect, click on the ‘Create Workflow’ button located on the right side of the dashboard. You will be prompted to name your workflow. For this integration, name it something relevant, like ‘Email Notification to IndiaMART Leads’.

  • Click on the ‘Create’ button to proceed.
  • Select ‘IndiaMART’ as your trigger application.
  • Choose the trigger event as ‘New Leads’.

Once set, the workflow will monitor for new leads in IndiaMART, which will trigger the email notification process.


3. Connecting IndiaMART to Pabbly Connect

Next, you need to connect your IndiaMART account to Pabbly Connect. Click on ‘Connect’ and then choose ‘Add New Connection’. You will be required to enter your CRM API key from your IndiaMART account.

To obtain the API key, log into IndiaMART, navigate to Settings, then Account Settings, and find the CRM API section. Generate your key and paste it into Pabbly Connect. This establishes a connection between the two platforms.


4. Setting Up Gmail Action in Pabbly Connect

After successfully connecting IndiaMART, it’s time to set up the action application. Select ‘Gmail’ as your action application in Pabbly Connect and choose the action event as ‘Send Email’.

Click on ‘Connect’ to link your Gmail account. You will need to authorize Pabbly Connect to access your Gmail account. Once authorized, fill in the required fields to set up the email notification.

  • Map the recipient’s email address from the previous step.
  • Provide a subject line like ‘Query Received Successfully’.
  • Compose the email content, including details about the lead.

After filling in the fields, click on ‘Save and Send Test Request’ to verify if the email is sent correctly.


5. Testing the Integration in Pabbly Connect

Once you have configured the Gmail action, it’s time to test the entire integration. Click on ‘Save and Send Test Request’ in Pabbly Connect. If everything is set up correctly, the recipient will receive the email notification.

Check the recipient’s inbox to confirm the email has been received. If the email appears as expected, your integration is successful! This means every time a new lead is captured in IndiaMART, an email notification will automatically be sent via Gmail.


Conclusion

Using Pabbly Connect, you can easily automate email notifications for IndiaMART leads. This integration streamlines your lead management process and ensures timely communication with potential customers.

Ensure you check out Pabbly Connect to create business automation workflows and reduce manual tasks. Pabbly Connect currently offer integration with 2,000+ applications.

Integrating Shopify with Flodesk Using Pabbly Connect: A Step-by-Step Guide

Learn how to integrate Shopify with Flodesk using Pabbly Connect to automate subscriber management based on orders. Follow this detailed tutorial for seamless automation. Revolutionize your productivity approach with just a few strategic clicks. Uncover professional methods for connecting applications and creating workflows that reclaim hours of your week.

Watch Step By Step Video Tutorial Below


Setting Up Pabbly Connect for Shopify and Flodesk Integration

To integrate Shopify with Flodesk, we will use Pabbly Connect. This platform allows us to automate the process of adding subscribers to Flodesk based on Shopify orders. Start by creating a free account on Pabbly Connect and log in to access the dashboard.

Once logged in, navigate to the dashboard and click on the ‘Create Workflow’ button. Name your workflow something descriptive like ‘Add Subscriber in Different Segment of Flodesk Based on Shopify Order’. Click on ‘Create’ to initiate the setup.


Connecting Shopify to Pabbly Connect

In this step, we will connect Shopify as the trigger application in Pabbly Connect. Select ‘Shopify’ from the application list and choose the trigger event as ‘New Order’. This means that every time a new order is placed in Shopify, it will trigger the workflow.

Pabbly Connect will provide you with a webhook URL. Copy this URL and go to your Shopify store. Navigate to Settings > Notifications, scroll down to the Webhooks section, and click on ‘Create Webhook’. Paste the copied URL, select ‘Order Payment’ as the event, choose JSON as the format, and save the webhook.

  • Copy the webhook URL from Pabbly Connect.
  • Go to Shopify Settings > Notifications.
  • Create a new webhook with the copied URL and save.

This connection will allow Pabbly Connect to capture order details whenever a new order is placed, enabling automation for adding subscribers to Flodesk.


Testing the Shopify Connection with Pabbly Connect

To ensure that the connection between Shopify and Pabbly Connect is working, place a test order in your Shopify store. Use dummy customer details and add multiple products to the cart. After completing the checkout process, return to Pabbly Connect to check if the order data has been received.

If the connection is successful, you will see the order details populated in the Pabbly Connect dashboard. This includes information such as customer email, product names, and order amounts. Confirm that the data reflects the order you just placed, which verifies that Pabbly Connect is capturing the information correctly.

  • Place a test order in Shopify with multiple products.
  • Check Pabbly Connect for the captured order data.
  • Ensure the customer details and product information are accurate.

Once you confirm that Pabbly Connect is receiving the data correctly, you can proceed to the next step of adding subscribers to Flodesk.


Adding Subscribers to Flodesk Using Pabbly Connect

Now that we have confirmed the Shopify connection, we will set up Flodesk as the action application in Pabbly Connect. Select ‘Flodesk’ and choose ‘Add Subscriber’ as the action event. Connect your Flodesk account by providing the necessary access permissions.

In the configuration, map the customer email and other relevant details from the Shopify order data captured earlier. This ensures that each customer who places an order is automatically added as a subscriber in Flodesk with their respective details.

Select Flodesk as the action application in Pabbly Connect. Map customer details from the Shopify order to Flodesk fields. Save the configuration to complete the subscriber addition process.

After saving, test this action to ensure that the subscriber is added to Flodesk successfully. You should see a confirmation message indicating that the subscriber was created.


Segmenting Subscribers in Flodesk Based on Orders

To enhance the automation, we will segment subscribers in Flodesk based on the products they ordered. This is done by using a lookup table in Pabbly Connect to determine which segment each subscriber should belong to based on the product type.

After adding the subscriber, click on the plus icon to add a new action step. Choose ‘Lookup Table’ and configure it to check the product name. Based on the product ordered, map the corresponding segment ID that you want the subscriber to be added to. This allows for dynamic segmentation of subscribers.

Add a Lookup Table action in Pabbly Connect. Map product names to their respective segment IDs. Ensure the segments are accurately set for dynamic subscriber management.

This segmentation process allows you to automatically categorize subscribers in Flodesk based on their purchasing behavior, enhancing your marketing efforts.


Conclusion

By following this tutorial, you can effectively integrate Shopify with Flodesk using Pabbly Connect, automating the addition of subscribers based on their orders. This setup not only saves time but also enhances your email marketing strategy through effective segmentation.

Ensure you check out Pabbly Connect to create business automation workflows and reduce manual tasks. Pabbly Connect currently offer integration with 2,000+ applications.

Utilizing Pabbly Connect for this integration simplifies the process, ensuring that your subscribers are managed efficiently and effectively based on their purchasing behavior.

How to Create Brevo Contacts from Google Sheets Using Pabbly Connect

Learn how to create Brevo contacts from Google Sheets using Pabbly Connect. This step-by-step tutorial guides you through the integration process effortlessly. Build sophisticated automated workflows in less time than you think. This guide translates complex integrations into straightforward steps for immediate implementation.

Watch Step By Step Video Tutorial Below


1. Accessing Pabbly Connect for Google Sheets and Brevo Integration

To create Brevo contacts from Google Sheets, you need to access Pabbly Connect. Start by opening your browser and searching for Pabbly Connect. Once on the landing page, new users should click on the ‘Sign Up for Free’ button to create an account. Existing users can simply sign in to access their dashboard.

After signing in, you will see all applications provided by Pabbly. Click on ‘Access Now’ for Pabbly Connect to reach the dashboard. Here, you can view all your workflows. To create a new workflow, click on the blue ‘Create Workflow’ button located in the top right corner.


2. Creating a Workflow in Pabbly Connect

When creating a workflow in Pabbly Connect, you will need to name it. For instance, you might name it ‘Create Brevo Contacts from Google Sheets’. After naming your workflow, click on ‘Create’. This will open two windows: one for the trigger and another for the action.

In this case, Google Sheets will be your trigger application. Select ‘New or Updated Spreadsheet Row’ as the trigger event. This means that whenever a new row is added to your Google Sheets, it will trigger the workflow in Pabbly Connect. To connect Google Sheets with Pabbly, you will need to copy the provided webhook URL and follow the instructions given in the interface.

  • Go to your Google Sheets and enter the details of a contact.
  • Navigate to Extensions > Add-ons > Get Add-ons to install the Pabbly Connect Webhooks add-on.
  • Select the Pabbly Connect Webhooks option and click on ‘Initial Setup’.

After completing these steps, your Google Sheets will be connected to Pabbly Connect, allowing automatic responses to be captured whenever a new row is added.


3. Mapping Data from Google Sheets to Brevo

Once your Google Sheets is connected to Pabbly Connect, you will need to set up the action application, which is Brevo. Select Brevo as your action application and choose ‘Create or Update Contact’ as the action event. Click on ‘Connect’ and then select ‘Add New Connection’. You will need to enter your Brevo domain and API key.

To find your domain, simply check the URL of your Brevo account. For the API key, navigate to your Brevo account, go to the profile option in the top right corner, and select ‘SMTP and API Key’. Generate a new API key by clicking on the respective button and give it a name. Copy this API key and paste it into Pabbly Connect.

  • Map the email and other contact details from the Google Sheets response to the corresponding fields in Brevo.
  • Set the email blacklisted field to true if you don’t want to send emails to the contact.
  • Select the appropriate list from Brevo where you want the new contacts to be added.

By mapping these details accurately, every new entry in your Google Sheets will create a corresponding contact in Brevo, ensuring that your workflow remains dynamic and efficient.


4. Testing the Workflow in Pabbly Connect

After setting up the mapping, it’s time to test your workflow in Pabbly Connect. Click on ‘Save and Send Test Request’ to check if a new contact is created in Brevo. If successful, you will receive a response that includes the contact ID, confirming that the integration is working as intended.

To validate this, go back to your Brevo account and check the specified list. You should see the newly created contact with the details you entered in Google Sheets. This confirms that your workflow has been set up correctly and is functioning as expected.

Before finalizing, make sure to adjust the settings in Google Sheets to send on events. This will ensure that every time a new row is added, the data is sent to Pabbly Connect automatically without needing manual intervention.


5. Finalizing the Google Sheets and Brevo Integration

To complete the integration process, return to your Google Sheets and navigate to Extensions > Pabbly Connect Webhooks. This time, select ‘Send on Events’. This will allow your Google Sheets to automatically send data to Pabbly Connect whenever a new row is added.

Now, add another row to your Google Sheets with new contact details. Once you do this, check your Brevo account again to see if the new contact has been added automatically. This step verifies that your integration is seamless and efficient, leveraging Pabbly Connect for automation.

By following these steps, you have successfully integrated Google Sheets with Brevo using Pabbly Connect. This automation saves time and enhances productivity by ensuring that all new contacts are created without manual input.


Conclusion

In this tutorial, we demonstrated how to create Brevo contacts from Google Sheets using Pabbly Connect. By following the steps outlined, you can automate the process of adding contacts and enhance your workflow efficiency.

Ensure you check out Pabbly Connect to create business automation workflows and reduce manual tasks. Pabbly Connect currently offer integration with 2,000+ applications.

Integrating URL with PAB Using Pabbly Connect: A Step-by-Step Tutorial

Learn how to integrate URL with PAB Using Pabbly Connect in this detailed tutorial. Follow the exact steps to connect Google Sheets and Box effortlessly. Transform complex automation concepts into accessible, actionable steps that eliminate unnecessary manual work while maximizing existing application capabilities. with Pabbly Connect.

Watch Step By Step Video Tutorial Below


1. Setting Up PAB for URL Integration

To begin the integration of URL with PAB, you first need to sign in to your PAB account. Once logged in, navigate to the dashboard where you can create a new workflow. Click on the ‘Create Workflow’ button on the right-hand side to start the process.

In the dialog box that appears, name your workflow. For example, you might name it ‘Integrating URL with PAB Using Pabbly Connect’. After naming, click on ‘Create’ to proceed to the trigger and action setup page.


2. Selecting Trigger Application: URL

The next step in the integration process is selecting the trigger application, which in this case is URL. In the trigger window, choose URL as your trigger application. This will initiate the workflow whenever a specific event occurs in the URL application.

  • Select ‘New URL Event’ as the trigger event.
  • Copy the webhook URL provided by PAB.
  • Use this URL in your URL application to send data.

Once you have configured the trigger, the next step is to set up the action that follows. This will allow PAB to respond to the trigger from the URL application.


3. Configuring Action Application: Google Sheets

After setting up the trigger, the action application needs to be configured. Here, you will select Google Sheets as your action application. This means that once the trigger from URL is activated, PAB will perform an action in Google Sheets.

In the action event section, select ‘Add New Row’. You will need to connect your Google account to PAB. If you already have a connection, simply select it; otherwise, sign in to create a new connection.


4. Mapping Data in Google Sheets

Now that you have configured the action application, it’s time to map the data from the URL trigger to your Google Sheets. In the mapping section, you will need to specify which data fields from the URL event correspond to the columns in your Google Sheets. using Pabbly Connect

  • Map the URL data fields to appropriate columns like Name, Email, and Phone.
  • Ensure that each field is correctly mapped to avoid data discrepancies.

Once the mapping is complete, click on ‘Save and Send Test Request’ to check if the data flows correctly into your Google Sheets. If successful, you will see the new row added in your spreadsheet.


5. Finalizing Integration with Box

To enhance the integration further, you can also link Box as part of your workflow. This allows files or documents related to the URL events to be stored in Box automatically. To do this, add another action step in your workflow and select Box as the application.

Choose the action event that corresponds to your needs, such as ‘Upload File’. You will need to connect your Box account to PAB, similar to how you connected Google Sheets. After connecting, specify the folder in Box where you want the files to be uploaded.

Now, your integration is complete. Whenever a new URL event occurs, the details will be sent to Google Sheets and relevant files will be uploaded to Box, streamlining your workflow.


Conclusion

This tutorial demonstrates how to integrate URL with PAB, Google Sheets, and Box Using Pabbly Connect. By following these steps, you can automate data entry and file management effectively, enhancing productivity and efficiency.

Thanks for following along with this tutorial! Remember to subscribe to the channel for more helpful content like this.

If you found this guide useful, please consider giving it a thumbs up and sharing it with others who might benefit from it.

How to Send GetResponse Data Using API by Pabbly Connect

Learn how to seamlessly integrate GetResponse with MailerLite using Pabbly Connect API. Follow our step-by-step tutorial for efficient automation. Implement the precise methodologies leading organizations use to automate repetitive tasks, illustrated with practical examples designed for immediate application.

Watch Step By Step Video Tutorial Below


1. Setting Up Pabbly Connect for Integration

Pabbly Connect is essential for automating the transfer of data between GetResponse and MailerLite. To start, visit the Pabbly Connect website and sign up for a free account if you’re a new user. Existing users can simply log in to access the dashboard. using Pabbly Connect

Once logged in, navigate to the Pabbly Connect dashboard. Here, you will see options to create a new workflow. Click on the ‘Create Workflow’ button, and enter a name for your workflow, such as ‘Send GetResponse Contact Data Through API’. After naming your workflow, click on ‘Create’ to proceed.


2. Configuring the GetResponse Trigger

In this step, you’ll set up GetResponse as the trigger application in your workflow using Pabbly Connect. Select ‘GetResponse’ from the trigger application options. Choose the event ‘Contact Subscribed’ to initiate the workflow when a new contact is added.

  • Select GetResponse as the trigger application.
  • Choose the event ‘Contact Subscribed’.
  • Copy the Webhook URL provided by Pabbly Connect.

Next, go to your GetResponse account. Under the ‘Tools’ section, select ‘Webhooks’ and click on ‘Create Webhook’. Paste the copied Webhook URL and select the event to notify, which in this case is when a contact subscribes. Finally, activate the Webhook by clicking on ‘Create Webhook’.


3. Testing the Webhook Response

After setting up the Webhook in GetResponse, it’s time to test the connection using Pabbly Connect. Go back to Pabbly Connect, which should show a message indicating it is waiting for a Webhook response. To test this, create a new contact in your GetResponse account.

  • Navigate to the Contacts section in GetResponse.
  • Click on ‘Add Contacts’ and select the appropriate list.
  • Enter the contact details and click ‘Add Contact’.

Once the contact is added, Pabbly Connect will capture the response with the contact details. This confirms that GetResponse is successfully sending data to Pabbly Connect.


4. Sending Data to MailerLite with Pabbly Connect

With the data now captured in Pabbly Connect, the next step is to send this information to MailerLite. Set MailerLite as the action application in your workflow. Choose the action event as ‘Create Subscriber’. This step utilizes Pabbly Connect to facilitate the data transfer.

To configure this, you will need the MailerLite API endpoint URL. Access this from the MailerLite developers’ website, specifically under the API reference for subscribers. Once you have the endpoint URL, paste it into Pabbly Connect. Set the payload type to JSON and ensure the wrap request option is set to ‘No’.


5. Finalizing the Integration and Testing

In this final step, complete the setup by configuring authentication in Pabbly Connect. Select ‘Bearer Token’ as the authentication method and add the required headers, including the API key from MailerLite.

Map the email and other parameters from the GetResponse data to the MailerLite fields. This ensures that whenever a new contact is added in GetResponse, the same details are sent to MailerLite to create a new subscriber. After completing the setup, click on ‘Save’ and test the request to confirm that everything is working correctly.

Upon successful testing, you will see the new subscriber reflected in your MailerLite account, indicating that the integration between GetResponse and MailerLite through Pabbly Connect is complete.


Conclusion

Integrating GetResponse with MailerLite using Pabbly Connect allows for seamless automation of subscriber management. By following these steps, you can efficiently send GetResponse data using API, ensuring that your marketing efforts are streamlined and effective.

Ensure you check out Pabbly Connect to create business automation workflows and reduce manual tasks. Pabbly Connect currently offer integration with 2,000+ applications.

Integrate WordPress and Brivo Email Campaigns Using Pabbly Connect

Learn how to automate email campaigns in Brivo from WordPress posts using Pabbly Connect. Step-by-step guide for seamless integration. Revolutionize your productivity approach with just a few strategic clicks. Uncover professional methods for connecting applications and creating workflows that reclaim hours of your week.

Watch Step By Step Video Tutorial Below


1. Accessing Pabbly Connect for Integration

To automate email campaigns in Brivo from WordPress posts, you first need to access Pabbly Connect. This platform allows you to create workflows that integrate various applications seamlessly.

If you are a new user, sign up for Pabbly Connect, which takes less than two minutes. Existing users can simply log in to their accounts. Upon signing up, you will receive 100 free tasks to test the automation.


2. Creating a Workflow in Pabbly Connect

Once you’re logged into Pabbly Connect, navigate to the dashboard. On the right side, click on the ‘Create Workflow’ button, which will prompt you to name your workflow. You can name it something like ‘Brivo Email Campaign from WordPress Post’.

  • Click on ‘Create’ to proceed.
  • You will see two main events: Trigger and Action.

Your trigger will be WordPress, and the action will be Brivo. This setup allows Pabbly Connect to automate the process of creating an email campaign whenever a new post is published on WordPress.


3. Setting Up the WordPress Trigger

The next step involves setting up the trigger in Pabbly Connect. Click on WordPress as your trigger application and select the event ‘New Post Published’. This event will initiate the workflow whenever a new post is published.

Upon selecting this, Pabbly Connect will provide you with a webhook URL. Copy this URL as it will be used to connect WordPress with Pabbly Connect. Now, go to your WordPress account and install the WP Webhooks plugin if you haven’t done so already.

  • Activate the plugin and go to its settings.
  • Under ‘Send Data’, select ‘Post Created’ and add the webhook URL you copied.

Make sure to configure the trigger settings to select the post type and status. Save these settings to complete the WordPress trigger setup.


4. Testing the Integration with a New Post

After setting up the trigger, it’s time to test the integration using Pabbly Connect. In your WordPress dashboard, create a new post. Give it a title and a description, then publish it. This action will send the post details to Pabbly Connect via the webhook.

Once the post is published, return to Pabbly Connect and check if the response has been captured. You should see the post details such as title, description, and permalink. This confirms that the trigger is working correctly.

Verify the received data includes the post title and description. This data will be used for creating the email campaign in Brivo.

With the test successful, you can now proceed to set up the action step in Pabbly Connect.


5. Creating the Email Campaign in Brivo

Now that you have tested the trigger, select Brivo as your action application in Pabbly Connect. Choose the action event ‘Create Email Campaign’ and click on connect. You will need to enter your Brivo domain and API key to establish this connection.

Once connected, you can set up the email campaign details. Map the campaign name to the post title received from the previous step. Fill in other required fields like sender’s email, sender’s name, and campaign content. This mapping ensures that each new post creates a unique email campaign.

Select the email list to which the campaign will be sent. Schedule the campaign using the current date and time.

After filling out all necessary fields, click on ‘Save and Send Request’ to create the email campaign. You will receive a confirmation response indicating that the campaign has been successfully scheduled.


Conclusion

In this tutorial, we demonstrated how to integrate WordPress with Brivo using Pabbly Connect. By following these steps, you can automate email campaigns every time a new post is published, streamlining your marketing efforts effectively.

Ensure you check out Pabbly Connect to create business automation workflows and reduce manual tasks. Pabbly Connect currently offer integration with 2,000+ applications.

How to Create Brevo Contact from Microsoft Excel Using Pabbly Connect

Learn how to integrate Microsoft Excel with Brevo to create contacts automatically using Pabbly Connect. Follow this step-by-step tutorial for seamless automation. Build sophisticated automated workflows in less time than you think. This guide translates complex integrations into straightforward steps for immediate implementation.

Watch Step By Step Video Tutorial Below


1. Accessing Pabbly Connect for Integration

To create Brevo contacts from Microsoft Excel, start by accessing Pabbly Connect. Sign in to your Pabbly Connect account, or if you are a new user, click on the ‘Sign Up for Free’ button to create an account. You will receive 100 free tasks upon registration.

Once logged in, navigate to the Pabbly Connect dashboard by clicking on ‘Access Now.’ From here, you can create a new workflow by selecting the ‘Create Workflow’ button. Name your workflow something descriptive, like ‘Create Brevo Contact from Microsoft Excel,’ and click on ‘Create’ to proceed.


2. Setting Up the Trigger in Pabbly Connect

In this step, you will set up the trigger application in Pabbly Connect. Select ‘Microsoft Excel’ as your trigger application. The trigger event will be ‘Add New Row in Worksheet,’ which will initiate the automation whenever a new row is added to your Excel sheet.

  • Select ‘Microsoft Excel’ as the trigger application.
  • Choose the trigger event as ‘Add New Row in Worksheet.’
  • Click on ‘Connect’ to establish a connection between Microsoft Excel and Pabbly Connect.

After connecting, select your workbook from the drop-down menu. For example, if your workbook is named ‘Book10,’ choose that from the list. The worksheet will be automatically selected, typically as ‘Sheet1’ if it is the only sheet available.


3. Capturing Data from Microsoft Excel

Once the connection is established, you will need to capture data from Microsoft Excel. Click on the ‘Save and Send Test Request’ button, which will fetch the latest data from your Excel sheet. This data will include the details of the last row added.

For instance, if the last row contains a first name, last name, and email ID, these will be displayed in the response received from Pabbly Connect. This confirms that the trigger is functioning correctly and will capture new data every 8 hours.

  • The trigger checks for new data every 8 hours.
  • Ensure that you have the correct data in the last row of your Excel sheet.
  • The response will show the captured data from Excel.

This step ensures that every new lead added to your Microsoft Excel sheet will be captured automatically by Pabbly Connect.


4. Creating a Brevo Contact from Excel Data

Now, you will set up the action application to create a Brevo contact. Search for ‘Brevo’ in the action application section of Pabbly Connect and select it. The action event will be ‘Create or Update Contact,’ which allows you to add new contacts based on the data fetched from Excel.

To establish a connection with Brevo, click on ‘Connect’ and enter your domain name and API key. You can find your domain name in your Brevo account settings. For the API key, navigate to Brevo’s SMTP and API section, generate a new API key, and copy it to Pabbly Connect.

Enter your Brevo domain name in the connection settings. Generate and paste your API key from Brevo into Pabbly Connect. Ensure the connection is successfully established.

After connecting, map the fields from the response you received from Microsoft Excel to the corresponding fields in Brevo, such as first name, last name, and email. This mapping ensures that the correct data is transferred whenever new leads are added to your Excel sheet.


5. Testing and Verifying the Integration

Finally, you will test the integration to ensure that contacts are created successfully in Brevo. Click on the ‘Save and Send Test Request’ button in Pabbly Connect. This will send the mapped data to Brevo and create a new contact.

Once the test request is successful, you can verify by checking your Brevo account. Navigate to the contacts list, and you should see the newly created contact with the details you mapped from Microsoft Excel. This confirms that the integration is working as intended.

Now, every time a new row is added to your Microsoft Excel sheet, Pabbly Connect will automatically create a corresponding contact in Brevo, streamlining your lead management process.


Conclusion

Using Pabbly Connect to integrate Microsoft Excel with Brevo allows for seamless contact creation. This automation saves time and ensures that your lead data is always up-to-date in Brevo. Follow these steps to enhance your workflow efficiency.

Ensure you check out Pabbly Connect to create business automation workflows and reduce manual tasks. Pabbly Connect currently offer integration with 2,000+ applications.

How to Add IndiaMART Leads to Google Sheets Using Pabbly Connect

Learn how to integrate IndiaMART leads to Google Sheets using Pabbly Connect. Follow our step-by-step guide for seamless automation. Transform complex automation concepts into accessible, actionable steps that eliminate unnecessary manual work while maximizing existing application capabilities.

Watch Step By Step Video Tutorial Below


Accessing Pabbly Connect Dashboard for IndiaMART Integration

To begin the integration process of adding IndiaMART leads to Google Sheets, first access the Pabbly Connect dashboard. This platform allows you to automate workflows effortlessly. If you are a new user, you can sign up quickly and receive 100 free tasks to start your automation journey.

Once logged in, navigate to the dashboard. On the right side, click on the ‘Create Workflow’ button. A dialog box will appear where you can name your workflow. For this tutorial, name it ‘Add IndiaMART Leads to Google Sheets’ and click on ‘Create’ to proceed with the setup.


Setting Up Trigger with IndiaMART in Pabbly Connect

In this section, you will set up the trigger for your workflow using Pabbly Connect and IndiaMART. The trigger application will be IndiaMART, which will initiate the workflow every time a new lead is generated. Click on the trigger application and select ‘IndiaMART’.

Next, choose the trigger event as ‘New Leads’. This event will check for new data every 24 hours. Click on the ‘Connect’ button to establish a connection with your IndiaMART account. You will need to add a new connection by providing your CRM API key, which can be generated from your IndiaMART account settings under the CRM API section.


Connecting Google Sheets as the Action Application

After successfully setting up the trigger, the next step is to connect Google Sheets as the action application in Pabbly Connect. Click on the action application and select ‘Google Sheets’. The action event will be ‘Add New Row’ to ensure that each new lead is added to your spreadsheet.

Click on the ‘Connect’ button and sign in with your Google account. Allow Pabbly Connect to access your Google Sheets. Once authorized, select the spreadsheet where you want to store the leads. For this tutorial, create a spreadsheet named ‘IndiaMART Leads’ with columns for name, email address, contact number, company name, city, query subject, product name, and query message.


Mapping Fields for IndiaMART Leads in Google Sheets

Now, you need to map the fields from the IndiaMART trigger to the columns in your Google Sheets using Pabbly Connect. This step is crucial for ensuring that the correct data is populated in your spreadsheet. Start by selecting the spreadsheet name and sheet name you created earlier.

  • Map the name of the lead from the IndiaMART trigger to the corresponding column in Google Sheets.
  • Continue mapping the email address, contact number, company name, city, query subject, product name, and query message.

After mapping all the fields, click on ‘Save and Send Test Request’. This action will send a test lead to your Google Sheets. Check your spreadsheet to confirm that the new lead has been added successfully, indicating that the integration has been set up correctly.


Conclusion

In conclusion, using Pabbly Connect, you can effortlessly automate the process of adding IndiaMART leads to Google Sheets. This integration allows for efficient lead management without manual input, enhancing productivity significantly.

Ensure you check out Pabbly Connect to create business automation workflows and reduce manual tasks. Pabbly Connect currently offer integration with 2,000+ applications.