Automate WhatsApp Messages to Facebook Leads Using Pabbly Connect

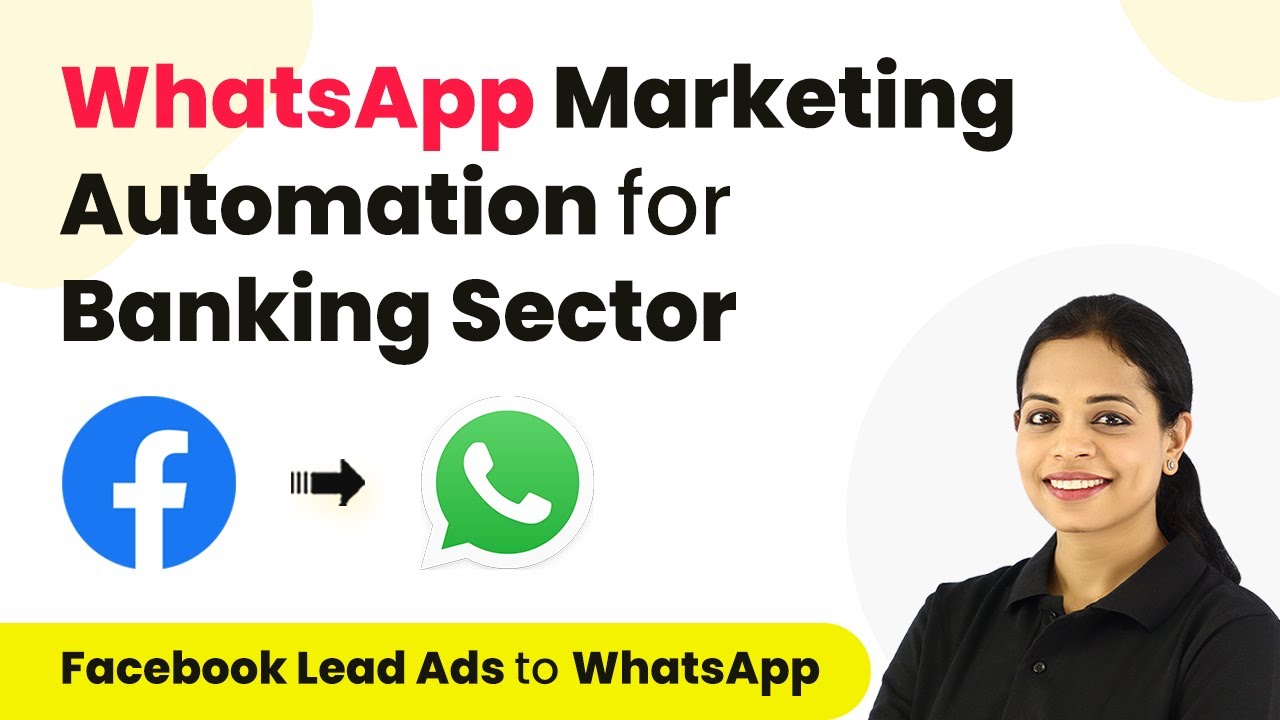
Learn how to automate WhatsApp messages to Facebook leads using Pabbly Connect. Step-by-step tutorial to integrate ABC Finance and WhatsApp Cloud API. Explore systematic approaches to creating efficient automation solutions that convert technical concepts into practical, implementable instructions.

Watch Step By Step Video Tutorial Below


1. Accessing Pabbly Connect for Integration

To begin automating WhatsApp messages to Facebook leads, first, access Pabbly Connect. You can do this by signing in to your existing account or signing up if you are a new user. Signing up takes less than two minutes, and you will receive 100 free tasks as a bonus.

Once logged in, navigate to the ‘All Apps’ page and select ‘Access Now’ for Pabbly Connect. This will take you to the dashboard where you can create your workflow for sending WhatsApp messages whenever a new lead is generated from Facebook ads.


2. Creating a Workflow in Pabbly Connect

In Pabbly Connect, click on the ‘Create Workflow’ button. A dialog box will appear prompting you to name your workflow. For example, you can name it ‘Send WhatsApp Messages to Facebook Leads’. After naming, select a folder if necessary, and click ‘Create’ to proceed.

  • Name your workflow based on your objective.
  • Select a folder for organization.
  • Click ‘Create’ to proceed to the next step.

The next window will present you with two key events: Trigger and Action. The Trigger is the event that starts the automation, while the Action is what happens as a result. This setup is essential for connecting Facebook Lead Ads to WhatsApp messaging.


3. Setting Up Trigger and Action in Pabbly Connect

In this step, select your trigger application, which is ‘Facebook Lead Ads’. The trigger event will be ‘New Lead Instant’. Click on connect and add a new connection for Facebook Lead Ads. Once connected, authorize Pabbly Connect to access your Facebook account.

After successful authorization, you will need to select the specific Facebook page and lead generation form associated with your business, such as ‘ABC Finance’. Click ‘Save and Send Test Request’ to ensure the connection is established and ready to receive lead data.


4. Testing the Integration with Facebook Leads

Next, you will test the integration by creating a test lead using the Facebook Lead Ads Debug Tool. This tool allows you to confirm that your integration is correctly receiving data. Fill out the test lead form with the required information such as first name, last name, email address, and phone number.

  • Use the Facebook Lead Ads Debug Tool for testing.
  • Submit the test lead form to capture data.
  • Verify that Pabbly Connect receives the lead data.

Once the test lead is submitted, return to Pabbly Connect to confirm that the data has been captured. This includes details such as the lead’s first name, last name, email, and phone number, which will be used to send the WhatsApp message.


5. Sending WhatsApp Messages Using Pabbly Connect

Now that the trigger is set up and tested successfully, you need to choose the action application, which will be ‘WhatsApp by AI Sensi’. The action event will be ‘Send Template Message’. Click on Connect and add a new connection to WhatsApp by entering your API key from your AI Sensi account.

Fill in the required fields such as campaign name, mobile number, and message template. Ensure that you map the mobile number and other variables correctly to personalize the message. Finally, click on ‘Save and Send Test Request’ to send a WhatsApp message to the lead.

After submitting the test request, check the WhatsApp application to confirm that the message has been received. This step will verify that the integration between Facebook Lead Ads and WhatsApp through Pabbly Connect is functioning successfully.


Conclusion

In this tutorial, we explored how to automate WhatsApp messages to Facebook leads using Pabbly Connect. By following these steps, you can effectively nurture leads from Facebook ads and enhance your communication strategy.

Ensure you check out Pabbly Connect to create business automation workflows and reduce manual tasks. Pabbly Connect currently offer integration with 2,000+ applications.

Integrate Facebook Lead Ads with Google Sheets Using Pabbly Connect

Learn how to automate the process of adding educational leads from Facebook Lead Ads to Google Sheets using Pabbly Connect for seamless integration. Explore systematic approaches to creating efficient automation solutions that convert technical concepts into practical, implementable instructions.

Watch Step By Step Video Tutorial Below


1. Access Pabbly Connect for Integration

To start integrating Facebook Lead Ads with Google Sheets, you need to access Pabbly Connect. First, sign in to your Pabbly Connect account. If you are a new user, click on the ‘Sign up for free’ button to create an account and receive 100 free tasks.

Once logged in, navigate to the applications page and click on Pabbly Connect. From there, access your dashboard to begin creating workflows that automate your processes between applications.


2. Create a New Workflow in Pabbly Connect

To create a new workflow, click on the ‘Create Workflow’ button in your Pabbly Connect dashboard. Name your workflow as ‘Facebook Lead Ads to Google Sheets’ and select the appropriate folder for organization.

  • Click on ‘Create’ to proceed to the trigger and action setup.
  • In the trigger section, select ‘Facebook Lead Ads’ as the trigger application.
  • Choose ‘New Lead’ as the trigger event.

After setting up the trigger, you will need to connect your Facebook account with Pabbly Connect. Click on the ‘Connect’ button and authorize the connection to allow Pabbly Connect to access your Facebook Lead Ads.


3. Configure Facebook Lead Ads in Pabbly Connect

Once connected, select the Facebook page associated with your educational institution, such as ‘Saint James Higher Education’. Next, choose the lead form you created for capturing leads.

To test the integration, you need to submit a sample lead using the Facebook Lead Ads testing tool. Ensure your lead form is live, then click on the ‘Save and Send Test Request’ button in Pabbly Connect to capture the lead details.

  • Open the Facebook Lead Ads testing tool and select your page and lead form.
  • Fill out the lead form and submit.

After submission, return to Pabbly Connect to verify that the lead information has been successfully captured. This completes the trigger setup for adding educational leads.


4. Add Leads to Google Sheets Using Pabbly Connect

Now, you need to set up the action to add the captured leads to Google Sheets. In the action section of Pabbly Connect, select ‘Google Sheets’ as the action application and choose ‘Add New Row’ as the action event.

Establish a connection between Pabbly Connect and Google Sheets by clicking on the ‘Connect’ button. Sign in to your Google account and authorize the connection to ensure data can be transferred securely.

Select the spreadsheet you created for leads, named ‘Facebook Leads New’. Map the fields from the Facebook lead response to the respective columns in your Google Sheets.

Make sure to map the email, name, and phone number correctly to ensure that each new lead is recorded accurately in your spreadsheet. After mapping, click on ‘Save and Send Test Request’ to confirm that the integration works as intended.


5. Verify Integration Success in Pabbly Connect

After testing the action step, check your Google Sheets to confirm that the lead details have been added successfully. You should see the lead email, name, and phone number recorded in the designated columns.

This integration ensures that every time a new lead is captured through Facebook Lead Ads, the information is automatically sent to Google Sheets, streamlining your lead management process. With the help of Pabbly Connect, you can automate this entire workflow efficiently.


Conclusion

Using Pabbly Connect, you can easily integrate Facebook Lead Ads with Google Sheets, automating the process of capturing educational leads. This setup saves time and enhances efficiency in managing leads for your educational institution.

Ensure you check out Pabbly Connect to create business automation workflows and reduce manual tasks. Pabbly Connect currently offer integration with 2,000+ applications.

How to Add Facebook Leads to Google Sheets for Travel & Tourism Business Using Pabbly Connect

Learn how to integrate Facebook Leads with Google Sheets for your travel and tourism business using Pabbly Connect. Step-by-step tutorial included. Learn to create powerful connections between your critical applications without requiring specialized programming knowledge or extensive technical background.

Watch Step By Step Video Tutorial Below


1. Accessing Pabbly Connect for Facebook Leads Integration

To automate the process of adding Facebook leads to Google Sheets for your travel and tourism business, you need to access Pabbly Connect. Start by visiting the Pabbly Connect website and signing up for a free account if you are a new user. This process is quick and provides you with 100 free tasks to explore the features.

After signing in, you will reach the dashboard of Pabbly Connect. Here, you can create new workflows that automate the integration of Facebook leads into Google Sheets. Click on the ‘Create Workflow’ button located in the top right corner to begin.


2. Creating the Workflow in Pabbly Connect

Once you click on ‘Create Workflow,’ a dialog box will appear asking for a name. Name your workflow something descriptive like ‘Add Facebook Leads to Google Sheets’. After naming, select the folder to save your workflow and click on ‘Create’. using Pabbly Connect

  • Name your workflow appropriately.
  • Choose the folder for organization.
  • Click on ‘Create’ to proceed.

After creating the workflow, you will see two sections: Trigger and Action. Select Facebook Lead Ads as your trigger application and choose the event ‘New Lead Instant’. This sets up your workflow to initiate whenever a new lead is generated from Facebook.


3. Connecting Facebook Lead Ads to Pabbly Connect

To connect Facebook Lead Ads with Pabbly Connect, you need to establish a new connection. Click on ‘Connect’ and select ‘Add New Connection’. Then, click on the ‘Connect with Facebook Lead Ads’ button. Ensure you are logged into your Facebook account, as this will simplify the authorization process.

Once connected, select the appropriate Facebook page and the lead generation form you created for your travel and tourism business. After selecting these, click on ‘Save and Send Test Request’ to fetch a test lead response, which will be critical for the next steps.


4. Mapping Lead Details to Google Sheets

After successfully receiving the lead data from Facebook, the next step is to map these details into Google Sheets using Pabbly Connect. For this, select Google Sheets as your action application and choose the action event ‘Add New Row’. This allows new lead information to be added as a new row in your spreadsheet.

  • Select your Google Sheets account to connect.
  • Choose the spreadsheet named ‘Facebook Leads’.
  • Map the fields: First Name, Last Name, Email, and Phone Number.

After mapping the fields, click on ‘Save and Send Test Request’ to verify that the data is correctly sent to your Google Sheets. Check your spreadsheet to confirm that a new row has been added with the lead details.


5. Testing the Integration for Success

To ensure everything is working correctly, perform a test submission using the Facebook Lead Ads Testing Tool. Fill out the form with dummy data and submit it. This will simulate a new lead being generated and allow you to see if the details are captured in your Google Sheets through Pabbly Connect.

After submitting the test lead, return to your Google Sheets and verify that the new lead information appears as expected. This confirms that your integration is successful and that every new lead from Facebook will automatically be recorded in your Google Sheets, streamlining your workflow for your travel and tourism business.


Conclusion

Integrating Facebook leads with Google Sheets using Pabbly Connect significantly enhances the efficiency of managing leads for your travel and tourism business. This automation ensures that every new lead is captured seamlessly, allowing you to focus on growing your business.

Ensure you check out Pabbly Connect to create business automation workflows and reduce manual tasks. Pabbly Connect currently offer integration with 2,000+ applications.

Lead Generation for Real Estate: Integrating Facebook Leads with Google Sheets Using Pabbly Connect

Learn how to automate lead generation for real estate by integrating Facebook leads with Google Sheets using Pabbly Connect. Step-by-step tutorial included. Master proven automation processes with practical implementation examples and strategic recommendations you can apply immediately in your workflow.

Watch Step By Step Video Tutorial Below


1. Accessing Pabbly Connect for Integration

To start integrating Facebook leads with Google Sheets, first, access Pabbly Connect. You can do this by entering ‘Pabbly.com/connect’ in your browser. If you are a new user, sign up; otherwise, simply sign in.

Once logged in, navigate to the dashboard where you will find the option to create a new workflow. Click on ‘Create Workflow’ and name it according to your objective, such as ‘Add Facebook Leads to Google Sheets for Real Estate’.


2. Setting Up the Trigger: Facebook Lead Ads

In this section, we will set up the trigger in Pabbly Connect. Select Facebook Lead Ads as your trigger application. The trigger event will be ‘New Lead Instant’.

After selecting the trigger, you need to connect your Facebook account. Click on ‘Connect’, then select ‘Add New Connection’. Authorize Pabbly Connect to access your Facebook Lead Ads account. This connection is crucial for receiving new leads.

  • Select your Facebook page where the lead ads are running.
  • Choose the lead generation form you want to use.
  • Confirm the connection to ensure data can flow into Pabbly Connect.

Once the connection is established, Pabbly Connect will wait for a webhook response, indicating that it is ready to receive new lead data.


3. Testing the Integration with Facebook Lead Ads

To ensure that your integration is functioning correctly, you will need to perform a test submission. Navigate to the Facebook Developer tools and access the Lead Ads Testing Tool.

Here, select your Facebook page and the lead form. Fill in the test lead details such as email, name, and phone number, then submit the form. This action will trigger Pabbly Connect to capture the lead data.

After submission, return to Pabbly Connect to verify that the lead information has been captured successfully.


4. Setting Up the Action: Google Sheets

Now that we have successfully tested the trigger, let’s set up the action in Pabbly Connect. Choose Google Sheets as your action application and select the action event as ‘Add New Row’.

Next, connect your Google Sheets account by clicking on ‘Connect’ and then ‘Add New Connection’. Sign in with your Google account and authorize Pabbly Connect to access your sheets.

Select the spreadsheet where you want to store the lead data. Map the fields: Name, Email, and Phone Number from the Facebook lead data to the respective columns in Google Sheets. Click on ‘Test Request’ to ensure data is sent correctly.

After testing, verify that the new lead details appear in your Google Sheet, confirming that the integration is successful.


5. Real-Time Testing of the Integration

To ensure everything works in real-time, delete the previous test lead and refresh the Facebook Lead Ads Testing Tool. Then, create a new test lead using the same form.

Fill in the lead details again and submit the form. Once submitted, check your Google Sheets to see if the new lead data has been captured automatically by Pabbly Connect.

Email: [email protected] Name: Smart User Phone: 0987654321

If the details appear in your Google Sheets, the integration is confirmed successful. This process demonstrates how efficiently Pabbly Connect automates lead generation for your real estate business.


Conclusion

In conclusion, using Pabbly Connect to integrate Facebook leads with Google Sheets streamlines your real estate lead generation process. This automation saves time and ensures accurate data management, enhancing your business efficiency.

Ensure you check out Pabbly Connect to create business automation workflows and reduce manual tasks. Pabbly Connect currently offer integration with 2,000+ applications.

Integrate Facebook Lead Ads with Google Sheets Using Pabbly Connect

Learn how to automate adding leads from Facebook Lead Ads to Google Sheets using Pabbly Connect. Step-by-step tutorial for seamless integration. Transform complex automation concepts into accessible, actionable steps that eliminate unnecessary manual work while maximizing existing application capabilities.

Watch Step By Step Video Tutorial Below


1. Accessing Pabbly Connect for Integration

To integrate Facebook Lead Ads with Google Sheets, you first need to access Pabbly Connect. This platform allows you to automate tasks between different applications seamlessly. Start by creating a free account on Pabbly Connect, which can be done in just a few minutes.

Once logged in, navigate to the dashboard and click on the blue button labeled ‘Create Workflow’. This action initiates the process to set up your automation. You will need to name your workflow, such as ‘Add Facebook Leads to Google Sheets’, and select a folder for organization.


2. Setting Up Trigger and Action in Pabbly Connect

In Pabbly Connect, the next step is to define your trigger and action. The trigger is the event that starts the automation, while the action is what happens as a result. For this integration, select ‘Facebook Lead Ads’ as your trigger application and ‘Google Sheets’ as your action application. using Pabbly Connect

  • Choose ‘New Lead Instant’ as the trigger event.
  • Click on ‘Connect’ and then ‘Add New Connection’ to link your Facebook account.
  • Authorize Pabbly Connect to access your Facebook account.

After successfully connecting, select the specific Facebook page that contains your lead ad form. All available forms will be displayed, allowing you to choose the one you want to use for capturing leads.


3. Capturing Leads from Facebook Lead Ads

Once the Facebook Lead Ads trigger is set up, you can start capturing leads. Use the Facebook Lead Ad Testing Tool to simulate lead submissions. This tool allows you to create dummy leads without needing a live ad campaign.

To generate a test lead, fill out the form with sample data like a name, email, and phone number. After submitting the form, you will see the response captured in Pabbly Connect. This confirms that your connection is functioning correctly, and the details of the lead will now be processed automatically.

  • Ensure all required fields are filled in the test form.
  • Check that the response data matches the input data.
  • This step verifies that the leads will be captured in real-time.

With this setup, every new lead generated from your Facebook Lead Ads will be automatically captured by Pabbly Connect, ensuring no leads are missed.


4. Sending Captured Data to Google Sheets

After capturing leads, the next step is to send this data to Google Sheets. In the action step of your Pabbly Connect workflow, select ‘Google Sheets’ as the action application and choose the ‘Add New Row’ action event.

Connect your Google Sheets account to Pabbly Connect by authorizing access. Once connected, select the specific spreadsheet where you want to store the lead information. The column names from your Google Sheets will automatically appear, allowing you to map the lead data accordingly.

Map the lead name, email, and phone number to the corresponding columns in Google Sheets. Ensure the mapping is correct to avoid data discrepancies. Test the workflow to confirm the data is added successfully.

Once this setup is complete, every new lead will be automatically added to your Google Sheets, streamlining your lead management process through Pabbly Connect.


5. Finalizing Your Pabbly Connect Workflow

After configuring the trigger and action, it’s essential to finalize your workflow. Click on the ‘Save’ button to ensure all settings are stored. You can then test the entire workflow by submitting another lead through your Facebook Lead Ads.

Once you confirm that leads are being captured and recorded in Google Sheets as expected, you can relax. Pabbly Connect will handle the automation, requiring no further manual input from you. This seamless integration saves time and enhances productivity.

Monitor your workflow in Pabbly Connect to track performance. Make adjustments as necessary based on your business needs. Utilize other integrations offered by Pabbly Connect for enhanced functionality.

By following these steps, you can effectively automate the process of adding leads from Facebook Lead Ads to Google Sheets using Pabbly Connect. This automation will significantly improve your efficiency and lead management capabilities.


Conclusion

In conclusion, using Pabbly Connect to automate the integration of Facebook Lead Ads with Google Sheets allows you to efficiently manage leads. This step-by-step guide ensures that every new lead is captured and recorded seamlessly, enhancing your business’s productivity.

Ensure you check out Pabbly Connect to create business automation workflows and reduce manual tasks. Pabbly Connect currently offer integration with 2,000+ applications.

Integrate MagicBricks Leads to Google Sheets with Pabbly Connect

Learn how to integrate MagicBricks leads into Google Sheets using Pabbly Connect. Follow our step-by-step guide for seamless automation. Transform complex automation concepts into accessible, actionable steps that eliminate unnecessary manual work while maximizing existing application capabilities.

Watch Step By Step Video Tutorial Below


1. Accessing Pabbly Connect for Integration

To begin integrating MagicBricks leads into Google Sheets, first access Pabbly Connect. This powerful platform allows you to automate the process without coding skills.

If you’re new to Pabbly Connect, sign up for an account. Existing users can simply log in. Once you’re in, you will have access to 100 free tasks upon account creation, which helps you get started with your integrations.


2. Creating a Workflow in Pabbly Connect

After logging into Pabbly Connect, click on the ‘Create Workflow’ button located on the right side of the dashboard. You will be prompted to name your workflow, so choose a name that reflects your objective, such as ‘Add Leads from MagicBricks to Google Sheets’.

  • Click on ‘Create’ after naming your workflow.
  • Select the trigger application, which is MagicBricks.
  • Choose the trigger event as ‘New Leads’.

Once you have set this up, Pabbly Connect will generate a webhook URL. This URL will serve as a bridge to connect MagicBricks with Google Sheets.


3. Configuring MagicBricks with Pabbly Connect

To capture leads from MagicBricks, copy the webhook URL generated by Pabbly Connect and configure it in your MagicBricks account. For this, you will need to reach out to your MagicBricks account manager to activate the integration.

Once activated, every time a new lead is received, the details will be sent to Pabbly Connect, which will then process this information for Google Sheets. Make sure to verify that the integration is active and functioning properly.


4. Adding Leads to Google Sheets via Pabbly Connect

Next, set up the action application in Pabbly Connect as Google Sheets. Select the action event as ‘Add New Row’. You will then need to connect your Google account to allow Pabbly Connect to access your Google Sheets.

  • Select ‘Add New Connection’ and sign in with Google.
  • Allow Pabbly Connect to access your Google account.
  • Choose the specific spreadsheet where you want to add the leads.

Once connected, map the fields from the MagicBricks leads to the corresponding columns in your Google Sheets. This ensures that every new lead is accurately recorded in your spreadsheet.


5. Testing the Integration

After mapping all the necessary fields, click on ‘Save and Send Test Request’ in Pabbly Connect. This will send a test lead to your Google Sheets, allowing you to verify that everything is working correctly.

Check your Google Sheets to confirm that the new lead has been added successfully. If the details appear as expected, your integration is complete and functioning as intended. This automation will save you time and effort by streamlining the process of capturing leads from MagicBricks directly into Google Sheets.


Conclusion

In this tutorial, we detailed how to integrate MagicBricks leads into Google Sheets using Pabbly Connect. This powerful integration automates the lead capture process, ensuring that your data is always up-to-date and organized.

Ensure you check out Pabbly Connect to create business automation workflows and reduce manual tasks. Pabbly Connect currently offer integration with 2,000+ applications.

How to Add Leads from Sulekha to Google Sheets Using Pabbly Connect

Learn how to integrate Sulekha with Google Sheets using Pabbly Connect. Follow our step-by-step tutorial to automate lead management effortlessly. Discover how to seamlessly connect your essential tools through accessible instructions that make powerful automation available to professionals at every skill level.

Watch Step By Step Video Tutorial Below


1. Accessing Pabbly Connect for Sulekha and Google Sheets Integration

To start integrating Sulekha with Google Sheets, access Pabbly Connect by visiting Pabbly.com/connect. This platform is designed to streamline automation and integration processes between various applications.

Once on the Pabbly Connect landing page, you can either sign in if you are an existing user or click on ‘Sign Up for Free’ to create a new account. This process is quick and gives you access to 100 free tasks to explore the software.


2. Creating a Workflow in Pabbly Connect

After signing into Pabbly Connect, navigate to the dashboard and click on ‘Create Workflow’. You will be prompted to name your workflow; for this integration, you can name it ‘Add Sulekha Leads to Google Sheets Automatically’.

  • Click on the ‘Create’ button to initiate the workflow.
  • Select ‘Sulekha’ as the trigger application.
  • Choose ‘New Leads’ as the trigger event.

By selecting Sulekha as the trigger, you will set the workflow to activate whenever a new lead is generated. This ensures that your Google Sheets will automatically update with new lead information.


3. Configuring the Sulekha Webhook in Pabbly Connect

To complete the integration, you will need to configure a webhook URL provided by Pabbly Connect. This URL must be sent to your Sulekha account manager to activate your subscription. Once activated, Sulekha will send lead data to this webhook.

Copy the webhook URL from Pabbly Connect and provide it to your Sulekha contact. They will enable your subscription so that you can start receiving lead data. After activation, you will see lead details appear in Pabbly Connect as responses.


4. Adding Leads to Google Sheets Using Pabbly Connect

Next, you will set up the action in your workflow. Select ‘Google Sheets’ as the action application and choose ‘Add New Row’ as the action event. This will allow new lead information from Sulekha to be added directly to your Google Sheets. using Pabbly Connect

  • Connect your Google account by clicking ‘Sign In with Google’.
  • Grant permission for Pabbly Connect to access your Google Sheets.
  • Select the correct spreadsheet where you want to add the leads.

Map the lead fields from Sulekha to the corresponding columns in your Google Sheets. This includes first name, last name, email, phone number, and other relevant details. This mapping ensures that each new lead populates a new row correctly.


5. Testing and Finalizing Your Integration

Once the mapping is complete, click on ‘Save and Send Test Request’ in Pabbly Connect. This will send a test lead to your Google Sheets to verify that everything is working correctly.

Check your Google Sheets to confirm that the new lead has been added successfully. If the details appear as expected, your integration is now fully operational. From this point forward, every new lead generated in Sulekha will automatically populate in your Google Sheets without any manual input.


Conclusion

Integrating Sulekha with Google Sheets using Pabbly Connect automates the process of managing leads effortlessly. By following these steps, you can ensure that your lead data is always up-to-date and accessible in Google Sheets.

Ensure you check out Pabbly Connect to create business automation workflows and reduce manual tasks. Pabbly Connect currently offer integration with 2,000+ applications.

How to Create Wave Invoice for New Shopify Orders Using Pabbly Connect

Learn how to automate Wave invoice creation for new Shopify orders using Pabbly Connect. Follow this step-by-step guide for seamless integration. Discover how to seamlessly connect your essential tools through accessible instructions that make powerful automation available to professionals at every skill level.

Watch Step By Step Video Tutorial Below


Accessing Pabbly Connect for Shopify and Wave Integration

To create a Wave invoice for new Shopify orders, we start by accessing Pabbly Connect. This platform facilitates the integration between Shopify and Wave, allowing for seamless invoice generation. First, navigate to the Pabbly website and either sign in or create a free account.

Once logged in, you will be directed to the dashboard of Pabbly Connect. Here, you can create a new workflow by clicking on the ‘Create Workflow’ button. Name your workflow something relevant, such as ‘Create Wave Invoice for Shopify Orders,’ and select the appropriate folder for organization.

Conclusion

This guide summarizes the key points and helps you understand the essential features and benefits of using this tool.

Ensure you check out Pabbly Connect to create business automation workflows and reduce manual tasks. Pabbly Connect currently offer integration with 2,000+ applications.


Setting Up the Trigger for New Shopify Orders

After creating the workflow, the next step is to set up the trigger. In this case, the trigger application is Shopify, and the event is set to ‘New Order’. This means that the workflow will activate whenever a new order is placed in your Shopify store.

To connect Shopify with Pabbly Connect, you will be provided with a webhook URL. Follow these steps to complete the setup:

  • Copy the webhook URL provided by Pabbly Connect.
  • Log into your Shopify account and navigate to Settings.
  • Select Notifications and scroll down to Webhooks.
  • Click on ‘Create Webhook’ and paste the copied URL, selecting ‘Order Creation’ as the event.

Now, save the webhook settings in Shopify, and you will see that Pabbly Connect is waiting for a response from Shopify to proceed with the workflow.

Integrate Freshdesk and Notion Using Pabbly Connect: A Step-by-Step Guide

Learn how to integrate Freshdesk with Notion using Pabbly Connect to automate ticket management. Follow this detailed tutorial for seamless integration. This comprehensive guide reveals exactly how to connect your applications and automate repetitive tasks — accessible for professionals of all technical backgrounds.

Watch Step By Step Video Tutorial Below


1. Accessing Pabbly Connect for Freshdesk and Notion Integration

To create a Notion page for a Freshdesk ticket, you need to access Pabbly Connect. Start by signing into your Pabbly Connect account. If you are new, you can click on the ‘Sign Up for Free’ button to create an account and receive 100 free tasks initially.

Once logged in, navigate to your dashboard. Click on the ‘Create Workflow’ button to initiate the integration setup. You will be prompted to name your workflow; for this integration, you can name it ‘Create Notion Page for Freshdesk Ticket’ and select the folder where you want to save this workflow.


2. Setting Up the Trigger in Pabbly Connect

The next step involves setting up the trigger for your integration. In the trigger section of Pabbly Connect, search for ‘Freshdesk’ as your trigger application. Once selected, choose the trigger event as ‘New Ticket’ to initiate the workflow whenever a new ticket is created.

  • Select ‘Freshdesk’ as your trigger application.
  • Choose the trigger event as ‘New Ticket’.
  • Copy the webhook URL provided by Pabbly Connect.

After copying the webhook URL, navigate to your Freshdesk account. Go to the ‘Admin’ section, then to ‘Workflows’, and select ‘Automations’. Here, create a new rule for ticket creation, paste the webhook URL, and set the conditions for when this rule should trigger.


3. Defining Conditions for Freshdesk Tickets

In the Freshdesk automation settings, you need to define specific conditions for the tickets that will trigger the webhook to Pabbly Connect. For example, you can set conditions such as the ticket’s priority being medium and the subject containing the word ‘Notion’.

  • Create a new rule named ‘Notion Page’.
  • Add conditions: Ticket Priority = Medium.
  • Add condition: Ticket Subject contains ‘Notion’.

Once these conditions are set, configure the action to send a POST request to the webhook URL you pasted earlier. This will ensure that whenever a ticket meeting these conditions is created, the details are sent to Pabbly Connect.


4. Setting Up the Action to Create Notion Page

After successfully capturing the Freshdesk ticket details in Pabbly Connect, the next step is to set up the action to create a new page in Notion. In the action section, search for ‘Notion’ and select it as your action application. Choose the action event as ‘Create a New Page’.

You’ll need to establish a connection between Notion and Pabbly Connect. Click on ‘Connect’ and authorize the connection. After connecting, select the Notion page where you want to create the new ticket details. Map the fields from the Freshdesk ticket response to the Notion page fields, such as ticket ID, subject, and description.


5. Testing the Integration Between Freshdesk and Notion

With everything set up, it’s time to test the integration. Create a new ticket in Freshdesk that meets the defined conditions. Once the ticket is created, return to Pabbly Connect and check if the response has been captured successfully.

If the integration is successful, you will see the details of the ticket, including the ticket ID, subject, and description. Then, head to Notion to confirm that a new page has been created with the ticket details. This confirms that the integration between Freshdesk and Notion via Pabbly Connect is working seamlessly.


Conclusion

Integrating Freshdesk with Notion using Pabbly Connect allows for efficient ticket management. By following these steps, you can automate the process of creating Notion pages for every Freshdesk ticket, enhancing productivity and organization.

Ensure you check out Pabbly Connect to create business automation workflows and reduce manual tasks. Pabbly Connect currently offer integration with 2,000+ applications.

How to Add Leads from 99acres to Google Sheets Using Pabbly Connect

Learn how to seamlessly integrate 99acres with Google Sheets using Pabbly Connect for automating lead management. Follow this definitive guide to creating powerful automated workflows with straightforward, efficiency-focused solutions that save valuable time.

Watch Step By Step Video Tutorial Below


1. Setting Up Pabbly Connect for Integration

To add leads from 99acres to Google Sheets, you first need to set up Pabbly Connect. Start by signing into your Pabbly Connect account or create one if you are a new user. Upon signing in, you will have access to your dashboard where you can create a new workflow.

Click on the ‘Create Workflow’ button on the right-hand side of the dashboard. Name your workflow, such as ‘ADD leads from 99acres to Google Sheets’ and select the appropriate folder for better organization. Once completed, click on the ‘Create’ button to proceed.


2. Configuring the Trigger Application in Pabbly Connect

In this step, you will configure the trigger application in Pabbly Connect. Select 99acres as your trigger application. The trigger event you need to choose is ‘New Leads’. This event will activate the workflow whenever a new lead is captured from 99acres.

  • Select ’99acres’ as the trigger application.
  • Choose the trigger event ‘New Leads’.
  • Copy the provided webhook URL for integration.

Since 99acres does not allow direct URL configuration in its user interface, you must send this webhook URL to your account manager at 99acres. Once they configure it, you can capture the webhook response in Pabbly Connect.


3. Setting Up Google Sheets as Action Application

Next, you will set up Google Sheets as the action application in Pabbly Connect. In the action window, search for Google Sheets and select it. The action event you need to select is ‘Add a New Row’. This action will add the lead details into your Google Sheets automatically.

To establish a connection between Google Sheets and Pabbly Connect, click on ‘Connect’. If you have an existing connection, you can use it; otherwise, you will need to sign in with your Google account. After signing in, allow access for a secure connection. Once the authorization is successful, you can proceed to select your spreadsheet.


4. Mapping Lead Details to Google Sheets

In this section, you will map the lead details from 99acres to Google Sheets using Pabbly Connect. After selecting your spreadsheet, choose the specific sheet where the data will be added. You will typically select ‘Sheet1’.

Now, you will map the fields from the webhook response to the corresponding columns in Google Sheets. Mapping ensures that each time a new lead is received, the correct information is inserted into the right columns. For instance, map the first name, last name, email, contact number, location, and area accordingly.

  • Map the first name to the corresponding field.
  • Map the last name from the received data.
  • Continue mapping email, contact number, location, and area.

Once all fields are mapped, click on ‘Save and Send Test Request’ to verify that the integration works correctly. If successful, you will see the lead information added to your Google Sheets.


5. Verifying the Success of the Integration

Finally, you will verify that the integration between 99acres and Google Sheets through Pabbly Connect is successful. Check your Google Sheets to see if the lead details have been added correctly. You should find the first name, last name, email address, contact number, location, and area populated in the respective columns.

Once confirmed, you can be assured that every new lead from 99acres will automatically populate in your Google Sheets. This seamless integration saves time and ensures that you have all your leads organized efficiently.

If you have any questions about using Pabbly Connect for this or other integrations, feel free to reach out for support or visit the Pabbly forums for more assistance.


Conclusion

In this tutorial, we explored how to use Pabbly Connect to add leads from 99acres to Google Sheets. By following the steps outlined, you can automate your lead management efficiently and effectively.

Ensure you check out Pabbly Connect to create business automation workflows and reduce manual tasks. Pabbly Connect currently offer integration with 2,000+ applications.