How to Send Discord Channel Messages for Facebook Lead Ads Using Pabbly Connect

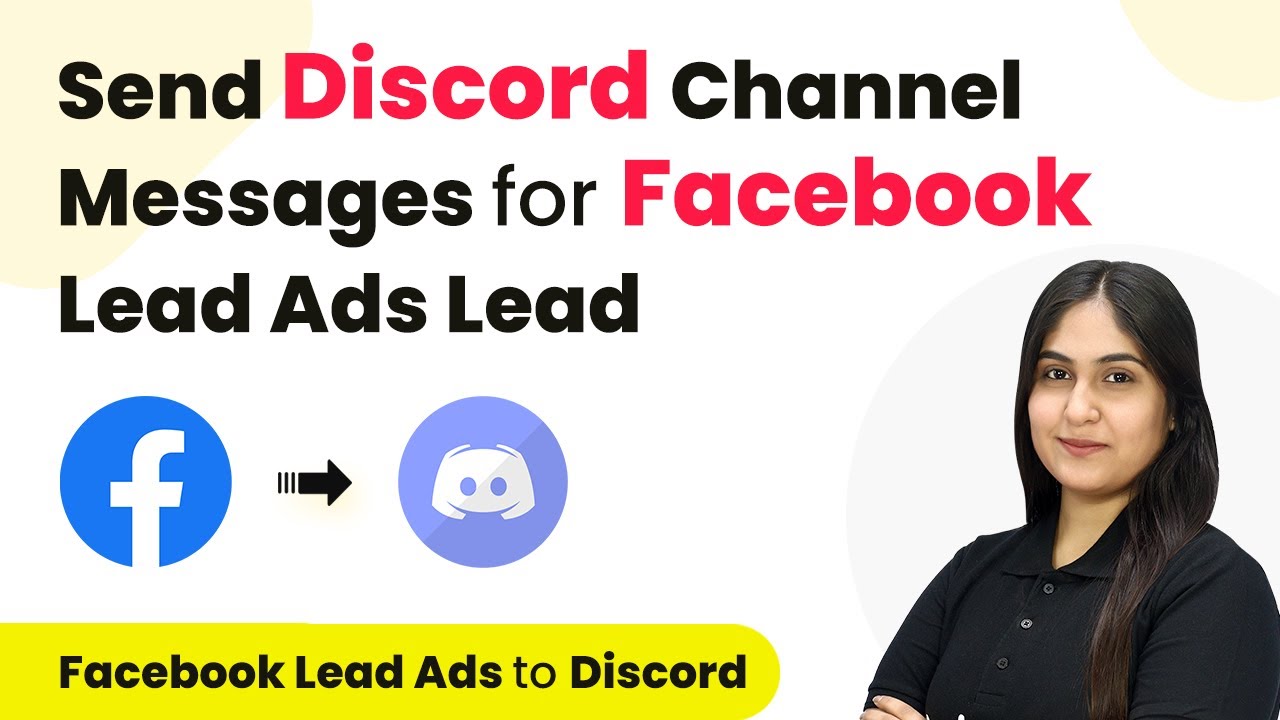
Learn how to automate sending Discord channel messages for Facebook Lead Ads using Pabbly Connect. Step-by-step guide for seamless integration. Learn to create powerful connections between your critical applications without requiring specialized programming knowledge or extensive technical background.

Watch Step By Step Video Tutorial Below


1. Accessing Pabbly Connect for Automation

To send Discord channel messages for Facebook Lead Ads, first, access Pabbly Connect. This platform allows you to integrate various applications seamlessly, automating your workflow.

Visit the Pabbly Connect homepage and log in. If you’re a new user, sign up for a free account to explore its features. Once logged in, you will see the dashboard where you can create your automation workflows.


2. Creating a Workflow in Pabbly Connect

To start, you need to create a new workflow in Pabbly Connect. Click on the ‘Create Workflow’ button located in the top right corner of the dashboard.

  • Enter a name for your workflow, such as ‘Send Discord Channel Messages for Facebook Lead Ads’.
  • Select a folder to organize your workflows, like ‘Facebook Lead Ads’.
  • Click on the ‘Create’ button to finalize your workflow setup.

Now that your workflow is created, you will set up a trigger and action. The trigger will be a new lead from Facebook Lead Ads, and the action will be sending a message to your Discord channel via Pabbly Connect.


3. Setting Up the Facebook Lead Ads Trigger

Next, configure the trigger in Pabbly Connect. Select Facebook Lead Ads as your trigger application and choose the event as ‘New Lead Instant’.

To connect your Facebook Lead Ads account, click on the ‘Connect’ button. If you have previously connected, select the existing connection. Otherwise, follow the prompts to authorize Pabbly Connect to access your Facebook account.

  • Choose your Facebook page, such as ‘Prime Properties’.
  • Select the lead form you want to use, like ‘Lead Form New’.

After selecting the page and lead form, click on ‘Save and Send Test Request’. This will prepare Pabbly Connect to receive lead data.


4. Generating a Test Lead and Setting Up Discord

To test the integration, generate a test lead using the Leadest Testing Tool from Meta. Select your Facebook page and lead form, fill in the required fields, and submit the lead.

Once the test lead is submitted, check back in Pabbly Connect to see if it captured the lead details successfully. Next, set up your Discord channel to receive messages. Choose Discord as your action application and select ‘Send Channel Message’ as your action event.

Connect your Discord account by clicking on the ‘Connect’ button. Enter the webhook URL obtained from your Discord channel settings. Craft your message using dynamic fields to personalize the notifications.

After entering all required details, click on ‘Save and Send Test Request’. This action will send a notification to your Discord channel, confirming the integration is working.


5. Conclusion

In summary, using Pabbly Connect, you can automate the process of sending Discord channel messages for Facebook Lead Ads leads. This integration allows you to receive instant notifications, enhancing your team’s responsiveness to potential customers.

Ensure you check out Pabbly Connect to create business automation workflows and reduce manual tasks. Pabbly Connect currently offer integration with 2,000+ applications.

By following the outlined steps, you can set up an efficient workflow that keeps your team informed and ready to engage with new leads promptly. Utilize Pabbly Connect to streamline your lead management process today.

How to Create Shopify Customer on Paperform Submission Using Pabbly Connect

Learn how to automate the process of creating Shopify customers from Paperform submissions using Pabbly Connect in this detailed step-by-step tutorial. Discover hidden automation capabilities within your existing tools. This guide shows you how to connect your essential applications and permanently eliminate redundant manual processes.

Watch Step By Step Video Tutorial Below


Accessing Pabbly Connect for Integration

To create Shopify customers from Paperform submissions, you must first access Pabbly Connect. This platform automates workflows between different applications seamlessly. Start by visiting the Pabbly Connect website and signing in to your account. If you are a new user, you can sign up for free and enjoy 100 tasks per month.

Once logged in, you will see all the Pabbly products. Click on the Pabbly Connect icon to enter the dashboard. From here, you can create a new workflow for your integration process.


Creating a Workflow in Pabbly Connect

To set up the integration, you need to create a workflow in Pabbly Connect. Click on the ‘Create Workflow’ button in the top right corner of the dashboard. A dialog box will appear, prompting you to name your workflow and select a folder for organization.

For this integration, name your workflow ‘Create Shopify Customer on Paperform Submission’ and select a folder like ‘Shopify Automations’. After naming and selecting the folder, click the ‘Create’ button to finalize your workflow. You will now see two windows labeled ‘Trigger’ and ‘Action’ in your new workflow.


Setting Up the Trigger in Pabbly Connect

The first step in your automation is to set up the trigger in Pabbly Connect. Select ‘Paperform’ as your trigger application. The event you want to choose is ‘New Form Submission’. This means that every time a new submission is made on your Paperform, the trigger will activate.

  • Select ‘Paperform’ as the trigger application.
  • Choose ‘New Form Submission’ as the trigger event.
  • Copy the Webhook URL provided by Pabbly Connect.

Next, log into your Paperform account and edit the form you want to connect. Navigate to the ‘After Submissions’ section, select ‘Integrations and Webhooks’, and click on ‘Add Webhook’. Paste the copied URL and select the trigger option as ‘New Submission’. Finally, click on the ‘Create’ button to link your Paperform to Pabbly Connect.


Testing the Integration with Paperform

After setting up the trigger, it’s essential to test the integration to ensure everything is functioning correctly. Go back to your workflow in Pabbly Connect and perform a test submission on the Paperform you just connected. Fill in the required fields and submit the form.

Once submitted, return to your workflow in Pabbly Connect. You should see that the response from the test submission has been captured successfully. This confirms that your Paperform is correctly linked to Pabbly Connect and is ready to send data to Shopify.


Setting Up the Action in Pabbly Connect

Now that your trigger is set up, it’s time to configure the action step to create a customer in Shopify. Select ‘Shopify Legacy’ as your action application and choose ‘Create Customer’ as your action event. Click the connect button to link Shopify to Pabbly Connect.

In the connection window, you will need to enter your Shopify store’s subdomain and the Admin API access token. To find the subdomain, log in to your Shopify account and check the URL of your online store. For the API token, navigate to ‘Settings’ > ‘Apps and Sales Channels’ > ‘Develop Apps’ to create a new app, configure the necessary API scopes, and install the app to get the token.

  • Enter your Shopify subdomain.
  • Create a new app for API access and configure scopes.
  • Copy the Admin API access token and paste it into Pabbly Connect.

After entering all necessary details, map the fields from the Paperform submission to the corresponding fields in Shopify. This will ensure that every new lead captured in Paperform is automatically added as a customer in your Shopify account.


Conclusion

In this tutorial, we explored how to create Shopify customers from Paperform submissions using Pabbly Connect. By following these steps, you can automate your lead management process, saving time and enhancing your customer engagement. With Pabbly Connect, integrating various applications has never been easier, allowing you to focus on growing your business.

Ensure you check out Pabbly Connect to create business automation workflows and reduce manual tasks. Pabbly Connect currently offer integration with 2,000+ applications.

How to Enroll Graphy User for Google Ads Lead Using Pabbly Connect

Learn how to enroll Graphy users for Google Ads leads using Pabbly Connect. Step-by-step guide to automate the integration process. Eliminate manual repetitive tasks from your workflow. Discover proven automation methods with intuitive steps designed for efficiency-minded professionals.

Watch Step By Step Video Tutorial Below


1. Accessing Pabbly Connect for Google Ads Lead Integration

To begin automating the enrollment of Graphy users for Google Ads leads, you need to access Pabbly Connect. First, navigate to the Pabbly Connect website and sign in to your existing account. If you are a new user, you can sign up for free and receive 100 free tasks every month.

After signing in, you will see the Pabbly Apps window. Click on the ‘Access Now’ button for Pabbly Connect. This will direct you to the dashboard where you can create workflows to automate your processes.


2. Creating a Workflow in Pabbly Connect

In Pabbly Connect, creating a workflow is essential for automating the enrollment process. Click on the button in the top right corner that says ‘Create Workflow’. A dialog box will appear prompting you to name your workflow and select a folder. Name it ‘Enroll Graphy User for Google Ads Lead’ and choose a folder for organization.

  • Enter a workflow name: Enroll Graphy User for Google Ads Lead
  • Select a folder: Google Ads Automations

After setting this up, click on the ‘Create’ button. Your workflow will now appear with two sections: Trigger and Action. The trigger will be set to Google Ads, while the action will involve Graphy.


3. Setting Up Trigger for Google Ads in Pabbly Connect

The next step in Pabbly Connect is to set up the trigger. Choose Google Ads as the trigger application and select ‘New Lead Form Entry’ as the trigger event. This captures new leads generated through Google Ads.

Pabbly Connect will provide a unique webhook URL. Copy this URL to integrate with your Google Ads campaign. Open your Google Ads campaign and navigate to the lead delivery options. Scroll down to the webhook integration option and paste the copied URL.

  • Paste the webhook URL in the Google Ads lead delivery option.
  • Send test data to verify the connection.

This connection confirms that Google Ads is successfully integrated with Pabbly Connect. After sending test data, check the response to ensure it is captured correctly.


4. Setting Up Action Steps in Pabbly Connect

Now that the trigger is established, the next step in Pabbly Connect is to set up the action. Select Graphy as the action application and choose ‘Create Learners’ as the action event. This allows you to create a new learner in your Graphy account based on the lead captured from Google Ads.

To connect Graphy with Pabbly Connect, you will need to enter the API key and merchant ID from your Graphy account. Navigate to the Integrations section in Graphy to find these details. Once entered, click ‘Save’. This establishes the connection between Graphy and Pabbly Connect.

Enter the API Key from Graphy. Enter the Merchant ID from Graphy.

After saving, map the fields from the previous step to create the learner. Map the email, name, and phone number of the lead to the corresponding fields in Graphy.


5. Enrolling the Learner in Graphy

The final step in this automation process using Pabbly Connect is to enroll the newly created learner into a specific course. Add another action step and select Graphy again, this time choosing ‘Enroll Learner to Course’ as the action event.

Map the learner’s email address and the course URL to complete the enrollment process. After entering these details, click ‘Save and Send Test Request’. If successful, the learner will be enrolled in the specified course in your Graphy account.

Select the course URL from your Graphy account. Confirm the enrollment status as success.

Once confirmed, refresh your Graphy account to see the new learner enrolled in the course. This completes the automation process where Pabbly Connect has facilitated the integration between Google Ads and Graphy.


Conclusion

In this tutorial, we demonstrated how to use Pabbly Connect to automate the enrollment of Graphy users for Google Ads leads. By following these steps, you can streamline your enrollment process and enhance user engagement.

Ensure you check out Pabbly Connect to create business automation workflows and reduce manual tasks. Pabbly Connect currently offer integration with 2,000+ applications.

How to Enroll Graphy Users from Facebook Lead Ads Using Pabbly Connect

Learn how to automate the enrollment of Graphy users from Facebook Lead Ads using Pabbly Connect with this step-by-step tutorial. Transform complex automation concepts into accessible, actionable steps that eliminate unnecessary manual work while maximizing existing application capabilities.

Watch Step By Step Video Tutorial Below


1. Accessing Pabbly Connect for Integration

To start automating your workflow, access Pabbly Connect by visiting the Pabbly website. You can either sign in if you already have an account or sign up for free to explore its features.

Once logged in, navigate to your dashboard where all Pabbly applications are listed. To create a new workflow, click on the Pabbly Connect option, which allows you to connect Facebook Lead Ads with Graphy seamlessly.


2. Creating a Workflow in Pabbly Connect

In this section, you will create a workflow to enroll Graphy users from Facebook Lead Ads leads. Click on the Pabbly Connect dashboard and select the Create Workflow button. Name your workflow appropriately, such as ‘Enroll Graphy User from Facebook Lead Ads Leads,’ and choose a folder to save it in.

  • Click on the Create button to enter the workflow window.
  • Select Facebook Lead Ads as your trigger application.
  • Choose New Lead Instant as the trigger event.

By selecting these options, you set up the automation that will trigger whenever a new lead is captured through Facebook Lead Ads. This is the first step in utilizing Pabbly Connect for effective lead management.


3. Connecting Facebook Lead Ads to Pabbly Connect

After setting up the trigger, you need to connect your Facebook Lead Ads account to Pabbly Connect. Click on Add New Connection and follow the prompts to connect your Facebook account. You will be asked to select your Facebook page and lead form.

  • Select your Facebook page, for example, ‘Spark Success Coaching’.
  • Choose the lead form you created, such as ‘Course Registration Form’.

This connection allows Pabbly Connect to capture lead data automatically, enabling you to enroll users in Graphy without manual intervention.


4. Enrolling Users in Graphy via Pabbly Connect

Once the connection with Facebook Lead Ads is established, you can proceed to enroll users in Graphy. Set the action application to Graphy and select Create Learner as the action event. Connect your Graphy account by entering the required API key and Merchant ID.

Map the data from your Facebook Lead Ads lead to the corresponding fields in Graphy, ensuring that the learner’s email, name, and mobile number are entered correctly. This mapping is crucial for creating a dynamic workflow in Pabbly Connect.


5. Testing and Activating Your Workflow

After mapping the necessary fields, you can test your workflow to ensure everything is functioning correctly. Click on Send Test Request to verify that a new learner is created in your Graphy account. Check the learner’s section to confirm that the information is accurately captured.

Once confirmed, your workflow is ready to be activated. This means every time a new lead is generated through Facebook Lead Ads, Pabbly Connect will automatically enroll them in your specified Graphy course, streamlining your onboarding process.


Conclusion

In summary, using Pabbly Connect to automate the enrollment of Graphy users from Facebook Lead Ads is a straightforward process. This integration allows for seamless onboarding, saving time and effort while enhancing your lead management strategy.

Ensure you check out Pabbly Connect to create business automation workflows and reduce manual tasks. Pabbly Connect currently offer integration with 2,000+ applications.

How to Automate Sending Zoho Mail on FlexiFunnels Purchase Using Pabbly Connect

Learn how to automate sending Zoho Mail for FlexiFunnels purchases using Pabbly Connect. Follow this detailed tutorial for seamless integration. This comprehensive guide reveals exactly how to connect your applications and automate repetitive tasks — accessible for professionals of all technical backgrounds.

Watch Step By Step Video Tutorial Below


1. Setting Up Pabbly Connect for FlexiFunnels and Zoho Mail Integration

To automate sending Zoho Mail upon a FlexiFunnels purchase, first access Pabbly Connect. Create a free account using the link provided in the description. This step is crucial as Pabbly Connect will enable the integration between your FlexiFunnels account and Zoho Mail.

After signing up, navigate to your dashboard and click on the ‘Create Workflow’ button. Name your workflow, for instance, ‘FlexiFunnels to Zoho Mail’, and select the appropriate folder in your Pabbly Connect account. Click on ‘Create’ to open the workflow interface.


2. Configuring the Trigger in Pabbly Connect

The next step is to set up the trigger for the automation in Pabbly Connect. In the trigger window, search for ‘FlexiFunnels’ and select it. Choose the trigger event as ‘New Purchase’ from the dropdown menu. This setup ensures that every time a purchase occurs, Pabbly Connect captures the details.

  • Select ‘FlexiFunnels’ as the app.
  • Choose the trigger event ‘New Purchase’.
  • Copy the generated webhook URL.

After copying the webhook URL, go to your FlexiFunnels account and navigate to the product section. Edit the product for which you want to set up this automation. Under the ‘Set Rules’ option, select ‘Webhooks’ and paste the webhook URL. Save the changes to complete the trigger setup.


3. Testing the Trigger with a Dummy Purchase

With the trigger configured, it’s time to test the integration. Make a dummy purchase on your FlexiFunnels sales page. Enter customer details such as name, email, and payment information. This action will trigger Pabbly Connect to capture the purchase data.

Upon completing the order, return to Pabbly Connect. You should see the captured response with all relevant purchase details, including customer name, email, and product information. This confirms that the trigger is working correctly.


4. Setting Up the Action to Send Email via Zoho Mail

Now, it’s time to configure the action step in Pabbly Connect to send an email through Zoho Mail. In the action window, search for ‘Zoho Mail’ and select it. Choose the action event as ‘Send Email’ and click on connect to establish the link between Pabbly Connect and your Zoho Mail account.

  • Select ‘Zoho Mail’ as the app.
  • Choose the action event ‘Send Email’.
  • Connect your Zoho Mail account by entering the domain.

Once connected, map the customer email from the trigger response to the ‘To’ field in the Zoho Mail action. Customize the email subject and body as required. Use HTML formatting for the email body to enhance its appearance. After completing the setup, click on ‘Save and Send Test Request’ to verify if the email is sent successfully.


5. Verifying Email Delivery from Zoho Mail

After sending the test email, check your Zoho Mail account to confirm receipt. Navigate to the ‘Sent’ section to see if the email was successfully sent to the customer’s email address. This step is crucial to ensure that Pabbly Connect has executed the entire workflow correctly.

If the email appears in the sent folder, you have successfully set up the automation between FlexiFunnels and Zoho Mail using Pabbly Connect. This integration will now automatically send confirmation emails to customers upon purchase, enhancing your customer communication.


Conclusion

In this tutorial, we explored how to automate sending Zoho Mail on FlexiFunnels purchases using Pabbly Connect. By following these steps, you can ensure seamless communication with your customers after their purchases, enhancing their experience.

Ensure you check out Pabbly Connect to create business automation workflows and reduce manual tasks. Pabbly Connect currently offer integration with 2,000+ applications.

How to Send WhatsApp Messages to IndiaMART Leads Using Pabbly Connect

Learn how to automate sending WhatsApp messages to IndiaMART leads for your bakery business using Pabbly Connect. Step-by-step tutorial included. Discover hidden automation capabilities within your existing tools. This guide shows you how to connect your essential applications and permanently eliminate redundant manual processes.

Watch Step By Step Video Tutorial Below


1. Accessing Pabbly Connect for Automation

To automate sending WhatsApp messages to IndiaMART leads, first, you need to access Pabbly Connect. Start by visiting the Pabbly Connect website and signing up for a free account if you are a new user. Existing users can simply log in.

Once logged in, you will be directed to the dashboard where you can create a new workflow. This is essential for connecting IndiaMART with WhatsApp through Pabbly Connect. Remember to familiarize yourself with the interface to streamline the setup process.


2. Creating a New Workflow in Pabbly Connect

After accessing Pabbly Connect, the next step is to create a new workflow. Click on the ‘Create Workflow’ button, and a dialog box will prompt you to name your workflow. For this example, name it ‘Send WhatsApp Message to IndiaMART Leads for Bakery Business’.

  • Select a folder for your workflow to keep it organized.
  • Click on ‘Create’ to proceed.

This workflow will serve as the foundation for automating messages sent to leads. Ensure you save your workflow in a designated folder for easy access later.


3. Setting Up Trigger and Action for Integration

In this step, you will set up the trigger and action in Pabbly Connect. Choose IndiaMART as your trigger application and select the event ‘New Leads’. This means every time a new lead is generated on IndiaMART, it will trigger the workflow.

Next, you need to establish the action that follows this trigger. Select Pabbly Chatflow as the action application and choose the event ‘Send Template Message’. This action will send a WhatsApp message to the lead captured from IndiaMART.


4. Connecting IndiaMART with Pabbly Connect

To connect IndiaMART with Pabbly Connect, you will need to copy the webhook URL provided by Pabbly. Navigate to your IndiaMART account, go to the Lead Manager, and choose the ‘API’ option. Here, you can set up a new webhook by pasting the copied URL.

  • Deactivate any existing webhooks to avoid conflicts.
  • Provide a name for the connection, such as ‘Pabbly Connect’.
  • Save the details and activate the webhook.

Once the webhook is set up, return to Pabbly Connect to test the connection by submitting a dummy lead inquiry on IndiaMART. This will ensure that the integration is functioning correctly.


5. Sending WhatsApp Messages to Leads

After confirming that the connection between IndiaMART and Pabbly Connect is active, it’s time to send WhatsApp messages. Go back to your Pabbly workflow and set up the action step to send a WhatsApp message using Pabbly Chatflow. Map the phone number of the lead dynamically from the previous response.

Choose the template you created in Pabbly Chatflow for sending messages. For example, a template could say, ‘Hello, thank you for reaching out! We have received your inquiry and are excited to assist you.’ This personalized message will be sent automatically to every new lead.


Conclusion

By using Pabbly Connect, you can efficiently automate the process of sending WhatsApp messages to your IndiaMART leads. This integration not only saves time but also enhances communication with potential customers, ensuring that you can manage inquiries effectively.

Ensure you check out Pabbly Connect to create business automation workflows and reduce manual tasks. Pabbly Connect currently offer integration with 2,000+ applications.

How to Enroll Zenler User for Facebook Lead Ads Leads Using Pabbly Connect

Learn how to seamlessly integrate Facebook Lead Ads with Zenler using Pabbly Connect. Automate user enrollment for enhanced efficiency. Develop expertise in application integration and learn how to design streamlined automation workflows using proven, simplified approaches.

Watch Step By Step Video Tutorial Below


1. Accessing Pabbly Connect for Integration

To enroll Zenler users using Facebook Lead Ads leads, you first need to access Pabbly Connect. Start by visiting the Pabbly website and signing in to your account. If you are a new user, you can sign up for free and get 100 tasks monthly.

Once logged in, select Pabbly Connect from the dashboard. This platform allows you to create workflows that automate your processes. Click on the ‘Create Workflow’ button to begin.


2. Creating a Workflow in Pabbly Connect

After clicking on ‘Create Workflow,’ a dialog box will appear. Here, you need to name your workflow. For this integration, name it ‘Enroll Zenler User for Facebook Lead Ads Lead.’ Select a folder to save your workflow, such as ‘Facebook Lead Ads Automations.’ Click the ‘Create’ button to proceed. using Pabbly Connect

  • Name your workflow appropriately.
  • Select the correct folder for organization.
  • Click on ‘Create’ to finalize your workflow setup.

With the workflow created, you will see two sections: Trigger and Action. The trigger will capture leads generated from Facebook Lead Ads, while the action will enroll these leads as users in Zenler.


3. Setting Up the Trigger for Facebook Lead Ads

The next step is to set up the trigger. Select Pabbly Connect as the trigger application and choose ‘Facebook Lead Ads’ as the trigger event. Click on the ‘Connect’ button to link your Facebook account.

After connecting, you will need to select the Facebook page and the lead form from which you want to capture leads. For example, choose the page ‘Spark Success Coaching’ and the lead form ‘Course Registration Form.’ Ensure that the simple response toggle is enabled and then click on ‘Save and Test Request’ to check the connection.


4. Generating a Test Lead for Verification

To verify that your trigger works, generate a test lead using the Meta Lead Ads Testing Tool. Select the same page and lead form used earlier, fill in the required fields, and submit the form. This step is crucial as it tests whether Pabbly Connect captures the lead data correctly.

  • Open the Meta Lead Ads Testing Tool.
  • Select your page and lead form.
  • Submit the test lead and check for successful capture in Pabbly Connect.

Once the test lead is generated, return to your Pabbly Connect workflow to see if the lead data has been captured. This confirms that the integration is functioning correctly.


5. Enrolling Users in Zenler

The final step is to enroll the captured lead as a user in Zenler. For this, you need to add an action step in your workflow. Select Pabbly Connect again and choose ‘Zenler’ as the action application. Select ‘Add New User’ as the action event.

Connect your Zenler account by entering the required API key and school URL. After connecting, you will need to map the lead data from the previous step to create the user. This includes first name, last name, email, and other details.

Map the lead data to the corresponding user fields in Zenler. Set the user role to ‘student’ and create a password. Save and send the test request to confirm user creation.

After successfully adding the user, you can enroll them in the desired course by selecting ‘Enroll User to a Course’ as the next action event. This completes the automation process, allowing seamless enrollment from Facebook Lead Ads to Zenler through Pabbly Connect.


Conclusion

Using Pabbly Connect, you can efficiently automate the enrollment of Zenler users generated from Facebook Lead Ads leads. This integration streamlines the process, saving time and enhancing student engagement.

Ensure you check out Pabbly Connect to create business automation workflows and reduce manual tasks. Pabbly Connect currently offer integration with 2,000+ applications.

How to Enroll ThriveCart Learn User on Cashfree Payment Using Pabbly Connect

Learn how to enroll ThriveCart Learn users on Cashfree Payment using Pabbly Connect with this step-by-step tutorial. Build sophisticated automated workflows in less time than you think. This guide translates complex integrations into straightforward steps for immediate implementation.

Watch Step By Step Video Tutorial Below


1. Accessing Pabbly Connect for Integration

To start integrating ThriveCart Learn and Cashfree, first access Pabbly Connect. This platform allows seamless automation without any coding skills. Simply visit the Pabbly website and sign in to your account.

Once logged in, navigate to the Pabbly Connect dashboard. Here, you can create a new workflow that connects Cashfree payments with ThriveCart Learn. Click on the ‘Create Workflow’ button to begin.


2. Creating a Workflow in Pabbly Connect

In this step, you will create a workflow to automate user enrollment in ThriveCart Learn via Cashfree payments. Start by naming your workflow as ‘How to Enroll ThriveCart Learn User on Cashfree Payment’. using Pabbly Connect

  • Select the folder where you want to save this workflow.
  • Click on the ‘Create’ button to initialize the workflow.

After clicking create, you will see two boxes appear: one for the trigger and the other for the action. The trigger will be set to ‘When this happens’ while the action will be ‘Do this’. This configuration will allow automation to occur whenever a payment is received through Cashfree.


3. Setting Up Trigger for Cashfree Payment

To set up the trigger, choose Cashfree as the application and select the event as ‘Payment via Form’. This action will initiate the workflow whenever a payment is processed.

Next, you will need to connect Cashfree with Pabbly Connect. Copy the provided webhook URL from Pabbly and paste it into your Cashfree account under the ‘Webhooks’ section.

  • Navigate to the Developers section in Cashfree.
  • Select Webhooks and add the copied URL.
  • Click on ‘Add Webhook’ to finalize the connection.

Finally, test the webhook to ensure that data is being sent correctly to Pabbly Connect. Check the response in your Pabbly dashboard to confirm successful integration.


4. Enrolling User in ThriveCart Learn

After successfully setting up the trigger, you can now configure the action to enroll users in ThriveCart Learn. Select ThriveCart Learn as the action application and choose the event ‘Create New Student’.

Next, you will need to connect ThriveCart Learn to Pabbly Connect. This requires entering your API key from your ThriveCart account. Navigate to your ThriveCart account, go to the settings, and create a new API key.

Copy the API key and paste it back into your Pabbly Connect action setup. Map the necessary fields such as email, course ID, and student name. Click on ‘Save’ to finalize the action setup.

Once you have completed these steps, your workflow will be ready to enroll users automatically whenever a payment is made through Cashfree.


5. Testing the Integration

Testing is crucial to ensure that the integration between Cashfree and ThriveCart Learn via Pabbly Connect is functioning correctly. Perform a test payment using the Cashfree payment form.

After completing the payment, check your Pabbly Connect dashboard to see if the user has been successfully enrolled in ThriveCart Learn. You should see the user details reflected in the response data.

Verify that the user information matches what you entered during the test payment. If everything is correct, your integration is successful!

This testing phase confirms that every payment will trigger user enrollment in your ThriveCart Learn account through Pabbly Connect.


Conclusion

Using Pabbly Connect, you can efficiently enroll ThriveCart Learn users on Cashfree Payment with an automated workflow. This integration streamlines the process and saves time, allowing you to focus on your online course business.

Ensure you check out Pabbly Connect to create business automation workflows and reduce manual tasks. Pabbly Connect currently offer integration with 2,000+ applications.

How to Create Salesforce Lead on FlexiFunnels Purchase Using Pabbly Connect

Learn how to create Salesforce leads automatically from FlexiFunnels purchases using Pabbly Connect. Follow this step-by-step tutorial for seamless integration. Explore systematic approaches to creating efficient automation solutions that convert technical concepts into practical, implementable instructions.

Watch Step By Step Video Tutorial Below


1. Accessing Pabbly Connect for Integration

To start creating Salesforce leads from FlexiFunnels purchases, you first need to access Pabbly Connect. This integration platform allows you to automate workflows by connecting various applications seamlessly. Simply visit the Pabbly Connect homepage and log in or sign up for a free account.

Once logged in, you will see multiple options available. To set up your integration, click on the ‘Create Workflow’ button located at the top right corner. This will allow you to begin the process of connecting FlexiFunnels with Salesforce through Pabbly Connect.


2. Creating a Workflow in Pabbly Connect

In this step, you will create a workflow specifically for capturing leads from FlexiFunnels purchases. After clicking on ‘Create Workflow’, you need to name your workflow, such as ‘Create Salesforce Lead on FlexiFunnels Purchase’. Select an appropriate folder to keep your workflows organized.

  • Choose a descriptive name for your workflow.
  • Select a folder for better organization.
  • Click on the ‘Create’ button to proceed.

Once you have created your workflow, you will be prompted to set up a trigger and an action. The trigger will be set to ‘FlexiFunnels’ to capture new purchases, while the action will be linked to Salesforce to create a lead. This is where Pabbly Connect plays a crucial role in automating the process.


3. Setting Up the Trigger in Pabbly Connect

For the workflow to function correctly, you need to establish a trigger that detects purchases made in FlexiFunnels. Select ‘FlexiFunnels’ as your trigger application and choose the event ‘New Purchase’. This setup ensures that every time a purchase is made, Pabbly Connect will capture the necessary details.

After setting the trigger, you will receive a webhook URL from Pabbly Connect. This URL will be used in FlexiFunnels to send purchase data. Copy this URL and navigate to your FlexiFunnels account to set it up.

  • Log in to your FlexiFunnels account.
  • Edit the product for which you want to set the webhook.
  • Under ‘Set Rules’, select ‘Set Product Rules’ and enter the webhook URL.

This step is crucial as it connects FlexiFunnels with Pabbly Connect, allowing the data to flow seamlessly between the two platforms.


4. Setting Up the Action in Pabbly Connect

After configuring the trigger, the next step is to set up the action that will create a lead in Salesforce. Select ‘Salesforce’ as your action application and choose the event ‘Create Lead’. This action ensures that every new purchase from FlexiFunnels is recorded as a lead in your Salesforce account.

To connect Salesforce with Pabbly Connect, click on ‘Connect with Salesforce’ and authorize the connection. After successful authorization, map the lead details such as first name, last name, email, and phone number using the data received from the trigger.

Map the first name and last name from the FlexiFunnels purchase data. Enter your company name in the required field. Set the lead source and status as needed.

Once all the required fields are filled and mapped, click on ‘Save and Send Test Request’. This will send the data to Salesforce, creating a new lead automatically. This integration through Pabbly Connect streamlines your sales process significantly.


5. Verifying Lead Creation in Salesforce

After setting up the action in Pabbly Connect, it’s essential to verify that the leads are being created in Salesforce as intended. To do this, go to your Salesforce account and refresh the leads page. You should see the new lead created from the test purchase made in FlexiFunnels.

Check the details of the lead, such as name, email, phone number, and lead source, to ensure everything is captured correctly. This verification step confirms that your integration is working flawlessly and that Pabbly Connect is effectively automating the lead creation process.

With this setup, you can now automate your sales process, ensuring that no potential leads are missed and allowing you to focus on engaging with your customers effectively.


Conclusion

In conclusion, using Pabbly Connect to create Salesforce leads from FlexiFunnels purchases is a seamless process that enhances your sales automation. By following these steps, you can ensure that every purchase is tracked as a lead, improving your customer engagement and follow-up strategies.

Ensure you check out Pabbly Connect to create business automation workflows and reduce manual tasks. Pabbly Connect currently offer integration with 2,000+ applications.

How to Create Pabbly Email Marketing Subscribers from Google Sheets

Learn how to automate subscriber creation in Pabbly Email Marketing using Google Sheets. Step-by-step tutorial to streamline your email marketing process. Build effective email marketing workflows that nurture leads and drive conversions through personalized content and perfect timing.

Watch Step By Step Video Tutorial Below


Accessing Pabbly Email Marketing for Subscriber Creation

To create subscribers in Pabbly Email Marketing from Google Sheets, you first need to access the platform. Start by navigating to the Pabbly Email Marketing homepage and signing in to your account. If you do not have an account, you can sign up for free and explore the features offered. using Pabbly Connect

Once you are logged in, you will find all the tools necessary for managing your email campaigns. Pabbly Email Marketing will serve as the central hub for integrating your subscriber data from Google Sheets. This integration allows for seamless automation of adding new subscribers to your email list.


Creating a Workflow in Pabbly Connect

Now, let’s create a new workflow in Pabbly Connect to automate the process. Click on the ‘Create Workflow’ option on your dashboard. A dialog box will appear prompting you to name your workflow. Enter a name like ‘Create Pabbly Email Marketing Subscriber from Google Sheets’ and select the appropriate folder for organization. using Pabbly Connect

After creating the workflow, you will encounter two main sections: Trigger and Action. The trigger will be Google Sheets, and the action will be Pabbly Email Marketing. This setup ensures that whenever a new lead is added to Google Sheets, Pabbly Email Marketing will automatically create a subscriber from that data.

  • Name your workflow appropriately.
  • Select the correct folder for organization.
  • Set Google Sheets as the trigger and Pabbly Email Marketing as the action.

With this setup, the workflow is now ready to respond to new data entries in Google Sheets, facilitating the creation of subscribers in Pabbly Email Marketing.


Setting Up Google Sheets Integration with Pabbly Email Marketing

To connect Google Sheets with Pabbly Email Marketing, you need to set up a webhook. In your Google Sheets, navigate to the Extensions menu, select Add-ons, and then Get Add-ons. Search for the ‘Pabbly Connect Webhooks’ add-on and install it. After installation, refresh your Google Sheets to see the new options under Extensions. using Pabbly Connect

Now, go to the Pabbly Connect Webhooks option and click on Initial Setup. Here, you will need to paste the webhook URL provided by Pabbly Connect. Specify the trigger column, which indicates the column that will activate the webhook when a new entry is made. For instance, if column C contains phone numbers, set it as your trigger column.

  • Navigate to Extensions > Add-ons > Get Add-ons to install Pabbly Connect Webhooks.
  • Paste the webhook URL in the Initial Setup.
  • Set the trigger column to the appropriate column in your Google Sheets.

After completing this setup, every new entry in your specified column will automatically trigger the webhook, sending data to Pabbly Email Marketing to create a new subscriber.


Adding Subscribers in Pabbly Email Marketing

With the connection established, the next step is to add subscribers in Pabbly Email Marketing. In the action step of your workflow, select Pabbly Email Marketing and choose the action event ‘Add Subscriber.’ You will then need to connect your Pabbly Email Marketing account by entering your API Bearer token. using Pabbly Connect

To obtain the API Bearer token, navigate to your Pabbly Email Marketing account, go to the integration section, and click on Developer API. Copy the token and paste it into the connection setup in Pabbly Connect. Once connected, you can map the subscriber details like name and email directly from the previous step’s response.

Select ‘Add Subscriber’ as the action event in Pabbly Email Marketing. Enter your API Bearer token to establish the connection. Map the subscriber’s name and email from the previous webhook response.

By completing this step, you ensure that every time a new lead is added in Google Sheets, Pabbly Email Marketing will automatically add them as a subscriber, streamlining your email marketing efforts.


Verifying the Integration Success

After setting everything up, it’s crucial to verify that the integration works correctly. To do this, add a new row in your Google Sheets with the details of a new lead. Ensure that the row includes all necessary information as per your setup. using Pabbly Connect

Next, check your Pabbly Email Marketing account to see if the new subscriber has been added successfully. Refresh the subscriber list in Pabbly Email Marketing, and you should see the new lead appear. This confirms that the connection between Google Sheets and Pabbly Email Marketing is functioning as intended.

If the subscriber appears in your list, it indicates that the workflow is active and effectively automating the subscriber addition process. You can now manage your email marketing campaigns more efficiently with this integration.


Conclusion

In this tutorial, we explored how to automate subscriber creation in Pabbly Email Marketing using Google Sheets. By setting up a workflow in Pabbly Connect, we ensured that every new lead added to Google Sheets is automatically added as a subscriber in Pabbly Email Marketing. This process streamlines your email marketing efforts and enhances efficiency.

Ensure you check out Pabbly Connect to create business automation workflows and reduce manual tasks. Pabbly Connect currently offer integration with 2,000+ applications.