Automate HubSpot Contact Creation with Pabbly Connect

Learn how to automate HubSpot contact creation from Pipeline form submissions using Pabbly Connect in this detailed tutorial. Explore systematic approaches to creating efficient automation solutions that convert technical concepts into practical, implementable instructions.

Watch Step By Step Video Tutorial Below


1. Creating a Form in Pipeline for Pabbly Connect Integration

To automate HubSpot contact creation from Pipeline, the first step is to create a form in Pipeline. This form will collect essential details like first name, last name, email, and phone number.

Navigate to your Pipeline dashboard and click on the ‘Add a Form’ button. Start from scratch and add the necessary fields. Once your form is ready, save it. This form will be connected to Pabbly Connect to sync data with HubSpot CRM.


2. Connecting Pipeline to Pabbly Connect

After saving your form, the next step is to connect Pipeline to Pabbly Connect. Log in to your Pabbly Connect account and create a new workflow by clicking on the ‘Create Workflow’ button. Name your workflow appropriately, such as ‘Sync Form Submission Data from Pipeline to HubSpot’.

In the workflow setup, select the trigger event as ‘Form Submission’ from Pipeline. Pabbly Connect will generate a webhook URL for you. Copy this URL and follow the instructions provided to integrate it with your Pipeline form.

  • Log in to Pabbly Connect.
  • Create a new workflow.
  • Select ‘Form Submission’ as trigger event.
  • Copy the generated webhook URL.

Once you have copied the webhook URL, you will need to configure it in your Pipeline automation section to ensure data flows correctly to Pabbly Connect.


3. Testing the Integration with Pabbly Connect

After setting up the webhook, it’s time to test the integration. Open your Pipeline form and make a dummy submission. This step is crucial as it allows Pabbly Connect to receive the form data and confirm that the connection works properly.

Once the submission is made, check your Pabbly Connect dashboard to see if the data has been received. You should see the submitted details, confirming that the integration is functioning correctly. This is a vital step to ensure that your automation is ready to go live.

  • Open your Pipeline form.
  • Make a dummy submission.
  • Check Pabbly Connect for received data.

Upon successful verification, you can now proceed to connect HubSpot CRM to Pabbly Connect for the next steps.


4. Connecting HubSpot CRM to Pabbly Connect

With the form submission data successfully captured, the next step is to connect HubSpot CRM to Pabbly Connect. Select HubSpot as the action application in your workflow. Since you are already logged in, grant the required permissions for Pabbly Connect to access your HubSpot account.

Once connected, you will need to map the fields from your Pipeline form to the corresponding fields in HubSpot. This mapping ensures that when a form is submitted, the data is accurately transferred to HubSpot as a new contact.

Select HubSpot as the action application. Grant permissions to Pabbly Connect. Map fields from Pipeline to HubSpot.

After mapping the fields, save your workflow in Pabbly Connect. This step is essential for activating the automation process.


5. Finalizing the Automation with Pabbly Connect

After mapping all necessary fields, it’s time to finalize your automation. Click on the ‘Save’ button to publish your workflow in Pabbly Connect. This action will activate the automation, allowing it to run in the background.

Now, whenever someone submits the form on Pipeline, a new contact will automatically be created in HubSpot CRM. You can monitor this process through your Pabbly Connect dashboard, ensuring everything works smoothly.

With this setup, you can automate numerous tasks and streamline your business processes efficiently. Pabbly Connect allows you to integrate multiple applications seamlessly, enhancing your productivity.


Conclusion

In this tutorial, we covered how to automate HubSpot contact creation from Pipeline form submissions using Pabbly Connect. By following these steps, you can streamline your workflow and enhance efficiency in managing contacts.

Ensure you check out Pabbly Connect to create business automation workflows and reduce manual tasks. Pabbly Connect currently offer integration with 2,000+ applications.

Seamlessly Integrate Calendly with Keep CRM Using Pabbly Connect

Learn how to automate the integration of Calendly with Keep CRM using Pabbly Connect. Follow this detailed step-by-step tutorial for seamless contact management. Learn to create powerful connections between your critical applications without requiring specialized programming knowledge or extensive technical background.

Watch Step By Step Video Tutorial Below


1. Setting Up Pabbly Connect for Calendly and Keep CRM Integration

To start integrating Calendly with Keep CRM, you must first access Pabbly Connect. This platform allows you to automate workflows effortlessly. Begin by signing up for a free account on Pabbly Connect and navigate to the dashboard.

Once on your dashboard, click on ‘Create Workflow’. Name your workflow, for example, ‘Calendly to Keep’, and click on ‘Create’. Now, you will see two windows: a trigger window and an action window, where you will configure the integration.


2. Configuring the Calendly Trigger in Pabbly Connect

In the trigger window of Pabbly Connect, search for ‘Calendly’ and select it as the app. Choose the trigger event ‘Invitee Created’. This event will activate whenever a new appointment is booked via Calendly.

  • Select ‘Add New Connection’ to link your Calendly account.
  • Click on the ‘Connect with Calendly’ button to authorize the connection.
  • Choose your organization and user account from the dropdown.

After saving these settings, click on ‘Save and Send Test Request’. This will prepare Pabbly Connect to receive data from a new booking. Make a test booking on your Calendly page to ensure the integration works correctly.


3. Setting Up the Keep CRM Action in Pabbly Connect

Now, move to the action window in Pabbly Connect. Search for ‘Keep (Infusionsoft)’ and select it as your action app. Choose the action event ‘Create/Update Contact’. This allows you to add the new booking details as a contact in Keep CRM.

Connect your Keep account by clicking on ‘Connect with Infusionsoft’. Authorize the connection in the popup. Once connected, map the fields from the Calendly booking to the corresponding fields in Keep. For example, map the email address, first name, and last name from the trigger response.

  • Select the email address from the Calendly response.
  • Map the first name and last name similarly.
  • Add any custom fields you want to include in the contact details.

After mapping all required fields, click on ‘Save and Send Test Request’. This will create a new contact in your Keep CRM based on the test booking data.


4. Testing the Integration Between Calendly and Keep CRM

To verify that your integration is working, create another test booking on your Calendly page. Ensure you fill in all required fields with unique data to differentiate it from previous entries. Once completed, check back in Pabbly Connect to see if the new contact appears in Keep CRM.

If successful, navigate to your Keep CRM account and refresh the contacts page. You should see the new contact added with all the details you provided during the booking process. This confirms that the integration is functioning as intended.

Repeat this process as necessary to ensure your automation is reliable. The workflow will automatically add new contacts to Keep CRM whenever a booking is made through Calendly.


5. Conclusion: Automate Your Contact Management with Pabbly Connect

Using Pabbly Connect, you can seamlessly integrate Calendly with Keep CRM, automating your contact management process. This integration ensures that every new appointment booking is automatically added as a contact, saving you time and effort.

Ensure you check out Pabbly Connect to create business automation workflows and reduce manual tasks. Pabbly Connect currently offer integration with 2,000+ applications.

By following the steps outlined in this tutorial, you can easily set up and test your automation, ensuring that your contact information is always up-to-date. Start utilizing Pabbly Connect today to enhance your workflow efficiency!


Automate WooCommerce Orders with WhatsApp Notifications Using Pabbly Connect

Learn how to automate WhatsApp notifications for WooCommerce orders using Pabbly Connect and Razer Pay. Step-by-step guide for seamless integration. Discover how to seamlessly connect your essential tools through accessible instructions that make powerful automation available to professionals at every skill level.

Watch Step By Step Video Tutorial Below


1. Setting Up Pabbly Connect for WooCommerce and WhatsApp Integration

To begin automating WhatsApp messages for WooCommerce orders, the first step involves using Pabbly Connect. This platform enables seamless integration between WooCommerce and WhatsApp, facilitating automatic notifications upon successful order placements.

Start by logging into your Pabbly Connect account. If you don’t have an account, you can create one for free in just a few minutes. Once logged in, navigate to the dashboard and click on the blue button labeled ‘Create Workflow’ to initiate your automation setup.


2. Creating a Workflow in Pabbly Connect

When you create a new workflow in Pabbly Connect, you will need to name it appropriately. For example, you can name it ‘Payment Done via Razer Pay’. This name will help you identify the workflow later.

  • Click on the blue button to create the workflow.
  • Select the trigger application as Razer Pay.
  • Set the action application to WooCommerce.

After setting up the trigger and action applications, you will begin to configure how Pabbly Connect will handle data between Razer Pay and WooCommerce. This step is crucial for ensuring the correct data flow during order processing.


3. Configuring Razer Pay Integration in Pabbly Connect

In this section, you will set up the Razer Pay integration within Pabbly Connect. The integration allows you to capture payment details every time a customer places an order via Razer Pay.

To do this, you will need to copy the webhook URL provided by Pabbly Connect. After copying the URL, go to your Razer Pay dashboard and navigate to the developer section. Here, you will find the option to add a new webhook. Paste the copied URL and save the configuration.


4. Fetching Order Details from WooCommerce

Once the Razer Pay integration is configured, the next step is to fetch order details from WooCommerce. This is done within Pabbly Connect by selecting WooCommerce as the action application.

In the WooCommerce settings, you will need to connect your store by providing the consumer key and secret. This allows Pabbly Connect to retrieve order information automatically. After establishing the connection, you can set the action to retrieve order details based on the customer’s email from the previous step.


5. Sending WhatsApp Notifications Using Pabbly Connect

The final step involves sending WhatsApp notifications to customers once their orders are confirmed. Using the Interact application, which integrates with Pabbly Connect, you can create a message template for order confirmations.

In this step, map the necessary variables such as customer name and order details to the WhatsApp message. After configuring the message template, Pabbly Connect will automatically send notifications to customers whenever an order is placed via Razer Pay.


Conclusion

By following these steps, you can effectively automate WhatsApp notifications for WooCommerce orders using Pabbly Connect and Razer Pay. This integration streamlines your order management process, ensuring timely communication with customers.

Ensure you check out Pabbly Connect to create business automation workflows and reduce manual tasks. Pabbly Connect currently offer integration with 2,000+ applications.

Automate WhatsApp Messages for WooCommerce Orders with Pabbly Connect

Learn how to automate WhatsApp messages for WooCommerce orders using Pabbly Connect, integrating Razer Pay and WhatsApp Cloud API effectively. Revolutionize your productivity approach with just a few strategic clicks. Uncover professional methods for connecting applications and creating workflows that reclaim hours of your week.

Watch Step By Step Video Tutorial Below


1. Setting Up Pabbly Connect for Automation

To automate WhatsApp messages for WooCommerce orders using Pabbly Connect, you first need to log in to your Pabbly Connect account. If you don’t have an account, creating one is quick and easy. Once logged in, navigate to the dashboard and click on the ‘Create Workflow’ button.

Next, you will need to give your workflow a name. For instance, you can use ‘Payment Done via Razer Pay’. After naming your workflow, click on the ‘Create’ button to proceed. This will allow you to start building your automation process.


2. Setting Up the Trigger for Razer Pay

In this step, you will set up the trigger event in Pabbly Connect. The trigger will be based on successful payments made via the Razer Pay payment gateway. To do this, select Razer Pay as your trigger application and choose the event ‘Order Paid’.

  • Select Razer Pay as the trigger application.
  • Choose the event ‘Order Paid’.
  • Copy the webhook URL provided by Pabbly Connect.

Once you have copied the webhook URL, go to your Razer Pay account and navigate to the Webhooks section. Here, paste the copied URL and set it to trigger on successful payments. This connection allows Pabbly Connect to capture payment details automatically.


3. Fetching Order Details from WooCommerce

After setting up the trigger, the next step is to fetch order details from WooCommerce using Pabbly Connect. You will need to connect WooCommerce as the action application. Choose the action event ‘Retrieve Order by Email’.

To establish this connection, you will need to provide your WooCommerce API credentials. Go to your WooCommerce settings, under the Advanced tab, and generate a new API key with read and write permissions. Once you have the API credentials, paste them into Pabbly Connect to connect your WooCommerce store.


4. Sending WhatsApp Messages via Interact

With order details successfully fetched, you can now set up the action to send WhatsApp messages. For this, you will use the Interact application. In Pabbly Connect, select Interact as your action application and choose the event ‘Send WhatsApp Template Message’.

  • Connect Interact by entering the API key.
  • Map the customer’s phone number and the message template.
  • Customize the message body with variables for personalization.

Ensure that your WhatsApp message template is approved before sending messages. This step allows Pabbly Connect to automate the entire process of sending order confirmation messages to customers once their payment is successful.


5. Conclusion: Benefits of Automation with Pabbly Connect

Using Pabbly Connect to automate WhatsApp messages for WooCommerce orders provides numerous benefits. It streamlines communication with customers, ensuring they receive timely order confirmations. Additionally, it reduces manual work, allowing businesses to focus on growth.

Ensure you check out Pabbly Connect to create business automation workflows and reduce manual tasks. Pabbly Connect currently offer integration with 2,000+ applications.

Check out Pabbly Connect – Automate your business workflows effortlessly! Sign Up Free – Start your journey with ease! 10,000+ Video Tutorials – Learn step by step! Join Pabbly Facebook Group – Connect with 21,000+ like minded people!

By integrating Razer Pay and WhatsApp Cloud API through Pabbly Connect, users can enhance their customer service and improve overall efficiency. This automation not only saves time but also enhances customer satisfaction, leading to increased sales and loyalty.


In this tutorial, we explored how to set up an automated workflow using Pabbly Connect, Razer Pay, and WhatsApp for WooCommerce orders. This integration simplifies processes and improves customer engagement effectively.

Integrate Clone and Mailchimp with Pabbly Connect: A Step-by-Step Guide

Learn how to automate subscriber creation in Mailchimp from Clone form submissions using Pabbly Connect. Follow our detailed tutorial for seamless integration. Discover hidden automation capabilities within your existing tools. This guide shows you how to connect your essential applications and permanently eliminate redundant manual processes.

Watch Step By Step Video Tutorial Below


1. Setting Up Pabbly Connect for Integration

To begin integrating Clone and Mailchimp, you need to access Pabbly Connect. Start by signing up for a free account on the Pabbly Connect dashboard, which allows you to create workflows effortlessly.

Once logged in, click on the ‘Create Workflow’ button. Name your workflow, for example, ‘Clone to Mailchimp Automation’ and click on ‘Create’. This opens a new workflow with two main sections: the trigger and the action.


2. Configuring Trigger in Pabbly Connect

The next step is to set up the trigger in Pabbly Connect. In the trigger section, search for ‘Clone’ and select it as your app. Then, choose the trigger event as ‘Form Submitted’. This configuration allows Pabbly Connect to capture form submissions from Clone.

  • Select the ‘Form Submitted’ trigger event.
  • Copy the provided webhook URL from Pabbly Connect.
  • Go to your Clone account and navigate to Automations to set up a new workflow.

In Clone, create a new workflow and select ‘Form Submitted’ as the trigger. Paste the webhook URL into the designated field. This setup ensures that every submission made in Clone is sent directly to Pabbly Connect for processing.


3. Setting Up Action in Pabbly Connect

After configuring the trigger, the next step is to define the action in Pabbly Connect. In the action section, search for ‘Mailchimp’ and select it. Choose the action event as ‘Add New Subscriber’.

To connect your Mailchimp account, you will need the API key and data center ID. Obtain these by logging into your Mailchimp account, going to your profile, and selecting ‘Extras’ followed by ‘API Keys’. Generate a new API key and copy it into Pabbly Connect.

  • Enter your Mailchimp API key and data center ID in Pabbly Connect.
  • Select your audience list from Mailchimp to which subscribers will be added.
  • Map the email address and other fields from Clone to Mailchimp.

Once all fields are correctly mapped, click on ‘Save and Send Test Request’ to verify the integration. If successful, the subscriber should appear in your Mailchimp account.


4. Testing the Integration Workflow

Now that both the trigger and action are set up in Pabbly Connect, it’s time to test the integration. Make a test submission in your Clone form using example data. For instance, enter a name, email, and phone number.

After submitting the form, return to Pabbly Connect and check the trigger window. You should see the form submission data captured successfully. This confirms that the connection between Clone and Pabbly Connect is working as intended.

To finalize, check your Mailchimp account under the ‘All Contacts’ section. The test submission should now appear as a new subscriber. This step verifies that your automation workflow is functioning correctly, allowing seamless subscriber addition from Clone to Mailchimp.


Conclusion

In this tutorial, we explored how to integrate Clone and Mailchimp using Pabbly Connect. By following the steps outlined, you can automate subscriber management efficiently. This integration enhances your marketing efforts by ensuring that new leads from Clone are automatically added to your Mailchimp audience.

Ensure you check out Pabbly Connect to create business automation workflows and reduce manual tasks. Pabbly Connect currently offer integration with 2,000+ applications.

Integrating UTC and Indian Standard Time with Pabbly Connect

Learn how to integrate UTC and Indian Standard Time using Pabbly Connect in this step-by-step tutorial. Automate your workflows today! Follow this definitive guide to creating powerful automated workflows with straightforward, efficiency-focused solutions that save valuable time.

Watch Step By Step Video Tutorial Below


1. Access Pabbly Connect for Integration

To integrate UTC and Indian Standard Time, the first step is to access Pabbly Connect. Open your preferred web browser and search for Pabbly Connect. You will be directed to the landing page where you can either sign in or sign up for a free account.

If you’re a new user, click on ‘Sign up for free’ to create your account. Existing users can simply sign in. After logging in, navigate to the dashboard where you can create a new workflow. Click on the ‘Create Workflow’ button in the top right corner to start your integration process.


2. Create a New Workflow in Pabbly Connect

In this section, we will create a workflow that integrates UTC and Indian Standard Time using Pabbly Connect. After clicking ‘Create Workflow’, a dialog box will prompt you to name your workflow. Enter a suitable name such as ‘Integrate UTC with Indian Standard Time’ and click on ‘Create’.

Once your workflow is created, you will see two sections: Trigger and Action. The Trigger is the event that starts the workflow, while the Action is what happens as a result. For this integration, we will set the Trigger to UTC and the Action to Indian Standard Time.

  • Select ‘UTC’ as your Trigger application.
  • Choose the appropriate Trigger event related to time.
  • Set the Action application to ‘Indian Standard Time’.

After selecting both applications, you can proceed to configure the specific details of your integration.


3. Configure Integration Details in Pabbly Connect

Now that you have set up the basic structure of your workflow in Pabbly Connect, it’s time to configure the integration details. You will need to connect your UTC settings to Indian Standard Time by providing specific parameters.

In this step, you will need to enter the date and time format required by both applications. Make sure to convert any local times to UTC format, as this is essential for accurate integration. Pabbly Connect will guide you through this process by providing fields where you can input the necessary details.

  • Enter the start and end times for your UTC settings.
  • Ensure that the time is correctly formatted in UTC.
  • Save your settings and proceed to the next step.

Once all details are entered, you can save the workflow and test the integration to ensure everything is functioning correctly.


4. Test the Integration in Pabbly Connect

Testing your integration is a crucial step to confirm that Pabbly Connect is working as expected. After saving your workflow, initiate a test to see if the data flows correctly from UTC to Indian Standard Time.

To do this, submit a test entry through the UTC application. Pabbly Connect will capture this submission and attempt to process it according to the rules you’ve set up. Check the logs in Pabbly Connect to see if the test was successful and if the data appears correctly in the Indian Standard Time application.

Submit a test entry to check the workflow. Verify that the data has been processed correctly. If successful, your integration is now complete!

If the test fails, review your settings and make any necessary adjustments before trying again.


5. Finalize Your Integration with Pabbly Connect

Congratulations! You have successfully set up your integration using Pabbly Connect. In this final step, ensure that everything is configured correctly and finalize your workflow. Make sure to publish your workflow so that it can run automatically.

To finalize, go back to your Pabbly Connect dashboard and check your workflow status. Ensure that it is active and ready to handle submissions from UTC to Indian Standard Time. This will allow you to automate your processes seamlessly.

With this integration, you can now manage your time settings more efficiently, utilizing the capabilities of both UTC and Indian Standard Time through Pabbly Connect. This automation will save you time and reduce the risk of errors in manual entry.


Conclusion

In this tutorial, we explored how to integrate UTC and Indian Standard Time using Pabbly Connect. By following the steps outlined, you can automate your workflows effectively and enhance productivity. Start using Pabbly Connect today for seamless integrations!

Ensure you check out Pabbly Connect to create business automation workflows and reduce manual tasks. Pabbly Connect currently offer integration with 2,000+ applications.

Integrate Facebook Conversions and Go High Level Using Pabbly Connect

Learn how to automate lead management by integrating Facebook Conversions and Go High Level using Pabbly Connect in this step-by-step tutorial. This comprehensive guide reveals exactly how to connect your applications and automate repetitive tasks — accessible for professionals of all technical backgrounds.

Watch Step By Step Video Tutorial Below


1. Access Pabbly Connect for Integration

To start using Pabbly Connect, open your browser and search for Pabbly.com. This will take you to the landing page of the software. If you are a new user, you can create a free account by clicking on ‘Sign Up for Free’. Existing users can simply click on ‘Sign In’.

After signing in, navigate to the ‘All Apps’ section and click on ‘Access Now’ under Pabbly Connect. Here, you will find the option to create a new workflow by clicking on the ‘Create Workflow’ button in the top right corner.


2. Create a Workflow in Pabbly Connect

Once you click on ‘Create Workflow’, a dialog box will appear asking for a workflow name. Enter a name such as ‘Gravity Forms to Facebook Lead Conversion to Go High Level’ and click on ‘Create’. This sets up the basic structure of your integration within Pabbly Connect.

Upon creation, you will see two windows open: one for the trigger and one for the action. The trigger is the event that starts the workflow, while actions are the responses to that event. For this integration, the trigger will be Gravity Forms, and the actions will be Facebook Conversions and Go High Level.

  • Select ‘Gravity Forms’ as the trigger application.
  • Choose ‘New Response’ as the trigger event.
  • Copy the Webhook URL provided by Pabbly Connect.

This URL will be used to connect your Gravity Forms with Pabbly Connect. After setting this up, you are ready to proceed with the integration.


3. Set Up Gravity Forms with Pabbly Connect

Next, go to your Gravity Forms dashboard and select the form you want to integrate. Click on the ‘Settings’ option and then select ‘Webhooks’. Here, you need to add a new Webhook feed.

Paste the Webhook URL you copied from Pabbly Connect into the URL field. Ensure that the request method is set to POST and the request format is JSON. Save these settings to complete the connection.

  • Ensure the request method is set to POST.
  • Set the request format to JSON.
  • Select all fields in the request body.

After saving the settings, you can preview the form to ensure it is ready to capture responses. Fill in the form to test the setup, ensuring that Pabbly Connect receives the data successfully.


4. Set Up Action Steps in Pabbly Connect

Now that your trigger is set, it’s time to configure the action steps. The first action will be sending a lead event to Facebook. Select ‘Facebook Conversions’ as the action application and choose ‘Send Lead Event’ as the action event.

Connect your Facebook account to Pabbly Connect by clicking on ‘Connect’ and selecting ‘Add New Connection’. After successful authorization, you will need to enter your Facebook Pixel ID, which can be found in the Event Manager section of your Facebook business account.

Enter your Facebook Pixel ID. Map the event source URL from the Gravity Forms response. Fill in other required fields like email, first name, and last name.

After completing these fields, click on ‘Save and Send Test Request’ to confirm that the lead event is sent successfully to Facebook.


5. Create a Contact in Go High Level Using Pabbly Connect

The final step in this integration is to create a new contact in Go High Level using the same details captured from the Gravity Forms submission. To do this, select ‘Lead Connector V2’ as your action application and choose ‘Create Contact’ as the action event.

Once again, connect your Go High Level account through Pabbly Connect. After successfully connecting, map the fields such as first name, last name, and email from the previous step. This ensures that the contact is created with the correct information.

Map the first name and last name from Gravity Forms. Enter the email address captured from the form submission. Click on ‘Save and Send Test Request’ to create the contact.

Once the test request is successful, you can check your Go High Level account to confirm that the new contact has been created with the details provided in the form submission.


Conclusion

In this tutorial, we covered how to automate lead management by integrating Facebook Conversions and Go High Level using Pabbly Connect. By following these steps, you can streamline your lead handling process effectively.

Ensure you check out Pabbly Connect to create business automation workflows and reduce manual tasks. Pabbly Connect currently offer integration with 2,000+ applications.

Integrating WhatsApp with Ultra MSG Using Pabbly Connect: A Step-by-Step Guide

Learn how to integrate WhatsApp with Ultra MSG using Pabbly Connect for seamless communication. Follow our detailed tutorial for step-by-step instructions. This comprehensive guide reveals exactly how to connect your applications and automate repetitive tasks — accessible for professionals of all technical backgrounds.

Watch Step By Step Video Tutorial Below


1. Setting Up Pabbly Connect for WhatsApp and Ultra Integration

To integrate WhatsApp with Ultra MSG, you will first need to set up Pabbly Connect. This platform is essential for automating your workflows without coding. Start by signing up for a free account and logging into the Pabbly Connect dashboard.

Once you’re logged in, click on the ‘Create Workflow’ button. Give your workflow a suitable name, such as ‘WhatsApp Ultra Integration’. After naming your workflow, click on the ‘Create’ button to proceed. This will load the workflow page where you can set up triggers and actions.


2. Configuring Landbot as the Trigger in Pabbly Connect

The next step involves configuring the Landbot application as the trigger in Pabbly Connect. Select Landbot from the trigger application options and choose the trigger event as ‘New Bot Response’. This event will initiate your workflow whenever a new response is received from the chatbot.

  • Select ‘New Bot Response’ as the trigger event.
  • Copy the provided webhook URL.
  • Integrate this URL within your Landbot flow at the last block.

After setting up the webhook URL in Landbot, initiate a test submission to ensure that everything is working correctly. You can test the chatbot directly within the Landbot interface to simulate user responses and check if the data is sent to Pabbly Connect.


3. Mapping Data from Landbot to Pabbly Connect

Once you receive a response from the Landbot, you will see the data populated in Pabbly Connect. Here, you need to map the data fields you want to send to WhatsApp via Ultra MSG. This is crucial for ensuring that the correct information is transmitted. using Pabbly Connect

In the mapping section, create key-value pairs for the data you want to capture, such as:

  • Name: Maps to the user’s name.
  • Email: Captures the user’s email address.
  • Phone Number: Maps to the user’s phone number.

After successfully mapping the data, you can proceed to set up the action that will send this information to WhatsApp via Ultra MSG. This step is crucial for completing the integration.


4. Sending Messages via Ultra MSG through Pabbly Connect

To send messages via WhatsApp using Ultra MSG, select Ultra MSG as the action application in Pabbly Connect. Choose the action event as ‘Send Message’. You will need to connect your Ultra MSG account by entering the instance ID and token key.

Once connected, fill in the required fields such as the recipient’s phone number and the message body. You can customize the message to include the data received from Landbot. For example, you might write:’We have just received a new response on our chatbot via Landbot. The details are as follows: Name, Email, Phone Number.’ This ensures that the recipient gets all relevant information directly in their WhatsApp.


5. Testing and Finalizing the Integration

After setting everything up, it’s important to test the integration. Click on the ‘Save and Send Test Request’ button in Pabbly Connect to check if the message is sent successfully to WhatsApp. Ensure that you enter the correct phone number to receive the test message.

If the message is successfully sent, you will see a confirmation in the Ultra MSG dashboard. This means your integration is working perfectly. Now, every time there’s a new response from your Landbot chatbot, it will trigger a message to be sent via WhatsApp automatically.

By using Pabbly Connect, you have streamlined your communication process, making it easier to manage customer interactions efficiently.


Conclusion

Integrating WhatsApp with Ultra MSG using Pabbly Connect enhances your communication capabilities. By following these steps, you can automate responses and ensure timely communication with your customers, making your workflow more efficient.

Ensure you check out Pabbly Connect to create business automation workflows and reduce manual tasks. Pabbly Connect currently offer integration with 2,000+ applications.

How to Integrate Thrivecart and Teachable Using Pabbly Connect

Learn how to seamlessly integrate Thrivecart and Teachable using Pabbly Connect for automated course enrollment. Follow our step-by-step tutorial now! Navigate the automation landscape confidently with clear, structured guidance suitable for professionals regardless of prior technical experience.

Watch Step By Step Video Tutorial Below


1. Accessing Pabbly Connect to Start Your Integration

To begin your integration process, you first need to access Pabbly Connect. This platform serves as the central hub for automating your workflows between Thrivecart and Teachable. Sign up for a free Pabbly account to get started.

Once you have signed up, log in to your Pabbly Connect dashboard. Here, you can create a new workflow by clicking on the ‘Create Workflow’ button. This is where you will set up the automation that links your Thrivecart product purchases to Teachable course enrollments.


2. Setting Up the Trigger in Pabbly Connect

In this step, you will configure the trigger in Pabbly Connect that starts the automation. The trigger for this integration is a product purchase in Thrivecart. Select Thrivecart as your trigger application and choose the ‘Product Purchase’ event.

  • Select Thrivecart as the trigger application.
  • Choose ‘Product Purchase’ as the trigger event.
  • Click on the ‘Connect’ button and add a new connection.

After connecting, you will need to enter your Thrivecart API key. You can find this key in your Thrivecart account under the ‘Settings’ section. Once you have pasted the API key into Pabbly Connect, save your changes to complete the trigger setup.


3. Testing the Thrivecart Connection

With the trigger set up, it’s time to test the connection between Pabbly Connect and Thrivecart. After saving the trigger setup, click on the ‘Save and Send Test Request’ button. This action will allow Pabbly Connect to listen for any purchases made through Thrivecart.

To perform a test submission, manually complete a purchase using test card details on your Thrivecart checkout page. Once the purchase is completed, Pabbly Connect will capture the data from this transaction, showing details such as the student’s name and email address.


4. Setting Up the Action in Pabbly Connect

Now that we have tested the Thrivecart connection, the next step is to set up the action in Pabbly Connect. This action will enroll the student in a specified course on Teachable. Search for Teachable in the action application section and select the ‘Enroll User in Course’ action event.

Connect to your Teachable account by entering your email, password, and the subdomain of your Teachable site. The subdomain can be found in the URL of your Teachable admin panel. Once connected, select the course in which you want to enroll the student.

  • Map the student’s email and name from the data captured in the previous step.
  • Leave the password field blank for the student to set later.
  • Click ‘Save and Send Test Request’ to finalize the action setup.

Once you receive a positive response, check your Teachable account to see that the student has been successfully enrolled in the course.


5. Finalizing Your Automation with Pabbly Connect

After completing all the steps, your automation is now set up using Pabbly Connect. This integration will automatically enroll students into your Teachable courses whenever they purchase through Thrivecart. You only need to set it up once, and it will run seamlessly in the background.

To ensure everything is functioning correctly, monitor the workflow in Pabbly Connect. You can view the logs and check for successful enrollments. With this automation in place, you can focus more on creating content for your courses while Pabbly Connect handles the enrollment process.


Conclusion

In this tutorial, we demonstrated how to use Pabbly Connect to integrate Thrivecart and Teachable for automated course enrollments. By following these steps, you can streamline your enrollment process and save valuable time. Experience the power of automation with Pabbly Connect today!

Ensure you check out Pabbly Connect to create business automation workflows and reduce manual tasks. Pabbly Connect currently offer integration with 2,000+ applications.

Automate Google My Business Reviews with Pabbly Connect: A Step-by-Step Guide

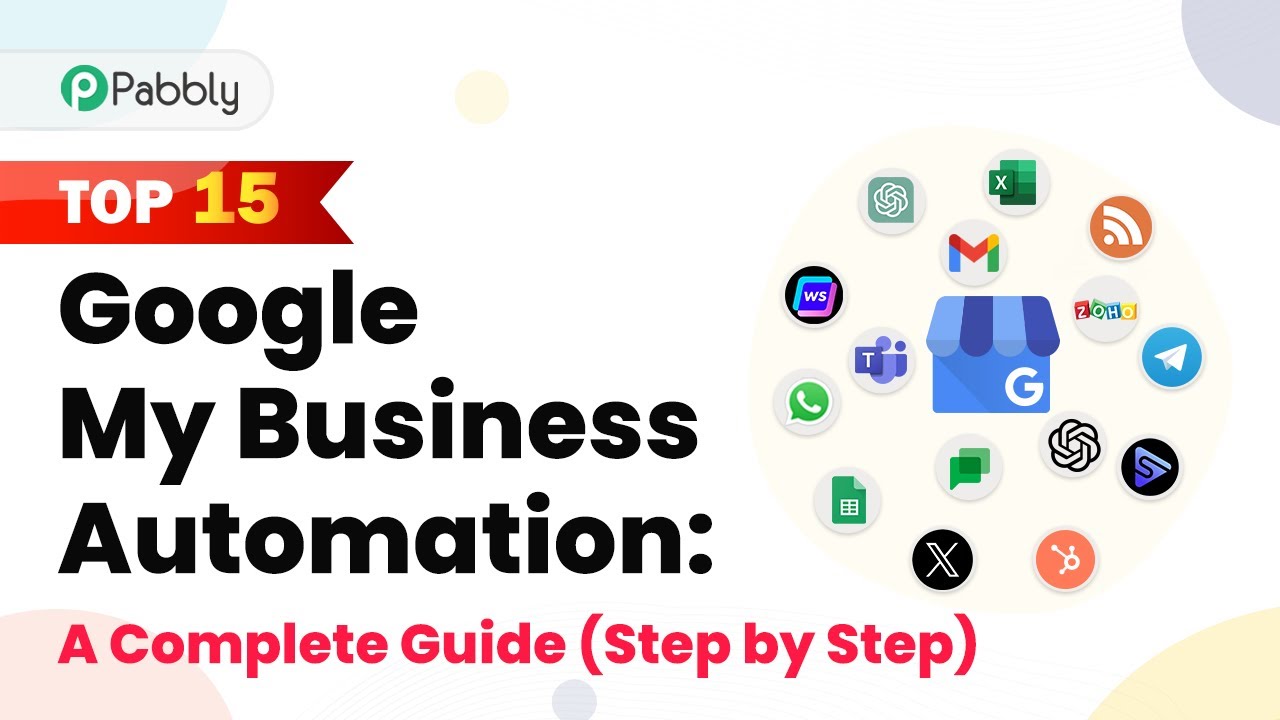
Learn how to automate Google My Business reviews using Pabbly Connect for seamless integration with WhatsApp, Facebook, and LinkedIn. Learn to create powerful connections between your critical applications without requiring specialized programming knowledge or extensive technical background.

Watch Step By Step Video Tutorial Below


1. Setting Up Pabbly Connect for Google My Business

To start automating your Google My Business reviews, first, you need to set up Pabbly Connect. Begin by visiting the Pabbly Connect website and signing up for a free account. Once logged in, access the dashboard where you can create a new workflow.

Click on the ‘Create Workflow’ button and give your workflow a suitable name, such as ‘Google My Business Reviews Automation’. This will help you identify the workflow later. After naming your workflow, click on ‘Create’ to proceed to the integration setup.


2. Integrating Google My Business with Pabbly Connect

In this step, you will integrate Google My Business as your trigger application. Search for ‘Google My Business’ in the trigger application field and select it. The trigger event will be set to ‘New Review’. This means the workflow will activate whenever a new review is posted. using Pabbly Connect

Next, click on the ‘Connect’ button and select ‘Add New Connection’. Sign in with your Google account that manages your Google My Business profile. After successful authorization, Pabbly Connect will automatically fetch your business account and location details.


3. Fetching Reviews from Google My Business

Once the integration is complete, click on the ‘Save and Send Test Request’ button. This action will retrieve the most recent review from your Google My Business profile. You should see a response in Pabbly Connect that includes the reviewer’s name, star rating, and the review content. using Pabbly Connect

For example, if the latest review states, ‘Amazing place for ethnic wear’ with a five-star rating, this data will be captured in the Pabbly Connect dashboard. This allows you to monitor customer feedback effectively.


4. Sending Review Alerts to WhatsApp

Now that you have integrated Google My Business with Pabbly Connect, the next step is to send alerts of new reviews to your WhatsApp number. Search for ‘WhatsApp’ in the action application field and select it. Choose the action event as ‘Send Message’. using Pabbly Connect

Connect your WhatsApp account by entering the required credentials. In the message field, you can create a template that includes the review details. For instance, your message could read: ‘New review received from [Reviewer’s Name]: [Review Content]’. Use the mapping feature to insert dynamic data from the previous step.

  • Map the reviewer’s name from the Google My Business integration.
  • Include the review content dynamically to personalize the message.
  • Click on ‘Save and Send Test Request’ to ensure the message is sent correctly.

After testing, you will receive alerts on WhatsApp whenever a new review is posted, keeping you informed in real-time.


5. Sharing Reviews on Social Media Platforms

To maximize visibility, you can also share new reviews on social media platforms like Facebook and LinkedIn. For this, integrate each platform with Pabbly Connect by selecting them as action applications.

For Facebook, choose ‘Create Page Post’ and for LinkedIn, select ‘Share Simple Text’. In both cases, map the reviewer’s name and review content similarly as done for WhatsApp. This ensures that every new review is shared across all platforms.

  • Create a post template that includes the review details.
  • Map the necessary fields to ensure dynamic content updates.
  • Test the integration to confirm posts are shared correctly.

After completing these steps, your Google My Business reviews will be automatically shared on your chosen social media platforms, enhancing your business’s online presence.


Conclusion

This tutorial demonstrates how to leverage Pabbly Connect to automate the management of Google My Business reviews by integrating with WhatsApp, Facebook, and LinkedIn. Streamline your customer engagement and improve your online reputation effortlessly.

Ensure you check out Pabbly Connect to create business automation workflows and reduce manual tasks. Pabbly Connect currently offer integration with 2,000+ applications.