Integrating LinkedIn Leads into Google Sheets and Zoho CRM with Pabbly Connect

Learn how to automate adding LinkedIn leads to Google Sheets and Zoho CRM using Pabbly Connect. Step-by-step guide for seamless integration. Develop expertise in application integration and learn how to design streamlined automation workflows using proven, simplified approaches.

Watch Step By Step Video Tutorial Below


1. Accessing Pabbly Connect for Integration

To automate the process of adding LinkedIn leads to Google Sheets and Zoho CRM, you need to access Pabbly Connect. First, create a free account on the Pabbly Connect website, which takes only a couple of minutes. After signing up, log into your account to reach the dashboard.

Once logged in, click on the blue button labeled ‘Create Workflow’ to begin setting up your automation. You should name your workflow something descriptive, such as ‘Add LinkedIn Leads to Google Sheets and Zoho CRM’. This naming helps you identify the workflow easily in the future.


2. Setting Up LinkedIn as the Trigger Application

In this step, you will set LinkedIn as the trigger application in Pabbly Connect. Select the trigger event as ‘New Lead Generation Form Response’. This means that whenever a new lead is generated from your LinkedIn lead generation form, it will activate your automation.

  • Click ‘Connect’ to set up the connection.
  • Choose ‘Add New Connection’ and allow access to your LinkedIn account.
  • Select the appropriate LinkedIn account and the specific lead generation form.

Once the connection is established, Pabbly Connect will begin to capture new lead data from LinkedIn. This setup ensures that every new lead is automatically collected in your workflow.


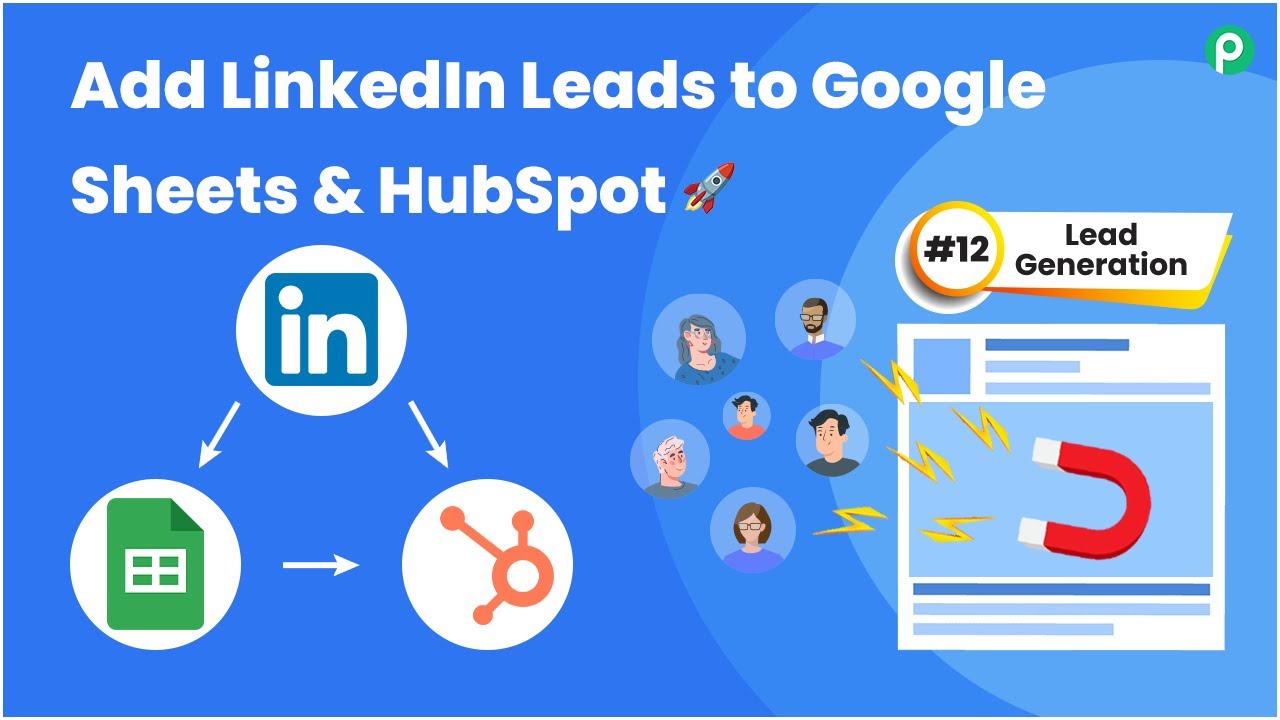
3. Adding Google Sheets for Lead Management

Next, you will add Google Sheets as an action application in Pabbly Connect. Select the action event as ‘Add a New Row’. This means that every time a new lead is captured, it will automatically create a new row in your designated Google Sheets document.

  • Click ‘Connect’ and then ‘Add New Connection’ to link your Google Sheets account.
  • Select the spreadsheet where you want to store the leads.
  • Map the fields from your LinkedIn lead data to the corresponding columns in Google Sheets.

This mapping allows Pabbly Connect to automatically fill in the lead information, ensuring that your Google Sheets is always up to date with the latest leads.


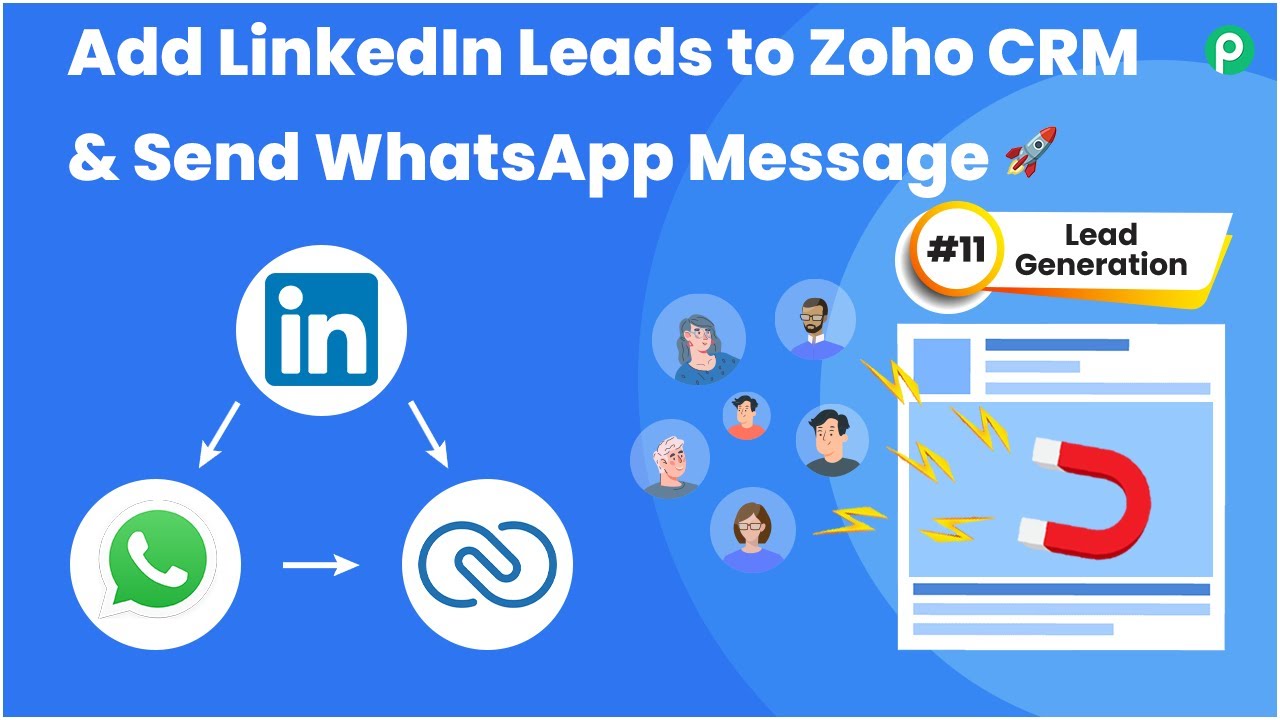
4. Creating Contacts in Zoho CRM

The final step is to set up Zoho CRM to create contacts using the same lead information. Select Zoho CRM as the action application in Pabbly Connect and choose the action event as ‘Create Contact’. This integration will ensure that every lead captured will also be added as a contact in your CRM.

Connect to your Zoho CRM account by clicking ‘Add New Connection’. Map the necessary fields such as first name, last name, email, and phone number. Ensure the mapping is accurate to create contacts effectively.

After saving the setup, Pabbly Connect will automatically create a new contact in Zoho CRM for every new lead received from LinkedIn. This process streamlines your lead management efforts significantly.


5. Conclusion: Automating Your Lead Generation Process

By integrating LinkedIn leads into Google Sheets and Zoho CRM using Pabbly Connect, you can automate your lead generation process efficiently. This setup not only saves time but also ensures that your lead data is organized and accessible across platforms.

Ensure you check out Pabbly Connect to create business automation workflows and reduce manual tasks. Pabbly Connect currently offer integration with 2,000+ applications.

With Pabbly Connect handling the automation, you can focus on other important aspects of your business while ensuring that no lead goes unnoticed. Start using this powerful integration today to enhance your lead management strategy.


Integrating Lead with SMS: A Step-by-Step Guide Using Pabbly Connect

Learn how to seamlessly integrate Lead with SMS Using Pabbly Connect to automate email and SMS notifications for Facebook leads. Follow our detailed tutorial for step-by-step instructions. with Pabbly Connect.

Watch Step By Step Video Tutorial Below


1. Setting Up Facebook Lead Integration

To integrate Lead with SMS, start by accessing your Facebook Lead Generation form. This form captures new leads whenever someone submits their information. The first step is to connect this form to your automation workflow. using Pabbly Connect

Navigate to the Pabbly Connect dashboard. Click on the blue button labeled ‘Create Workflow’. Name your workflow something like ‘Send Automated Outlook Emails and SMS to Facebook Leads’ and select the appropriate folder for your automation.


2. Configuring the Trigger Event for New Leads

In this step, you will set the trigger event for your automation. Choose ‘Microsoft 365’ as the application to handle email notifications. This integration will allow you to send emails to new leads captured through Facebook. using Pabbly Connect

  • Select ‘New Lead Instant’ as the trigger event.
  • Connect your Facebook account to Pabbly Connect.
  • Select the Facebook page associated with your lead generation form.

After connecting, Pabbly Connect will display available forms associated with the selected Facebook page. Choose the form you created for lead generation. This setup ensures that every new lead submission triggers the subsequent actions in your workflow.


3. Sending Email Notifications via Outlook

After configuring the trigger, the next step is to set up email notifications. Select ‘Send Email’ as the action event within the Microsoft 365 application. This action will send an automated email to the lead once they submit the form. using Pabbly Connect

Map the necessary fields such as the recipient’s email address, subject line, and body content. For example, you could use a subject line like ‘Thank You for Submitting the Form’ and personalize the email by including the lead’s name.

  • Map the lead’s first name and last name in the email body.
  • Use a friendly tone to thank them for their interest.
  • Include details like their email and phone number for reference.

Once you have configured the email, save the settings. This step ensures that every new lead receives a confirmation email immediately after their submission.


4. Automating SMS Notifications with TWU

Now that email notifications are set up, the next step is to automate SMS notifications using the TWU application. Select ‘Send SMS’ as the action event. This integration will allow you to send SMS messages to the same lead. using Pabbly Connect

Connect your TWU account by providing the necessary credentials like Account S ID and Authorization Token. This connection will enable Pabbly Connect to send SMS messages on your behalf.

Map the recipient’s phone number from the lead submission data. Craft a message similar to the email content for consistency. Ensure to include a friendly introduction and relevant details.

Once configured, save the settings. Now, every time a new lead submits their information, they will automatically receive an SMS notification along with their email confirmation.


5. Conclusion

In conclusion, integrating Lead with SMS Using Pabbly Connect allows you to automate the process of sending emails and SMS notifications to new Facebook leads. By following these steps, you can enhance your lead management process and ensure timely communication with potential clients.

Thanks for following along with this tutorial! Remember to subscribe to the channel for more helpful content like this.

If you found this guide useful, please consider giving it a thumbs up and sharing it with others who might benefit from it.

This automation not only saves time but also improves your engagement with leads, making it easier to follow up and convert them into customers.


Automate Outlook Email and SMS for LinkedIn Leads Using Pabbly Connect

Learn how to automate sending Outlook emails and SMS to LinkedIn leads using Pabbly Connect. Step-by-step tutorial with detailed instructions. Navigate the automation landscape confidently with clear, structured guidance suitable for professionals regardless of prior technical experience.

Watch Step By Step Video Tutorial Below


1. Accessing Pabbly Connect for Automation

To begin automating your processes, access Pabbly Connect by visiting its homepage. You can reach it by typing Pabbly.com/connect in your browser. Once on the homepage, you will see options for signing in or signing up for free.

If you are a new user, click on the ‘Sign up for free’ button. After creating your account, you will receive 100 free tasks every month to explore Pabbly Connect and test various automations. Existing users can simply click on ‘Sign In’ to access their dashboards.


2. Creating a New Workflow in Pabbly Connect

Once logged into Pabbly Connect, navigate to the dashboard where you can view all your workflows. To create a new workflow, click on the ‘Create Workflow’ option. A dialog box will prompt you to name your workflow.

  • Provide a name for your workflow, such as ‘Send Outlook Email and SMS to LinkedIn Leads’.
  • Select the folder in which to save your workflow.
  • Click ‘Create’ to proceed.

After creating the workflow, you will see two windows for trigger and action. The trigger indicates what event will start the workflow, while the action defines what happens once the trigger occurs. In this case, we will use LinkedIn Lead Gen Forms as the trigger.


3. Setting Up the Trigger with LinkedIn Lead Gen Forms

In Pabbly Connect, select LinkedIn Lead Gen Forms as your trigger application. Choose the trigger event as ‘New Lead Gen Form Response’. This event will start the workflow whenever a new lead is generated through LinkedIn.

After selecting the trigger event, click on ‘Connect’ and choose ‘Add New Connection’ to establish a link with your LinkedIn account. Click on the button to connect with LinkedIn Lead Gen Forms. Once authorized, you will be prompted to select the account and the specific lead gen form you wish to use.

  • Select your LinkedIn account and the lead gen form.
  • Click ‘Save and Send Test Request’ to capture the response.

After submitting the test form, you will receive the lead details in Pabbly Connect. This confirms that your trigger is set up correctly.


4. Configuring Actions: Sending Emails via Microsoft Outlook

With the trigger established, the next step is to set up the action to send emails. Select Microsoft Office 365 as the action application and choose ‘Send Email’ as the action event. Click on ‘Connect’ to link your Office 365 account with Pabbly Connect.

Once connected, you will need to fill in the details for the email, including the subject and body content. You can use mapping to personalize the email by including the lead’s first name from the LinkedIn response.

Enter a static subject like ‘Response Received’. Map the email address and first name from the LinkedIn lead response.

After entering these details, click on ‘Save and Send Test Request’ to ensure the email is sent correctly. Check the mapped email address to confirm receipt of the email.


5. Sending SMS to LinkedIn Leads Using Twilio

The final step in this automation is to send an SMS to the lead using Twilio. In Pabbly Connect, add an action step and select Twilio as the application. Choose the action event ‘Send SMS Message’ and connect your Twilio account.

After connecting, you will need to enter the necessary details, including the sender number and recipient number. Use mapping to automatically pull the lead’s phone number from the LinkedIn response.

Enter your Twilio sender number. Map the recipient’s phone number from the LinkedIn lead response.

Compose the SMS body, including personalized content using mapping for the lead’s first name. Once set, click ‘Save and Send Test Request’ to send the SMS. Verify that the SMS is received to confirm the workflow is complete.


Conclusion

In this tutorial, we explored how to automate sending Outlook emails and SMS to LinkedIn leads using Pabbly Connect. By following the steps outlined, you can efficiently manage lead communication without manual intervention.

Ensure you check out Pabbly Connect to create business automation workflows and reduce manual tasks. Pabbly Connect currently offer integration with 2,000+ applications.

Integrating Company with Automation Using Pabbly Connect: A Step-by-Step Guide

Learn how to integrate Company with Automation, HubSpot CRM, and more Using Pabbly Connect. This guide provides detailed steps for seamless automation. Implement the precise methodologies leading organizations use to automate repetitive tasks, illustrated with practical examples designed for immediate application. with Pabbly Connect.

Watch Step By Step Video Tutorial Below


1. Integrating LinkedIn Leads with Google Sheets and HubSpot CRM

The integration of Company with Automation begins by connecting LinkedIn leads to Google Sheets and HubSpot CRM. This process streamlines lead generation and management effectively. using Pabbly Connect

To start, you will need to create a workflow in Make. This involves selecting the trigger as a new lead from the LinkedIn lead generation form. Follow these steps to set up:

  • Log into your Make account.
  • Click on the ‘Create Workflow’ button.
  • Name your workflow, e.g., ‘ADD LinkedIn leads to Google Sheets and HubSpot CRM.’

After naming your workflow, select the folder for your automation. Once done, you will see two boxes for trigger and action. Select LinkedIn as the trigger application and Google Sheets as the action application. This setup will automate the process of adding leads to both platforms.


2. Connecting LinkedIn Lead Generation Form with Make

Connecting the LinkedIn lead generation form is essential for the automation process. This allows the data to flow seamlessly into Google Sheets and HubSpot CRM. using Pabbly Connect

To connect LinkedIn, follow these detailed steps:

  • Select the trigger event as ‘New Lead Generation Form Response.’
  • Click on the ‘Connect’ button and then ‘Add a New Connection.’
  • Authorize your LinkedIn account.

Once authorized, select the specific LinkedIn lead generation form you want to use. This ensures that every new lead captured will be processed correctly. Submit a dummy lead to test the integration, and ensure that the data is flowing into Make.


3. Sending Data to Google Sheets

Once the LinkedIn lead generation form is connected, the next step is to send the lead data to Google Sheets. This allows for easy tracking and management of leads. using Pabbly Connect

To configure the Google Sheets integration, select the action as ‘Add a New Row.’ Connect your Google account and choose the specific spreadsheet where you want to store the lead data.

Select the spreadsheet named ‘Leads via LinkedIn Lead Form.’ Map the fields from the LinkedIn form to the corresponding columns in Google Sheets. Ensure that the first name, last name, email, phone, and company fields are correctly mapped.

After mapping the fields, test the integration to confirm that new leads are being added to your Google Sheets as expected. This step is crucial for maintaining an organized lead database.


4. Creating a Contact in HubSpot CRM

The final step in this automation process is creating a contact in HubSpot CRM. This ensures that every lead captured is also tracked in your customer relationship management system. using Pabbly Connect

Select HubSpot as the next action application and choose the ‘Create a Contact’ action. Connect your HubSpot account and map the required fields from the LinkedIn lead generation form.

Map the first name, last name, email, phone, and company fields to HubSpot CRM. Ensure that all mandatory fields are filled to create a contact successfully. Test the integration by submitting a lead and checking if the contact appears in HubSpot.

Confirm that the contact has been created in HubSpot CRM, and you will see all the details populated correctly. This integration allows for effective lead management directly from your LinkedIn ads.


5. Conclusion

Integrating Company with Automation Using Pabbly Connect streamlines the lead generation and management process. By connecting LinkedIn leads to Google Sheets and HubSpot CRM, you can enhance your workflow efficiency.

Thanks for following along with this tutorial! Remember to subscribe to the channel for more helpful content like this.

If you found this guide useful, please consider giving it a thumbs up and sharing it with others who might benefit from it.

This tutorial has provided detailed steps for integrating these applications, ensuring that every lead is captured and managed effectively. Automate your processes today for better lead management!

Integrating LinkedIn Leads into Zoho CRM and Sending Automated WhatsApp Messages with Pabbly Connect

Learn how to seamlessly integrate LinkedIn leads into Zoho CRM and automate WhatsApp messages using Pabbly Connect. Step-by-step tutorial included. Follow this definitive guide to creating powerful automated workflows with straightforward, efficiency-focused solutions that save valuable time.

Watch Step By Step Video Tutorial Below


Accessing Pabbly Connect for Integration

To start integrating LinkedIn leads into Zoho CRM and automate WhatsApp messages, first access Pabbly Connect. This powerful integration platform allows you to connect various applications effortlessly.

Visit the Pabbly Connect homepage by typing Pabbly.com/connect in your browser. If you are a new user, click on the ‘Sign Up for Free’ button to create an account, which includes 100 free tasks every month. Existing users can simply sign in to access their dashboard.


Creating a Workflow in Pabbly Connect

Once logged into Pabbly Connect, click on the ‘Create Workflow’ option to initiate a new automation. Name your workflow, for instance, ‘Add LinkedIn Leads to Zoho CRM and Send WhatsApp Message,’ and select a folder for organization.

After naming your workflow, you will see two windows: Trigger and Action. The Trigger is the event that starts the workflow while Actions are the responses to that event. For this integration, select LinkedIn Lead Gen Forms as your trigger application and set the trigger event to ‘New Lead Gen Form Response.’

  • Select ‘Add New Connection’ to connect your LinkedIn account.
  • Authorize the connection to allow Pabbly Connect to access your LinkedIn data.

After establishing the connection, select the lead form you want to use from LinkedIn. This step ensures that every new lead captured through the form will trigger the workflow.


Integrating Zoho CRM with Pabbly Connect

Next, you need to set up the action in Pabbly Connect to insert the lead into Zoho CRM. Choose Zoho CRM as the action application and select the action event as ‘Insert or Update Record.’

To connect to Zoho CRM, click on ‘Add New Connection’ and enter your domain name, which you can find in the URL of your Zoho account. After pasting the domain, authorize the connection. Once connected, select the module as ‘Leads’ to ensure the new lead details are correctly added.

  • Map the fields from LinkedIn to Zoho CRM, including first name, last name, email, and phone number.
  • Click ‘Save and Send Test Request’ to verify that the lead is created successfully in Zoho CRM.

Check your Zoho CRM account to confirm that the new lead has been added, indicating that the integration was successful.


Sending Automated WhatsApp Messages

After successfully adding leads to Zoho CRM, the final step is to send automated WhatsApp messages using Pabbly Connect. For this, select Wati as the action application and choose ‘Send Template Message’ as the action event.

To connect Wati, click on ‘Add New Connection’ and input your API endpoint and access token, which can be found in your Wati dashboard under API docs. After entering these details, click ‘Save’ to establish the connection.

Map the phone number from the LinkedIn lead response to ensure the message is sent to the correct contact. Select the WhatsApp template you created for your leads and ensure the broadcast title is set up correctly.

Finally, add custom parameters for variables in your template, ensuring that names are dynamically replaced for each lead. Click ‘Save and Send Test Request’ to send a test message and confirm that the automation is functioning correctly.


Conclusion

In this tutorial, we explored how to integrate LinkedIn leads into Zoho CRM and send automated WhatsApp messages using Pabbly Connect. This seamless automation saves time and enhances lead management.

Ensure you check out Pabbly Connect to create business automation workflows and reduce manual tasks. Pabbly Connect currently offer integration with 2,000+ applications.

By following these steps, you can efficiently manage your leads and communicate with them automatically, ensuring no opportunity is missed. Start using Pabbly Connect today to streamline your lead generation process!

Integrate LinkedIn Leads in Zoho CRM and Automate WhatsApp Messages with Pabbly Connect

Learn how to seamlessly integrate LinkedIn leads into Zoho CRM and send automated WhatsApp messages using Pabbly Connect. Step-by-step tutorial included. Eliminate manual repetitive tasks from your workflow. Discover proven automation methods with intuitive steps designed for efficiency-minded professionals.

Watch Step By Step Video Tutorial Below


1. Access Pabbly Connect for Integration

To start integrating LinkedIn leads into Zoho CRM and sending automated WhatsApp messages, you need to access Pabbly Connect. Begin by navigating to the Pabbly Connect website and signing up for a free account if you are new.

Once you log in, you will find options to create workflows. Click on the ‘Create Workflow’ button to get started. Ensure you have your LinkedIn, Zoho CRM, and WhatsApp accounts ready for integration.


2. Create a New Workflow in Pabbly Connect

In this section, you will set up your workflow in Pabbly Connect. After clicking on ‘Create Workflow’, name it appropriately, for example, ‘Add LinkedIn Leads to Zoho CRM and Send WhatsApp Message’. Select a folder to save your workflow.

  • Name your workflow clearly.
  • Choose the appropriate folder for organization.

After naming and selecting the folder, click on ‘Create’. This will open the trigger and action setup windows. In the trigger section, select LinkedIn Lead Gen Forms as your trigger application.


3. Set Up LinkedIn Lead Gen Forms as Trigger

To automate the process, you need to configure LinkedIn Lead Gen Forms as the trigger in Pabbly Connect. Choose ‘New Lead Gen Form Response’ as the trigger event. Click ‘Connect’ to establish a connection with your LinkedIn account.

Once connected, you will need to select the specific lead form you have created in LinkedIn. This form will automatically send new leads to Pabbly Connect whenever someone fills it out.

  • Select the correct LinkedIn account.
  • Choose the lead form you want to use.

After selecting your lead form, click on ‘Save and Send Test Request’ to verify that the connection is working correctly. You should receive a response with the details of the lead.


4. Add Leads to Zoho CRM Using Pabbly Connect

Now that you have configured the trigger, it’s time to set up the action to add leads to Zoho CRM. In the action application, select Zoho CRM and choose ‘Insert or Update Record’ as the action event. Connect your Zoho CRM account through Pabbly Connect.

You’ll need to enter your Zoho domain and grant permission for Pabbly Connect to access your account. After connecting, map the lead details from the LinkedIn response to the corresponding fields in Zoho CRM, such as first name, last name, and email.

Map first name, last name, and email fields. Ensure all required fields are filled for successful record creation.

Once all fields are mapped correctly, click ‘Save and Send Test Request’ to check if the lead has been successfully added to Zoho CRM.


5. Send Automated WhatsApp Messages via Pabbly Connect

The final step is to send automated WhatsApp messages to your new leads. In the action application, select Wati and choose ‘Send Template Message’ as the action event. Connect your Wati account through Pabbly Connect.

After connecting, you will need to specify the WhatsApp number to send the message to, which you can map from the LinkedIn lead response. Additionally, select the message template you created for this purpose.

Map the phone number from the lead response. Select the appropriate message template for sending.

Once you have configured the message details, click ‘Save and Send Test Request’ to ensure the message is sent successfully to the lead’s WhatsApp number.


Conclusion

By following these steps, you can effectively integrate LinkedIn leads into Zoho CRM and automate WhatsApp messages using Pabbly Connect. This process streamlines your lead management and enhances communication with potential clients.

Ensure you check out Pabbly Connect to create business automation workflows and reduce manual tasks. Pabbly Connect currently offer integration with 2,000+ applications.

ActiveCampaign Zoho Integration: Create Zoho CRM Lead from ActiveCampaign Contact Using Pabbly Connect

Learn how to integrate ActiveCampaign with Zoho CRM using Pabbly Connect to automate lead creation from new contacts. Discover how to seamlessly connect your essential tools through accessible instructions that make powerful automation available to professionals at every skill level.

Watch Step By Step Video Tutorial Below


1. Accessing Pabbly Connect for Integration

To create a Zoho CRM lead from an ActiveCampaign contact, you need to access Pabbly Connect. Start by visiting the Pabbly website and signing in or signing up for a free account.

Once logged in, click on the ‘Access Now’ button under Pabbly Connect. This will take you to the dashboard where you can manage your workflows. Here, you can create a new workflow specifically for the integration between ActiveCampaign and Zoho CRM.


2. Creating a Workflow in Pabbly Connect

To create a new workflow, click on the ‘Create Workflow’ button. Name your workflow something descriptive, like ‘ActiveCampaign and Zoho CRM Integration’. After naming your workflow, select the folder where you want to save it. using Pabbly Connect

  • Click on the ‘Create’ button to proceed.
  • You will see two sections: Triggers and Actions.
  • Select ActiveCampaign as the Trigger application.

This setup allows you to define the parameters for when a new contact is added in ActiveCampaign, which will trigger the creation of a lead in Zoho CRM.


3. Configuring the ActiveCampaign Trigger

In the Trigger section, search for and select ActiveCampaign. Choose the trigger event as ‘Contact Added’. This event will activate whenever a new contact is added to your ActiveCampaign account. using Pabbly Connect

Next, you will need to connect your ActiveCampaign account by providing the API key and URL. To find these, log into your ActiveCampaign account, navigate to the settings tab, and select the developers’ section. Copy the API key and URL, then paste them into the respective fields in Pabbly Connect.


4. Setting Up the Zoho CRM Action

After configuring the trigger, you will set up the action in Zoho CRM. In the Action section, search for Zoho CRM and select it. The action event will be ‘Insert/Update Record’. This action will create a new lead in Zoho CRM based on the information received from ActiveCampaign. using Pabbly Connect

Connect your Zoho CRM account by entering your domain. Once connected, you can map the fields from ActiveCampaign to Zoho CRM. This mapping is crucial as it ensures that the first name, last name, email, and phone number from ActiveCampaign are correctly inserted into the new lead in Zoho CRM.


5. Testing the Integration

Once the mapping is complete, click on the ‘Save and Send Test Request’ button to test the integration. This will send a test lead to Zoho CRM based on the details provided in the ActiveCampaign trigger. using Pabbly Connect

To verify the integration, go to your Zoho CRM account and check the leads section. Refresh the page to see if the new lead has been created successfully with the details from ActiveCampaign. If everything is set up correctly, you should see the new lead reflecting in Zoho CRM.

Conclusion

This guide summarizes the key points and helps you understand the essential features and benefits of using this tool.

Ensure you check out Pabbly Connect to create business automation workflows and reduce manual tasks. Pabbly Connect currently offer integration with 2,000+ applications.


In summary, using Pabbly Connect, you can automate the process of creating leads in Zoho CRM from new contacts in ActiveCampaign. This integration not only saves time but also enhances your workflow efficiency.

Automate Google Sheets with Automation Integration

Learn how to automate adding contacts from Motric to Google Sheets using Automation. Follow this step-by-step guide for seamless integration. Develop expertise in application integration and learn how to design streamlined automation workflows using proven, simplified approaches. with Pabbly Connect.

Watch Step By Step Video Tutorial Below


1. Overview of Automation Integration with Google Sheets

Automation is a powerful tool that helps streamline processes. In this case, we will automate the addition of contacts from Motric to Google Sheets. This integration will save time and enhance efficiency. using Pabbly Connect

By utilizing Automation, we can ensure that every new contact added in Motric is automatically reflected in Google Sheets. This eliminates the need for manual entry and reduces the chance of errors.


2. Setting Up Automation with Google Sheets

To start, we need to access Automation and set up a workflow that connects Motric and Google Sheets. First, log in to your Automation account or create a new one if you haven’t already. using Pabbly Connect

Once logged in, follow these steps to create your workflow:

  • Click on the ‘Create Workflow’ button.
  • Name your workflow, for example, ‘Add Motric Contacts to Google Sheets.’
  • Select the appropriate folder to save your workflow.

After creating the workflow, you will set up the trigger application, which in this case is Motric. Choose the trigger event as ‘New Contact Identified’ to initiate the workflow whenever a new contact is added.


3. Connecting Motric and Google Sheets

Now that the trigger is set, we need to connect Motric with Automation. This requires generating a webhook URL from Automation and configuring it in Motric. using Pabbly Connect

Follow these detailed steps:

  • Copy the webhook URL provided by Automation.
  • In Motric, navigate to the settings and select ‘Webhooks.’
  • Create a new webhook, name it ‘Demo,’ and paste the copied URL.
  • Select the event type as ‘Contact Identified’ and save the webhook.

After saving, you can test the connection by submitting a new contact in Motric. This will send a test payload to Automation, confirming the integration is successful.


4. Mapping Data to Google Sheets

With the trigger and connection established, the next step is to map the data to Google Sheets. In Automation, select Google Sheets as your action application and set the action event to ‘Add New Row.’ using Pabbly Connect

Connect your Google account by signing in and granting the necessary permissions. Then, select the Google Sheet where you want the data to be added. For instance, choose the sheet named ‘Motric Contacts’ and ensure it has the columns for first name, last name, mobile number, and email.

Map the fields from the webhook response to the respective columns in Google Sheets. For example, map ‘First Name’ to the corresponding first name field. Repeat this for last name, mobile number, and email address.

Once all fields are mapped, save the configuration and send a test request to ensure everything is working correctly. You should see the new contact details appear in your Google Sheets.


5. Finalizing the Integration

After successfully mapping the data, it’s time to finalize the integration. You can review the test response to confirm that the data was added to Google Sheets correctly. Check the entries in your sheet to verify. using Pabbly Connect

Your integration between Motric and Google Sheets is now complete! Whenever a new contact is submitted in Motric, it will automatically create a new entry in Google Sheets. This automation saves time and reduces manual entry errors.

To summarize, we set up a trigger in Motric, connected it to Automation, and mapped the data to Google Sheets. This process allows for seamless integration and efficient data management.


Conclusion

This tutorial demonstrates how to effectively automate the addition of contacts from Motric to Google Sheets using Automation. By following these steps, you can streamline your data management processes and enhance productivity.

Thanks for following along with this tutorial! Remember to subscribe to the channel for more helpful content like this.

If you found this guide useful, please consider giving it a thumbs up and sharing it with others who might benefit from it.

How to Create Zoho Desk Ticket for ThriveCart Purchase Using Pabbly Connect

Learn how to create a Zoho Desk ticket for ThriveCart purchases using Pabbly Connect. Follow this step-by-step guide for seamless integration. Discover hidden automation capabilities within your existing tools. This guide shows you how to connect your essential applications and permanently eliminate redundant manual processes.

Watch Step By Step Video Tutorial Below


1. Accessing Pabbly Connect for Integration

To create a Zoho Desk ticket for ThriveCart purchases, you first need to access Pabbly Connect. This powerful integration platform allows you to automate tasks between different applications.

Start by visiting the Pabbly Connect website. If you have an account, simply sign in. If not, you can sign up for free, which only takes a few minutes. After logging in, you will see the dashboard where you can manage your workflows.


2. Creating a Workflow in Pabbly Connect

Once logged into Pabbly Connect, the next step is to create a new workflow. Click on the ‘Create Workflow’ button and name it according to your objective, such as ‘Create Zoho Desk Ticket for ThriveCart Purchase’.

  • Name your workflow appropriately.
  • Select a folder to save your workflow.
  • Click on ‘Create’ to proceed.

This will take you to the workflow setup page where you can define triggers and actions. The trigger is what starts the workflow, while actions are what happen as a result.


3. Setting Up Trigger and Action in Pabbly Connect

The first step in your workflow is to set up the trigger. For this integration, select ThriveCart as your trigger application and choose the event ‘Product Purchase’. This means that whenever a new product is purchased in ThriveCart, it will trigger the workflow.

Next, connect your ThriveCart account to Pabbly Connect by adding a new connection. Enter the API key from your ThriveCart account, which can be found in the API and Webhooks section under settings. Once connected, select the product you want to track, such as ‘Advanced PHP’.


4. Formatting Date and Finding Contact in Zoho Desk

After setting up the trigger, the next step is to format the order date received from ThriveCart. Use the Date and Time Formatter tool in Pabbly Connect to change the date format to one that Zoho Desk accepts.

  • Select the action event as ‘Format Date Only’.
  • Map the order date from the ThriveCart response.
  • Save and send a test request to ensure the format is correct.

Next, you will set up another action to find the contact in Zoho Desk. Choose Zoho Desk as the action application and select ‘Find Contact’. Connect your Zoho Desk account by entering your domain, which is usually part of your Zoho Desk URL.


5. Creating Tickets in Zoho Desk

Once you have determined whether the contact exists or not, you can proceed to create a ticket in Zoho Desk. If the contact exists, set up the action to create a new ticket directly. Map the necessary fields like subject, contact ID, due date, and description.

If the contact does not exist, you will first create a new contact in Zoho Desk using the details from the ThriveCart purchase. After creating the contact, set up another action to create a new ticket for this contact. Again, map all necessary fields to ensure the ticket is created correctly.

This entire process demonstrates how Pabbly Connect facilitates seamless integration between ThriveCart and Zoho Desk, ensuring that every purchase results in a new ticket for your support team.


Conclusion

In conclusion, using Pabbly Connect to create a Zoho Desk ticket for ThriveCart purchases automates your customer support process effectively. This integration enhances productivity and ensures timely responses to customer inquiries.

Ensure you check out Pabbly Connect to create business automation workflows and reduce manual tasks. Pabbly Connect currently offer integration with 2,000+ applications.

Automate Emails and SMS for Facebook Leads Using Pabbly Connect

Learn how to automate sending emails and SMS for Facebook leads using Pabbly Connect. This tutorial covers setup and integration steps in detail. Master proven automation processes with practical implementation examples and strategic recommendations you can apply immediately in your workflow.

Watch Step By Step Video Tutorial Below


1. Accessing Pabbly Connect for Automation

To automate sending emails and SMS for Facebook leads, start by accessing Pabbly Connect. This integration platform allows you to connect Facebook Leads with Gmail and SMS services seamlessly.

Visit the Pabbly Connect homepage by typing Pabbly.com/connect in your browser. Here, you can sign up for a free account or log in if you are an existing user. New users get 100 free tasks monthly to explore the platform.


2. Creating a Workflow in Pabbly Connect

Once logged into Pabbly Connect, navigate to the dashboard to create a new workflow. Click on the ‘Create Workflow’ button located in the top right corner.

  • Name your workflow, for example, ‘Send Email and SMS to Facebook Leads Automatically’.
  • Select a folder to save your workflow, such as ‘Test Integrations’.
  • Click on ‘Create’ to proceed.

After creating the workflow, you will see options for setting up triggers and actions. This is where you will define how Pabbly Connect will respond to new Facebook leads.


3. Setting Up Facebook Leads as Trigger

In this step, you will set Facebook Leads as the trigger for your workflow in Pabbly Connect. Select ‘Facebook Lead Ads’ from the trigger application options.

Choose the trigger event as ‘New Lead Instant’. This means the workflow will activate every time a new lead is generated. Click on ‘Connect’ and choose to add a new connection to link your Facebook account.

  • Authorize the connection by logging into your Facebook account.
  • Select your Facebook page and associated lead form.
  • Click on ‘Save and Send Test Request’ to confirm the connection.

After the test request, you can now capture lead details directly through Pabbly Connect.


4. Sending Automated Emails via Gmail

Next, configure the action to send emails using Gmail through Pabbly Connect. Select ‘Gmail’ as the action application and choose ‘Send Email’ as the action event.

Connect your Gmail account by selecting ‘Add New Connection’ and provide the necessary permissions. Once connected, you will need to fill in the email details:

Map the recipient’s email address using the data captured from the Facebook lead. Enter a static sender name and subject for the email. Compose the email content, including mapped variables for personalization.

After configuring the email settings, click on ‘Save and Send Test Request’ to verify that the email is sent successfully.


5. Sending SMS via Twilio

The final step is to send an SMS to the Facebook lead using Twilio through Pabbly Connect. Select ‘Twilio’ as the action application and choose ‘Send SMS’ as the action event.

Connect your Twilio account by entering your Account SID and Auth Token. You can find these details in your Twilio dashboard. Fill in the required fields for the SMS:

Enter the sender number provided by Twilio. Map the recipient’s number using the lead’s phone number captured from Facebook. Compose the SMS body, ensuring to include mapped variables for personalization.

Once everything is set, click on ‘Save and Send Test Request’ to send the SMS and confirm the integration works as expected.


Conclusion

By following these steps, you can effectively automate sending emails and SMS to new Facebook leads using Pabbly Connect. This integration not only saves time but also enhances your lead engagement strategy.

Ensure you check out Pabbly Connect to create business automation workflows and reduce manual tasks. Pabbly Connect currently offer integration with 2,000+ applications.