Integrating URL, Automation, Google Sheets, and Facebook for Seamless Social Media Posting

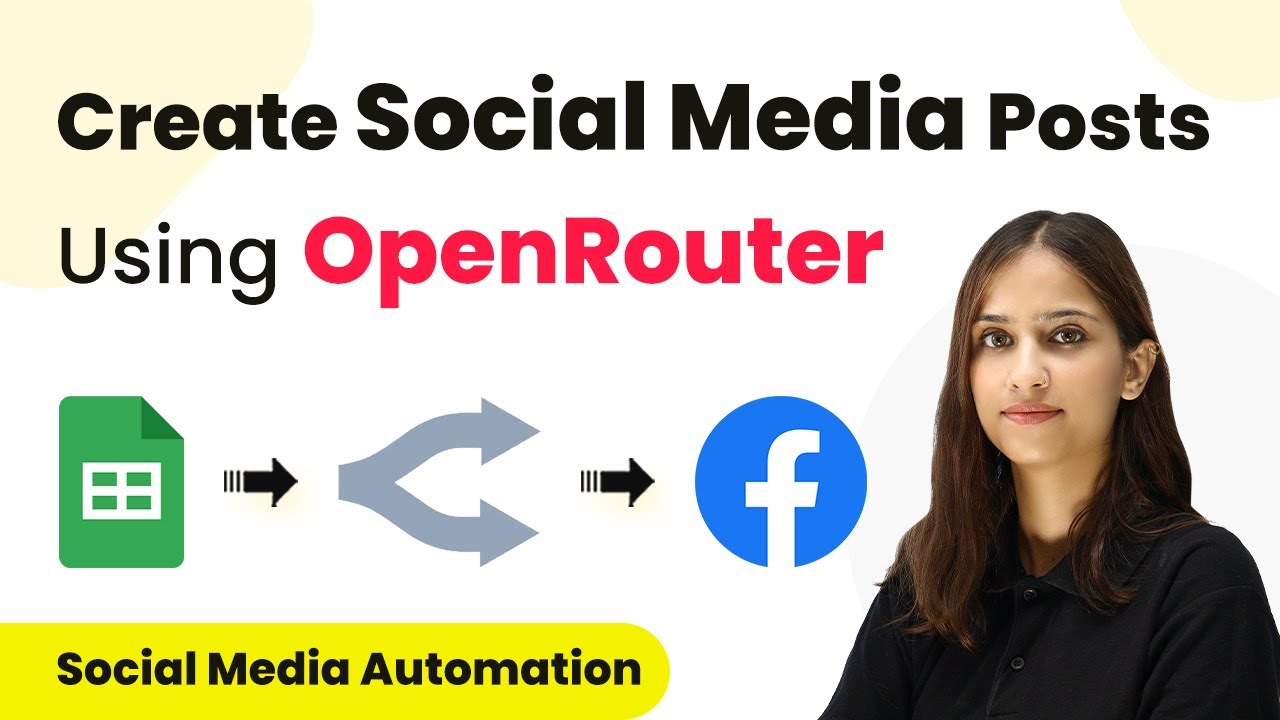
Learn how to automate social media posts using URL, Automation, Google Sheets, and Facebook. Follow our step-by-step guide for seamless integration. Follow this definitive guide to creating powerful automated workflows with straightforward, efficiency-focused solutions that save valuable time. with Pabbly Connect.

Watch Step By Step Video Tutorial Below


1. Setting Up Google Sheets for URL and Automation

The first step in our integration process involves using Google Sheets to manage post titles. Google Sheets will act as the trigger application in this automation process. Whenever a new post title is added to the sheet, it will initiate the workflow. using Pabbly Connect

To set this up, create a Google Sheet titled ‘Post Spreadsheet’ with two columns: one for the post title and another for the generated content. Make sure the first column is designated for the post titles to trigger the automation. This setup is crucial for the integration to function properly.


2. Connecting Pabbly Connect with Google Sheets

Next, we will connect Google Sheets with Pabbly Connect. This connection allows us to automate the process of generating content and posting it on Facebook. Begin by signing into your Pabbly Connect account and creating a new workflow.

  • Click on ‘Create Workflow’ in your Pabbly dashboard.
  • Name your workflow, for example, ‘Create Social Media Post using Open Router’.
  • Select Google Sheets as the trigger application and choose the event ‘New or Updated Spreadsheet Row’.

After setting up the trigger, Pabbly Connect will provide a webhook URL. This URL is essential for connecting your Google Sheets to Pabbly Connect. Copy this URL and proceed to your Google Sheet to set up the Pabbly Connect Webhook extension.


3. Initializing the Webhook in Google Sheets

To finalize the connection, you need to initialize the webhook in your Google Sheets. This step is critical for the automation to work effectively. Open your Google Sheets, navigate to the ‘Extensions’ menu, and select ‘Pabbly Connect Webhooks’. using Pabbly Connect

In the initial setup, paste the copied webhook URL from Pabbly Connect. Set the trigger column to the column where you will input the post titles. For example, if your post titles are in column A, set the trigger column accordingly. Finally, click on ‘Submit’ to complete the setup.


4. Generating Post Content with Open Router

After successfully connecting Google Sheets to Pabbly Connect, the next step is to generate the post content using Open Router. In your Pabbly Connect workflow, add an action step and select Open Router as the application.

  • Choose the action event ‘Create Chat Completions’.
  • Connect your Open Router account by entering the API token.
  • Map the caption from Google Sheets to the prompt for generating content.

Once you have set up the action, send a test request to see if the content is generated successfully. If everything is set up correctly, you will receive the generated content that can be used for your Facebook post.


5. Posting the Generated Content on Facebook

The final step is to post the generated content on Facebook. In your Pabbly Connect workflow, add another action step and select Facebook as the application. Choose the action event ‘Create Page Post’. using Pabbly Connect

Connect your Facebook account to Pabbly Connect, select the page where you want to post, and map the title and generated content received from Open Router. This mapping is essential to ensure that each new post reflects the latest content generated automatically.


Now, whenever you add a new post title in Google Sheets, the entire process will run automatically. The content will be generated using Open Router and posted directly on your Facebook page. This integration not only saves time but also enhances your social media management efficiency.

Conclusion

This guide summarizes the key points and helps you understand the essential features and benefits of using this tool.

Thanks for following along with this tutorial! Remember to subscribe to the channel for more helpful content like this.

If you found this guide useful, please consider giving it a thumbs up and sharing it with others who might benefit from it.


In summary, this tutorial detailed how to integrate URL, Automation, Google Sheets, and Facebook for seamless social media posting. By following these steps, you can automate your social media posts effectively, ensuring your content is always fresh and engaging.

Integrating URL with Automation: A Step-by-Step Guide

Learn how to integrate URL, Automation, Google Sheets, and Facebook for seamless social media posting. Follow this detailed tutorial for automation success. Revolutionize your productivity approach with just a few strategic clicks. Uncover professional methods for connecting applications and creating workflows that reclaim hours of your week. with Pabbly Connect.

Watch Step By Step Video Tutorial Below


1. Setting Up Google Sheets for URL Integration

The first step in URL integration involves using Google Sheets. In this step, you’ll create a Google Sheet to manage your social media post titles. This Google Sheet will serve as the trigger for the automation process. using Pabbly Connect

Open Google Sheets and create two columns: one for the post title and another for the generated post content. This setup will allow you to add new post titles, which will automatically generate content using Automation.


2. Connecting Google Sheets with Automation

To connect Google Sheets with Automation, you will use Pabbly Connect. First, log in to your Pabbly Connect account. If you’re a new user, sign up for free to get started.

  • Click on ‘Create Workflow’ in your dashboard.
  • Name your workflow to reflect its purpose, such as ‘Create Social Media Post’.
  • Select Google Sheets as your trigger application.

Next, set the trigger event to ‘New or Updated Spreadsheet Row’. This will initiate the automation whenever a new row is added or updated in your Google Sheets.


3. Configuring the Webhook URL in Google Sheets

In this step, you will configure the webhook URL in Google Sheets. This URL acts as a bridge between Google Sheets and Pabbly Connect. Copy the webhook URL provided by Pabbly Connect.

Go to your Google Sheet, click on ‘Extensions’, and select ‘Pabbly Connect Webhooks’. Choose ‘Initial Setup’ and paste the copied webhook URL. Set the trigger column to the column where you will add your post titles. Once done, click on ‘Submit’ to save the settings.


4. Generating Content Using Open Router

Now that you have set up Google Sheets, the next step is to generate content using Open Router. In Pabbly Connect, add Open Router as your action application. Select the action event ‘Create Chat Completions’. using Pabbly Connect

To connect Open Router with Pabbly Connect, you will need to enter your API token. Generate a new key in your Open Router account, copy it, and paste it into Pabbly Connect. Set the HTTP referer and other necessary fields as instructed, and map the caption from Google Sheets into the content field.

  • Enter a prompt like ‘Write short content for Facebook post’.
  • Click on ‘Save and Send Test Request’ to generate content.

Once the content is generated, you will see the response from Open Router in Pabbly Connect.


5. Posting to Facebook from Pabbly Connect

After generating the content, the final step is to post it to your Facebook page. In Pabbly Connect, add Facebook as your action application and select the action event ‘Create Page Post’. using Pabbly Connect

Connect your Facebook account to Pabbly Connect and select the Facebook page where you want to post. Map the title and generated content from Open Router into the respective fields. Click on ‘Save and Send Test Request’ to publish your post.

Once you receive a positive response, check your Facebook page to see the newly created post with the title and content generated automatically. This integration allows you to automate your social media posting efficiently.


Conclusion

This tutorial detailed the process of integrating URL, Automation, Google Sheets, and Facebook for seamless social media posting. By following these steps, you can automate your social media content generation and posting effectively.

Thanks for following along with this tutorial! Remember to subscribe to the channel for more helpful content like this.

If you found this guide useful, please consider giving it a thumbs up and sharing it with others who might benefit from it.

Integrating New Leads with Google Sheets Using Automation

Learn how to integrate New Leads with Google Sheets using Automation. This tutorial covers step-by-step instructions for capturing leads from Facebook ads to Google Sheets. with Pabbly Connect.

Watch Step By Step Video Tutorial Below


1. Setting Up New Leads Integration with Automation

New Leads integration with Automation allows you to streamline your lead management process. In this section, we will connect Facebook lead ads to Google Sheets using Pabbly Connect.

To begin, you will need to log into your Pabbly Connect account. If you are a new user, simply click on the sign-up button for free access. After logging in, navigate to your dashboard and click on the ‘Create Workflow’ button to get started.


2. Creating Your Workflow for New Leads

Creating a workflow is essential for automating the process of adding new leads to Google Sheets. Start by naming your workflow, for instance, ‘Add Facebook Leads to Google Sheets’. Save this workflow in a designated folder for easy access. using Pabbly Connect

  • Name your workflow appropriately.
  • Select the folder where you want to save it.
  • Click on ‘Create’ to proceed.

After creating your workflow, you will arrive at a window where you can set up your trigger and action. The trigger will be ‘New Lead’ from Facebook, and the action will be to add a new row in Google Sheets. This setup ensures that every new lead captured will be automatically recorded in your Google Sheets.


3. Connecting Facebook Lead Ads for New Leads

To connect Facebook Lead Ads to Pabbly Connect, you will need to establish a connection. Click on the ‘Connect’ button and select Facebook Lead Ads as your trigger application. Authorize the connection by logging into your Facebook account.

Next, you will need to select the Facebook page associated with your jewelry store and the lead generation form. Ensure you choose the correct form, titled ‘The Jewelry Store New Leads’. After selecting the page and form, click on ‘Save’ and send a test request to confirm the connection.

  • Select your Facebook page.
  • Choose the lead form you created.
  • Click ‘Save’ and send a test request.

Once the test lead is sent successfully, you will see the response in Pabbly Connect, confirming that the integration is working correctly.


4. Integrating Google Sheets to Capture New Leads

After successfully connecting Facebook Lead Ads, the next step is to integrate Google Sheets. This integration allows you to capture the details of new leads directly into your Google Sheets. Click on the ‘Connect’ button for Google Sheets.

Log in to your Google account and authorize access. Select the specific spreadsheet where you want to save the leads, ensuring it matches the setup in Pabbly Connect. Map the necessary fields such as lead email, name, and phone number to ensure accurate data capture.

Select the spreadsheet named ‘Facebook Leads New’. Map the lead email, name, and phone number fields. Click ‘Save’ and send a test request.

Once you receive a positive response, check your Google Sheets to confirm that the new lead details are successfully added in a new row.


5. Conclusion: Automating New Leads with Google Sheets

Integrating New Leads with Google Sheets using Pabbly Connect streamlines your lead management process. This automation ensures that every new lead from Facebook is captured and recorded efficiently.

Thanks for following along with this tutorial! Remember to subscribe to the channel for more helpful content like this.

If you found this guide useful, please consider giving it a thumbs up and sharing it with others who might benefit from it.

This setup not only saves time but also reduces the risk of manual errors. By following the steps outlined in this tutorial, you can effectively manage your leads and enhance your business operations.


In summary, this tutorial covers the integration of New Leads with Automation using PAB, Google, Google Sheets, Box, and Facebook. It highlights the importance of automating your lead capture process for better efficiency and accuracy.

Integrating Facebook Lead Ads with Google Sheets Using Pabbly Connect

Learn how to automate your lead generation by integrating Facebook Lead Ads with Google Sheets using Pabbly Connect in this step-by-step tutorial. Learn to create powerful connections between your critical applications without requiring specialized programming knowledge or extensive technical background.

Watch Step By Step Video Tutorial Below


1. Accessing Pabbly Connect for Integration

To start integrating Facebook Lead Ads with Google Sheets, first, access Pabbly Connect. Type ‘Pabbly.com/connect’ in your browser. This platform facilitates the necessary automation between your applications.

On the Pabbly Connect homepage, you will see options to sign in or sign up for free. If you’re a new user, click on the ‘Sign Up for Free’ button, which allows you to create an account and receive 100 free tasks monthly. Existing users can directly sign in.


2. Creating a Workflow in Pabbly Connect

Once signed in, locate the ‘Create Workflow’ option on the dashboard of Pabbly Connect. Click on it to begin setting up your automation. You will be prompted to name your workflow; enter a name like ‘Facebook Leads to Google Sheets’.

  • Choose a folder to save your workflow.
  • Click ‘Create’ to proceed.

After creating the workflow, you will see options for setting a trigger and an action. The trigger will be Facebook Lead Ads, and the action will be Google Sheets. This setup allows Pabbly Connect to automate the data transfer whenever a new lead is generated.


3. Setting Up Facebook Lead Ads as Trigger

In this section, select Facebook Lead Ads as your trigger application in Pabbly Connect. Choose the trigger event ‘New Lead Instant’. This event will activate the workflow whenever a new lead is generated from your Facebook lead ads.

Next, click on ‘Connect’ and select ‘Add New Connection’ to link your Facebook account. Once connected, you will need to specify the Facebook Page and the Lead Gen Form associated with your ads. After selecting these, click ‘Save and Send Test Request’ to verify the connection.

  • Select your Facebook page from the dropdown.
  • Choose the lead form you created.

Once you have completed these steps, Pabbly Connect will wait for a response from your lead form submission, enabling you to capture the lead details automatically.


4. Testing the Integration with Google Sheets

After successfully setting up the trigger, it’s time to configure Google Sheets as the action application in Pabbly Connect. Select ‘Google Sheets’ and then choose the action event ‘Add New Row’. This action will add a new row in your specified Google Sheets whenever a new lead is captured.

Click ‘Connect’ and select ‘Add New Connection’ to link your Google Sheets account. You will need to authorize Pabbly Connect to access your Google Sheets. Once connected, specify the spreadsheet name and the sheet where you want the data to be added.

Map the fields from Facebook Lead Ads to the columns in Google Sheets. Ensure that the name, email, and contact number fields are correctly mapped.

After mapping the fields, click ‘Save and Send Test Request’ to check if the integration works correctly. If successful, a new row will appear in your Google Sheets with the lead information.


5. Finalizing the Integration Process

After testing the integration, you should see that a new row has been added to your Google Sheets with the lead details captured from Facebook Lead Ads. This confirms that your automation using Pabbly Connect is functioning correctly.

To summarize, you have successfully created a workflow that connects Facebook Lead Ads to Google Sheets using Pabbly Connect. This automation will help streamline your lead management process, ensuring that every new lead is recorded without manual input.

Now, you can manage your electronic business leads efficiently, allowing you to focus on other important aspects of your business. By following these steps, you can replicate this process for other applications using Pabbly Connect.


Conclusion

This tutorial demonstrated how to integrate Facebook Lead Ads with Google Sheets using Pabbly Connect. By automating this process, you can manage your leads more effectively and save time on data entry.

Ensure you check out Pabbly Connect to create business automation workflows and reduce manual tasks. Pabbly Connect currently offer integration with 2,000+ applications.

Automate Marketing Emails with Pabbly Connect, Google Sheets, and Open Router

Learn how to automate marketing emails using Pabbly Connect, Google Sheets, and Open Router in this detailed tutorial. Follow step-by-step instructions for seamless integration. Build sophisticated automated workflows in less time than you think. This guide translates complex integrations into straightforward steps for immediate implementation.

Watch Step By Step Video Tutorial Below


1. Accessing Pabbly Connect for Email Automation

To start automating marketing emails, we will use Pabbly Connect. First, access the Pabbly Connect homepage by typing Pabbly.com/connect in your browser. Here, you can either sign in if you are an existing user or sign up for free to create a new account.

Once you sign up, you will receive 100 free tasks each month to explore the features of Pabbly Connect. After logging in, navigate to the dashboard where you can manage your workflows and integrations.


2. Creating a New Workflow in Pabbly Connect

After accessing Pabbly Connect, click on the ‘Create Workflow’ button located in the upper right corner. A dialog box will appear prompting you to name your workflow. You can name it something descriptive, like ‘Automatically Generate Marketing Emails with Open Router.’ Choose a folder to save your workflow.

Once you click ‘Create’, you will see two sections: Trigger and Action. The trigger indicates what event starts the workflow, while the action defines what happens once the trigger occurs. For this integration, we will select Google Sheets as our trigger application.

  • Select Google Sheets as the trigger application.
  • Choose the trigger event as ‘New or Updated Spreadsheet Row’.
  • Copy the webhook URL provided by Pabbly Connect for the next steps.

With these steps, you have successfully set the trigger for your automation using Pabbly Connect.


3. Connecting Google Sheets to Pabbly Connect

To connect Google Sheets with Pabbly Connect, open your Google Sheets document where you want to automate the email generation. You will need to install the Pabbly Connect webhooks add-on if you haven’t done so already. Go to Extensions > Add-ons > Get Add-ons and search for ‘Pabbly Connect Webhooks’ to install it.

After installation, refresh your Google Sheet. Navigate to Extensions > Pabbly Connect Webhooks > Initial Setup. Here, paste the webhook URL you copied earlier from Pabbly Connect. Specify the trigger column, which in this case is Column A, where you will input the titles for which emails will be generated.

  • Paste the webhook URL in the designated field.
  • Set the trigger column to ‘A’ for title inputs.
  • Click ‘Send Test’ to verify the connection.

Once the test is successful, your Google Sheets is now connected to Pabbly Connect, allowing it to capture data automatically.


4. Generating Marketing Emails Using Open Router

With the Google Sheets connected to Pabbly Connect, the next step is to set up the action to generate marketing emails using Open Router. In the Action section of your workflow, select Open Router as the action application. Choose the action event as ‘Create Chat Completions’.

To connect Open Router, you will need an API token. Retrieve this from your Open Router account under the key section. After entering the API token in Pabbly Connect, fill in the required fields to generate the email content.

Enter the HTTP referral (AI site URL). Select the model as ‘Open AI GPT 3.5 Turbo’. Map the title from the Google Sheet to the content instruction.

After filling all details, click ‘Save’ to generate a marketing email based on the title entered in Google Sheets. This automation allows for dynamic email generation without manual input.


5. Updating Google Sheets with Generated Emails

After generating the email, the final step is to update the Google Sheet with the newly created email content. In Pabbly Connect, add another action step and select Google Sheets again. This time, choose the action event as ‘Update Cell Value’.

Connect to Google Sheets using your existing connection. Specify the spreadsheet name and the range where the email should be updated. For this, use Column B and map the row index from the previous response to ensure it updates the correct cell.

Set the spreadsheet name as ‘Marketing Emails’. Input ‘B’ for the column where emails will be updated. Map the row index for dynamic updates.

Once you click ‘Save’ and send a test request, the email will be automatically added next to the corresponding title in Google Sheets, completing the automation process.


Conclusion

This tutorial demonstrated how to use Pabbly Connect to automate the generation of marketing emails from titles entered in Google Sheets. By integrating Open Router with Google Sheets through Pabbly Connect, you can streamline your email marketing process efficiently.

Ensure you check out Pabbly Connect to create business automation workflows and reduce manual tasks. Pabbly Connect currently offer integration with 2,000+ applications.

Integrating Google Sheets with Blogger Using Pabbly Connect

Learn how to automate the creation of Blogger posts from Google Sheets using Pabbly Connect. Follow our detailed tutorial for seamless integration. Explore systematic approaches to creating efficient automation solutions that convert technical concepts into practical, implementable instructions.

Watch Step By Step Video Tutorial Below


1. Integrating Google Sheets and Blogger with Pabbly Connect

The integration of Pabbly Connect with Google Sheets and Blogger allows you to automate the process of creating blog posts. This is particularly useful when you want to publish content directly from a spreadsheet without manual input. In this section, we will set up the integration step by step.

To begin, we will create a workflow in Pabbly Connect. First, log in to your account and navigate to the dashboard. Click on ‘Create Workflow’ and name it appropriately, such as ‘Create Blogger Post from Google Sheets.’ Select a folder to save this workflow and proceed to set up the trigger and action.


2. Setting Up the Trigger in Google Sheets

The first critical step in this integration is to set up the trigger using Google Sheets. For this, select Google Sheets as your trigger application in Pabbly Connect. You will then need to choose the trigger event, which is ‘New or Updated Spreadsheet Row.’ This means that every time a new row is added or updated, it will trigger an action.

Next, you need to connect your Google Sheets account to Pabbly Connect. This involves copying the webhook URL provided by Pabbly Connect and pasting it into the Google Sheets add-on. Follow these steps:

  • Go to Google Sheets and select Extensions.
  • Click on Add-ons and then on Get Add-ons.
  • Search for Pabbly Connect Webhooks and install it.

Now, paste the webhook URL into the add-on and specify the trigger column, which in this case is the last data column where changes will be detected.


3. Configuring the Action in Blogger

After setting up the trigger, the next step is to configure the action to create a post in Blogger. In Pabbly Connect, select Blogger as your action application. The action event you need to choose is ‘Create a Post.’ This will allow you to generate a new post based on the data from the Google Sheets row.

To connect your Blogger account, click on ‘Add New Connection’ and sign in using your Google account. Once connected, you will need to map the fields from Google Sheets to Blogger. This includes mapping the blog ID, title, and content. You can retrieve the blog ID from your Blogger account and map the title and content from the response received from Google Sheets.

After mapping these fields, click on ‘Save and Send Test Request.’ If everything is set up correctly, you will receive a response confirming that a new post has been created in your Blogger account. You can verify this by refreshing your Blogger dashboard and checking for the new post.


4. Automating the Workflow for Continuous Updates

To ensure that your workflow operates continuously, you need to set it to listen for new entries in Google Sheets. This is done by going back to the Google Sheets add-on and selecting ‘Send on Event’ under Pabbly Connect Webhooks. This setting ensures that every time a new row is added or an existing row is updated, the workflow will trigger automatically. using Pabbly Connect

Now, whenever you add a new blog topic or content in your Google Sheets, it will automatically create a new post in Blogger. This seamless integration saves time and reduces the risk of errors in manual data entry.

For example, if you add a new row with the blog topic ‘Testing Post’ and the content, it will create a corresponding post in your Blogger account. You can verify this by checking your Blogger dashboard for the new entry.


5. Summary and Benefits of Integration

In summary, integrating Google Sheets with Blogger using Pabbly Connect streamlines the process of creating blog posts. The main steps include setting up a trigger in Google Sheets and an action in Blogger. This integration allows for real-time updates and automated post creation.

The benefits of this integration are significant. It enhances productivity by automating repetitive tasks, reduces manual errors, and allows for quick updates to your blog. By following the steps outlined above, you can successfully implement this integration and improve your blogging workflow.

Conclusion

This guide summarizes the key points and helps you understand the essential features and benefits of using this tool.

Thanks for following along with this tutorial! Remember to subscribe to the channel for more helpful content like this.

If you found this guide useful, please consider giving it a thumbs up and sharing it with others who might benefit from it.


This tutorial has guided you through the process of integrating Google Sheets with Blogger using Pabbly Connect. By following these steps, you can create a seamless workflow that enhances your blogging experience.

Integrating Lead with Trigger Using Pabbly Connect: A Step-by-Step Guide

Learn how to integrate Lead with Trigger using Pabbly Connect to automatically add Facebook leads to Google Sheets. Follow this detailed tutorial for seamless automation. Follow this definitive guide to creating powerful automated workflows with straightforward, efficiency-focused solutions that save valuable time. with Pabbly Connect.

Watch Step By Step Video Tutorial Below


1. Setting Up Trigger with Facebook Lead Ads

To begin integrating Lead with Trigger, we will set up a trigger using Facebook Lead Ads. This step ensures that every time a new lead is generated, it will automatically initiate the workflow. using Pabbly Connect

First, log into your Pabbly Connect account. Once logged in, you’ll need to create a new workflow. Click on the blue button labeled ‘Create Workflow’. Name your workflow based on your objective, such as ‘Add Entertainment and Media Industries Leads to Google Sheets’. Next, select the folder where you want to save this workflow.


2. Connecting Facebook Lead Ads as Trigger

Now, let’s connect Facebook Lead Ads as our trigger application. Search for ‘Facebook Lead Ads’ within Pabbly Connect, and select it. The trigger event will be set as ‘New Lead Instant’. This means that whenever a new lead is generated, the workflow will automatically execute. using Pabbly Connect

  • Select ‘Add New Connection’ to connect your Facebook account.
  • Grant access by clicking ‘Continue’.
  • Choose your Facebook page and lead generation form.

After mapping your Facebook page and lead form, ensure that the lead form is live. Click on ‘Save and Send Test Request’ to test the connection. You will need to generate a sample submission of your lead ad form to proceed.


3. Testing Facebook Lead Ads Integration

After setting up the trigger, it’s essential to test the integration with Facebook Lead Ads. Open the Meta Business Suite and navigate to the Instant Forms section. Here, you can preview your lead form. using Pabbly Connect

Fill out the form with test details such as:

  • First Name: New
  • Last Name: Lead
  • Email: [email protected]
  • Phone Number: [Your Phone Number]

After submitting the form, return to Pabbly Connect to check if the lead details have been captured successfully. This step verifies that your trigger is functioning correctly.


4. Setting Up Action with Google Sheets

Now that we have confirmed the trigger works, we will set up the action using Google Sheets. In Pabbly Connect, search for ‘Google Sheets’ and select it as your action application. The action event will be ‘Add New Row’. using Pabbly Connect

Connect your Google Sheets account by selecting ‘Add New Connection’ and logging in with your Google credentials. Grant necessary permissions to allow Pabbly Connect to access your Google Sheets. Choose the specific Google Sheet where you want to add the leads, such as ‘Facebook Leads’.


5. Mapping Lead Details to Google Sheets

Next, we will map the lead details from Facebook to Google Sheets. In Pabbly Connect, you’ll see fields for First Name, Last Name, Email, and Phone Number. Use the mapping feature to link these fields from the trigger response. using Pabbly Connect

After mapping all the necessary fields, click on ‘Save and Test Request’. This action will send the lead data to your Google Sheet. Check your Google Sheet to confirm that the new lead information has been added successfully.

By following these steps, you have successfully integrated Lead with Trigger using Pabbly Connect, allowing for seamless automation of adding leads from Facebook to Google Sheets.

Conclusion

This guide summarizes the key points and helps you understand the essential features and benefits of using this tool.

Thanks for following along with this tutorial! Remember to subscribe to the channel for more helpful content like this.

If you found this guide useful, please consider giving it a thumbs up and sharing it with others who might benefit from it.


In this tutorial, we explored how to integrate Lead with Trigger using Pabbly Connect, focusing on Facebook Lead Ads and Google Sheets. By automating this process, you can save time and efficiently manage your leads. Feel free to reach out if you have any questions or need further assistance with your integrations.

Automate Facebook Page Posts Using Pabbly Connect and Open Router

Learn how to automate Facebook page posts using Pabbly Connect with Open Router. This detailed tutorial covers each step of the integration process. Explore efficient methods for automating routine tasks with clear, concise instructions suited for both newcomers and experienced professionals.

Watch Step By Step Video Tutorial Below


1. Accessing Pabbly Connect for Automation

To automate Facebook page posts, start by accessing Pabbly Connect. You can reach the platform by typing Pabbly.com/connect in your browser. Once there, you will see options to sign in or sign up for free.

If you are a new user, click on the ‘Sign Up for Free’ button to create an account. Existing users can simply click on the ‘Sign In’ button. Upon signing up, you will receive 100 free tasks every month to explore the features of Pabbly Connect.


2. Creating a Workflow in Pabbly Connect

After signing in, navigate to the all apps section and click on ‘Access Now’ under Pabbly Connect. This will take you to your dashboard where you can create a new workflow.

To create a new workflow, click on the ‘Create Workflow’ option. A dialog box will appear asking for a name. Name your workflow ‘Automate Facebook Post Using Open Router’ and select a folder to save it in. Click on ‘Create’ to proceed.

  • Click on ‘Create Workflow’.
  • Provide a name for your workflow.
  • Select a folder to save your workflow.

After creating the workflow, you will see options for trigger and action. Triggers are what start the automation, while actions are the tasks that follow. In this case, we will be using a schedule trigger to automate posting daily.


3. Scheduling the Workflow with Pabbly Connect

To schedule your workflow, select the ‘Schedule’ option as the trigger application. This feature in Pabbly Connect allows you to set a specific time for the workflow to run every day.

Choose the time you want the workflow to trigger, for example, 12:10 PM. After setting the time, click on ‘Save’ to finalize the schedule. This ensures that your workflow will automatically run at the designated time every day.

  • Select the ‘Schedule’ option as the trigger.
  • Set the desired time for the workflow to trigger.
  • Click on ‘Save’ to confirm the schedule.

With the schedule set, the next step is to gather the current date, which will be used in the Facebook post content. This will be done using the DateTime Formatter feature in Pabbly Connect.


4. Generating Content for the Facebook Post

To generate content for the Facebook post, select the ‘DateTime Formatter’ as the next action step in Pabbly Connect. This feature allows you to format the current date in the desired format.

Choose the option to generate the current date and select the format as year-month-date. After saving and sending the test request, the current date will be generated automatically. This date will be utilized to create the content for your Facebook post.

Select ‘DateTime Formatter’ as the action. Choose the option to generate the current date. Save and send the test request to confirm the date generation.

Next, you will split the generated date to remove the year. This is done using the Text Formatter feature in Pabbly Connect, where you will select the ‘Split Text’ option to separate the day and month.


5. Posting to Facebook Using Pabbly Connect

Now that the content is ready, it’s time to post it to your Facebook page. Select ‘Facebook Pages’ as the action application in Pabbly Connect. Choose the action event as ‘Create Page Post’ and connect your Facebook account.

After successfully connecting, you will need to specify the page you want to post to and map the content generated from Open Router into the message field. Once you have mapped the content, click on ‘Save and Send Test Request’ to create the post.

Select ‘Facebook Pages’ as the action application. Choose ‘Create Page Post’ as the action event. Map the generated content into the message field.

Upon successful execution, your Facebook page will automatically display the new post with the content generated based on the current date. Thus, the automation using Pabbly Connect is complete, allowing you to post daily without manual effort.


Conclusion

This tutorial demonstrated how to automate Facebook page posts using Pabbly Connect and Open Router. You can easily set up daily posts with generated content, enhancing your social media engagement effortlessly.

Ensure you check out Pabbly Connect to create business automation workflows and reduce manual tasks. Pabbly Connect currently offer integration with 2,000+ applications.

Automate Facebook Page Posts Using Pabbly Connect and Open Router

Learn how to automate Facebook page posts by integrating Open Router with Pabbly Connect. Follow this step-by-step tutorial to streamline your social media management. Discover how to seamlessly connect your essential tools through accessible instructions that make powerful automation available to professionals at every skill level.

Watch Step By Step Video Tutorial Below


1. Accessing Pabbly Connect for Automation

To start automating Facebook page posts, first access Pabbly Connect by typing ‘Pabbly.com/connect’ in your browser. Once on the homepage, you will find options to sign in or sign up for free.

If you are a new user, click on the ‘Sign Up for Free’ button to create your account. Existing users can simply sign in. Upon signing up, you will receive 100 free tasks monthly to explore Pabbly Connect and its features.


2. Creating a Workflow in Pabbly Connect

After signing in, navigate to the dashboard of Pabbly Connect. Here, you can create new workflows by clicking on the ‘Create Workflow’ button. This opens a dialog box where you will name your workflow, such as ‘Automate Facebook Post Using Open Router’.

After naming your workflow, select the folder for saving it, then click on ‘Create’. You will be presented with trigger and action windows, which are essential components in Pabbly Connect that dictate how your automation will operate.

  • Set up the trigger application to schedule the workflow.
  • Define the action applications that will respond to the trigger.

Understanding triggers and actions is crucial as triggers initiate the workflow while actions execute the commands based on those triggers. For this automation, we will use the ‘Schedule’ feature in Pabbly Connect.


3. Scheduling Daily Posts Using Pabbly Connect

In this step, select ‘Schedule’ as your trigger application. This feature allows you to set the workflow to run at specific intervals, such as daily. Choose the time for the workflow to trigger; for instance, set it to 12:10 PM.

After scheduling, click on ‘Save’ to confirm your settings. This ensures that your workflow will automatically start every day at the designated time. Next, to generate content for your Facebook post, you will need the current date.

  • Use the ‘Date Time Formatter’ feature in Pabbly Connect to get the current date.
  • Format the date to your desired structure, such as YYYY-MM-DD.

Once you have the current date, you can proceed to use it to create unique content for your Facebook post.


4. Generating Content with Open Router

Now, select Open Router as your action application in Pabbly Connect. Choose the action event ‘Create Chat Completions’ and connect your Open Router account by providing the necessary API token.

Once connected, fill in the required fields. For instance, enter an HTTP referrer and select the model to use, such as GPT-3.5 Turbo. In the content field, instruct Open Router to create a Facebook post based on the current date.

Map the current date to your content request to generate relevant posts. Ensure the content reflects the significance of the date without specifying a year.

After saving and sending the test request, you will receive a response with the generated content ready for posting on Facebook.


5. Posting to Facebook Using Pabbly Connect

In this final step, connect your Facebook Pages application to Pabbly Connect. Select the action event ‘Create Page Post’ and authorize your Facebook account.

Once connected, select the page where you want to post the content. Map the content generated from Open Router into the message field of the Facebook post.

Ensure all required fields are filled out before saving. Test the workflow by sending a test request to confirm successful posting.

After testing, check your Facebook page to see the new post created automatically. This confirms that your workflow is successfully operational, automating your daily Facebook posts without manual effort.


Conclusion

This tutorial demonstrated how to automate Facebook page posts using Pabbly Connect and Open Router. By following these steps, you can streamline your social media management and ensure consistent content delivery.

Ensure you check out Pabbly Connect to create business automation workflows and reduce manual tasks. Pabbly Connect currently offer integration with 2,000+ applications.

Integrating WhatsApp with Facebook Lead Ads Using Automation

Learn how to automate WhatsApp messages for Facebook lead ads using Pabbly Connect. This tutorial covers step-by-step integration for effective event management. Follow this definitive guide to creating powerful automated workflows with straightforward, efficiency-focused solutions that save valuable time.

Watch Step By Step Video Tutorial Below


1. WhatsApp Integration with Facebook Lead Ads

WhatsApp integration allows businesses to send automated messages via WhatsApp whenever they receive new leads from Facebook lead ads. This process enhances communication and streamlines lead management. By using Pabbly Connect, you can easily create workflows that connect Facebook lead ads to WhatsApp.

To start, ensure you have a Facebook page and lead generation form set up for your event management company. This setup will facilitate the integration process. Below are the basic steps to integrate these applications:

  • Create a Facebook lead ad for your event.
  • Set up a WhatsApp account for messaging.
  • Use Pabbly Connect to link the two applications.

After completing these steps, you can proceed to set up the workflow in Pabbly Connect for sending messages automatically.


2. Creating a Workflow in Pabbly Connect

Creating a workflow in Pabbly Connect is essential for automating the process of sending WhatsApp messages. Start by signing into your Pabbly Connect account. If you are a new user, you can sign up for free and receive 100 tasks monthly.

Once logged in, navigate to the dashboard. Click on the ‘Create Workflow’ button located in the top right corner. Name your workflow, for example, ‘Facebook Leads to WhatsApp,’ and save it under the relevant folder. This organization will help you manage multiple workflows effectively.

  • Click on ‘Create Workflow’ in your dashboard.
  • Name your workflow appropriately.
  • Select the appropriate folder for organization.

After saving your workflow, you will be directed to a window where you can set up triggers and actions for your automation.


3. Setting Up Trigger and Action Applications

To integrate WhatsApp and Facebook lead ads, you need to set up a trigger and an action in Pabbly Connect. The trigger will be your Facebook lead ads, and the action will be sending a WhatsApp message.

In the trigger section, select ‘Facebook Lead Ads’ as the trigger application and choose ‘New Lead Instant’ as the trigger event. This selection ensures that every time a new lead is generated, the workflow activates automatically. Next, for the action application, select ‘Interact’ to send WhatsApp messages.

Select ‘Facebook Lead Ads’ as your trigger application. Choose ‘New Lead Instant’ as the trigger event. Select ‘Interact’ as the action application.

With these settings in place, your workflow will be ready to send automated WhatsApp messages to new leads captured from Facebook.


4. Establishing Connections Between Applications

Establishing connections between Facebook lead ads and Pabbly Connect is crucial for the workflow to function. Click on the ‘Connect’ button in Pabbly Connect to add a new connection for Facebook lead ads. You will be prompted to log into your Facebook account and authorize the connection.

Once the connection is established, select your Facebook page and the corresponding lead generation form associated with your event management company. For example, select the page named ‘Sparkle Evenings’ and the lead form titled ‘New Contact Leads Form’. After making your selections, click ‘Save’ and send a test request to confirm the connection.

Click ‘Connect’ and log into Facebook. Select your Facebook page. Choose the lead generation form associated with your page.

After setting up the connections, you will be ready to test the workflow by submitting a test lead.


5. Testing the Integration and Sending WhatsApp Messages

To ensure that your integration is working correctly, you need to test the workflow by submitting a test lead through Facebook lead ads. This test will confirm that the data is being captured in Pabbly Connect and that WhatsApp messages are being sent successfully.

Navigate to the ‘Meta for Developers’ page and use the lead ads testing tool to create a test lead. Fill in the required fields such as contact number, email, first name, and last name, and submit the form. Once the test lead is submitted, check Pabbly Connect to see if the details have been captured correctly.

Go to the ‘Meta for Developers’ page. Use the lead ads testing tool to create a test lead. Check if the details are captured in Pabbly Connect.

If the test lead is successfully captured, you can then proceed to set up the WhatsApp message template and send a test message to confirm the entire integration works as intended.

Conclusion

This guide summarizes the key points and helps you understand the essential features and benefits of using this tool.

Thanks for following along with this tutorial! Remember to subscribe to the channel for more helpful content like this.

If you found this guide useful, please consider giving it a thumbs up and sharing it with others who might benefit from it.


This tutorial demonstrates how to effectively integrate WhatsApp with Facebook lead ads using Pabbly Connect. By following these detailed steps, you can automate your lead management process and enhance your event marketing strategy.