Top 5 Discord Automation Using Pabbly Connect: A Complete Guide

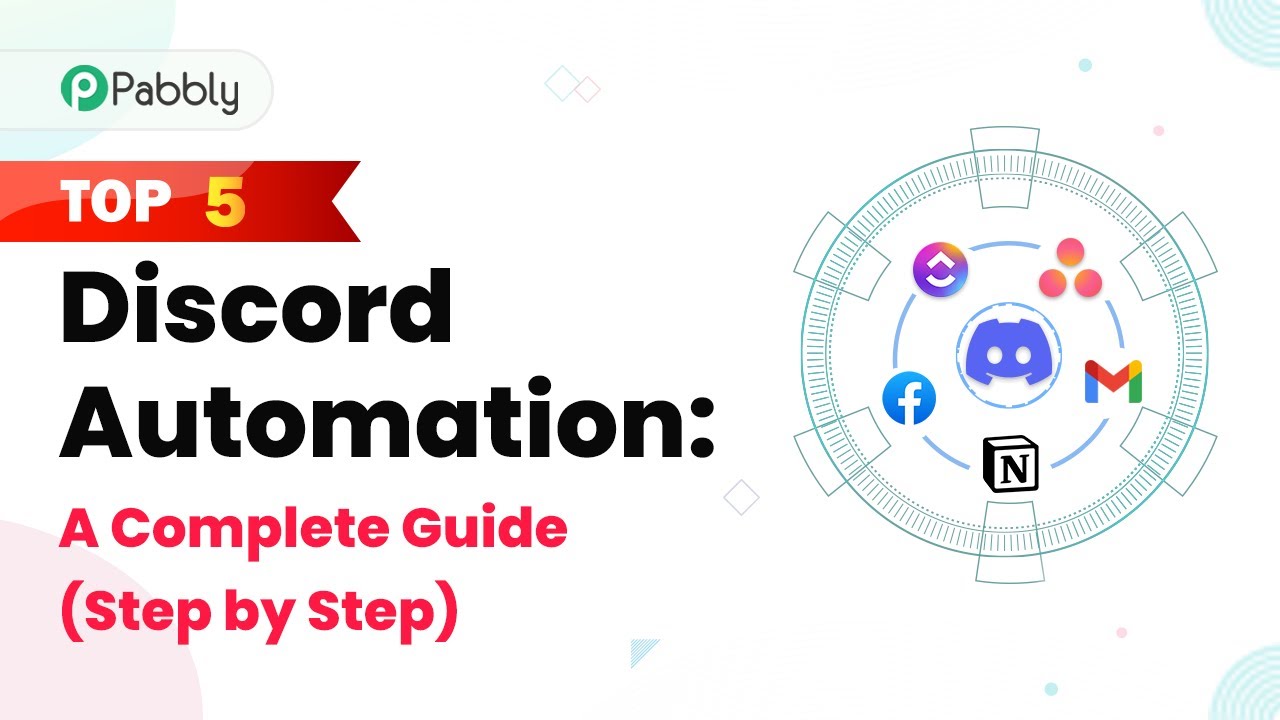
Discover the top 5 Discord automation techniques using Pabbly Connect to streamline your workflows and enhance communication. Follow this step-by-step guide! Revolutionize your productivity approach with just a few strategic clicks. Uncover professional methods for connecting applications and creating workflows that reclaim hours of your week.

Watch Step By Step Video Tutorial Below


1. Setting Up Pabbly Connect for Discord Automation

To begin automating your Discord processes, the first step is to access Pabbly Connect. This platform allows you to connect various applications seamlessly. You can sign up for a free account on the Pabbly Connect website, which takes less than two minutes.

Once you are logged into your Pabbly Connect dashboard, you can create a new workflow. Click on the ‘Create Workflow’ button, and give your workflow a suitable name, like ‘Discord Automation’. This sets the stage for integrating Discord with other applications.


2. Automating Discord Messages from Notion Using Pabbly Connect

The first automation example is sending Discord messages whenever a new item is created in Notion. Here, Pabbly Connect acts as the bridge to facilitate this integration. Start by selecting Notion as your trigger app in Pabbly Connect.

  • Choose ‘New Database Item’ as the trigger event.
  • Connect your Notion account by clicking on ‘Connect’ and authorizing Pabbly Connect.
  • Select the database you want to monitor for new items.

After setting up the trigger, you will be prompted to test the connection. Click on ‘Save and Send Test Request’ to capture the latest item details from your Notion database. These details will be used in the next step to send a message to Discord.


3. Sending Messages to Discord Channels Using Pabbly Connect

After capturing the new item details from Notion, the next step is to send these details to a Discord channel. Select Discord as your action app in Pabbly Connect and choose the action event as ‘Send Channel Message’.

To connect Discord, you will need to create a webhook URL. This is done by going to your Discord server settings, navigating to Integrations, and creating a new webhook. Copy the generated URL and paste it into Pabbly Connect.

  • Draft your message, incorporating the mapped fields from Notion.
  • Specify the bot name and icon for your message.
  • Click on ‘Save and Send Test Request’ to send the message to your Discord channel.

Once the message is sent, you can check your Discord channel to see if the automation worked as expected. This confirms that the integration between Notion and Discord through Pabbly Connect is successful.


4. Automating YouTube Video Notifications on Discord with Pabbly Connect

The next automation involves sending notifications to Discord whenever a new video is uploaded to your YouTube channel. Again, Pabbly Connect will facilitate this integration. Start by setting YouTube as your trigger app and selecting ‘New Video on Channel’ as the trigger event.

Authorize your YouTube account in Pabbly Connect, and select the channel you want to monitor. After that, you will need to save and send a test request to capture the details of the latest video uploaded.

Set Discord as your action app and choose ‘Send Channel Message’ as the action event. Create a webhook URL in Discord and paste it into Pabbly Connect. Draft your notification message, using mapped video details.

This setup allows your Discord community to receive instant updates whenever you upload a new video, enhancing engagement and communication.


5. Sharing Asana Task Updates in Discord via Pabbly Connect

Lastly, we will automate the process of sharing task updates from Asana to Discord. Start by selecting Asana as your trigger app in Pabbly Connect, and choose ‘New Task’ as the trigger event. This will allow you to monitor new tasks created in Asana.

Connect your Asana account and select the project you want to monitor. After saving and sending a test request, you will capture the latest task details. Next, set Discord as your action app and choose ‘Send Channel Message’.

Create a webhook URL in Discord and paste it into Pabbly Connect. Draft your message using the mapped task details from Asana. Test the integration by sending a message to your Discord channel.

This automation ensures your team stays updated with the latest tasks from Asana, improving workflow efficiency and collaboration.


Conclusion

In this guide, we’ve explored how to use Pabbly Connect for automating Discord processes, including notifications from Notion, YouTube, and Asana. These integrations enhance communication and streamline workflows, making it easier to manage updates across platforms.

Ensure you check out Pabbly Connect to create business automation workflows and reduce manual tasks. Pabbly Connect currently offer integration with 2,000+ applications.

Integrating Airtable and Infinity Using Pabbly Connect: A Step-by-Step Guide

Learn how to integrate Airtable with Infinity using Pabbly Connect. This tutorial provides a detailed step-by-step guide to automate your workflows effectively. This comprehensive guide reveals exactly how to connect your applications and automate repetitive tasks — accessible for professionals of all technical backgrounds.

Watch Step By Step Video Tutorial Below


1. Accessing Pabbly Connect for Integration

To start integrating Airtable with Infinity using Pabbly Connect, first, access the platform by typing the URL Pabbly.com/connect in your browser. If you are an existing user, click on ‘Sign In’. New users can easily sign up, which takes less than two minutes.

After signing in, you will reach the Pabbly dashboard. Click on the ‘Access Now’ button for Pabbly Connect. This brings you to the main interface where you can create your workflows.


2. Creating a Workflow in Pabbly Connect

In this section, we will create a workflow to automate the process of creating items in Infinity from records in Airtable. Click on the ‘Create Workflow’ button on the right-hand side. You will be prompted to name your workflow. using Pabbly Connect

  • Name the workflow based on your objective, such as ‘Create Infinity items from Airtable records’.

After naming your workflow, you will see two essential events: Trigger and Action. Select Airtable as your trigger application and choose the ‘New Record’ event. This event will check for new data in Airtable every 10 minutes, ensuring timely updates.


3. Setting Up Airtable Connection in Pabbly Connect

To connect Airtable to Pabbly Connect, click on ‘Connect’ next to the Airtable option. You will need to add a new connection by providing a personal access token. Log in to your Airtable account and navigate to the Developer Hub to create this token.

  • Click on ‘Create New Token’ and name it accordingly.
  • Add the required scopes such as Data Records and Schema Basis.
  • Copy the generated token and paste it back into Pabbly Connect.

Once connected, enter the name of your Airtable base and table. Ensure you have created a field named ‘Created’ in your table schema to capture the timestamp of new records. This field is essential for the trigger to function correctly.


4. Configuring Infinity Connection in Pabbly Connect

After setting up Airtable, the next step is to configure Infinity as the action application in Pabbly Connect. Select Infinity and the action event ‘Create Item’. Click on ‘Connect’ to link your Infinity account.

Once connected, you will need to specify your workspace and board where the new item will be created. Use the information retrieved from your Infinity account to fill in these fields. The process of mapping data from Airtable to Infinity is crucial. Ensure you map the fields accurately to transfer the information correctly.

Map fields such as email, phone number, first name, and last name from the Airtable response.

After mapping, click on ‘Save and Send Test Request’ to check if the integration works. If successful, you will see the new item created in Infinity.


5. Testing the Integration for Success

Now that you have set up the integration between Airtable and Infinity using Pabbly Connect, it’s time to test it. Add a new record in your Airtable table. This should automatically trigger the workflow.

Since the trigger checks for new records every 10 minutes, wait for a short period. After the waiting period, check your Infinity account to confirm that the new item has been created successfully. The data should match what you entered in Airtable.

Ensure that all fields are correctly populated in Infinity. If any issues arise, revisit the mapping and configuration steps in Pabbly Connect.

Once confirmed, your integration is complete, allowing seamless automation between Airtable and Infinity through Pabbly Connect.


Conclusion

In this tutorial, we explored how to integrate Airtable with Infinity using Pabbly Connect. By following the detailed steps, you can automate your workflows efficiently, ensuring that new records in Airtable are automatically created as items in Infinity. This integration simplifies task management and enhances productivity.

Ensure you check out Pabbly Connect to create business automation workflows and reduce manual tasks. Pabbly Connect currently offer integration with 2,000+ applications.

How to Create Infinity Items From Google Sheets Using Pabbly Connect

Learn how to automate the creation of Infinity items from Google Sheets using Pabbly Connect in this detailed tutorial. Step-by-step guide included. Implement the precise methodologies leading organizations use to automate repetitive tasks, illustrated with practical examples designed for immediate application.

Watch Step By Step Video Tutorial Below


1. Accessing Pabbly Connect for Integration

To start creating Infinity items from Google Sheets, you need to access Pabbly Connect. Begin by typing the URL Pabbly.com/connect in your web browser. Once on the landing page, click on the ‘Sign In’ button to log into your account.

After logging in, you will reach the ‘All Apps’ page where various Pabbly products are displayed. Click on the ‘Access Now’ button for Pabbly Connect to proceed to the dashboard. Here, you will find the option to create a new workflow.


2. Creating a Workflow in Pabbly Connect

In the Pabbly Connect dashboard, locate the ‘Create Workflow’ tab on the right side. Click on it to open a dialog box that prompts you to name your workflow. For this integration, name it something relevant like ‘Create Infinity Items from Google Sheets’ and click on ‘Create’.

  • Select Google Sheets as the trigger application.
  • Choose the trigger event as ‘New or Updated Spreadsheet Row’.
  • Copy the generated webhook URL for connecting Google Sheets.

After copying the webhook URL, navigate to your Google Sheets to set it up. Make sure to follow the instructions closely to ensure that your integration with Pabbly Connect is successful.


3. Setting Up Google Sheets with Pabbly Connect

Open the Google Sheet you want to use, which should contain relevant columns like First Name, Last Name, Email Address, and Phone Number. Go to the ‘Extensions’ menu, select ‘Add-ons’, and then ‘Get Add-ons’. Search for ‘Pabbly Connect Webhooks’ and ensure it is installed. using Pabbly Connect

Once installed, refresh your Google Sheet. After refreshing, go back to ‘Extensions’, find ‘Pabbly Connect Webhooks’, and click on ‘Initial Setup’. Paste the copied webhook URL into the provided field and set the trigger column to the final data column, which is usually the last column where data will be added.


4. Configuring Infinity Integration in Pabbly Connect

Now, return to Pabbly Connect and click on ‘Send Test’ to send test data from Google Sheets. Once the test is successful, you can proceed to set up the action application, which is Infinity. Select Infinity and choose the action event as ‘Create Item’.

Connect your Infinity account by selecting ‘Add New Connection’. Once connected, you will need to specify the details of the item you want to create in Infinity. This includes selecting the workspace, board, and parent folder where the item will be stored.

  • Map the fields from Google Sheets to Infinity, such as First Name, Last Name, Email, and Phone Number.
  • Ensure that you save and send a test request to confirm the integration.

After confirming the integration, check your Infinity board to see if the new item has been created successfully. This will verify that the integration through Pabbly Connect is working as intended.


5. Testing the Integration in Real-Time

To ensure that the integration is functioning correctly, add a new row in your Google Sheet with the necessary details. For example, input a new entry with First Name, Last Name, Email, and Phone Number. Once you save this entry, Pabbly Connect should automatically capture this event and create a corresponding item in Infinity.

Go back to Infinity to verify that the new item appears with the details you entered in Google Sheets. This real-time testing confirms that the integration is complete and operational, effectively demonstrating how Pabbly Connect facilitates the automation process between Google Sheets and Infinity.


Conclusion

This tutorial effectively illustrates how to create Infinity items from Google Sheets using Pabbly Connect. By following the steps outlined, you can automate data entry and streamline your workflow between these applications. Enjoy the benefits of seamless integration!

Ensure you check out Pabbly Connect to create business automation workflows and reduce manual tasks. Pabbly Connect currently offer integration with 2,000+ applications.

Automate Google Map Business Review Replies Using Pabbly Connect

Learn how to automate replies to Google Map Business Reviews using Pabbly Connect. Step-by-step guide for seamless integration and response generation. Master proven automation processes with practical implementation examples and strategic recommendations you can apply immediately in your workflow.

Watch Step By Step Video Tutorial Below


1. Accessing Pabbly Connect for Automation

To start automating replies to Google Map Business Reviews, first access Pabbly Connect. You can create a free account on the Pabbly Connect dashboard. Once logged in, you can create workflows that will help automate your review replies.

After reaching the dashboard, click on ‘Create Workflow’. Name your workflow, for example, ‘Automatically Reply to Google My Business Review’. This sets the groundwork for your automation process.


2. Setting Up Triggers in Pabbly Connect

The first step in your automation is to set up a trigger in Pabbly Connect. You will need to select the ‘Schedule by Pabbly’ app to configure how often you want the automation to run. For instance, you can set it to trigger every 15 minutes.

  • Choose ‘Schedule by Pabbly’ from the app list.
  • Select the frequency as every 15 minutes.
  • Click ‘Save’ to finalize your trigger settings.

Once saved, your workflow will be set to check for new reviews every 15 minutes, allowing you to respond promptly to customer feedback.


3. Fetching Unreplied Reviews from Google Map

The next step involves fetching unreplied reviews from your Google Map Business profile using Pabbly Connect. In the action step, select the ‘Google Map Business’ app and choose the action event ‘Fetch Review’.

Connect your Google Map Business account and select the account name and location from which you want to fetch unreplied reviews. You can specify to fetch only unreplied reviews to streamline your responses.

  • Choose the account and location from the dropdown.
  • Set the review type to ‘Unreplied’.
  • Click on ‘Save’ to complete this step.

This setup ensures that you only respond to reviews that have not yet received a reply, maintaining a professional image for your business.


4. Generating Replies Using OpenAI

After fetching the unreplied reviews, the next step in Pabbly Connect is to generate a reply using OpenAI. You will need to add an action step and select ‘OpenAI’ as the app, choosing the action event ‘Generate Content’.

Connect your OpenAI account and provide the API key. Set the prompt to instruct OpenAI on how to generate the reply based on the review content and star rating. For example, your prompt could be: ‘Write a reply to this Google Map Business Review without salutation, and the star rating is [star rating].’ This allows OpenAI to create personalized responses.

Set the max token limit for the response. Choose the sampling type for varied responses. Click ‘Save’ to generate the reply.

This integration allows you to automate the reply generation process, ensuring timely and relevant responses to customer reviews.


5. Posting Replies Back on Google Map

Finally, the last step involves posting the generated replies back to your Google Map Business profile through Pabbly Connect. Again, select the ‘Google Map Business’ app and choose the action event ‘Create Reply’.

Map the review ID and the generated reply from OpenAI into the respective fields. This ensures that the correct reply is posted to the corresponding review. After mapping the necessary fields, click ‘Save’ to finalize the setup.

By automating this process, you ensure that all customer feedback is acknowledged, enhancing customer satisfaction and engagement with your business.


Conclusion

In this tutorial, we explored how to automate replies to Google Map Business Reviews using Pabbly Connect. By setting up triggers, fetching reviews, generating replies, and posting them back, you can enhance your customer interaction effortlessly. This automation not only saves time but also improves your business’s responsiveness to customer feedback.

Ensure you check out Pabbly Connect to create business automation workflows and reduce manual tasks. Pabbly Connect currently offer integration with 2,000+ applications.

Integrating Wix with Airtable Using Pabbly Connect: A Step-by-Step Guide

Learn how to integrate Wix with Airtable using Pabbly Connect. This detailed tutorial provides step-by-step instructions for creating contacts in Wix from Airtable records. Build sophisticated automated workflows in less time than you think. This guide translates complex integrations into straightforward steps for immediate implementation.

Watch Step By Step Video Tutorial Below


1. Accessing Pabbly Connect for Integration

To start integrating Wix with Airtable, you need to access Pabbly Connect. First, sign in to your Pabbly account and click on the ‘Access Now’ button to reach the dashboard.

Once on the dashboard, locate the blue button labeled ‘Create Workflow’. Click on it to begin setting up your integration. This is where you will define the automation process between Airtable and Wix using Pabbly Connect.


2. Creating a Workflow in Pabbly Connect

After clicking ‘Create Workflow’, you will need to name your workflow. For this tutorial, we can name it ‘Create Contact in Wix from Airtable Record’. Once named, click ‘Create’ to proceed.

  • Select ‘Airtable’ as the trigger application.
  • Choose ‘New Record’ as the trigger event.
  • Connect your Airtable account by entering the required token.

With this setup, every time a new record is created in Airtable, it will trigger the workflow in Pabbly Connect to create a corresponding contact in Wix.


3. Setting Up Airtable for Integration

To set up Airtable, create a base called ‘Team Members’ where you will add the details of each team member. Ensure to include a field for ‘Created Time’ to track when records are added.

Once you have your Airtable base ready, switch back to Pabbly Connect and refresh your connection. Select the ‘Team Members’ base and choose the appropriate trigger field for the record creation time.


4. Connecting to Wix through Pabbly Connect

After setting up Airtable, the next step is to connect to Wix. In Pabbly Connect, select ‘Wix’ as the action application and choose ‘Create Contact’ as the action event.

  • Enter your Wix App ID and Secret ID to connect.
  • Map the necessary fields like First Name, Last Name, Email, and Phone Number.
  • Click ‘Save and Send Test Request’ to finalize the setup.

This connection ensures that every new record in Airtable automatically creates a contact in Wix, utilizing the powerful features of Pabbly Connect.


5. Testing the Integration

Once the integration is set up, it’s crucial to test it. Go back to your Airtable base and add a new record with the required details. After saving, return to Pabbly Connect and send a test request.

If everything is configured correctly, you should see a confirmation that a contact has been created in Wix. Refresh your Wix account to verify that the new contact appears with all the details you provided.


Conclusion

This tutorial demonstrated how to integrate Wix with Airtable using Pabbly Connect. By following the steps outlined, you can automate the process of creating contacts in Wix from Airtable records efficiently. Enjoy seamless automation and improved workflow!

Ensure you check out Pabbly Connect to create business automation workflows and reduce manual tasks. Pabbly Connect currently offer integration with 2,000+ applications.

Integrating Bravo and Gmail Using Pabbly Connect: A Step-by-Step Guide

Learn how to automate sending coupon codes to Bravo subscribers using Pabbly Connect, Google Sheets, and Gmail. Follow this detailed tutorial for seamless integration. Navigate the automation landscape confidently with clear, structured guidance suitable for professionals regardless of prior technical experience.

Watch Step By Step Video Tutorial Below


1. Setting Up Pabbly Connect for Integration

To start your integration process, access Pabbly Connect by signing in to your account. This platform enables seamless automation between Bravo, Google Sheets, and Gmail. Once logged in, navigate to your dashboard to create a new workflow.

Click on the big blue button labeled ‘Create Workflow’. Name your workflow, for example, ‘Send Coupon Code to Bravo Subscriber’, and click on ‘Create’. This action will initiate a blank workflow where you can set your triggers and actions.


2. Configuring the Trigger in Bravo

The next step involves configuring the trigger in your Bravo account. In Pabbly Connect, select Bravo as the trigger application. The specific trigger event you need is ‘New Contact Added to a List’. This event will activate every time a new contact is added to your Bravo account.

  • Copy the webhook URL provided by Pabbly Connect.
  • Go to your Bravo account settings and find the Webhooks section.
  • Add a new webhook using the copied URL and select the event for when a contact is added to a list.

After setting up the webhook in Bravo, you can proceed to create a new contact in your Bravo account. This action will trigger the response in Pabbly Connect and allow you to fetch the necessary coupon code from Google Sheets.


3. Fetching Coupons from Google Sheets

With the trigger set up, the next step is to fetch coupon codes from Google Sheets using Pabbly Connect. Select Google Sheets as your action application and choose the event ‘Lookup Spreadsheet Rows’. This event will allow you to pull coupon codes based on the status.

Connect your Google account to Pabbly Connect and select the spreadsheet named ‘Coupons for New Bravo Users’. Set the lookup column to the status column, which should be column B, and the lookup value as ‘Not Used’. This setup ensures that only unused coupons are fetched.

  • Choose the correct spreadsheet and sheet name.
  • Set the lookup value to ‘Not Used’ to fetch available coupons.
  • Test the request to ensure you’re retrieving the correct coupon details.

After testing, you will receive the coupon code details from Google Sheets, which will be used in the next step to send an email to the new customer.


4. Sending Emails with Gmail

Now that you have the coupon code, the next step is to send an email to the new customer using Gmail through Pabbly Connect. Select Gmail as your action application and choose the event ‘Send Email’. This step will allow you to send the coupon code directly to the customer’s email address.

Connect your Gmail account, and map the recipient email address from the trigger response in Bravo. Set the email subject as ‘Coupon Codes for New Customer’ and customize the email content to include a greeting and the coupon code fetched from Google Sheets.

Map the recipient’s email address from the Bravo trigger. Customize the email subject and body to include the coupon code. Test the email sending process to confirm successful delivery.

Once the email is sent, you can check the recipient’s inbox to confirm receipt of the coupon code. This completes the sending process for the coupon code to the new customer.


5. Updating Coupon Status in Google Sheets

After sending the email, it’s essential to update the status of the used coupon in Google Sheets using Pabbly Connect. This will ensure that the same coupon is not sent to another customer. Select Google Sheets again as your action application and choose the event ‘Update Cell Value’.

Connect to your existing Google Sheets connection, select the same spreadsheet, and specify the range for the coupon status. Map the row index based on the coupon used and set the new value to ‘Used’. This step is crucial for maintaining the integrity of your coupon codes.

Select the correct spreadsheet and map the row index for the coupon code. Set the value to ‘Used’ to update the coupon status. Test the update process to confirm the status change.

After testing, you will see that the coupon status in Google Sheets has been successfully updated to ‘Used’. This automation ensures that your workflow remains efficient and accurate.


Conclusion

In this tutorial, we explored how to use Pabbly Connect to automate the process of sending coupon codes from Google Sheets to new Bravo subscribers via Gmail. By following these steps, you can efficiently manage your coupon distribution and ensure that each customer receives a unique code.

Ensure you check out Pabbly Connect to create business automation workflows and reduce manual tasks. Pabbly Connect currently offer integration with 2,000+ applications.

Utilizing Pabbly Connect for this integration not only saves time but also streamlines your workflow, making it easy to handle customer interactions. Now, you can focus more on growing your business while automating repetitive tasks.

Automate Calendly and Microsoft Excel Integration with Pabbly Connect

Learn how to automate the integration of Calendly and Microsoft Excel using Pabbly Connect. Follow this step-by-step guide for seamless automation. Discover how to seamlessly connect your essential tools through accessible instructions that make powerful automation available to professionals at every skill level.

Watch Step By Step Video Tutorial Below


1. Setting Up Pabbly Connect for Calendly and Microsoft Excel Integration

To automate the process of adding new invitees from Calendly to Microsoft Excel, you need to set up Pabbly Connect. First, log in to your Pabbly Connect dashboard. If you don’t have an account, you can create a free one in just two minutes.

Once logged in, click on the blue ‘Create Workflow’ button. You will be prompted to name your workflow, which in this case is ‘Add New Invitees of Calendly to MS Excel.’ After naming it, click the ‘Create’ button to proceed.


2. Selecting Applications in Pabbly Connect

In Pabbly Connect, you will need to select the applications for the integration. The trigger application will be Calendly, and the action application will be Microsoft Excel. This means that whenever an invite is created in Calendly, the details will be sent to Microsoft Excel.

  • Choose Calendly as the trigger application.
  • Select ‘New Invitee’ as the trigger event.
  • Connect your Calendly account to Pabbly Connect.

After connecting, you will need to test the trigger to ensure it captures the invite details correctly. Click on ‘Save and Send Test Request’ to retrieve the latest invite details from Calendly.


3. Formatting Date and Time Using Pabbly Connect

Next, you will format the date and time using the features provided by Pabbly Connect. Since Calendly sends the date and time in UTC format, you need to convert it to your local time zone.

To do this, add a new step in your workflow by clicking the plus icon and selecting the ‘Format Date’ feature. Map the date and time from the previous step and set the appropriate time zones. You will need to:

  • Select the start date from the Calendly data.
  • Choose UTC as the from time zone.
  • Select your local time zone (e.g., Asia/Kolkata) as the to time zone.

After setting this up, click ‘Save and Send Test Request’ to confirm that the date and time are formatted correctly.


4. Adding Data to Microsoft Excel via Pabbly Connect

Now that you have formatted the date and time, the next step is to add the invitee details to Microsoft Excel. In Pabbly Connect, select Microsoft Excel as the action application and choose ‘Add Row’ as the action event.

Connect your Microsoft Excel account to Pabbly Connect. After connecting, select the specific worksheet where you want to add the invitee details. Ensure that the columns in your Excel sheet match the data fields you want to populate.

Map the event name, invitee name, phone number, email, start time, and end time to their respective columns. Test the action by clicking ‘Save and Send Test Request’.

Once the test is successful, refresh your Excel sheet to see the new invitee details added automatically.


5. Conclusion

In this tutorial, you learned how to automate the integration of Calendly and Microsoft Excel using Pabbly Connect. By following these steps, you can streamline your workflow and ensure that every new invitee is recorded in Excel without manual effort. This automation saves time and enhances productivity.

Ensure you check out Pabbly Connect to create business automation workflows and reduce manual tasks. Pabbly Connect currently offer integration with 2,000+ applications.

Utilizing Pabbly Connect for such integrations allows you to focus on more important tasks while the automation handles the repetitive work. Start using Pabbly Connect today to enhance your business automation!


How to Upload YouTube Videos from Notion Using Pabbly Connect

Learn how to automate YouTube video uploads from Notion using Pabbly Connect. Step-by-step tutorial on integrating Notion and YouTube for seamless uploads. Master proven automation processes with practical implementation examples and strategic recommendations you can apply immediately in your workflow.

Watch Step By Step Video Tutorial Below


1. Setting Up Pabbly Connect for Notion and YouTube Integration

To upload YouTube videos from Notion, you must first set up Pabbly Connect. This integration platform allows you to connect various applications seamlessly. Start by creating a free account on Pabbly Connect if you don’t have one yet.

Once logged in, navigate to the dashboard and click on the blue button labeled ‘Create Workflow’. Here, you will name your workflow, such as ‘Upload YouTube Videos from Notion Automatically’. After naming, click on the ‘Create’ button to proceed.


2. Select Trigger and Action Applications in Pabbly Connect

In this step, you will configure the trigger and action applications. The trigger will be Notion, and the action will be YouTube. Click on the trigger box and select Notion as the application.

  • Select ‘New Database Item’ as the trigger event.
  • Click on the ‘Connect’ button to link Notion to Pabbly Connect.
  • Authorize access to your Notion pages as prompted.

Once connected, select the database containing your YouTube video details. After this, you will be able to see the recent data added to Notion, which will be captured by Pabbly Connect.


3. Uploading Video to YouTube via Pabbly Connect

After capturing the data from Notion, the next step is to upload the video to YouTube. In the action event section, select YouTube as the application and choose ‘Upload Video’ as the action event. Connect your YouTube account to Pabbly Connect by clicking on the ‘Connect’ button again.

Once connected, you will need to fill in the video details. This includes mapping the title, description, and video URL fetched from Notion. Click on the respective fields and select the mapped data from the dropdown provided by Pabbly Connect.

  • Map the title of the video.
  • Map the description and video URL accordingly.
  • Set the visibility status to Pabbly.

After mapping all necessary details, click on ‘Save and Send Test Request’ to initiate the upload process. You will receive a request ID confirming that the upload has started.


4. Checking Video Upload Status with Pabbly Connect

Next, you need to check if the video upload was successful. To do this, add another action step in Pabbly Connect to check the upload status. Again, select YouTube and choose ‘Get Video Upload Status’ as the action event.

Connect this action step to your YouTube account and map the request ID received from the previous step. This allows Pabbly Connect to fetch the upload status of your video. Click on ‘Save and Send Test Request’ to check the status.

If the video has been uploaded successfully, you will see a response indicating the upload status, confirming that the video is now live on your YouTube channel.


5. Automating YouTube Video Uploads from Notion

With the integration complete, every time you add video details to Notion, Pabbly Connect will automatically upload the video to your YouTube channel. This automation saves you time and effort, allowing you to focus on content creation.

Remember, the trigger checks for new data every 8 hours, so any updates will be processed accordingly. You can now sit back and relax while Pabbly Connect handles your YouTube uploads efficiently.

Conclusion

This guide summarizes the key points and helps you understand the essential features and benefits of using this tool.

Ensure you check out Pabbly Connect to create business automation workflows and reduce manual tasks. Pabbly Connect currently offer integration with 2,000+ applications.


In conclusion, using Pabbly Connect to automate YouTube video uploads from Notion streamlines your workflow. This integration ensures that your videos are uploaded seamlessly based on the information provided in Notion.

How to Save Order Receipts from Gmail to Dropbox Automatically Using Pabbly Connect

Learn how to automate saving order receipts from Gmail to Dropbox using Pabbly Connect. Step-by-step tutorial for seamless integration. This comprehensive guide reveals exactly how to connect your applications and automate repetitive tasks — accessible for professionals of all technical backgrounds.

Watch Step By Step Video Tutorial Below


1. Setting Up Pabbly Connect for Gmail and Dropbox Integration

To automate saving order receipts from Gmail to Dropbox, you need to set up Pabbly Connect. Start by logging into your Pabbly Connect account. If you don’t have one, you can create a free account in just two minutes.

Once logged in, navigate to your dashboard. Click the blue ‘Create Workflow’ button and give your workflow a name, such as ‘Save Invoices and Receipts from Gmail to Dropbox.’ This naming helps you identify the workflow later.


2. Selecting Trigger and Action in Pabbly Connect

In this step, you will set the trigger and action for your automation using Pabbly Connect. The trigger will be based on receiving new emails in Gmail. Select the ‘Email Parser’ as the application, rather than Gmail directly, because it facilitates better integration with Pabbly Connect.

  • Select ‘Email Parser’ for the trigger.
  • Choose ‘Dropbox’ for the action.
  • Map the fields accordingly to ensure smooth data transfer.

This setup means that whenever a new invoice or receipt arrives in Gmail, it will be processed by Pabbly Connect and saved to Dropbox automatically.


3. Configuring Gmail Settings for Pabbly Connect

Next, you need to configure your Gmail settings to integrate with Pabbly Connect. Copy the email address provided by Pabbly Connect for the Email Parser. Go to your Gmail settings, navigate to ‘Forwarding and POP/IMAP,’ and remove any existing forwarding addresses.

After removing the old address, add the new email address from Pabbly Connect. Click ‘Proceed’ to grant permissions and confirm the forwarding by entering the code sent to the new address. This step ensures that your Gmail account can send emails to Pabbly Connect.


4. Filtering Emails for Relevant Invoices and Receipts

To refine the automation process, you will add a filter in Pabbly Connect. This filter checks if the incoming emails contain specific keywords like ‘invoice,’ ‘order,’ or ‘receipt.’ This step is crucial to avoid cluttering your Dropbox with irrelevant emails.

  • Set conditions for the subject line and body text of the emails.
  • Use the ‘contains’ filter type for keywords.
  • Ensure that if any condition is met, the workflow continues.

This filtering mechanism allows Pabbly Connect to only process relevant emails and enhance the efficiency of your automation.


5. Uploading Invoices to Dropbox Automatically

Finally, you will set up the action to upload the filtered invoices to Dropbox using Pabbly Connect. Choose the ‘Upload File’ action in Dropbox and connect your Dropbox account. Make sure you authorize the connection to allow Pabbly Connect to access your Dropbox.

Specify the file URL and folder path where you want to save the invoices. You can map the file name dynamically using the sender’s name and add the correct file extension, such as .pdf. Once configured, click ‘Save and Send Test Request’ to test the automation.


Conclusion

Using Pabbly Connect, you can easily automate saving order receipts from Gmail to Dropbox. This integration streamlines your workflow, ensuring that important documents are securely stored without manual effort. Implementing this automation allows you to focus on more critical tasks while Pabbly Connect handles the routine processes seamlessly.

Ensure you check out Pabbly Connect to create business automation workflows and reduce manual tasks. Pabbly Connect currently offer integration with 2,000+ applications.

Integrating JotForm with Google Contacts, Jira, Facebook, Google Meet, and Mailchimp Using Pabbly Connect

Learn how to automate JotForm responses with Google Contacts, Jira, Facebook, Google Meet, and Mailchimp using Pabbly Connect. Step-by-step tutorial included. This comprehensive guide reveals exactly how to connect your applications and automate repetitive tasks — accessible for professionals of all technical backgrounds.

Watch Step By Step Video Tutorial Below


1. Accessing Pabbly Connect for JotForm Integration

To begin integrating JotForm with other applications, you need to access Pabbly Connect. Start by signing up for a free account if you don’t have one. After logging into your dashboard, click on ‘Create Workflow’ to start the integration process.

Once you have created your workflow, you will see two main sections: the trigger window and the action window. The trigger window is where you specify the event that initiates the automation, while the action window is where you define what happens as a result. This setup is crucial for automating tasks effectively.


2. Integrating JotForm Responses with Google Contacts Using Pabbly Connect

To automate adding JotForm responses to Google Contacts, first set up your trigger in Pabbly Connect. Choose JotForm as the app and select ‘New Response’ as the trigger event. Pabbly Connect will provide you with a webhook URL.

Next, go to your JotForm account and open the form you wish to integrate. Navigate to the settings and select ‘Integrations’. Choose ‘Webhooks’ and paste the webhook URL from Pabbly Connect. Click on ‘Complete Integration’ to finalize the connection. Now, whenever a new response is submitted in JotForm, it will trigger the automation.

  • Select JotForm as the app in Pabbly Connect.
  • Set ‘New Response’ as the trigger event.
  • Copy the provided webhook URL.
  • Paste the webhook URL in JotForm under Webhooks.

Now, proceed to the action window in Pabbly Connect. Choose Google Contacts and select ‘Create Contact’ as the action event. Connect your Google account and map the fields from JotForm to Google Contacts. This way, all new responses will be automatically added as contacts.


3. Creating Jira Issues from JotForm Submissions Using Pabbly Connect

Next, we will set up an integration to create Jira issues from JotForm submissions. Start by creating a new workflow in Pabbly Connect and set JotForm as the trigger app with the ‘New Response’ event as before. This will allow you to capture the details from the form submissions.

After configuring the trigger, you will need to connect to Jira. In the action window, select Jira and choose ‘Create Issue’ as the action event. To link Jira with Pabbly Connect, you will need to authorize your Jira account. Once connected, you can map the fields from JotForm to the Jira issue, including the summary and description fields.

  • Select JotForm as the trigger app and set ‘New Response’.
  • Choose Jira as the action app and ‘Create Issue’ as the action event.
  • Authorize your Jira account in Pabbly Connect.
  • Map the JotForm fields to the Jira issue fields.

Once everything is set up, every new form submission will automatically create a corresponding issue in your Jira project, streamlining your issue tracking process.


4. Automating Facebook Posts from JotForm Submissions with Pabbly Connect

In this section, we will automate Facebook posts based on JotForm submissions. Start by creating a new workflow in Pabbly Connect and set JotForm as the trigger app with the ‘New Response’ event. This will allow you to capture form submissions as they come in.

For the action, select Facebook Pages and choose ‘Create Page Post’ as the action event. Connect your Facebook account to Pabbly Connect, allowing it to publish posts on your behalf. You can then map the relevant fields from JotForm, such as the name and message, to the Facebook post content.

After configuring the mapping, your workflow will automatically publish a new post to your selected Facebook page every time a new response is received from JotForm. This integration helps maintain an active presence on social media without manual effort.


5. Scheduling Google Meet Appointments from JotForm Submissions Using Pabbly Connect

Finally, we will set up an integration to schedule Google Meet appointments based on JotForm submissions. Create a new workflow in Pabbly Connect and select JotForm as the trigger app with the ‘New Response’ event. This captures the necessary appointment details from the form.

In the action window, select Google Meet and choose ‘Schedule Meeting’ as the action event. Connect your Google account and map the required fields such as start time, end time, and attendees’ email addresses. Make sure to format the date and time correctly to ensure seamless scheduling.

Once configured, every new form submission will automatically create a scheduled Google Meet appointment, streamlining your appointment-setting process and enhancing productivity.


Conclusion

In this tutorial, we explored how to use Pabbly Connect to integrate JotForm with Google Contacts, Jira, Facebook, Google Meet, and Mailchimp. Automating these processes can save time and improve efficiency significantly.

Ensure you check out Pabbly Connect to create business automation workflows and reduce manual tasks. Pabbly Connect currently offer integration with 2,000+ applications.