Integrating Google APIs with Pabbly Connect: A Step-by-Step Guide

Learn how to integrate Google APIs with Pabbly Connect, including Google Analytics, Google Calendar, and WhatsApp, to automate your workflows effectively. Revolutionize your productivity approach with just a few strategic clicks. Uncover professional methods for connecting applications and creating workflows that reclaim hours of your week.

Watch Step By Step Video Tutorial Below


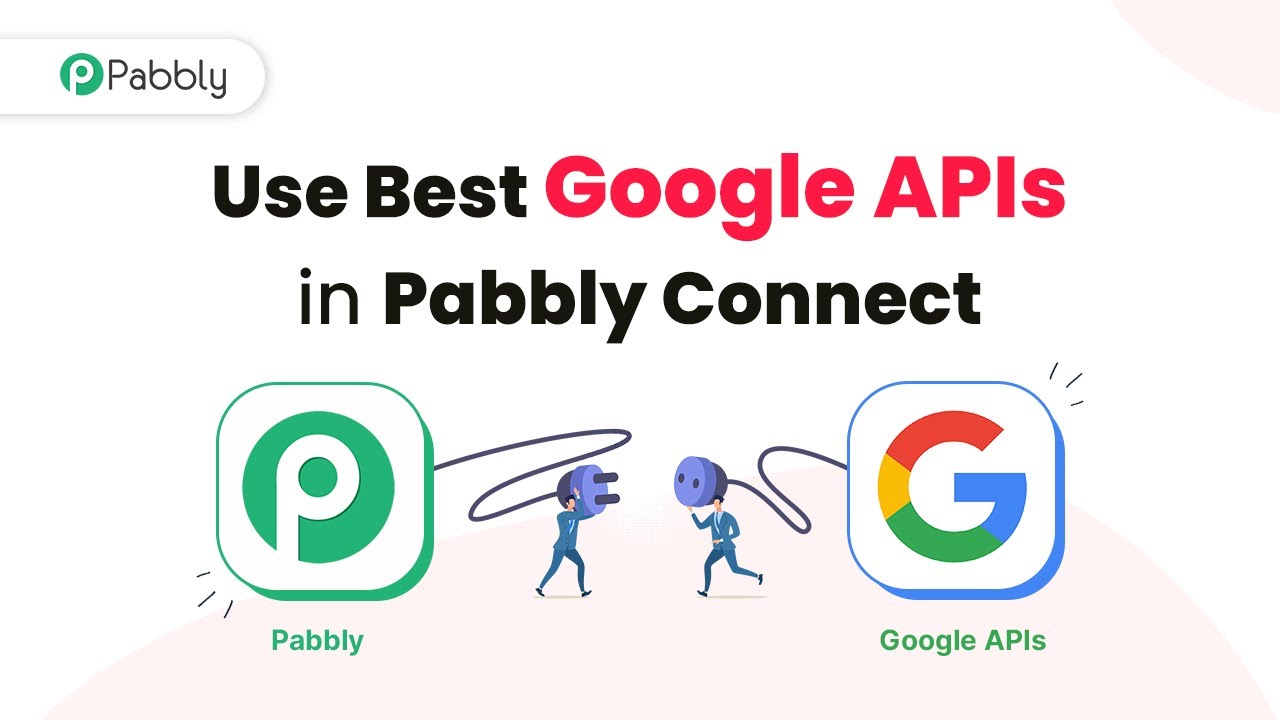
1. Using Google API with Pabbly Connect

Pabbly Connect allows users to integrate various Google APIs seamlessly. With the help of Google APIs, users can automate their workflows and enhance productivity. Google offers a wide range of APIs, including Google Analytics, Google Calendar, and more, which can be utilized effectively through Pabbly Connect.

To start using Google APIs, first, access Pabbly Connect. Here, you can explore various APIs available for integration. The setup process is straightforward, allowing you to connect different applications and automate tasks efficiently.


2. Integrating Google Analytics with Microsoft Excel

One of the popular use cases is integrating Google Analytics with Microsoft Excel using Pabbly Connect. This integration allows users to export analytics data directly into Excel spreadsheets. This process simplifies data management and reporting.

To set up this integration, follow these steps:

  • Log into Pabbly Connect and create a new workflow.
  • Select Google Analytics as the trigger application.
  • Choose the specific trigger event you want to use.
  • Connect your Google Analytics account to Pabbly Connect.
  • Select Microsoft Excel as the action application.
  • Map the data fields from Google Analytics to Excel.

After completing these steps, your Google Analytics data will automatically populate in your Excel spreadsheet, enhancing your reporting capabilities.


3. Automating WhatsApp Reminders with Google Calendar

Another valuable integration is automating WhatsApp reminders using Google Calendar through Pabbly Connect. This setup helps users receive timely reminders directly on WhatsApp, improving task management.

To automate WhatsApp reminders, follow these steps:

  • Create a new workflow in Pabbly Connect.
  • Select Google Calendar as the trigger application.
  • Choose the event type to trigger the reminder.
  • Connect your Google Calendar account to Pabbly Connect.
  • Select WhatsApp as the action application.
  • Map the reminder message fields to WhatsApp.

Once set up, you will receive WhatsApp reminders based on your Google Calendar events, streamlining your scheduling process.


4. Syncing Google Docs with WordPress

Integrating Google Docs with WordPress through Pabbly Connect is an excellent way to automate content publishing. This integration allows users to import content from Google Docs directly into their WordPress site, saving time and effort.

To sync Google Docs with WordPress, follow these steps:

Log into Pabbly Connect and create a new workflow. Select Google Docs as the trigger application. Choose the event that triggers the import. Connect your Google Docs account to Pabbly Connect. Select WordPress as the action application. Map the content fields from Google Docs to WordPress.

After completing these steps, your Google Docs content will be automatically published on your WordPress site, enhancing your content management workflow.


5. Automating File Transfer Between Google Drives

Pabbly Connect also facilitates file transfer between Google Drives. This integration is useful for users who need to manage files across different Google Drive accounts or folders.

To automate file transfers, follow these steps:

Create a new workflow in Pabbly Connect. Select Google Drive as the trigger application. Choose the event that triggers the file transfer. Connect your Google Drive account to Pabbly Connect. Select the destination Google Drive account or folder. Map the file fields accordingly.

Once set up, files will be transferred automatically based on the specified trigger, enhancing your file management efficiency.


Conclusion

In this tutorial, we explored how to use Pabbly Connect to integrate various Google APIs, including Google Analytics, Google Calendar, and WhatsApp. These integrations help automate workflows and boost productivity effectively.

Ensure you check out Pabbly Connect to create business automation workflows and reduce manual tasks. Pabbly Connect currently offer integration with 2,000+ applications.

By leveraging the capabilities of Pabbly Connect, users can streamline their processes, save time, and enhance their overall efficiency in managing tasks and data.

Integrating Google API and WhatsApp Using Pabbly Connect

Learn how to integrate Google API and WhatsApp using Pabbly Connect for seamless automation. Step-by-step guide with practical examples. Master proven automation processes with practical implementation examples and strategic recommendations you can apply immediately in your workflow.

Watch Step By Step Video Tutorial Below


1. Understanding Google APIs and Pabbly Connect

In this section, we will discuss how Pabbly Connect utilizes Google APIs to enable seamless integration. Google provides a variety of APIs, allowing developers to automate workflows and enhance productivity.

With over 246 APIs, Google offers extensive resources for users. Through Pabbly Connect, you can easily access and utilize these APIs to streamline your tasks efficiently.


2. Using Google Analytics with Pabbly Connect

Integrating Google Analytics with Pabbly Connect allows you to export data to Microsoft Excel or Google Sheets automatically. This is a powerful way to analyze your data without manual intervention.

To set up this integration, follow these steps:

  • Log into your Pabbly Connect account.
  • Create a new workflow.
  • Select Google Analytics as the trigger application.
  • Choose the specific event to trigger the data export.

Once configured, this automation will ensure that your Google Analytics data is consistently updated in your chosen spreadsheet, saving you valuable time.


3. Automating WhatsApp Reminders with Google Calendar

Pabbly Connect enables you to automate WhatsApp reminders directly from Google Calendar, enhancing your productivity. This integration is particularly useful for timely reminders. using Pabbly Connect

To set this up, follow these steps:

  • Access your Pabbly Connect dashboard.
  • Create a new automation workflow.
  • Select Google Calendar as the trigger application.
  • Choose the event type that will send reminders via WhatsApp.

Once the integration is complete, you will receive WhatsApp reminders automatically based on your Google Calendar events, ensuring you never miss an important task.


4. Connecting Google Docs to WordPress with Pabbly Connect

Another powerful feature of Pabbly Connect is the ability to connect Google Docs to your WordPress website. This integration allows for seamless content management.

To set this up, follow these steps:

Log into Pabbly Connect. Create a new workflow. Choose Google Docs as the trigger application. Select the action to import content into WordPress.

This automation helps teams streamline content creation and management, allowing writers to focus on producing quality content without worrying about manual uploads.


5. Automating File Transfers in Google Drive with Pabbly Connect

Using Pabbly Connect, you can automate file transfers between folders in Google Drive. This integration is essential for efficient file management.

To set up this automation, follow these steps:

Access your Pabbly Connect account. Create a new workflow. Select Google Drive as the trigger application. Choose the folders involved in the file transfer.

With this setup, files can be automatically moved or copied between specified folders in Google Drive, enhancing your organizational efficiency.


Conclusion

In summary, utilizing Pabbly Connect for integrating Google API and WhatsApp greatly enhances productivity and automates repetitive tasks. This tutorial covered essential integrations, showcasing how to streamline your workflows effectively.

Ensure you check out Pabbly Connect to create business automation workflows and reduce manual tasks. Pabbly Connect currently offer integration with 2,000+ applications.

Automate Google My Business Replies Using Pabbly Connect: A Step-by-Step Guide

Learn how to automate Google My Business replies using Pabbly Connect with OpenAI integration. Follow our detailed tutorial for seamless automation. Revolutionize your productivity approach with just a few strategic clicks. Uncover professional methods for connecting applications and creating workflows that reclaim hours of your week.

Watch Step By Step Video Tutorial Below


1. Setting Up Pabbly Connect for Google My Business Automation

To start automating Google My Business replies, you need to set up Pabbly Connect. First, create an account on the Pabbly Connect dashboard. This platform will serve as the central hub for integrating various applications like Google My Business and OpenAI.

Once logged in, you can easily navigate to the dashboard. Here’s how to set up your first automation workflow:

  • Click on the ‘Create Workflow’ button.
  • Name your workflow (e.g., ‘Fetch and Generate Replies’).
  • Select the trigger event as ‘Schedule by Pabbly’.

This setup allows you to automate the process of fetching reviews from Google My Business at regular intervals. Remember, Pabbly Connect is essential for connecting these applications seamlessly.


2. Fetching Reviews from Google My Business

After setting up Pabbly Connect, the next step is to fetch the reviews from your Google My Business account. In the action window, search for ‘Google My Business’ and select it.

Then, choose the action event as ‘Fetch Reviews’. You will need to connect your Google account to Pabbly Connect to access your Google My Business data. Make sure you select the correct business account and location from the dropdown menus.

  • Select ‘Unreplied’ reviews to focus on those needing responses.
  • Choose whether to reset on execution or not for your review fetching.
  • Click ‘Save and Send Test Request’ to verify the connection.

This step is crucial as it allows Pabbly Connect to pull in the latest reviews, which are then used to generate replies. Make sure to test the connection to ensure everything is working properly.


3. Generating Replies Using OpenAI

Once you have successfully fetched the reviews, the next step is to generate replies using OpenAI. In the action window, add another action step and select ‘OpenAI’ from the app list.

Select ‘Chat GPT’ as the action event. You will need to connect your OpenAI account to Pabbly Connect by entering your API key. This key can be obtained from your OpenAI account settings.

Craft a prompt that instructs Chat GPT to generate replies based on the fetched review data. Map the review’s star rating and comment into the prompt. Click ‘Save and Send Test Request’ to receive a generated reply.

This integration allows Pabbly Connect to leverage AI capabilities, making your review responses timely and relevant. Ensure that the generated replies align with your brand voice for better customer engagement.


4. Adding Reviews and Replies to Google Sheets

After generating the replies, the next step is to log these details into a Google Sheet for tracking and manual approval. In the action window, search for ‘Google Sheets’ and select it.

Choose the action event ‘Add New Row’ and connect your Google Sheets account to Pabbly Connect. Select the spreadsheet where you want to log the review details and replies.

Map each relevant field (created date, review name, comment, star rating, and generated reply) to their respective columns in the sheet. Leave the reply status field blank for manual approval later. Click ‘Save and Send Test Request’ to log the data.

This step ensures that all review interactions are documented and can be reviewed before posting responses on Google My Business. Pabbly Connect facilitates this integration, making it easy to manage customer feedback.


5. Setting Up a Manual Approval System

The final step in this process is to set up a manual approval system for the replies before they are posted on Google My Business. Create a new workflow in Pabbly Connect and select Google Sheets as the trigger app.

Choose the trigger event as ‘New or Updated Spreadsheet Row’. This action will allow Pabbly Connect to monitor changes in your Google Sheet, specifically the reply status column.

Add a filter condition to check if the reply status is set to ‘Approved’. If approved, proceed to post the reply on Google My Business. Select Google My Business again and choose ‘Create Reply’ as the action event.

This manual approval system provides control over the replies being posted, ensuring quality and relevance. By utilizing Pabbly Connect, you can effectively manage customer interactions while maintaining a personalized touch.


Conclusion

In this guide, we explored how to automate Google My Business replies using Pabbly Connect. By integrating Google My Business with OpenAI and Google Sheets, you can streamline your review management process. This setup not only saves time but also enhances customer engagement through timely responses. Implementing this system will help you maintain a strong online presence and improve customer satisfaction.

Ensure you check out Pabbly Connect to create business automation workflows and reduce manual tasks. Pabbly Connect currently offer integration with 2,000+ applications.

Automate Video Transcription with Pabbly Connect: A Step-by-Step Guide

Learn how to automate video transcription into text documents using Pabbly Connect, Google Sheets, and Happy Scribe with this detailed tutorial. Transform complex automation concepts into accessible, actionable steps that eliminate unnecessary manual work while maximizing existing application capabilities.

Watch Step By Step Video Tutorial Below


1. Setting Up Pabbly Connect for Video Transcription

To start automating your video transcription, you first need to access Pabbly Connect. This integration tool allows you to connect different applications seamlessly. Begin by signing up for a free account on the Pabbly Connect website. After signing in, navigate to your dashboard.

Once on the dashboard, click on the ‘Create Workflow’ button. Here, you can name your workflow according to your preference. After naming, click the ‘Create’ button to proceed to the workflow page where you will set up triggers and actions for your automation.


2. Configuring Google Sheets as a Trigger in Pabbly Connect

In this step, you will set Google Sheets as the trigger for your workflow in Pabbly Connect. Select Google Sheets from the app options and choose the trigger event as ‘New Row’. This means that every time a new row is added to your Google Sheets, the workflow will be activated.

  • Choose Google Sheets as the app.
  • Select the trigger event ‘New Row’.
  • Copy the provided webhook URL.

After setting up the trigger, you will need to perform a test submission to ensure that the connection is working correctly. Enter a new row in your Google Sheets with the video file link and title. This data will be captured by Pabbly Connect to proceed with the next actions in your workflow.


3. Connecting to Happy Scribe for Transcription

Next, you will connect to Happy Scribe using Pabbly Connect. In the action step, search for Happy Scribe and select the action event as ‘Create Transcription’. This action will initiate the transcription process for the video file you entered in Google Sheets.

To connect to Happy Scribe, you will need to provide your API key and organization ID. These can be found in your Happy Scribe account settings under the API section. Format the API key as follows: ‘Bearer YOUR_API_KEY’. After entering the required information, click on ‘Save’ to establish the connection.

  • Select ‘Create Transcription’ as the action event.
  • Map the video title from Google Sheets to the transcription name field.
  • Enter the language code (e.g., ‘en’ for English).

Once configured, click on ‘Save and Send Test Request’. This will start the transcription process for the video file, and you can verify the response to ensure everything is working correctly.


4. Delaying and Retrieving the Transcription File

After initiating the transcription, you need to add a delay before retrieving the transcription file. This is because Happy Scribe requires some time to process the transcription. Use the delay feature in Pabbly Connect and set it to wait for 5 minutes.

Once the delay is set, you will connect to Happy Scribe again to retrieve the transcription file. Choose the action event as ‘Retrieve Export’. Use the existing connection for Happy Scribe and map the export ID from the previous step. Click ‘Save’ to proceed.

Select ‘Retrieve Export’ as the action event. Map the export ID from the previous step. Click ‘Save and Send Test Request’ to get the downloadable link.

After retrieving the link, you can check the status to ensure that the transcription file is ready for download. This link will be used to update your Google Sheets.


The final step is to update your Google Sheets with the transcription link using Pabbly Connect. Again, select Google Sheets as the app and choose the action event ‘Update Cell Value’. This will allow you to insert the transcription link into the appropriate cell in your spreadsheet.

Connect to your Google account and select the spreadsheet and sheet where you want to update the link. Specify the cell range where the link should be placed, such as C2, and map the transcription link from the previous step. Click on ‘Save and Send Test Request’ to complete the process.

Select the spreadsheet and sheet name. Map the cell range for the transcription link. Click ‘Save and Send Test Request’ to update the cell.

After this step, your Google Sheets will automatically be updated with the transcription link every time a new video file is added. This automation saves significant time and effort, allowing you to focus on other tasks.


Conclusion

This tutorial demonstrated how to automate video transcription using Pabbly Connect, Google Sheets, and Happy Scribe. By following these steps, you can efficiently convert video files into text documents automatically. This process enhances productivity and reduces manual effort significantly.

Ensure you check out Pabbly Connect to create business automation workflows and reduce manual tasks. Pabbly Connect currently offer integration with 2,000+ applications.

Integrate Monday.com and Google Docs Using Pabbly Connect

Learn how to integrate Monday.com and Google Docs using Pabbly Connect for seamless document creation from new items. Follow our step-by-step tutorial! Implement the precise methodologies leading organizations use to automate repetitive tasks, illustrated with practical examples designed for immediate application.

Watch Step By Step Video Tutorial Below


1. Setting Up Pabbly Connect for Integration

To integrate Monday.com and Google Docs, we will use Pabbly Connect as our central platform. First, log into your Pabbly Connect account. Once logged in, navigate to the dashboard where you can create a new workflow.

Click on the blue button labeled ‘Create Workflow’. You will be prompted to name your workflow. For this tutorial, name it ‘Create Document in Google Docs from Monday.com’. After naming it, click on ‘Create’ to proceed with setting up your automation.


2. Triggering an Event in Monday.com

In this section, we will set Monday.com as the trigger application in Pabbly Connect. Choose Monday.com from the list of applications and select the event ‘New Item in Board’. This will ensure that every time a new item is created, it triggers the workflow.

  • Select the board you want to monitor for new items.
  • Copy the webhook URL provided by Pabbly Connect.
  • Log into your Monday.com account and navigate to the Integrations section.
  • Add a new integration and select ‘Webhooks’.

Paste the copied webhook URL into the integration setup in Monday.com. Once the integration is connected, any new item created in the specified board will send data to Pabbly Connect.


3. Fetching Item Details from Monday.com

After setting up the trigger, we will now fetch the details of the newly created item using Pabbly Connect. Add another action step and select Monday.com again, this time choosing the event ‘Get Item’. This allows us to retrieve detailed information about the newly created item.

For this step, you will need to map the Item ID from the previous step. Ensure you have the correct board and group IDs set as static values. The Item ID should be dynamically mapped from the data received from the trigger event.

Once the details are fetched, you will have access to important information such as item name, delivery date, delivery city, price, and payment status. This data will be used to create a document in Google Docs.


4. Creating a Document in Google Docs

The final step in this integration process involves creating a document in Google Docs using the details fetched from Monday.com via Pabbly Connect. Select Google Docs as your action application and choose the event ‘Create Document from Text’.

  • Connect your Google account to Pabbly Connect.
  • Name the document based on the item name from Monday.com.
  • Map the relevant details such as price, payment status, and delivery date into the document content.

After mapping all necessary fields, click ‘Save and Send Test Request’. This will create a new document in Google Docs with the specified details from the Monday.com item, ensuring a seamless integration using Pabbly Connect.


5. Verifying Document Creation

Once the document is created, you can verify its creation in your Google Docs account. Check for the document named after the item you created in Monday.com. The document should contain all the mapped details such as item name, price, payment status, and delivery date.

If everything is set up correctly, you will see the complete billing details in the newly created document. This process illustrates how Pabbly Connect can facilitate the integration between Monday.com and Google Docs effectively.

Make sure to customize the document content as per your requirements in the setup. This automation will save time and streamline your workflow, allowing for efficient document management.


Conclusion

In this tutorial, we explored how to use Pabbly Connect to integrate Monday.com and Google Docs, enabling automatic document creation from new items. This integration simplifies the process of managing billing details and enhances productivity.

Ensure you check out Pabbly Connect to create business automation workflows and reduce manual tasks. Pabbly Connect currently offer integration with 2,000+ applications.

Integrate Google Sheets with Wix Using Pabbly Connect

Learn how to integrate Google Sheets with Wix using Pabbly Connect. This step-by-step tutorial guides you through the entire process of automation. Eliminate manual repetitive tasks from your workflow. Discover proven automation methods with intuitive steps designed for efficiency-minded professionals.

Watch Step By Step Video Tutorial Below


1. Accessing Pabbly Connect for Integration

To begin integrating Google Sheets with Wix, access Pabbly Connect by visiting the Pabbly website. If you are an existing user, click on the sign-in button. For new users, signing up takes less than two minutes.

Once logged in, navigate to the dashboard and click on the ‘Create Workflow’ tab. A dialog box will prompt you to name your workflow. This workflow will automate the process of creating contacts in Wix whenever a new row is added to your Google Sheets.


2. Setting Up Google Sheets with Pabbly Connect

In this section, we will set up Google Sheets as the trigger application in Pabbly Connect. Select Google Sheets as your trigger application and choose the event as ‘New or Updated Spreadsheet Row’. This event will initiate the workflow each time a new row is added.

  • Copy the generated webhook URL from Pabbly Connect.
  • Open your Google Sheets and navigate to Extensions > Add-ons > Get Add-ons.
  • Search for and install the Pabbly Connect Webhooks add-on.

After installing, refresh your Google Sheet to ensure the add-on is active. Go back to the Extensions menu and select Pabbly Connect Webhooks to configure the trigger settings. Paste the copied webhook URL and set the trigger column to the last column where data will be added.


3. Configuring Wix Integration in Pabbly Connect

Next, we will set up Wix as the action application in Pabbly Connect. Choose Wix and select the action event as ‘Create Contact’. You will need to connect your Wix account to Pabbly Connect by providing your app ID and secret key.

To obtain these credentials, log in to the Wix Developer Center, create a new app, and navigate to the Auth section to find your app ID and secret key. Copy these values back to Pabbly Connect to establish the connection.

  • Make sure to set the redirect URL as specified in the Pabbly Connect instructions.
  • Grant the necessary permissions for managing contacts.

Once the connection is successful, you will need to map the data fields from your Google Sheets to the corresponding fields in Wix. This ensures that the right information is sent when a new row is added.


4. Testing the Google Sheets to Wix Integration

After configuring both Google Sheets and Wix in Pabbly Connect, it’s time to test the integration. You can do this by adding a new row in your Google Sheets with the required contact information. Once you press enter, Pabbly Connect should automatically create a new contact in your Wix account.

To verify the success of the integration, check the contacts section in your Wix dashboard. If the new contact appears, the integration is working correctly. You can also go back to Pabbly Connect to view the response received from Wix.


5. Conclusion: Automate Your Workflow with Pabbly Connect

In this tutorial, we successfully integrated Google Sheets with Wix using Pabbly Connect. This automation allows you to create contacts in Wix effortlessly whenever new data is entered into your Google Sheets. By following the steps outlined, you can streamline your workflow and enhance productivity.

Ensure you check out Pabbly Connect to create business automation workflows and reduce manual tasks. Pabbly Connect currently offer integration with 2,000+ applications.

Utilizing Pabbly Connect for such integrations not only saves time but also reduces manual errors, ensuring your data is always up to date. Start automating your processes today!


Integrating Asana and Outscraper Using Pabbly Connect: A Step-by-Step Guide

Learn how to integrate Asana and Outscraper using Pabbly Connect in this detailed tutorial. Automate your workflow effectively! This comprehensive guide reveals exactly how to connect your applications and automate repetitive tasks — accessible for professionals of all technical backgrounds.

Watch Step By Step Video Tutorial Below


1. Accessing Pabbly Connect for Integration

To start integrating Outscraper and Asana, you need to access Pabbly Connect. Begin by typing the URL into your browser and navigating to the Pabbly website. If you are an existing user, click on the ‘Sign In’ button. For new users, the option to sign up is available.

Once you are logged in, you will reach the applications page. Click on ‘Access Now’ for Pabbly Connect. This will take you to the digital dashboard where you can create your workflow.


2. Creating a Workflow in Pabbly Connect

After accessing the dashboard, the next step is to create a new workflow in Pabbly Connect. Click on the ‘Create Workflow’ button. A dialog box will appear asking you to name your workflow. For this integration, name it ‘Create Asana Task on Completion of Outscraper Task’ and click on ‘Create’.

  • Name your workflow appropriately.
  • Choose the trigger application as Outscraper.
  • Select the trigger event as ‘Task Completed’.

Once you have set the trigger, Pabbly Connect will provide you with a webhook URL. This URL is essential as it connects Outscraper with Pabbly Connect. Copy this URL to use it in the next steps.


3. Setting Up Outscraper with Pabbly Connect

Now that you have the webhook URL, log into your Outscraper account. Navigate to the ‘Integrations’ section and delete any previous webhook if it exists. Paste the copied webhook URL and save the changes. This step ensures that Outscraper can communicate with Pabbly Connect.

After saving, create a new scraping task in Outscraper. Enter the domain or URL for which you want to scrape emails and contacts. Click on ‘Get Data’ to initiate the scraping process. Once the task is completed, the data will be sent to Pabbly Connect, confirming that the integration is working properly.


4. Creating an Asana Task Using Pabbly Connect

Once the data is received in Pabbly Connect, the next step is to create a task in Asana. Select Asana as the action application. Choose the event as ‘Create Task’ and connect your Asana account to Pabbly Connect. After successful authorization, you will need to fill in details like workspace, project ID, task name, and notes.

  • Select the appropriate workspace from your Asana account.
  • Enter the project ID and task name for the Asana task.
  • Use mapping to pull in relevant data from the previous steps.

This mapping process ensures that every time a task is created, it pulls current data from the scraping task in Outscraper, allowing for dynamic task creation based on the latest information.


5. Testing and Verifying the Integration

After setting up the Asana task, it’s important to test the integration. Go back to Outscraper and add another domain to scrape. Initiate the scraping process and confirm that the data is sent to Pabbly Connect. Check your Asana account to verify that a new task has been created successfully.

This process will demonstrate that the integration is working as intended. You can see the newly created task in Asana with all the relevant details mapped correctly from the Outscraper data. This confirms that Pabbly Connect has successfully facilitated the integration between Outscraper and Asana.


Conclusion

In this tutorial, we explored how to integrate Outscraper and Asana using Pabbly Connect. By following the detailed steps, you can automate your workflow effectively, ensuring that tasks are created in Asana every time an Outscraper task is completed. This integration enhances productivity and streamlines your processes.

Ensure you check out Pabbly Connect to create business automation workflows and reduce manual tasks. Pabbly Connect currently offer integration with 2,000+ applications.

Integrating Automation and Connection: A Step-by-Step Guide

Learn how to integrate Automation, Connection, and various applications like Jira and Google Sheets using P Connect Now for seamless workflows. Build sophisticated automated workflows in less time than you think. This guide translates complex integrations into straightforward steps for immediate implementation. with Pabbly Connect.

Watch Step By Step Video Tutorial Below


1. Setting Up Automation with Jira and Google Sheets

Automation is key in streamlining workflows. In this tutorial, we will integrate Jira with Google Sheets using P Connect Now. This integration allows you to automatically add Jira issues to Google Sheets whenever a new issue is created.

To start, log into your P Connect Now dashboard. If you do not have an account, you can create one quickly. Once logged in, click on the ‘Create Workflow’ button. Name your workflow, such as ‘Sync Jira Issues with Google Sheets’ and click ‘Create’ to proceed.


2. Configuring Trigger and Action for Integration

In this section, we will configure the trigger and action for our integration. The trigger will be set to detect when a new issue is created in Jira. The action will be to add this issue to Google Sheets using P Connect Now.

To set this up, select ‘Configure Webhooks’ as your trigger event. You will receive a webhook URL that you will use to connect Jira to P Connect Now. Copy this URL and navigate to your Jira software.

  • Select your Jira project.
  • Go to the Settings section and find Webhooks.
  • Create a new webhook and paste the copied URL.

Ensure the webhook is enabled and specify the event type as ‘Issue Created’. This setup will ensure that any new issues in Jira automatically trigger the integration with Google Sheets via P Connect Now.


3. Testing the Integration with Jira

After configuring the trigger, it’s time to test the integration. In Jira, create a new issue in the project you are working on. This will trigger the webhook you set up earlier.

Once the issue is created, return to P Connect Now. The dashboard will show that it is waiting for a webhook response. If everything is correctly set up, you will see the details of the created issue appear in the dashboard.

  • Check the response for the issue details.
  • Ensure the data includes the project name, issue type, and description.
  • Confirm the timezone is set to Asia Kolkata.

This step verifies that the connection between Jira and P Connect Now is functioning as intended.


4. Adding Jira Issues to Google Sheets

With the integration tested and working, we can now set the action to add the Jira issue details to Google Sheets. In P Connect Now, select Google Sheets as your action application.

Choose the action event ‘Add a New Row’. Connect your Google Sheets account to P Connect Now by providing the necessary permissions. Once connected, select the specific Google Sheet where you want to add the Jira issue details.

Map the fields from Jira to the corresponding columns in Google Sheets. Ensure all relevant details like project name, issue type, and description are included. Click on the button to send the data to Google Sheets.

After completing these steps, the Jira issue details will appear in your selected Google Sheet, confirming the successful integration.


5. Final Steps for Automation

Now that the integration is complete, any new issue created in Jira will automatically sync to Google Sheets. This automation saves time and reduces manual entry errors.

You can further customize your automation by adding more actions or using different applications within P Connect Now. For instance, you can format dates or send notifications through Gmail when new issues are created.

To ensure everything runs smoothly, monitor the integration regularly and adjust settings as necessary. This way, you can keep your workflow optimized and efficient.

Conclusion

This guide summarizes the key points and helps you understand the essential features and benefits of using this tool.

Thanks for following along with this tutorial! Remember to subscribe to the channel for more helpful content like this.

If you found this guide useful, please consider giving it a thumbs up and sharing it with others who might benefit from it.


In conclusion, integrating Automation and Connection with applications like Jira and Google Sheets using P Connect Now streamlines your workflow. Follow these steps to ensure seamless operations and enhance productivity.

Top 5 CloudConvert Automations with Pabbly Connect: A Complete Guide

Learn how to automate CloudConvert with Pabbly Connect in this step-by-step guide. Discover the top 5 automations and streamline your file conversions today! Revolutionize your productivity approach with just a few strategic clicks. Uncover professional methods for connecting applications and creating workflows that reclaim hours of your week.

Watch Step By Step Video Tutorial Below


1. Accessing Pabbly Connect for CloudConvert Automation

To start automating your CloudConvert tasks, first, you need to access Pabbly Connect. This platform enables seamless integration between CloudConvert and other applications like Google Drive.

Visit the Pabbly website and sign up for a free account if you haven’t done so already. Once logged in, navigate to the Pabbly Connect dashboard where you can create workflows that connect CloudConvert with various apps.


2. Setting Up CloudConvert to Google Drive Integration

In this section, we will set up automation to upload files converted in CloudConvert directly to Google Drive using Pabbly Connect. This integration saves time and ensures files are backed up immediately.

Follow these steps to create the integration:

  • Log into your Pabbly Connect account.
  • Click on ‘Create Workflow’ and name it accordingly.
  • Select CloudConvert as your trigger app and choose ‘Job is Finished’ as the trigger event.
  • Connect your CloudConvert account by authorizing it.
  • Map the necessary fields for the file URL and folder ID in Google Drive.

After you have completed these steps, your CloudConvert files will automatically upload to Google Drive after conversion.


3. Automating File Conversion from Google Drive to CloudConvert

This section focuses on how to convert files from Google Drive using Pabbly Connect. This process allows you to convert various file formats directly from your Google Drive.

To set this up, follow these steps:

  • Create a new workflow in Pabbly Connect.
  • Set Google Drive as the trigger app and select ‘New File’ as the trigger event.
  • Authorize your Google Drive account.
  • Choose CloudConvert as the action app and select ‘Convert a File’ as the action event.
  • Map the file URL and specify the desired output format.

This setup will ensure that every time a new file is added to Google Drive, it will be converted using CloudConvert automatically.


4. Merging PDF Files with CloudConvert and Updating Google Sheets

In this section, we will automate the process of merging multiple PDF files stored in Google Sheets using Pabbly Connect. This is particularly useful for organizing documents efficiently.

Follow these steps to set up this automation:

Create a new workflow within Pabbly Connect. Select Google Sheets as the trigger app and set ‘New Row’ as the trigger event. Authorize your Google Sheets account. Choose CloudConvert as the action app and select ‘Merge Files’ as the action event. Map the URLs of the PDFs you want to merge.

After setting this up, every time new URLs are added to Google Sheets, the corresponding PDFs will be merged and the link to the merged file will be updated in the sheet automatically.


5. Capturing Websites to PDF and Uploading to Google Drive

In this final section, we will automate the process of capturing websites as PDFs and uploading them to Google Drive using Pabbly Connect. This is especially useful for archiving web content.

To complete this setup, follow these steps:

Create a new workflow in Pabbly Connect. Set Google Sheets as the trigger app and choose ‘New Row’ as the trigger event. Authorize your Google Sheets account. Select CloudConvert as the action app and choose ‘Capture Website to PDF’ as the action event. Map the website URL and specify the desired output format.

This automation will allow you to capture any new website URLs added to Google Sheets, convert them to PDF, and automatically upload the PDFs to Google Drive.


Conclusion

In this guide, we explored how to utilize Pabbly Connect for automating CloudConvert tasks, including file conversions, uploads, and merges. These automations can significantly enhance productivity and streamline workflows.

Ensure you check out Pabbly Connect to create business automation workflows and reduce manual tasks. Pabbly Connect currently offer integration with 2,000+ applications.

Automate Your Telegram Notifications with Pabbly Connect and Instamojo

Learn how to automate Telegram notifications for Instamojo payments using Pabbly Connect. Follow this step-by-step guide to streamline your payment notifications. This comprehensive guide reveals exactly how to connect your applications and automate repetitive tasks — accessible for professionals of all technical backgrounds.

Watch Step By Step Video Tutorial Below


1. Accessing Pabbly Connect for Integration

To begin automating your Telegram notifications with Pabbly Connect, first, access the Pabbly Connect dashboard. If you’re new, you can sign up for a free account in just a couple of minutes. Once logged in, you’ll find the dashboard where you can create your integration workflow.

Click on the ‘Create Workflow’ button to start the setup. You’ll be prompted to name your workflow; for this tutorial, let’s call it ‘Instamojo to Telegram Automation.’ This name will help you identify the workflow later on.


2. Creating a Webhook in Instamojo

Next, you’ll need to set up a webhook in your Instamojo account to capture payment notifications. In your Instamojo dashboard, navigate to the product section, and select the product for which you want to receive notifications.

  • Click on the ‘Advanced’ option under your product settings.
  • Paste the webhook URL provided by Pabbly Connect into the designated field.
  • Save the changes to complete the webhook setup.

After saving, you will see a confirmation message indicating that your webhook has been successfully created. This step is crucial as it allows Pabbly Connect to receive payment notifications from Instamojo.


3. Testing the Webhook Connection

Now that the webhook is set up, it’s time to test the connection. To do this, you need to make a test payment through your Instamojo product page. Click on the ‘Buy Now’ button and fill in the required details to complete the payment.

Once the payment is processed, Pabbly Connect will capture the payment details as a response. You can view this response in your Pabbly Connect workflow under the webhook trigger. This response will include essential details like the buyer’s name, email, phone number, and the amount received.


4. Sending Notifications to Telegram

To send notifications to your Telegram group, you must set up the Telegram bot. Go to your Telegram app and search for ‘BotFather’ to create a new bot. Use the command /newbot to start the process, and follow the prompts to name your bot and receive the API token. using Pabbly Connect

  • Add the bot to your Telegram group and promote it to admin.
  • Copy the chat ID from the group URL and paste it into your Pabbly Connect workflow.
  • Map the payment details from the previous step into the message format you want to send.

After configuring these settings, click on ‘Save and Send Test Request’ to check if the message is successfully sent to your Telegram group. If everything is set up correctly, you will see the payment notification appear in your group.


5. Automating the Process with Pabbly Connect

With the webhook and Telegram bot set up, your automation is nearly complete. The final step is to ensure that this process runs automatically without manual intervention. Pabbly Connect allows you to set triggers that will automatically send notifications each time a payment is received. using Pabbly Connect

Once your workflow is configured, you can relax knowing that every new payment through Instamojo will trigger an instant notification to your Telegram group. This automation saves you time and keeps your team informed in real-time.


Conclusion

In this tutorial, we explored how to automate Telegram notifications for Instamojo payments using Pabbly Connect. By following these steps, you can streamline your payment notifications and improve communication with your team.

Ensure you check out Pabbly Connect to create business automation workflows and reduce manual tasks. Pabbly Connect currently offer integration with 2,000+ applications.