Automate Discord Notifications with Pabbly Connect and Calendly

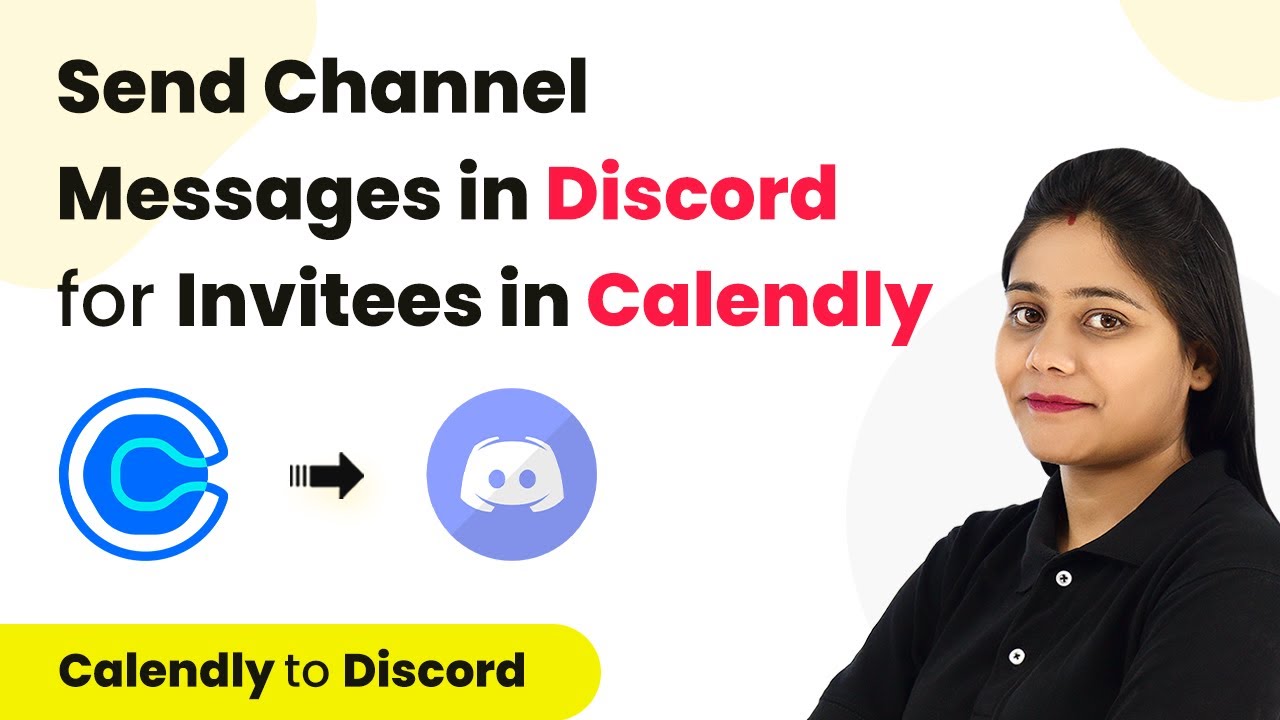
Learn how to automate Discord notifications for new Calendly invites using Pabbly Connect in this step-by-step tutorial. Transform complex automation concepts into accessible, actionable steps that eliminate unnecessary manual work while maximizing existing application capabilities.

Watch Step By Step Video Tutorial Below


1. Setting Up Pabbly Connect for Discord and Calendly Integration

To automate notifications in Discord for new invites created in Calendly, you need to use Pabbly Connect. First, log in to your Pabbly Connect account. If you do not have an account, you can create a free one in just a few minutes by clicking the sign-up button.

Once logged in, navigate to the dashboard and click on the blue button labeled ‘Create Workflow.’ Give your workflow a name, such as ‘Send Calendly Invite to Discord Channel’ and then click on ‘Create’. You will now see two boxes for trigger and action.


2. Choosing Applications for Automation in Pabbly Connect

In this step, you will choose the applications that Pabbly Connect will integrate. The trigger application will be Calendly, and the action application will be Discord. Select Calendly as the trigger by clicking on the trigger box and searching for it.

  • Select ‘New Invitee Created’ as the trigger event.
  • Click on ‘Connect’ and then choose ‘Add New Connection’.
  • Authorize your Calendly account when prompted.

After successful connection, you will see a confirmation message. Now, set up the action by selecting Discord. Choose the action event as ‘Send Channel Message’ and connect to your Discord account in a similar manner. This establishes the workflow between Calendly and Discord through Pabbly Connect.


3. Configuring the Discord Webhook in Pabbly Connect

To send messages to a Discord channel, you need to configure a webhook. In your Discord server, navigate to server settings, then to the ‘Integrations’ section, and create a new webhook.

  • Name your webhook appropriately, such as ‘Calendly Notifications’.
  • Copy the webhook URL provided after creating the webhook.
  • Paste this URL into the action configuration in Pabbly Connect.

Once you have pasted the webhook URL, you can compose the message that will be sent to Discord. You can include dynamic fields from the Calendly invite, such as the invitee’s name, email, and event details by mapping them from the previous steps.


4. Testing the Integration with Pabbly Connect

Now that you have set up your workflow, it’s time to test it. Go back to your Calendly account and create a new dummy invite. Fill in the necessary details and schedule the event. Once the invite is created, Pabbly Connect will capture this event.

After the invite creation, check if the message has been sent to your Discord channel. You should see a message that includes the invitee’s name, email, and event details. This confirms that your integration is working correctly and that Pabbly Connect is effectively automating the process.


5. Finalizing Your Pabbly Connect Automation

After successfully testing the automation, you can finalize your settings in Pabbly Connect. Make sure to save your workflow to ensure that it runs automatically in the background whenever a new invite is created in Calendly.

Now, every time a new invitee is created, the details will be automatically sent to your Discord channel. This saves time and keeps your team informed without any manual effort. Remember, you can access this automation anytime in your Pabbly Connect account for further modifications or to create additional workflows.


Conclusion

In this tutorial, we demonstrated how to automate Discord notifications for new Calendly invites using Pabbly Connect. This integration streamlines communication and enhances team collaboration by automatically notifying team members of new events.

Ensure you check out Pabbly Connect to create business automation workflows and reduce manual tasks. Pabbly Connect currently offer integration with 2,000+ applications.

Integrate Outscraper with Gmail Using Pabbly Connect: A Step-by-Step Guide

Learn how to automate email notifications with Pabbly Connect when Outscraper tasks are completed. Step-by-step guide to integrate Gmail and Outscraper. Explore systematic approaches to creating efficient automation solutions that convert technical concepts into practical, implementable instructions.

Watch Step By Step Video Tutorial Below


1. Setting Up Pabbly Connect for Email Notifications

To begin the integration process, first access Pabbly Connect. This platform will allow you to automate sending email notifications when a task is completed in Outscraper. Start by signing in to your Pabbly account and navigating to the Pabbly Connect dashboard.

Once you are on the dashboard, click on the big blue button labeled ‘Create Workflow’. This will lead you to a blank workflow setup page where you can name your workflow. For this tutorial, name it ‘Send Email When Outscraper Task is Completed’. After naming your workflow, click on the ‘Create’ button to proceed.


2. Choosing Outscraper as the Trigger Application

In this step, you will set Outscraper as the trigger application in Pabbly Connect. The trigger event will be set to ‘On Task Complete’, which means the workflow will activate whenever a task in Outscraper is completed. Select Outscraper from the list of applications and choose the trigger event accordingly.

After selecting the trigger event, you will be provided with a webhook URL. This URL is crucial for connecting Outscraper with Pabbly Connect. Copy this URL and head over to your Outscraper account. Navigate to the Integrations section and paste the webhook URL into the designated field. Then, save the changes to establish the connection.


3. Creating a Task in Outscraper

Now that the webhook is set up, you need to create a task in Outscraper to scrape the desired data. In Outscraper, enter the URL of the website from which you want to scrape emails or contacts. Make sure to choose the output format, such as JSON or Google Sheets, based on your requirements.

After entering the necessary details, click on ‘Get Data’ to initiate the scraping process. The task will take some time to complete, typically around 10 to 20 minutes. Once the task is finished, Pabbly Connect will receive the data response, which will be displayed on your workflow page.

  • Enter the URL of the website to scrape.
  • Select the output format (JSON or Google Sheets).
  • Click ‘Get Data’ to start the scraping process.

Once the data is received, you will see the status as ‘Success’ in Pabbly Connect. This indicates that the information has been successfully scraped and is ready for the next step.


4. Setting Up Gmail as the Action Application

In this section, you will configure Gmail as the action application in Pabbly Connect. The action event will be set to ‘Send Email’, which allows you to notify your team members about the completed task in Outscraper. Select Gmail from the list of applications and choose the action event.

To connect Gmail with Pabbly Connect, click on ‘Connect’ and then choose ‘Add New Connection’. Since Gmail is a Google application, you will need to authorize it by signing into your Google account and granting the necessary permissions. Once connected, fill in the required fields such as recipient email address, sender’s name, subject, and email content.

  • Enter the recipient’s email address.
  • Fill in the sender’s name and subject of the email.
  • Compose the email content, including any relevant links or data.

After filling out all the necessary fields, click on ‘Save and Send Test Request’. This will send a test email to the recipient you specified, confirming that the integration is working correctly. You will see a response indicating that the email was sent successfully.


5. Conclusion

In this tutorial, we demonstrated how to automate email notifications using Pabbly Connect when tasks are completed in Outscraper. By following the steps outlined, you can easily integrate Outscraper with Gmail to streamline your workflow and keep your team informed. This process not only saves time but also ensures that important updates are communicated promptly.

Ensure you check out Pabbly Connect to create business automation workflows and reduce manual tasks. Pabbly Connect currently offer integration with 2,000+ applications.

Utilizing Pabbly Connect for this integration can significantly enhance your productivity and efficiency. Now, you can focus on other important tasks while receiving instant notifications about your Outscraper activities.

How to Transcribe YouTube Videos to Text, PDF & Docs Automatically Using Pabbly Connect

Learn how to automatically transcribe YouTube videos to text, PDF, and Docs using Pabbly Connect with Google Drive and Happy Scribe integration. Explore systematic approaches to creating efficient automation solutions that convert technical concepts into practical, implementable instructions.

Watch Step By Step Video Tutorial Below


1. Accessing Pabbly Connect for YouTube Video Transcription

To begin the process of transcribing YouTube videos to text, PDF, and Docs automatically, access Pabbly Connect. Start by navigating to the Pabbly Connect website and signing in to your account. If you are a new user, you can sign up for a free trial to explore its features.

Once logged in, click on the ‘Create Workflow’ button to initiate the integration process. Here, you will set up your workflow to automate the transcription process every time a new video is uploaded to your YouTube channel.


2. Setting Up the Trigger Application in Pabbly Connect

In this step, you will set up YouTube as the trigger application in Pabbly Connect. Select YouTube and choose the trigger event as ‘New Video in Channel’. This event will monitor your YouTube channel for any new uploads.

  • Click on ‘Connect’ to link your YouTube account.
  • Authorize Pabbly Connect to access your YouTube account.
  • Select your YouTube channel ID to complete the setup.

After saving the trigger, Pabbly Connect will fetch the details of the latest video uploaded to your channel. This information is essential for the next steps in the transcription process.


3. Creating Transcriptions Using Happy Scribe

Now that the trigger is set, the next action is to create a transcription using Happy Scribe through Pabbly Connect. Select Happy Scribe as your action application and choose the action event ‘Create Transcription’. Connect your Happy Scribe account by providing the necessary API key and organization ID.

Map the fields for the transcription by using the video title as the transcription name and selecting the language as English (India). Ensure you also map the media URL from the previous step. This mapping allows Pabbly Connect to dynamically use the latest video data for transcription.


4. Exporting the Transcription as PDF

After creating the transcription, the next step is to export it. In Pabbly Connect, select Happy Scribe again as the action application and choose ‘Create Export’ as the action event. This will generate a downloadable PDF file of your transcription.

  • Map the transcription ID from the previous step to link the export with the correct transcription.
  • Select PDF as the export format and set options for timestamps and speaker identification.

Once the export is created, Pabbly Connect will retrieve the export status, ensuring that the file is ready for download.


5. Uploading the PDF to Google Drive

The final step in the workflow is to upload the generated PDF file to Google Drive using Pabbly Connect. Select Google Drive as your action application and choose ‘Upload File’ as the action event. Connect your Google Drive account and authorize Pabbly Connect to access your files.

Map the downloadable link of the PDF file and specify the folder ID where you want to store the transcription. After confirming the details, save the workflow to complete the setup. Now, every time you upload a new video, the transcription will automatically be created and stored in your Google Drive.


Conclusion

Using Pabbly Connect, you can efficiently automate the process of transcribing YouTube videos to text, PDF, and Docs. This integration saves time and effort, ensuring your content is readily available in multiple formats.

Ensure you check out Pabbly Connect to create business automation workflows and reduce manual tasks. Pabbly Connect currently offer integration with 2,000+ applications.

Integrate YouTube with Pabbly Connect for Seamless Automation

Learn how to automate your email marketing with Pabbly Connect by integrating YouTube, Moose, and more. Follow our step-by-step tutorial for effective automation. Discover how to seamlessly connect your essential tools through accessible instructions that make powerful automation available to professionals at every skill level.

Watch Step By Step Video Tutorial Below


1. Setting Up Pabbly Connect for YouTube Integration

To start integrating YouTube with other applications, you will need to access Pabbly Connect. This platform allows you to automate workflows seamlessly. After signing up, log into your Pabbly Connect dashboard to create a new workflow.

Click on the ‘Create Workflow’ button, name your workflow, and click ‘Create’. You will see options to set a trigger and an action. The trigger will initiate the workflow, while the action will be the response to that trigger.


2. Choosing the Trigger App in Pabbly Connect

In this step, you need to select the application that will act as the trigger in your Pabbly Connect workflow. Choose ‘Moosend’ as your trigger app. The event that will trigger the workflow is a new subscriber being added. using Pabbly Connect

  • Select Moosend as the trigger application.
  • Choose the trigger event: New Subscriber.
  • Copy the webhook URL provided by Pabbly Connect.

After copying the webhook URL, navigate to your Moosend dashboard. Here, you will set up the automation to connect with Pabbly Connect. This allows you to capture subscriber information automatically.


3. Configuring Moosend Automation with Pabbly Connect

In your Moosend account, click on the ‘Automation’ tab and then select ‘Custom Automation’. Here, you will set the trigger for when someone subscribes to a list. Select the option that states ‘When someone subscribes to any list’.

  • Choose ‘When someone subscribes’ as the trigger.
  • Set it to trigger for every new subscription.
  • Paste the webhook URL from Pabbly Connect into the specified field.

After saving the automation, you will need to activate it. This ensures that every time a new subscriber is added through Moosend, the workflow in Pabbly Connect will be triggered automatically.


4. Adding Tags to Subscribers Automatically via Pabbly Connect

Once the automation is set up in Moosend, you can now configure the action in Pabbly Connect. Select Moosend again as the action app and choose ‘Add Tag to Subscriber’ as the action event. This allows you to tag subscribers automatically based on their source.

To connect Moosend, you will need to enter the API key. You can find this in your Moosend settings under API keys. Once connected, you will map the mailing list ID and subscriber ID from the trigger step. This ensures that the correct subscriber is tagged every time a new subscription is made.

Enter your Moosend API key to connect. Map the mailing list ID and subscriber ID from the trigger response. Add tags such as ‘Manual’, ‘Lead’, ‘Website’ to categorize your subscribers.

After setting up the tags, click on ‘Save and Send Test Request’. This will execute the action and apply the tags to the new subscriber in Moosend, enhancing your email marketing efforts.


5. Testing and Activating Your Pabbly Connect Workflow

Now that your workflow is set up, it’s time to test it. Go back to your Moosend account and manually add a new subscriber. This will send a test response back to Pabbly Connect, allowing you to verify that everything is working correctly.

Once the test subscriber is added, check the response in Pabbly Connect. You should see the subscriber’s details along with the tags you set up. If everything looks good, activate your workflow to start automating the process.

After activation, every new subscriber added in Moosend will automatically receive the designated tags. This automation saves time and improves your productivity by streamlining your email marketing efforts.


Conclusion

In this tutorial, we explored how to use Pabbly Connect to automate the tagging of new subscribers in Moosend. By following the steps outlined, you can enhance your email marketing efficiency without any coding knowledge.

Ensure you check out Pabbly Connect to create business automation workflows and reduce manual tasks. Pabbly Connect currently offer integration with 2,000+ applications.

How to Send Jira Issues to Discord Channel Using Pabbly Connect

Learn how to automate sending Jira issues to a Discord channel using Pabbly Connect. Follow this step-by-step tutorial for seamless integration. Develop expertise in application integration and learn how to design streamlined automation workflows using proven, simplified approaches.

Watch Step By Step Video Tutorial Below


1. Overview of Pabbly Connect for Jira and Discord Integration

To send Jira issues to a Discord channel, we will utilize Pabbly Connect, an integration and automation platform. This process will ensure that whenever a new issue is created in Jira, it is automatically sent to your designated Discord channel, keeping your team updated in real-time.

First, you need to log in to your Pabbly Connect account. If you don’t have one, you can create a free account quickly. Once logged in, you will be on the Pabbly Connect dashboard, ready to create your workflow.


2. Creating a Workflow in Pabbly Connect

To start the integration, click on the blue ‘Create Workflow’ button on your Pabbly Connect dashboard. You will then need to name your workflow. For this tutorial, we will name it ‘ADD Jira Issues to Discord Automatically’. After naming, click on the ‘Create’ button to proceed. using Pabbly Connect

  • Click on ‘Create Workflow’
  • Provide a name for your workflow
  • Select ‘Jira’ as the Trigger Application
  • Select ‘Discord’ as the Action Application

After creating the workflow, you will see two boxes for Trigger and Action. The Trigger box is where you will set up the Jira application to capture new issues, while the Action box will configure the Discord channel to send notifications. Select ‘Jira’ for the trigger event.


3. Configuring the Jira Webhook in Pabbly Connect

In the Jira trigger setup, you will be prompted to configure a webhook. Copy the webhook URL provided by Pabbly Connect and head over to your Jira software. In Jira, navigate to Settings > System and find the Webhooks option.

Click on the ‘Create Webhook’ button and paste the copied URL. Provide a name for the webhook, such as ‘Jira Connection with Discord’. Set the status to enabled and select the events that will trigger this webhook, specifically the ‘Issue Created’ event. Once done, click on the ‘Create’ button to save your webhook settings.


4. Testing the Jira to Discord Connection

Now that your webhook is set up, go back to Pabbly Connect and test the connection. You will need to create a new issue in Jira to trigger the webhook. Click on the ‘Create New’ button in Jira, select your project, and fill in the issue details.

  • Select the project for the new issue
  • Fill in the subject and description
  • Click on ‘Create’ to submit the issue

Once the issue is created, Pabbly Connect should capture the data from Jira. You will see the response in your Pabbly Connect dashboard, confirming that the integration is working correctly.


5. Sending Notifications to Discord Channel

Next, you will configure the Discord action in Pabbly Connect. Select ‘Send Channel Message’ as the action event. You will need to connect to your Discord account and choose the channel where you want to send the notifications.

Compose the message you want to send to your team. You can include dynamic data from the Jira issue, such as the issue name and description. This mapping will ensure that every time a new issue is created, the details are automatically populated in the Discord message.

Finally, click on the ‘Save and Send Test Request’ button to test the integration. If everything is set up correctly, you will see the notification appear in your Discord channel, confirming that the automation is functioning as intended.


Conclusion

In this tutorial, we explored how to use Pabbly Connect to automate the process of sending Jira issues to a Discord channel. By following these steps, you can keep your team informed of new issues in real-time, enhancing your workflow efficiency.

Ensure you check out Pabbly Connect to create business automation workflows and reduce manual tasks. Pabbly Connect currently offer integration with 2,000+ applications.

Top 5 Typeform Automation: A Complete Guide with Pabbly Connect

Learn how to automate Typeform with Pabbly Connect in this step-by-step guide. Discover integrations with Google Sheets, Google Contacts, Google Slides, and more! Eliminate manual repetitive tasks from your workflow. Discover proven automation methods with intuitive steps designed for efficiency-minded professionals.

Watch Step By Step Video Tutorial Below


1. Automating Typeform Responses to Google Sheets with Pabbly Connect

In this section, we will discuss how to automate Typeform responses to Google Sheets using Pabbly Connect. This integration allows you to add or update rows in Google Sheets whenever a new form submission is received. Start by logging into your Pabbly Connect account.

To set this up, follow these steps:

  • Go to Pabbly Connect and create a new workflow.
  • Select Typeform as your trigger application and choose ‘New Entry’ as the event.
  • Connect your Typeform account by authorizing Pabbly Connect.

Once connected, map the fields from your Typeform submission to the corresponding columns in your Google Sheets. This way, every time a new entry is submitted, Pabbly Connect will automatically add or update the information in your Google Sheets.


2. Creating Google Contacts from Typeform Responses Using Pabbly Connect

This section focuses on how to create Google Contacts from Typeform responses through Pabbly Connect. This automation ensures that each form submission results in a new contact being added to your Google Contacts list.

To create this integration, follow these steps:

  • In Pabbly Connect, create a new workflow and select Typeform as the trigger application.
  • Choose ‘New Entry’ as the trigger event and connect your Typeform account.
  • For the action application, select Google Contacts and choose the event ‘Create Contact’.

After connecting your Google Contacts account, map the necessary fields from Typeform such as name, email, and phone number. By doing this, Pabbly Connect will create a new Google Contact every time someone fills out your Typeform.


3. Generating Google Slides Presentations from Typeform Responses with Pabbly Connect

Next, we will explore how to automatically create Google Slides presentations based on Typeform responses using Pabbly Connect. This is particularly useful for generating reports or presentations directly from collected data.

To set this up, follow these steps:

Create a new workflow in Pabbly Connect and select Typeform as the trigger application. Choose ‘New Entry’ as your trigger event and connect Typeform. For the action application, select Google Slides and choose ‘Create Presentation’ from the template.

Map the fields from Typeform responses to the corresponding fields in your Google Slides template. This way, every new submission will generate a presentation in Google Slides, automatically filled with the collected data through Pabbly Connect.


4. Sending Typeform Responses to Google Chat via Pabbly Connect

This section will illustrate how to send Typeform responses directly to Google Chat using Pabbly Connect. This integration is perfect for keeping your team updated in real-time with form submissions.

To set this integration up, follow these steps:

In Pabbly Connect, create a new workflow and select Typeform as the trigger application. Choose ‘New Entry’ as the trigger event and connect your Typeform account. For the action application, select Google Chat and choose ‘Create Message’.

After connecting Google Chat, map the fields from Typeform responses to the message content. This way, every time a form is submitted, Pabbly Connect will send a message to your specified Google Chat channel, ensuring your team stays informed.


5. Automating Typeform Responses to Slack with Pabbly Connect

In this final section, we will discuss how to automate sending Typeform responses to Slack channels using Pabbly Connect. This integration is ideal for teams that use Slack for communication.

To set up this automation, follow these steps:

Create a new workflow in Pabbly Connect and select Typeform as the trigger application. Choose ‘New Entry’ as the trigger event and connect to Typeform. For the action application, select Slack and choose ‘Send Channel Message’.

Connect your Slack account and map the fields from Typeform to the message content. This will allow Pabbly Connect to send a message to your chosen Slack channel every time a new Typeform submission is received.


Conclusion

In this tutorial, we explored how to automate Typeform responses using Pabbly Connect. By integrating with Google Sheets, Google Contacts, Google Slides, Google Chat, and Slack, you can streamline your workflows and enhance productivity. Automating these processes saves time and ensures that your team stays informed with real-time updates.

Ensure you check out Pabbly Connect to create business automation workflows and reduce manual tasks. Pabbly Connect currently offer integration with 2,000+ applications.

Automate WhatsApp Notifications with Pabbly Connect and Pabbly Email Marketing

Learn how to automate WhatsApp notifications using Pabbly Connect and Pabbly Connect in this step-by-step tutorial. Explore systematic approaches to creating efficient automation solutions that convert technical concepts into practical, implementable instructions.

Watch Step By Step Video Tutorial Below


1. Setting Up Pabbly Connect for WhatsApp Automation

To begin automating WhatsApp notifications, first access Pabbly Connect by visiting their website. Here, you can create a free account which will allow you to utilize 100 free tasks for testing your automation. Once signed up, log in to reach your dashboard.

After logging into Pabbly Connect, click on the ‘Create Workflow’ button. Name your workflow something descriptive, such as ‘WhatsApp Notifications Automation’. This will help you identify the workflow easily in the future.


2. Trigger Setup with Typeform

In this section, we will set up Typeform as the trigger application in Pabbly Connect. Select Typeform from the app dropdown and choose the trigger event as ‘New Entry’. This means that every time a new form submission occurs, it will trigger the automation.

  • Select Typeform as the application.
  • Choose ‘New Entry’ as the trigger event.
  • Connect your Typeform account by following the prompts.

After connecting your Typeform account, you will need to test the trigger by submitting a dummy entry. This will allow Pabbly Connect to capture the data from the form submission, which will be used in the subsequent steps.


3. Integrating WhatsApp Cloud API

Next, we will integrate the WhatsApp Cloud API using Pabbly Connect. Select WhatsApp Cloud API as the action application and choose the action event as ‘Send Template Message’. This integration allows you to send automated messages to users via WhatsApp.

To connect, you will need to provide your WhatsApp Cloud API credentials, including your token, phone number ID, and WhatsApp Business Account ID. These can be obtained from the WhatsApp developer portal. Make sure to use a permanent access token for continuous operations.

  • Select WhatsApp Cloud API as the action application.
  • Choose ‘Send Template Message’ as the action event.
  • Provide the necessary credentials to connect.

Once connected, you will need to create a message template that has been approved by WhatsApp. This template will be used to format the messages sent to users based on their form submissions.


4. Final Steps and Testing the Automation

With both Typeform and WhatsApp Cloud API set up, it’s time to map the data. In the WhatsApp message template, you can include dynamic fields such as the user’s name and other relevant information collected from the Typeform submission.

After mapping all the necessary fields, click on ‘Save and Send Test Request’ in Pabbly Connect. This will send a test message to the WhatsApp number provided in the form submission. Ensure that you check the recipient’s WhatsApp to confirm that the message has been delivered successfully.


5. Conclusion

In conclusion, using Pabbly Connect to automate WhatsApp notifications streamlines communication with your customers. By integrating Typeform and WhatsApp Cloud API, you can efficiently send important updates and notifications with ease. Automating these processes not only saves time but also enhances customer engagement.

Ensure you check out Pabbly Connect to create business automation workflows and reduce manual tasks. Pabbly Connect currently offer integration with 2,000+ applications.

Top 5 Airtable Automations Using Pabbly Connect: A Complete Guide

Learn how to automate Airtable tasks using Pabbly Connect. Follow our step-by-step guide to integrate Airtable with WooCommerce, ChatGPT, Outlook, and more! Master proven automation processes with practical implementation examples and strategic recommendations you can apply immediately in your workflow.

Watch Step By Step Video Tutorial Below


1. Integrating Airtable with WooCommerce Using Pabbly Connect

In this section, we will learn how to integrate Airtable with WooCommerce using Pabbly Connect. This automation will allow you to create products in WooCommerce whenever a new record is added in Airtable. First, log in to your Pabbly Connect account and create a new workflow.

Once you are in the workflow dashboard, set Airtable as your trigger application and select ‘New Record’ as the trigger event. After connecting your Airtable account using the API token obtained from the Developer Hub, specify the base and table where your product details are stored. Ensure you have a ‘Created Time’ field in your Airtable schema to capture the timestamp for new records.


2. Automating Product Creation in WooCommerce

After setting up Airtable as the trigger, the next step involves configuring WooCommerce as the action application in your Pabbly Connect workflow. Choose the action event ‘Create Product’ to automate the product creation process.

  • Connect to your WooCommerce account using the Consumer Key and Secret.
  • Map the product details such as name, price, and image URL from Airtable.
  • Test the connection by sending a test request to ensure everything is set up correctly.

Once you have mapped all necessary fields, click on ‘Save and Send Test Request’. If the setup is correct, a new product will be created in WooCommerce based on the details from Airtable.


3. Generating Content with ChatGPT from Airtable Records

This section covers how to generate content using ChatGPT whenever a new record is added in Airtable. Start by setting Airtable as the trigger application in Pabbly Connect and select ‘New Record’ as the trigger event.

Next, add ChatGPT as your action application. Connect your ChatGPT account using the API key and set the action event to generate content based on the title from Airtable. You will need to map the title field from Airtable to the prompt in ChatGPT.

  • Make sure to format the prompt correctly to get relevant content.
  • Test the connection to see if ChatGPT generates the content as expected.

After generating the content, you can proceed to the next step in your workflow to utilize this content further, such as creating a video or posting on social media.


4. Sending Automated Emails via Outlook from Airtable

In this section, we will explore how to send automated emails using Outlook whenever a new record is added to Airtable. Start by setting Airtable as the trigger application in Pabbly Connect and select the ‘New Record’ trigger event.

Next, choose Microsoft Outlook as your action application and connect it to Pabbly Connect. You will need to map the fields such as recipient email, subject, and body content from your Airtable record.

Ensure to format the email body correctly to include personalized greetings. Send a test email to verify the setup works as intended.

Once you have configured the email settings, every time a new record is added to Airtable, an email will be sent automatically to the specified recipient using Outlook.


5. Posting on Social Media with NewLink from Airtable

Finally, we will automate the process of posting on social media using NewLink whenever a new record is created in Airtable. Start by selecting Airtable as the trigger application in Pabbly Connect and set the trigger event to ‘New Record’.

Next, add NewLink as the action application and connect it to Pabbly Connect. You will need to map the caption and media URL fields from Airtable to the corresponding fields in NewLink.

Specify the collection in NewLink where the posts will be added. Test the connection to ensure posts are created successfully.

With this setup, every time a new record is added to Airtable, a corresponding post will be created in NewLink with the specified media and caption.


Conclusion

This guide provides a detailed overview of automating various tasks using Pabbly Connect with Airtable. By integrating applications like WooCommerce, ChatGPT, Outlook, and NewLink, you can streamline your workflows and enhance productivity. Start automating today with Pabbly Connect!

Ensure you check out Pabbly Connect to create business automation workflows and reduce manual tasks. Pabbly Connect currently offer integration with 2,000+ applications.

How to Create Google Docs from Google Sheets Using Pabbly Connect

Learn how to automate document creation in Google Docs from Google Sheets using Pabbly Connect. Step-by-step tutorial for seamless integration. Learn to create powerful connections between your critical applications without requiring specialized programming knowledge or extensive technical background.

Watch Step By Step Video Tutorial Below


1. Setting Up Pabbly Connect for Google Sheets and Google Docs

To create documents in Google Docs from text in Google Sheets, we will use Pabbly Connect. Begin by signing into your Pabbly Connect account. Once logged in, click on the ‘Create Workflow’ button to start a new automation process.

After clicking, name your workflow something relevant, like ‘Create Google Docs Document from Google Sheets Data’. This title helps identify the purpose of the workflow easily. You will now see the Trigger and Action modules that will facilitate the integration.


2. Configuring the Google Sheets Trigger in Pabbly Connect

The next step is to set up the Google Sheets trigger in Pabbly Connect. Select Google Sheets as your trigger application. The event to choose is ‘New or Updated Spreadsheet Row’. This means that every time a new row is added or updated in your Google Sheet, it will trigger the workflow.

  • Select Google Sheets as the trigger application.
  • Choose the event ‘New or Updated Spreadsheet Row’.
  • Connect your Google Sheets account to Pabbly Connect.

After setting up the trigger, you will receive a webhook URL from Pabbly Connect. This URL will be used to connect your Google Sheets to the workflow, ensuring that any new or updated rows are sent directly to Pabbly Connect.


3. Connecting Google Sheets to Pabbly Connect

Now, navigate to your Google Sheets and open the Extensions menu. From there, select Add-ons and search for the Pabbly Connect Webhooks add-on. Install this add-on if you haven’t already. Once installed, you will find it under the Extensions menu.

Click on Pabbly Connect Webhooks and then select ‘Initial Setup’. Here, paste the webhook URL you copied from Pabbly Connect and set the trigger column to the last updated column, which is typically the F column. After entering this, click on ‘Submit’ to finalize the setup.


4. Setting Up the Google Docs Action in Pabbly Connect

With the trigger set, the next step is to configure the action in Pabbly Connect. Choose Google Docs as the action application and select the action event ‘Create Document from Text’. This action will create a new document in Google Docs based on the data received from Google Sheets.

Connect your Google Docs account to Pabbly Connect and allow the necessary permissions. You will now need to specify the document’s name, which can be the student’s name for uniqueness. Also, select the folder in Google Drive where the document will be saved.

  • Choose the document name based on the student’s name.
  • Select the Google Drive folder for saving the document.
  • Map the content fields accordingly.

In the content field, format the text with headings (H1 for the subject, H2 for questions, H3 for answers) to maintain clarity in the document. This structured formatting will help in organizing the information properly when viewed in Google Docs.


5. Testing and Completing the Integration

Finally, it’s time to test your setup. Click on ‘Save and Send Test Request’ in Pabbly Connect. If everything is set up correctly, a new document will be created in Google Docs with the specified format and content from Google Sheets.

Check your Google Docs to ensure the document has been created successfully. The document should reflect the student’s name as the title and contain the structured content formatted with appropriate headings. If any errors occur, Pabbly Connect will provide feedback to help you troubleshoot.


Conclusion

Using Pabbly Connect, you can efficiently automate the process of creating Google Docs from data in Google Sheets. This integration streamlines workflows, allowing for quick document generation based on spreadsheet inputs. Enjoy the benefits of automation!

Ensure you check out Pabbly Connect to create business automation workflows and reduce manual tasks. Pabbly Connect currently offer integration with 2,000+ applications.

How to Create Document From Text From Airtable Record in Google Docs Using Pabbly Connect

Learn how to automate document creation in Google Docs from Airtable records using Pabbly Connect. Step-by-step guide included. Explore efficient methods for automating routine tasks with clear, concise instructions suited for both newcomers and experienced professionals.

Watch Step By Step Video Tutorial Below


1. Setting Up Pabbly Connect for Integration

To create a document from text in Airtable records using Google Docs, we will utilize Pabbly Connect. First, sign in to your Pabbly Connect account. Once logged in, locate the big blue button labeled ‘Create Workflow’ on the right side of the dashboard.

Click this button and name your workflow appropriately, such as ‘Create Document in Google Docs from Airtable Text.’ After naming, click on the ‘Create’ button to initiate a blank workflow. This is where we will set our trigger and action for the integration.


2. Configuring the Trigger Event in Airtable

Next, we need to set up the trigger event in Pabbly Connect. Select Airtable as the trigger application and choose the event ‘New Record’. This means that every time a new record is created in Airtable, it will trigger the workflow.

  • Select Airtable as the trigger application.
  • Choose the event ‘New Record’.
  • Click on ‘Connect’ to link Airtable with Pabbly Connect.

After clicking on ‘Connect,’ you will be prompted to add a new connection by entering an API token from Airtable. For this, go to the Airtable Developer Hub, create a new token, and set the necessary scopes for access. This step is crucial as it allows Pabbly Connect to fetch data from your Airtable base.


3. Setting Up Google Docs Action in Pabbly Connect

With the trigger configured, it’s time to set the action in Pabbly Connect. Choose Google Docs as the action application and select the event ‘Create Document from Text’. This action will create a new document in Google Docs whenever a new record is added in Airtable.

After selecting Google Docs, click on ‘Connect’ and sign in with your Google account. Allow Pabbly Connect to access your Google Docs. You will now need to specify the document’s name and the parent folder ID where the document will be saved.

  • Select the folder in Google Drive where you want the document saved.
  • Set the document name, preferably using the student’s name from Airtable.
  • Map the content from Airtable, including headings and notes.

Once all fields are filled, click on ‘Save and Send Test Request’ to create the document. This step will verify that your integration is working correctly, and a new Google Doc will be generated based on the Airtable record.


4. Testing the Integration for Success

After setting up the action, it’s essential to test the integration to ensure everything works as expected. In Pabbly Connect, click on ‘Save and Send Test Request’ again to fetch the latest record from Airtable. This will allow you to see if the data is being correctly pulled into Google Docs.

Once the test is successful, you should see a new document created in your specified Google Drive folder. Open the document to confirm that it contains the correct title and content from the Airtable record. If everything looks good, your integration is complete!


5. Conclusion: Automating Document Creation with Pabbly Connect

In conclusion, using Pabbly Connect to integrate Airtable with Google Docs allows for seamless document creation based on new records. This automation saves time and ensures that all necessary information is captured accurately in your Google Docs.

Ensure you check out Pabbly Connect to create business automation workflows and reduce manual tasks. Pabbly Connect currently offer integration with 2,000+ applications.

Check out Pabbly Connect – Automate your business workflows effortlessly! Sign Up Free – Start your journey with ease! 10,000+ Video Tutorials – Learn step by step! Join Pabbly Facebook Group – Connect with 21,000+ like minded people!

By following the steps outlined in this tutorial, you can easily set up similar integrations with other applications as well. Embrace the power of automation with Pabbly Connect and enhance your productivity today!