Integrate Google Forms with Zoho Bookings Using Pabbly Connect

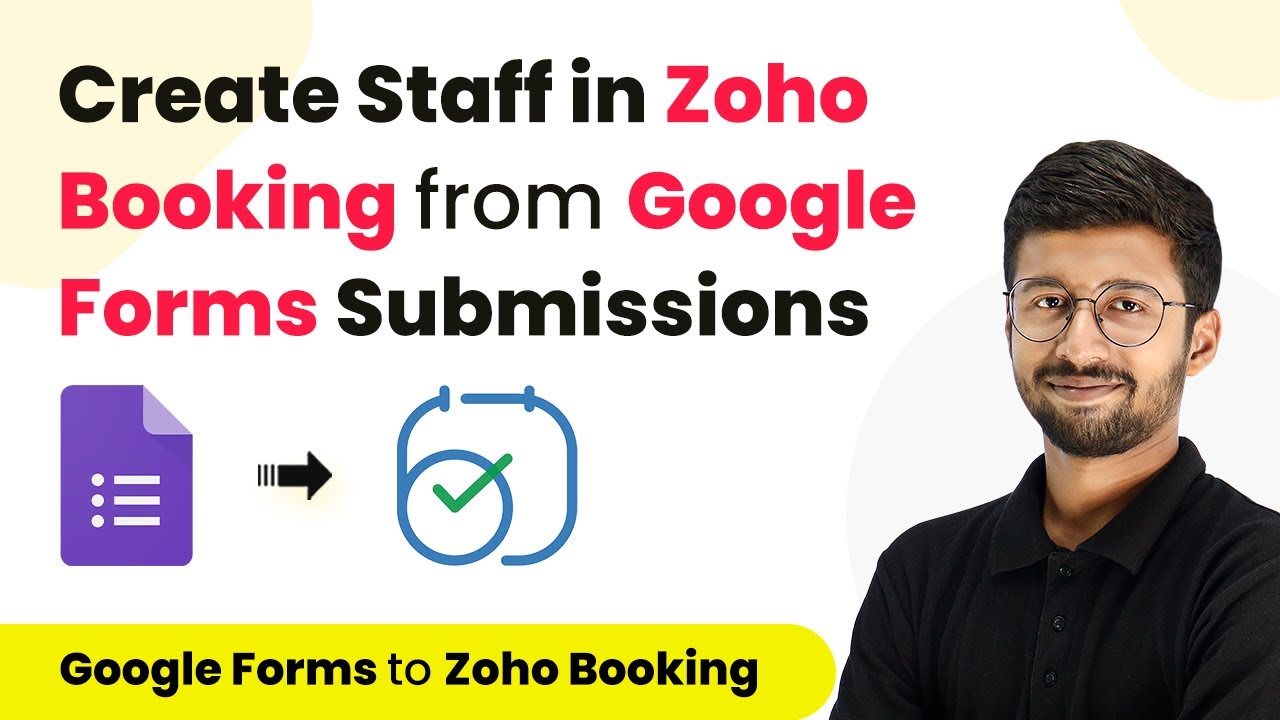
Learn how to automate adding staff to Zoho Bookings from Google Forms submissions using Pabbly Connect. Step-by-step guide included. Explore systematic approaches to creating efficient automation solutions that convert technical concepts into practical, implementable instructions.

Watch Step By Step Video Tutorial Below


1. Setting Up Pabbly Connect for Google Forms Integration

To begin the integration process, we will use Pabbly Connect to automate adding staff members into Zoho Bookings from Google Forms submissions. First, access your Pabbly Connect dashboard by signing up for a free account if you haven’t already.

Once logged in, click on ‘Create Workflow’ and name it, for example, ‘Google Forms to Zoho Bookings.’ After creating the workflow, you will see two windows: the trigger window and the action window. The trigger window will allow you to set up the Google Forms integration.


2. Connecting Google Forms to Pabbly Connect

In this step, we will connect Google Forms to Pabbly Connect to capture new form submissions. In the trigger window, select ‘Google Forms’ as the app and then choose the trigger event as ‘New Response Received.’ This will enable Pabbly Connect to listen for new submissions.

  • Choose ‘Google Forms’ from the app list.
  • Select the trigger event as ‘New Response Received’.
  • Copy the webhook URL provided by Pabbly Connect.
  • Link your Google Form responses to a Google Sheet.

After copying the webhook URL, navigate to your Google Form, go to the ‘Responses’ tab, and click on ‘Link to Sheets’ to create a new Google Sheet. This sheet will store all the form responses, which will be sent to Pabbly Connect whenever a new response is received.


3. Configuring Google Sheets for Webhooks

Next, we need to configure the Google Sheet to send data to Pabbly Connect via webhooks. In your Google Sheet, go to ‘Extensions’ > ‘Add-ons’ > ‘Get add-ons’ and search for ‘Pabbly Connect Webhooks.’ Install the add-on and refresh your Google Sheet.

Once refreshed, go to ‘Extensions’ > ‘Pabbly Connect Webhooks’ > ‘Initial Setup’. Here, you will need to select the sheet, paste the webhook URL, and specify the trigger column. The trigger column is usually the last column with data, for instance, Column G.

  • Select the sheet from which data will be sent.
  • Paste the copied webhook URL in the designated field.
  • Set the trigger column (e.g., Column G).

After completing this setup, click on ‘Submit’. You will see a confirmation that the setup is configured successfully. This means your Google Sheet is now ready to send data to Pabbly Connect whenever a new form submission occurs.


4. Adding Staff to Zoho Bookings via Pabbly Connect

Now that we have set up the trigger, it’s time to add the staff member to Zoho Bookings using the data received through Pabbly Connect. In the action window of your workflow, select ‘Zoho Bookings’ as the app and choose the action event as ‘Add Staff’.

Click on ‘Connect’ to establish a connection with your Zoho Bookings account. You will be prompted to select the domain of your Zoho account (e.g., zoho.com, zoho.in). Once connected, you will see fields where you can map the responses from the Google Form to the respective fields in Zoho Bookings.

Map the name field to the name response from Google Forms. Map the email address field to the email response. Map the gender, role, and other necessary fields accordingly.

After mapping all the necessary fields, click on ‘Save and Send Test Request’. If the mapping is successful, you will receive a positive response from Zoho Bookings, confirming that the staff member has been added successfully.


5. Testing the Integration Workflow

Finally, it’s crucial to test the integration workflow to ensure everything works as expected. Open the Google Form in preview mode and submit a test response with a name, email, mobile number, and designation.

After submitting the form, check your Google Sheet to confirm that the new response has been recorded. Then, return to Pabbly Connect and observe the trigger window; it should show that a new response has been captured. This indicates that the integration is functioning correctly.

Next, verify in your Zoho Bookings account that the new staff member has been added with the correct details. This end-to-end testing confirms that your automation setup using Pabbly Connect is working perfectly, allowing seamless staff addition from Google Forms submissions.


Conclusion

In this tutorial, we demonstrated how to integrate Google Forms with Zoho Bookings using Pabbly Connect. This automation simplifies the process of adding staff members based on form submissions, enhancing efficiency and accuracy in your booking system.

Ensure you check out Pabbly Connect to create business automation workflows and reduce manual tasks. Pabbly Connect currently offer integration with 2,000+ applications.

Integrating Webflow with Microsoft Teams Using Pabbly Connect

Learn how to integrate Webflow with Microsoft Teams using Pabbly Connect for automated notifications on form submissions. Transform complex automation concepts into accessible, actionable steps that eliminate unnecessary manual work while maximizing existing application capabilities.

Watch Step By Step Video Tutorial Below


1. Setting Up Pabbly Connect for Webflow and Microsoft Teams Integration

To start using Pabbly Connect, you need to access the dashboard. This is where you can create workflows that automate tasks between different applications. If you are new to Pabbly, sign up quickly to get started.

Once you are logged in, find the ‘Create Workflow’ button on the right side of your dashboard. Click on it to open a dialog box where you can name your workflow. For this tutorial, name it something like ‘Webflow to Microsoft Teams Notifications’ and click on ‘Create’ to proceed.


2. Choosing Trigger and Action Applications in Pabbly Connect

In this step, we will define the trigger and action applications in Pabbly Connect. The trigger application will be Webflow, and the action application will be Microsoft Teams. Click on Webflow as your trigger application.

  • Select ‘New Form Submission’ as the trigger event.
  • Copy the webhook URL provided by Pabbly Connect.
  • This URL will be used to connect Webflow with Pabbly Connect.

After copying the webhook URL, you will proceed to set it up in your Webflow account. This step ensures that every time a new form submission occurs, Pabbly Connect will receive the data.


3. Integrating Webflow with Pabbly Connect

Next, you will integrate Webflow with Pabbly Connect. Open your Webflow dashboard, navigate to your project, and click on the settings icon. Look for the ‘Integrations’ tab and scroll down to find the ‘Webhooks’ section.

  • Click on ‘Add Webhook’ and select the trigger type as ‘Form Submission’.
  • Paste the copied webhook URL from Pabbly Connect.
  • Click on ‘Add Webhook’ to finalize the integration.

Once the webhook is added, return to Pabbly Connect where it will be waiting for a webhook response. This indicates that the integration between Webflow and Pabbly Connect is set up and ready for testing.


4. Testing the Integration and Sending Notifications to Microsoft Teams

Now that Webflow is integrated with Pabbly Connect, it’s time to test the setup. Go back to your Webflow contact form and submit a test entry. For example, fill in the name, email, phone number, and gender, then click on submit.

After submitting the form, return to Pabbly Connect to check if it has received the data from Webflow. If successful, you will see the details such as name, email, and phone number captured in the webhook response.


5. Configuring Microsoft Teams to Receive Notifications from Pabbly Connect

With the data received in Pabbly Connect, the next step is to configure Microsoft Teams to send notifications. Select Microsoft Teams as the action application and choose the action event as ‘Send Message in a Channel’.

Connect your Microsoft Teams account to Pabbly Connect. Select the team and channel where the message will be sent. Map the fields from the webhook data to create a message.

Finally, test the action by sending a message. If everything is set up correctly, you will receive a notification in your selected Microsoft Teams channel every time a new form submission occurs in Webflow. This confirms that your integration is successful.


Conclusion

In this tutorial, we demonstrated how to use Pabbly Connect to automate notifications from Webflow to Microsoft Teams. By following these steps, you can streamline your workflow and ensure your team stays informed about new submissions effortlessly.

Ensure you check out Pabbly Connect to create business automation workflows and reduce manual tasks. Pabbly Connect currently offer integration with 2,000+ applications.

Integrate Google Chat with Webflow Using Pabbly Connect: A Step-by-Step Guide

Learn how to integrate Google Chat with Webflow for form submissions using Pabbly Connect. Follow our detailed tutorial for seamless automation. Explore systematic approaches to creating efficient automation solutions that convert technical concepts into practical, implementable instructions.

Watch Step By Step Video Tutorial Below


1. Setting Up Pabbly Connect for Google Chat Integration

To begin the integration process, access Pabbly Connect and create a new workflow. This platform allows you to automate tasks between Google Chat and Webflow effectively. Start by signing in or signing up if you are a new user, which takes just a couple of minutes.

Once logged in, click on the ‘Create Workflow’ button. A dialog box will prompt you to name your workflow. For this integration, name it ‘Send Notification on Google Chat for Webflow Form Submission’ and click ‘Create’ to proceed.


2. Configuring the Trigger: Webflow Form Submissions

In this step, you will set Webflow as the trigger application in Pabbly Connect. Select Webflow as your trigger application and choose the event ‘New Form Submission’. This event will initiate the workflow every time a new form is submitted.

  • Choose Webflow as the trigger application.
  • Select the event type as ‘New Form Submission’.
  • Copy the generated webhook URL provided by Pabbly Connect.

After copying the webhook URL, go to your Webflow dashboard. Navigate to the project settings, then to the Integrations tab. Here, add a new webhook for form submissions and paste the copied webhook URL, clicking ‘Add Webhook’ to save the changes.


3. Testing the Integration Between Webflow and Pabbly Connect

Once the webhook is set up, it’s time to test the integration. Go back to Pabbly Connect and perform a test submission on your Webflow form. Fill out the form with sample data and submit it.

After submitting, return to Pabbly Connect to check if the data has been captured. You should see the response with all the details like name, email, phone number, etc. This confirms that Webflow and Pabbly Connect are successfully integrated.


4. Configuring the Action: Sending Messages to Google Chat

Next, you will configure Google Chat as the action application in Pabbly Connect. Select Google Chat and choose the action event ‘Create Message’. Connect your Google Chat account to Pabbly Connect.

To send messages to Google Chat, you will need the chat webhook URL. Go to your Google Chat account, create a space, and manage webhooks to generate a new webhook URL. Copy this URL and paste it into Pabbly Connect.

  • Go to Google Chat and create a new space.
  • Manage webhooks and create a new webhook.
  • Copy the webhook URL and paste it into Pabbly Connect.

Now, you can customize the message that will be sent to your Google Chat. Use the mapping feature to include dynamic data from the Webflow submission, such as name, email, and phone number.


5. Finalizing the Integration and Sending Notifications

After completing the configuration, you can send a test message to Google Chat to verify the integration. Click on ‘Save and Send Test Request’ in Pabbly Connect and check your Google Chat for the notification.

To see the integration in action, submit another form on Webflow. You should receive a notification in Google Chat with the details of the new lead. This confirms that your integration is successful and that every new submission will notify your team in real-time.

Conclusion

This guide summarizes the key points and helps you understand the essential features and benefits of using this tool.

Ensure you check out Pabbly Connect to create business automation workflows and reduce manual tasks. Pabbly Connect currently offer integration with 2,000+ applications.


In this tutorial, we have successfully integrated Google Chat with Webflow using Pabbly Connect. This seamless automation allows for instant notifications, enhancing team communication and efficiency.

Automate Invoice Creation with Pabbly Connect: A Step-by-Step Guide

Learn how to automate invoice creation using Pabbly Connect, Microsoft Excel, and QuickBooks in this detailed tutorial. Explore efficient methods for automating routine tasks with clear, concise instructions suited for both newcomers and experienced professionals.

Watch Step By Step Video Tutorial Below


1. Accessing Pabbly Connect for Invoice Automation

To automate invoice creation, first, access Pabbly Connect by logging into your account. If you are a new user, create a free account in just two minutes by clicking the ‘Sign Up Free’ button. This account provides you with free tasks to test automation.

After logging in, you will reach the dashboard of Pabbly Connect. Click on the blue ‘Create Workflow’ button to initiate a new automation. Assign a name to your workflow, such as ‘Automate Invoice Creation with MS Excel,’ and click ‘Create’ to proceed.


2. Setting Up Excel Integration in Pabbly Connect

In this section, you will set up Microsoft Excel as the trigger application. Select ‘Microsoft Excel’ from the list of applications in the trigger box. Choose the trigger event as ‘New Row’ to ensure that whenever a new invoice detail is added, the automation triggers.

  • Select ‘Add New Connection’ and connect with Microsoft Excel.
  • Grant access to your Microsoft Excel account.
  • Once connected, select the workbook containing your invoice data.

After establishing the connection, Pabbly Connect will fetch the most recent data from your Excel sheet. This data will be used to create invoices in QuickBooks automatically.


3. Creating Customers in QuickBooks via Pabbly Connect

The next step involves creating customers in QuickBooks using the data from Excel. Select QuickBooks as the action application and choose the action event as ‘Create Customer.’ This ensures that each new customer from your Excel sheet gets added to QuickBooks.

Connect to your QuickBooks account by granting the necessary permissions. After successful authentication, map the required customer details from the Excel data to QuickBooks. This includes fields such as name, email address, and phone number.

  • Map customer name, email, and phone number from the Excel sheet.
  • Ensure all mandatory fields are filled to create the customer successfully.

Once the mapping is complete, click on the button to create the customer. Pabbly Connect will send the data to QuickBooks, and you will receive a positive response indicating that the customer has been created.


4. Automating Invoice Creation in QuickBooks

After successfully creating a customer, the next step is to automate invoice creation in QuickBooks. Again, select QuickBooks as the action application, but this time choose ‘Create Invoice’ as the action event. This allows you to generate invoices based on the customer data you just created.

Connect to QuickBooks using the existing connection you established earlier. Map the necessary fields for the invoice, including customer ID, transaction date, and item details. This ensures that invoices are created with accurate information pulled from your Excel sheet.

Map the customer ID from the previous step to link the invoice to the correct customer. Provide item descriptions, quantities, and pricing as required for the invoice.

Once all fields are mapped, click the button to create the invoice. Pabbly Connect will process this request, and upon success, the invoice will be generated in QuickBooks.


5. Finalizing Your Automation with Pabbly Connect

Now that you’ve set up the integration between Microsoft Excel and QuickBooks using Pabbly Connect, your workflow is almost complete. Each time you or your team adds new invoice details to the Excel sheet, Pabbly Connect will automatically create a corresponding invoice in QuickBooks.

Remember that the trigger checks for new data every 8 hours. This means that any changes made to the Excel sheet will be reflected in QuickBooks within that timeframe. You can relax knowing that Pabbly Connect will handle the automation seamlessly.

In conclusion, by utilizing Pabbly Connect, you can streamline your invoicing process, saving time and minimizing errors. Share the Excel sheet with your team, and let Pabbly Connect take care of the rest!


Conclusion

In this tutorial, we explored how to automate invoice creation using Pabbly Connect, Microsoft Excel, and QuickBooks. This integration saves time and reduces manual errors, allowing for a smoother invoicing process.

Ensure you check out Pabbly Connect to create business automation workflows and reduce manual tasks. Pabbly Connect currently offer integration with 2,000+ applications.

Automate Google Drive Folder Creation with Pabbly Connect

Learn how to automate daily Google Drive folder creation and file uploads using Pabbly Connect. Step-by-step tutorial for seamless integration. Follow this definitive guide to creating powerful automated workflows with straightforward, efficiency-focused solutions that save valuable time.

Watch Step By Step Video Tutorial Below


1. Setting Up Pabbly Connect for Automation

To automate Google Drive folder creation, start by accessing Pabbly Connect. This integration platform allows you to connect various applications effortlessly. Sign up for a free account to begin using its features.

Once logged in, navigate to the dashboard. Click on the ‘Create Workflow’ button. Here, you can name your workflow, which will help you identify it later. After naming, click on ‘Create’ to proceed to the workflow page.


2. Configuring the Trigger in Pabbly Connect

Now, set up the trigger for your automation in Pabbly Connect. The trigger will determine when the workflow starts. For this automation, select the ‘Schedule by Pabbly’ feature to run the workflow daily.

  • Choose the frequency as ‘Every Day’.
  • Set the time for execution, e.g., 12:30 AM.

After configuring the schedule, you can use the ‘Date Time Formatter’ feature to get the current date. This will be used to name the folder created in Google Drive.


3. Creating a Folder in Google Drive Using Pabbly Connect

With the trigger set, the next step is to create a folder in Google Drive. Use the Google Drive integration within Pabbly Connect. In the action step, select Google Drive and choose the ‘Create Folder’ action event.

Map the folder name to the current date obtained from the previous step. This ensures that a new folder is created daily with the date as its name. Click ‘Save’ to complete this action.


4. Setting Up Email Parser for Incoming Emails

Next, set up the Email Parser in Pabbly Connect to capture incoming emails with photos. This feature will monitor your inbox for specific emails. Select the ‘Email Parser’ option in your second workflow.

  • Copy the email parser address provided.
  • Add this address as a forwarding address in your email settings.

After verifying the forwarding address, any email sent to this address will trigger the workflow, allowing you to capture the data from incoming emails.


5. Uploading Files to Google Drive from Emails

Finally, set up the action to upload files to Google Drive using the captured email data. In Pabbly Connect, add a new action step for Google Drive and select the ‘Upload File’ action.

Map the file URL from the email parser to the upload file step. Additionally, specify the folder ID of the newly created folder to ensure the file is uploaded in the correct location. Click ‘Save’ to finalize the setup.

Now, every time an email with a photo is received, it will automatically be uploaded to the appropriate folder in Google Drive, streamlining your workflow.


Conclusion

Using Pabbly Connect, you can efficiently automate the creation of Google Drive folders and file uploads from incoming emails. This integration simplifies your daily tasks, ensuring that your photos are organized without manual intervention.

Ensure you check out Pabbly Connect to create business automation workflows and reduce manual tasks. Pabbly Connect currently offer integration with 2,000+ applications.

How to Integrate Twilio with Google Sheets Using Pabbly Connect

Learn how to automate SMS notifications using Pabbly Connect by integrating Twilio with Google Sheets step-by-step. Perfect for e-commerce and notifications! Eliminate manual repetitive tasks from your workflow. Discover proven automation methods with intuitive steps designed for efficiency-minded professionals.

Watch Step By Step Video Tutorial Below


Setting Up Pabbly Connect for Integration

To start the integration process, you will need to access Pabbly Connect. Visit the Pabbly website and sign in to your account. If you do not have an account, create one for free to access all features. Once logged in, navigate to the dashboard where you can create a new workflow.

Click on the ‘Create Workflow’ button and name it appropriately, such as ‘Google Sheets to Twilio Integration.’ This naming helps in identifying the workflow later. After naming, click on the create button to proceed with setting up the trigger and action for your workflow.


Configuring the Trigger in Pabbly Connect

In this step, you will configure the trigger that initiates the workflow. Select Google Sheets as the trigger application. Choose the trigger event as ‘New Spreadsheet Row’ which will activate the workflow whenever a new row is added to your specified Google Sheet. using Pabbly Connect

Next, you will need to connect your Google Sheets account. Once connected, select the specific spreadsheet you want to monitor for new entries. Ensure that the range includes all relevant data you want to send via SMS. After setting this up, click on ‘Save and Send Test Request’ to confirm the connection and fetch the data from Google Sheets.


Setting Up Twilio as the Action Application

After configuring the trigger, the next step is to set Twilio as the action application. Select Twilio from the application list and choose the action event as ‘Send SMS.’ This action will send an SMS whenever a new entry is detected in Google Sheets. using Pabbly Connect

To connect Twilio, you will need your Twilio account SID and authentication token. These can be found in your Twilio dashboard. Enter these credentials in Pabbly Connect to establish the connection. After successfully connecting, you will need to map the SMS body, sender number, and recipient number using the data fetched from Google Sheets.

  • Body of SMS: Customize the message you want to send.
  • Sender Number: Enter your Twilio number.
  • Recipient Number: Map this to the phone number field from Google Sheets.

Once all fields are mapped, click on ‘Save and Send Test Request’ to send a test SMS. Check your Twilio account or the recipient’s phone to confirm that the SMS was sent successfully.


Finalizing Your Workflow in Pabbly Connect

With both Google Sheets and Twilio configured, it’s time to finalize your workflow. Review all settings to ensure accuracy. Make sure that the trigger is set to monitor the correct Google Sheet and that the action is set to send SMS via Twilio correctly. using Pabbly Connect

Once everything looks good, save your workflow. You can now test it by adding a new row in your Google Sheet. This should trigger the workflow and send an SMS notification via Twilio automatically. Monitor your Twilio dashboard for sent messages to verify that the integration is functioning as expected.


Conclusion

This tutorial demonstrated how to effectively use Pabbly Connect to integrate Google Sheets with Twilio for automated SMS notifications. By following these steps, you can streamline your communication process and keep your customers informed effortlessly.

Ensure you check out Pabbly Connect to create business automation workflows and reduce manual tasks. Pabbly Connect currently offer integration with 2,000+ applications.

Automate WhatsApp Order Confirmation with Pabbly Connect

Learn how to automate WhatsApp order confirmations using Pabbly Connect with Jotform and WhatsApp Cloud API in this detailed step-by-step tutorial. Master proven automation processes with practical implementation examples and strategic recommendations you can apply immediately in your workflow.

Watch Step By Step Video Tutorial Below


1. Setting Up Pabbly Connect for Integration

To automate WhatsApp order confirmations, start by accessing Pabbly Connect. Create a new workflow by clicking on the ‘Create Workflow’ button. Name your workflow, for example, ‘Jotform to WhatsApp Confirmation’. This workflow will connect Jotform and WhatsApp Cloud API to send automated messages.

Once the workflow is created, you will see two sections: Trigger and Action. In the Trigger section, select Jotform as the application and choose ‘New Response’ as the trigger event. This setup allows Pabbly Connect to capture new order details whenever a form is submitted.


2. Configuring Jotform to Work with Pabbly Connect

Now, you need to integrate Jotform with Pabbly Connect. Copy the webhook URL generated in the trigger setup and go to your Jotform account. In the settings of your order form, find the ‘Integrations’ section, and add a new webhook.

  • Select ‘Webhook’ from the integrations list.
  • Paste the copied webhook URL in the designated field.
  • Save the integration settings.

This step ensures that every time a new order is placed through Jotform, the details will be sent to Pabbly Connect.


3. Integrating WhatsApp Cloud API with Pabbly Connect

Next, you will set up the action step to send a WhatsApp message. In the Action section of Pabbly Connect, select WhatsApp Cloud API and choose ‘Send Template Message’ as the action event. You will need to connect your WhatsApp account by entering the access token, phone number ID, and WhatsApp business account ID.

To find these details, log into your WhatsApp Cloud API account on the Meta developer portal. Ensure you have created a message template approved by Meta to use for sending messages. Select this template in Pabbly Connect and map the necessary fields such as recipient mobile number and body fields for dynamic content like customer name and order details.


4. Testing the Automation Workflow

After setting up the integration, it’s crucial to test the workflow. Submit a test order through your Jotform to generate a lead. Check Pabbly Connect to confirm that the new lead’s details have been captured correctly. You should see the order details including customer name, product, and contact information.

Next, trigger the WhatsApp message by clicking ‘Save and Send Test Request’. Verify that the message has been sent to the customer’s WhatsApp. The message should include the order confirmation and any other relevant details as per your template.


5. Conclusion

In this tutorial, we demonstrated how to automate WhatsApp order confirmations using Pabbly Connect with Jotform and WhatsApp Cloud API. This integration streamlines the order confirmation process, ensuring timely and personalized communication with customers. By setting up this automation, businesses can enhance customer engagement and improve operational efficiency.

Ensure you check out Pabbly Connect to create business automation workflows and reduce manual tasks. Pabbly Connect currently offer integration with 2,000+ applications.

Integrating Notion with Google Sheets Using Pabbly Connect: A Step-by-Step Guide

Learn how to automate the integration of Notion with Google Sheets using Pabbly Connect. Follow our detailed tutorial for seamless data management. Discover how to seamlessly connect your essential tools through accessible instructions that make powerful automation available to professionals at every skill level.

Watch Step By Step Video Tutorial Below


Accessing Pabbly Connect for Integration

To begin your journey of integrating Notion with Google Sheets, first access Pabbly Connect by visiting the official website. If you are a new user, you will need to sign up for a free account, which can be done in just a few minutes. Existing users can simply sign in to their accounts.

Once logged in, navigate to the Pabbly Connect dashboard. Here, you will find a button labeled ‘Create Workflow.’ Click on this button to initiate the process of creating your integration workflow.


Creating a Workflow in Pabbly Connect

After clicking on ‘Create Workflow,’ you will be prompted to name your workflow. For this integration, you can name it ‘Google Sheets to Notion.’ This name helps identify the workflow later. Upon naming, click on the ‘Create’ button to proceed. using Pabbly Connect

In the newly opened window, you will see two sections: the trigger and action windows. The trigger is the event that starts the workflow, while the action is what happens as a result. In this case, we will set Google Sheets as the trigger app and Notion as the action app.

  • Select Google Sheets as the trigger application.
  • Choose ‘New Spreadsheet Row’ as the trigger event.
  • Connect your Google account to allow Pabbly Connect to access your sheets.

After completing these steps, you will be ready to capture data from Google Sheets.


Setting Up Google Sheets Integration

With the trigger set, it’s time to prepare your Google Sheets for integration with Pabbly Connect. Open your Google Sheets and create a new sheet with columns such as ‘Name,’ ‘Email,’ ‘Age,’ and ‘Address.’ This structure will help you organize the data you want to transfer to Notion.

Next, return to Pabbly Connect and click on ‘Save and Send Test Request.’ This action will capture the most recent row of data added to your Google Sheet. Ensure you add some dummy data to see how it reflects in Notion.

  • Add a new row in Google Sheets with relevant details.
  • Click on ‘Save and Send Test Request’ in Pabbly Connect.
  • Check if the data is captured correctly in Pabbly Connect.

This step ensures that your Google Sheets data is ready for the next phase of integration with Notion.


Integrating Notion with Pabbly Connect

Now that you have set up Google Sheets, it’s time to integrate Notion. In the action window of Pabbly Connect, select Notion as the action app and choose ‘Create Database Item’ as the action event. Click on connect and allow Pabbly Connect to access your Notion account.

In Notion, create a database with columns that match the data you are transferring, such as ‘Name,’ ‘Email,’ ‘Age,’ and ‘Address.’ Once the database is set up, return to Pabbly Connect and map the fields from Google Sheets to the corresponding fields in Notion.

Map the ‘Name’ field from Google Sheets to Notion. Repeat the mapping for ‘Email,’ ‘Age,’ and ‘Address.’ Click on ‘Save and Send Test Request’ to finalize the integration.

By following these steps, you will successfully integrate Notion with Google Sheets through Pabbly Connect, allowing automatic data transfer.


Testing the Integration

After completing the setup, it’s essential to test the integration to ensure everything works as expected. Go back to your Google Sheets and add another row of data. This could be a new contact or any other relevant information.

Once you add the data, wait a few moments and check your Notion database to see if the new entry appears. This will confirm that the integration is functioning correctly through Pabbly Connect.

Add a new entry in Google Sheets. Wait for a few moments to allow the integration to process. Check Notion for the new entry.

Testing ensures that your automated workflow is reliable and ready for use in your daily tasks.


Conclusion

This tutorial has guided you through the process of integrating Notion with Google Sheets using Pabbly Connect. You can now automate data transfer between these applications, streamlining your workflow and improving efficiency.

Ensure you check out Pabbly Connect to create business automation workflows and reduce manual tasks. Pabbly Connect currently offer integration with 2,000+ applications.

Integrating Google Chat with Google Sheets Using Pabbly Connect

Learn how to integrate Google Chat with Google Sheets using Pabbly Connect for automated notifications when new rows are added. Step-by-step tutorial included. Discover how to seamlessly connect your essential tools through accessible instructions that make powerful automation available to professionals at every skill level.

Watch Step By Step Video Tutorial Below


1. Setting Up Pabbly Connect for Google Chat Integration

To start integrating Google Chat with Google Sheets, you need to access Pabbly Connect. Begin by signing into your Pabbly Connect account and navigating to the dashboard. Here, you will find a big blue button labeled ‘Create Workflow’ that allows you to initiate the automation process.

Click on the button and name your workflow. A suitable name for this integration could be ‘Send Notification in Google Chat for New Row Added in Shared Google Sheet.’ After naming, click on the ‘Create’ button to proceed to the workflow setup, where you will configure the trigger and action applications.


2. Setting Up the Trigger Event with Google Sheets

In this integration, the trigger event will be set to monitor Google Sheets for new or updated rows. Select Google Sheets as your trigger application in Pabbly Connect. The specific trigger event will be ‘New or Updated Spreadsheet Row,’ which will activate when a new row is added or an existing row is updated.

  • Choose Google Sheets as the trigger application.
  • Select the trigger event: New or Updated Spreadsheet Row.
  • Copy the webhook URL provided by Pabbly Connect.

After copying the webhook URL, you will need to paste it in Google Sheets. This URL acts as a bridge between Google Sheets and Pabbly Connect, enabling the automation to function correctly. Make sure to keep your Google Sheets open for the next steps.


3. Configuring Google Sheets for Webhook Integration

Next, you need to configure Google Sheets to send data to Pabbly Connect. Go to the Extensions menu in Google Sheets, select ‘Add-ons,’ and then click on ‘Get Add-ons.’ Search for ‘Pabbly Connect Webhooks’ and install it if you haven’t already.

Once installed, go back to Extensions, select Pabbly Connect Webhooks, and choose ‘Initial Setup.’ Here, paste the webhook URL you copied earlier and specify the trigger column, which should be the last updated column (e.g., column D). Click ‘Submit’ to save your configuration.


4. Setting Up Google Chat to Receive Notifications

After configuring Google Sheets, the next step is to set up Google Chat. In Pabbly Connect, select Google Chat as the action application. Choose the action event to create a message in Google Chat. You will need to connect your Google Chat account to Pabbly Connect.

To send messages to the correct space, you must create a webhook in Google Chat. Open Google Chat, navigate to Apps and Integrations, and click on Manage Webhooks. Create a new webhook, name it (e.g., ‘Shared Sheet Notification’), and copy the generated webhook URL back into your Pabbly Connect workflow.


5. Testing the Integration Between Google Sheets and Google Chat

Once everything is set up, it’s time to test the integration. Go back to your Google Sheets and add a new row or update an existing one. After pressing Enter, the data should be sent to Pabbly Connect, which will trigger the Google Chat notification.

Check your Google Chat space to see if the notification has been received. The message should contain the details of the updated row, confirming that the integration works as intended. This automated process ensures that all team members are promptly notified of any changes made in the shared Google Sheet.


Conclusion

This tutorial demonstrated how to use Pabbly Connect to integrate Google Chat with Google Sheets for automated notifications when new rows are added. By following these steps, you can streamline your communication and keep your team updated effortlessly.

Ensure you check out Pabbly Connect to create business automation workflows and reduce manual tasks. Pabbly Connect currently offer integration with 2,000+ applications.

How to Integrate Webflow and Salesforce Using Pabbly Connect

Learn how to seamlessly integrate Webflow and Salesforce to create leads using Pabbly Connect with this step-by-step tutorial. Implement the precise methodologies leading organizations use to automate repetitive tasks, illustrated with practical examples designed for immediate application.

Watch Step By Step Video Tutorial Below


1. Setting Up Pabbly Connect for Webflow and Salesforce Integration

To integrate Webflow and Salesforce, you will first need to set up Pabbly Connect. Begin by signing into your Pabbly Connect account. Once logged in, click on the ‘Create Workflow’ button located on the right side of the dashboard.

After clicking the button, provide a suitable name for your workflow, such as ‘Create Leads in Salesforce from Webflow Form Submissions’. Click on the ‘Create’ button to proceed. This will initiate a blank workflow where you can define the trigger and action for your automation.


2. Defining the Trigger Event in Pabbly Connect

The next step involves defining the trigger event in Pabbly Connect. For this integration, the trigger will be a new form submission from Webflow. Select ‘New Form Submission’ as the trigger event.

  • Choose ‘New Form Submission’ from the list of available triggers.
  • Copy the generated webhook URL provided by Pabbly Connect.
  • This URL will be used to connect Webflow with Pabbly Connect.

Now, navigate to your Webflow account and access the settings for your form. Under the Integrations tab, add the copied webhook URL to enable the connection between Webflow and Pabbly Connect.


3. Submitting the Form and Receiving a Response

After setting up the webhook in Webflow, it’s time to test the integration. Fill out your Webflow form with the necessary details such as email address, phone number, and company name. Click on the submit button to send the form data. using Pabbly Connect

Return to your Pabbly Connect dashboard, where you will see that it is waiting for a webhook response. Once the form is submitted, Pabbly Connect will receive the data, which includes all the filled fields from the form submission.


4. Creating a Lead in Salesforce Using Pabbly Connect

Now that you have received the form submission data, the next step is to create a lead in Salesforce. In the action section of Pabbly Connect, select ‘Create Lead’ as the action event. This will allow you to map the data from the form submission to the appropriate fields in Salesforce.

To connect Salesforce with Pabbly Connect, click on the ‘Connect’ button and follow the prompts to allow access. Once connected, you will need to map the fields such as first name, last name, email, and phone number from the form submission to the corresponding fields in Salesforce.

  • Ensure to separate the first name and last name if they are combined.
  • Use the text formatter feature in Pabbly Connect for splitting names.
  • After mapping all necessary fields, click on ‘Save and Send Test Request’.

Upon successful execution, you will receive a confirmation with the ID of the newly created lead in Salesforce, confirming that the integration was successful.


5. Verifying Lead Creation in Salesforce

After creating the lead through Pabbly Connect, it’s important to verify that the lead has been successfully created in Salesforce. Log into your Salesforce account and refresh the leads page to see the latest entries.

Check for the lead you just created using the Webflow form submission. The details such as company name, contact information, and address should all be accurately reflected in Salesforce. This confirms that the integration between Webflow and Salesforce via Pabbly Connect is functioning as intended.


Conclusion

In this tutorial, we explored how to automate lead creation in Salesforce from Webflow form submissions using Pabbly Connect. By following the steps outlined, you can efficiently manage leads and streamline your workflow with these powerful applications.

Ensure you check out Pabbly Connect to create business automation workflows and reduce manual tasks. Pabbly Connect currently offer integration with 2,000+ applications.