How to Send Automatic WhatsApp Messages from Google Forms Using Pabbly Connect

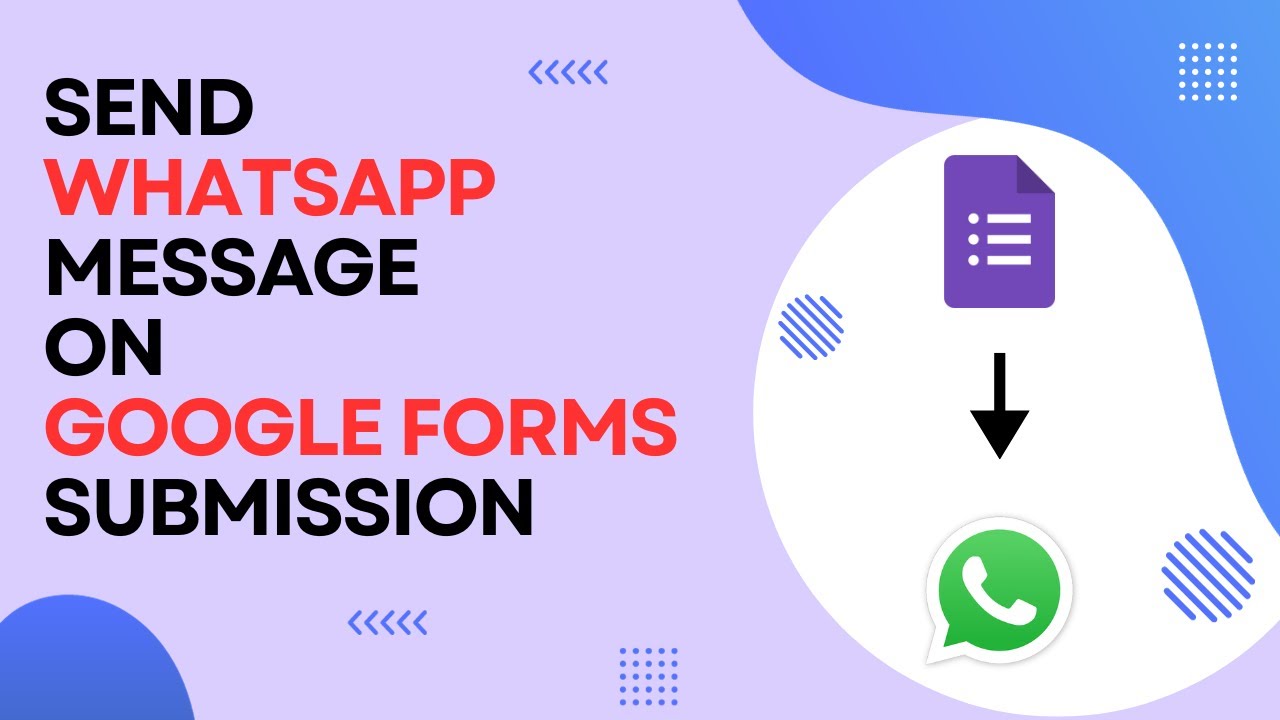
Learn how to send automatic WhatsApp messages from Google Forms using Pabbly Connect. Follow this step-by-step tutorial for seamless integration. Eliminate manual repetitive tasks from your workflow. Discover proven automation methods with intuitive steps designed for efficiency-minded professionals.

Watch Step By Step Video Tutorial Below


1. Accessing Pabbly Connect for WhatsApp Integration

To send automatic WhatsApp messages from Google Forms, first, you need to access Pabbly Connect. Visit the Pabbly Connect homepage by entering Pabbly.com/connect in your browser. Here, you can sign in if you are an existing user or click on ‘Sign up for free’ to create a new account.

Once you have logged in, you will be directed to the dashboard. From here, you can create a new workflow by clicking on the ‘Create Workflow’ button located in the top right corner. This is where you will set up the automation between Google Forms and WhatsApp.


2. Creating the Workflow in Pabbly Connect

In this step, you’ll create a workflow to automate WhatsApp messaging. After clicking ‘Create Workflow’, name it ‘Send WhatsApp Message from Google Forms’ and select a folder to save it. This helps in organizing your workflows efficiently.

  • Select Google Forms as the trigger application.
  • Choose the trigger event as ‘New Response Received’.
  • Pabbly Connect will provide a webhook URL to capture responses.

After setting up the trigger, you will need to copy the webhook URL provided by Pabbly Connect. This URL will be used to connect Google Forms with Pabbly Connect, allowing the automation to work seamlessly.


3. Linking Google Forms with Pabbly Connect

To link Google Forms with Pabbly Connect, you must first connect your Google Form to Google Sheets. Open your Google Form, click on the ‘Responses’ tab, and select ‘Link to Sheets’. Choose to create a new spreadsheet for capturing responses.

Once linked, go back to your Google Sheets, click on ‘Extensions’, and then select ‘Add-ons’. Search for ‘Pabbly Connect Webhooks’ and install it. After installation, refresh your Google Sheets to find the Pabbly Connect Webhooks option. Click on ‘Initial Setup’ and paste the webhook URL you copied earlier. Specify the trigger column, which will be the column that indicates a new response.


4. Sending WhatsApp Messages via Pabbly Connect

With the integration set up, the next step is to configure the action to send WhatsApp messages. Select the action application as Wati from the options provided in Pabbly Connect. Choose the action event ‘Send Template Message’ and connect your Wati account by entering the API endpoint and access token.

After connecting, you will need to specify the WhatsApp number to which the message should be sent. Use mapping to pull the number from the Google Sheets response, ensuring that each response is sent to the correct user. Additionally, select the template you created in Wati for the message.

  • Map the WhatsApp number from the Google Sheets response.
  • Provide the template name and broadcast title.
  • Set custom parameters for any variables used in the template.

Once all details are filled in, click ‘Save and Send Test Request’ to ensure everything is working correctly. If successful, the WhatsApp message will be sent to the user who submitted the form.


5. Conclusion: Automate WhatsApp Messaging with Pabbly Connect

In conclusion, using Pabbly Connect to send automatic WhatsApp messages from Google Forms is a straightforward process. By following the steps outlined above, you can efficiently set up an automation that enhances communication with your users. This integration not only saves time but also ensures that your participants receive timely acknowledgments for their feedback.

Ensure you check out Pabbly Connect to create business automation workflows and reduce manual tasks. Pabbly Connect currently offer integration with 2,000+ applications.

Now you can leverage Pabbly Connect to automate various processes, making your workflows more efficient and effective. Don’t hesitate to explore more integrations available through Pabbly Connect to enhance your automation capabilities.

Automate WhatsApp Invites for Special Occasions with Pabbly Connect

Learn how to send WhatsApp invites automatically for weddings, birthdays, and engagements using Pabbly Connect. Follow our step-by-step guide for seamless integration. Learn to create powerful connections between your critical applications without requiring specialized programming knowledge or extensive technical background.

Watch Step By Step Video Tutorial Below


1. Accessing Pabbly Connect for Automated WhatsApp Invites

To send automated WhatsApp invites for special occasions, the first step is to access Pabbly Connect. You can do this by visiting the Pabbly website and signing in or signing up for a free account.

Once logged in, navigate to the Pabbly Connect dashboard. Here, you will find options to create workflows that automate your invitation sending process. This is crucial, as Pabbly Connect will be the central platform facilitating the integration between your Google Sheets and WhatsApp.


2. Creating a New Workflow in Pabbly Connect

After accessing Pabbly Connect, the next step is to create a new workflow. Click on the ‘Create Workflow’ button and give your workflow a name that reflects your objective, such as ‘Send WhatsApp Invites’. Select a folder to save this workflow.

  • Click on ‘Create’ to proceed.
  • Ensure that you are in the workflow section to see the trigger and action boxes.

Your workflow will consist of two main parts: the trigger and the action. The trigger will initiate the workflow when a new row is added to your Google Sheets, and the action will send the WhatsApp message.


3. Setting Up Trigger and Action in Pabbly Connect

In this step, you will configure the trigger by selecting Google Sheets as your application. Choose the trigger event as ‘New or Updated Spreadsheet Row’. This means that whenever a new row is added to your Google Sheets, it will activate the workflow.

To connect Google Sheets with Pabbly Connect, use the BB URS as a bridge. Copy the webhook URL provided by Pabbly Connect and paste it into the Google Sheets add-on settings. Ensure that the trigger column is set to the final data column, typically the mobile number column.

  • Go to Extensions > Add-ons > Get Add-ons to install the Pabbly Webhook add-on.
  • Once installed, configure it to send data to the webhook URL.

After setting up the trigger, return to Pabbly Connect to confirm that the data is being received correctly from Google Sheets. This confirmation is essential before proceeding to the action setup.


4. Sending WhatsApp Invites Automatically

The action step involves selecting the WhatsApp application within Pabbly Connect. Choose the action event as ‘Send Template Message’ to automate the sending of invites to guests. You will need to connect WhatsApp by providing the API endpoint and access token from your WhatsApp API documentation.

Once connected, map the WhatsApp number field to the mobile number received from the Google Sheets trigger. This mapping ensures that the correct number receives the invitation. You can also select the invitation template that you previously created in your WhatsApp API account.

Map the guest’s name and other variables in the message template to personalize your invites. Test the action to ensure that the invitation message is sent successfully to the intended guest.

After confirming the successful sending of the message, you can enable the option to send invites to all guests automatically. This feature allows for instant invitations as soon as new contacts are added to your Google Sheets.


5. Summary of Automating WhatsApp Invitations with Pabbly Connect

In summary, we have successfully set up an automated system to send WhatsApp invites using Pabbly Connect. The process involved accessing Pabbly Connect, creating a new workflow, configuring the trigger with Google Sheets, and setting up the action to send messages via WhatsApp.

This integration not only saves time but also enhances the efficiency of sending invitations for your special occasions. By following these steps, you can easily automate the process of sending beautiful WhatsApp invites to your guests.

Conclusion

This guide summarizes the key points and helps you understand the essential features and benefits of using this tool.

Ensure you check out Pabbly Connect to create business automation workflows and reduce manual tasks. Pabbly Connect currently offer integration with 2,000+ applications.


By utilizing Pabbly Connect, you can streamline your invitation process and ensure that your guests receive timely notifications for events like weddings, birthdays, and more.

How to Add Guests to Google Calendar Events Using Pabbly Connect: A Step-by-Step Guide

Learn how to integrate JotForm and Google Calendar using Pabbly Connect to add guests to events seamlessly. Follow this detailed step-by-step guide. Navigate the automation landscape confidently with clear, structured guidance suitable for professionals regardless of prior technical experience.

Watch Step By Step Video Tutorial Below


1. Accessing Pabbly Connect for Integration

To begin adding guests to Google Calendar events, you first need to access Pabbly Connect. This integration platform facilitates the connection between JotForm and Google Calendar, allowing you to automate guest additions seamlessly.

As an existing user, sign in to your Pabbly Connect account. If you are new, you can sign up for free to get started. Once logged in, navigate to the Pabbly Connect dashboard. Here, you will see the option to create a new workflow.


2. Creating a New Workflow in Pabbly Connect

In this section, you will create a new workflow in Pabbly Connect to set up the integration. Click on the ‘Create Workflow’ button located at the top right corner of your dashboard.

In the dialog box that appears, name your workflow something descriptive, like ‘Add Guests to Google Calendar Event’. You can also choose to save it in a specific folder, such as the one named Google Calendar. After naming your workflow, click on the ‘Create’ button to proceed.

  • Choose a trigger application, which in this case will be JotForm.
  • Select the trigger event as ‘New Response’ to start the workflow on new form submissions.
  • Set the action application to Google Calendar and choose the action event as ‘Add Guest to Event’.

Now that you have set up your trigger and action applications, you can move on to the next steps in your integration process.


3. Connecting JotForm to Pabbly Connect

To connect JotForm with Pabbly Connect, you will need to establish a webhook URL. This URL facilitates communication between the two applications. You will find the webhook URL in your Pabbly Connect workflow setup.

Next, go to your JotForm account, open the form you created for the event, and navigate to the settings. In the settings menu, select Integrations, and search for Webhooks. Paste the webhook URL from Pabbly Connect into the designated field and click on ‘Complete Integration’. This action will link JotForm to your Pabbly Connect account, enabling it to send responses.


4. Testing the Integration with Pabbly Connect

Once the integration is set up, it’s crucial to test it to ensure everything is functioning correctly. Start by publishing your form and making a test submission. After submitting the form, return to Pabbly Connect to check if the response has been captured.

When you submit the test form with dummy details, you should see the response logged in your Pabbly Connect dashboard. This confirms that the workflow is ready to process actual submissions. If the response is successfully captured, you can proceed to add the guest to the Google Calendar event.

  • Check the response details in Pabbly Connect to ensure they match the submitted form data.
  • Confirm that the trigger is working by monitoring for new responses.

With the successful capture of the form response, you are now ready to add the guest to your Google Calendar event.


5. Finalizing the Guest Addition in Google Calendar

To finalize the integration, you need to connect Google Calendar with Pabbly Connect. Click on the connect button and sign in with your Google account. Grant the necessary permissions to allow Pabbly Connect to access your Google Calendar.

Once connected, select the calendar from your Google Calendar that you wish to add guests to. Choose the specific event (e.g., Pre-Christmas Event) and map the guest’s email address from the JotForm submission to the guest field in Pabbly Connect. This mapping ensures that the correct email is added each time a new response is received.

Finally, click on ‘Save and Send Test Request’ to verify that the guest has been added successfully. Refresh your Google Calendar to see the new guest listed under your event. This confirms that the integration is complete and functioning as intended.


Conclusion

In this tutorial, we explored how to use Pabbly Connect to automate the process of adding guests to Google Calendar events through JotForm submissions. By following these steps, you can streamline your event management efficiently.

Ensure you check out Pabbly Connect to create business automation workflows and reduce manual tasks. Pabbly Connect currently offer integration with 2,000+ applications.

Utilizing Pabbly Connect not only saves time but also ensures that all responses are captured accurately, enhancing your event planning experience.

How to Send REAL-TIME SMS from Google Sheets Using Pabbly Connect

Learn how to send real-time SMS notifications from Google Sheets using Pabbly Connect. This step-by-step tutorial guides you through the integration process. Develop expertise in application integration and learn how to design streamlined automation workflows using proven, simplified approaches.

Watch Step By Step Video Tutorial Below


1. Accessing Pabbly Connect for SMS Automation

To send real-time SMS notifications, you first need to access Pabbly Connect. This platform allows you to automate tasks between Google Sheets and SMS services seamlessly.

Start by signing up for a free account on Pabbly Connect. You can create your account in just two minutes. Once logged in, you will be directed to the dashboard where you can set up your workflows.


2. Creating a New Workflow in Pabbly Connect

In this step, you will create a workflow to automate SMS sending. Click on the ‘Create Workflow’ button and name your workflow, for example, ‘Google Sheets to Twilio’.

  • Select the folder for your workflow in Pabbly Connect.
  • Choose ‘Google Sheets’ as the trigger app.
  • Set the trigger event to ‘New or Updated Spreadsheet Row’.

After setting up the trigger, you will get a webhook URL. This URL is essential for connecting your Google Sheets with Pabbly Connect.


3. Connecting Google Sheets to Pabbly Connect

To link Google Sheets with Pabbly Connect, copy the webhook URL provided. Open your Google Sheets, go to ‘Extensions’ > ‘Add-ons’ > ‘Get add-ons’ and search for ‘Pabbly Connect Webhooks’.

  • Install the Pabbly Connect Webhooks add-on.
  • Refresh your Google Sheets after installation.
  • Go to ‘Extensions’ > ‘Pabbly Connect Webhooks’ > ‘Initial Setup’.

In the setup box, paste the webhook URL and set the trigger column to the last data entry column in your sheet. This setup enables Pabbly Connect to send data whenever a new row is added.


4. Configuring SMS Service with Pabbly Connect

After configuring Google Sheets, the next step is to set up your SMS service. In the action window of your Pabbly Connect workflow, select ‘Twilio’ as your SMS service provider.

Choose the action event as ‘Send SMS Message’. You will need to connect your Twilio account by entering your Account SID and Auth Token, which can be found in your Twilio dashboard.

Enter the body of the SMS, including personalized details from Google Sheets. Map the recipient’s mobile number and sender number from your Twilio account.

Once you have configured these details, click on ‘Save and Send Test Request’. This will allow you to test if the SMS is sent successfully through Pabbly Connect.


5. Testing Your SMS Automation Workflow

To verify that your automation is functioning correctly, return to your Google Sheets and enter a new user’s details in a new row.

Once the details are added, Pabbly Connect will automatically trigger and send an SMS notification to the user. You should see the SMS arrive on the recipient’s mobile device almost instantly.

This confirms that your setup is working perfectly. If you want to replicate this automation, you can clone the workflow using the link provided in the description.


Conclusion

This tutorial demonstrated how to send real-time SMS notifications from Google Sheets using Pabbly Connect. By following these steps, you can automate SMS notifications efficiently and enhance your communication processes.

Ensure you check out Pabbly Connect to create business automation workflows and reduce manual tasks. Pabbly Connect currently offer integration with 2,000+ applications.

Sending WhatsApp Messages from Google Sheets Using Pabbly Connect

Learn how to send WhatsApp messages from Google Sheets using Pabbly Connect in minutes without any coding. Follow this step-by-step tutorial for seamless integration. Implement the precise methodologies leading organizations use to automate repetitive tasks, illustrated with practical examples designed for immediate application.

Watch Step By Step Video Tutorial Below


1. Access Pabbly Connect to Start the Integration

To send WhatsApp messages from Google Sheets, you first need to access Pabbly Connect. This integration platform allows seamless automation between various applications, including Google Sheets and WhatsApp API.

Begin by signing up for a free account on Pabbly Connect. Once logged in, navigate to the dashboard and click on ‘Create Workflow’. Name your workflow, for example, ‘Google Sheets to WhatsApp’, and select the appropriate folder for your automation.


2. Setting Up Google Sheets Trigger in Pabbly Connect

In this step, you will set up Google Sheets as the trigger application in Pabbly Connect. Choose Google Sheets from the application list and select the trigger event as ‘New or Updated Spreadsheet Row’. This will initiate the automation whenever a new row is added.

  • Select Google Sheets as the trigger application.
  • Choose ‘New or Updated Spreadsheet Row’ as the trigger event.
  • Copy the webhook URL provided by Pabbly Connect.

After copying the webhook URL, go to your Google Sheets, click on ‘Extensions’, and then ‘Add-ons’. Search for the Pabbly Connect Webhooks add-on and install it. After installation, refresh your Google Sheet to see the new add-on.


3. Initial Setup in Google Sheets for Pabbly Connect

Once the Pabbly Connect Webhooks add-on is installed, you need to perform the initial setup. Go to ‘Extensions’, hover over Pabbly Connect Webhooks, and select ‘Initial Setup’. Here, you will configure the selected sheet and paste the webhook URL you copied earlier.

  • Select the sheet you want to send data from.
  • Paste the webhook URL into the designated field.
  • Choose the trigger column, which is the last data entry column.

After completing these steps, click the ‘Send Test’ button to ensure that the test data is sent successfully to Pabbly Connect. This confirms that your Google Sheets is correctly linked to the automation workflow.


4. Sending WhatsApp Messages Using Pabbly Connect

Now that the trigger is set up, the next step is to send WhatsApp messages using Pabbly Connect. In the action step of your workflow, search for your chosen WhatsApp API partner, such as Vati or WhatsApp Cloud API. Select the action event as ‘Send Template Message’.

Connect your WhatsApp API account by entering the API endpoint and access token. Map the WhatsApp number field to the mobile number received from Google Sheets. Select the template message you want to send.

Make sure your WhatsApp number is formatted correctly, and enter the template message details. After configuring these settings, click on ‘Save and Send Test Request’ to verify that the message is sent successfully through Pabbly Connect.


5. Final Testing and Automation Completion

After setting up the WhatsApp message sending feature, it’s time to test the entire automation. Go back to your Google Sheets and add a new row with the user details. Once you enter the details, Pabbly Connect will automatically send the WhatsApp message based on the template you created.

Check your WhatsApp to confirm that the message has been received. You should see the personalized message with the user’s first name included. This confirms that the automation is working correctly and that you can send WhatsApp messages directly from Google Sheets using Pabbly Connect.


Conclusion

In this tutorial, we demonstrated how to use Pabbly Connect to send WhatsApp messages from Google Sheets quickly and efficiently. By following the steps outlined, you can automate your communication process without any coding knowledge.

Ensure you check out Pabbly Connect to create business automation workflows and reduce manual tasks. Pabbly Connect currently offer integration with 2,000+ applications.

Automate WhatsApp Messages with Pabbly Connect: A Step-by-Step Guide

Learn how to send automated WhatsApp messages to your dance academy leads using Pabbly Connect with Facebook integration. Follow our detailed tutorial! This comprehensive guide reveals exactly how to connect your applications and automate repetitive tasks — accessible for professionals of all technical backgrounds.

Watch Step By Step Video Tutorial Below


1. Accessing Pabbly Connect for Integration

To send automated WhatsApp messages to your dance academy leads, you first need to access Pabbly Connect. This platform allows seamless integration between Facebook lead ads and WhatsApp messages.

Start by visiting the Pabbly Connect website. If you don’t have an account, sign up for free, which only takes a couple of minutes. Once signed in, click on the ‘Access Now’ button under Pabbly Connect to reach the dashboard.


2. Creating a Workflow in Pabbly Connect

After accessing Pabbly Connect, you will see the option to create a new workflow. Click on the ‘Create Workflow’ button, and a pop-up will appear for naming your workflow. Name it something descriptive, such as ‘Send Automated WhatsApp Message to Dance Academy Leads’.

  • Select a folder to save your workflow.
  • Click ‘Create’ to proceed to the next step.

This will take you to the main workflow window where you can set up your trigger and action. Remember, the trigger is the event that starts the workflow, and the action is what happens as a result.


3. Setting Up the Trigger in Pabbly Connect

The next step involves setting up the trigger in Pabbly Connect. For this integration, select ‘Facebook Lead Ads’ as your trigger application. Then, choose ‘New Lead’ as the trigger event.

Click on ‘Connect’ to link your Facebook account with Pabbly Connect. You will need to authorize the connection by logging into your Facebook account. Once connected, you will see options to select your Facebook page and lead generation form.

  • Choose your page, such as ‘NR Dance Academy’.
  • Select your lead gen form, like the ‘Registration Form’.

After making these selections, click on ‘Save and Send Test Request’ to ensure everything is set up correctly. This step is crucial for mapping the lead details later.


4. Setting Up the Action to Send WhatsApp Messages

Now that the trigger is configured, it’s time to set up the action in Pabbly Connect. Here, select ‘Vati’ as your action application and choose the ‘Send Template Message’ as the action event.

To connect Vati with Pabbly Connect, you need to provide the API endpoint and access token from your Vati account. Copy these details from the Vati API documentation and paste them into the respective fields in Pabbly Connect.

Map the WhatsApp number from the Facebook lead response. Select your pre-approved message template, such as ‘Dance Academy Lead’.

Once you have completed these steps, click on ‘Save and Send Test’ to verify that the WhatsApp message is sent successfully to the lead.


5. Testing the Integration and Finalizing the Workflow

With the action set up, it’s essential to test the integration in Pabbly Connect. After sending the test message, check your WhatsApp to confirm that the message was received. The message should reflect the template you created earlier.

If the test is successful, your workflow is ready! You can now automate sending WhatsApp messages to every new lead captured from your Facebook ads. This integration allows you to engage with potential students promptly and efficiently.

Review your workflow settings to ensure everything is correct. Activate your workflow to start automation.

Congratulations! You have successfully set up an automated WhatsApp messaging system for your dance academy leads using Pabbly Connect.


Conclusion

In this tutorial, we explored how to use Pabbly Connect to send automated WhatsApp messages to dance academy leads from Facebook. By following these steps, you can streamline your communication process and enhance lead engagement effectively.

Ensure you check out Pabbly Connect to create business automation workflows and reduce manual tasks. Pabbly Connect currently offer integration with 2,000+ applications.

Send Christmas Wishes to Customers on WhatsApp Using Pabbly Connect

Learn how to send Christmas wishes to customers on WhatsApp by integrating Google Sheets with Pabbly Connect. Step-by-step tutorial included! Eliminate manual repetitive tasks from your workflow. Discover proven automation methods with intuitive steps designed for efficiency-minded professionals.

Watch Step By Step Video Tutorial Below


1. Introduction to Pabbly Connect for Sending Christmas Wishes

In this section, we will explore how to use Pabbly Connect to send Christmas wishes to customers via WhatsApp. By integrating Google Sheets with Pabbly Connect, you can automate the process of sending personalized messages. This tutorial will guide you through the setup step-by-step.

Pabbly Connect is an integration platform that allows you to connect various applications seamlessly. In this case, we will connect Google Sheets to WhatsApp to send automated Christmas greetings. Let’s dive into the setup process.


2. Creating a Workflow in Pabbly Connect

To begin, you need to access your Pabbly Connect account. If you are a new user, sign up for free to get started. Once logged in, you will see the dashboard where you can create a new workflow.

  • Click on the ‘Create Workflow’ button on the right side of the dashboard.
  • Name your workflow something like ‘Send Christmas Wishes to Customers’.

After naming your workflow, you will set up the trigger. In this case, we will use the ‘Schedule by Pabbly’ trigger. This allows you to specify when you want to send the messages. Set it to run once on December 25th at 10 AM.


3. Fetching Customer Data from Google Sheets

Next, we will fetch customer data from Google Sheets using Pabbly Connect. This step is crucial as it allows us to retrieve the names and phone numbers of the customers to whom we will send the wishes. Select Google Sheets as the action application.

Choose the spreadsheet containing your customer data. Ensure that the sheet consists of the customer’s name and phone number. Enter the range of data you want to fetch, for example, A2:B250, which includes the names and phone numbers of up to 250 customers.

  • Select the spreadsheet named ‘Customer Data’.
  • Define the data range as A2 to B250.

Once you have configured this, test the connection to ensure that Pabbly Connect can successfully retrieve the customer data. You should see a response indicating that the data has been fetched correctly.


4. Sending WhatsApp Messages to Customers

With the customer data fetched, we will now set up the action to send WhatsApp messages. In this step, you will select WhatsApp as the action application in Pabbly Connect. You need to connect your WhatsApp account by providing the API endpoint and access token.

After connecting your WhatsApp account, you will set up the message template. Create a message that includes a personalized greeting. For example, ‘Dear [Customer Name], wishing you a Merry Christmas!’ This template will be sent to each customer based on the data retrieved from Google Sheets.

Map the customer’s name from the Google Sheets data to the message template. Ensure the message is set to send at the scheduled time.

Once everything is configured, test the action to verify that the WhatsApp message is sent correctly. You should receive a confirmation response indicating the success of the operation.


5. Finalizing the Integration in Pabbly Connect

Finally, review the entire setup in Pabbly Connect to ensure everything is configured correctly. This includes checking the trigger settings, customer data fetching, and WhatsApp message sending. Make adjustments if necessary.

Once you are satisfied with the setup, activate the workflow. This will allow Pabbly Connect to run the workflow automatically on the specified date and time, sending Christmas wishes to your customers without any manual intervention.

Congratulations! You have successfully set up an automated system to send Christmas wishes to your customers using Pabbly Connect, Google Sheets, and WhatsApp.


Conclusion

In this tutorial, we explored how to use Pabbly Connect to send Christmas wishes to customers via WhatsApp by integrating Google Sheets. This automation saves time and ensures a personal touch in your customer communications. Start using Pabbly Connect today to enhance your customer engagement strategies!

Ensure you check out Pabbly Connect to create business automation workflows and reduce manual tasks. Pabbly Connect currently offer integration with 2,000+ applications.

Top 5 Must-Use Automations Your Business Needs with Pabbly Connect

Discover the top 5 automations your business needs using Pabbly Connect to streamline processes across platforms like WhatsApp, Google, and social media. Navigate the automation landscape confidently with clear, structured guidance suitable for professionals regardless of prior technical experience.

Watch Step By Step Video Tutorial Below


1. Automate WhatsApp Messages for Webinar Registrants Using Pabbly Connect

Pabbly Connect allows you to automate WhatsApp messages for new webinar registrants. This automation sends a welcome message and adds users to your CRM, ensuring seamless communication. using Pabbly Connect

To set this up, follow these steps:

  • Create a new workflow in Pabbly Connect.
  • Select your webinar registration app as the trigger.
  • Set WhatsApp as the action app to send messages.

This automation not only sends welcome messages but also reminds users about upcoming webinars, reducing the chances of no-shows.


2. Automatically Reply to Comments on Facebook and YouTube with Pabbly Connect

Using Pabbly Connect, you can set up an automation to reply to comments on your Facebook and YouTube posts. This feature enhances user engagement by providing instant responses. using Pabbly Connect

To implement this automation:

  • Create a new workflow in Pabbly Connect.
  • Choose Facebook or YouTube as your trigger app.
  • Set AI tools like ChatGPT as the action to generate replies.

This setup allows you to maintain active interaction with your audience, making your social media presence more vibrant and responsive.


3. Create a Social Media Calendar with Pabbly Connect

Pabbly Connect can automate your social media posting by creating a social media calendar. This allows you to schedule and post content across multiple platforms effortlessly. using Pabbly Connect

To create a social media calendar, follow these steps:

Set up a Google Sheet with your content and posting schedule. Create a new workflow in Pabbly Connect. Select Google Sheets as the trigger and social media platforms as actions.

This automation ensures that your content is consistently shared, saving you time and effort while keeping your audience engaged.


4. Nurture Leads Automatically Using Pabbly Connect

With Pabbly Connect, you can automate lead nurturing through instant messaging and email notifications. This workflow is crucial for businesses generating leads through ads. using Pabbly Connect

To set this up, follow these steps:

Create a new workflow in Pabbly Connect. Select your lead generation platform as the trigger. Set WhatsApp, SMS, and email as actions for notifications.

This automation helps you respond to new leads immediately, enhancing their experience and increasing the likelihood of conversion.


5. Generate Blog Content Automatically with Pabbly Connect

Pabbly Connect can be used to generate blog content automatically using AI tools. This automation saves time and effort in content creation for your WordPress site. using Pabbly Connect

To implement this automation:

Set up a Google Sheet with blog topics. Create a new workflow in Pabbly Connect. Select the AI tool for content generation and WordPress for posting.

This automation allows you to create and schedule blog posts efficiently, ensuring your website remains updated with fresh content.


Conclusion

In summary, utilizing Pabbly Connect for these top 5 automations can significantly enhance your business operations. From automating WhatsApp messages to generating blog content, Pabbly Connect streamlines processes across various platforms.

Ensure you check out Pabbly Connect to create business automation workflows and reduce manual tasks. Pabbly Connect currently offer integration with 2,000+ applications.

Create an Airtable Record from an Email | Gmail Airtable Integration with Pabbly Connect

Learn how to create an Airtable record from Gmail emails using Pabbly Connect. Follow this step-by-step guide for seamless integration. Build sophisticated automated workflows in less time than you think. This guide translates complex integrations into straightforward steps for immediate implementation.

Watch Step By Step Video Tutorial Below


1. Setting Up Pabbly Connect for Gmail and Airtable Integration

To create an Airtable record from an email, we will use Pabbly Connect. Start by signing into your Pabbly Connect account. If you are a new user, you can click on the ‘Sign Up for Free’ button to create an account and enjoy 100 free tasks each month.

Once logged in, navigate to the Pabbly Connect dashboard. Click on the ‘Create Workflow’ button located on the right side. Name your workflow, for example, ‘Create an Airtable Record from an Email’, and choose a folder to save it in. After that, click on ‘Create’ to proceed.


2. Selecting Trigger Application in Pabbly Connect

The next step is to set up the trigger application. In this case, we will use Email Parser to capture emails from your Gmail account. In the trigger window, select ‘Email Parser’ as your trigger application. using Pabbly Connect

  • Choose ‘Email Parser’ from the list of applications.
  • Set up the email hook to connect with your Gmail account.
  • This hook will capture incoming emails and send the data to Pabbly Connect.

After selecting Email Parser, you will need to establish a connection with your Gmail account. This connection allows Pabbly Connect to fetch the email details automatically whenever a new email is received.


3. Configuring Email Forwarding in Gmail

To ensure that Pabbly Connect can capture emails, you need to set up email forwarding in your Gmail account. Go to Gmail settings, then navigate to the ‘Forwarding and POP/IMAP’ tab. Here, add the forwarding address provided by Pabbly Connect. using Pabbly Connect

  • Copy the forwarding address from Pabbly Connect.
  • Paste it into the forwarding address field in Gmail settings.
  • Click ‘Next’ and confirm the forwarding address.

Once the confirmation link is sent to the email hook, click on it to verify the forwarding address. After verifying, go back to Gmail and select the option to forward a copy of incoming mail to the email hook. Save the changes to complete the setup.


4. Setting Up the Action Application in Pabbly Connect

After configuring the trigger, the next step is to set up the action application. In this case, we will use Airtable as the action application to create a new record. In the action window, select ‘Airtable’ as your action application. using Pabbly Connect

For the action event, choose ‘Create New Record’. This allows Pabbly Connect to create a new record in your Airtable whenever a new email is received. You will need to connect your Airtable account to Pabbly Connect by providing the API token.

Go to your Airtable account and navigate to the Developer Hub. Create a new token with the required scopes as indicated in Pabbly Connect. Copy the token and paste it into Pabbly Connect to establish the connection.

Once connected, select the base where you want to create the record in Airtable. Use the mapping feature to insert the email’s subject, body content, and sender’s email into the respective fields in Airtable.


5. Testing the Integration and Finalizing

To finalize the setup, test the integration by sending a sample email to your Gmail account. Check Pabbly Connect to see if the email has been captured successfully. You should see the subject and body of the email reflected in the Pabbly Connect interface.

Once you confirm that the email has been fetched, you can proceed to test the action step. Click on ‘Save and Send Test Request’ in Pabbly Connect. If everything is set up correctly, a new record will be created in Airtable with the details from the email.

Verify that the record in Airtable contains the correct subject, body content, and sender’s email. This confirms that the automation is working successfully. Now, every time you receive an email related to social media planning, a record will be created automatically.

With this, your integration using Pabbly Connect is complete. You can now manage your social media tasks more efficiently by capturing relevant emails directly into Airtable.


Conclusion

In this tutorial, we demonstrated how to create an Airtable record from an email using Pabbly Connect. This integration allows you to automate the process of capturing email details directly into Airtable, enhancing your workflow and productivity.

Ensure you check out Pabbly Connect to create business automation workflows and reduce manual tasks. Pabbly Connect currently offer integration with 2,000+ applications.

How to Automatically Upload Files to Server Using Pabbly Connect EasyFTP Integration

Learn how to automatically upload files to your server using Pabbly Connect and EasyFTP integration. Step-by-step guide with detailed instructions. Develop expertise in application integration and learn how to design streamlined automation workflows using proven, simplified approaches.

Watch Step By Step Video Tutorial Below


1. Setting Up Pabbly Connect for Automation

To automatically upload files to your server, you first need to set up Pabbly Connect. Start by logging into your Pabbly Connect account. Once logged in, create a new automation workflow.

In this workflow, select an online form building application, such as Pabbly Form Builder, as your trigger step. After connecting your form with Pabbly Connect, you can receive the form responses which include the uploaded files.


2. Trigger Step Integration with Pabbly Connect

The next step involves configuring the trigger in Pabbly Connect. You will need to provide the form URL from Pabbly Form Builder. This URL will connect the form submissions to your automation workflow.

  • Select the trigger application (Pabbly Form Builder).
  • Connect the form URL to Pabbly Connect.
  • Receive the form response including the uploaded file link.

After setting up the trigger, you will see the details of the user, including the file URL uploaded during the form submission. This is crucial for the next steps in the automation.


3. Configuring EasyFTP Connection in Pabbly Connect

After the trigger step, you will configure the action step by selecting EasyFTP within Pabbly Connect. Choose the action event as ‘Upload File’. Click on the connect button to establish a connection to your EasyFTP account.

To connect, simply select the ‘Add New Connection’ option. Once connected, you will need to specify the server connection where you want to upload files. Ensure that your server is correctly configured in EasyFTP.


4. Uploading Files to Your Server with Pabbly Connect

Now, you will specify the details for uploading files to your server using Pabbly Connect and EasyFTP. In the action step, you will need to provide the file URL that you received from the form submission.

  • Map the file URL from the trigger step to the action step.
  • Choose whether to overwrite existing files on the server.
  • Specify the folder path where the files will be uploaded.
  • Set a custom file name using the user’s first name, last name, and email address.

After completing these fields, click on the ‘Save and Send Test Request’ button to verify the upload process. A successful response indicates that the file has been uploaded to your server.


5. Testing the Automation Workflow

After setting up the automation, it’s essential to test the workflow using Pabbly Connect. Submit a new form entry with a file to see if the automation works as intended.

Check your EasyFTP account to confirm that the file has been uploaded successfully. If everything is configured correctly, the file should appear with the specified naming convention, ensuring that your automation is functioning properly.

Conclusion

This guide summarizes the key points and helps you understand the essential features and benefits of using this tool.

Ensure you check out Pabbly Connect to create business automation workflows and reduce manual tasks. Pabbly Connect currently offer integration with 2,000+ applications.


In conclusion, using Pabbly Connect for automating file uploads to your server via EasyFTP is an efficient solution. This integration allows you to streamline the process of managing files uploaded through various platforms, enhancing your workflow significantly.