Creating Google Docs from Airtable Records Using Pabbly Connect and OpenAI

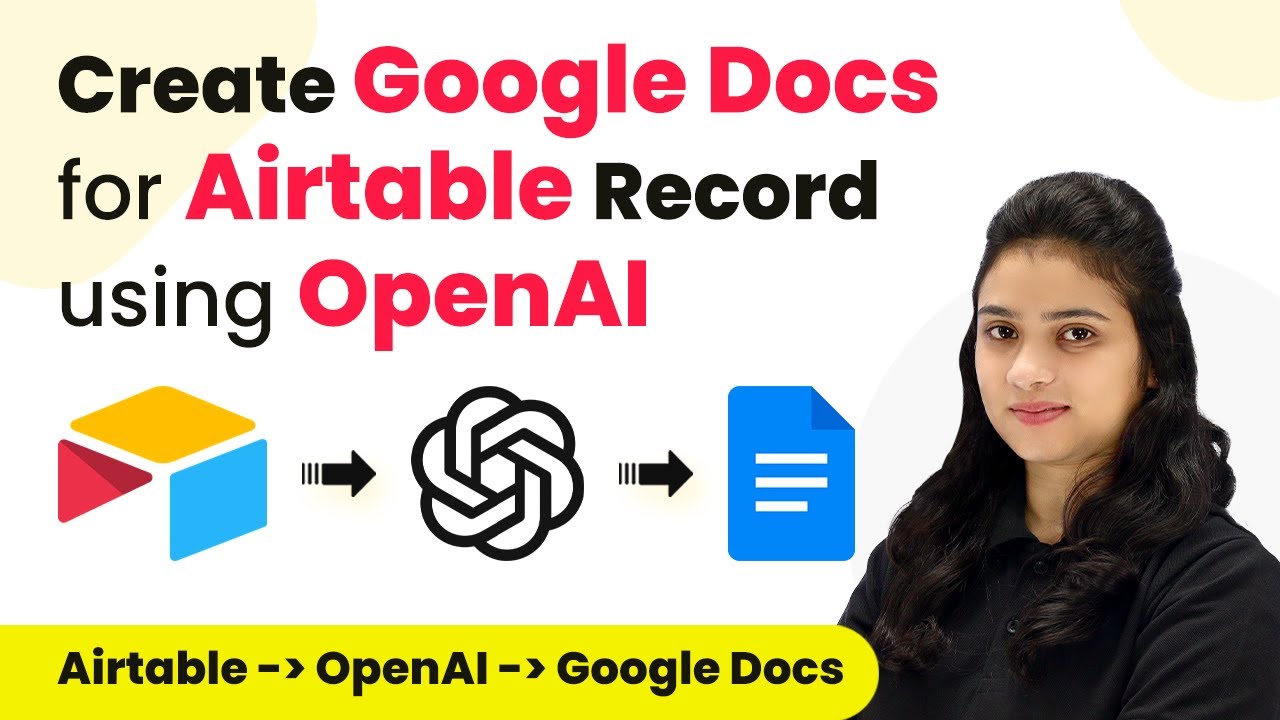
Learn how to automate the creation of Google Docs from Airtable records using Pabbly Connect and OpenAI. Step-by-step tutorial included. This comprehensive guide reveals exactly how to connect your applications and automate repetitive tasks — accessible for professionals of all technical backgrounds.

Watch Step By Step Video Tutorial Below


1. Accessing Pabbly Connect for Automation

To start automating the creation of Google Docs from Airtable records, first, access Pabbly Connect by visiting its homepage. You can do this by typing ‘Pabbly.com/connect’ into your browser. Here, you will see options to sign in or sign up for free if you are a new user.

After signing in, you will be directed to the dashboard of Pabbly Connect. This dashboard allows you to create and manage your workflows. Click on the ‘Create Workflow’ button to begin setting up your automation.


2. Creating a Workflow in Pabbly Connect

In this section, you will create a workflow that integrates Airtable, OpenAI, and Google Docs. After clicking the ‘Create Workflow’ button, you will need to name your workflow. For instance, name it ‘Create Google Docs for Airtable Record Using OpenAI’ and select a folder to save it.

  • Select the trigger application as Airtable.
  • Choose the trigger event as ‘New Record’.
  • Connect your Airtable account to Pabbly Connect by adding a new connection.

After setting the trigger, you will need to specify the base and table from which the data will be pulled. This will ensure that Pabbly Connect captures the correct data from Airtable.


3. Integrating OpenAI with Pabbly Connect

Once the trigger is set, the next step involves integrating OpenAI to generate content based on the titles from Airtable. Select OpenAI as your action application in Pabbly Connect and choose the action event to generate content.

To establish a connection with OpenAI, you will need to provide your API key. After connecting, you will configure the parameters such as AI model, prompt, and maximum tokens. For example, set the AI model to ‘text-davinci-003’ and provide a prompt like ‘Generate an article on’ followed by the title mapped from Airtable.


4. Creating Google Docs with Pabbly Connect

In this step, you will create a Google Doc to store the generated content. Select Google Docs as your action application in Pabbly Connect, then choose the action event to create a blank document. You will need to map the document name to the title received from Airtable.

  • Connect your Google Docs account to Pabbly Connect.
  • Use the mapped title as the name of the document.
  • Save and send a test request to verify document creation.

This process ensures that every time a new title is added in Airtable, a corresponding Google Doc is created with the title as its name.


5. Finalizing the Integration and Testing

Finally, to complete the integration, you will append the generated content into the newly created Google Doc. Select Google Docs again and choose the action event to append a paragraph to a document. Map the document ID and insert the generated article content into this document. using Pabbly Connect

After saving and sending a test request, check your Google Docs to confirm that the article has been successfully added. This automated process ensures that each time a title is added in Airtable, a document is created with the relevant content generated by OpenAI.


Conclusion

In this tutorial, we explored how to automate the creation of Google Docs from Airtable records using Pabbly Connect and OpenAI. This integration allows for efficient document generation based on dynamic content, saving time and effort in content creation.

Ensure you check out Pabbly Connect to create business automation workflows and reduce manual tasks. Pabbly Connect currently offer integration with 2,000+ applications.

Auto-Post Your Blogs on Social Media Platforms Using Pabbly Connect

Learn how to automate posting your WordPress blogs to social media platforms like Facebook and LinkedIn using Pabbly Connect in this detailed step-by-step tutorial. Follow this definitive guide to creating powerful automated workflows with straightforward, efficiency-focused solutions that save valuable time.

Watch Step By Step Video Tutorial Below


1. Access Pabbly Connect for Automation

To begin automating your blog posts, access Pabbly Connect by typing ‘Pabbly.com/connect’ in your browser. If you are a new user, click on the ‘Sign up for free’ button to create an account. Existing users can simply click on ‘Sign in’.

Once logged in, you will land on the dashboard where you can see all your workflows. To create a new automation, click on the ‘Create Workflow’ button located at the top right corner. Here, you can give your workflow a name, such as ‘Auto Post WordPress Blogs on Social Media Platforms’, and select a folder for organization.


2. Set Up Trigger and Action in Pabbly Connect

In this step, we will set up the trigger and action in Pabbly Connect. The trigger will be ‘WordPress’, which will initiate the workflow when a new blog post is published. Select ‘New Post Publish’ as the trigger event.

  • Choose ‘WordPress’ as the trigger application.
  • Select ‘New Post Publish’ as the trigger event.
  • Copy the Webhook URL provided by Pabbly Connect.

Next, you need to connect your WordPress account with Pabbly Connect using the Webhook URL. This URL will act as a bridge for sending data from WordPress to Pabbly Connect. Install the WP Webhooks plugin on your WordPress site if you haven’t already, and follow the setup instructions to add the Webhook URL.


3. Publish a Blog to Test the Integration

After setting up the Webhook, it’s time to test the integration. Create a new blog post in WordPress. Add a title and content, for example, ‘Impact of Fast Fashion in India’. After entering your content, click on ‘Publish’.

Once the blog is published, return to Pabbly Connect. You should see a message indicating that the Webhook response has been received. This confirms that your integration between WordPress and Pabbly Connect is successful, allowing for automatic data capture of the new blog.


4. Share Your Blog on Facebook Using Pabbly Connect

Now that the integration is working, we will configure Pabbly Connect to share your blog on Facebook. Select ‘Facebook Pages’ as the action application and choose ‘Create Page Post’ as the action event.

  • Connect your Facebook account to Pabbly Connect.
  • Select the Facebook Page where you want to post.
  • Map the title and content of your blog post from the previous step.

After mapping the required fields, click on ‘Save and Send Test Request’. Check your Facebook page to confirm that the post has been created successfully, displaying the title and content of your blog.


5. Share Your Blog on LinkedIn with Pabbly Connect

In this final step, we will set up Pabbly Connect to share your blog on LinkedIn. Select ‘LinkedIn’ as the action application and choose ‘Share Simple Text’ as the action event.

Connect your LinkedIn account to Pabbly Connect and map the blog title and content as you did for Facebook. Ensure that the visibility is set to Pabbly, so your connections can see the post. Click on ‘Save and Send Test Request’ to finalize the setup.

Once the request is successful, visit your LinkedIn profile to verify that the post has been created. This confirms that your blog is now automatically shared on multiple social media platforms using Pabbly Connect.


Conclusion

In this tutorial, we explored how to automate posting your blogs on various social media platforms using Pabbly Connect. By integrating WordPress with Facebook and LinkedIn, you can effortlessly share your content and expand your reach online.

Ensure you check out Pabbly Connect to create business automation workflows and reduce manual tasks. Pabbly Connect currently offer integration with 2,000+ applications.

How to Send Offers and Discounts to Customers on WhatsApp Using Pabbly Connect

Learn how to automate sending offers and discounts to customers on WhatsApp using Pabbly Connect and Google Sheets. Step-by-step tutorial included. Follow this definitive guide to creating powerful automated workflows with straightforward, efficiency-focused solutions that save valuable time.

Watch Step By Step Video Tutorial Below


1. Accessing Pabbly Connect for WhatsApp Integration

To send offers and discounts to customers on WhatsApp, you first need to access Pabbly Connect. Visit the Pabbly Connect homepage by typing Pabbly.com/connect in your browser. Here, you can either sign in or sign up for a free account.

If you are a new user, signing up will give you 100 free tasks each month to explore the platform. Once logged in, navigate to the dashboard where you can manage your workflows. This is where you’ll set up the integration between Google Sheets and WhatsApp using Pabbly Connect.


2. Creating a Workflow in Pabbly Connect

After accessing your dashboard in Pabbly Connect, you can create a new workflow. Click on the ‘Create Workflow’ button located in the top right corner. A dialog box will appear asking for a name for your workflow. Enter a descriptive name like ‘Send Automated WhatsApp Messages for Discounts’ and select a folder to save it.

  • Click on the ‘Create’ button to finalize your workflow creation.
  • You will see two windows: one for Trigger and the other for Action.
  • Select Google Sheets as your Trigger application and WhatsApp as your Action application.

By setting up this workflow, you enable Pabbly Connect to automate the process of sending WhatsApp messages whenever new data is added to your Google Sheets.


3. Setting Up Google Sheets Integration

To integrate Google Sheets with Pabbly Connect, select Google Sheets as your trigger application. Choose the trigger event as ‘New or Updated Spreadsheet Row’. This event will initiate the workflow when new data is added to the sheet.

Next, copy the webhook URL provided by Pabbly Connect and go to your Google Sheets. Navigate to Extensions > Add-ons > Get Add-ons, and search for ‘Pabbly Connect Webhooks’ to install it. After installation, refresh the Google Sheets page to access the add-on.

  • In the add-on, go to Initial Setup and paste the webhook URL.
  • Specify the Trigger Column; for example, Column B.
  • Send a test to confirm the connection.

This setup allows Pabbly Connect to capture customer data automatically from Google Sheets, streamlining the process of sending messages.


4. Sending WhatsApp Messages Using Pabbly Connect

Once Google Sheets is integrated, the next step is to set up WhatsApp messaging. For this, select WhatsApp as your action application in Pabbly Connect and choose the action event as ‘Send Template Message’. You will need to connect your WhatsApp account using the API endpoint and access token from your WhatsApp provider.

After connecting, map the WhatsApp number from the Google Sheets response to ensure messages are sent to the correct customer. Also, select the template you created for sending discount offers. Make sure to fill in any required fields such as the broadcast title and custom parameters.

Map the customer’s name to personalize the message. Ensure all template variables are correctly set up to avoid errors. Click on Save and Send Test Request to confirm the message is sent successfully.

This integration ensures that Pabbly Connect automates the sending of personalized discount messages to your customers via WhatsApp.


5. Finalizing and Testing the Automation

To finalize your automation, go back to Google Sheets and use the Pabbly Connect Webhooks add-on to send all data. This will trigger the sending of WhatsApp messages to all customers listed in your sheet. Each time new data is added, the integration will automatically send messages without manual intervention.

Test the entire process by adding a new customer to your Google Sheets. After entering the details, check WhatsApp to confirm that the message has been received correctly. This confirms that your workflow is functioning as intended, leveraging the power of Pabbly Connect.

In summary, you have successfully set up an automated system using Pabbly Connect to send discount offers to your customers on WhatsApp based on data from Google Sheets. This process not only saves time but also enhances customer engagement.


Conclusion

This tutorial on using Pabbly Connect to send offers and discounts to customers on WhatsApp provides a seamless way to automate communications. By integrating Google Sheets and WhatsApp, you can efficiently manage customer outreach.

Ensure you check out Pabbly Connect to create business automation workflows and reduce manual tasks. Pabbly Connect currently offer integration with 2,000+ applications.

How to Auto-Share YouTube Videos on Facebook Page Using Pabbly Connect

Learn how to automate sharing YouTube videos on your Facebook page using Pabbly Connect. Follow this step-by-step tutorial to streamline your social media presence. This comprehensive guide reveals exactly how to connect your applications and automate repetitive tasks — accessible for professionals of all technical backgrounds.

Watch Step By Step Video Tutorial Below


1. Accessing Pabbly Connect for Integration

To start automating your process, access Pabbly Connect by opening a new tab and navigating to the Pabbly website. If you are new, you can sign up for free, which takes only a couple of minutes, or log in if you already have an account.

Once logged in, click on the Access Now button under Pabbly Connect to reach the dashboard. Here, you will see various options, including the workflow section, where you can manage your integrations effectively.


2. Creating a New Workflow in Pabbly Connect

To create a new workflow, click on the Create Workflow button. You will need to name your workflow, for example, ‘Auto Share YouTube Videos on Facebook Page’. Make sure to select the folder where you want to save this workflow.

  • Click on the Create button to proceed.
  • You will see two boxes: Trigger and Action.
  • Set up the Trigger first, which will be YouTube in this case.

After naming your workflow, you will be directed to a new screen. Here, you will set up your trigger application, which is YouTube, and select the trigger event as ‘New Video in Channel with Video URL’. This is crucial for automating the sharing process.


3. Connecting YouTube to Pabbly Connect

To connect YouTube, click on the Connect button and select Add New Connection. You will need to authorize access to your YouTube account by clicking Continue. Once the connection is successful, you will be prompted to select your Channel ID.

Open the tab that displays your channel IDs and select the appropriate one, such as your demo channel. After this setup, go back to YouTube and publish a new video to test the integration.


4. Setting Up Facebook Integration with Pabbly Connect

Now that you have connected YouTube, it’s time to set up the action application, which is Facebook Pages. Search for Facebook in the action application field and select it. The action event you need is Create Page Post.

  • Click Connect and add a new connection to your Facebook account.
  • Authorize access by clicking Continue.
  • Select your Facebook page from the dropdown list.

After selecting your page, map the message for your post by retrieving the description of your YouTube video. This is done through the mapping feature in Pabbly Connect, which allows real-time data updates.


5. Finalizing the Integration and Testing

Once you have filled in all the details, including the message and video URL, click on the Save and Send Test Request button. A positive response will confirm that a new post has been created on your Facebook page.

To verify, refresh your Facebook page to see the new post. It should contain the same video and description that you uploaded on YouTube. This confirms that your integration between YouTube and Facebook via Pabbly Connect is functioning correctly.


Conclusion

This tutorial demonstrated how to use Pabbly Connect to automate the sharing of YouTube videos on your Facebook page. By following these steps, you can save time and enhance your social media presence effectively.

Ensure you check out Pabbly Connect to create business automation workflows and reduce manual tasks. Pabbly Connect currently offer integration with 2,000+ applications.

Automate WhatsApp Messages for False Ceiling Business Leads Using Pabbly Connect

Learn how to automate WhatsApp messages to your false ceiling business leads using Pabbly Connect with Facebook integration. Follow these detailed steps for seamless integration.

Watch Step By Step Video Tutorial Below


1. Accessing Pabbly Connect for Integration

To start automating WhatsApp messages, you first need to access Pabbly Connect. This platform allows seamless integration between Facebook Lead Ads and WhatsApp messaging applications like Vati. Begin by visiting the Pabbly website and signing in or creating a free account.

Once logged in, navigate to the Pabbly Connect dashboard. Here, you can create new workflows that will facilitate the integration process. Click on the ‘Create Workflow’ button to start setting up the connection between Facebook and WhatsApp.


2. Creating a New Workflow in Pabbly Connect

In this section, you will create a workflow specifically for sending automated WhatsApp messages to your leads. After clicking the ‘Create Workflow’ button, name your workflow based on its purpose, such as ‘Automated WhatsApp Messages for False Ceiling Business Leads’.

  • Name your workflow clearly for easy identification.
  • Select a folder to save your workflow.
  • Click ‘Create’ to proceed to the next step.

After creating the workflow, you will see two main sections: Trigger and Action. The Trigger is set to activate when a new lead is generated from Facebook Lead Ads. This setup ensures that every new lead automatically initiates the WhatsApp messaging process through Pabbly Connect.


3. Setting Up the Trigger with Facebook Lead Ads

Now, it’s time to configure the Trigger in Pabbly Connect. Search for ‘Facebook Lead Ads’ in the Trigger application section. Select it and then choose the event ‘New Lead Instant’. This event will trigger the workflow whenever a new lead is captured.

Next, connect your Facebook account to Pabbly Connect. After clicking on ‘Connect’, follow the prompts to authorize access. Once connected, you will need to select the specific Facebook page and lead generation form that corresponds to your false ceiling business.


4. Sending Automated WhatsApp Messages via Vati

After setting up the Trigger, the next step is to configure the Action by selecting Vati as the application to send WhatsApp messages. Choose the action event ‘Send Template Message’. This allows you to send predefined messages to leads captured from Facebook.

  • Paste the API endpoint and access token from your Vati account into Pabbly Connect.
  • Map the WhatsApp number from the lead response to ensure messages are sent to the correct contact.
  • Select the message template you created in Vati for your WhatsApp messages.

By following these steps, Pabbly Connect will successfully send automated WhatsApp messages to your leads, enhancing communication and engagement with potential clients.


5. Testing the Integration Workflow

Once everything is set up, it’s crucial to test the integration to ensure it works as intended. Make a sample submission through your Facebook lead form to generate a new lead. This action should trigger the WhatsApp message sending process via Pabbly Connect.

Check your WhatsApp to confirm if the automated message was received. The message should include the lead’s name and a welcoming note as per your template. This test will validate that the integration between Facebook Lead Ads and Vati through Pabbly Connect is functioning correctly.


Conclusion

In this tutorial, we demonstrated how to use Pabbly Connect to automate WhatsApp messages for new leads generated through Facebook Lead Ads. By following the steps outlined, you can enhance your customer engagement and streamline your communication process effectively.

Ensure you check out Pabbly Connect to create business automation workflows and reduce manual tasks. Pabbly Connect currently offer integration with 2,000+ applications.

How to Send Automated WhatsApp Messages to Facebook Leads Using Pabbly Connect

Learn how to automate WhatsApp messages to Facebook leads in the healthcare equipment industry using Pabbly Connect. Step-by-step guide included. Implement the precise methodologies leading organizations use to automate repetitive tasks, illustrated with practical examples designed for immediate application.

Watch Step By Step Video Tutorial Below


1. Accessing Pabbly Connect for Automation

To start sending automated WhatsApp messages to Facebook leads, you need to access Pabbly Connect. First, sign in to your existing account or click on the sign-up button if you are a new user. Pabbly Connect offers 100 free tasks each month for new users, making it easy to get started.

Once logged in, navigate to the Pabbly Connect dashboard. Click on the ‘Access Now’ button to reach your dashboard. Here, you will create a new workflow to automate the message sending process. This is the first step in integrating WhatsApp with Facebook leads.


2. Creating a New Workflow in Pabbly Connect

In your Pabbly Connect dashboard, click on the ‘Create Workflow’ button. You will be prompted to name your workflow, which you can title ‘Send Automated WhatsApp Message to Facebook Leads’. Make sure to save it in a relevant folder for easy access. using Pabbly Connect

  • Click on ‘Create’ to finalize your workflow setup.
  • You will now see a trigger and action window.

In this window, you will set up the trigger application as Facebook Lead Ads and the action application as WhatsApp using Vati. This setup is crucial for sending automated messages whenever a new lead is generated.


3. Setting Up Facebook Lead Ads as Trigger

To establish the trigger for your workflow, select Facebook Lead Ads as the trigger application in Pabbly Connect. Choose the trigger event as ‘New Lead Instant’. This means that every time a new lead is generated through your Facebook ads, the workflow will initiate automatically.

Next, you need to connect your Facebook account to Pabbly Connect. Click on the ‘Connect’ button and authorize the connection. Once connected, select the Facebook page and the lead generation form associated with it. For example, if your page is named ‘Life Care Medical Equipments’, select it along with the corresponding lead form.


4. Sending WhatsApp Messages Using Vati

After setting up the trigger, the next step is to define the action. Select Vati as your action application in Pabbly Connect and choose the action event as ‘Send Template Message’. This allows you to send a predefined message to your leads via WhatsApp.

To connect to Vati, you will need to input the API endpoint and access token from Vati’s API documentation. Once connected, you can map the WhatsApp number from the data received from the Facebook lead ads. This ensures that the message is sent directly to the lead’s phone number.

  • Select the template you have created for WhatsApp messages.
  • Customize the message body to include the lead’s name dynamically.

Once everything is set up, click on ‘Save and Test Request’ to ensure that the WhatsApp message is sent successfully to the test lead.


5. Testing and Verifying the Integration

To confirm that your integration works, you need to create a test lead using the Facebook lead ads testing tool. This tool allows you to simulate a new lead entry. Once you submit the test lead, check Pabbly Connect to see if the lead details are captured correctly.

If the integration is successful, you will receive a WhatsApp message sent to the test lead. This verifies that your setup is functioning as intended. Now, every time a new lead is generated through Facebook, an automated WhatsApp message will be sent, enhancing your communication process in the healthcare equipment industry.

Utilizing Pabbly Connect for this automation greatly simplifies the process of managing leads and ensures timely communication with potential customers. This integration not only saves time but also improves customer engagement.


Conclusion

In this tutorial, we explored how to use Pabbly Connect to send automated WhatsApp messages to Facebook leads in the healthcare equipment industry. By following the steps outlined, you can streamline your lead communication effectively and efficiently.

Ensure you check out Pabbly Connect to create business automation workflows and reduce manual tasks. Pabbly Connect currently offer integration with 2,000+ applications.

How to Add WooCommerce Orders to Google Sheets Using Pabbly Connect

Learn how to integrate WooCommerce with Google Sheets using Pabbly Connect for seamless order management. Follow our step-by-step tutorial to automate your workflow! Explore systematic approaches to creating efficient automation solutions that convert technical concepts into practical, implementable instructions.

Watch Step By Step Video Tutorial Below


1. Setting Up Pabbly Connect for WooCommerce and Google Sheets

To start integrating WooCommerce orders into Google Sheets, you will first need to access Pabbly Connect. This powerful automation tool allows you to connect various applications seamlessly. Sign up for a free account on Pabbly Connect to begin your automation journey.

Once logged in, navigate to the dashboard and click on the blue button labeled ‘Create Workflow’. Provide a name for your workflow, such as ‘Add WooCommerce Orders in Google Sheets for Multiple Products’. Select the main workflow folder and click on ‘Create’ to proceed.


2. Configuring Trigger and Action in Pabbly Connect

In the Pabbly Connect interface, you will find two boxes labeled as ‘Trigger’ and ‘Action’. The trigger represents the event that starts the automation, while the action is what happens as a result. For this integration, select ‘WooCommerce’ as the trigger application and ‘New Order’ as the trigger event. using Pabbly Connect

  • Select ‘WooCommerce’ as your trigger application.
  • Choose ‘New Order’ as the trigger event.
  • Copy the provided webhook URL for integration.

Make sure to disable the simple response option in Pabbly Connect to enable advanced response format. This is crucial for capturing detailed order information. After copying the webhook URL, proceed to your WooCommerce settings to set up the webhook.


3. Setting Up WooCommerce Webhook

In your WooCommerce dashboard, navigate to ‘Settings’ and then to the ‘Advanced’ section. Here, you will find the option for webhooks. Click on ‘Add New Webhook’. Provide a name such as ‘Connection with Pabbly Connect’, set the status to active, and paste the copied webhook URL in the delivery URL field.

Next, ensure that you select the same topic as the trigger event, which is ‘New Order’. Save the webhook settings. Once saved, you will receive a webhook ID, indicating that the connection has been successfully established. This step is vital as it allows Pabbly Connect to listen for new orders placed in WooCommerce.


4. Transforming Order Data for Google Sheets

After setting up the webhook, the next step is to transform the order data into a format suitable for Google Sheets. In Pabbly Connect, click on the plus icon to add a new step and search for the ‘Data Transformer’ feature. This allows you to convert the array of order details into a simpler format.

  • Select ‘Data Transformer’ from the options.
  • Map the line items data from the previous step.
  • Convert JSON data into comma-separated values.

To ensure the data is correctly formatted, you can replace commas with new lines. This can be achieved by adding another step in Pabbly Connect using the text formatter feature. This step will ensure that each product detail appears on a new line in your Google Sheets.


5. Sending Transformed Data to Google Sheets

Once the data is transformed, it’s time to send it to Google Sheets. In Pabbly Connect, select Google Sheets as the action application and choose ‘Add a New Row’ as the action event. Connect your Google Sheets account by providing the necessary access.

After connecting, select the spreadsheet and the specific sheet where you want the data to be sent. Map the fields from the transformed data to the corresponding columns in your Google Sheet, such as customer name, email, product details, and total amount.

Once all fields are mapped, the integration is complete. You can test the workflow by placing a new order in WooCommerce. The order details should automatically appear in your Google Sheets, confirming that Pabbly Connect is functioning correctly. This automation saves time and ensures accurate order tracking without manual input.


Conclusion

Integrating WooCommerce orders into Google Sheets using Pabbly Connect simplifies order management and enhances efficiency. By following the steps outlined in this tutorial, you can automate your workflow, ensuring that every new order is captured and documented seamlessly. Start automating today for better business management!

Ensure you check out Pabbly Connect to create business automation workflows and reduce manual tasks. Pabbly Connect currently offer integration with 2,000+ applications.

How to Connect Telegram Bot to Google Sheets Using Pabbly Connect

Learn how to seamlessly integrate Google Sheets with Telegram Bot using Pabbly Connect. Follow our step-by-step tutorial for automation. Navigate the automation landscape confidently with clear, structured guidance suitable for professionals regardless of prior technical experience.

Watch Step By Step Video Tutorial Below


1. Accessing Pabbly Connect for Integration

To begin the integration of Google Sheets with Telegram Bot, access Pabbly Connect by visiting its landing page. If you are a new user, you can sign up for free and get 100 tasks monthly.

Once logged in, navigate to the Pabbly Connect dashboard by clicking on ‘Access Now’. From here, you can create a new workflow to connect your applications seamlessly.


2. Creating a New Workflow in Pabbly Connect

In Pabbly Connect, creating a new workflow is crucial for setting up the integration. Click on the ‘Create Workflow’ button located in the top right corner of your dashboard.

  • Name your workflow as ‘Connect Telegram Bot to Google Sheets’.
  • Select the folder where you want to save this workflow.
  • Click on ‘Create’ to proceed.

This step sets the stage for defining the trigger and action applications that will automate your workflow.


3. Setting Up Trigger and Action Applications

In this tutorial, the trigger application will be Google Sheets, and the action application will be the Telegram Bot. In Pabbly Connect, select Google Sheets as your trigger application.

Choose the trigger event as ‘New or Updated Spreadsheet Row’. This will activate whenever a new row is added or updated in your Google Sheets document.

  • Select the specific Google Sheets document where you will be adding post titles and content.
  • Ensure that the trigger column is set to the column where the final data will be entered.

Now, you have successfully set up the trigger application that will monitor Google Sheets for changes.


4. Connecting Telegram Bot in Pabbly Connect

Next, in Pabbly Connect, select Telegram Bot as your action application. Choose the action event as ‘Send Text Message’. This action will send messages to your Telegram group based on the data captured from Google Sheets.

To establish a connection, you will need a Telegram Bot Token. Use the BotFather in Telegram to create a bot and obtain this token. Copy the token into Pabbly Connect to establish the connection.

Add your bot to the target Telegram group and set it as an admin. Enter the chat ID of the group where you want to send messages.

Once these steps are completed, you will have successfully connected your Telegram Bot to Pabbly Connect.


5. Mapping Data and Testing the Integration

In this final step, you will map the data from Google Sheets to the message format in Telegram. In Pabbly Connect, create the message to be sent by including the post title and content from the Google Sheet.

After mapping the fields, click on ‘Save’ and then ‘Send Test Request’ to verify the integration. If successful, the message will appear in your Telegram group.

Ensure that the message includes dynamic data from Google Sheets. Check the Telegram group for the received message to confirm successful integration.

With this, your integration between Google Sheets and Telegram Bot using Pabbly Connect is complete and ready to automate your workflow.


Conclusion

In this tutorial, we explored how to connect Google Sheets to Telegram Bot using Pabbly Connect. This integration allows you to automate message sending based on new entries in your Google Sheets, streamlining your communication process effectively.

Ensure you check out Pabbly Connect to create business automation workflows and reduce manual tasks. Pabbly Connect currently offer integration with 2,000+ applications.

How to Create Multi Image Facebook Page Post from Google Sheets Using Pabbly Connect

Learn how to create multi-image Facebook page posts from Google Sheets using Pabbly Connect for seamless integration and automation. Discover hidden automation capabilities within your existing tools. This guide shows you how to connect your essential applications and permanently eliminate redundant manual processes.

Watch Step By Step Video Tutorial Below


1. Accessing Pabbly Connect for Facebook Integration

To create multi-image Facebook page posts from Google Sheets, you’ll first need to access Pabbly Connect. This platform allows seamless integration between Google Sheets and Facebook, facilitating automation.

Start by signing in to your existing Pabbly account. If you’re new, click on the ‘Sign up for free’ button. Each month, new users receive 100 tasks for free, making it easy to explore Pabbly Connect.


2. Creating a Workflow in Pabbly Connect

In Pabbly Connect, creating a new workflow is straightforward. Click on the ‘Create Workflow’ button located in the top right corner of the dashboard.

  • Give your workflow a descriptive name, such as ‘Create Multi Image Facebook Page Post from Google Sheets’.
  • Select the folder where you want to save this workflow.
  • Click on ‘Create’ to finalize your workflow setup.

After creating the workflow, you will see options for setting up triggers and actions. This is where the integration between Google Sheets and Facebook will take place using Pabbly Connect.


3. Setting Up the Trigger with Google Sheets

The next step involves setting up the trigger in Pabbly Connect. Choose Google Sheets as your trigger application. The trigger event should be set to ‘New or Updated Spreadsheet Row’.

This means that whenever a new row is added to your Google Sheet with the title and image links, the workflow will activate. Make sure to properly configure the connection between Google Sheets and Pabbly Connect.

  • Copy the webhook URL provided by Pabbly Connect.
  • In your Google Sheet, go to Extensions > Pabbly Connect Webhooks > Initial Setup.
  • Paste the webhook URL and set the trigger column (e.g., column B for your title).

After this setup, whenever you add a new row in Google Sheets, the details will be captured by Pabbly Connect and trigger the workflow.


4. Configuring the Action to Create Facebook Post

After setting up the trigger, it’s time to configure the action in Pabbly Connect. Choose Facebook Pages as your action application and select the action event as ‘Create Multi-Image Post’.

Establish a connection between Facebook and Pabbly Connect by logging into your Facebook account and authorizing the integration. Select the page where you want to create the post.

Map the image links from Google Sheets to the image URL field in the action setup. Map the title from Google Sheets to the message field. Leave the publish time blank if you want it to post immediately.

This mapping ensures that each new entry in Google Sheets automatically populates the corresponding fields in your Facebook post, streamlining the process through Pabbly Connect.


5. Testing the Integration

To ensure everything is working correctly, test the integration by adding a new row in your Google Sheet with a title and image links. Once you save this row, Pabbly Connect should capture the data and execute the workflow.

Check your Facebook page to verify that the post has been created successfully with the title and images provided. This confirms that the integration between Google Sheets and Facebook via Pabbly Connect is functioning as intended.

With this setup, you can effortlessly create multi-image Facebook posts directly from Google Sheets, showcasing the powerful capabilities of Pabbly Connect for automation and integration.


Conclusion

Using Pabbly Connect, you can easily automate the process of creating multi-image Facebook posts from Google Sheets. This integration streamlines your workflow and saves time, making it ideal for regular social media updates.

Ensure you check out Pabbly Connect to create business automation workflows and reduce manual tasks. Pabbly Connect currently offer integration with 2,000+ applications.

Automate WhatsApp Messages to Arms Industries Leads with Pabbly Connect

Learn how to send automated WhatsApp messages to your arms industries leads using Pabbly Connect. Step-by-step guide on Facebook WhatsApp integration. Navigate the automation landscape confidently with clear, structured guidance suitable for professionals regardless of prior technical experience.

Watch Step By Step Video Tutorial Below


1. Access Pabbly Connect for WhatsApp Integration

To start automating WhatsApp messages for your arms industries leads, first access Pabbly Connect. This platform is essential for integrating various applications seamlessly. Open a new tab and go to the Pabbly website to either sign in or sign up for a free account.

Once logged in, navigate to the dashboard. Here, you will find all the apps offered by Pabbly. Click on the access button for Pabbly Connect to get started with your integration setup. This will lead you to the workflow section, where you can create a new workflow.


2. Creating a New Workflow in Pabbly Connect

In Pabbly Connect, click on the button to create a new workflow. Name your workflow something descriptive, like ‘Automated WhatsApp Message for Arms Industries Leads.’ Select the folder where you want to save this workflow, and then click on Create.

  • Click on the ‘Create Workflow’ button.
  • Name your workflow appropriately.
  • Select the folder for saving your workflow.

This setup will allow you to define triggers and actions for your workflow, which is crucial for the automation process. Now, you can proceed to set up the trigger for your WhatsApp message integration.


3. Setting Up the Trigger in Pabbly Connect

The next step involves setting up the trigger in your Pabbly Connect workflow. Select Facebook Lead Ads as your trigger application. This will initiate the workflow whenever a new lead is generated. Choose the event ‘New Lead Instant’ as your trigger event.

To connect Facebook Lead Ads with Pabbly Connect, click on the connect button and add a new connection. Follow the prompts to grant access to your Facebook account. Once connected, you need to select the specific Facebook page and lead generation form from which you want to pull data.

  • Select ‘Facebook Lead Ads’ as the trigger application.
  • Choose ‘New Lead Instant’ as the trigger event.
  • Connect your Facebook account to Pabbly Connect.

After mapping these details, save your settings and test the connection to ensure everything is working correctly. This will prepare you for the action step of sending WhatsApp messages.


4. Configuring the Action Step in Pabbly Connect

Now that your trigger is set up, it’s time to configure the action step in Pabbly Connect. Select WTI as your action application. Choose the action event “Send Template Message.” This step is crucial as it allows you to send automated messages to your leads via WhatsApp.

To connect WTI with Pabbly Connect, you will need to provide the API endpoint and access token. These can be found in the WTI API documentation. Paste these details into the respective fields in Pabbly Connect.

Select ‘WTI’ as the action application. Choose ‘Send Template Message’ as the action event. Enter the API endpoint and access token from WTI.

After connecting, you will need to map the WhatsApp number from the Facebook lead response. This mapping will ensure that the correct number receives the message. Finally, select the message template you created in WTI to complete your setup.


5. Testing and Verifying the Integration

With both the trigger and action steps configured in Pabbly Connect, it’s time to test the integration. Generate a sample lead through your Facebook lead form to see if the automated WhatsApp message is sent. This step is crucial to ensure that your workflow functions as intended.

Check your WhatsApp for the received message. It should match the template you set up in WTI, confirming that the integration is successful. If the message is received correctly, your automation is now fully operational.

Generate a sample lead through your Facebook form. Verify the WhatsApp message received matches your template. Ensure that the integration is functioning as expected.

Now, whenever a new lead is generated from Facebook, an automated WhatsApp message will be sent, streamlining your communication process in the arms industry.


Conclusion

In this tutorial, we explored how to use Pabbly Connect to automate WhatsApp messages for your arms industries leads. By following the steps outlined, you can successfully integrate Facebook Lead Ads with WhatsApp messaging, enhancing your lead communication process effectively.

Ensure you check out Pabbly Connect to create business automation workflows and reduce manual tasks. Pabbly Connect currently offer integration with 2,000+ applications.