How to Generate Permanent WhatsApp Cloud API Token Using Pabbly Connect

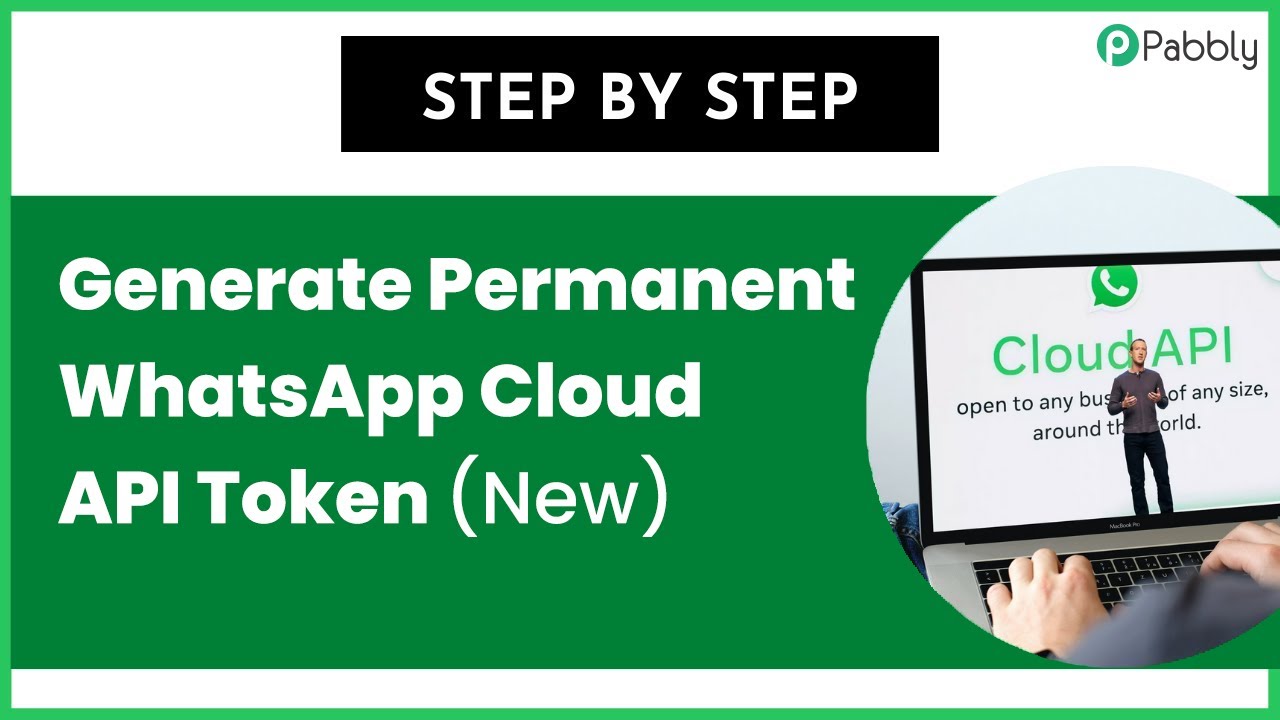
Learn how to generate a permanent WhatsApp Cloud API token step by step using Pabbly Connect for seamless integration with Box and Facebook. Discover hidden automation capabilities within your existing tools. This guide shows you how to connect your essential applications and permanently eliminate redundant manual processes.

Watch Step By Step Video Tutorial Below


1. Accessing Pabbly Connect for Integration

To generate a permanent WhatsApp Cloud API token, you need to access Pabbly Connect. This platform allows seamless integration with various applications like Box and Facebook.

First, log in to your Pabbly Connect account. Once you are logged in, you will be able to create workflows that connect your WhatsApp Cloud API with other applications. This is crucial for automating your messaging processes.


2. Creating Your WhatsApp Cloud API Account

Creating a WhatsApp Cloud API account is essential before using Pabbly Connect. This account will serve as the foundation for generating the permanent access token.

Follow these steps to create your account:

  • Visit the Facebook Developer portal and create a new app.
  • Select WhatsApp as the product for your app.
  • Complete the app setup by following the on-screen instructions.

Once the app is created, you can access it through Pabbly Connect to generate the permanent access token. This process is vital for ensuring your WhatsApp Cloud API remains functional without needing frequent re-authentication.


3. Generating the Permanent Access Token

Generating the permanent access token involves specific actions in your Facebook Developer settings. This token will allow you to use your WhatsApp Cloud API with Pabbly Connect without expiration.

Here’s how to generate the token:

  • Navigate to the System Users section in your app settings.
  • Click on ‘Add’ to create a new system user and assign it appropriate permissions.
  • Select the ‘Generate Token’ option and choose ‘Never’ for expiration.

After selecting the necessary permissions, click on ‘Generate Token’. This permanent token is crucial for integrating with Pabbly Connect, allowing you to automate your WhatsApp messaging effectively.


4. Connecting Pabbly Connect with WhatsApp API

Now that you have your permanent access token, it’s time to connect it with Pabbly Connect. This step involves creating a new workflow to send messages through your WhatsApp Cloud API.

To connect, follow these steps:

In Pabbly Connect, create a new workflow and select WhatsApp Cloud API as the action app. Choose ‘Send Template Message’ as the action event. Enter the permanent access token along with your phone number ID and WhatsApp business account ID.

Click on ‘Save’ to finalize the connection. This integration allows you to send messages without worrying about token expiration, thanks to the permanent access token generated earlier.


5. Sending a Test Message via Pabbly Connect

After connecting your WhatsApp Cloud API with Pabbly Connect, you can send a test message to ensure everything is working correctly. This step verifies your setup and integration.

To send a test message, follow these steps:

Select a template from your WhatsApp Cloud API account. Enter the recipient’s mobile number. Click on ‘Send Test Request’ to dispatch the message.

If the message is successfully sent, you will receive a confirmation response. This indicates that your WhatsApp Cloud API is properly integrated with Pabbly Connect, allowing for seamless communication.


Conclusion

In this tutorial, we demonstrated how to generate a permanent WhatsApp Cloud API token using Pabbly Connect. This process ensures uninterrupted messaging capabilities without the need for frequent token renewal. By following the outlined steps, you can effectively integrate your WhatsApp Cloud API with Pabbly Connect, enhancing your automation capabilities.

Ensure you check out Pabbly Connect to create business automation workflows and reduce manual tasks. Pabbly Connect currently offer integration with 2,000+ applications.

How to Take Medicine Orders Online & Send Automatic Confirmation to Customers Using Pabbly Connect

Learn how to automate medicine orders and send confirmations using Pabbly Connect with WhatsApp and Google Forms in this detailed tutorial. Transform complex automation concepts into accessible, actionable steps that eliminate unnecessary manual work while maximizing existing application capabilities.

Watch Step By Step Video Tutorial Below


1. Accessing Pabbly Connect for Automation

To automate the process of taking medicine orders online, you need to access Pabbly Connect. Start by visiting the Pabbly Connect homepage by entering the URL in your browser. Once there, you will see options to sign in or sign up for free.

If you are a new user, click on the ‘Sign Up for Free’ button. This allows you to create your account and explore the features with 100 free tasks each month. Existing users can simply click ‘Sign In’ to access their dashboard and start creating workflows.


2. Creating a Workflow in Pabbly Connect

Once logged into Pabbly Connect, you will arrive at the dashboard where you can manage your workflows. To create a new workflow, click on the ‘Create Workflow’ button in the top right corner. A dialog box will prompt you to name your workflow.

  • Name your workflow something like ‘Take Medicine Orders and Send Confirmation’.
  • Select a folder to save your workflow, such as ‘Test Integrations’.
  • Click ‘Create’ to proceed.

After creating the workflow, you will see two windows: one for the trigger and one for the action. This is where you will set up the integration between Google Forms and WhatsApp using Pabbly Connect.


3. Setting Up Google Forms as a Trigger

The next step is to set up Google Forms as your trigger application in Pabbly Connect. Select Google Forms from the trigger application options and choose ‘New Response Received’ as your trigger event. This means the workflow will start whenever a new form response is submitted.

Once you select the trigger event, Pabbly Connect will provide you with a webhook URL and instructions to connect Google Forms to it. Copy the webhook URL and proceed to your Google Forms to link it with Pabbly Connect.

  • Open your Google Form and navigate to the Responses section.
  • Click on ‘View in Sheets’ to link the form with Google Sheets.
  • Install the Pabbly Connect Webhooks add-on from Google Workspace Marketplace.

After installing, refresh your Google Sheets to see the Pabbly Connect Webhooks option under the Extensions menu. This integration will allow responses from Google Forms to be captured in Pabbly Connect.


4. Sending Confirmation Messages via WhatsApp

Now that your Google Forms is set up, the next step is to send confirmation messages to customers via WhatsApp using Pabbly Connect. In the action application section, select WhatsApp and choose ‘Send Template Message’ as your action event. This will allow you to send a pre-defined message to the customer who placed the order.

To connect to WhatsApp, you need to add a new connection by entering the API endpoint and access token from your WhatsApp provider, such as Vati. After entering these details, click ‘Save’ to establish the connection.

Map the WhatsApp number field to the number collected from the Google Form response. Select the template you created for order confirmation. Enter the broadcast title matching your template.

This setup ensures that every time a new order is placed, a confirmation message is automatically sent to the customer via WhatsApp, streamlining your order process through Pabbly Connect.


5. Testing and Finalizing Your Integration

After setting up the action in Pabbly Connect, it’s crucial to test your integration. Submit a test order through your Google Form to ensure that all data is correctly captured and sent to WhatsApp. Once the form is submitted, check your Google Sheets to confirm that the response appears.

Then, in Pabbly Connect, click on ‘Send Test Request’ to verify that the WhatsApp message is dispatched successfully. If everything is set up correctly, you should receive the confirmation message on WhatsApp, indicating that your integration works as intended.

To finalize, ensure that the workflow is saved and activated in Pabbly Connect. This automation will now automatically handle medicine orders and confirmations, enhancing your customer service.


Conclusion

In this tutorial, we explored how to use Pabbly Connect to automate taking medicine orders online and sending automatic confirmations via WhatsApp. This integration streamlines your order management process, ensuring timely communication with customers.

Ensure you check out Pabbly Connect to create business automation workflows and reduce manual tasks. Pabbly Connect currently offer integration with 2,000+ applications.

How to Share One Facebook Page Post on Multiple Facebook Pages Using Pabbly Connect

Learn how to automate sharing a Facebook page post on multiple pages using Pabbly Connect. Follow this step-by-step guide for seamless integration. Develop expertise in application integration and learn how to design streamlined automation workflows using proven, simplified approaches.

Watch Step By Step Video Tutorial Below


1. Accessing Pabbly Connect for Facebook Automation

To share one Facebook page post on multiple Facebook pages, you first need to access Pabbly Connect. This platform allows you to automate the sharing process seamlessly. Start by navigating to the Pabbly Connect homepage by entering ‘Pabbly.com/connect’ in your browser.

Once on the homepage, you will see options to sign in or sign up for free. If you are a new user, click on the ‘Sign Up for Free’ button to create your account. Existing users can directly sign in. Upon registration, you will receive 100 free tasks each month to explore the features of Pabbly Connect.


2. Creating a New Workflow in Pabbly Connect

After signing into your Pabbly Connect account, you will be directed to the dashboard. Here, you can create a new workflow by clicking the ‘Create Workflow’ button located in the top right corner. A dialog box will prompt you to name your workflow; enter a name like ‘Share Facebook Page Post on Multiple Facebook Pages’.

  • Select the appropriate folder for your workflow.
  • Click on ‘Create’ to initiate your workflow setup.

Now, you will see two windows labeled ‘Trigger’ and ‘Action’. The trigger determines when the workflow starts, while actions are the responses to that trigger. In this case, you will set the trigger as Facebook Pages and the action as the same.


3. Setting Up the Trigger in Pabbly Connect

The next step involves selecting your trigger application. Choose Facebook Pages and then select the trigger event as ‘New Post’. This event will activate the workflow whenever a new post is created on your selected Facebook page.

Click on ‘Connect’ and choose ‘Add New Connection’ to link your Facebook account. Once the connection is established, select the specific Facebook page you want to monitor for new posts. After selecting the page, click on the ‘Save and Send Test Request’ button to test the connection.

  • Create a test post on the selected Facebook page.
  • Ensure the test post details are captured in Pabbly Connect.

This confirmation indicates that your Facebook page is successfully connected to Pabbly Connect, allowing it to listen for new posts.


4. Configuring Action Steps to Share Posts

With the trigger set up, the next step is to configure the action steps. You will add multiple actions to share the post on different Facebook pages. Start by selecting Facebook Pages again as your action application and choose ‘Create Page Post’ as the action event.

After establishing the connection, select the first Facebook page where you want the post to be shared. In the message field, use the mapping feature to insert the content from the trigger step. This ensures that the post shared on the new page contains the same content as the original post.

Map the content from the trigger response to the action message. Click on ‘Save and Send Test Request’ to verify the action.

Repeat this process for any additional Facebook pages you want to share the post on. This step ensures that every time a post is made on the original page, it will automatically be shared on all designated pages through Pabbly Connect.


5. Testing the Automation for Successful Sharing

After configuring all action steps, it is crucial to test the automation. Create a new post on your primary Facebook page and check if it is shared across all connected pages. This verification ensures that your setup is functioning correctly.

Once you create the post, refresh the other Facebook pages to see if the same content appears. If the posts are shared successfully, your automation is complete, and you can now share content effortlessly across multiple Facebook pages using Pabbly Connect.

Confirm that the post appears on all selected pages. Make adjustments if necessary to ensure seamless sharing.

This setup allows for efficient management of multiple Facebook pages, enhancing your social media strategy with the help of Pabbly Connect.


Conclusion

Using Pabbly Connect, you can easily automate the process of sharing a Facebook page post on multiple Facebook pages. This integration streamlines your social media management, allowing you to focus on content creation while ensuring consistent messaging across all platforms.

Ensure you check out Pabbly Connect to create business automation workflows and reduce manual tasks. Pabbly Connect currently offer integration with 2,000+ applications.

How to Generate Unique Articles with AI Using Pabbly Connect: A Step-by-Step Guide

Learn how to generate unique articles automatically using Pabbly Connect with Google Sheets and ChatGPT. Follow our detailed tutorial for seamless integration. Navigate the automation landscape confidently with clear, structured guidance suitable for professionals regardless of prior technical experience.

Watch Step By Step Video Tutorial Below


1. Accessing Pabbly Connect for Automation

To generate unique articles using AI, you first need to access Pabbly Connect. This platform enables seamless integration between various applications, including Google Sheets and ChatGPT. Start by creating a free account on Pabbly Connect by visiting their website and signing up.

After logging in, you will be directed to the dashboard. Here, you can create a new workflow to automate the article generation process. Follow these steps to get started:

  • Visit the Pabbly Connect website and sign up for a free account.
  • Log in to your account and navigate to the dashboard.
  • Click on the ‘Create Workflow’ button to start a new automation.

With these steps, you are now ready to set up your first automation using Pabbly Connect.


2. Creating a Workflow for Article Generation

Once you are in the Pabbly Connect dashboard, you can create a workflow to automate article generation. Start by naming your workflow, such as ‘Generate Unique Articles with AI Step by Step’. Next, you will set up the trigger for your workflow. using Pabbly Connect

For this process, select Google Sheets as your trigger application. Choose the event ‘New or Updated Spreadsheet Row’. This means that whenever a new topic is added to your spreadsheet, it will trigger the automation. Follow these steps:

  • Select Google Sheets as your trigger application.
  • Choose the trigger event ‘New or Updated Spreadsheet Row’.
  • Copy the webhook URL provided by Pabbly Connect.

Now, you can connect your Google Sheets to Pabbly Connect by using the webhook URL in your spreadsheet to send data automatically.


3. Setting Up Google Sheets for Automation

After setting up the trigger in Pabbly Connect, you need to configure your Google Sheets to work with this automation. Open your Google Sheets and install the Pabbly Connect Webhooks add-on. This will allow your spreadsheet to communicate with Pabbly Connect.

Once the add-on is installed, go to the add-on menu, select Pabbly Connect, and then click on ‘Initial Setup’. Paste the webhook URL you copied earlier and specify the trigger column, which will be the column where you enter your command (e.g., ‘Yes’). Follow these steps:

Install the Pabbly Connect Webhooks add-on in Google Sheets. Open the add-on and select ‘Initial Setup’. Paste the webhook URL and set the trigger column.

With this configuration, your Google Sheets will now send data to Pabbly Connect whenever a new topic is added, enabling the automation to begin.


4. Integrating ChatGPT for Article Generation

Now that your Google Sheets is set up, it’s time to integrate ChatGPT into your workflow using Pabbly Connect. Select ChatGPT as the action application and choose the event ‘Ask ChatGPT’. You will need to connect your ChatGPT account by providing the API key.

In the action setup, map the fields to pull the topic and instructions from your Google Sheets. This allows ChatGPT to generate an article based on the data from your spreadsheet. Follow these steps:

Select ChatGPT as the action application. Choose the action event ‘Ask ChatGPT’. Map the fields to pull topic and instructions from Google Sheets.

With this setup, ChatGPT will automatically generate articles based on the topics you enter in your spreadsheet, streamlining your content creation process.


5. Finalizing the Automation with Google Drive

The last step in this automation process involves saving the generated articles in Google Drive. In Pabbly Connect, select Google Drive as another action application and choose the event ‘Create File in Specific Folder’. This will ensure that your articles are organized in a designated folder.

Map the fields for the file name and content. This way, each time an article is generated, it will be saved with the corresponding topic name. Follow these steps:

Select Google Drive as the action application. Choose the event ‘Create File in Specific Folder’. Map the fields for file name and content from ChatGPT response.

Once this step is complete, your automation will not only generate articles using ChatGPT but also save them directly to Google Drive, making your workflow efficient and effective.


Conclusion

In this tutorial, we explored how to generate unique articles using AI with the help of Pabbly Connect, Google Sheets, and ChatGPT. By following the steps outlined, you can automate your content creation process, saving time and enhancing productivity. Start leveraging these tools today for efficient article generation!

Ensure you check out Pabbly Connect to create business automation workflows and reduce manual tasks. Pabbly Connect currently offer integration with 2,000+ applications.

Never Pay for Content Again! Automate Your Writing with Pabbly Connect

Learn how to automate your content creation process using Pabbly Connect. This step-by-step guide shows you how to integrate Google Sheets, AI writing tools, and WordPress seamlessly.

Watch Step By Step Video Tutorial Below


1. Setting Up Pabbly Connect for Automation

Pabbly Connect is an essential tool for automating your content creation process. To get started, you need to create an account on Pabbly Connect. Once logged in, navigate to the dashboard where you can create a new workflow.

In this workflow, you will set up triggers and actions. The first step is to select Google Sheets as the trigger application. This is crucial as it will allow you to enter your blog title and automate the rest of the process using Pabbly Connect.


2. Trigger Setup with Google Sheets

To set up your trigger, select the option for ‘New or Updated Spreadsheet Row’ within Google Sheets on Pabbly Connect. This means that every time you enter a new blog title in your Google Sheet, it will trigger the workflow.

  • Connect your Google Sheets account to Pabbly Connect.
  • Select the specific sheet where you will enter your blog titles.
  • Map the row data to capture the title of your blog.

Once the trigger is set, any new title entered will automatically initiate the next steps in your automation process. This integration is seamless and efficient, thanks to Pabbly Connect.


3. Generating Content Using AI

After setting up the Google Sheets trigger, the next step is to generate the blog content using AI. For this, you will use OpenAI’s ChatGPT. Within Pabbly Connect, select OpenAI as the action application.

In this action step, you will specify the blog title as a prompt for ChatGPT. Ensure that the content is generated in HTML format to maintain proper formatting. This allows your blog to look professional when posted on WordPress.

  • Set the action event to ‘Generate Article’.
  • Map the blog title from Google Sheets into the prompt field.
  • Request the article to include an image generated from AI.

Once the content is generated, you will receive a response that includes the HTML formatted article. This is a crucial step in automating your writing process with Pabbly Connect.


4. Image Generation and Posting to WordPress

Following the content generation, the next step is to create an image for your blog using OpenAI’s image generation model. In Pabbly Connect, you will add another action step to generate an image based on the blog title.

After the image is generated, you will set up a new action to create a post on your WordPress site. This is where the automation truly shines, as it allows you to publish your content without any manual input.

Select WordPress as the action application. Choose ‘Create a Post’ as the action event. Map the blog content and image URL into the post fields.

By automating this process through Pabbly Connect, your blog is created and published on WordPress with just the title entered in Google Sheets.


5. Updating Google Sheets with the Post Link

The final step in this automation process is to update your Google Sheets with the link to the newly created blog post. This ensures that you have a record of all your published content.

In Pabbly Connect, you will add a final action step to update the Google Sheets row with the blog post link. This keeps everything organized and easily accessible.

Select ‘Update Spreadsheet Row’ as the action event. Map the blog link into the appropriate column. Use the row index from the trigger step to ensure correct mapping.

This final integration with Pabbly Connect completes the automation workflow. Now, every time you enter a new title in Google Sheets, the entire process from content creation to publishing is automated.


Conclusion

By utilizing Pabbly Connect, you can automate your content creation process efficiently. This tutorial outlines how to set up an integration that generates blog content, images, and posts them on WordPress with minimal effort. Start using Pabbly Connect to never pay for content again!

Ensure you check out Pabbly Connect to create business automation workflows and reduce manual tasks. Pabbly Connect currently offer integration with 2,000+ applications.

How to Set Up INSTANT Facebook Lead Alerts on WhatsApp Using Pabbly Connect

Learn to set up instant Facebook lead alerts on WhatsApp using Pabbly Connect. Step-by-step guide to automate lead notifications effectively. Explore efficient methods for automating routine tasks with clear, concise instructions suited for both newcomers and experienced professionals.

Watch Step By Step Video Tutorial Below


1. Accessing Pabbly Connect for Integration

To set up instant Facebook lead alerts on WhatsApp, start by accessing Pabbly Connect. Open your browser and type in the URL for Pabbly Connect to reach the homepage.

On the homepage, you will find two options: ‘Sign In’ and ‘Sign Up for Free.’ If you’re an existing user, click on ‘Sign In.’ New users should click on ‘Sign Up for Free’ to create an account. Once logged in, you can explore the features of Pabbly Connect and utilize 100 free tasks each month.


2. Creating a New Workflow in Pabbly Connect

After logging into Pabbly Connect, navigate to the dashboard where you can create a new workflow. Click on the ‘Create Workflow’ button located in the top right corner.

  • Provide a workflow name, such as ‘Instantly Get Facebook Lead Alert on WhatsApp’.
  • Select a folder to save your workflow, for example, ‘Test Integrations’.
  • Click on ‘Create’ to proceed.

Once you create the workflow, two windows will appear: Trigger and Action. For this integration, select ‘Facebook Lead Ads’ as the trigger application, which will activate when a new lead is generated.


3. Setting Up the Trigger for Facebook Lead Ads

With Pabbly Connect, select the trigger event as ‘New Lead Instant’ for Facebook Lead Ads. This event will initiate the workflow whenever a new lead is captured.

Click on ‘Connect’ and choose ‘Add New Connection’. Log into your Facebook account to authorize the connection. Once authorized, select the specific Facebook page and lead generation form you created earlier. Click on ‘Save and Send Test Request’ to test the connection.

  • Ensure you are logged into your Facebook account before making the connection.
  • Select the appropriate Facebook page and lead gen form.
  • Click on ‘Save and Send Test Request’ to proceed.

After submitting a test lead through the Facebook lead form, you should see a response in Pabbly Connect, confirming that the integration is successful.


4. Integrating WhatsApp with Pabbly Connect

Next, for the action step, select ‘Wati’ as the application to send WhatsApp messages. Set the action event to ‘Send Template Message’. Click on ‘Connect’ and choose ‘Add New Connection’ to connect your Wati account. using Pabbly Connect

Fill in the required details, including the API endpoint and access token from your Wati dashboard. Once connected, you will need to enter the WhatsApp number you wish to receive alerts on, the template name, and the broadcast title.

Enter the WhatsApp number for notifications. Select the template name you created for alerts. Provide the broadcast title that will appear in the message.

After filling in these details, click on ‘Save and Send Test Request’ to verify if the WhatsApp message is sent correctly. Check your WhatsApp to confirm receipt of the alert.


5. Finalizing Your Facebook to WhatsApp Integration

After setting up the action in Wati, your integration is nearly complete. Ensure that all variables in your template are mapped correctly to receive dynamic details about each new lead.

Whenever a new lead is generated from Facebook Lead Ads, Pabbly Connect will automatically send a WhatsApp notification containing the lead’s details. Test the workflow by submitting a lead through your Facebook form and check for the WhatsApp alert.

This automation allows you to manage leads efficiently, ensuring you never miss an opportunity. With Pabbly Connect, you can easily create such integrations without any coding skills.


Conclusion

Setting up instant Facebook lead alerts on WhatsApp using Pabbly Connect streamlines your lead management process. By automating notifications, you can respond quickly and effectively to potential customers, enhancing your business operations.

Ensure you check out Pabbly Connect to create business automation workflows and reduce manual tasks. Pabbly Connect currently offer integration with 2,000+ applications.

How to Send Automated WhatsApp Messages to Facebook Leads for Astrology Business Using Pabbly Connect

Learn how to automate WhatsApp messages to Facebook leads for your astrology business using Pabbly Connect. Step-by-step tutorial included. Learn to create powerful connections between your critical applications without requiring specialized programming knowledge or extensive technical background.

Watch Step By Step Video Tutorial Below


1. Accessing Pabbly Connect for Automation

To send automated WhatsApp messages to Facebook leads for your astrology business, first, access Pabbly Connect. This integration platform allows you to connect various applications seamlessly. Start by signing into your existing account or create a new one for free, which includes 100 tasks monthly.

After logging in, navigate to the Pabbly Connect dashboard. From there, click on the ‘Create Workflow’ button located in the top right corner. Here, name your workflow something descriptive like ‘Send Automated WhatsApp Messages to Facebook Leads’ and save it under a relevant folder, such as ‘Facebook Lead Ads.’


2. Setting Up the Trigger Application in Pabbly Connect

In this step, you will set Facebook Lead Ads as the trigger application in Pabbly Connect. This means that every time a new lead is generated through Facebook, the automation will be triggered. Select ‘Facebook Lead Ads’ as your trigger application and choose ‘New Lead Instant’ as the trigger event.

  • Select Facebook Lead Ads as the trigger application.
  • Choose the trigger event as New Lead Instant.
  • Click on ‘Connect’ to establish a connection with your Facebook account.

Once connected, choose the Facebook page associated with your astrology business and select the lead generation form you wish to use. This setup will ensure that any new leads from your Facebook ads will automatically trigger the workflow in Pabbly Connect.


3. Testing the Facebook Lead Integration

After setting up the trigger, it’s crucial to test the integration to ensure it works correctly. Use the Meta for Developers tools to create a test lead. Navigate to the Lead Ads Testing Tool, select your Facebook page, and fill in the required lead details such as email, full name, and phone number.

Once you submit the test lead, return to Pabbly Connect to check if the lead details have been captured successfully. You should see the response with all relevant information such as email, full name, and phone number. This confirms that the integration is functioning as expected.


4. Connecting WhatsApp for Automated Messaging

Now that you have successfully set up the trigger, it’s time to connect WhatsApp using Wati as your action application in Pabbly Connect. Select Wati and choose the action event ‘Send Template Message’. This will allow you to send an automated WhatsApp message to the leads captured from Facebook.

  • Connect Wati by entering the API endpoint and access token.
  • Map the WhatsApp number from the lead response you received.
  • Select the message template you wish to use for the WhatsApp message.

By mapping the WhatsApp number, you ensure that the message is sent to the correct lead. After completing these steps, save the configuration and send a test request to verify that the automated message is sent successfully.


5. Finalizing and Testing the Automated WhatsApp Messages

With everything set up, it’s time to finalize your automation in Pabbly Connect. After sending the test request, check if the automated WhatsApp message has been successfully sent to the test lead. You should see the message with the lead’s name and the body content you defined in your template.

This confirms that your automation is now live. Whenever a new lead is generated through Facebook Lead Ads, an automated WhatsApp message will be sent to them. This integration not only saves time but also enhances your engagement with potential clients in your astrology business.

Conclusion

This guide summarizes the key points and helps you understand the essential features and benefits of using this tool.

Ensure you check out Pabbly Connect to create business automation workflows and reduce manual tasks. Pabbly Connect currently offer integration with 2,000+ applications.


In conclusion, using Pabbly Connect allows you to effortlessly send automated WhatsApp messages to Facebook leads for your astrology business. This automation enhances communication and ensures no lead goes unattended. Start integrating today to streamline your processes!

Automate Email Marketing with AI Using Pabbly Connect

Learn how to automate your email marketing using Pabbly Connect and ChatGPT. This detailed tutorial guides you through the integration process step-by-step. Discover how to seamlessly connect your essential tools through accessible instructions that make powerful automation available to professionals at every skill level.

Watch Step By Step Video Tutorial Below


1. Accessing Pabbly Connect for Email Marketing Automation

To automate your email marketing, the first step is accessing Pabbly Connect. This integration platform allows you to connect various applications seamlessly. Start by visiting the Pabbly Connect website and creating a free account to explore its features.

Once you’ve signed up, log into your Pabbly Connect dashboard. Here, you can create workflows that will facilitate the automation of your email marketing tasks. This includes generating subject lines and email content automatically using AI.


2. Creating a Workflow in Pabbly Connect

After logging into Pabbly Connect, the next step is to create a new workflow for your email marketing automation. Click on the blue button to start a new workflow and give it a relevant name, such as ‘Automate Email Marketing with AI’.

  • Select a folder for your workflow.
  • Define the trigger and action applications.
  • Choose Google Sheets as the trigger application.

By selecting Google Sheets as the trigger, you ensure that whenever a new topic is added to your spreadsheet, the automation will initiate. This is where Pabbly Connect plays a crucial role in connecting your applications.


3. Connecting Google Sheets with Pabbly Connect

To establish a connection between Google Sheets and Pabbly Connect, you will need to copy the webhook URL provided in your workflow setup. This URL allows Pabbly Connect to receive data from your spreadsheet.

Next, open your Google Sheets and navigate to Extensions > Add-ons > Get Add-ons. Search for the Pabbly Connect Webhooks add-on and install it. Once installed, go back to the add-on and paste the webhook URL in the initial setup section.


4. Generating Email Content and Subject Lines with ChatGPT

With your Google Sheets connected, the next step is to generate email content and subject lines using ChatGPT via Pabbly Connect. Select ChatGPT as the action application in your workflow.

  • Choose the AI model (GPT-3.5 or GPT-4).
  • Set the prompt for generating the subject line.
  • Map the topic from your spreadsheet to the prompt.

This integration allows you to create personalized email content automatically. Every time a new topic is added to your Google Sheets, Pabbly Connect triggers ChatGPT to generate the required content.


5. Updating Google Sheets with Generated Content

The final step in your automation process is to update Google Sheets with the generated email content and subject lines. In your Pabbly Connect workflow, select Google Sheets again as the action application to update the row.

Map the necessary fields, including the subject line and email content generated by ChatGPT. This ensures that both pieces of information are stored in your spreadsheet for future reference.

Once you’ve completed these steps, your email marketing process is fully automated. Each time you add a topic to your spreadsheet, Pabbly Connect will handle the rest, generating content and updating your sheets seamlessly.


Conclusion

By following this tutorial, you can effectively automate your email marketing using Pabbly Connect. This integration allows you to generate subject lines and email content automatically, streamlining your marketing efforts.

Ensure you check out Pabbly Connect to create business automation workflows and reduce manual tasks. Pabbly Connect currently offer integration with 2,000+ applications.

How to Update WordPress User for Webhook Response Using Pabbly Connect

Learn how to update WordPress users automatically using Pabbly Connect and Webhook responses. Follow our detailed tutorial for seamless integration. Transform complex automation concepts into accessible, actionable steps that eliminate unnecessary manual work while maximizing existing application capabilities.

Watch Step By Step Video Tutorial Below


1. Accessing Pabbly Connect to Set Up Integration

To start, access Pabbly Connect by visiting the official website. Here, you can either sign up for a free account or log in if you already have one. Signing up takes just a couple of minutes and gives you 100 free tasks each month.

Once logged in, click on the ‘Access Now’ button under Pabbly Connect. This will direct you to the dashboard where you can create a new workflow. You will see options for workflows and folders, making it easy to manage your automation tasks.


2. Creating a Workflow in Pabbly Connect

In this step, you will create a new workflow in Pabbly Connect. Click on the ‘Create Workflow’ button. A pop-up window will appear, prompting you to name your workflow. For this tutorial, name it ‘Update WordPress User for Webhook Response’ and select a folder to save it.

  • Click ‘Create’ to proceed to the workflow setup page.
  • You will see two main boxes: Trigger and Action.
  • Select ‘Webhook by Pabbly’ as your trigger application.

After selecting the trigger application, you will need to set up the trigger event. This event will initiate the workflow whenever a new webhook response is received. This setup is crucial for connecting your JotForm with WordPress through Pabbly Connect.


3. Connecting JotForm to Pabbly Connect

Now, you will connect your JotForm to Pabbly Connect using the webhook URL generated in the previous step. Copy this URL and navigate to your JotForm account. Open the user updation form that you have created earlier.

In the JotForm settings, go to the ‘Integrations’ tab and search for ‘Webhook’. Paste the copied URL into the appropriate field and complete the integration. Once done, go back to Pabbly Connect, and you will see it is waiting for a webhook response.

  • Publish your JotForm and fill it with dummy data.
  • Submit the form to trigger the webhook response.

This will allow Pabbly Connect to capture the response, which includes user details that will be used to update the WordPress user.


4. Updating WordPress User Using Pabbly Connect

After receiving the webhook response in Pabbly Connect, the next step is to set up the action for updating the WordPress user. Select ‘WordPress’ as your action application and choose the ‘Search User’ action event. This will allow you to find the user based on the email address provided in the webhook response.

To connect WordPress with Pabbly Connect, you will need to provide your WordPress username, password, and the base URL. Ensure that the base URL is correctly formatted by clearing everything ahead of ‘wp-json’ in your WordPress URL. After saving the connection, proceed to map the email address from the webhook response.

Use the email from the webhook response to search for the user in WordPress. Click ‘Save and Send Test Request’ to confirm the user was found.

This step is essential as it verifies if the user exists before attempting to update their information in WordPress using Pabbly Connect.


5. Finalizing the User Update in Pabbly Connect

After successfully searching for the user, the final step is to update their details. Add another action step in Pabbly Connect and select ‘WordPress’ again, this time choosing the ‘Update User’ action event. Connect using the existing connection you created earlier.

Map the user ID from the search user action response to the update action. Fill in the details you wish to update, such as first name, last name, nickname, and description. Remember, usernames cannot be changed. Click on ‘Save and Test Request’ to execute the update.

Check your WordPress account to confirm the user details have been updated. Refresh the user list to see the changes reflected.

This integration demonstrates how Pabbly Connect automates the process of updating WordPress users based on webhook responses, making your workflow efficient and seamless.


Conclusion

This tutorial showed how to use Pabbly Connect to automate the process of updating WordPress users based on webhook responses. By following the steps outlined, you can create a seamless integration that enhances your workflow efficiency.

Ensure you check out Pabbly Connect to create business automation workflows and reduce manual tasks. Pabbly Connect currently offer integration with 2,000+ applications.

How to Create Facebook Page Post for Google Calendar Events Using Pabbly Connect

Learn how to integrate Google Calendar events with Facebook posts using Pabbly Connect. Follow this step-by-step tutorial for seamless automation. Navigate the automation landscape confidently with clear, structured guidance suitable for professionals regardless of prior technical experience.

Watch Step By Step Video Tutorial Below


1. Accessing Pabbly Connect for Integration

To create a Facebook page post for Google Calendar events, we will utilize Pabbly Connect. Start by visiting the Pabbly website and signing in or signing up for a free account. This process is quick and allows you to access various automation tools offered by Pabbly.

Once logged in, navigate to the Pabbly Connect dashboard. Here, you can create workflows that automate tasks between different applications. Click on the ‘Access Now’ button under Pabbly Connect to begin setting up your integration.


2. Creating a New Workflow in Pabbly Connect

In the Pabbly Connect dashboard, click on the ‘Create Workflow’ button. You will be prompted to name your workflow. For this integration, name it ‘Create Facebook Page Post for Google Calendar Events’ and select a folder to save it in.

  • Click on ‘Create’ to proceed to the workflow setup.
  • You will see two main boxes: Trigger and Action.
  • The Trigger box will initiate the workflow when a new event is created in Google Calendar.

Now, set up the trigger by selecting Google Calendar as your trigger application. Choose the event ‘New Event’ as the trigger event. Click on ‘Connect’ to link your Google Calendar account with Pabbly Connect.


3. Setting Up Google Calendar Trigger

After connecting Google Calendar, select the specific calendar you want to use for this integration. This is essential as it determines which events will trigger the workflow in Pabbly Connect.

Next, create a new event in Google Calendar. For example, set the title as ‘Science Webinar’ and provide the event details such as date and time. Ensure you include a description mentioning any special guests like ‘Mr Charles Xavier’ to enrich your event details.

  • Fill in the event title, date, and time accurately.
  • Save the event to finalize it in Google Calendar.

Return to Pabbly Connect and click on ‘Save and Send Test Request’. You should receive a response containing the event details, confirming that the trigger is successfully set up.


4. Formatting Date and Time for Facebook Post

Now that we have the event details, the next step is to format the date and time correctly. Use the Date and Time Formatter tool in Pabbly Connect to convert the event timing from UTC to your local time zone.

Select the action event ‘Format Date with Time Zone’. Connect this action and specify the start date and time from the Google Calendar response. Adjust the time zone settings accordingly to reflect your local time.

Ensure the ‘From Time Zone’ is set to UTC and ‘To Time Zone’ to Asia/Kolkata. Repeat the process for the end date and time of the event.

Once formatted, you will have the correct start and end times ready for your Facebook post. Make sure to test this action to confirm the output is as expected before proceeding to the next step.


5. Creating Facebook Page Post Using Pabbly Connect

The final step is to create a post on your Facebook page using the event details captured from Google Calendar. In Pabbly Connect, select Facebook Pages as your action application and choose the action event ‘Create Page Post’.

Connect your Facebook account and select the page where you want to post the event. Use mapping to pull in the event title, description, and formatted date and time into the post content.

Make sure to include all relevant details in your post for clarity. Click on ‘Save and Send Test Request’ to create the post.

After successfully creating the post, check your Facebook page to confirm that the new post appears as intended. This integration demonstrates how Pabbly Connect can automate posting from Google Calendar events directly to Facebook.


Conclusion

In this tutorial, we explored how to create a Facebook page post for Google Calendar events using Pabbly Connect. By following the steps outlined, you can automate the posting process and ensure your events are shared efficiently on social media.

Ensure you check out Pabbly Connect to create business automation workflows and reduce manual tasks. Pabbly Connect currently offer integration with 2,000+ applications.