Integrating Airtable, Google Gemini, and Gmail Using Pabbly Connect: A Step-by-Step Guide

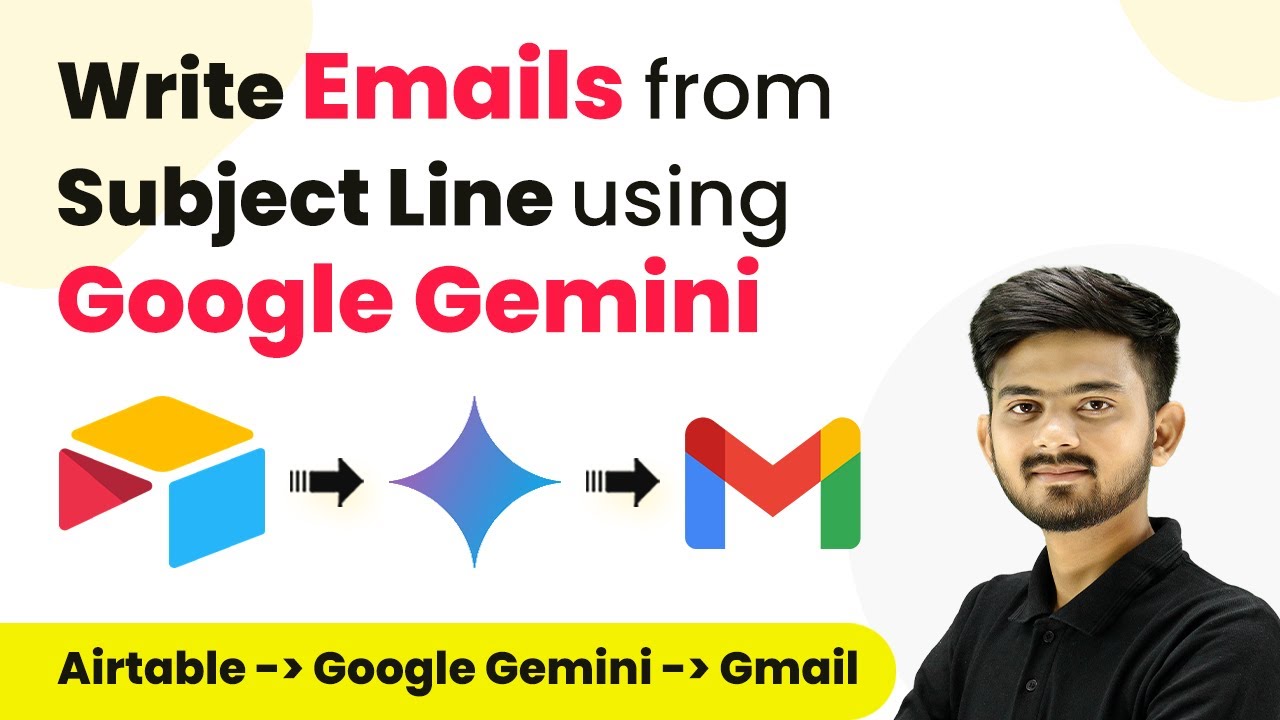
Learn how to write emails from a subject line using Pabbly Connect to integrate Airtable, Google Gemini, and Gmail seamlessly. Navigate the automation landscape confidently with clear, structured guidance suitable for professionals regardless of prior technical experience.

Watch Step By Step Video Tutorial Below


1. Accessing Pabbly Connect for Integration

To begin integrating Airtable, Google Gemini, and Gmail, you must first access Pabbly Connect. This platform allows seamless automation and integration between different applications.

Start by visiting the Pabbly website. If you don’t have an account, sign up for free. Once logged in, navigate to the Pabbly Connect section by clicking on the ‘Access Now’ button. This will take you to the Pabbly Connect dashboard where you can create new workflows.


2. Creating a Workflow in Pabbly Connect

In this step, you will create a new workflow in Pabbly Connect. Click on the ‘Create Workflow’ button, and a dialog box will appear for naming your workflow. Name it something descriptive, like ‘Write Emails from Subject Line using Google Generative AI’.

  • Select a folder to save your workflow.
  • Click on ‘Create’ to proceed.

Once created, you will see two sections labeled ‘Trigger’ and ‘Action’. The trigger is the event that starts the workflow, while the action is what happens as a result. In this case, the trigger will be Airtable.


3. Setting Up the Trigger with Airtable

To set up the trigger in Pabbly Connect, select Airtable as the trigger application. You will then need to choose a trigger event, which in this case is ‘New Record’. Click on ‘Connect’ to link your Airtable account with Pabbly Connect.

After connecting, you will be prompted to select a base from your Airtable account. Choose the base that contains your email details. Ensure you have created a field named ‘Created’ with the type set to ‘Created Time’. This is essential for capturing the trigger response.


4. Generating Email Content Using Google Gemini

Next, you will add an action to generate email content using Google Gemini through Pabbly Connect. Select Google Generative AI as the action application and choose the action event ‘Generate Content’. Connect your Google AI Studio account by providing an API key.

  • Log into Google AI Studio to create an API key.
  • Map the details from Airtable, including the subject line and description.

In the prompt section, instruct Google Gemini to write a simple email based on the provided details. Once everything is set up, click on ‘Save and Send Test’ to generate the email content.


5. Sending the Email via Gmail

The final step involves sending the generated email through Gmail using Pabbly Connect. Select Gmail as your action application and choose the action event ‘Send Email’. Connect your Gmail account by granting necessary permissions.

Map the recipient’s email address, subject line, and the generated email content. After ensuring all fields are filled correctly, click on ‘Save and Send Test’. This will send the email to the specified recipient, completing the automation process.


Conclusion

In this tutorial, we demonstrated how to use Pabbly Connect to automate the process of writing and sending emails from a subject line. By integrating Airtable, Google Gemini, and Gmail, you can efficiently manage your email communications without manual intervention.

Ensure you check out Pabbly Connect to create business automation workflows and reduce manual tasks. Pabbly Connect currently offer integration with 2,000+ applications.

How to Create Google Docs from Zoho Forms Submission Using Pabbly Connect

Learn how to automate Google Docs creation from Zoho Forms submissions using Pabbly Connect. Step-by-step guide for seamless integration. Follow this definitive guide to creating powerful automated workflows with straightforward, efficiency-focused solutions that save valuable time.

Watch Step By Step Video Tutorial Below


1. Accessing Pabbly Connect for Automation

To create Google Docs from Zoho Forms submissions, first, access Pabbly Connect. This platform facilitates the integration between Zoho Forms and Google Docs, automating document creation based on form submissions.

Sign in to your Pabbly Connect account. If you are a new user, you can sign up for free and get 100 tasks monthly. After logging in, you will see the dashboard where you can create a new workflow.


2. Creating a Workflow in Pabbly Connect

To set up the automation, click on the ‘Create Workflow’ button in the top right corner of your Pabbly Connect dashboard. You will be prompted to name your workflow. Name it something descriptive, like ‘Google Docs from Zoho Form Submission’.

  • Select a folder to save your workflow, such as ‘Zoho Forms’.
  • Click the ‘Create’ button to finalize your workflow setup.

Your workflow is now created, and you will see two sections: Trigger and Action. The Trigger is the event that starts the automation, while the Action is what happens as a result.


3. Setting Up the Trigger with Zoho Forms

In this step, you will set up the Trigger application. Click on the dropdown and select ‘Zoho Forms’ as your Trigger application. The Trigger event will be ‘New Form Submission’.

After selecting the Trigger, Pabbly Connect will provide you with a webhook URL. This URL needs to be integrated into your Zoho Forms account. Go to your Zoho Forms, click on ‘Integrations’, and then select ‘Webhooks’.

  • Click on ‘Configure Webhooks’ and paste the webhook URL from Pabbly Connect.
  • Select the form fields you want to capture, such as first name, last name, and email.

Once you have configured the webhook, save your settings. Now, whenever a new form submission occurs in Zoho Forms, Pabbly Connect will capture the response.


4. Setting Up the Action to Create Google Docs

Next, you need to set up the Action application. Click on the Action dropdown and select ‘Google Docs’. The Action event will be ‘Create Document from Template’.

To connect your Google Docs account, click on ‘Connect’ and then ‘Add New Connection’. You will be prompted to sign in to your Google account and authorize Pabbly Connect to access your Google Docs.

Select the template document you created in Google Docs, such as ‘Travel Letters’. Map the fields from the Trigger step to the document variables in your template.

After mapping the fields, save your settings and send a test request to ensure the document is created successfully in your Google Drive.


5. Testing and Verifying the Integration

To test the integration, submit a dummy response in your Zoho Form. After submitting, return to Pabbly Connect to check if the response has been captured correctly.

If everything is set up correctly, you will see the captured response in Pabbly Connect. Next, check your Google Drive to verify that a new document has been created with the mapped details from the form submission.

Check for the document name, which should include the customer’s first name and last name followed by ‘- Travel Details’. Open the document to verify that all the details are correctly populated.

This confirms that the integration between Zoho Forms and Google Docs through Pabbly Connect is successful. You can now automate document creation for every new submission.


Conclusion

In this tutorial, we demonstrated how to automate the creation of Google Docs from Zoho Forms submissions using Pabbly Connect. By following these steps, you can streamline your workflow and improve efficiency in handling customer data.

Ensure you check out Pabbly Connect to create business automation workflows and reduce manual tasks. Pabbly Connect currently offer integration with 2,000+ applications.

How to Add New Cliniko Attendee to GoHighLevel as Contacts Using Pabbly Connect

Learn how to automate adding new Cliniko attendees as contacts in GoHighLevel using Pabbly Connect. Follow our step-by-step guide for seamless integration. Follow this definitive guide to creating powerful automated workflows with straightforward, efficiency-focused solutions that save valuable time.

Watch Step By Step Video Tutorial Below


1. Setting Up Pabbly Connect for Cliniko and GoHighLevel Integration

To add new Cliniko attendees as contacts in GoHighLevel, the first step is to set up Pabbly Connect. This platform allows you to create automation workflows that connect various applications.

Start by signing up for a free account on Pabbly Connect. Once logged in, navigate to the dashboard and click on ‘Create Workflow’. Name your workflow, for example, ‘Cliniko to GoHighLevel’. After naming, select the desired folder in your Pabbly account and click on ‘Create’.


2. Connecting Cliniko to Pabbly Connect

In this step, you will connect your Cliniko account to Pabbly Connect. Under the trigger section, search for Cliniko and select it. Choose the trigger event as ‘New Attendee’ and click on ‘Connect’.

  • Select ‘Add New Connection’.
  • Enter your Cliniko API Key and Shard.
  • Keep the password field blank as directed.

After entering the required information, click ‘Save’. This will establish the connection between Cliniko and Pabbly Connect. To test the connection, click on ‘Save and Send Test Request’ to retrieve the details of the most recent attendee.


3. Extracting Patient ID from Cliniko Response

Once you have the attendee details, the next step is to extract the Patient ID using Pabbly Connect. Add a new action step and choose ‘Text Formatter’ from the app list. Select ‘Split Text’ as the action event and click ‘Connect’.

In the configuration, map the Patient Link Self response from the Cliniko trigger. Use ‘/’ as the separator and select ‘Last’ for the segment index. Click on ‘Save and Send Test Request’ to extract the Patient ID from the link.


4. Adding the Attendee as a Contact in GoHighLevel

Now that you have the Patient ID, it’s time to add this attendee as a contact in GoHighLevel using Pabbly Connect. Search for ‘Lead Connector’ in the app list and select it. Choose ‘Create or Update a Contact’ as the action event and click ‘Connect’.

  • Map the first name, last name, email, and phone number from the previous step.
  • Ensure at least one of the email or phone number fields is filled.
  • Click ‘Save and Send Test Request’ to finalize the addition.

Upon successful execution, the attendee will be added as a contact in GoHighLevel. You can verify this by checking the contacts section in your GoHighLevel account.


5. Conclusion

In conclusion, using Pabbly Connect effectively automates the process of adding new Cliniko attendees as contacts in GoHighLevel. This integration saves time and ensures accurate data transfer between the two applications.

Ensure you check out Pabbly Connect to create business automation workflows and reduce manual tasks. Pabbly Connect currently offer integration with 2,000+ applications.

Check out Pabbly Connect – Automate your business workflows effortlessly! Sign Up Free – Start your journey with ease! 10,000+ Video Tutorials – Learn step by step! Join Pabbly Facebook Group – Connect with 21,000+ like minded people!

By following the steps outlined, you can set up this automation seamlessly and enhance your workflow efficiency. With Pabbly Connect, managing your contacts has never been easier.


How to Create an AI Chatbot for Facebook Messenger using Pabbly Connect and Dante AI

Learn how to create an AI chatbot for Facebook Messenger using Pabbly Connect and Dante AI with this step-by-step tutorial. Automate your responses now! Revolutionize your productivity approach with just a few strategic clicks. Uncover professional methods for connecting applications and creating workflows that reclaim hours of your week.

Watch Step By Step Video Tutorial Below


1. Setting Up Pabbly Connect for Facebook Messenger Automation

To create an AI chatbot for Facebook Messenger using Pabbly Connect, start by accessing your Pabbly Connect dashboard. This platform serves as the central hub for automating your Facebook Messenger responses.

Once logged in, click on the ‘Create Workflow’ button. Name your workflow, for example, ‘AI Chatbot for Facebook Messenger’, and select the appropriate folder for organization. After naming, click on the ‘Create’ button to initiate the workflow setup.


2. Connecting Facebook Messenger to Pabbly Connect

The next step involves connecting your Facebook Messenger account with Pabbly Connect. In the trigger window, search for ‘Facebook Messenger’ and select it. Choose the trigger event as ‘New Message Sent to Page’.

  • Click on ‘Connect’ and select ‘Add New Connection’.
  • Authorize the connection by clicking on the ‘Connect with Facebook Messenger’ button.
  • Select your Facebook page from the dropdown menu where you wish to receive messages.

After setting up the connection, click on ‘Save and Send Test Request’. This action allows Pabbly Connect to wait for incoming messages from your Facebook page, which will trigger the automation.


3. Using Google Sheets to Track Conversations

To maintain a record of conversations, you will use Google Sheets in conjunction with Pabbly Connect. This is crucial for identifying whether a user is new or returning. Set up an action step by selecting ‘Google Sheets’ from the app options.

Choose the action event as ‘Lookup Spreadsheet Row’. Connect your Google Sheets account, then select the spreadsheet and sheet where user data is stored.

  • Map the lookup value to the sender ID received from Facebook Messenger.
  • Specify the lookup column (e.g., Column B for Facebook account IDs).
  • Set the end column of data to retrieve necessary information.

Once completed, click on ‘Save and Send Test Request’ to verify if the user exists in your Google Sheets database. This integration is essential for personalizing responses using Pabbly Connect.


4. Sending Replies with Dante AI

After identifying the user, the next step is to send the received message to Dante AI for generating a response. Add an action step and select ‘Dante AI’ as the app. Choose the action event ‘Add Prompt’ and connect your Dante AI account using the API key.

Map the necessary fields, including the prompt from the message received via Facebook Messenger. Additionally, map the conversation ID if it exists; otherwise, Dante AI will create a new one.

Select the knowledge base you want to use for generating responses. Choose the model type for response generation, such as GP4. Click on ‘Save and Send Test Request’ to generate a reply.

This step ensures that Pabbly Connect facilitates seamless communication between Facebook Messenger and Dante AI, allowing for automated replies based on user queries.


5. Finalizing the Integration and Testing

The final step is to send the generated reply back to the user via Facebook Messenger. Add another action step and select ‘Facebook Messenger’ again. This time, choose the action event ‘Send Message’. using Pabbly Connect

Map the recipient ID to the sender ID from the trigger step and the message to the reply generated by Dante AI. Click on ‘Save and Send Test Request’ to ensure the message is sent successfully.

After confirming the message was sent, you can add a final action to update Google Sheets with new user details if applicable. This completes the setup.


Conclusion

In this tutorial, we explored how to create an AI chatbot for Facebook Messenger using Pabbly Connect and Dante AI. By automating responses, you can enhance customer interaction and streamline communication. This powerful integration allows you to manage conversations effectively, ensuring no message goes unanswered.

Ensure you check out Pabbly Connect to create business automation workflows and reduce manual tasks. Pabbly Connect currently offer integration with 2,000+ applications.

How to Send Template Email Using Postmark Custom API with Pabbly Connect

Learn how to send template emails using Postmark Custom API through Pabbly Connect. Step-by-step guide for seamless integration with Google Sheets. Navigate the automation landscape confidently with clear, structured guidance suitable for professionals regardless of prior technical experience.

Watch Step By Step Video Tutorial Below


Setting Up Pabbly Connect for Email Automation

To send template emails using Postmark Custom API, you need to set up Pabbly Connect. This platform allows you to automate the process between Google Sheets and Postmark. Begin by logging into your Pabbly Connect account or sign up if you don’t have one.

Once logged in, navigate to the dashboard and click on the ‘Create Workflow’ button. Name your workflow something descriptive, like ‘Send Template Email Using Postmark Custom API’. This will help you recognize the workflow later. After naming it, select the folder where you want to save this workflow and proceed to create it.


Setting Up Google Sheets as the Trigger in Pabbly Connect

The first step in your workflow is to set Google Sheets as the trigger application in Pabbly Connect. Click on the trigger section and select Google Sheets. You will need to choose the trigger event, which should be ‘New or Updated Spreadsheet Row’.

After selecting the trigger event, you will be prompted to connect your Google Sheets account. Copy the webhook URL provided by Pabbly Connect and navigate back to your Google Sheets. You will need to install the Pabbly Connect Webhook extension if you haven’t already. Once installed, go to Extensions > Pabbly Connect Webhooks > Initial Setup.

  • Paste the copied webhook URL into the designated field.
  • Specify the trigger column, which should be the last column with data (e.g., Column B).
  • Click on ‘Send Test’ to ensure the connection is working.

Once the test is successful, click on submit to finalize your setup. Now, whenever a new row is added in your Google Sheets, it will trigger the Pabbly Connect workflow to send an email.


Setting Up Postmark as the Action in Pabbly Connect

After configuring the trigger, the next step is to set up Postmark as the action application in Pabbly Connect. Click on the action section and select Postmark. You will need to choose the action event, which should be ‘Custom API Request’.

To connect Postmark with Pabbly Connect, you will need your API key. Go to your Postmark account, find the server token, and copy it. Back in Pabbly Connect, click on ‘Add New Connection’ and paste the server token into the key field. For the value, also paste the token from your Postmark account.

  • Select the request method as POST.
  • Use the API endpoint URL provided in the Postmark API documentation.
  • Import the cURL request from the Postmark API documentation for sending template emails.

After importing the cURL request, you will see all the required fields populated. Make sure to fill in the parameters such as ‘from’, ‘to’, ‘template ID’, and ‘username’. Mapping the email address and customer name from Google Sheets ensures the email is personalized.


Finalizing Your Email Template in Pabbly Connect

In this step, you will finalize the email template that will be sent via Postmark using Pabbly Connect. Ensure that you have the correct values for the parameters. For the ‘from’ field, enter a verified email address from Postmark. For the ‘to’ field, map the email address from the Google Sheets response.

Next, you need to specify the template ID from Postmark. Go back to your Postmark account, access the template section, and copy the template ID for the welcome email. Paste this ID into the corresponding field in Pabbly Connect.

Ensure the parameters are correctly formatted in JSON. Double-check that the mapping for customer name and email is accurate. Click on ‘Save and Send Test Request’ to send a test email.

Once the test is successful, you will receive a confirmation response from Postmark, indicating that the email has been sent. You can check the recipient’s inbox to verify the email appearance and content.


Conclusion

Using Pabbly Connect to send template emails via Postmark Custom API is an efficient way to automate your email communications. By following the steps outlined in this tutorial, you can seamlessly integrate Google Sheets with Postmark, ensuring timely and personalized emails for your customers. Start automating your email processes today!

Ensure you check out Pabbly Connect to create business automation workflows and reduce manual tasks. Pabbly Connect currently offer integration with 2,000+ applications.

Automatically Generate Event Passes Using Pabbly Connect, MS Excel & Passcreator

Learn how to automatically generate event passes using Pabbly Connect, Microsoft Excel, and Passcreator in this detailed tutorial. Follow the exact steps to integrate these applications.

Watch Step By Step Video Tutorial Below


1. Accessing Pabbly Connect for Event Pass Generation

To automatically generate event passes, the first step is accessing Pabbly Connect. You can do this by visiting the Pabbly Connect website and signing up for a free account if you don’t have one.

Once logged in, click on the ‘Access Now’ button under Pabbly Connect to reach the dashboard. Here, you’ll find the option to create workflows that integrate Microsoft Excel with Passcreator, allowing you to automate the pass generation process.


2. Creating a Workflow in Pabbly Connect

Creating a new workflow in Pabbly Connect is essential for setting up the automation. Click on the ‘Create Workflow’ button and name it appropriately, such as ‘Automatically Generate Event Passes using Microsoft Excel and Passcreator’. This gives clarity to your workflow’s purpose.

  • Select a folder to save your workflow.
  • Set up the trigger application as Microsoft Excel.
  • Choose the trigger event as ‘New Row in Worksheet’.

By setting this workflow, you ensure that every time a new entry is added in Microsoft Excel, it will trigger the action to generate a pass in Passcreator.


3. Connecting Microsoft Excel to Pabbly Connect

To connect Microsoft Excel with Pabbly Connect, you need to establish a connection after selecting the trigger event. Click on ‘Connect’, then choose ‘Add New Connection’. You will be prompted to log into your Microsoft Excel account and grant access.

Once connected, select the workbook and worksheet containing your event pass data. For example, if your workbook is named ‘Event Passes’ and your worksheet is ‘Sheet1’, make sure to select them accordingly. After selecting, save your settings to ensure the connection is stable.


4. Setting Up the Action in Passcreator

The next step involves setting up the action in Passcreator through Pabbly Connect. After configuring your trigger, select Passcreator as the action application. Click on ‘Connect’ and then ‘Add New Connection’ to enter your API key from Passcreator.

  • Log into Passcreator, navigate to ‘Integration’, and then ‘API Keys’ to generate a new key.
  • Copy the API key and paste it into Pabbly Connect.
  • Select the action event as ‘Create Wallet Pass’.

Completing these steps will allow you to create customized passes based on the data received from Microsoft Excel.


5. Mapping Data and Generating Passes

Mapping the data from Microsoft Excel to Passcreator is crucial in Pabbly Connect. After selecting the template for your pass, you will need to map fields such as first name, last name, and email address from the Excel sheet to the corresponding fields in Passcreator.

After mapping the details, click on ‘Save and Send Test Request’. This will generate a pass based on the data provided. If successful, you will receive a confirmation response indicating that the pass has been created. You can then check the created passes in your Passcreator account.


Conclusion

In this tutorial, we explored how to automatically generate event passes using Pabbly Connect, Microsoft Excel, and Passcreator. By following the exact steps outlined, you can streamline your event management process, ensuring that every attendee receives their customized pass efficiently.

Ensure you check out Pabbly Connect to create business automation workflows and reduce manual tasks. Pabbly Connect currently offer integration with 2,000+ applications.

How to Schedule Discord Channel Messages from Notion Database Using Pabbly Connect

Learn how to schedule Discord channel messages from a Notion database using Pabbly Connect in this detailed step-by-step tutorial. Revolutionize your productivity approach with just a few strategic clicks. Uncover professional methods for connecting applications and creating workflows that reclaim hours of your week.

Watch Step By Step Video Tutorial Below


1. Accessing Pabbly Connect to Start the Integration

To schedule Discord channel messages from a Notion database, you first need to access Pabbly Connect. You can do this by typing the URL Pabbly.com/connect into your browser. Once there, you will find options to sign in or sign up for free.

If you are a new user, click on ‘Sign up for free’. After creating your account, you will receive 100 free tasks each month. If you are an existing user, simply click on ‘Sign in’ to access your dashboard. Once logged in, navigate to the ‘All Apps’ section and select Pabbly Connect.


2. Creating a Workflow in Pabbly Connect

After accessing Pabbly Connect, you need to create a new workflow. Click on the ‘Create Workflow’ button. A dialog box will appear prompting you to name your workflow. Name it ‘Schedule Discord Channel Messages from Notion Database’ and choose a folder to save it in.

  • Click on ‘Create’ to finalize the workflow setup.
  • You will see two windows: one for the trigger and one for the action.

In the trigger window, select ‘Schedule by Pabbly’ as your trigger application to run this workflow daily at a specific time. Set the frequency to ‘Every Day’ and choose a time, for example, 10:00 AM. Click on ‘Save’ to schedule the workflow.


3. Fetching the Current Date for Automation

To ensure the messages sent to the Discord channel are relevant, you will need to fetch the current date. In the action application, select ‘DateTime Formatter’ and choose the action event as ‘Current Date’. Click on ‘Connect’ to establish this connection. using Pabbly Connect

Specify the date format you want; for instance, select ‘Year-Month-Date’. After saving, click on the ‘Save and Send Test Request’ button to confirm that you have successfully retrieved today’s date. This date will be dynamically updated every time the workflow runs.


4. Querying the Notion Database

Next, you need to retrieve data from your Notion database. Click on the ‘Add Action Step’ button and select ‘Notion’ as your action application. Choose the action event ‘Query a Database’ and click on ‘Connect’.

  • Select your Notion database, for example, ‘Google Calendar Events’.
  • Set the filter condition to match the current date retrieved earlier.

Map the current date to the filter condition to ensure that the workflow retrieves relevant tasks for that specific day. This setup allows Pabbly Connect to automatically pull tasks daily without manual intervention.


5. Sending Messages to Discord Channel

Finally, to send the messages to your Discord channel, add another action step and select ‘Discord’ as your action application. Choose the action event ‘Send Channel Message’ and click on ‘Connect’.

Input the webhook URL from your Discord channel settings. You can create a new webhook in your Discord server settings under ‘Integrations’. Once you have the webhook URL, paste it into Pabbly Connect.

Compose your message in basic HTML format, including task details. Map the task title and description from the previous steps.

Click on ‘Save and Send Test Request’ to send a test message. Check your Discord channel to verify that the message appears as intended. This confirms that your automation is set up correctly using Pabbly Connect.


Conclusion

By following these steps, you can easily schedule Discord channel messages from a Notion database using Pabbly Connect. This automation allows for efficient communication with your team without manual effort, enhancing productivity and organization.

Ensure you check out Pabbly Connect to create business automation workflows and reduce manual tasks. Pabbly Connect currently offer integration with 2,000+ applications.

How to Sync Slack Status With Calendly Using Pabbly Connect

Learn how to sync your Slack status with Calendly using Pabbly Connect. Follow this step-by-step tutorial for seamless integration. Transform complex automation concepts into accessible, actionable steps that eliminate unnecessary manual work while maximizing existing application capabilities.

Watch Step By Step Video Tutorial Below


1. Accessing Pabbly Connect for Integration

To begin the integration process, first access Pabbly Connect. This platform allows you to automate workflows between applications like Slack and Calendly. You can sign up for free or log in if you already have an account.

After logging in, navigate to the dashboard. From here, click on the Pabbly Connect option to access the workflow section. You’ll see options to create new workflows or access existing ones.


2. Creating a New Workflow in Pabbly Connect

To create a new workflow, click on the Create Workflow button. Name your workflow according to its purpose, such as ‘Sync Slack Status With Calendly.’ Choose a folder to save your workflow in and click on Create.

  • Select the trigger application as Calendly.
  • Choose the event trigger as Invite Created by User.
  • Connect your Calendly account to Pabbly Connect.

After setting the trigger, click on Save and Test to ensure that the connection is successful. This will allow Pabbly Connect to receive data whenever a new invite is created in Calendly.


3. Setting Up Slack Integration Through Pabbly Connect

Next, you need to set up the action application, which is Slack. In the action step, select Slack and choose the action event as Set Status. This will allow you to update your Slack status based on the invite details from Calendly.

Click on Connect to link your Slack account with Pabbly Connect. You will need to select the token type as User and allow access to your Slack account. After a successful connection, you can set the status text, emoji, and expiration time.

  • Use the description from the Calendly invite as your status text.
  • Choose an emoji for your status, ensuring it is formatted correctly.
  • Set the expiration time to match the end time of the event in Unix timestamp format.

After filling in all the necessary details, click on Save and Test to finalize the Slack integration.


4. Finalizing the Integration Process in Pabbly Connect

After setting up both the trigger and action applications, you need to add a delay to ensure the Slack status updates only when the event starts. In the action tab, select Delay by Pabbly and choose Add Time Delay as the action event.

Map the start date and time from the Calendly invite response to the delay action. This ensures that the workflow is delayed until the event actually starts. Once you have set the delay, click on Save and Test to confirm the settings.

Now, your workflow is ready. Whenever a new invite is created in Calendly, your Slack status will automatically update based on the invite details. This integration ensures your team is always informed of your availability.


5. Conclusion: Automate Your Slack Status with Pabbly Connect

In this tutorial, we explored how to sync Slack status with Calendly using Pabbly Connect. By setting up triggers and actions, you can automate status updates in Slack based on your Calendly invites. This saves time and keeps your team informed.

Ensure you check out Pabbly Connect to create business automation workflows and reduce manual tasks. Pabbly Connect currently offer integration with 2,000+ applications.

With Pabbly Connect, you can create various workflows to enhance productivity and streamline communication. Start using Pabbly Connect today to automate your tasks efficiently!

How to Add New Slack Channel Messages in Microsoft Excel Spreadsheet Using Pabbly Connect

Learn how to automate adding new Slack channel messages to Microsoft Excel spreadsheets using Pabbly Connect with this step-by-step tutorial. Implement the precise methodologies leading organizations use to automate repetitive tasks, illustrated with practical examples designed for immediate application.

Watch Step By Step Video Tutorial Below


1. Accessing Pabbly Connect for Integration

To start integrating Slack with Microsoft Excel Spreadsheet, you need to access Pabbly Connect. This platform allows you to automate tasks easily by connecting different applications.

Log in to your existing Pabbly Connect account or create a new account for free. Once logged in, navigate to your dashboard, where you can create a new workflow for your integration.


2. Creating a New Workflow in Pabbly Connect

In this step, you will create a new workflow to automate the process of adding Slack messages to your Microsoft Excel Spreadsheet. Click on the ‘Create Workflow’ button in the top right corner of your dashboard.

  • Name your workflow, e.g., ‘Add New Slack Channel Messages in Microsoft Excel Spreadsheet’.
  • Select the folder where you want to save your workflow.
  • Click on ‘Create’ to proceed.

After creating your workflow, you will be directed to a page where you can set the trigger and action for your integration using Pabbly Connect.


3. Setting Up Trigger and Action in Pabbly Connect

In this section, you will set up the trigger and action for your workflow. The trigger will be Slack, and the action will be Microsoft Excel Spreadsheet.

Search for Slack in the trigger window and select it. Choose the trigger event as ‘New Message’. Next, for the action, select Microsoft Excel and choose the action event as ‘Add Row to Worksheet’. This setup allows Pabbly Connect to automate the data transfer from Slack to Excel.


4. Connecting to Slack and Microsoft Excel

Now, establish a connection between Slack and Pabbly Connect. Click on ‘Connect’ and select ‘Connect with Slack’. You will need to provide the token type as user and allow Pabbly Connect to access your Slack workspace.

After connecting to Slack, repeat the process for Microsoft Excel. Click on ‘Connect’ for Microsoft Excel, accept the authorization, and ensure the connection is successful. This step is crucial as it allows Pabbly Connect to send data to your Excel spreadsheet.


5. Mapping Data to Microsoft Excel Spreadsheet

In this final step, you will map the data from Slack to your Microsoft Excel spreadsheet. Select the workbook where you want to store the messages and user details.

  • Map the username and message content to the respective columns in Excel.
  • Use the mapping feature to ensure that new responses are dynamically inserted into the spreadsheet.

After mapping, click on ‘Save and Send Test Request’. This will send a test message from Slack to your Excel sheet, confirming that the integration via Pabbly Connect works as intended.


Conclusion

In this tutorial, you learned how to add new Slack channel messages to a Microsoft Excel spreadsheet using Pabbly Connect. This automation streamlines your workflow, ensuring that all messages are logged efficiently and accurately.

Ensure you check out Pabbly Connect to create business automation workflows and reduce manual tasks. Pabbly Connect currently offer integration with 2,000+ applications.

How to Get WhatsApp Notification for New MySQL Row Added Using Pabbly Connect

Learn how to automate WhatsApp notifications for new MySQL rows using Pabbly Connect. Step-by-step guide for seamless integration. Discover how to seamlessly connect your essential tools through accessible instructions that make powerful automation available to professionals at every skill level.

Watch Step By Step Video Tutorial Below


1. Accessing Pabbly Connect for Automation

To automate WhatsApp notifications for new MySQL rows, first access Pabbly Connect by typing the URL in your browser. This platform allows you to connect different applications without coding.

Once on the homepage, you will see options to sign in or sign up. If you are a new user, click on the ‘Sign up for free’ button to create your account. Existing users can directly sign in. After signing up, you receive 100 free tasks monthly to explore Pabbly Connect.


2. Creating a Workflow in Pabbly Connect

After signing into Pabbly Connect, navigate to the dashboard where you can create a new workflow. Click on the ‘Create Workflow’ button and provide a name for your workflow, such as ‘Get WhatsApp Notification for New Row in MySQL’.

  • Select the folder to save your workflow.
  • Click on ‘Create’ to initiate the workflow setup.

Once the workflow is created, you will see two windows: one for the trigger and one for the action. The trigger will be MySQL, and the action will be the WhatsApp Cloud API.


3. Setting Up MySQL Trigger in Pabbly Connect

In this step, select MySQL as the trigger application in Pabbly Connect. The trigger event should be set to ‘New Row in Table’. This means that whenever a new row is added to your MySQL database, it will trigger the workflow.

Next, connect your MySQL account by selecting either ‘Add New Connection’ or ‘Select Existing Connection’. If you choose to add a new connection, you will need to provide your database details such as username, password, and host name. Once connected, select the specific table you want to monitor.

  • Choose the unique column, typically the ID, for the new row.
  • Click ‘Save & Send Test Request’ to confirm the connection.

After testing, you will receive a response with the last data added to your MySQL database, confirming the successful setup of the trigger.


4. Configuring WhatsApp Action in Pabbly Connect

Now, select WhatsApp Cloud API as the action application in Pabbly Connect. The action event should be set to ‘Send Template Message’. This allows you to receive WhatsApp notifications based on the data captured from the MySQL trigger.

To connect your WhatsApp Cloud API account, click on ‘Add New Connection’ and enter the required details such as token, phone number ID, and WhatsApp business account ID. These can be found in your WhatsApp Cloud API setup under the API setup section.

Select the template you created for WhatsApp notifications. Map the dynamic fields from the MySQL response to the WhatsApp template.

After entering the details and mapping the fields, click on ‘Save & Send Test Request’. You should receive a WhatsApp notification confirming the successful setup.


5. Testing the Integration and Confirmation

Once you have configured both the MySQL trigger and the WhatsApp action, it’s time to test the entire workflow in Pabbly Connect. Add a new row to your MySQL database to trigger the workflow. After adding the row, click on ‘Save & Send Test Request’ in the WhatsApp action.

If everything is set up correctly, you will receive a WhatsApp notification with the details of the new row added to your MySQL database. This confirms that your automation is working as intended.

In summary, you have successfully integrated MySQL with WhatsApp using Pabbly Connect, allowing you to receive real-time notifications for new entries in your database. This automation can be beneficial for various applications, including customer queries or form responses.


Conclusion

In this tutorial, we demonstrated how to automate WhatsApp notifications for new MySQL rows using Pabbly Connect. This integration helps streamline notifications and improves efficiency in managing data updates.

Ensure you check out Pabbly Connect to create business automation workflows and reduce manual tasks. Pabbly Connect currently offer integration with 2,000+ applications.