Integrate WooCommerce with Airtable Using Pabbly Connect

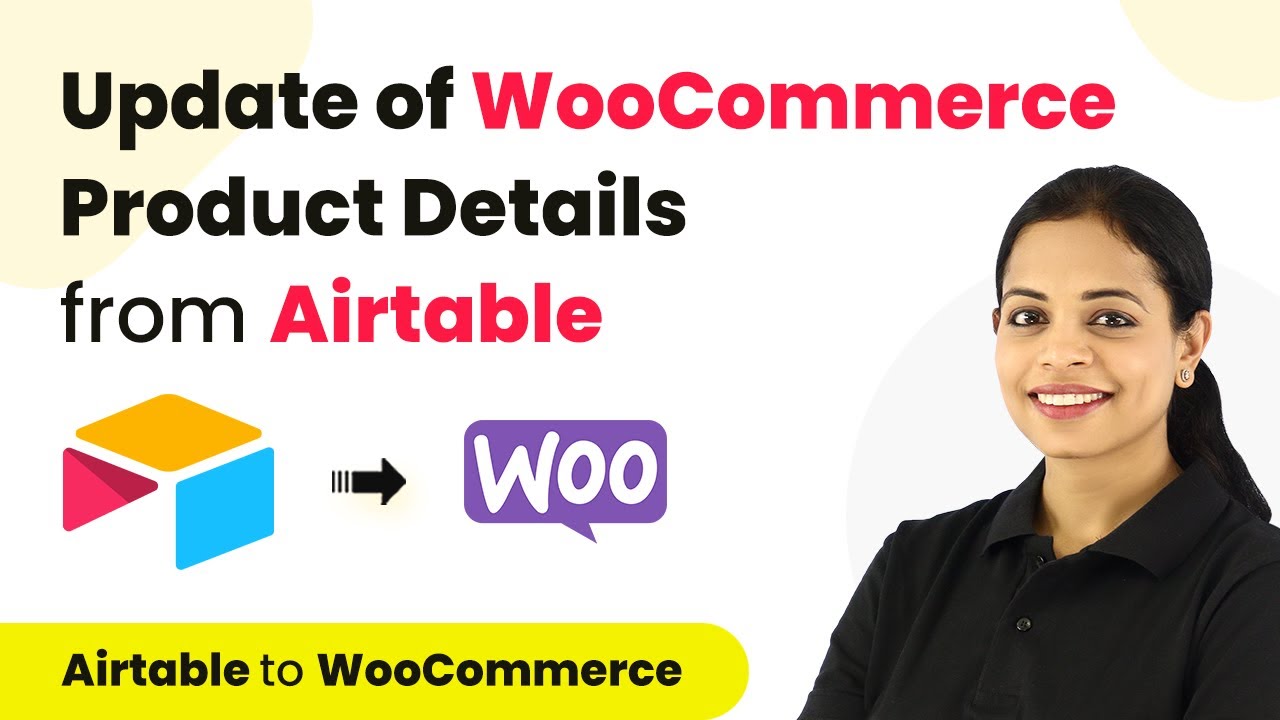
Learn how to automate product updates in WooCommerce from Airtable using Pabbly Connect. Step-by-step tutorial with detailed instructions. Implement the precise methodologies leading organizations use to automate repetitive tasks, illustrated with practical examples designed for immediate application.

Watch Step By Step Video Tutorial Below


1. Setting Up Pabbly Connect for Integration

To start integrating WooCommerce with Airtable, first access Pabbly Connect. You can sign in if you are an existing user or sign up to create a new account. Upon signing up, you will receive 100 free tasks to explore the platform.

Once logged in, navigate to the dashboard and click on the ‘Create Workflow’ button. Here, you can name your workflow according to your objective, such as ‘Update WooCommerce Product from Airtable.’ Click on the ‘Create’ button to proceed.


2. Selecting Trigger Application in Pabbly Connect

For this integration, we will set Airtable as our trigger application. In Pabbly Connect, select Airtable from the list of applications. The trigger event will be ‘New Record,’ which activates the workflow when a new record is added in Airtable.

  • Select Airtable as the trigger application.
  • Choose ‘New Record’ as the trigger event.
  • Click on ‘Connect’ to link your Airtable account.

After connecting, you will need to create a new token in Airtable’s Developer Hub. This token allows Pabbly Connect to access your Airtable data securely. Make sure to grant the necessary permissions when generating the token.


3. Setting Up WooCommerce as Action Application

Next, we will set WooCommerce as the action application in Pabbly Connect. Select WooCommerce and choose the action event ‘Update a Product.’ This action updates product details in WooCommerce based on the information received from Airtable.

To connect WooCommerce, you will need the Consumer Key, Consumer Secret, and the Website URL. These can be generated from the WooCommerce settings under the Advanced tab, specifically in the REST API section. Ensure that you have set the user permissions to read and write.

  • Navigate to WooCommerce settings and select Advanced.
  • Generate API keys for access.
  • Input the Consumer Key, Consumer Secret, and Website URL in Pabbly Connect.

After successfully connecting WooCommerce, you can proceed to map the product details from Airtable to WooCommerce. This mapping ensures that the correct product information is updated during the integration process.


4. Mapping Product Details and Testing Integration

In this step, you will map the product details from Airtable to WooCommerce using Pabbly Connect. First, retrieve the product ID by selecting the action event ‘Retrieve a Product by Name or Slug’ in WooCommerce. This step is crucial for identifying which product to update.

Once you have retrieved the product ID, you can proceed to map the necessary fields such as product name, SKU, regular price, and stock status. Each field should be mapped correctly to ensure that the data flows seamlessly from Airtable to WooCommerce.

Map the product name and SKU from Airtable to WooCommerce. Set the regular price and stock status. Review the mapping to ensure accuracy.

After mapping, click on ‘Save and Send Test Request’ to verify that the integration works as expected. Once the test is successful, the product details in WooCommerce will be updated automatically based on the changes made in Airtable.


5. Checking Integration Success in WooCommerce

To confirm the success of your integration, refresh your WooCommerce products page. You should see the updated product details reflecting the changes made in Airtable. This step validates that Pabbly Connect has successfully automated the workflow.

For instance, if you updated the product name and price in Airtable, those changes should now appear in WooCommerce. You can repeat this process for any other products you want to update automatically.

Navigate to your WooCommerce products section. Check for updated product details based on Airtable entries. Ensure all changes are reflected accurately.

If everything is in order, your integration is complete, and you can now automate product updates using Pabbly Connect efficiently. This automation saves time and reduces manual errors in product management.


Conclusion

In this tutorial, we explored how to use Pabbly Connect to integrate WooCommerce with Airtable for automatic product updates. This process enhances efficiency and ensures accurate product information in your WooCommerce store.

Ensure you check out Pabbly Connect to create business automation workflows and reduce manual tasks. Pabbly Connect currently offer integration with 2,000+ applications.

Integrating WordPress and Telegram Using Pabbly Connect: A Step-by-Step Guide

Learn how to integrate WordPress and Telegram using Pabbly Connect. This guide provides a detailed tutorial on setting up notifications for new posts automatically. Explore systematic approaches to creating efficient automation solutions that convert technical concepts into practical, implementable instructions.

Watch Step By Step Video Tutorial Below


1. Accessing Pabbly Connect for Integration

To integrate WordPress and Telegram, first, access Pabbly Connect by visiting the official website. If you don’t have an account, sign up for free to get started. Once logged in, navigate to the dashboard where you can create a new workflow.

Click on the ‘Create Workflow’ button and name your workflow, for example, ‘WordPress to Telegram’. This will help you easily identify the purpose of this integration later on.


2. Setting Up the Trigger in Pabbly Connect

In the trigger window, select ‘WordPress’ as your application. The next step is to choose the trigger event, which should be set to ‘New Post Published’. This event will act as a signal to initiate the workflow whenever a new post is published on your WordPress site.

After selecting the trigger event, you will need to copy the provided webhook URL. This URL will be used in your WordPress settings to establish a connection between WordPress and Pabbly Connect. Follow these steps to set up the webhook:

  • Log in to your WordPress dashboard.
  • Navigate to the plugins section and install the ‘WP Webhooks’ plugin.
  • Under the WP Webhooks settings, select ‘Send Data’ and add a new webhook using the copied URL.

Now, whenever a new post is published, the webhook will trigger and send the data to Pabbly Connect.


3. Creating a Group in Telegram

To send notifications to your team, you need to create a Telegram group. Open your Telegram app and create a new group, adding your newly created bot as a member. This bot will be responsible for sending the notifications. using Pabbly Connect

Once the group is created, promote the bot to an admin position to ensure it has the necessary permissions to send messages. After promoting the bot, copy the chat ID from the group settings, which will be used to direct the messages.


4. Configuring the Action in Pabbly Connect

Now that you have set up the trigger and created your Telegram group, it’s time to configure the action in Pabbly Connect. In the action window, select ‘Telegram Bot’ as your application and choose the action event as ‘Send a Text Message’.

Map the fields from the trigger response to the message body. For example, include the title of the post and a link to the post in the message. This way, your team members will receive detailed information about the new post directly in Telegram.

  • Use the mapping feature to insert the post title and URL.
  • Customize your message format as needed.
  • Click on Save and send test request to ensure everything is working correctly.

After testing, your integration should be complete, and you will see the message appear in your Telegram group.


5. Testing the Integration

To ensure that everything is functioning properly, publish a new post on your WordPress site. Check your Telegram group to see if the notification appears as expected. This step confirms that the integration between WordPress and Telegram via Pabbly Connect is successful.

If the message appears in Telegram, your setup is complete. You can now automate notifications for every new post published on your WordPress site without any manual effort.


Conclusion

Integrating WordPress with Telegram using Pabbly Connect allows you to automate notifications for new posts, streamlining your communication process. Set up this integration to keep your team updated effortlessly.

Ensure you check out Pabbly Connect to create business automation workflows and reduce manual tasks. Pabbly Connect currently offer integration with 2,000+ applications.

Automate Payment Reminders with Pabbly Connect and Google Sheets

Learn how to automate payment reminders on WhatsApp using Pabbly Connect and Google Sheets. This detailed guide walks you through the integration process step by step.

Watch Step By Step Video Tutorial Below


Setting Up Pabbly Connect for Payment Reminders

To begin automating payment reminders, first, navigate to Pabbly Connect’s dashboard. This is where you will create a workflow to connect Google Sheets with WhatsApp via Pabbly Connect. Start by signing up or signing into your Pabbly account. using Pabbly Connect

Once logged in, click on the ‘Create Workflow’ button. Name your workflow something descriptive, like ‘Payment Reminders Automation.’ This will help you identify the workflow later. Pabbly Connect will guide you through the setup process, ensuring that you stay on track.


Configuring the Google Sheets Trigger

The next step is to set up Google Sheets as the trigger application. Select Google Sheets from the list of applications in Pabbly Connect. For the trigger event, choose ‘New or Updated Spreadsheet Row.’ This means that every time a new row is added or an existing row is updated in your Google Sheet, the workflow will be triggered. using Pabbly Connect

To connect your Google Sheets account, you will need to grant Pabbly Connect access. Follow the prompts to authorize Pabbly Connect. Once connected, select the specific spreadsheet that contains your payment data and the sheet where you have the due dates listed. This is critical for ensuring that the automation works correctly.


Setting Up WhatsApp Action via Pabbly Connect

Now that your trigger is configured, it’s time to set up the action that will send WhatsApp messages. In the action step, select WhatsApp as the application. Choose the action event as ‘Send Template Message.’ This allows you to send pre-defined messages to your customers. using Pabbly Connect

To connect your WhatsApp account, you will need to use the WhatsApp Cloud API. Make sure you have your API credentials ready. Map the fields required for the WhatsApp message, including the recipient’s phone number and the message template you want to use. This mapping ensures that each customer receives a personalized reminder based on the data in your Google Sheet.


Finalizing the Workflow and Testing

With both your trigger and action set up, it’s time to finalize the workflow. Click on the ‘Save’ button to ensure all your settings are stored. After saving, you can test the workflow by adding a new row in your Google Sheet with a due date and customer details. using Pabbly Connect

Once you add the new row, Pabbly Connect will automatically trigger the workflow, sending a WhatsApp message to the specified customer. Check your WhatsApp to confirm that the message was sent successfully. If everything works as expected, your automation is complete!


Conclusion

This tutorial demonstrates how to automate payment reminders using Pabbly Connect by integrating Google Sheets and WhatsApp. By following these steps, you can efficiently manage reminders without manual effort, enhancing your business’s operational efficiency.

Ensure you check out Pabbly Connect to create business automation workflows and reduce manual tasks. Pabbly Connect currently offer integration with 2,000+ applications.

Automate Google Docs Document Creation with Pabbly Connect

Learn how to automate document creation in Google Docs using Pabbly Connect with Google Forms responses. Step-by-step guide for seamless integration. Master proven automation processes with practical implementation examples and strategic recommendations you can apply immediately in your workflow.

Watch Step By Step Video Tutorial Below


1. Setting Up Pabbly Connect for Google Forms Integration

To begin automating document creation in Google Docs, you first need to set up Pabbly Connect. This platform acts as the central hub for integrating Google Forms responses with Google Docs. Start by logging into your Pabbly Connect account and clicking on the ‘Create Workflow’ button.

Once on the workflow page, you will find the basic building blocks necessary for automation. The first step is to set up a trigger event. You will select Google Forms and choose the trigger event as ‘New Response Received’. This will allow Pabbly Connect to listen for new submissions from your Google Form.


2. Connecting Google Forms with Pabbly Connect

After selecting the trigger, you will receive a webhook URL from Pabbly Connect. This URL is crucial for linking your Google Form to the workflow. Open your Google Form’s associated spreadsheet in an incognito window to avoid any account conflicts.

  • Click on ‘Extensions’ in the spreadsheet.
  • Select ‘Add-ons’, then ‘Get add-ons’.
  • Search for ‘Pabbly Connect Webhooks’ and install it.
  • Refresh the spreadsheet after installation.

Once refreshed, go back to the ‘Extensions’ menu, find ‘Pabbly Connect Webhooks’, and click on ‘Initial Setup’. Here, you will enter the webhook URL provided by Pabbly Connect and specify the final data entry column (usually the last column with responses).


3. Testing the Google Forms Connection

With the webhook URL in place, it’s time to test the connection. After entering the URL and selecting the final data entry column, you will see a message indicating that Pabbly Connect is waiting for a response. Now, go back to your Google Form and submit a test response.

Once the test response is submitted, return to Pabbly Connect and check if the data appears in the workflow. You should see the details from your form submission, confirming that the connection is successful. If everything looks good, click ‘Submit’ to finalize the initial setup.


4. Creating Google Docs from Form Responses

Now that the Google Forms responses are connected, the next step is to create a document in Google Docs using the data received. In the Pabbly Connect dashboard, add an action step and select Google Docs as the application. using Pabbly Connect

  • Choose the action event as ‘Create Document from Template’.
  • Connect your Google account that contains the document template.
  • Select the template you want to use for creating new documents.

Once you select the template, you will need to map the fields from the form responses to the placeholders in your document. For example, map the first name, last name, and other relevant fields to create a personalized document automatically.


5. Finalizing the Pabbly Connect Automation

After mapping all necessary fields, you can save and test the document creation. Click on ‘Save & Send Test Request’ to generate a document based on the template. Check your Google Drive to confirm that the new document has been created successfully. using Pabbly Connect

This automation will now run every time a new response is submitted to your Google Form, creating a document automatically in Google Docs without any manual intervention. You can also extend this workflow further by adding additional actions, such as sharing the document via Google Drive.

Conclusion

This guide summarizes the key points and helps you understand the essential features and benefits of using this tool.

Ensure you check out Pabbly Connect to create business automation workflows and reduce manual tasks. Pabbly Connect currently offer integration with 2,000+ applications.


In this tutorial, we explored how to automate the creation of Google Docs documents using Pabbly Connect with Google Forms responses. By following these steps, you can streamline your workflow and save time on manual document creation.

Integrate Go High Level with Pabbly Connect: A Step-by-Step Tutorial

Learn how to seamlessly integrate Go High Level with Pabbly Connect for automated sub-account creation using webhooks. Follow this detailed tutorial for step-by-step instructions. Follow this definitive guide to creating powerful automated workflows with straightforward, efficiency-focused solutions that save valuable time.

Watch Step By Step Video Tutorial Below


1. Accessing Pabbly Connect for Integration

To start the integration process, first access Pabbly Connect. You can create a free account by signing up on their website. Once logged in, you will arrive at the Pabbly Connect dashboard.

After accessing the dashboard, click on the ‘Create Workflow’ button. You will be prompted to name your workflow. For instance, you can name it ‘Create Sub Account in Go High Level.’ This sets the stage for the automation process.


2. Setting Up the Trigger in Pabbly Connect

In this section, we will configure the trigger to capture user details. The trigger is essential as it defines when the automation initiates. Select the ‘Webhook’ option in the trigger window. using Pabbly Connect

  • Select Webhook as the trigger event.
  • Copy the generated webhook URL.
  • Paste this URL in your form application, such as JotForm or Short Pump.

Once the webhook is set up, Pabbly Connect will wait for the incoming data from the specified application. This means you can now collect user details when they submit the form.


3. Creating a Sub Account in Go High Level

After setting up the trigger, the next step involves creating a sub account using the data captured. In the action window, search for ‘Lead Connector’ in Pabbly Connect.

Select ‘Create Location or Sub Account’ as your action event. Following this, you must connect your Go High Level account to Pabbly Connect. Ensure you are subscribed to the Agency Pro Plan, as it is required for this integration.

  • Click on ‘Connect’ and choose ‘Add New Connection’.
  • Select your agency account from the dropdown menu.
  • Map the user details received from the webhook to the respective fields in Go High Level.

This mapping is crucial as it ensures the correct user details are sent to Go High Level for sub account creation.


4. Testing the Integration with Pabbly Connect

With the action set up and the connection made, it’s time to test the integration. Submit a test form in your chosen application to ensure that data is sent to Pabbly Connect.

Once you submit the form, check the Pabbly Connect dashboard. You should see the incoming data captured in the trigger window. If successful, proceed to finalize the integration by sending a test request to Go High Level.

Upon a successful test, you will receive a confirmation response indicating that the sub account has been created in Go High Level. You can verify this by logging into your Go High Level account and checking the sub account section.


Conclusion

In this tutorial, we demonstrated how to use Pabbly Connect to integrate Go High Level for automatic sub account creation. By following these steps, you can streamline user data collection and account management efficiently.

Ensure you check out Pabbly Connect to create business automation workflows and reduce manual tasks. Pabbly Connect currently offer integration with 2,000+ applications.

How to Integrate AWeber with Google Forms Using Pabbly Connect

Learn how to seamlessly integrate AWeber with Google Forms using Pabbly Connect. Follow our step-by-step tutorial for automated subscriber creation. Discover how to seamlessly connect your essential tools through accessible instructions that make powerful automation available to professionals at every skill level.

Watch Step By Step Video Tutorial Below


1. Accessing Pabbly Connect for Integration

To start integrating AWeber with Google Forms, you first need to access Pabbly Connect. Simply log in or sign up on the Pabbly Connect dashboard. This process is quick, taking less than two minutes, and you receive 100 free tasks upon account creation.

Once you are logged in, navigate to the dashboard and locate the ‘Create Workflow’ tab on the right side. Click on it to begin setting up your integration workflow. You will be prompted to name your workflow; for this example, name it ‘Create Subscriber in AWeber from Webhook Response.’ This naming helps you identify your workflow later.


2. Setting Up the Trigger in Pabbly Connect

In this step, you will set up the trigger for your workflow using the webhook feature in Pabbly Connect. Triggers are essential as they initiate the automation process. Select the ‘Webhook’ option as your trigger application.

  • Copy the webhook URL provided by Pabbly Connect.
  • Add this webhook URL to your Google Forms settings under the webhook section.
  • Test the submission in Google Forms to capture the webhook response.

It’s important to note that each workflow has a unique webhook URL. After setting up, make sure to submit a test response in Google Forms to ensure that Pabbly Connect captures the data correctly.


3. Configuring Google Forms with Pabbly Connect

Next, you will configure Google Forms to send responses to Pabbly Connect. Open your Google Forms enrollment form and go to the responses section. Click on the three dots to select ‘Destination for Responses’ and choose to create a new spreadsheet.

After creating the spreadsheet, go back to Google Forms. Under the ‘Extensions’ menu, locate and install the ‘Pabbly Connect Webhooks’ add-on if you haven’t already. Make sure to refresh the page after installation to see the add-on in the menu.

  • Select ‘Pabbly Connect Webhooks’ from the Extensions menu.
  • Choose ‘Initial Setup’ and paste the copied webhook URL.
  • Set the trigger column to the final data column in your spreadsheet.

Finally, click on ‘Submit’ and send a test response to ensure that everything is set up correctly. This integration will allow Google Forms to send user responses directly to Pabbly Connect.


4. Creating Subscribers in AWeber via Pabbly Connect

After setting up Google Forms, the next step is to create subscribers in AWeber using the data captured by Pabbly Connect. In the Pabbly Connect dashboard, select AWeber as your action application and choose the action event as ‘Add or Update Subscriber.’ This action will ensure that new subscribers are added to your AWeber account.

To connect Pabbly Connect with your AWeber account, you will need to authorize the connection. Click on ‘Connect’ and log into your AWeber account. Once authorized, you will be prompted to fill in the required fields such as Account ID and List ID.

Map the fields from the Google Forms response to the corresponding fields in AWeber. Ensure that the ‘Update Existing Subscriber’ option is set to ‘Yes’ if needed. Click on ‘Save and Send Test Request’ to verify the integration.

Once the test is successful, you can check your AWeber account to see if the subscriber has been created. This confirms that your integration is working as intended.


5. Finalizing and Testing Your Integration

To finalize your integration, you will need to test the entire process to ensure everything works seamlessly. Go back to Google Forms and fill out the enrollment form with new test data to simulate a real user response.

After submitting the form, check your AWeber account to confirm that the new subscriber has been added. This step is crucial to ensure that Pabbly Connect is effectively capturing the data and creating subscribers in AWeber.

If everything is functioning correctly, you will see the new subscriber listed in your AWeber account. This successful integration demonstrates how Pabbly Connect can automate tasks between Google Forms and AWeber, streamlining your workflow.


Conclusion

In this tutorial, we explored how to integrate AWeber with Google Forms using Pabbly Connect. By following the exact steps outlined, you can automate subscriber creation efficiently. Pabbly Connect serves as the central platform that simplifies this integration process, enhancing your workflow.

Ensure you check out Pabbly Connect to create business automation workflows and reduce manual tasks. Pabbly Connect currently offer integration with 2,000+ applications.

Integrate LinkedIn Lead Generation Forms with WhatsApp Using Pabbly Connect

Learn how to automate sending WhatsApp messages to leads from LinkedIn using Pabbly Connect. Follow our step-by-step guide for seamless integration. This comprehensive guide reveals exactly how to connect your applications and automate repetitive tasks — accessible for professionals of all technical backgrounds.

Watch Step By Step Video Tutorial Below


1. Accessing Pabbly Connect for Integration

To start integrating LinkedIn Lead Generation Forms with WhatsApp, first, access Pabbly Connect. You can sign in if you are an existing user or create a new account in just a few minutes. This process allows you to explore the application with 100 free tasks.

Once logged in, you will be directed to the dashboard. Here, locate the ‘Create Workflow’ button on the right side. Clicking this will allow you to set up a new workflow for automating your lead responses.


2. Setting Up Trigger Application in Pabbly Connect

In this step, you will configure the trigger application in Pabbly Connect. Select ‘LinkedIn Lead Generation Forms’ as your trigger application. This application will monitor for new leads generated from your forms.

  • Choose ‘New Lead Generation Form Response’ as the trigger event.
  • Connect your LinkedIn account by following the prompts.
  • Select the specific lead form you want to monitor.

After setting up the trigger, Pabbly Connect will check for new leads every 10 minutes. This ensures that your workflow remains up-to-date with the latest lead information.


3. Configuring Action Application in Pabbly Connect

Next, you will set up the action application in Pabbly Connect. Choose ‘WhatsApp by AI Sensei’ as your action application to send messages automatically. This integration allows you to communicate with leads via WhatsApp seamlessly.

For the action event, select ‘Send Template Message’. You will need to connect your WhatsApp account by entering the API key from your AI Sensei account. This step is crucial as it establishes the link between Pabbly Connect and your WhatsApp messaging service.


4. Mapping Parameters and Testing the Workflow

After configuring both the trigger and action applications in Pabbly Connect, you need to map the parameters. This involves setting up the message content using variables from the lead form responses.

  • Map the phone number with the country code.
  • Include the lead’s first name, last name, and email address in the message template.
  • Test the workflow to ensure everything is functioning correctly.

Once the parameters are mapped, you can send a test message. This test will confirm that the integration between LinkedIn and WhatsApp via Pabbly Connect is successful.


5. Finalizing and Monitoring Your Integration

After testing your workflow, finalize the setup in Pabbly Connect. Make sure to save your workflow and monitor it for any new leads. The integration will automatically send WhatsApp messages to new leads captured through LinkedIn.

Regularly check your Pabbly Connect dashboard to ensure the workflow is running smoothly. This automation will save you time and help nurture your leads effectively.


Conclusion

In this tutorial, we demonstrated how to use Pabbly Connect to automate sending WhatsApp messages to leads from LinkedIn Lead Generation Forms. This integration not only streamlines your communication process but also enhances lead nurturing. By following the steps outlined, you can efficiently manage your leads and improve your business outreach.

Ensure you check out Pabbly Connect to create business automation workflows and reduce manual tasks. Pabbly Connect currently offer integration with 2,000+ applications.

Integrating MySQL with Form Submissions Using Pabbly Connect

Learn how to use Pabbly Connect to integrate form submissions directly into MySQL. This tutorial covers step-by-step instructions for seamless automation. Implement the precise methodologies leading organizations use to automate repetitive tasks, illustrated with practical examples designed for immediate application.

Watch Step By Step Video Tutorial Below


1. Understanding Webhooks and Pabbly Connect

In this section, we will explore the concept of webhooks and how Pabbly Connect utilizes them to integrate applications. Webhooks act as URLs that allow applications to send data to each other in real-time. When an event occurs in one application, it sends data to the specified webhook URL.

For instance, if you use a form builder as your application A, once a form submission occurs, the data can be sent to the webhook URL provided by Pabbly Connect. This enables automatic data transfer to another application, such as a MySQL database, which serves as application B.


2. Creating a Pabbly Connect Account

To begin using Pabbly Connect, you first need to create a free account. This account will allow you to access the features necessary for automating your workflows. Once logged in, you will be directed to the dashboard where you can create a new workflow.

Follow these steps to set up your account and workflow in Pabbly Connect:

  • Visit the Pabbly Connect website and sign up for a free account.
  • Log in to your account and click on the ‘Create Workflow’ button.
  • Name your workflow (e.g., ‘Insert Data in MySQL from Webhook Response’) and click ‘Create’.

Now, you will see two boxes labeled ‘Trigger’ and ‘Action’ which are essential for setting up your automation.


3. Configuring Trigger and Action in Pabbly Connect

In this step, we will configure the trigger and action within Pabbly Connect. The trigger will be set to capture the webhook response, while the action will be to insert this data into MySQL. Select the webhook option as your trigger application.

Next, you need to set up the action application as MySQL. Here’s how to do it:

  • Choose ‘Webhook’ as the trigger application.
  • Select ‘Insert Row’ as the action event for MySQL.
  • Connect your MySQL database by providing the necessary credentials.

After setting this up, Pabbly Connect will generate a webhook URL that you need to copy and paste into your form builder application.


4. Integrating Form Builder with Pabbly Connect

Now that you have the webhook URL, it’s time to integrate it with your form builder application. For this example, we will use a form builder like JotForm. Go to your form settings, find the integration options, and select ‘Webhook’ to paste the URL you copied from Pabbly Connect.

Once the webhook URL is integrated, perform a test submission to ensure that the data is being captured correctly. Here’s how:

Go to the form preview and fill in the required fields. Submit the form to trigger the webhook. Check Pabbly Connect to see if the response has been received.

Successful submission indicates that the integration is working seamlessly.


5. Inserting Data into MySQL Database

With the webhook successfully capturing data from your form submissions, the final step is to insert this data into your MySQL database. In Pabbly Connect, select the appropriate MySQL table where you want the data to be inserted.

Map the fields from the webhook response to the corresponding columns in your MySQL table:

Map the first name, last name, email, phone number, and city fields from the webhook to your MySQL table. Click on ‘Save’ to finalize the mapping. Refresh your MySQL database to see the newly inserted data.

The successful insertion confirms that Pabbly Connect is effectively automating the data transfer process.


Conclusion

In this tutorial, we explored how to use Pabbly Connect to integrate form submissions directly into a MySQL database. By following the steps outlined, you can automate data insertion seamlessly, enhancing your workflow efficiency.

Ensure you check out Pabbly Connect to create business automation workflows and reduce manual tasks. Pabbly Connect currently offer integration with 2,000+ applications.

Integrate Facebook Leads to Google Sheets Using Pabbly Connect

Learn how to automate the integration of Facebook Leads to Google Sheets using Pabbly Connect. Step-by-step guide for seamless data transfer in real-time. Discover how to seamlessly connect your essential tools through accessible instructions that make powerful automation available to professionals at every skill level.

Watch Step By Step Video Tutorial Below


1. Accessing Pabbly Connect for Integration

To start integrating Facebook leads with Google Sheets, first, access Pabbly Connect. This platform allows you to automate the process seamlessly. Log in to your Pabbly Connect account or create a free account if you don’t have one.

Once logged in, navigate to the dashboard where you can create a new workflow. Click on the ‘Create Workflow’ button and name your workflow. For example, you might use ‘Add Facebook Leads to Google Sheets in Real Time’ to reflect its purpose.


2. Setting Up the Trigger in Pabbly Connect

In this step, you will set up the trigger which will initiate the data transfer. Choose ‘Facebook Lead Ads’ as your trigger application. Then, select the event as ‘New Lead Instant.’ This configuration allows Pabbly Connect to capture new leads as they come in. using Pabbly Connect

  • Click on the ‘Connect’ button to link your Facebook account.
  • Authorize the connection by logging into your Facebook account.
  • Select the Facebook page that contains your lead form.

After successfully connecting, you can select the specific lead form you want to use. For this example, choose the ‘Inquire Now’ form. Save your settings and proceed to test the connection.


3. Testing the Integration with Dummy Data

Next, you need to test the integration to ensure it works correctly. After saving the trigger settings, click on ‘Save and Send Test Request’. This action will prompt you to make a sample submission on your Facebook lead form.

To do this, use the Facebook Lead Ads Testing Tool. Here, you can simulate a lead submission. Fill in the required fields with dummy data, such as a name, email, and phone number. After submitting the form, check Pabbly Connect to see if the data has been captured successfully.

  • Ensure all fields are filled correctly in the test submission.
  • Verify that the response in Pabbly Connect reflects the submitted data.

Once you see the captured data, you can confirm that the connection between Facebook Lead Ads and Pabbly Connect is functioning well.


4. Setting Up Google Sheets as the Action

Now, it’s time to set up the action that will transfer the captured leads to Google Sheets. Select ‘Google Sheets’ as your action application in Pabbly Connect. Choose the action event as ‘Add a New Row’. This will allow you to add each new lead to your Google Sheets automatically. using Pabbly Connect

Sign in to your Google account to connect it with Pabbly Connect. Once connected, select the specific spreadsheet where you want the leads to be added. Ensure that the columns in your Google Sheets match the fields from the Facebook lead form.

Map the fields from the Facebook lead data to the corresponding columns in Google Sheets. Ensure that the mapping is correct to avoid data mismatches.

After mapping the fields, test the action to ensure that data is being added to your Google Sheets correctly. If successful, you’ll see the new lead data reflected in your spreadsheet.


5. Finalizing the Automation with Pabbly Connect

After successfully testing both the trigger and action, your automation is now complete. With Pabbly Connect, every time a new lead is captured via your Facebook lead ad form, the details will be automatically added to your Google Sheets in real-time.

This eliminates the need for manual data entry or exporting CSV files daily. You can set this automation once and let Pabbly Connect handle the rest, allowing you to focus on your business.

In case you want to access this automation setup, you can find it in your Pabbly Connect account. Simply log in and view your workflows. This powerful integration saves time and streamlines your lead management process.


Conclusion

In conclusion, using Pabbly Connect to integrate Facebook leads with Google Sheets automates data handling efficiently. This setup ensures real-time updates, reducing manual tasks and enhancing productivity.

Ensure you check out Pabbly Connect to create business automation workflows and reduce manual tasks. Pabbly Connect currently offer integration with 2,000+ applications.

Automate Facebook Lead Ads to Flowdesk with Pabbly Connect

Learn how to automate Facebook Lead Ads to Flowdesk using Pabbly Connect. This step-by-step tutorial guides you through the integration process. This comprehensive guide reveals exactly how to connect your applications and automate repetitive tasks — accessible for professionals of all technical backgrounds.

Watch Step By Step Video Tutorial Below


1. Accessing Pabbly Connect for Integration

To start the integration process, access Pabbly Connect by signing up or logging into your account. This platform serves as the central hub for connecting various applications, including Facebook Lead Ads and Flowdesk.

Once logged in, navigate to the dashboard where you will find the ‘Create Workflow’ button on the right-hand side. Click this to begin setting up your automation.


2. Creating a Workflow in Pabbly Connect

After clicking on ‘Create Workflow’ in Pabbly Connect, a dialog box will prompt you to name your workflow. For this tutorial, we will name it ‘Add New Leads from Facebook Lead Ads to Flowdesk’.

  • Click on ‘Create’ to proceed.
  • You will see options for Trigger and Action events.
  • Select Facebook Lead Ads as the Trigger application.

In the next step, you will choose the trigger event, which is ‘New Lead Instant’. Click on ‘Connect’ to link your Facebook Lead Ads account with Pabbly Connect.


3. Setting Up Facebook Lead Ads in Pabbly Connect

Once the connection prompt appears, click on ‘Add New Connection’ to connect Pabbly Connect with your Facebook Lead Ads account. After successful authorization, you will need to select the specific Facebook page and lead generation form.

To do this, navigate to your Facebook account to find the page and form you want to integrate. Select the page, and if there is only one lead form, it will be automatically captured by the system. Click on ‘Save and Send Test Request’ to confirm the setup.


4. Creating a Subscriber in Flowdesk

The next step involves setting up Flowdesk as the Action application in Pabbly Connect. Choose ‘Create or Update Subscriber’ as the action event. Click on ‘Connect’ to link your Flowdesk account.

After authorizing the connection, you will need to fill in the subscriber details. Choose to create the subscriber by email, and map the email address from the previous step. This mapping ensures that every new lead will be processed correctly.

  • Enter the first name and last name by splitting the full name.
  • You can choose to send opt-in confirmation emails or not.

After filling in the required fields, click on ‘Save and Send Test Request’ to create the subscriber in Flowdesk. This action will confirm that the integration is successful.


5. Testing the Integration

To test the integration, go back to Facebook and submit a new lead through the lead generation form. After submission, return to Pabbly Connect and check for the webhook response to ensure that the lead data has been captured.

Finally, refresh your Flowdesk account to verify that the new subscriber has been successfully created. This confirms that your integration is working as intended.


Conclusion

This tutorial demonstrated how to automate the process of adding new leads from Facebook Lead Ads to Flowdesk using Pabbly Connect. By following these steps, you can streamline your lead management and enhance your marketing efforts effectively.

Ensure you check out Pabbly Connect to create business automation workflows and reduce manual tasks. Pabbly Connect currently offer integration with 2,000+ applications.