Generate Images and Text in Airtable using OpenAI & DALL-E with Pabbly Connect

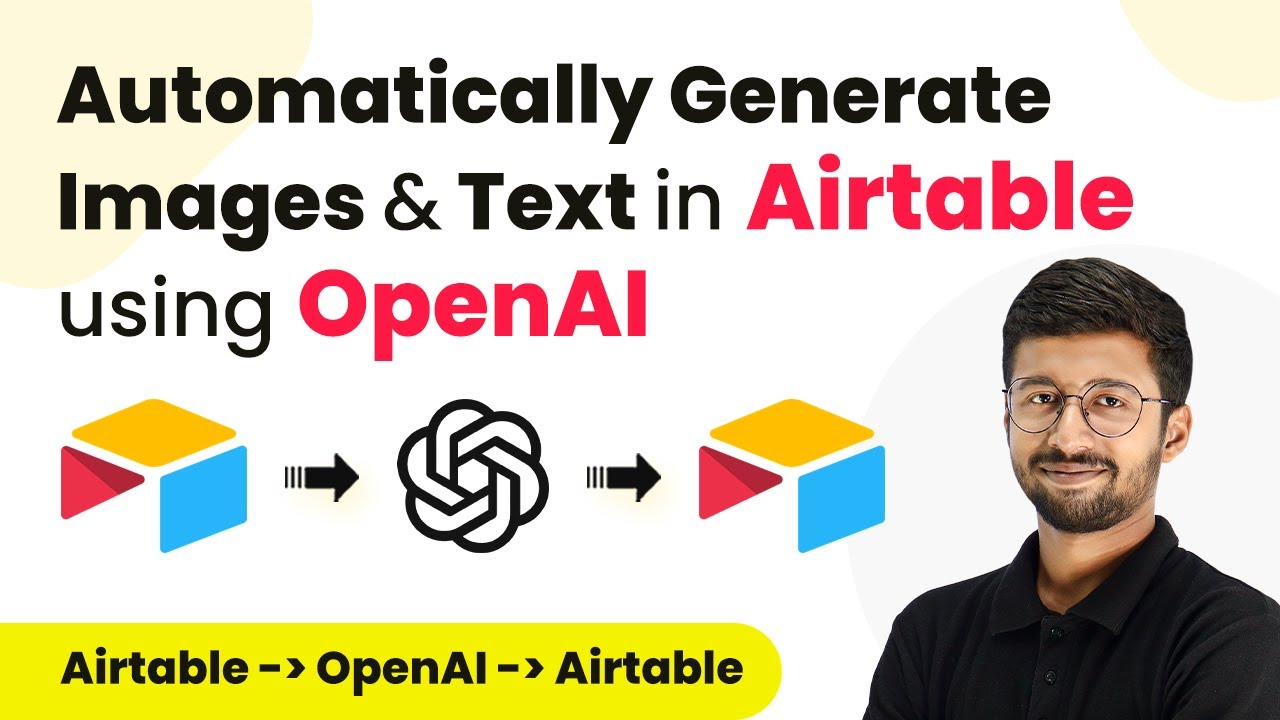
Learn how to automate image and text generation in Airtable using OpenAI and DALL-E with Pabbly Connect. Step-by-step guide included! Build sophisticated automated workflows in less time than you think. This guide translates complex integrations into straightforward steps for immediate implementation.

Watch Step By Step Video Tutorial Below


1. Setting Up Pabbly Connect for Automation

In this section, we will discuss how to set up Pabbly Connect to automate image and text generation in Airtable. To begin, access the Pabbly Connect dashboard by signing up for a free account. Once logged in, click on the ‘Create Workflow’ button to initiate a new automation workflow.

Give your workflow a descriptive name, such as ‘Airtable to OpenAI Automation’. After naming, select the appropriate folder in your Pabbly Connect account. Click on ‘Create’ to proceed. This will open a new workflow where you can set up the trigger and action steps necessary for your automation.


2. Connecting Airtable to Pabbly Connect

To connect Airtable with Pabbly Connect, you need to set a trigger event. Search for Airtable in the trigger app section and select it. Choose the event type as ‘New Record’. This will ensure that every time a new record is added to Airtable, Pabbly Connect will initiate the automation.

  • Select ‘Add New Connection’ to link your Airtable account.
  • Enter your Airtable API access token, which you can find in the Airtable Developer Hub.
  • Choose the base and table from which you want to fetch new records.

After configuring these settings, click on ‘Save and Send Test Request’. This will confirm that Pabbly Connect can successfully retrieve data from your Airtable account.


3. Generating Images with OpenAI’s DALL-E

Once Airtable is connected to Pabbly Connect, the next step is to generate images using OpenAI’s DALL-E. In the action step, search for OpenAI and select it as your app. Choose the action event ‘Generate Image’ to start the process.

To connect OpenAI with Pabbly Connect, you need to enter your OpenAI API key. This key can be generated from your OpenAI account. Once connected, select the model you want to use (DALL-E 2 or DALL-E 3). Map the image prompt from the Airtable trigger response to the prompt field in OpenAI.

  • Set the number of images to generate (usually 1).
  • Define the image size for the output.
  • Select the image quality and style if desired.

After setting these parameters, click on ‘Save and Send Test Request’. You will receive an image URL generated by DALL-E, which you can preview to ensure it meets your expectations.


4. Generating Text Content with GPT

Following the image generation, the next step involves creating text content using OpenAI’s GPT. Again, search for OpenAI in the action step and select it. This time, choose the action event ‘Chat GPT’ or ‘Generate Content’ to create the article.

Since you’ve already connected OpenAI to Pabbly Connect, you can use the existing connection. Select the latest model, such as GPT-4, for generating text. In the prompt field, you can write something like ‘Write an article on’ and map the title from the Airtable trigger response to complete the request.

Make sure to provide any additional context for the article. Click ‘Save and Send Test Request’ to see the generated article. Review the content for quality and relevance.

After receiving the text response, you can proceed to the final step, which involves updating the Airtable record with both the image URL and the generated text.


5. Updating Airtable with Generated Content

The last step is to update your Airtable record with the newly generated image and text content. In the action step of Pabbly Connect, search for Airtable again and select it. Choose the action event ‘Update Record’ to modify the existing record.

Once again, use your existing Airtable connection. You will need to select the same base and table. For the record ID, map the record ID from the trigger response to ensure the correct record is updated. Then, map the text content and image URL from the previous action steps.

Click ‘Save and Send Test Request’ to finalize the update. Check Airtable to confirm that the new content has been added successfully.

This completes the automation process using Pabbly Connect, enabling seamless integration between Airtable and OpenAI for generating images and text.


Conclusion

In this tutorial, we explored how to use Pabbly Connect to automate the generation of images and text in Airtable using OpenAI and DALL-E. This integration streamlines the workflow, allowing you to focus on creating content efficiently.

Ensure you check out Pabbly Connect to create business automation workflows and reduce manual tasks. Pabbly Connect currently offer integration with 2,000+ applications.

Create Dynamic PDF Files from Google Sheets and Send via WhatsApp Using Pabbly Connect

Learn how to automate the creation of dynamic PDF files from Google Sheets and send them via WhatsApp using Pabbly Connect in this step-by-step tutorial.

Watch Step By Step Video Tutorial Below


Setting Up Pabbly Connect for Integration

To start creating dynamic PDF files from Google Sheets and send them via WhatsApp, you first need to access Pabbly Connect. This powerful integration platform allows you to automate workflows between different applications without any coding.

Begin by signing up for a free account on Pabbly Connect. Once logged in, you can create a new workflow by clicking on the ‘Create Workflow’ button. Name your workflow something descriptive, like ‘Dynamic PDF Creation and WhatsApp Sending’. After naming, select the folder where you want to save this workflow and click ‘Create’.


Preparing Google Sheets for Data Collection

Next, you need to prepare your Google Sheets with the necessary data. This includes the participants’ names, WhatsApp numbers, email addresses, and competition names. This data will be used to generate personalized certificates.

Once your data is in place, go back to Pabbly Connect and set Google Sheets as your trigger application. Select the event as ‘New or Updated Spreadsheet Row’. Pabbly Connect will provide you with a webhook URL, which you will need to copy and paste into the Google Sheets add-on. You can install the Pabbly Connect Webhooks add-on from the Google Workspace Marketplace if you haven’t done so already.

  • Open Google Sheets and go to Extensions > Add-ons > Get add-ons.
  • Search for Pabbly Connect Webhooks and install it.
  • Open the add-on, click on Initial Setup, and paste the webhook URL.

After pasting the URL, select the trigger column where new data will be added. This setup ensures that every time a new participant is added, Pabbly Connect will trigger the workflow automatically.


Creating Dynamic Certificates Using Google Slides

With your Google Sheets set up, the next step is to create a certificate template in Google Slides. This template will be used to generate personalized certificates for each participant. Open Google Slides, design your certificate, and use variables for dynamic content such as participant names and competition names.

Now, return to Pabbly Connect and select Google Slides as your action application. Choose the action event ‘Create Presentation from Template’. Connect your Google Slides account to Pabbly Connect, and select the certificate template you created earlier. You will see fields for the variables you set up in your template.

  • Map the participant’s name from Google Sheets to the corresponding field in Google Slides.
  • Provide a static title for the certificate, such as ‘Certificate of Participation’.
  • Select the folder in Google Drive where the generated certificates will be saved.

After mapping all the necessary fields, click ‘Save and Send Test Request’ to verify that the certificate is generated correctly.


Sending Certificates on WhatsApp Using Pabbly Connect

The final step is to send the generated certificates via WhatsApp. For this, you will need to use an application that integrates with WhatsApp, such as Vati. In Pabbly Connect, add Vati as another action application and select the action event ‘Send Template Message’.

Connect your Vati account by providing the necessary API credentials. Map the WhatsApp number from your Google Sheets data, and select the template you created in Vati for sending the certificates. Make sure to include the link to the generated PDF certificate in the message.

Ensure the WhatsApp number is formatted correctly without the plus sign. Provide a broadcast name for your message. Map all required variables in the message template.

After completing the setup, send a test message to confirm that everything works as intended. You should see the certificate sent to the specified WhatsApp number.


Generating and Sending Bulk Certificates Automatically

Once the individual certificate generation and sending process is confirmed to be working, you can enable bulk processing. In the Pabbly Connect Webhooks add-on, switch from ‘Send on Event’ to ‘Send All Data’. This will trigger the automation to process all existing entries in your Google Sheets.

After enabling this option, Pabbly Connect will automatically generate and send all certificates in bulk. You will see the certificates being created in your Google Drive and sent to respective WhatsApp numbers in real-time.

With Pabbly Connect, you can automate an entire workflow, allowing you to generate thousands of dynamic PDF files from Google Sheets data and send them via WhatsApp without manual intervention. This saves you time and ensures accuracy in your communications.


Conclusion

Using Pabbly Connect, you can efficiently create thousands of dynamic PDF files from Google Sheets data and automatically send them via WhatsApp. This powerful integration streamlines processes and enhances productivity.

Ensure you check out Pabbly Connect to create business automation workflows and reduce manual tasks. Pabbly Connect currently offer integration with 2,000+ applications.

How to Send Order Confirmation SMS for Multi-Product WooCommerce Orders Using Pabbly Connect

Learn how to automate sending order confirmation SMS for multi-product WooCommerce orders using Pabbly Connect and Twilio in this detailed tutorial. Discover how to seamlessly connect your essential tools through accessible instructions that make powerful automation available to professionals at every skill level.

Watch Step By Step Video Tutorial Below


1. Setting Up Pabbly Connect for WooCommerce and Twilio Integration

To send order confirmation SMS for multi-product WooCommerce orders, you need to set up Pabbly Connect. First, log into your Pabbly Connect account. If you don’t have an account, you can create one for free in just a few minutes.

Once logged in, navigate to the dashboard and click on the blue button labeled ‘Create Workflow’. You will be prompted to name your workflow; a suitable name could be ‘Send Order Confirmation SMS for Multiple Product WooCommerce Orders.’ Select a folder for your workflow and click on ‘Create’.


2. Setting the Trigger Event in WooCommerce

In this step, we will set the trigger event in WooCommerce using Pabbly Connect. Choose WooCommerce as the trigger application. Select the trigger event as ‘New Order Created’. This will ensure that every time a new order is placed, it triggers the workflow.

  • Select WooCommerce as the trigger application.
  • Choose ‘New Order Created’ as the trigger event.
  • Copy the webhook URL provided by Pabbly Connect.

Next, go to your WooCommerce dashboard, navigate to the settings, and find the advanced options. Here, you will add a new webhook by pasting the copied URL. Make sure to set the status to active and select the same topic as the trigger event.


3. Capturing Order Details from WooCommerce

After setting up the trigger, the next step is to capture order details using Pabbly Connect. Once a new order is placed, the details will be sent to the webhook URL you configured. You will see the order details captured in Pabbly Connect.

To ensure the data is captured correctly, place a test order in WooCommerce. The order details, including customer information and product items, will be sent to Pabbly Connect. Make sure that the response includes the necessary order details like customer name, email, and phone number.

  • Place a test order in WooCommerce.
  • Check the response in Pabbly Connect for accuracy.
  • Ensure the response contains all necessary details.

This process confirms that Pabbly Connect is effectively capturing the order data. Once you have verified the details, you can proceed to format this data for the SMS.


4. Formatting Order Details for SMS

Now that we have captured the order details, the next step is to format this data into a readable format using Pabbly Connect. Add a new action step and select the ‘Run JavaScript’ option. This allows you to manipulate the data as needed.

In the JavaScript code section, input the necessary code to convert the captured order details into a simpler format. Make sure to map the line items correctly so that the product details are included in the SMS.

Select ‘Run JavaScript’ as the action step. Input the JavaScript code to format the data. Map the line items to include product details.

Once you save and execute this step, you should receive a response that confirms the data is formatted correctly. This sets the stage for sending the SMS with the formatted order details.


5. Sending SMS Confirmation via Twilio

The final step in this integration process is to send the order confirmation SMS using Twilio, facilitated by Pabbly Connect. Choose Twilio as the action application and select the ‘Send SMS’ action event. Connect your Twilio account by entering the required credentials.

In the SMS body section, craft your confirmation message. Use the mapped customer details and formatted product information to personalize the message. Ensure you also specify the recipient’s phone number, which you can map from the order details captured earlier.

Select Twilio as the action application. Input the SMS body with mapped details. Specify the recipient’s phone number.

After saving this step, send a test SMS. You should receive the SMS confirmation on the specified number, indicating that the integration is successful. From now on, every time an order is placed, an SMS will be sent automatically to the customer.


Conclusion

In this tutorial, we demonstrated how to use Pabbly Connect to automate sending order confirmation SMS for multi-product WooCommerce orders. By integrating WooCommerce with Twilio through Pabbly Connect, you can streamline your order confirmation process efficiently.

Ensure you check out Pabbly Connect to create business automation workflows and reduce manual tasks. Pabbly Connect currently offer integration with 2,000+ applications.

With this setup, every new order will trigger an SMS confirmation, enhancing customer communication and satisfaction. Automate your WooCommerce workflow today with Pabbly Connect!

Integrate Systeme.io Contact with Tag for WordPress Users Using Pabbly Connect

Learn how to create Systeme.io contacts with tags for WordPress users using Pabbly Connect. Follow this step-by-step tutorial for seamless integration. Build sophisticated automated workflows in less time than you think. This guide translates complex integrations into straightforward steps for immediate implementation.

Watch Step By Step Video Tutorial Below


1. Access Pabbly Connect to Start Integration

To create a Systeme.io contact with a tag for WordPress users, the first step is to access Pabbly Connect. Sign in as an existing user or click on the sign-up button for free access. Once logged in, navigate to the Pabbly Connect dashboard.

In the dashboard, you will find the option to create a new workflow. Click on the ‘Create Workflow’ button and name your workflow appropriately, such as ‘Create Systeme.io Contact with Tag for WordPress User.’ This sets the stage for integrating your WordPress registration with Systeme.io using Pabbly Connect.


2. Set Up Trigger and Action in Pabbly Connect

In Pabbly Connect, the integration process relies on defining a trigger and action. For this setup, your trigger application will be WordPress, and the action application will be Systeme.io. The trigger event will be set to ‘User Registers,’ which activates the workflow whenever a new user registers on your WordPress site.

  • Select WordPress as the trigger application.
  • Choose ‘User Registers’ as the trigger event.
  • Set Systeme.io as the action application.
  • Select ‘Create New Contact’ as the action event.

This configuration allows Pabbly Connect to automatically create a contact in Systeme.io whenever a new user registers on your WordPress site, streamlining your user management process.


3. Connect WordPress to Pabbly Connect

To establish the connection between WordPress and Pabbly Connect, you will need a webhook URL provided by Pabbly. Navigate to your WordPress settings and access the WP Webhooks section. Here, you will add a new webhook for user registration.

  • Go to WordPress settings and select WP Webhooks.
  • Choose ‘User Created’ as the event to trigger the webhook.
  • Paste the webhook URL from Pabbly Connect.
  • Save the webhook settings.

After saving, Pabbly Connect will wait for a webhook response, which is crucial for capturing the user data whenever a new registration occurs on your WordPress site.


4. Test the Registration Process

To ensure everything is working correctly, it’s essential to test the registration process. Open a new incognito window and fill out the registration form on your WordPress site. Once you submit the form, you should see a confirmation message indicating successful registration.

After submitting the registration, return to Pabbly Connect. The webhook response should now display the details of the newly registered user, such as their name, email, and other relevant information. This confirms that the trigger is functioning correctly and that the user data is being captured.


5. Create Contact and Add Tag in Systeme.io

With the user details successfully captured, the next step is to create a contact in Systeme.io. In Pabbly Connect, establish a connection to Systeme.io by providing an API key. This key can be generated from your Systeme.io account settings under the Pabbly API Keys section.

Once the connection is made, map the user data received from WordPress to the corresponding fields in Systeme.io, including email, first name, last name, and phone number. After mapping, save the action and send a test request to create the contact. A successful response will indicate that the contact has been created in Systeme.io.

Finally, to add a tag to the newly created contact, use the same connection to Systeme.io. Specify the contact ID and the tag name (e.g., ‘WordPress’) to ensure that the contact is appropriately tagged. This completes the integration process, allowing Pabbly Connect to automate the creation of contacts with tags based on WordPress registrations.


Conclusion

This tutorial demonstrated how to use Pabbly Connect to create a Systeme.io contact with a tag for WordPress users. By following these steps, you can streamline your user management and automate the process effectively.

Ensure you check out Pabbly Connect to create business automation workflows and reduce manual tasks. Pabbly Connect currently offer integration with 2,000+ applications.

Automate Your Business with Google Forms, Google Docs, Google Sheets and Gmail Using Pabbly Connect

Learn how to automate your business operations using Google Forms, Google Docs, Google Sheets, and Gmail with Pabbly Connect. Step-by-step tutorial included. Discover how to seamlessly connect your essential tools through accessible instructions that make powerful automation available to professionals at every skill level.

Watch Step By Step Video Tutorial Below


1. Overview of Pabbly Connect for Automation

Pabbly Connect is a powerful automation tool that allows you to seamlessly integrate various applications like Google Forms, Google Sheets, Google Docs, and Gmail. In this tutorial, we will explore how to use Pabbly Connect to automate your business processes.

To get started, access Pabbly Connect by visiting their website and creating a free account. This platform offers a free trial with 100 tasks to help you test the automation features. Once you have logged in, you can create workflows that connect your applications efficiently.


2. Setting Up Google Forms with Pabbly Connect

To collect orders using Google Forms, you first need to create a form that captures customer information. This form will serve as the trigger for our automation with Pabbly Connect.

Follow these steps to set up Google Forms:

  • Create a new Google Form for capturing orders.
  • Link the form to a Google Sheets spreadsheet to store responses.
  • Use the ‘Responses’ tab to view collected data.

After setting up your Google Form, you will need to integrate it with Pabbly Connect to capture new responses automatically.


3. Integrating Google Docs for Invoice Generation

The next step is to generate invoices using Google Docs. After a customer submits an order through Google Forms, we will create a document using a predefined template in Google Docs. This is where Pabbly Connect plays a crucial role in automating the invoice generation process.

To set this up:

  • Create a Google Docs template for your invoices.
  • Connect Google Docs with Pabbly Connect and select the action event ‘Create Document from Template’.
  • Map the customer details from the Google Forms response into the invoice template.

With this setup, every new order will automatically generate an invoice in Google Docs using Pabbly Connect.


4. Saving Invoices in Google Drive via Pabbly Connect

Once the invoice is generated, it needs to be saved in Google Drive. This can be easily achieved by integrating Google Drive with Pabbly Connect. The process ensures that every invoice is stored securely and can be accessed later.

Here’s how to save invoices in Google Drive:

Select Google Drive as the next action in your Pabbly Connect workflow. Choose the action event ‘Upload File’ and map the generated invoice document. Specify the destination folder in Google Drive where the invoices will be saved.

By following these steps, you will ensure that all invoices generated are automatically saved in Google Drive, thanks to Pabbly Connect.


5. Sending Emails with Gmail Using Pabbly Connect

The final step in our automation process is to send an email to the customer with their invoice and payment link. This can be done using Gmail integrated with Pabbly Connect. The email will include all necessary details for the customer to complete their order.

To send emails via Gmail:

Select Gmail as the final action in your Pabbly Connect workflow. Choose the action event ‘Send Email’ and map the recipient’s email address from the Google Forms response. Compose the email content, including the invoice link and payment details.

This setup will ensure that every time an order is placed, the customer receives an email with all the necessary information, fully automated by Pabbly Connect.


Conclusion

In conclusion, using Pabbly Connect to automate your business processes with Google Forms, Google Docs, Google Sheets, and Gmail can significantly enhance efficiency. This tutorial has provided a step-by-step guide to setting up the entire workflow, ensuring that each application works seamlessly with Pabbly Connect.

Ensure you check out Pabbly Connect to create business automation workflows and reduce manual tasks. Pabbly Connect currently offer integration with 2,000+ applications.

Integrate Facebook Leads to Google Sheets Using Pabbly Connect

Learn how to automate adding Facebook leads to Google Sheets for your consultancy business using Pabbly Connect. Follow this step-by-step tutorial. Discover hidden automation capabilities within your existing tools. This guide shows you how to connect your essential applications and permanently eliminate redundant manual processes.

Watch Step By Step Video Tutorial Below


1. Accessing Pabbly Connect for Integration

To get started with integrating Facebook leads into Google Sheets, first, you need to access Pabbly Connect. Visit the official website and either sign in or create a new account. If you’re a new user, you’ll receive 100 free tasks every month, allowing you to explore the platform’s capabilities.

Once logged in, navigate to the dashboard where you can create workflows. Select the option to create a new workflow and name it something descriptive, like ‘Add Facebook Leads to Google Sheets for Consultancy Services’. This will help you keep your integrations organized.


2. Setting Up the Trigger with Facebook Lead Ads

The next step involves setting up the trigger in Pabbly Connect. For this integration, select Facebook Lead Ads as your trigger application. The trigger event should be set to ‘New Lead Instant’, which activates the workflow whenever a new lead is generated.

  • Select ‘Add New Connection’ to link your Facebook account.
  • Authorize Pabbly Connect to access your Facebook Lead Ads.
  • Choose the Facebook page and lead form associated with your consultancy business.

After setting up the connection, click on ‘Save and Send Test Request’ to verify that everything is working correctly. This step ensures that any new leads generated will be captured by Pabbly Connect for further processing.


3. Testing the Facebook Leads Integration

To test the integration, you’ll need to submit a test lead using the Facebook Lead Ads testing tool. This simulates a real lead submission, allowing you to see if Pabbly Connect captures the data correctly. Make sure to delete any existing leads before submitting a new test lead.

Once you submit the test lead form, return to Pabbly Connect and check for the captured response. If successful, you’ll see the lead details appear in your Pabbly dashboard, confirming that the integration works as intended.


4. Adding Google Sheets as the Action Application

Now it’s time to set Google Sheets as the action application in your workflow. Within Pabbly Connect, select Google Sheets and choose the action event as ‘Add New Row’. This action will add the details of your new lead into a specified Google Sheet.

Connect your Google Sheets account by clicking on ‘Add New Connection’ or using an existing connection. Once connected, you’ll need to select the spreadsheet and the specific sheet where you want the lead data to be stored.

  • Map the fields from the Facebook lead response to the corresponding columns in Google Sheets.
  • Ensure that the first name, last name, email, and phone number fields are correctly mapped.

After mapping the necessary fields, click on ‘Save and Send Test Request’ to add a test row to your Google Sheets. Check your spreadsheet to confirm that the data has been successfully entered.


5. Conclusion and Summary of Integration

In this tutorial, we learned how to integrate Facebook leads into Google Sheets using Pabbly Connect. By setting up a trigger with Facebook Lead Ads and an action with Google Sheets, you can automate the process of capturing leads for your consultancy business.

Ensure you check out Pabbly Connect to create business automation workflows and reduce manual tasks. Pabbly Connect currently offer integration with 2,000+ applications.

With this integration, you can efficiently manage your leads without manual entry, ensuring that your Google Sheets are always up to date with the latest information. This not only saves time but also enhances your productivity as a consultancy service provider.


By following these steps, you can easily automate the addition of Facebook leads to Google Sheets using Pabbly Connect. This integration will streamline your lead management process, allowing you to focus more on your consultancy services.

Automatically Convert Text to Speech from Google Sheets Using Pabbly Connect

Learn how to automatically convert text to speech from Google Sheets using Pabbly Connect and Eden AI. Follow this detailed tutorial for seamless integration. Build sophisticated automated workflows in less time than you think. This guide translates complex integrations into straightforward steps for immediate implementation.

Watch Step By Step Video Tutorial Below


1. Setting Up Pabbly Connect for Google Sheets

To automatically convert text to speech from Google Sheets, you first need to set up Pabbly Connect. This platform acts as the bridge between your Google Sheets and Eden AI, facilitating the conversion process.

Begin by signing up for a free account on Pabbly Connect. Once you are logged into your dashboard, you can create a new workflow. Click on ‘Create Workflow’ and give it a name, such as ‘Google Sheets to Eden AI’. This setup is crucial for ensuring that your Google Sheets data can be processed seamlessly.


2. Configuring Google Sheets with Pabbly Connect

Next, you will configure Google Sheets to work with Pabbly Connect. In the trigger window, select Google Sheets as your app. Choose the trigger event as ‘New or Updated Spreadsheet Row’. This setup allows Pabbly Connect to monitor your Google Sheets for any new entries.

  • Select the Google Sheets app in Pabbly Connect.
  • Choose ‘New or Updated Spreadsheet Row’ as the trigger event.
  • Copy the webhook URL provided by Pabbly Connect.

After copying the webhook URL, go to your Google Sheet. Navigate to Extensions > Add-ons > Get Add-ons and search for Pabbly Connect Webhooks. Install the add-on, then refresh your Google Sheet. This step ensures that your Google Sheet is ready to communicate with Pabbly Connect.


3. Connecting Eden AI with Pabbly Connect

After configuring Google Sheets, the next step is to connect Eden AI through Pabbly Connect. In the action window, select Eden AI as the app and choose the action event as ‘Convert Text to Speech’. This integration allows you to send text from Google Sheets to Eden AI for conversion.

To establish this connection, you will need your Eden AI API token. Go to your Eden AI account, copy the API token, and paste it into Pabbly Connect. This step is essential for authenticating the connection between the two platforms.

  • Select ‘Convert Text to Speech’ as the action event.
  • Paste your Eden AI API token in Pabbly Connect.
  • Map the text input from Google Sheets to the Eden AI action.

After mapping the text input, you can also select the voice type and language for the speech output. This configuration ensures that the audio generated matches your preferences.


4. Updating Google Sheets with Audio URL

Once you have converted the text to speech using Eden AI, the next step is to update your Google Sheets with the audio URL. In this step, select Google Sheets again in the action window and choose ‘Update Cell Value’ as the action event. This allows Pabbly Connect to write back the audio URL to your Google Sheet.

Connect your Google Sheets account with Pabbly Connect using the same method as before. After connecting, you will need to select the specific spreadsheet and sheet where you want to update the audio URL. Make sure to map the row index received in the trigger step to ensure the audio URL is placed in the correct row.

Select the spreadsheet and sheet for updating the audio URL. Map the row index to ensure the URL is placed correctly. Map the audio URL received from Eden AI.

After completing these steps, you can test the entire workflow by adding a new row of text to your Google Sheet. Within moments, the audio URL should automatically update in the same row, demonstrating the successful integration of Pabbly Connect.


5. Testing the Automation Workflow

Finally, it’s time to test your automation workflow. Add a new text entry in your Google Sheet and observe how Pabbly Connect triggers the automation. The text should be sent to Eden AI for conversion, and the resulting audio URL should be updated back into the Google Sheet.

Ensure that the audio file is accessible by clicking on the URL in your Google Sheet. This test confirms that the entire process works seamlessly, from inputting text to receiving audio output.

By following these steps, you can effectively utilize Pabbly Connect to automate the conversion of text to speech from Google Sheets. This integration not only saves time but also enhances productivity by allowing you to convert text into audio effortlessly.


Conclusion

In this tutorial, we explored how to use Pabbly Connect to automatically convert text to speech from Google Sheets using Eden AI. By following the structured steps, you can streamline your workflow and enhance productivity.

Ensure you check out Pabbly Connect to create business automation workflows and reduce manual tasks. Pabbly Connect currently offer integration with 2,000+ applications.

Utilizing Pabbly Connect as the central integration platform simplifies the process, allowing you to focus on your content rather than the technicalities of integration.

Automate WhatsApp Messages for Physiotherapy Leads with Pabbly Connect

Learn how to use Pabbly Connect to send automated WhatsApp messages to your physiotherapy clinic leads from Facebook ads. Follow our step-by-step guide! Learn to create powerful connections between your critical applications without requiring specialized programming knowledge or extensive technical background.

Watch Step By Step Video Tutorial Below


1. Accessing Pabbly Connect for Integration

To automate WhatsApp messages to your physiotherapy clinic leads, you will first need to access Pabbly Connect. This powerful platform allows you to connect various applications seamlessly.

Start by visiting the Pabbly website. If you don’t have an account, you can sign up for free, which will only take a few minutes. Once signed in, navigate to the Pabbly Connect dashboard to begin creating your workflow.


2. Creating a New Workflow in Pabbly Connect

To create a new workflow in Pabbly Connect, click on the ‘Create Workflow’ button. You will be prompted to name your workflow. Enter a descriptive name, such as ‘Automated WhatsApp Message for Clinic Leads’.

  • Select a folder to save your workflow.
  • Click on ‘Create’ to proceed.

Once your workflow is created, you will see two sections: Trigger and Action. The Trigger section will initiate the workflow when a new lead is generated from Facebook.


3. Setting Up the Trigger with Facebook Lead Ads

For the Trigger application, select ‘Facebook Lead Ads’ in Pabbly Connect. The trigger event you should choose is ‘New Lead Instant’. This event will activate whenever a new lead fills out your form.

Next, you need to connect your Facebook account to Pabbly Connect. Click on ‘Connect’ and then ‘Add New Connection’. Follow the prompts to authorize the connection.

  • Select your Facebook Page (e.g., Peak Performance Physio).
  • Choose the lead generation form associated with your page.

Make sure your lead generation form is live to test the connection successfully. After setting up, click on ‘Save and Send Test Request’ to verify the integration.


4. Setting Up the Action to Send WhatsApp Messages

Now, it’s time to set up the Action in Pabbly Connect. For the Action application, select ‘Vati’, which is the WhatsApp API you will use to send messages. Choose the action event as ‘Send Template Message’.

Connect Vati to Pabbly Connect by providing the API endpoint and access token from your Vati account. Once connected, you will be able to map the necessary fields.

Map the WhatsApp number from the Facebook lead response. Select your pre-approved message template (e.g., Physio Lead).

Fill in the required details and ensure that the custom parameters are formatted correctly to avoid errors during message delivery.


5. Testing the Integration and Finalizing

After configuring the Action, it’s crucial to test the entire integration in Pabbly Connect. Click on ‘Save and Test’ to send a sample WhatsApp message to verify that everything works correctly.

Once the test is successful, you can check your WhatsApp to see if you received the automated message. If everything looks good, your workflow is now complete!

This integration ensures that every time you get a new lead from Facebook, an automated WhatsApp message is sent, enhancing your communication with potential clients.


Conclusion

Using Pabbly Connect, you can efficiently automate WhatsApp messages to your physiotherapy clinic leads from Facebook ads. This integration streamlines communication and helps in engaging potential clients effectively.

Ensure you check out Pabbly Connect to create business automation workflows and reduce manual tasks. Pabbly Connect currently offer integration with 2,000+ applications.

Automate Replies on Google Business Profile Reviews with Pabbly Connect

Learn how to automate replies to Google Business Profile reviews based on ratings using Pabbly Connect. Follow our step-by-step tutorial for seamless integration. Navigate the automation landscape confidently with clear, structured guidance suitable for professionals regardless of prior technical experience.

Watch Step By Step Video Tutorial Below


1. Introduction to Pabbly Connect for Google Business Profile Automation

In this section, we will discuss how to use Pabbly Connect to automate replies to Google Business Profile reviews based on ratings. This integration allows businesses to respond quickly to customer feedback, enhancing customer engagement.

To get started, you need to create an account on Pabbly Connect. After signing up, log in to your dashboard where you can create a new workflow for automating replies. This process will streamline your interactions with customers and improve your business’s online presence.


2. Creating a Workflow in Pabbly Connect

To create a workflow in Pabbly Connect, click on the blue button labeled ‘Create Workflow’ on your dashboard. You will then be prompted to name your workflow. A suitable name could be ‘Automatically Reply to Google Business Profile Reviews Based on Rating’.

Next, select the folder where you want to save this workflow. After this, you will see two boxes labeled ‘Trigger’ and ‘Action’. The trigger will be set to capture new reviews from your Google Business Profile, while the action will be to send an automated reply based on the review rating. Follow these steps:

  • Click on the ‘Create Workflow’ button.
  • Name your workflow appropriately.
  • Select the folder for your workflow.

After setting up the workflow, you can now connect your Google Business Profile to Pabbly Connect by selecting the relevant trigger event, which is ‘New Review’. This will allow Pabbly Connect to capture reviews as they come in.


3. Setting Up the Trigger in Pabbly Connect

In this step, you will configure the trigger in Pabbly Connect to fetch new reviews from your Google Business Profile. Select the trigger event as ‘New Review’ and connect your Google account. You will need to grant access to your Gmail account that is associated with your Google Business Profile.

Once you connect, Pabbly Connect will automatically fetch the latest review data. You can test this connection to ensure that it works correctly. This includes reviewing the details such as the reviewer’s name and the rating they provided. Here’s how to do it:

  • Select ‘New Review’ as the trigger event.
  • Connect your Google account.
  • Test the connection to ensure data is being received.

After testing, you will see the most recent review captured by Pabbly Connect. This confirms that your integration is functioning properly and ready to automate replies based on ratings.


4. Using the Router Feature in Pabbly Connect

The router feature in Pabbly Connect is powerful for setting conditions based on review ratings. You can create multiple paths for different ratings. For example, you can set one path for four or five-star ratings and another for one or two-star ratings.

To do this, select the action event as ‘Conditionally Run’ and connect it. You can rename the router steps for clarity, such as ‘Reply for Good Rating’ and ‘Reply for Bad Rating’. Here’s how to set the conditions:

Create a router step for positive ratings (4 or 5 stars). Create a router step for negative ratings (1 or 2 stars). Set the conditions for each step based on the rating received.

Once the router steps are in place, Pabbly Connect will automatically determine which reply to send based on the rating received, ensuring that your responses are timely and appropriate.


5. Sending Automated Replies with Pabbly Connect

After setting up the router conditions, you will configure the automated replies for both positive and negative ratings. For a four or five-star rating, you can set a reply like, ‘Thank you for the kind words! We are glad you enjoyed shopping with us.’ For one or two-star ratings, a reply might be, ‘Thank you for your feedback. We apologize for any inconvenience and appreciate another chance to serve you.’

To set these replies, choose the action event as ‘Create Reply’ and map the review ID from the previous step. This ensures that the reply is linked to the correct review. Here’s how to finalize the setup:

Select ‘Create Reply’ as the action event. Map the review ID to ensure replies are correctly linked. Test the replies to confirm they are sent correctly.

Once everything is set up, Pabbly Connect will automatically send the appropriate replies to reviews based on their ratings, ensuring your business maintains a positive online presence without manual intervention.


Conclusion

By using Pabbly Connect, businesses can automate replies to Google Business Profile reviews based on ratings effectively. This integration enhances customer engagement and streamlines the feedback process, allowing businesses to focus on providing excellent service.

Ensure you check out Pabbly Connect to create business automation workflows and reduce manual tasks. Pabbly Connect currently offer integration with 2,000+ applications.

Automate Google Chat Notifications from Google Sheets with Pabbly Connect

Learn how to send automated Google Chat notifications from Google Sheets in real-time using Pabbly Connect. Step-by-step tutorial included. Eliminate manual repetitive tasks from your workflow. Discover proven automation methods with intuitive steps designed for efficiency-minded professionals.

Watch Step By Step Video Tutorial Below


Accessing Pabbly Connect for Automation

To start sending automated Google Chat notifications from Google Sheets, you first need to access Pabbly Connect. This powerful integration platform enables seamless automation without coding skills. Visit the Pabbly Connect homepage by entering Pabbly.com/connect in your browser.

Once on the homepage, you will see options to either sign in or sign up for free. If you are a new user, click on the ‘Sign Up for Free’ button to create your account and receive 100 free tasks monthly to test the automation features of Pabbly Connect.


Creating a Workflow in Pabbly Connect

After signing in, navigate to the dashboard of Pabbly Connect. Here, you can create a new workflow by clicking on the ‘Create Workflow’ option located in the top right corner. A dialog box will prompt you to name your workflow. Enter a name such as ‘Send Automated Google Chat Message from Google Sheets’ and select a folder for organization.

Upon clicking ‘Create’, you will see two windows open for trigger and action. The trigger will be Google Sheets, and the action will be Google Chat. This setup means that whenever a new row is added in Google Sheets, a corresponding message will be sent in Google Chat through Pabbly Connect.


Setting Up Google Sheets as the Trigger

To set Google Sheets as the trigger in Pabbly Connect, select it from the list of applications. Next, choose the trigger event as ‘New or Updated Spreadsheet Row’. This event indicates that the workflow will initiate whenever a new row is added to your Google Sheets.

After selecting the trigger, Pabbly Connect provides a webhook URL. Copy this URL as it will be used to connect Google Sheets to Pabbly Connect. Open your Google Sheets, go to Extensions > Add-ons > Get Add-ons, and search for ‘Pabbly Connect Webhooks’ to install the necessary add-on.

  • Install the Pabbly Connect Webhooks add-on.
  • Access the initial setup under Extensions > Pabbly Connect Webhooks.
  • Paste the copied webhook URL and specify the trigger column.

After completing these steps, click on ‘Send Test’ to verify the connection. Once successful, you will see the test data captured in Pabbly Connect.


Configuring Google Chat as the Action

With Google Sheets set up as the trigger, the next step is to configure Google Chat as the action in Pabbly Connect. Select Google Chat from the action applications list and choose the action event ‘Create Message’. This action will allow you to send messages to your desired Google Chat space.

To connect Google Chat, you will need a webhook URL for your chat space. Click on the hyperlink provided in Pabbly Connect to access the Pabbly Forum page, where you can find the Avatar URL. Then, navigate to your Google Chat space, click on ‘Apps and Integrations’, and create a new webhook by providing a name and pasting the Avatar URL.

  • Create a new webhook in Google Chat.
  • Copy the new webhook URL and paste it in Pabbly Connect.
  • Map the message content from the Google Sheets response.

After mapping the message content, click on ‘Save and Send Test Request’. Check your Google Chat space to confirm if the message has been received successfully.


Testing and Verifying the Integration

Once the setup is complete, it’s time to test the automation. Go back to your Google Sheets and add a new row with a message. For example, enter ‘Hello team, please submit your reports by the end of the day.’ This action will trigger the workflow configured in Pabbly Connect.

After adding the new message, check your Google Chat space. You should see the message appear almost instantly. This confirms that the integration between Google Sheets and Google Chat through Pabbly Connect is functioning correctly and that messages are being sent automatically as intended.

By following these steps, you can automate the process of sending notifications to your Google Chat space whenever updates are made in Google Sheets. This integration not only saves time but also ensures that your team stays informed in real-time.


Conclusion

In this tutorial, we demonstrated how to use Pabbly Connect to send automated Google Chat notifications from Google Sheets in real-time. By following the detailed steps, you can efficiently set up this integration to enhance communication within your team.

Ensure you check out Pabbly Connect to create business automation workflows and reduce manual tasks. Pabbly Connect currently offer integration with 2,000+ applications.