How to Add ActiveCampaign Subscriber from WooCommerce Order with Pabbly Connect

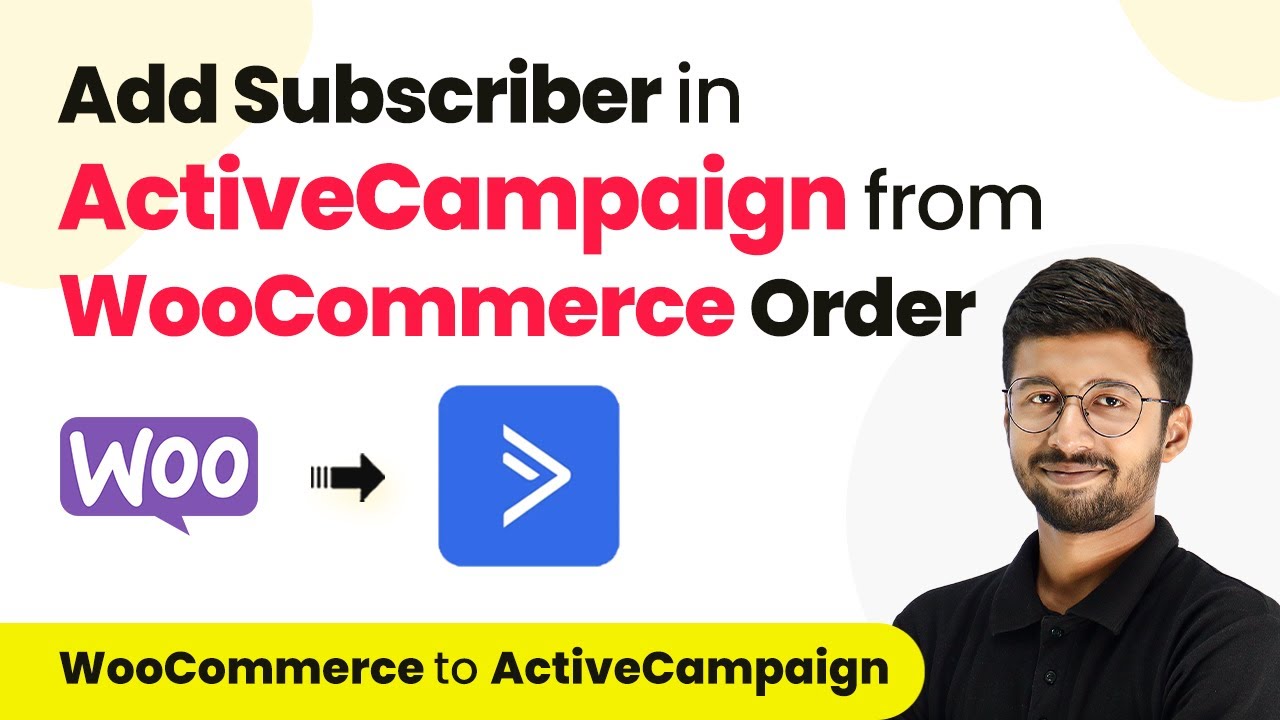
Learn how to integrate ActiveCampaign with WooCommerce orders using Pabbly Connect to automate subscriber addition with product tags. Implement the precise methodologies leading organizations use to automate repetitive tasks, illustrated with practical examples designed for immediate application.

Watch Step By Step Video Tutorial Below


1. Setting Up Pabbly Connect for WooCommerce and ActiveCampaign

To automate the process of adding ActiveCampaign subscribers from WooCommerce orders, we will use Pabbly Connect. First, access your Pabbly Connect dashboard by signing up for a free account. Once logged in, click on the ‘Create Workflow’ button to start a new automation.

Give your workflow a name, such as ‘WooCommerce to ActiveCampaign’, and select the appropriate folder for your Pabbly account. After creating the workflow, you will see a trigger and action window. The trigger is where we will set up WooCommerce to notify Pabbly Connect when a new order is placed.


2. Configuring WooCommerce as the Trigger in Pabbly Connect

In the trigger window of Pabbly Connect, search for ‘WooCommerce’ and select it. Then, choose the trigger event ‘New Order Created’ from the dropdown. Pabbly Connect will provide you with a webhook URL to connect your WooCommerce store.

  • Copy the webhook URL provided by Pabbly Connect.
  • Go to your WooCommerce settings in WordPress.
  • Navigate to ‘Advanced’ and then ‘Webhooks’.
  • Click on ‘Add Webhook’ and paste the copied URL.
  • Set the status to ‘Active’ and choose the topic as ‘Order Created’.

After saving the webhook, return to Pabbly Connect and click on ‘Recapture Webhook Response’. This will allow Pabbly Connect to wait for the new order details from WooCommerce.


3. Adding the Customer as a Contact in ActiveCampaign

Once Pabbly Connect receives the new order details, the next step is to add the customer as a contact in ActiveCampaign. In the action window of Pabbly Connect, search for ‘ActiveCampaign’ and select it. Choose the action event ‘Create or Update Contact’.

Connect your ActiveCampaign account by entering the API key and URL. You can find these in your ActiveCampaign account under the ‘Developer’ settings. Map the email address, first name, last name, and phone number from the WooCommerce trigger response to the corresponding fields in ActiveCampaign.

  • Map the customer’s email address from WooCommerce to the ActiveCampaign email field.
  • Map the customer’s first name and last name similarly.
  • For the tag, we will add the product name as a tag in ActiveCampaign.

After mapping all necessary fields, click on ‘Save and Send Test Request’ to ensure the contact is added successfully.


4. Tagging the Contact with the Product Name

To ensure that the contact in ActiveCampaign is tagged with the product they purchased, we will need to search for the tag based on the product name. In the action window of Pabbly Connect, add another action step and choose ‘ActiveCampaign’ again. This time, select the action event ‘Search Tag’.

Map the product name from the WooCommerce order to the tag search. This allows Pabbly Connect to find the correct tag ID associated with the product. Once you have the tag ID, map it back to the ‘Create or Update Contact’ action step in the tag ID field.

Ensure the product name matches the tag name in ActiveCampaign. Map the tag ID from the search results to the contact creation step. Finalize by saving and testing the workflow.

After completing these steps, the contact will be tagged with the product name whenever a new order is placed in WooCommerce.


5. Testing the Automation Workflow

To ensure everything is functioning correctly, place a test order in your WooCommerce store. After placing the order, check your ActiveCampaign account to verify that the customer has been added and tagged appropriately. This step is crucial to confirm that Pabbly Connect is successfully automating the process.

Once you confirm that the automation is working, you can repeat the test with different products and customer details to ensure robustness. Pabbly Connect allows you to connect various applications seamlessly, making it a valuable tool for automating tasks across platforms.

Overall, this integration between WooCommerce and ActiveCampaign using Pabbly Connect streamlines your marketing efforts and enhances customer management.


Conclusion

In this tutorial, we explored how to use Pabbly Connect to automate the addition of ActiveCampaign subscribers from WooCommerce orders. By following the steps outlined, you can efficiently manage customer data and enhance your marketing strategies.

Ensure you check out Pabbly Connect to create business automation workflows and reduce manual tasks. Pabbly Connect currently offer integration with 2,000+ applications.

Send Promotional Messages on WhatsApp Using Pabbly Connect and Google Sheets

Learn how to send promotional messages on WhatsApp using Pabbly Connect and Google Sheets. This detailed tutorial covers all steps and integrations needed. Explore efficient methods for automating routine tasks with clear, concise instructions suited for both newcomers and experienced professionals.

Watch Step By Step Video Tutorial Below


1. Accessing Pabbly Connect for Integration

To send promotional messages on WhatsApp, first, access Pabbly Connect. Sign in if you are an existing user or click on the ‘Sign up for free’ button if you are new. You can get 100 tasks free every month.

Once logged in, click on ‘Access Now’ to reach your dashboard. Here, you will create a new workflow by clicking on the ‘Create Workflow’ button, naming it ‘Send Promotional Messages on WhatsApp,’ and selecting the appropriate folder for organization.


2. Setting Up Trigger and Action in Pabbly Connect

In this step, you will set up the trigger and action for your workflow in Pabbly Connect. The trigger application will be Google Sheets, and the action application will be WhatsApp Cloud API. Select ‘New or Updated Spreadsheet Row’ as your trigger event.

  • Choose Google Sheets as the trigger application.
  • Set the trigger event to ‘New or Updated Spreadsheet Row’.
  • Select WhatsApp Cloud API as the action application.
  • Set the action event to ‘Send Template Message’.

After selecting the applications and events, you will see a webhook URL in Pabbly Connect. This URL is crucial for linking your Google Sheets with the integration.


3. Configuring Google Sheets for Pabbly Connect

Now, configure your Google Sheets to work with Pabbly Connect. Open your Google Sheet containing customer details. Navigate to the ‘Extensions’ menu, then select ‘Pabbly Connect Webhooks’ and click on ‘Initial Setup’.

  • Copy the webhook URL from Pabbly Connect and paste it into the designated field.
  • Set the trigger column to the final data column (Column B in this case).
  • Click on ‘Submit’ to save your configuration.

Once the setup is complete, send test data to ensure that the connection works properly. You will receive a response in Pabbly Connect confirming that customer details have been captured successfully.


4. Sending Promotional Messages via WhatsApp Cloud API

With the connection established, you can now send promotional messages using Pabbly Connect and WhatsApp Cloud API. Click on the connect button in the action window to set up the connection with WhatsApp Cloud API.

Enter the required details such as the temporary access token, phone number ID, and WhatsApp business account ID. After entering these details, click on ‘Save’ to establish the connection.

Select the template you want to use for the promotional message. Map the recipient’s mobile number and customer name from the previous step’s response. Click on ‘Save and Send Test Request’ to send a test message.

You should receive a positive response indicating that the promotional WhatsApp message has been sent successfully to your customer.


5. Sending Messages to Multiple Customers

To send promotional messages to all customers, return to your Google Sheets and repeat the process. Go to ‘Extensions’ and select ‘Pabbly Connect Webhooks’ and then click on ‘Send All Data’.

This action will trigger the sending of promotional WhatsApp messages to all customers listed in your Google Sheet through Pabbly Connect. The automation ensures that each customer receives their personalized message based on the details provided in the sheet.

Once the messages are sent, you can verify by checking each WhatsApp message received by your customers. This confirms that the integration and automation were successful.


Conclusion

In this tutorial, we explored how to send promotional messages on WhatsApp using Pabbly Connect and Google Sheets. By following the steps outlined, you can automate your messaging process effectively, ensuring timely communication with your customers.

Ensure you check out Pabbly Connect to create business automation workflows and reduce manual tasks. Pabbly Connect currently offer integration with 2,000+ applications.

Integrate Trello Cards with Google Sheets Using Pabbly Connect

Learn how to instantly add new Trello cards to Google Sheets using Pabbly Connect for seamless automation. Follow our step-by-step guide! Learn to create powerful connections between your critical applications without requiring specialized programming knowledge or extensive technical background.

Watch Step By Step Video Tutorial Below


Introduction to Pabbly Connect for Trello and Google Sheets Integration

Pabbly Connect is an essential tool for automating workflows between applications like Trello and Google Sheets. In this tutorial, we will explore how to instantly add new Trello cards to Google Sheets using Pabbly Connect. This integration allows you to streamline your workflow by automatically transferring card details from Trello into a Google Sheets document.

To get started, you need to have accounts set up for both Trello and Google Sheets. Once you have these ready, you can access Pabbly Connect to create your integration workflow. This process will ensure that whenever you create a new card in Trello, the details will be automatically added to your specified Google Sheets file.


Setting Up Your Pabbly Connect Workflow

To set up your integration workflow in Pabbly Connect, first, log into your Pabbly account. If you’re a new user, you can sign up for free and receive 100 tasks per month. Once logged in, navigate to the dashboard and click on the ‘Create Workflow’ button. Name your workflow something descriptive, such as ‘Instantly Add New Trello Cards to Google Sheets’.

After naming your workflow, you will see options to set up a trigger and an action. The trigger application will be Trello, and you will select the trigger event as ‘New Card’. This means that every time a new card is created in Trello, it will trigger the next action in your workflow. The action application will be Google Sheets, with the action event set to ‘Add New Row’.


Connecting Trello to Pabbly Connect

To connect Trello to Pabbly Connect, click on the ‘Connect’ button in the Trello trigger setup. You will need to enter your Trello username, API key, and token. You can find these details by logging into your Trello account and following the instructions provided in Pabbly Connect.

  • Log in to your Trello account to retrieve your API key.
  • Generate a token from your Trello account settings.
  • Enter the username, API key, and token in Pabbly Connect.

Once you have entered all required information, click on ‘Save’ to establish the connection. After successfully connecting Trello to Pabbly Connect, select the specific board and list where you want to monitor new cards. This setup is crucial for ensuring that card details are captured accurately.


Capturing Trello Card Details

After setting up the connection, you will need to create a new card in Trello to capture its details. Go to your Trello board and create a card with a relevant title. For example, you might title it ‘Write an article on the topic Global Warming’. Once the card is created, return to Pabbly Connect to capture the response.

When you click on ‘Save and Send Test Request’ in Pabbly Connect, it will wait for a webhook response from Trello. Once you create the new card, Pabbly Connect will capture the details such as the card title and list name. You can then use this information in the subsequent steps of your workflow.

To add more details like due date and description, you can use the ‘Delay by Pabbly’ feature. Set a delay (e.g., 2 minutes) to allow time for you to add these details in Trello. After the delay, you can then use the ‘Get Card by ID’ action in Trello to fetch the complete card information, including the description and due date.


Adding Trello Card Details to Google Sheets

Now that you have captured all necessary details from Trello, it’s time to transfer this information to Google Sheets. In Pabbly Connect, you will need to set up another connection, this time with Google Sheets. Click on the ‘Connect’ button and sign in with your Google account to authorize access.

Once connected, select the specific Google Sheets file where you want to add the Trello card details. Make sure your Google Sheet has the appropriate columns for card name, description, and due date. Use the mapping feature in Pabbly Connect to insert the data from Trello into the corresponding columns in Google Sheets.

  • Map the card title to the card name column.
  • Map the description to the description column.
  • Map the due date to the due date column.

After mapping the details, click on ‘Save and Send Test Request’ to finalize the integration. If everything is set up correctly, you will see the Trello card details appear in a new row in your Google Sheets document, confirming that the integration was successful.


Conclusion

In this tutorial, we demonstrated how to use Pabbly Connect to instantly add new Trello cards to Google Sheets. By following these steps, you can automate the process of transferring card details, ensuring your data is always up-to-date. With Pabbly Connect, you can integrate various applications, enhancing your workflow efficiency.

Ensure you check out Pabbly Connect to create business automation workflows and reduce manual tasks. Pabbly Connect currently offer integration with 2,000+ applications.

Integrate Facebook Leads to Google Sheets for Your Matrimony Business Using Pabbly Connect

Learn how to automate adding Facebook leads to Google Sheets for your matrimony business using Pabbly Connect. Follow our detailed step-by-step tutorial. Learn to create powerful connections between your critical applications without requiring specialized programming knowledge or extensive technical background.

Watch Step By Step Video Tutorial Below


1. Accessing Pabbly Connect for Your Matrimony Business

To integrate Facebook leads into Google Sheets for your matrimony business, you need to start with Pabbly Connect. Begin by visiting the Pabbly Connect homepage by typing the URL in your browser. Here, you will find options to sign in or sign up for free.

If you are a new user, click on the ‘Sign Up for Free’ button. After creating your account, you will receive 100 free tasks each month to explore Pabbly Connect. Existing users can directly sign in to access the dashboard where all workflows are managed.


2. Creating a Workflow in Pabbly Connect

Once logged into Pabbly Connect, you need to create a new workflow for automating the addition of Facebook leads to Google Sheets. Click on the ‘Create Workflow’ button located in the top right corner. A dialog box will appear, prompting you to name your workflow, such as ‘Add Facebook Leads to Google Sheets for Matrimony Business’.

  • Name your workflow appropriately.
  • Select a folder to save your workflow.
  • Click on ‘Create’ to proceed.

After creating the workflow, you will see two windows: one for the trigger and one for the action. The trigger is set to Facebook Lead Ads, while the action will be Google Sheets.


3. Setting Up the Trigger with Facebook Lead Ads

In this step, you will configure the trigger in Pabbly Connect to capture new leads from Facebook Lead Ads. Select Facebook Lead Ads as your trigger application and choose the trigger event as ‘New Lead Instant’. This event will initiate the workflow as soon as a new lead is generated.

Click on ‘Connect’ and opt to add a new connection to link your Facebook Lead Ads account. Once authorized, you will select your Facebook page and the specific lead generation form you created for your matrimony business. After selecting the appropriate options, click on ‘Save and Send Test Request’ to test the connection.


4. Testing the Integration with Pabbly Connect

After setting up the trigger, it’s crucial to test the integration to ensure everything is functioning as expected. Once you click ‘Save and Send Test Request’, Pabbly Connect will indicate that it is waiting for a webhook response. At this point, you need to submit a test lead through your Facebook lead generation form.

Navigate to the Meta for Developers tools, select the lead ads debugging tool, and submit the test lead form. Once submitted, return to Pabbly Connect to check if the lead details have been captured successfully. You should see the details like email, full name, phone number, and gender in the response.


5. Adding Leads to Google Sheets Using Pabbly Connect

Now that you have confirmed the trigger works, you can set up the action to add the captured leads to Google Sheets. In Pabbly Connect, select Google Sheets as your action application and choose the action event as ‘Add New Row’. This will allow you to add the lead details into a new row of your spreadsheet.

Connect your Google Sheets account by selecting an existing connection or creating a new one. After successfully connecting, select your spreadsheet and the specific sheet where you want to store the lead details. You will then map the fields from the Facebook lead response to the corresponding columns in your Google Sheets.

  • Map the name, email, phone number, and gender fields.
  • Click on ‘Save and Send Test Request’ to finalize the setup.

After clicking the test request, check your Google Sheets to verify that the lead details have been added automatically. This confirms that your workflow is successful, and now every new lead from Facebook will be recorded in Google Sheets.


Conclusion

In summary, integrating Facebook leads into Google Sheets for your matrimony business using Pabbly Connect streamlines your lead management process. By following the steps outlined, you can automate data entry, ensuring you capture every lead efficiently.

Ensure you check out Pabbly Connect to create business automation workflows and reduce manual tasks. Pabbly Connect currently offer integration with 2,000+ applications.

Automate Replies to Google Business Profile Reviews Using Pabbly Connect and ChatGPT

Learn how to automate replies to Google Business Profile reviews using Pabbly Connect and ChatGPT. Follow this step-by-step guide for seamless integration. Implement the precise methodologies leading organizations use to automate repetitive tasks, illustrated with practical examples designed for immediate application.

Watch Step By Step Video Tutorial Below


1. Introduction to Pabbly Connect for Automation

Pabbly Connect is a powerful integration platform that allows you to automate tasks between different applications. In this tutorial, we will use Pabbly Connect to automatically reply to Google Business Profile reviews using AI tools like ChatGPT. This automation will save you time and ensure timely responses to customer feedback.

To get started, you need to sign up for Pabbly Connect. Once you have your account ready, you can access the dashboard where you can create workflows that connect various applications. In this case, we will integrate Google Business Profile with ChatGPT through Pabbly Connect.


2. Creating a Workflow in Pabbly Connect

To create a workflow in Pabbly Connect, navigate to the dashboard and click on the ‘Create Workflow’ button. You will be prompted to name your workflow; for this tutorial, name it ‘Google Business Profile to ChatGPT.’ Select the folder where you want to save this workflow and click on Create.

Once your workflow is created, you will see two sections: Trigger and Action. The Trigger section is where you specify what event will start the automation. Here, we will set up Google Business Profile as the trigger app. Follow these steps:

  • Select Google Business Profile as the trigger app.
  • Choose ‘New Review’ as the trigger event.
  • Connect your Google Business Profile account by clicking ‘Sign in with Google’ and authorize access.

After completing these steps, you will have successfully set up the trigger for new reviews on your Google Business Profile.


3. Setting Up ChatGPT Integration with Pabbly Connect

After setting up the trigger in Pabbly Connect, the next step is to generate replies using ChatGPT. For this, we will add an action step that connects to OpenAI’s ChatGPT. To do this, click on ‘Add Action Step’ and choose OpenAI from the app list.

Follow these steps to set up the ChatGPT integration:

  • Select ‘ChatGPT’ as the action event.
  • Connect your OpenAI account by entering your API key.
  • Set the AI model to use (e.g., GPT-4) and define your prompt for generating replies.

By doing this, you will enable Pabbly Connect to send the review content to ChatGPT, which will generate a personalized reply based on the review.


4. Customizing Replies and Handling Different Review Types

After generating the replies, you can customize them to ensure they are appropriate for your audience. In Pabbly Connect, you can set up conditions to handle different types of reviews. For example, if a review includes a comment, you can generate a tailored response. If it only contains a star rating, you can send a generic thank-you message.

To implement this, use the Router feature in Pabbly Connect to create two branches in your workflow:

Branch 1: For reviews with comments, generate a personalized reply. Branch 2: For reviews without comments, send a simple thank-you response.

This setup allows you to manage responses effectively and ensures that your replies are relevant to the customer’s feedback.


5. Posting Replies on Google Business Profile

The final step in this automation process is to post the replies generated by ChatGPT back to your Google Business Profile. In Pabbly Connect, add another action step to connect back to Google Business Profile.

Here’s how to set it up:

Select Google Business Profile as the action app. Choose the action event as ‘Create Reply’. Map the review ID and the reply content generated by ChatGPT.

After completing this setup, every time a new review is posted on your Google Business Profile, Pabbly Connect will automatically generate and post a reply, streamlining your customer engagement process.


Conclusion

In this tutorial, we explored how to automate replies to Google Business Profile reviews using Pabbly Connect and ChatGPT. By following these steps, you can enhance your customer engagement effortlessly. This integration not only saves time but also ensures that every review receives a thoughtful response.

Ensure you check out Pabbly Connect to create business automation workflows and reduce manual tasks. Pabbly Connect currently offer integration with 2,000+ applications.

How to Set Up a WhatsApp Chatbot Using Pabbly Connect

Learn to set up a WhatsApp chatbot using Pabbly Connect with this step-by-step tutorial. Integrate Google Sheets and WhatsApp Cloud API seamlessly. Discover how to seamlessly connect your essential tools through accessible instructions that make powerful automation available to professionals at every skill level.

Watch Step By Step Video Tutorial Below


1. Setting Up Pabbly Connect for WhatsApp Chatbot

To set up a WhatsApp chatbot, first access Pabbly Connect by visiting its homepage. You can sign in if you already have an account or click on the ‘Sign Up for Free’ button to create a new account. After signing up, you will receive 100 free tasks every month to explore the platform.

Once logged in, navigate to the dashboard where you can create workflows. Click on the ‘Create Workflow’ option and name your workflow, for example, ‘Send WhatsApp Message from Google Sheets.’ Select a folder to organize your workflow, and click on ‘Create’ to proceed.


2. Integrating Google Sheets with Pabbly Connect

To automate sending WhatsApp messages, we will integrate Google Sheets with Pabbly Connect. Start by selecting Google Sheets as your trigger application. The trigger event will be ‘New or Updated Spreadsheet Row,’ allowing the workflow to activate whenever a new row is added to your sheet.

Follow these steps to set up the integration:

  • Open your Google Sheets and click on Extensions.
  • Select Add-ons and click on ‘Get Add-ons’ to install Pabbly Connect Webhook.
  • After installation, refresh your spreadsheet and navigate to Extensions > Pabbly Connect Webhooks.
  • Set up the initial configuration by entering the Webhook URL and trigger column.

After completing these steps, test the connection by sending a test response from Google Sheets to Pabbly Connect. If successful, you will see the test data reflected in your Pabbly dashboard, confirming the integration.


3. Sending WhatsApp Messages via Pabbly Connect

Now that Google Sheets is integrated with Pabbly Connect, the next step is to send WhatsApp messages. Select WhatsApp Cloud API as the action application in your workflow. Choose the action event ‘Send Template Message’ to initiate the message sending process.

To set up the WhatsApp connection, you must enter the following details:

  • Temporary Access Token
  • Phone Number ID
  • WhatsApp Business Account ID

Once you have entered these details, select the template you created earlier for sending discount offers. Map the recipient’s mobile number from the Google Sheets data to ensure the message is personalized for each customer. Finally, click ‘Save and Send Test Request’ to verify that the message is sent successfully.


4. Setting Up Automated Replies to Customer Messages

After sending WhatsApp messages, the next step is to set up automated replies for incoming messages from customers. Create a new workflow in Pabbly Connect named ‘WhatsApp Chatbot Part Two’ and select WhatsApp Cloud API as the trigger application.

For this workflow, choose the trigger event ‘Message Notification’. This will allow you to capture any incoming messages from customers. Copy the Webhook URL provided by Pabbly Connect and paste it into the WhatsApp Cloud API settings for verification.

To filter incoming messages, add a filter action in your workflow. Set the condition to check if the message received is from a customer. If the condition is met, use a lookup table to determine the appropriate reply based on the customer’s response. Map the customer’s reply to send customized messages for different inputs (1, 2, or 3).


5. Conclusion

In this tutorial, we successfully set up a WhatsApp chatbot using Pabbly Connect to automate customer interactions. By integrating Google Sheets and WhatsApp Cloud API, we created a seamless communication flow that enhances customer engagement. With automation, businesses can efficiently manage marketing campaigns and respond to customer inquiries without manual effort.

Ensure you check out Pabbly Connect to create business automation workflows and reduce manual tasks. Pabbly Connect currently offer integration with 2,000+ applications.

This setup not only improves operational efficiency but also personalizes customer experiences, ultimately driving sales and customer satisfaction. Explore more automations with Pabbly Connect to maximize your business potential.

How to Send Automated WhatsApp Messages to Your Textile Business Using Pabbly Connect

Learn how to automate WhatsApp messages for your textile business using Pabbly Connect and WhatsApp Cloud API. Step-by-step guide included. This comprehensive guide reveals exactly how to connect your applications and automate repetitive tasks — accessible for professionals of all technical backgrounds.

Watch Step By Step Video Tutorial Below


1. Accessing Pabbly Connect for Integration

To automate WhatsApp messages for your textile business, start by accessing Pabbly Connect. This platform enables seamless integration between WhatsApp and Facebook Lead Ads. First, visit the Pabbly website and sign in or create a free account.

Once logged in, click on the ‘Access Now’ button under Pabbly Connect. This will take you to the dashboard where you can create workflows. Here, you can manage all your integration tasks efficiently.


2. Creating a New Workflow in Pabbly Connect

In this section, you will create a workflow that sends automated WhatsApp messages. Click on the ‘Create Workflow’ button, name your workflow (e.g., ‘Send Automated WhatsApp Messages to Textile Business Leads’), and select the folder to save it in.

  • Click on the ‘Create’ button to proceed.
  • You will see two main boxes: Trigger and Action.
  • Set up the Trigger as Facebook Lead Ads.

Next, select the trigger event as ‘New Lead Instant’. Click on ‘Connect’ to link Facebook Lead Ads with Pabbly Connect. After successful connection, you will need to select your Facebook page and lead generation form.


3. Setting Up Trigger and Action for WhatsApp Messages

After successfully setting up the trigger, it’s time to configure the action. In the action application, select ‘WhatsApp Cloud API’ and choose the action event ‘Send Template Message’. This action will send the WhatsApp message to the leads captured from Facebook.

Click on ‘Connect’ and then add a new connection to WhatsApp Cloud API by entering the required details such as access token, phone number ID, and WhatsApp business account ID. These details can be found in your WhatsApp Cloud API account.

  • Refresh your access token if needed.
  • Copy and paste the phone number ID and WhatsApp business account ID accurately.

Once connected, you can set up the message template that you want to send to your leads. Make sure your template is approved by Meta before using it in Pabbly Connect.


4. Sending Automated WhatsApp Messages

With the trigger and action set up, it’s time to send your first automated WhatsApp message. Map the recipient’s mobile number and the body of the message using the data from the Facebook lead. The lead’s name can also be dynamically included in the message.

After mapping the necessary fields, click the ‘Save and Send Test Request’ button. If everything is set up correctly, you will receive a positive response indicating that the message has been sent successfully. You can verify this by checking your WhatsApp.

Ensure that the phone number used is a valid WhatsApp number. Customize your message template as needed.

Your automated WhatsApp message should now appear in the WhatsApp chat of the lead, confirming that the integration via Pabbly Connect is working effectively.


5. Summarizing the Integration Process

In this section, let’s recap the steps taken to integrate Facebook Lead Ads with WhatsApp Cloud API using Pabbly Connect. You initiated the process by creating a new workflow and setting up the trigger and action.

Then, you connected Facebook Lead Ads to Pabbly Connect and configured the WhatsApp Cloud API for sending messages. After mapping the necessary fields and testing the workflow, you successfully sent an automated WhatsApp message to your new leads.

This integration not only streamlines your communication with leads but also enhances your business efficiency. By using Pabbly Connect, you can automate various processes, saving time and effort while improving customer engagement.


Conclusion

In conclusion, using Pabbly Connect to send automated WhatsApp messages is an effective way to engage with your textile business leads. This tutorial provided a step-by-step guide to setting up the integration with Facebook Lead Ads and WhatsApp Cloud API, ensuring seamless communication.

Ensure you check out Pabbly Connect to create business automation workflows and reduce manual tasks. Pabbly Connect currently offer integration with 2,000+ applications.

Automatically Add Todoist Tasks in Notion Database Using Pabbly Connect

Learn how to automatically add Todoist tasks to a Notion database using Pabbly Connect. Follow our step-by-step tutorial for seamless integration. Develop expertise in application integration and learn how to design streamlined automation workflows using proven, simplified approaches.

Watch Step By Step Video Tutorial Below


1. Setting Up Pabbly Connect for Todoist and Notion Integration

To automatically add Todoist tasks in Notion, we will utilize Pabbly Connect. Start by accessing the Pabbly Connect website. If you don’t have an account, sign up for free, which only takes a couple of minutes.

Once logged in, navigate to the Pabbly Connect dashboard. Here, you can create a new workflow by clicking on the ‘Create Workflow’ button. Name your workflow something descriptive, like ‘Automatically Add Todoist Tasks in Notion Database’, and save it in your preferred folder.


2. Configuring the Trigger App: Todoist

In this section, we will set up the trigger application, which is Todoist. Select Todoist as your trigger app in Pabbly Connect. The trigger event you need to choose is ‘New Task’. This event will initiate the workflow whenever a new task is created in Todoist.

  • Select Todoist as your trigger application.
  • Choose ‘New Task’ as the trigger event.
  • Connect Todoist to Pabbly Connect using the provided webhook URL.

Once you have selected the trigger event, copy the webhook URL provided by Pabbly Connect. Then, log into your Todoist account and navigate to the App Management section to create a new app. Paste the copied webhook URL into the callback URL section of your new app in Todoist.


3. Capturing Task Data from Todoist

After configuring the trigger, it’s time to capture task data from Todoist. Create a new task in Todoist to test the integration. For instance, you can create a task named ‘Team Meeting’ with a due date set for January 22, 2024.

Once you create the task, return to Pabbly Connect. You should see that the new task data has been captured, including the task name, description, due date, and project ID. This data will be used in the subsequent steps to add the task details to Notion.

  • Create a task in Todoist to trigger the workflow.
  • Return to Pabbly Connect to see the captured data.
  • Make sure to note down the project ID for mapping later.

Now that you have the task data, you can move on to setting up the action step.


4. Setting Up the Action App: Notion

The next step is to configure the action app, which is Notion. In Pabbly Connect, select Notion as your action application. The action event should be ‘Create Database Item’. This will allow you to add the captured Todoist task details into your Notion database.

Connect your Notion account to Pabbly Connect by clicking on ‘Add New Connection’. Make sure you have already logged into your Notion account in your browser to facilitate this connection. Once connected, select the Notion database where you want to store the task details.

Select Notion as the action application. Choose ‘Create Database Item’ as the action event. Connect your Notion account and select the desired database.

Now, map the details from the previous steps, including the task name, due date, and project name, into the corresponding fields in your Notion database.


5. Testing the Integration

Finally, it’s time to test the integration between Todoist and Notion using Pabbly Connect. After mapping all the necessary fields, click on ‘Save and Send Request’. If everything is set up correctly, you should receive a positive response indicating that the task details have been added to your Notion database.

To verify, go to your Notion database and check for the newly created entry. You should see the task details, including the task name, description, due date, and project name, accurately reflected in your Notion database.

Click on ‘Save and Send Request’ in Pabbly Connect. Check for a positive response indicating success. Verify the task details in your Notion database.

By following these steps, you have successfully set up an automation that captures Todoist tasks and adds them to your Notion database using Pabbly Connect.


Conclusion

In this tutorial, we demonstrated how to use Pabbly Connect to automatically add Todoist tasks to a Notion database. By following the steps outlined, you can streamline your workflow and ensure all tasks are backed up in Notion efficiently.

Ensure you check out Pabbly Connect to create business automation workflows and reduce manual tasks. Pabbly Connect currently offer integration with 2,000+ applications.

Integrate Facebook Leads to Google Sheets with Pabbly Connect for Dairy Business

Learn how to automate the process of adding Facebook leads to Google Sheets for your dairy business using Pabbly Connect. Step-by-step guide included. Explore systematic approaches to creating efficient automation solutions that convert technical concepts into practical, implementable instructions.

Watch Step By Step Video Tutorial Below


1. Setting Up Pabbly Connect for Facebook Leads

To add Facebook leads to Google Sheets for your dairy business, you will first need to set up Pabbly Connect. Start by signing into your existing account or create a new one if you’re a new user. Pabbly Connect offers 100 free tasks each month, making it accessible for all users.

Once logged in, navigate to the applications page and select Pabbly Connect. Click on the ‘Create Workflow’ button on the right corner of the dashboard. Name your workflow, for instance, ‘Add Facebook Leads to Google Sheets for Dairy Business,’ and save it in a relevant folder.


2. Configuring the Trigger Application in Pabbly Connect

In this step, you need to configure the trigger application in Pabbly Connect. The trigger application will be Facebook Lead Ads, and the trigger event should be set to ‘New Lead Instant.’ This means every time a new lead comes in, it will trigger the workflow.

  • Select Facebook Lead Ads as the trigger application.
  • Choose ‘New Lead Instant’ as the trigger event.
  • Click on ‘Connect’ to establish a connection.

Once connected, select the Facebook page and the lead gen form associated with your dairy business. For example, if your page is named ‘Humble Cow’s Dairy’, select it along with the lead form named ‘Humble Cows Contact Form’. After this, click on ‘Save and Send Test Request’ to ensure the connection works properly.


3. Testing the Lead Capture with Pabbly Connect

After setting up the trigger, it’s time to test the lead capture feature in Pabbly Connect. To do this, you will need to create a test lead using the Meta for Developers tool. This will simulate a new lead submission from your Facebook Lead Ads.

  • Go to the Meta for Developers page and select your Facebook page.
  • Choose the lead form you created earlier.
  • Fill in the required details like email, full name, and phone number, then submit the form.

Once the test submission is completed, return to Pabbly Connect. You should see the response captured, including the email, full name, and phone number of the test lead. This confirms that your trigger setup is working correctly.


4. Setting Up Google Sheets as Action in Pabbly Connect

Next, you will need to configure Google Sheets as the action application in Pabbly Connect. The action event should be set to ‘Add New Row’. This allows you to automatically add the captured lead details into your Google Sheets.

To connect Google Sheets, sign in with your Google account through Pabbly Connect. Once connected, select the spreadsheet you created for this purpose, named ‘Facebook Leads New.’ This spreadsheet should have columns for lead email, lead name, and phone number.


5. Mapping Lead Details to Google Sheets

In this final step, you will map the lead details captured from Facebook Lead Ads to the respective columns in Google Sheets using Pabbly Connect. This is crucial to ensure that every new lead is recorded correctly.

Map the email field to the lead email column. Map the full name field to the lead name column. Map the phone number field to the phone number column.

After mapping the fields, click on ‘Save and Send Test Request’. If successful, you will see the lead details added as a new row in your Google Sheets. This confirms that your automation is set up correctly and will work seamlessly for future leads.


Conclusion

By following these steps, you can successfully integrate Facebook leads into Google Sheets for your dairy business using Pabbly Connect. This automation saves time and ensures accurate data management for your leads.

Ensure you check out Pabbly Connect to create business automation workflows and reduce manual tasks. Pabbly Connect currently offer integration with 2,000+ applications.

How to Share WhatsApp Messages on Microsoft Teams Using Pabbly Connect

Learn how to seamlessly share WhatsApp messages on Microsoft Teams using Pabbly Connect. Follow this step-by-step guide for integration. Discover how to seamlessly connect your essential tools through accessible instructions that make powerful automation available to professionals at every skill level.

Watch Step By Step Video Tutorial Below


1. Accessing Pabbly Connect for Integration

To share WhatsApp messages on Microsoft Teams, you first need to access Pabbly Connect. This platform simplifies the integration process between various applications, including WhatsApp and Microsoft Teams.

To get started, visit the Pabbly Connect website and either sign in or create a new account. If you are new, signing up is quick and free, allowing you to utilize 100 tasks monthly without any charge.


2. Creating a Workflow in Pabbly Connect

After logging into Pabbly Connect, you’ll need to create a new workflow. Click on the ‘Create Workflow’ button and name it something relevant, such as ‘Share WhatsApp Messages on MS Teams’.

  • Select the folder to save your workflow.
  • Click on ‘Create’ to proceed to the workflow setup.

In this workflow, you will set up a trigger and an action. The trigger will be the WhatsApp Cloud API, while the action will be sending a message to Microsoft Teams.


3. Setting Up Trigger with WhatsApp Cloud API

The next step is to configure the trigger in Pabbly Connect. Choose WhatsApp Cloud API as your trigger application and select the event type as ‘Message Notification’. This event will activate whenever a new message is received.

You will need to copy the webhook URL provided by Pabbly Connect and set it in your WhatsApp Cloud API account. This connection allows Pabbly Connect to receive messages from WhatsApp.

  • Open your WhatsApp Cloud API account and navigate to the webhook settings.
  • Paste the copied webhook URL and verify it with the provided token.

After verifying the webhook, you can test it to ensure it is functioning correctly. If successful, you will receive a test message in Pabbly Connect, confirming the connection is active.


4. Configuring Action to Send Message in MS Teams

Now that your trigger is set up, it’s time to configure the action in Pabbly Connect. Select Microsoft Teams as your action application and choose the event ‘Send Message in a Channel’. This will allow you to send messages directly to your team channel.

Connect Microsoft Teams with Pabbly Connect by clicking ‘Add New Connection’. You will need to grant access to your Teams account for this integration to work.

Select the appropriate team and channel where you want to send the messages. Map the details from WhatsApp, including the message content, customer name, and phone number.

After filling in these details, click ‘Save and Send Test Request’. If everything is configured correctly, a message will appear in your selected Microsoft Teams channel.


5. Testing and Verifying the Integration

With the integration set up, it’s crucial to test the entire workflow to ensure it works as intended. Send a message to your WhatsApp Business account and check if it appears in the specified Microsoft Teams channel.

When you receive a message, it should automatically trigger the workflow in Pabbly Connect, sending the message details to your team. This seamless integration allows for efficient communication and quick responses to customer inquiries.

In summary, you have successfully created a workflow that captures WhatsApp messages and shares them on Microsoft Teams using Pabbly Connect. This integration enhances team collaboration and improves customer service efficiency.


Conclusion

In this tutorial, we explored how to use Pabbly Connect to share WhatsApp messages on Microsoft Teams. By following these steps, you can automate communication and enhance your team’s responsiveness to customer inquiries.

Ensure you check out Pabbly Connect to create business automation workflows and reduce manual tasks. Pabbly Connect currently offer integration with 2,000+ applications.