Automate YouTube Channel Video Details to Google Sheets Using Pabbly Connect

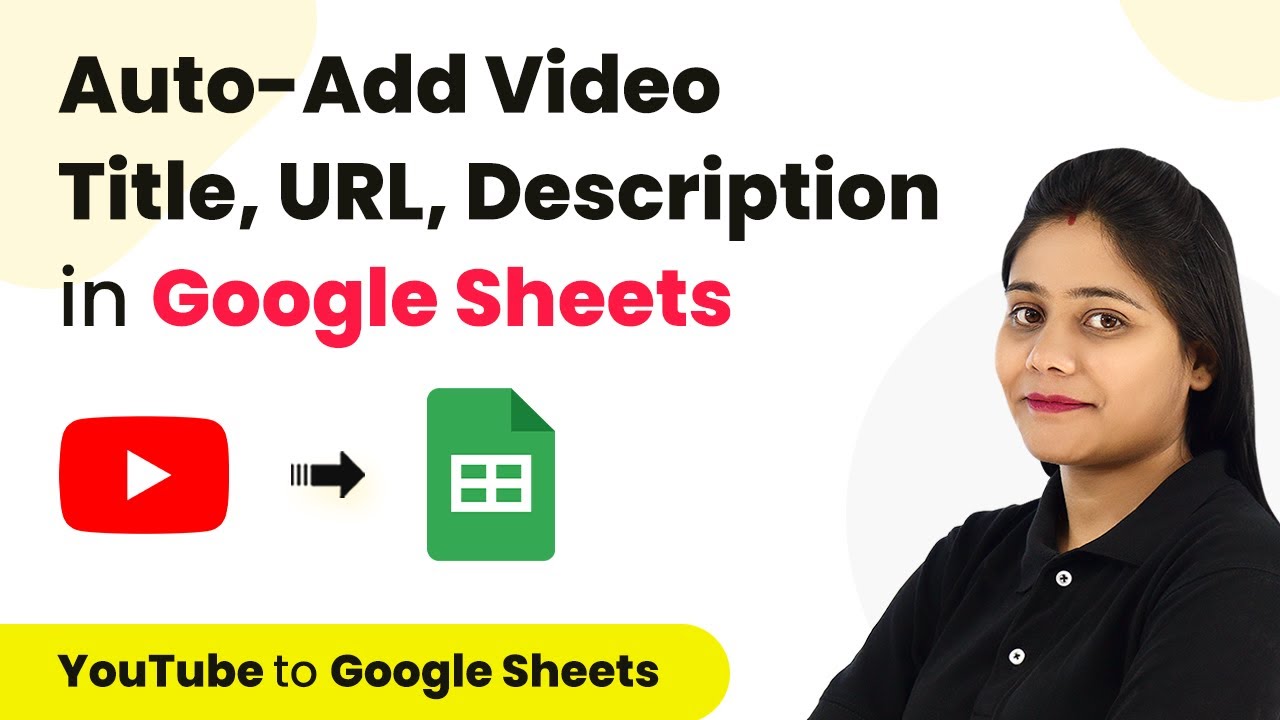
Learn how to automatically add YouTube video details to Google Sheets using Pabbly Connect. This tutorial provides step-by-step guidance for seamless integration. Eliminate manual repetitive tasks from your workflow. Discover proven automation methods with intuitive steps designed for efficiency-minded professionals.

Watch Step By Step Video Tutorial Below


1. Introduction to Pabbly Connect for Automation

Pabbly Connect is a powerful integration platform that allows users to automate tasks between various applications. In this tutorial, we will explore how to use Pabbly Connect to automatically add YouTube video details to Google Sheets. This automation saves time and ensures that all video details are stored systematically.

To get started, you must have a Pabbly Connect account. If you don’t have one, you can create a free account in just a few minutes. Once logged in, you can access the dashboard where you will create your workflow for integrating YouTube with Google Sheets.


2. Creating Your Workflow in Pabbly Connect

To set up the automation, first, navigate to the Pabbly Connect dashboard. Click on the blue button labeled ‘Create Workflow’ to begin. In the workflow setup, you will need to provide a name for your automation, which will help you identify it later.

In the workflow interface, you will see two boxes: one for the trigger and one for the action. The trigger is the event that initiates the workflow, while the action is what happens as a result. For this integration:

  • Select YouTube as the trigger application.
  • Select Google Sheets as the action application.

After selecting the applications, you will connect them through Pabbly Connect to facilitate the automation process. This step is crucial for ensuring that data flows correctly between YouTube and Google Sheets.


3. Connecting YouTube to Pabbly Connect

To connect YouTube with Pabbly Connect, click on the connect button next to the YouTube trigger. You will be prompted to add a new connection. If you have previously connected your YouTube account, you can select the existing connection. Otherwise, follow the prompts to authorize Pabbly Connect to access your YouTube channel.

Once connected, you will be able to test the connection by uploading a new video to your YouTube channel. After uploading, return to Pabbly Connect and click on the ‘Save and Send Test Request’ button. This action will fetch the most recent video details, including the video ID, title, URL, description, and thumbnail URL.

It’s essential to ensure that the details captured from YouTube are accurate. If the information does not appear immediately, you may need to click the button again or wait for a brief period for the data to sync correctly.


4. Adding Video Details to Google Sheets via Pabbly Connect

Now that your YouTube channel is connected to Pabbly Connect, the next step is to add the video details to Google Sheets. In the action setup, select the option to add a new row in your specified Google Sheets document. You will need to connect Google Sheets to Pabbly Connect in a similar manner as you did with YouTube.

Once connected, you will see the available spreadsheets in your Google account. Choose the spreadsheet where you want to store the video details. You will then map the fields from the YouTube response to the corresponding columns in your Google Sheets. This mapping ensures that each piece of data goes into the correct place.

  • Map the Video ID to the appropriate column.
  • Map the Video Title, URL, Description, and Thumbnail URL accordingly.
  • Adjust the Publish Date format if necessary.

After mapping all necessary fields, click the button to save and send the test request. This action will populate your Google Sheets with the most recent video details, confirming that the integration is functioning as intended.


5. Finalizing and Testing Your Automation

With the workflow set up, it’s time to finalize your automation. Ensure that your Pabbly Connect workflow is saved and activated. This step is crucial as it allows the automation to run in the background every time a new video is uploaded to your YouTube channel.

To test the automation, upload another video to your YouTube channel. After a few minutes, check your Google Sheets to confirm that the new video details have been added automatically. If the details appear correctly, your automation is working perfectly.

With Pabbly Connect, this process can save you significant time and effort by eliminating manual data entry. Once set up, you can focus on creating content while the automation handles the administrative tasks for you.


Conclusion

In this tutorial, we demonstrated how to use Pabbly Connect to automate the process of adding YouTube video details to Google Sheets. By following these steps, you can streamline your workflow and ensure that all video information is accurately recorded without manual intervention.

Ensure you check out Pabbly Connect to create business automation workflows and reduce manual tasks. Pabbly Connect currently offer integration with 2,000+ applications.

Automate Email Notifications for Salon Bookings Using Pabbly Connect

Learn how to automate email notifications for salon bookings using Pabbly Connect. This step-by-step guide covers integration with Tidycal and Gmail. Discover how to seamlessly connect your essential tools through accessible instructions that make powerful automation available to professionals at every skill level.

Watch Step By Step Video Tutorial Below


1. Setting Up Pabbly Connect for Salon Bookings

To automate email notifications for salon bookings, start by accessing Pabbly Connect. After logging in, you can create a workflow that connects Tidycal and Gmail for seamless integration.

Once logged in, click on the ‘Create Workflow’ button. Name your workflow something like ‘Automatically Send Email for Every Tidycal Booking’ and click on ‘Create’. This initializes the automation process where Pabbly Connect serves as the central hub for your applications.


2. Connecting Tidycal to Pabbly Connect

In the newly created workflow, you will see two boxes labeled as Trigger and Action. For this integration, select Tidycal as the Trigger application. This means that whenever a new booking is made in Tidycal, it will trigger an action in Gmail.

  • Select Tidycal as the trigger application.
  • Choose the trigger event as ‘New Booking’.
  • Click on ‘Connect’ to authorize the connection.

Once connected, Pabbly Connect will automatically capture the most recent booking details from Tidycal. This is crucial for ensuring that the correct information is sent via email.


3. Sending Email Notifications via Gmail

After successfully connecting Tidycal, the next step is to set up Gmail as the Action application. This means that when a booking is made, an email will be sent to the customer using Gmail.

Select Gmail as the Action application and choose the event as ‘Send Email’. You will need to connect your Gmail account to Pabbly Connect. Once connected, you will be prompted to fill in the email details such as recipient email, subject, and message body.

  • Map the recipient email from the Tidycal booking data.
  • Customize the subject line to include the customer’s name.
  • Compose the email body with booking details.

This integration ensures that every time a booking is made, the customer receives an immediate confirmation email, streamlining your communication process.


4. Formatting Dates and Times in Pabbly Connect

When capturing booking details, the date and time may be in UTC format. To ensure the email reflects the correct local time, you can use the Date & Time Formatter feature in Pabbly Connect.

To format the date, add a new step in your workflow and select the Date & Time Formatter. Specify the input date format and the desired output format. Make sure to select the correct time zones for accurate representation.

For example, set the input format as ‘YYYY-MM-DDTHH:mm:ssZ’ and the output format to your local time zone. This way, the email sent to the customer will display the correct appointment time.


5. Testing and Finalizing the Integration

After setting up all the steps in Pabbly Connect, it’s crucial to test the integration to ensure everything works smoothly. You can do this by making a test booking in Tidycal and checking if the email is sent correctly.

Once you confirm that the email notification is sent with the correct details, you can finalize your workflow. Save all your settings and ensure that the automation is active.

With this setup, Pabbly Connect will check for new bookings every 10 minutes and send email notifications automatically, reducing manual workload and enhancing customer experience.


Conclusion

In this tutorial, we explored how to automate email notifications for salon bookings using Pabbly Connect. By integrating Tidycal and Gmail, you can streamline your appointment management process efficiently.

Ensure you check out Pabbly Connect to create business automation workflows and reduce manual tasks. Pabbly Connect currently offer integration with 2,000+ applications.

Integrating Razer Pay and Mailchimp Using Pabbly Connect: A Step-by-Step Guide

Learn how to integrate Razer Pay with Mailchimp using Pabbly Connect to automate member creation upon payment. Follow our detailed tutorial for seamless integration. Transform complex automation concepts into accessible, actionable steps that eliminate unnecessary manual work while maximizing existing application capabilities.

Watch Step By Step Video Tutorial Below


1. Accessing Pabbly Connect for Integration

To begin integrating Razer Pay with Mailchimp, first, you need to access Pabbly Connect. This platform allows you to automate workflows between different applications seamlessly. If you are a new user, sign up for an account, which takes less than two minutes and offers 100 free tasks upon registration.

Once you log in to Pabbly Connect, navigate to the dashboard. On the right side, click on the ‘Create Workflow’ button to start setting up your integration. Name your workflow appropriately, such as ‘Create Member in Mailchimp for Razer Pay Payments’ and then click on create to proceed to the next step.


2. Setting Up the Trigger Event with Razer Pay

In this step, you will set up the trigger event that initiates the workflow. Select Razer Pay as your trigger application in Pabbly Connect. The event you want to choose is ‘Payment Captured’, which will activate the workflow every time a payment is successfully processed.

  • Select Razer Pay as the trigger application.
  • Choose ‘Payment Captured’ as the trigger event.
  • Copy the provided webhook URL for integration.

After copying the webhook URL, navigate to your Razer Pay account. Go to Account and Settings, then find the Webhooks section. Paste the copied URL and select the ‘Payment Captured’ event to create the webhook. This setup allows Pabbly Connect to receive notifications every time a payment is made.


3. Testing the Webhook Integration

Once you have set up the webhook in Razer Pay, it’s time to test the integration. Go back to Pabbly Connect, where it will show that it is waiting for a webhook response. To initiate this, perform a test payment on Razer Pay.

Navigate to the payment page of the product you want to test, fill in the required details such as name, email, and payment information, and complete the transaction. After the payment is successful, return to Pabbly Connect to see if the webhook response has been recorded. You should see details like payment status, order ID, and user information.


4. Adding Member to Mailchimp with Pabbly Connect

With the webhook successfully tested, the next step is to add the user as a member in Mailchimp. In Pabbly Connect, set the action application to Mailchimp and select the ‘Add New Member with Custom Fields’ action. This allows you to map user data from the payment response to Mailchimp fields.

  • Connect your Mailchimp account by providing the API key and data center.
  • Map the user’s email, first name, last name, and any other relevant fields.
  • Set the subscriber status to ‘Subscribed’.

After mapping the fields, save and test the action. If everything is set up correctly, you should see a confirmation that the member has been added to your Mailchimp audience. This completes the integration process, allowing new members to be automatically added upon payment.


5. Conclusion

In this tutorial, we demonstrated how to integrate Razer Pay and Mailchimp using Pabbly Connect. By following the steps outlined, you can automate member creation in Mailchimp every time a payment is captured. This integration enhances your marketing efforts and streamlines user management.

Ensure you check out Pabbly Connect to create business automation workflows and reduce manual tasks. Pabbly Connect currently offer integration with 2,000+ applications.

With Pabbly Connect, automating workflows between applications becomes simple and efficient. Start integrating your applications today to improve your business processes.


Automate User Management with Pabbly Connect: Teachable to Flowdesk Integration

Learn how to automate user management between Teachable and Flowdesk using Pabbly Connect. Step-by-step guide to streamline your processes. Implement the precise methodologies leading organizations use to automate repetitive tasks, illustrated with practical examples designed for immediate application.

Watch Step By Step Video Tutorial Below


1. Setting Up Pabbly Connect for Teachable and Flowdesk Integration

To automate user management between Teachable and Flowdesk, we will use Pabbly Connect as the integration platform. Start by signing up for a free account on Pabbly Connect. Once logged in, navigate to the dashboard and click on ‘Create Workflow’ to initiate the automation process.

In the workflow setup, give your workflow a name, for example, ‘Teachable to Flowdesk’. This workflow will connect your Teachable account to Flowdesk, allowing new users registered in Teachable to be automatically added as subscribers in Flowdesk. Click on ‘Create’ to proceed.


2. Configuring the Trigger in Pabbly Connect

Now, we will set up the trigger to monitor new user sign-ups in Teachable using Pabbly Connect. In the trigger window, search for ‘Teachable’ and select it. For the trigger event, choose ‘New User’. This means that every time a new user registers in Teachable, the workflow will be triggered.

  • Select ‘Teachable’ as the app in the trigger window.
  • Choose ‘New User’ as the trigger event.
  • Copy the provided webhook URL to connect with Teachable.

Next, go to your Teachable account settings and navigate to the webhooks section. Here, you will paste the copied webhook URL and set the event to ‘New User’ as a custom event. Ensure that you enable the JSON array option for the webhook payload settings before saving.


3. Setting Up the Action to Add Subscribers in Flowdesk

After configuring the trigger, it’s time to set up the action in Pabbly Connect. In the action window, search for ‘Flowdesk’ and select it. For the action event, choose ‘Create/Update Subscriber’. This will allow you to add the new user as a subscriber in Flowdesk.

Connect your Flowdesk account by entering your login credentials. Once connected, you will need to map the email address of the new user from the Teachable trigger response to the email field in Flowdesk. Also, map the full name of the user, splitting it into first and last names as required by Flowdesk.

  • Select ‘Create/Update Subscriber’ as the action event.
  • Map the email and full name fields from the trigger response.
  • Choose whether to send an opt-in confirmation email to the new subscriber.

Once all fields are mapped correctly, click on ‘Save’ and send a test request to ensure the integration works properly. You should see a confirmation response indicating that the subscriber has been successfully added.


4. Adding Subscribers to a Specific Segment in Flowdesk

The final step in our automation process using Pabbly Connect is to add the newly created subscriber to a specific segment in Flowdesk. Click on ‘Add Action Step’ and select ‘Flowdesk’ again. This time, choose the action event ‘Add Existing Subscriber to Segment’.

In this step, you will need to map the subscriber’s email from the previous action response and select the segment you want to add them to. For example, you can create a segment called ‘New Teachable Users’ and add all newly signed-up users to this segment automatically.

Choose ‘Add Existing Subscriber to Segment’ as the action event. Map the email of the subscriber from the previous response. Select the segment where you want to add the subscriber.

After completing these steps, click on ‘Save’ and send a test request. Check your Flowdesk account to confirm that the new subscriber has been added to the specified segment successfully. This completes your automation setup!


5. Testing the Automation Workflow

Once the automation setup is complete using Pabbly Connect, it’s crucial to test the entire workflow. Log out of your current account and create a new dummy user in Teachable. Fill in the registration details and click on the sign-up button.

After signing up, quickly check your Flowdesk account. The new user should appear as a subscriber, and they should also be added to the specified segment. This real-time test confirms that your automation is functioning correctly.

To ensure continued functionality, you can repeat the test with different user details. Each time a new user registers in Teachable, they should automatically be added as a subscriber in Flowdesk and placed in the correct segment without any manual intervention.


Conclusion

In this tutorial, we explored how to automate user management between Teachable and Flowdesk using Pabbly Connect. By following these steps, you can streamline your user onboarding process and enhance your email marketing efforts seamlessly.

Ensure you check out Pabbly Connect to create business automation workflows and reduce manual tasks. Pabbly Connect currently offer integration with 2,000+ applications.

Integrate MemberPress with Flowdesk Using Pabbly Connect: A Step-by-Step Guide

Learn how to integrate MemberPress and Flowdesk using Pabbly Connect to automate subscriber management seamlessly. Follow this detailed tutorial for step-by-step instructions. Explore efficient methods for automating routine tasks with clear, concise instructions suited for both newcomers and experienced professionals.

Watch Step By Step Video Tutorial Below


1. Setting Up Pabbly Connect for Integration

In this section, we will set up Pabbly Connect to automate the integration between MemberPress and Flowdesk. Start by logging into your Pabbly Connect account and accessing the dashboard. Once there, click on the big blue button labeled ‘Create Workflow’ to initiate the process.

Next, name your workflow appropriately, such as ‘Create and Add Subscribers to Flowdesk Segment for MemberPress Sign Up.’ After naming, click on ‘Create’ to generate a new blank workflow. You will see the Trigger and Action modules, which are essential for setting up your automation.


2. Configuring the Trigger Event in Pabbly Connect

The first step in your integration using Pabbly Connect is to configure the trigger event. Select MemberPress as your trigger application and choose the event ‘Member Sign Up Completed.’ This event will initiate the workflow whenever a new member signs up.

  • Copy the Webhook URL provided by Pabbly Connect.
  • Open your MemberPress account and navigate to the Developer Tools add-on.
  • Create a new webhook and paste the copied URL.

Ensure that you set the webhook to trigger only when a member sign-up is completed. Click on ‘Save Webhook’ to finalize this setup. Now your Pabbly Connect is ready to receive data from MemberPress.


3. Testing the Integration with Sample Submission

After setting up the trigger, it’s time to test the integration using Pabbly Connect. Go back to your MemberPress account and complete a sample sign-up using a free membership. This action will send the sign-up data to Pabbly Connect.

Once the sign-up is completed, return to your Pabbly Connect workflow. You should see a response containing the member’s details, including their username, email address, and membership type. This data is crucial for the next steps in your integration.


4. Filtering Data for Specific Memberships

To ensure that only specific subscribers are added to Flowdesk, we will use the filtering feature in Pabbly Connect. Click on the plus button to add a new module and select ‘Filter’ as the action. Set the condition to check if the membership title equals ‘Lifetime Membership.’

This filter ensures that only subscribers with the Lifetime Membership will proceed to the next step. If the condition is met, the workflow will continue to create a subscriber in Flowdesk. Click on ‘Save’ and test the request to confirm that the filter is functioning correctly.


5. Creating a Subscriber in Flowdesk

Now it’s time to create a subscriber in Flowdesk using the data received through Pabbly Connect. Add a new action module and select Flowdesk as your application. Choose the action event ‘Add New Subscriber.’

Connect your Flowdesk account by entering your credentials and granting access to Pabbly Connect. Next, map the fields using the data from the previous steps, such as email, first name, and last name. After filling in the required fields, click on ‘Save’ and send a test request. You should receive a confirmation that the subscriber was created successfully.


6. Adding the Subscriber to a Specific Segment

In this final step, you will add the newly created subscriber to a specific segment in Flowdesk. Add another action in your workflow and select Flowdesk again. Choose the action event ‘Add Existing Subscriber to Segment.’ using Pabbly Connect

Use the email of the subscriber you just created and select the segment you want to add them to, such as the MemberPress segment. Click on ‘Save’ and send a test request to confirm that the subscriber has been added to the segment successfully. Check your Flowdesk account to see the subscriber in the specified segment.


Conclusion

This tutorial detailed how to integrate MemberPress with Flowdesk using Pabbly Connect. By following these steps, you can automate the process of adding subscribers to specific segments based on their membership status. This integration enhances your subscriber management and marketing efforts.

Ensure you check out Pabbly Connect to create business automation workflows and reduce manual tasks. Pabbly Connect currently offer integration with 2,000+ applications.

Integrating Multiple Lists in AWeber Using Pabbly Connect

Learn how to integrate AWeber with multiple lists using Pabbly Connect. This step-by-step guide covers the entire process from setting up webhooks to adding subscribers.

Watch Step By Step Video Tutorial Below


1. Accessing Pabbly Connect for Integration

To start integrating AWeber with multiple lists using Pabbly Connect, first access the Pabbly Connect dashboard. You can reach this by signing up or logging in to your existing account. If you are a new user, creating an account is quick and grants you 100 free tasks to explore the software.

After logging into Pabbly Connect, you will see a button labeled ‘Create Workflow’ on the right side of the dashboard. Click on this button to initiate the workflow setup process.


2. Creating a Workflow in Pabbly Connect

Once you click on ‘Create Workflow,’ a dialog box will appear prompting you to name your workflow. The objective here is to automate the process of adding subscribers to AWeber from various applications using webhooks. For instance, you can use data from a payment gateway or a form builder.

  • Click on ‘Create’ after naming your workflow.
  • You will then see two options: Trigger and Action.
  • Select ‘Webhook’ as your trigger application.

This step is crucial as it sets the foundation for receiving data from applications that may not be directly integrated with Pabbly Connect.


3. Setting Up Webhook Integration

After selecting ‘Webhook’ as your trigger, Pabbly Connect will generate a unique webhook URL. You need to copy this URL and add it to the application from which you want to receive data, such as a form builder or payment gateway.

For example, if you are using JotForm, navigate to the settings of your form and add the copied webhook URL under the integrations section. Make sure to complete the integration and perform a test submission to ensure that the webhook is functioning correctly.


4. Creating a Subscriber in AWeber

Once the webhook is set up and you have received the data, the next step is to create a subscriber in AWeber. In Pabbly Connect, you will use the ‘Router’ feature to manage different actions based on the data received.

  • Rename the router paths according to the courses or lists in AWeber.
  • Set up filters to determine which list a subscriber should be added to based on the course they enrolled in.
  • Map the necessary fields like first name, last name, and email address to create the subscriber.

This mapping is essential for ensuring that the correct data is sent to AWeber each time a new form submission occurs.


5. Testing and Verifying the Integration

After setting up everything, it is crucial to test the integration. Submit a new entry through the form you set up with JotForm. Once submitted, check your AWeber account to see if the subscriber has been added correctly.

In Pabbly Connect, you can view the response from AWeber to confirm that the subscriber was successfully created. This confirmation will show the status of the subscriber, ensuring that the integration works smoothly.

Repeat this process for multiple submissions to verify that everything is functioning as intended. If any issues arise, review your workflow in Pabbly Connect to troubleshoot the problem.


Conclusion

In this tutorial, we demonstrated how to integrate AWeber with multiple lists using Pabbly Connect. By following these steps, you can automate the process of adding subscribers efficiently and effectively, enhancing your email marketing efforts.

Ensure you check out Pabbly Connect to create business automation workflows and reduce manual tasks. Pabbly Connect currently offer integration with 2,000+ applications.

How to Integrate WooCommerce with Pabbly Connect for Automated Customer Management

Learn how to automate customer management by integrating WooCommerce with Pabbly Connect. This step-by-step tutorial covers the exact processes for seamless integration. Discover how to seamlessly connect your essential tools through accessible instructions that make powerful automation available to professionals at every skill level.

Watch Step By Step Video Tutorial Below


1. Setting Up Pabbly Connect for WooCommerce Integration

To begin integrating WooCommerce with Pabbly Connect, first log in to your Pabbly Connect account. If you don’t have an account, you can create one for free. Once logged in, navigate to the dashboard where you can create a new workflow. using Pabbly Connect

Click on the ‘Create Workflow’ button and name your workflow, for example, ‘WooCommerce to Pabbly Connect Integration’. This step sets the foundation for the automation process that will follow.


2. Connecting WooCommerce to Pabbly Connect

In this section, you will set up the trigger for your workflow. Select WooCommerce as your trigger application and choose the trigger event as ‘New Order Created’. This event will notify Pabbly Connect whenever a new order is placed in your WooCommerce store. using Pabbly Connect

After selecting the trigger, Pabbly Connect will provide you with a webhook URL. This URL is essential for connecting your WooCommerce store to Pabbly Connect. Follow these steps to set it up:

  • Navigate to WooCommerce settings in your WordPress dashboard.
  • Click on the Advanced tab and then on Webhooks.
  • Add a new webhook using the provided URL.

Save your settings, and your WooCommerce store will now be connected to Pabbly Connect, ready to capture new order data.


3. Testing the WooCommerce Integration

Once your WooCommerce store is connected, you need to test the integration. To do this, place a test order on your WooCommerce store. After placing the order, go back to your Pabbly Connect dashboard and click on the ‘Capture Webhook Response’ button to see if the order details have been captured successfully. using Pabbly Connect

If done correctly, you should see the order information including customer details and product information appear in the Pabbly Connect interface. This confirms that your WooCommerce store is successfully sending data to Pabbly Connect.


4. Creating Customer Contacts in Pabbly Connect

With the integration established, you can now create customer contacts automatically in your Pabbly Connect account. Add a new action step in your workflow and select the appropriate action application, such as Zoho CRM or any other CRM tool you use. using Pabbly Connect

Map the customer details received from WooCommerce to the CRM fields. This includes first name, last name, email, and any other relevant customer information. This automation saves you time and ensures that customer records are updated in real-time.


5. Sending Notifications via WhatsApp

Finally, to enhance customer communication, you can set up an action to send WhatsApp notifications to customers after they place an order. Choose WhatsApp as your action application and set up the message template that includes order details. using Pabbly Connect

Map the customer’s mobile number and other relevant information into the WhatsApp message. This ensures that customers receive instant notifications about their order status, enhancing their overall shopping experience.


Conclusion

Integrating WooCommerce with Pabbly Connect streamlines customer management and enhances communication. This tutorial demonstrated how to set up automated workflows for new orders, customer records, and notifications effectively.

Ensure you check out Pabbly Connect to create business automation workflows and reduce manual tasks. Pabbly Connect currently offer integration with 2,000+ applications.

Integrating WhatsApp Messages to Google Sheets Using Pabbly Connect

Learn how to automate the process of sending WhatsApp messages to Google Sheets using Pabbly Connect in this detailed tutorial. Follow this definitive guide to creating powerful automated workflows with straightforward, efficiency-focused solutions that save valuable time.

Watch Step By Step Video Tutorial Below


1. Setting Up Pabbly Connect for Integration

To begin integrating WhatsApp messages into Google Sheets, you need to access Pabbly Connect. Start by signing into your Pabbly account and navigating to the dashboard where you can create a new workflow.

Click on the ‘Create Workflow’ button and name your workflow, for instance, ‘Get WhatsApp Messages in Google Sheets’. Once created, you will see the trigger and action modules where you can set up the integration.


2. Configuring Trigger and Action in Pabbly Connect

In this step, you will set the trigger event for your workflow. Choose ‘Customer Message Received’ from the Interact by WhatsApp as the trigger event. This means that every time a message is received, it will initiate the workflow. using Pabbly Connect

  • Select the trigger application: Interact by WhatsApp.
  • Choose the event: Customer Message Received.
  • Set up the action application: Google Sheets.
  • Select the action event: Add New Row.

After setting up the trigger, you will connect to Google Sheets where the data will be recorded. Ensure that your Google Sheets is ready to receive the data from the workflow.


3. Configuring Webhook in Interact by WhatsApp

Next, you need to configure the webhook that connects Pabbly Connect to Interact by WhatsApp. Copy the webhook URL provided by Pabbly Connect and navigate to your Interact settings.

  • Go to Developer Settings in Interact.
  • Paste the copied webhook URL into the designated field.
  • Select the trigger for message receipt.
  • Submit the settings to finalize the webhook configuration.

Once the webhook is configured, test the connection to ensure that messages are being captured correctly by Pabbly Connect.


4. Formatting Data Before Sending to Google Sheets

After receiving the message in Pabbly Connect, you will need to format the data appropriately before sending it to Google Sheets. This includes changing the time zone and splitting the date and time into separate columns.

Use the Date Time Formatter feature in Pabbly Connect to adjust the time zone from UTC to your local time zone, such as Asia/Kolkata. Then, implement the Text Formatter to separate the date and time into distinct fields.


5. Finalizing the Integration to Google Sheets

The final step involves mapping the formatted data to the appropriate columns in Google Sheets. Ensure that you select the spreadsheet and sheet where the data will be recorded. using Pabbly Connect

Choose the correct spreadsheet name: Customer Feedback. Map the fields: Country Code, Phone Number, Message, Date, and Time. Save and test the integration.

Once the integration is confirmed, every feedback message received via WhatsApp will automatically populate your Google Sheets, streamlining your data collection process.


Conclusion

In this tutorial, we demonstrated how to use Pabbly Connect to integrate WhatsApp messages into Google Sheets effectively. By automating this process, you can efficiently collect feedback without manual intervention, enhancing your operational efficiency.

Ensure you check out Pabbly Connect to create business automation workflows and reduce manual tasks. Pabbly Connect currently offer integration with 2,000+ applications.

Integrating Pabbly Subscription Billing with Automation Tools for Seamless Customer Management

Learn how to integrate Pabbly Subscription Billing with URL and Automation tools to streamline customer data management effortlessly. Follow our detailed tutorial for step-by-step guidance.

Watch Step By Step Video Tutorial Below


1. Setting Up Pabbly Subscription Billing for Integration

To start integrating Pabbly Subscription Billing with other applications, first access the Pabbly Subscription Billing dashboard. This application allows you to manage subscriptions and automate data handling efficiently. using Pabbly Connect

Once you are logged into Pabbly Subscription Billing, navigate to the settings where you can set up the necessary webhooks for automation. This step is crucial for enabling the integration between Pabbly Subscription Billing and other applications.


2. Creating a Webhook in Pabbly Subscription Billing

Within Pabbly Subscription Billing, you need to create a webhook that will facilitate the connection with the other applications. This webhook acts as a trigger for data transfer. using Pabbly Connect

  • Access the Settings section from the left-hand panel.
  • Click on the Webhooks tab and select the ADD Webhook button.
  • Enter a name for your webhook, such as ‘Customer Data’.
  • Paste the webhook URL provided by the automation tool.

After saving the webhook, it will start listening for events in Pabbly Subscription Billing. This sets the stage for capturing customer data automatically.


3. Triggering Data Capture in Pabbly Subscription Billing

Now that the webhook is set up, the next step is to ensure that customer data is captured whenever a new customer is added. This is where the automation comes into play. using Pabbly Connect

In Pabbly Subscription Billing, you will create a new customer profile. This action will trigger the webhook, sending the customer data to the connected application. Follow these steps:

  • Click on the Add Customer button.
  • Fill in the customer details such as name, email, and phone number.
  • Save the new customer profile.

Once the customer is saved, the data will be sent to the connected application automatically, ensuring seamless data management.


4. Connecting Pabbly Subscription Billing to Other Applications

To connect Pabbly Subscription Billing with other applications like Box or Make, you will need to configure the action steps in your automation tool. This enables the transfer of customer data to the desired platform. using Pabbly Connect

In the action step, select the application you want to connect with. For instance, if you’re using Box, you would choose Box as the action application and configure it to create a record with the customer data received from Pabbly Subscription Billing.

Ensure that all fields in the action step are mapped correctly to the headers in Box or any other application you are using. This mapping ensures that the right data goes to the right place, enhancing your workflow efficiency.


5. Testing and Optimizing the Integration

After setting up the integration, it’s essential to test it to ensure everything works as expected. Trigger a test by adding a new customer in Pabbly Subscription Billing and check if the data appears in the connected application. using Pabbly Connect

If the data is captured correctly, your integration is successful. You can further optimize the workflow by adjusting settings or adding more actions as needed. This ensures that your automation continues to run smoothly and efficiently.

Remember, once set up, this integration will work automatically, saving you time and effort in managing customer data across platforms.

Conclusion

This guide summarizes the key points and helps you understand the essential features and benefits of using this tool.

Ensure you check out Pabbly Connect to create business automation workflows and reduce manual tasks. Pabbly Connect currently offer integration with 2,000+ applications.


In conclusion, by using Pabbly Subscription Billing, you can seamlessly integrate with various applications to automate your customer data management. This integration not only saves time but also enhances the efficiency of your subscription-based services.

Integrating Facebook Lead Ads with Systeme.io Using Pabbly Connect

Learn how to integrate Facebook Lead Ads with Systeme.io using Pabbly Connect for seamless contact creation. Follow our step-by-step tutorial now! Build sophisticated automated workflows in less time than you think. This guide translates complex integrations into straightforward steps for immediate implementation.

Watch Step By Step Video Tutorial Below


1. Accessing Pabbly Connect for Integration

To integrate Facebook Lead Ads with Systeme.io, we start by accessing Pabbly Connect. First, navigate to the Pabbly Connect website at Pabbly.com/connect. If you’re an existing user, click on ‘Sign In’; otherwise, sign up for a free account.

Upon signing in, you will reach the ‘All Apps’ page. Click on ‘Access Now’ for Pabbly Connect to enter the dashboard. Here, you can create a new workflow by clicking on the ‘Create Workflow’ button on the right side.


2. Setting Up the Trigger in Pabbly Connect

The next step is to set up the trigger for our integration. Select ‘Facebook Lead Ads’ as your trigger application. The trigger event will be ‘New Lead Instant,’ which allows the workflow to run each time a new lead is captured. using Pabbly Connect

  • Choose ‘Facebook Lead Ads’ as the trigger application.
  • Select ‘New Lead Instant’ as the trigger event.
  • Connect your Facebook account to Pabbly Connect.

After connecting your Facebook account, select the specific Facebook page and lead generation form you want to use. Click on ‘Save and Send Test Request’ to ensure the trigger is set up correctly.


3. Creating the Action Integration with Systeme.io

Now, we will create the action step to add the new lead as a contact in Systeme.io. Since Systeme.io does not have a native integration with Pabbly Connect, we will use the API feature. This involves setting up an API call to Systeme.io.

  • Choose ‘API’ as your action application.
  • Select ‘POST’ as the action event.
  • Enter the endpoint URL from Systeme.io.

Fill in the required parameters, including first name, last name, and email address, by mapping the values from the trigger step. This ensures that each new lead is correctly added to Systeme.io as a contact.


4. Testing the Integration with Pabbly Connect

After setting up the action integration, it is crucial to test the workflow. Go back to your Facebook Lead Ads and submit a test lead. This will trigger the workflow in Pabbly Connect and allow you to confirm that the integration is functioning correctly.

Once you submit the lead form, check the response in Pabbly Connect. If the test is successful, you will see the lead data captured in the webhook response. Verify that the contact has been created in Systeme.io by checking the contacts section.


Conclusion

In this tutorial, we demonstrated how to integrate Facebook Lead Ads with Systeme.io using Pabbly Connect. This integration automates the process of adding new leads as contacts, enhancing your marketing efficiency. By following these steps, you can streamline your lead management effectively.

Ensure you check out Pabbly Connect to create business automation workflows and reduce manual tasks. Pabbly Connect currently offer integration with 2,000+ applications.