Integrating Pabbly Subscription Billing with Automation Tools: A Step-by-Step Guide

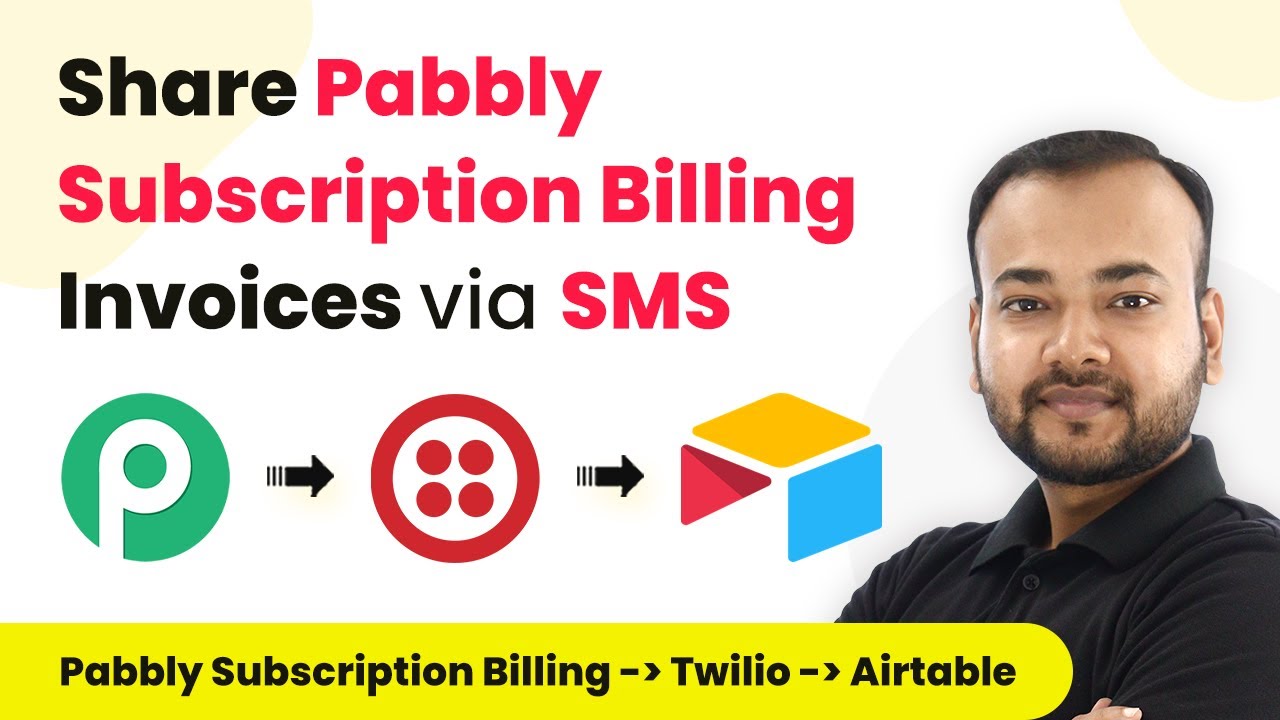
Learn how to integrate Pabbly Subscription Billing with automation tools for seamless payment tracking and SMS notifications. Follow this detailed tutorial for step-by-step instructions. Learn step-by-step how to configure flexible subscription plans, automate billing cycles, and generate detailed revenue reports without coding knowledge.

Watch Step By Step Video Tutorial Below


1. Setting Up Pabbly Subscription Billing for Integration

To begin with, Pabbly Subscription Billing is crucial for managing your subscription-based payments. Start by accessing your Pabbly Subscription Billing account and logging into the dashboard. This platform allows you to track every payment efficiently. using Pabbly Connect

Once logged in, navigate to the settings to configure your products. Here, you can manage subscriptions, set pricing, and customize your billing options. This setup is essential for the automation process that follows.


2. Creating a Webhook in Pabbly Subscription Billing

Creating a webhook in Pabbly Subscription Billing is a key step to integrate with automation tools. First, go to the settings section and select the ‘Webhooks’ tab. Click on the ‘Add Webhook’ button to initiate the process. using Pabbly Connect

  • Enter a name for the webhook, such as ‘Payment Notification’.
  • Select the product for which you want to create the webhook.
  • Paste the webhook URL provided by Pabbly Connect.
  • Choose the event to send data, typically ‘Successful Payment’.

After filling in these details, save the webhook. This will allow Pabbly Subscription Billing to send payment data to Pabbly Connect whenever a new payment is made.


3. Configuring Pabbly Connect for Automation

Pabbly Connect is the integration platform that automates the workflow between Pabbly Subscription Billing and other applications. Start by creating a new workflow in Pabbly Connect. Name your workflow appropriately, such as ‘Payment Automation Workflow’. using Pabbly Connect

Next, set the trigger application to Pabbly Subscription Billing. Select the event as ‘New Payment’. This will ensure that every time a payment is received, the workflow gets triggered. You will need to test this connection by simulating a payment.

  • Click on ‘Create Workflow’ to start.
  • Select the trigger event as ‘Successful Payment’.
  • Use the webhook URL from the previous step to complete this setup.

After setting this up, you will be ready to capture payment data in Pabbly Connect.


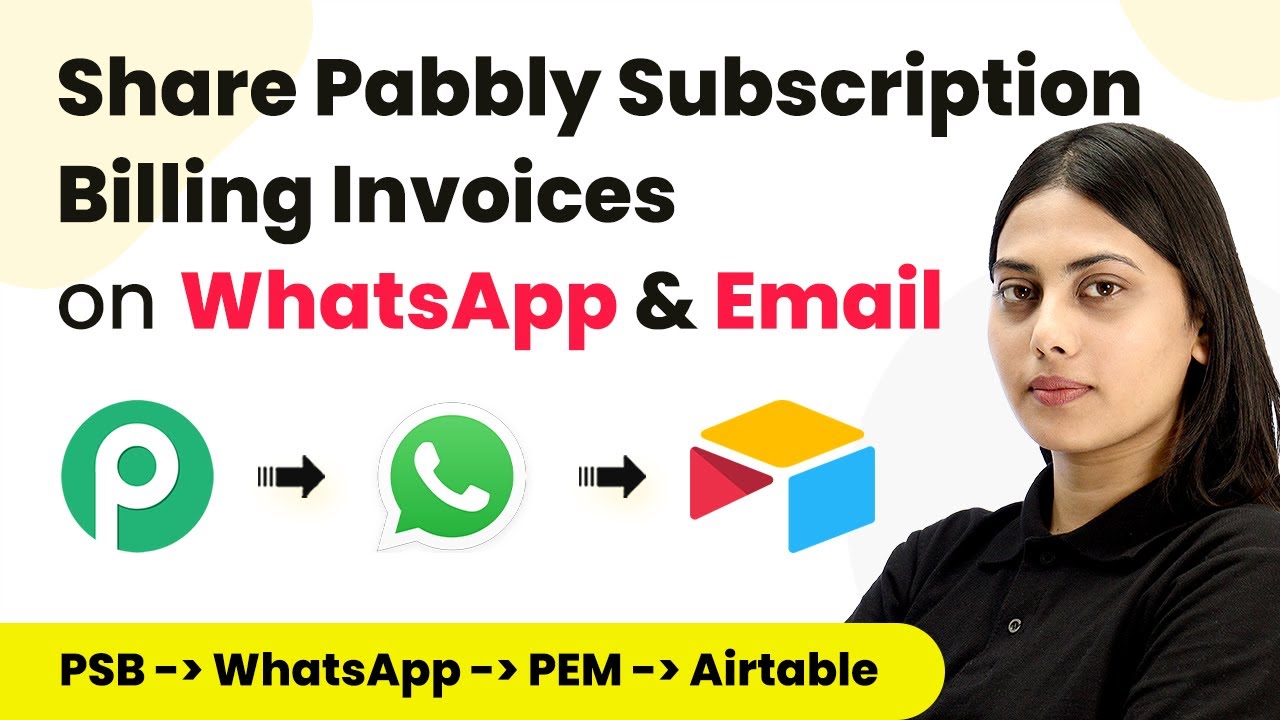
4. Recording Payments in a Table

Once you have captured the payment data, the next step is to record this information in a table. In Pabbly Connect, add an action app and select the table application. Choose the action event as ‘Create Record’. using Pabbly Connect

Connect to your table by providing the required access token. You can find this token in the developer section of your table application. Ensure you select the correct base and table ID where the payment data will be stored.

Map the fields such as Name, Email, Amount, and Date from the payment data. Test the connection to ensure data is being recorded properly.

This step ensures that every payment received through Pabbly Subscription Billing is accurately recorded in your database.


5. Sending SMS Notifications via Twilio

The final step in this automation process is to send SMS notifications to customers. After recording the payment, add another action in Pabbly Connect and select Twilio as the SMS service provider. Choose the action event as ‘Send SMS’. using Pabbly Connect

Connect your Twilio account by entering your Account SID and Auth Token. You can find these details in your Twilio console. Set up the SMS body and specify the recipient’s phone number by mapping it from the payment data.

Enter a thank-you message for the customer. Ensure the sender’s number is your Twilio number.

After completing these steps, test the SMS functionality to confirm that notifications are sent successfully. This integration allows you to keep your customers informed automatically.


Conclusion

This tutorial has detailed how to integrate Pabbly Subscription Billing with automation tools to streamline payment tracking and customer notifications. By following these steps, you can efficiently manage payments and enhance customer communication.

Ensure you check out Pabbly Connect to create business automation workflows and reduce manual tasks. Pabbly Connect currently offer integration with 2,000+ applications.

Integrate WooCommerce with Go High Level Using Pabbly Connect

Learn how to integrate WooCommerce with Go High Level using Pabbly Connect for seamless automation of contacts and opportunities. Eliminate manual repetitive tasks from your workflow. Discover proven automation methods with intuitive steps designed for efficiency-minded professionals.

Watch Step By Step Video Tutorial Below


1. Accessing Pabbly Connect for Integration

To start integrating WooCommerce with Go High Level, you need to access Pabbly Connect. First, navigate to the Pabbly Connect dashboard by signing in or creating an account if you are a new user.

After logging in, you can explore the features of Pabbly Connect which allow you to automate tasks between different applications. This integration will enable you to create contacts and opportunities automatically whenever a new order is placed in WooCommerce.


2. Creating a Workflow in Pabbly Connect

To create a workflow in Pabbly Connect, click on the ‘Create Workflow’ button on the dashboard. Name your workflow something descriptive, like ‘Create Contact and Opportunity in Go High Level for WooCommerce Orders’.

  • Click on the ‘Create’ button to proceed.
  • Choose WooCommerce as your trigger application.
  • Select the trigger event as ‘New Order Created’.

Once you have set up the trigger, Pabbly Connect will provide you with a webhook URL. This URL will allow WooCommerce to send new order data to your Pabbly Connect workflow.


3. Setting Up WooCommerce to Send Data

Now, you need to configure WooCommerce to send data to Pabbly Connect. Go to your WordPress dashboard, navigate to WooCommerce settings, and click on the ‘Advanced’ tab. Here, you’ll find the option for webhooks.

  • Click on ‘Add Webhook’ and enter a name for your webhook.
  • Set the status to active and choose the topic as ‘Order Created’.
  • Paste the webhook URL you copied from Pabbly Connect.

After saving the webhook, your WooCommerce store will now communicate with Pabbly Connect whenever a new order is created, allowing for real-time data transfer.


4. Testing the Integration with a New Order

To ensure that the integration works correctly, create a test order in WooCommerce. Add a product to the cart, proceed to checkout, and fill in the required details. Once you place the order, this action will trigger the workflow in Pabbly Connect.

Return to Pabbly Connect to check if the webhook has received the order data. You should see all relevant information, such as the customer’s name, email, and order details. This confirms that the integration between WooCommerce and Pabbly Connect is functioning properly.


5. Creating Contacts and Opportunities in Go High Level

After testing the integration, the next step is to set up actions in Pabbly Connect to create contacts and opportunities in Go High Level. Select ‘Lead Connector V2’ as your action application and choose ‘Create or Update Contact’ as the action event.

Map the fields from the WooCommerce order data to the corresponding fields in Go High Level, such as first name, last name, email address, and phone number. Once you have mapped all necessary fields, click on ‘Save and Send Test Request’ to create the contact.

Next, add another action step to create an opportunity. Again, select ‘Lead Connector V2’ and choose ‘Create or Update Opportunity’. Fill in the details such as opportunity name and status, and then save the request. This will ensure that both a contact and an opportunity are created in Go High Level every time an order is placed in WooCommerce.

Conclusion

This guide summarizes the key points and helps you understand the essential features and benefits of using this tool.

Ensure you check out Pabbly Connect to create business automation workflows and reduce manual tasks. Pabbly Connect currently offer integration with 2,000+ applications.


In conclusion, this tutorial demonstrated how to integrate WooCommerce with Go High Level using Pabbly Connect. By following these steps, you can automate the creation of contacts and opportunities, streamlining your workflow and enhancing your business efficiency.

Automate WhatsApp Messages for New Google Leads Using Pabbly Connect

Learn how to automate WhatsApp messages for new leads generated from Google Ads using Pabbly Connect in this detailed tutorial. Discover how to seamlessly connect your essential tools through accessible instructions that make powerful automation available to professionals at every skill level.

Watch Step By Step Video Tutorial Below


1. Setting Up Pabbly Connect for Google Lead Integration

To automate WhatsApp messages for new leads using Pabbly Connect, start by accessing the platform. First, create a free account on Pabbly Connect by signing up through the link provided in the description.

Once logged in, navigate to the dashboard and click on ‘Create Workflow’. Name your workflow, for example, ‘Google Ads to AI Sensei’, and click on ‘Create’. This initiates your automation setup.


2. Triggering Google Ads to Pabbly Connect

In this step, connect your Google Ads account to Pabbly Connect as the trigger. Select ‘Google Ads’ from the app options and choose the trigger event as ‘New Lead Form Entry’.

  • Select Google Ads as the trigger app.
  • Choose ‘New Lead Form Entry’ as the trigger event.
  • Copy the webhook URL provided by Pabbly Connect.

Paste this webhook URL into your Google Ads account under the lead form settings to establish the connection. This allows Pabbly Connect to receive lead details every time a new lead is generated.


3. Sending WhatsApp Messages via AI Sensei

After setting up the trigger, the next step is to send a WhatsApp message using AI Sensei through Pabbly Connect. In the action window, search for ‘AI Sensei’ and select it.

Choose the action event as ‘Send Template Message’. Connect your AI Sensei account by entering the API key from your AI Sensei dashboard. Ensure that the API key is correctly pasted in Pabbly Connect to establish the integration.


4. Configuring the WhatsApp Message Template

To send a WhatsApp message, you will need to create a campaign in AI Sensei. Go to the campaigns section in your AI Sensei account and create a new API campaign.

  • Name the campaign (e.g., ‘Google Ads’).
  • Select a message template that has been approved by Facebook.
  • Ensure the campaign status is live before proceeding.

Once the campaign is created, return to Pabbly Connect and enter the campaign name and map the parameters such as the lead’s first name and email to personalize the WhatsApp message.


5. Finalizing the Automation Workflow

With all configurations complete, finalize your automation by mapping the mobile number from the Google Ads lead form to the WhatsApp message field in Pabbly Connect.

After mapping, click on the ‘Save’ button. This saves your workflow, allowing Pabbly Connect to send WhatsApp messages automatically whenever a new lead is generated through Google Ads.

Test the setup by sending a test message to ensure everything is working as intended. Once confirmed, your automation is ready to go live!


Conclusion

In this tutorial, we explored how to automate WhatsApp messages for new leads generated from Google Ads using Pabbly Connect. By following these steps, you can efficiently nurture your leads and enhance your marketing efforts.

Ensure you check out Pabbly Connect to create business automation workflows and reduce manual tasks. Pabbly Connect currently offer integration with 2,000+ applications.

Integrate Facebook Leads with Pabbly Connect and Pabbly Email Marketing

Learn how to integrate Facebook leads with Pabbly Connect and Pabbly Connect to automate contact creation and email notifications effectively. Explore systematic approaches to creating efficient automation solutions that convert technical concepts into practical, implementable instructions.

Watch Step By Step Video Tutorial Below


1. Accessing Pabbly Connect for Integration

To start the integration process, first, access Pabbly Connect by typing Pabbly.com in your browser. This is the central platform for connecting various applications seamlessly.

If you are a new user, you can click on ‘Sign up for free’ to create an account. Existing users should click on ‘Sign In’ and then select ‘Access Now’ under Pabbly Connect. This will take you to the dashboard where you can manage your workflows.


2. Creating a New Workflow in Pabbly Connect

In Pabbly Connect, creating a new workflow is essential for integrating your applications. Click on the ‘Create Workflow’ option located in the upper right-hand corner of the dashboard.

  • Give your workflow a descriptive name, such as ‘Facebook Lead Ads to Pipedrive and Pabbly Email Marketing’.
  • Click on ‘Create’ to proceed.
  • This will set up the trigger and action framework for your workflow.

Once created, you will see options for setting triggers and actions. This is where the integration process begins, allowing you to connect Facebook Leads with Pipedrive and Pabbly Email Marketing through Pabbly Connect.


3. Setting Up the Trigger from Facebook Leads

The first step in the workflow is to set up a trigger using Facebook Leads. This is done by selecting Facebook Lead Ads as your trigger application in Pabbly Connect.

Choose the ‘New Lead’ trigger event and then click on ‘Connect’. You will have the option to add a new connection. Once connected successfully, select the Facebook page and the lead generation form you want to use. This ensures that every form submission is captured as a lead.


4. Adding Contacts to Pipedrive

After setting up the trigger, the next action is to create a contact in Pipedrive. Select Pipedrive as your action application in Pabbly Connect and choose the ‘Create Person’ action event.

  • Add your API token from Pipedrive to establish a connection.
  • Map the details from the Facebook lead to create a new contact.
  • Click on ‘Save and Send Test Request’ to ensure the contact is created successfully.

Check your Pipedrive account to confirm that the new contact appears with the details you mapped. This step is crucial for maintaining your sales pipeline effectively.


5. Subscribing to Pabbly Email Marketing

The final action in this workflow is to add the lead as a subscriber in Pabbly Email Marketing. Select Pabbly Email Marketing as your action application and choose the ‘Add Subscriber’ action event.

Provide the necessary bearer token from your Pabbly Email Marketing account to establish the connection. Map the email and name fields from the Pipedrive contact to subscribe the lead successfully. Finally, confirm by clicking ‘Save and Send Test Request’.


6. Sending Email Notifications via Gmail

To complete the integration, the last action is to send an email notification to the new subscriber using Gmail. Choose Gmail as your action application in Pabbly Connect and select the ‘Send Email’ action event.

Connect your Gmail account and map the recipient’s email address, sender’s name, subject, and content. Click on ‘Save and Send Test Request’ to send out the confirmation email. This ensures that the subscriber receives a welcome message, confirming their subscription.


Conclusion

This tutorial demonstrates how to use Pabbly Connect to integrate Facebook Leads with Pipedrive and Pabbly Email Marketing effectively. By following these steps, you can automate contact creation and email notifications seamlessly, enhancing your marketing efforts.

Ensure you check out Pabbly Connect to create business automation workflows and reduce manual tasks. Pabbly Connect currently offer integration with 2,000+ applications.

Integrating HubSpot CRM with Google Sheets Using Pabbly Connect

Learn how to automate adding new HubSpot CRM contacts to Google Sheets using Pabbly Connect. Step-by-step guide for seamless integration. Discover hidden automation capabilities within your existing tools. This guide shows you how to connect your essential applications and permanently eliminate redundant manual processes.

Watch Step By Step Video Tutorial Below


1. Accessing Pabbly Connect for Integration

To integrate HubSpot CRM with Google Sheets, first, you need to access Pabbly Connect. Sign in to your Pabbly account and navigate to the dashboard where you will see various applications available.

Click on the big blue button labeled ‘Create Workflow’. You will then be prompted to name your workflow. For this example, name it ‘Add HubSpot Contacts to Google Sheets’ and click on ‘Create’ to initiate your integration process.


2. Setting Up the Trigger in Pabbly Connect

In this integration, the trigger will be a new contact added in HubSpot CRM. Select HubSpot as your trigger application in Pabbly Connect. You will need to choose the event as ‘New Contact’ which will serve as the starting point for the automation.

  • Select HubSpot as the trigger application.
  • Choose the event ‘New Contact’.
  • Connect your HubSpot account with Pabbly Connect.

After connecting, you will be asked to test the trigger. Ensure that you have existing contacts in HubSpot to verify that the connection is successful and that it retrieves the correct data.


3. Configuring the Action to Add Rows in Google Sheets

Next, set up the action application in Pabbly Connect. Choose Google Sheets as your action application. The event you need to select is ‘Add New Row’. This action will allow you to add a new row in your Google Sheets each time a new contact is added in HubSpot.

Connect your Google account to Pabbly Connect. Once connected, select the spreadsheet you want to update, which in this case is named ‘HubSpot Contacts’. The sheet will be automatically selected if there is only one in the spreadsheet.

  • Select the spreadsheet ‘HubSpot Contacts’.
  • Map the fields from HubSpot to Google Sheets.
  • Ensure all relevant fields such as first name, last name, email, phone number, and job title are included.

This mapping is crucial as it ensures that data from the new contact in HubSpot is correctly transferred to the respective fields in Google Sheets.


4. Testing the Integration Workflow

Once you have configured the action, it’s time to test your entire workflow in Pabbly Connect. Click on ‘Save and Send Test Request’ to ensure that the data flows from HubSpot to Google Sheets correctly. This test will simulate adding a new contact in HubSpot and check if a new row is created in your Google Sheets.

After running the test, check your Google Sheets to confirm that the new contact details appear as expected. You should see the first name, last name, email, phone number, and job title populated in the new row.


5. Conclusion and Benefits of Using Pabbly Connect

By integrating HubSpot CRM with Google Sheets using Pabbly Connect, you can automate the process of backing up your contact information seamlessly. This integration saves time and reduces the chances of errors that come with manual data entry.

Ensure you check out Pabbly Connect to create business automation workflows and reduce manual tasks. Pabbly Connect currently offer integration with 2,000+ applications.

With Pabbly Connect, you can easily manage and automate various applications, enhancing your productivity and ensuring your data is always up-to-date across platforms.


In conclusion, utilizing Pabbly Connect for integrating HubSpot CRM with Google Sheets streamlines your workflow. This automation not only simplifies data management but also ensures that you have a reliable backup of your contacts readily available.

Integrate WooCommerce Customers to Zoho Books Using Pabbly Connect

Learn how to automate the integration of WooCommerce customers to Zoho Books using Pabbly Connect for seamless contact management. Discover hidden automation capabilities within your existing tools. This guide shows you how to connect your essential applications and permanently eliminate redundant manual processes.

Watch Step By Step Video Tutorial Below


1. Accessing Pabbly Connect for Integration

To begin integrating WooCommerce customers with Zoho Books, you need to access Pabbly Connect. Sign in to your Pabbly Connect account to get started. Once logged in, you will see all available applications provided by Pabbly.

Click on the ‘Access Now’ button to enter the dashboard. Here, you can create a new workflow by clicking on the ‘Create Workflow’ button. Name your workflow appropriately, for example, ‘Add WooCommerce Customers to Zoho Books,’ and click on ‘Create’ to proceed.


2. Setting Up WooCommerce as the Trigger Application

In this step, you will set WooCommerce as the trigger application in Pabbly Connect. The trigger event will be when a new customer is created in WooCommerce. Choose ‘New Customer Created’ as the trigger event.

  • Select the WooCommerce application from the list.
  • Choose ‘New Customer Created’ as the event.
  • Copy the generated webhook URL provided by Pabbly Connect.

Next, navigate to your WooCommerce settings and click on the ‘Advanced’ tab. Here, you will find the Webhooks section. Add a new webhook by clicking on ‘Add Webhook,’ and fill in the necessary details, including the delivery URL you copied from Pabbly Connect. Save the webhook to complete the setup.


3. Capturing Customer Data from WooCommerce

After setting up the webhook, the next step is to capture the customer data from WooCommerce using Pabbly Connect. Make sure you have created a test customer in WooCommerce to trigger the webhook. Once you create the customer, Pabbly Connect will receive the webhook response.

  • Fill in the customer details such as username, email, first name, and last name.
  • Check the webhook response in Pabbly Connect to verify the data received.
  • Ensure all necessary fields are populated correctly.

Once the webhook response is captured, you can proceed to map this data for the next step of the integration. This will ensure that the customer details are accurately transferred to Zoho Books.


4. Connecting Zoho Books as the Action Application

Now that you have captured the customer data, it’s time to connect Zoho Books as the action application in Pabbly Connect. Choose Zoho Books from the list of applications and select the action event ‘Create Contact’. This action will allow you to create a new contact in Zoho Books using the data from WooCommerce.

To establish the connection, click on ‘Connect’ and then select ‘Add New Connection’. You will need to enter your Zoho domain, for example, ‘zoho.in’, and grant access to Pabbly Connect. After successfully connecting, you will be able to map the customer data received from the WooCommerce trigger.


5. Mapping Customer Data to Zoho Books

In this final step, you will map the customer data from WooCommerce to Zoho Books using Pabbly Connect. Begin by selecting your organization name in Zoho Books and specify the contact type as ‘Customer’. Then, fill in the required fields such as contact name, first name, last name, and email address.

Ensure that you map the fields correctly from the WooCommerce trigger response. For example, map the username to the contact name field and the email address appropriately. Once all fields are filled, click on ‘Save and Send Test Request’ to create the contact in Zoho Books.

After the test request, check Zoho Books to confirm that the new contact has been created successfully. This integration ensures that every new customer added in WooCommerce will automatically be reflected in Zoho Books.


Conclusion

This tutorial demonstrated how to use Pabbly Connect to automate the integration of WooCommerce customers to Zoho Books. By following these steps, you can streamline your contact management process and ensure that customer data is consistent across platforms.

Ensure you check out Pabbly Connect to create business automation workflows and reduce manual tasks. Pabbly Connect currently offer integration with 2,000+ applications.

Integrating Stripe with MySQL Using Pabbly Connect: A Step-by-Step Guide

Learn how to automate the integration of Stripe with MySQL using Pabbly Connect. This detailed tutorial walks you through each step of the process. Discover hidden automation capabilities within your existing tools. This guide shows you how to connect your essential applications and permanently eliminate redundant manual processes.

Watch Step By Step Video Tutorial Below


1. Accessing Pabbly Connect for Integration

To begin integrating Stripe with MySQL, start by accessing Pabbly Connect. This powerful platform enables seamless automation between different applications. You can create a free account in just two minutes, which allows you to test various automation tasks.

Once logged into your Pabbly Connect dashboard, click on the blue ‘Create Workflow’ button. Here, you will name your workflow, such as ‘Sync Stripe Customers with MySQL Database Automatically’. After naming your workflow, click on the ‘Create’ button to proceed.


2. Setting Up Trigger and Action in Pabbly Connect

In the Pabbly Connect interface, you will see two boxes labeled ‘Trigger’ and ‘Action’. The trigger is the event that starts the automation, while the action is what happens as a result. For this integration, select Stripe as your trigger application.

  • Select ‘New Charge’ as the trigger event in Stripe.
  • Copy the webhook URL provided by Pabbly Connect.
  • Go to your Stripe dashboard and navigate to the Developer section.
  • Add the copied webhook URL as an endpoint in Stripe.

After adding the endpoint, select the event ‘Charge Succeeded’ to ensure that payments trigger data transfer to MySQL. This setup allows Pabbly Connect to listen for successful payments in Stripe.


3. Testing the Integration with Dummy Payments

To verify that your Pabbly Connect setup works correctly, make a dummy payment using the Stripe dashboard. Fill out the payment form with test details, including a dummy email and a card number for testing.

As soon as the payment is successful, Pabbly Connect will capture the payment details. You will see various data points, including customer information and payment amounts. Ensure that this data is correctly fetched by Pabbly Connect.

  • Check for customer details like name, email, and address.
  • Look for the payment status to confirm it is ‘Charge Succeeded’.

This test confirms that the connection between Stripe and Pabbly Connect is functioning as intended, allowing data to flow in real time.


4. Inserting Data into MySQL with Pabbly Connect

After confirming the connection, the next step is to insert the captured payment details into your MySQL database using Pabbly Connect. Select MySQL as the action application and choose the ‘Insert Row’ action event.

Connect to your MySQL database by entering your database details such as username, password, and host. Once connected, select the table where the payment details will be stored. You can map the fields from the Stripe payment data to the respective columns in your MySQL table.

Map customer name, email, and other relevant details. Ensure the product price is correctly formatted by dividing it by 100 to avoid extra zeros.

Once all fields are mapped, your Pabbly Connect workflow is set to automatically insert data into MySQL whenever a new charge is made in Stripe.


5. Finalizing and Automating the Workflow with Pabbly Connect

Finally, review your Pabbly Connect setup to ensure all connections and mappings are correct. After saving your workflow, you can test it by making another dummy payment to confirm that the data is inserted into MySQL as expected.

Once confirmed, you can relax knowing that Pabbly Connect will handle all future payments automatically. This integration allows you to sync Stripe customers with your MySQL database in real-time without manual intervention.

By setting up this automation, you can focus on growing your business while Pabbly Connect takes care of the backend processes. This integration is efficient and reliable for maintaining customer records.


Conclusion

In this tutorial, we explored how to integrate Stripe with MySQL using Pabbly Connect. This powerful automation tool enables real-time data syncing, ensuring your customer information is always up to date.

Ensure you check out Pabbly Connect to create business automation workflows and reduce manual tasks. Pabbly Connect currently offer integration with 2,000+ applications.

Integrating Pabbly Connect with Pabbly Subscription Billing for Seamless Invoice Management

Learn how to integrate Pabbly Connect with Pabbly Connect to automate invoice sharing via WhatsApp and email while backing up to Airtable. Discover how to seamlessly connect your essential tools through accessible instructions that make powerful automation available to professionals at every skill level.

Watch Step By Step Video Tutorial Below


1. Setting Up Pabbly Connect for Invoice Automation

To begin integrating Pabbly Connect with Pabbly Subscription Billing, access your Pabbly account. Here, you can create a new workflow that will automate the process of sharing invoices through WhatsApp and email.

Click on the ‘Create Workflow’ button in Pabbly Connect and name your workflow, for instance, ‘Subscription Billing Invoices on WhatsApp and Email’. This will set the foundation for your automation.


2. Configuring Webhook in Pabbly Subscription Billing

The next step involves setting up a webhook in Pabbly Subscription Billing. This webhook will notify Pabbly Connect when an invoice is created. Open Pabbly Subscription Billing, navigate to the ‘Settings’ menu, and select ‘Webhooks’.

  • Copy the webhook URL provided by Pabbly Connect.
  • Create a new webhook and paste the copied URL.
  • Select the event as ‘Invoice Created’ to trigger the integration.

After saving the webhook, proceed to create an invoice in Pabbly Subscription Billing to test if the webhook is correctly capturing the event.


3. Sending Invoice via WhatsApp Using AI Sensi

Once the webhook is set up, the next action in your workflow is to send the invoice via WhatsApp using AI Sensi. In your Pabbly Connect workflow, add a new action module and select AI Sensi as the application.

Here, you will configure the WhatsApp message template. Enter the campaign name and map the mobile number from the webhook response. This ensures that the message is sent to the correct customer. Additionally, include the invoice link and other relevant details in the message template.


4. Emailing Invoice to Customers with Pabbly Email Marketing

After successfully sending the WhatsApp message, the next step is to email the invoice to the customer using Pabbly Email Marketing. In your Pabbly Connect workflow, add another action module and select Pabbly Email Marketing.

  • Create an email template including customer details and the invoice link.
  • Map the email address from the webhook response to ensure it reaches the correct recipient.

Once the email template is set up, send a test request to confirm that the email is being sent correctly. Ensure that the email contains all necessary details for the customer.


5. Backing Up Invoice Data to Airtable

The final step in your workflow is to create a backup of the invoice data in Airtable. In your Pabbly Connect workflow, add Airtable as the last action module.

Connect to Airtable using a generated API token. Map the required fields such as customer name, email, phone number, and product cost. This will ensure that all relevant data is stored securely for future reference.


Conclusion

This tutorial has demonstrated how to effectively use Pabbly Connect to integrate Pabbly Subscription Billing with WhatsApp, email, and Airtable for seamless invoice management. By following these steps, you can automate invoice sharing and backup processes efficiently.

Ensure you check out Pabbly Connect to create business automation workflows and reduce manual tasks. Pabbly Connect currently offer integration with 2,000+ applications.

Integrating Facebook Pages with Groups Using Pabbly Connect

Learn how to automate posting from Facebook Pages to multiple Facebook Groups using Pabbly Connect. Follow our step-by-step tutorial for seamless integration. Build sophisticated automated workflows in less time than you think. This guide translates complex integrations into straightforward steps for immediate implementation.

Watch Step By Step Video Tutorial Below


1. Setting Up Pabbly Connect for Facebook Integration

To begin using Pabbly Connect, visit the dashboard by signing in or creating an account. This platform allows you to automate tasks between different applications effortlessly. Once logged in, navigate to the ‘Create Workflow’ tab to start your integration process.

Here, you will need to name your workflow based on your objective. In this case, it is to automate posting from Facebook Pages to multiple Facebook Groups. After naming your workflow, click on ‘Create’ to proceed to the next step.


2. Configuring the Facebook Pages Trigger in Pabbly Connect

In this section, we will configure the Facebook Pages trigger using Pabbly Connect. Select Facebook Pages as your trigger application and choose the ‘New Post’ event. This event will activate the workflow every time a new post is made on your Facebook page.

  • Select ‘Add New Connection’ to link your Facebook account.
  • Authorize Pabbly Connect to access your Facebook Pages.
  • Specify how many posts to retrieve in each request, up to 100.

Once you have successfully connected your Facebook account, click on ‘Save and Send Test Request’ to confirm that the integration is working correctly. You should see the last post details from your selected Facebook page.


3. Using Google Sheets to Store Facebook Group Details

Next, we will utilize Google Sheets to manage the Facebook group details using Pabbly Connect. Create a spreadsheet containing the names and IDs of all the Facebook groups you want to post to. This will allow Pabbly Connect to access and utilize this information seamlessly.

In Pabbly Connect, select Google Sheets as your action application and choose the ‘Get Rows’ event. Connect to your Google Sheets account by selecting ‘Add New Connection’ and authorizing access. Once connected, select the spreadsheet you created earlier and specify the range of data to retrieve.


4. Posting to Facebook Groups via Pabbly Connect

After retrieving the group details, the next step is to post the message to the identified Facebook groups using Pabbly Connect. Choose Facebook Groups as your action application and select the ‘Post Message’ event. Ensure you connect to your Facebook Groups account.

  • Map the group ID from the previous step to ensure the message reaches the correct group.
  • Input the message you want to post, which can include links or additional content.
  • Click ‘Save and Send Test Request’ to verify the message is posted correctly.

After completing these steps, your message should appear in all selected Facebook groups, confirming that the integration via Pabbly Connect was successful.


5. Testing and Verifying the Integration

To ensure everything is functioning as intended, test the integration by posting a new message on your Facebook Page. Within 10 minutes, check the Facebook groups to see if the post appears. This delay is due to the polling time set in Pabbly Connect.

Once you confirm that the message has been posted in all the groups, you can be assured that your integration is working flawlessly. If you encounter any issues, revisit the steps to ensure all connections and mappings are set up correctly.


Conclusion

This tutorial demonstrated how to use Pabbly Connect to automate posting from Facebook Pages to multiple Facebook Groups. With this integration, you can save time and streamline your social media management effectively.

Ensure you check out Pabbly Connect to create business automation workflows and reduce manual tasks. Pabbly Connect currently offer integration with 2,000+ applications.

Automate Google Forms Responses with Pabbly Connect and Microsoft Outlook

Learn how to automate Google Forms responses and send emails via Microsoft Outlook using Pabbly Connect. Step-by-step tutorial included. Discover hidden automation capabilities within your existing tools. This guide shows you how to connect your essential applications and permanently eliminate redundant manual processes.

Watch Step By Step Video Tutorial Below


Setting Up Pabbly Connect for Google Forms

To start automating your workflow, first, access Pabbly Connect by visiting Pabbly.com. Once there, create your free account if you haven’t already. After signing in, navigate to the dashboard and click on the ‘Create Workflow’ button. Name your workflow as ‘Google Forms to Microsoft Outlook’ and click on ‘Create’ to proceed.

In the trigger window, select Google Forms as your application. For the trigger event, choose ‘New Response Received.’ This integration allows you to capture responses from your Google Forms directly into Pabbly Connect. Follow the instructions provided to set up the webhook URL in your Google Forms for seamless data transfer.


Creating Your Google Form

Next, create a Google Form for your data collection. For instance, title it ‘Customer Feedback Form’ and add fields such as Name, Email, Phone Number, and Feedback. Ensure the last field is marked as required to trigger the webhook effectively. Once your form is ready, navigate to the responses tab and click on the green spreadsheet icon to create a Google Sheets document associated with your form.

This Google Sheets document will automatically collect the responses from your form submissions. Once you’ve created the spreadsheet, go back to Pabbly Connect and ensure that it is set to listen for new responses by using the previously generated webhook URL. This setup will ensure that every time a new form is submitted, the data is captured in real-time.


Integrating Microsoft Outlook with Pabbly Connect

Now that your Google Form is connected to Pabbly Connect, it’s time to set up the action app. In the action window, select Microsoft Outlook as your application and choose the action event ‘Send Email’. You will need to connect your Microsoft Outlook account by providing the necessary authorization. Once connected, you can customize the email subject and body.

For the email body, you can map the fields from the Google Form responses, such as the name and email address of the respondent. This allows you to personalize the emails sent out via Outlook. After filling in all the necessary details, click on ‘Save and Send Test Request’ to verify that everything is working correctly. If successful, the email will be sent to the respondent confirming their submission.


Testing Your Automation

To ensure everything is functioning as expected, submit a test response through your Google Form. Check your Microsoft Outlook account for the confirmation email. You should see the email populated with the details you mapped from the Google Form. This confirms that your integration between Google Forms, Pabbly Connect, and Microsoft Outlook is working seamlessly.

If you encounter any issues, revisit the steps to ensure that the webhook is correctly set up and that all necessary fields are mapped accurately. This setup not only saves time but also automates your workflow, allowing you to focus on more critical tasks.


Conclusion

In this tutorial, we demonstrated how to automate Google Forms responses using Pabbly Connect and Microsoft Outlook. With this setup, you can efficiently manage customer interactions and streamline your communication process.

Ensure you check out Pabbly Connect to create business automation workflows and reduce manual tasks. Pabbly Connect currently offer integration with 2,000+ applications.