Automate WhatsApp Messages for Sam Cart Orders Using Pabbly Connect

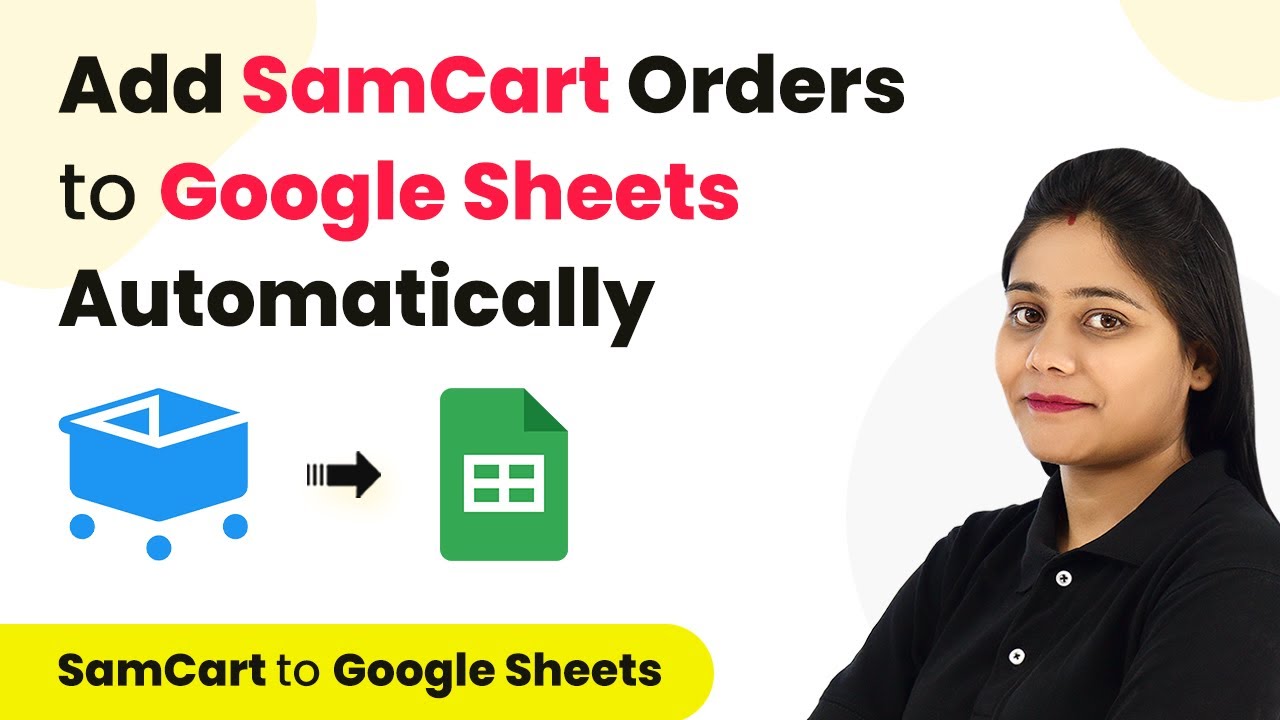
Learn how to automate WhatsApp messages for Sam Cart orders using Pabbly Connect. Step-by-step tutorial for seamless integration. Explore efficient methods for automating routine tasks with clear, concise instructions suited for both newcomers and experienced professionals.

Watch Step By Step Video Tutorial Below


1. Accessing Pabbly Connect for Integration

To automate WhatsApp messages for Sam Card orders, you first need to access Pabbly Connect. This integration platform allows you to connect various applications seamlessly. Start by creating a free account on Pabbly Connect if you haven’t already.

Once logged in, navigate to the dashboard. Click on the blue button labeled ‘Create Workflow’ to initiate your automation process. This is where you will set up the connection between Sam Card and the WhatsApp messaging application.


2. Setting Up Sam Card Integration in Pabbly Connect

In this step, you will connect Sam Card to Pabbly Connect. Select Sam Card as your trigger application and choose the trigger event as ‘New Order’. This step ensures that every time a new order is placed, the automation will be triggered.

  • Select ‘New Order’ as the trigger event.
  • Copy the webhook URL provided by Pabbly Connect.
  • Go to your Sam Card application and paste the webhook URL.

After pasting the URL, name your integration (e.g., ‘Automate WhatsApp Messages’) and save it. This configuration allows Pabbly Connect to receive data from Sam Card whenever a new order is created.


3. Testing the Sam Card Connection

Now it’s time to test the connection between Sam Card and Pabbly Connect. Place a test order in your Sam Card application. This step is crucial as it verifies whether the integration is functioning correctly.

After placing the order, check the Pabbly Connect dashboard for incoming data. You should see the order details captured, confirming that Sam Card is successfully sending information to Pabbly Connect. This data includes customer name, product details, and order price.

Once the test order is verified, you can proceed to set up the WhatsApp messaging integration using Pabbly Connect. This step will ensure customers receive confirmation messages for their orders automatically.


4. Integrating WhatsApp Messaging via Pabbly Connect

Next, you will integrate the WhatsApp messaging application using Pabbly Connect. Select the WhatsApp application as your action app and choose the action event as ‘Send WhatsApp Template Message’. This action will send an order confirmation message to the customer.

  • Connect to your WhatsApp application by providing the necessary credentials.
  • Map the customer details and order information to the WhatsApp message template.
  • Ensure the template is approved and ready for use.

This integration allows you to customize messages with variables such as customer name, product name, and order price, ensuring each message is personalized and relevant.


5. Finalizing and Testing the Integration

After setting up the WhatsApp messaging integration, it’s time to finalize everything using Pabbly Connect. Click the ‘Save and Send Test Request’ button to test the WhatsApp message functionality. Ensure that the message is sent correctly to the customer’s WhatsApp number.

Check your WhatsApp to see if the confirmation message appears as expected. The message should include customer details and order information, confirming that the integration works seamlessly. If successful, you can now relax as Pabbly Connect will handle future order confirmations automatically.

This step completes your automation setup. With Pabbly Connect, you can now manage your order confirmations efficiently and keep your customers informed without manual intervention.


Conclusion

Using Pabbly Connect, you can automate WhatsApp messages for every Sam Card order seamlessly. This integration enhances customer experience by providing timely order confirmations, ensuring satisfaction and efficiency in your business operations.

Ensure you check out Pabbly Connect to create business automation workflows and reduce manual tasks. Pabbly Connect currently offer integration with 2,000+ applications.

Automate SamCart Orders to Google Sheets with Pabbly Connect

Learn how to automate the transfer of SamCart orders to Google Sheets using Pabbly Connect. Step-by-step guide for seamless integration. Navigate the automation landscape confidently with clear, structured guidance suitable for professionals regardless of prior technical experience.

Watch Step By Step Video Tutorial Below


1. Accessing Pabbly Connect for Integration

To begin automating your SamCart orders to Google Sheets, first, access Pabbly Connect. This platform allows seamless integration between various applications, including SamCart and Google Sheets.

Once you have created your free account on Pabbly Connect, log in to access the dashboard where you can create your workflow. Click on the ‘Create Workflow’ button to start the automation process.


2. Setting Up Trigger and Action with Pabbly Connect

In this step, you will define the trigger and action for your workflow using Pabbly Connect. Select SamCart as your trigger application, specifically the ‘New Order’ event. This means that every time a new order is placed, the automation will be triggered.

  • Choose ‘New Order’ as the trigger event in SamCart.
  • Copy the webhook URL provided by Pabbly Connect.
  • Integrate this URL into your SamCart settings under ‘Webhooks’.

After setting up the trigger, return to Pabbly Connect to set the action application as Google Sheets. Choose ‘Add a New Row’ as the action event, which will allow the order details to be automatically added to your chosen spreadsheet.


3. Configuring SamCart Integration in Pabbly Connect

Now, configure the integration between SamCart and Pabbly Connect. Go to your SamCart dashboard and navigate to the settings. Under integrations, select ‘New Integration’ and choose ‘Notify URL’.

Paste the webhook URL from Pabbly Connect and save the integration. This step is crucial as it establishes the connection that allows data to flow from SamCart to Pabbly Connect.

  • Name your integration for easy identification.
  • Ensure you save the integration settings to avoid any disruptions.

Once you have completed this setup, trigger a test order in SamCart to confirm that the webhook is receiving data correctly in Pabbly Connect.


4. Adding Order Data to Google Sheets via Pabbly Connect

With the trigger set up, it’s time to map the order data to Google Sheets. In Pabbly Connect, select the Google Sheets action and connect your Google account. Choose the spreadsheet where you want to store the order details.

Map the fields from the SamCart order data to the corresponding columns in your Google Sheets. This ensures that every new order will automatically populate the correct information in your spreadsheet.

Select the appropriate spreadsheet and sheet within your Google account. Map fields such as Order ID, Product Name, Customer Name, and Price.

After mapping, test the workflow to ensure that data from SamCart is correctly reflected in Google Sheets via Pabbly Connect. This will confirm that your automation is functioning as intended.


5. Finalizing the Automation Process with Pabbly Connect

After successful testing, your automation is ready to go live. Now, every time a customer places an order in SamCart, their order details will be automatically added to Google Sheets through Pabbly Connect.

This automation not only saves time but also minimizes human error by ensuring that all order details are accurately recorded. You can now focus on other aspects of your business while Pabbly Connect handles the data transfer seamlessly.

Additionally, if you wish to customize the format of the data, such as separating date and time, you can utilize features within Pabbly Connect to achieve that. This flexibility allows for tailored automation that fits your needs perfectly.


Conclusion

In this tutorial, we explored how to automate the transfer of SamCart orders to Google Sheets using Pabbly Connect. By following the steps outlined, you can streamline your order management process and ensure that all data is accurately captured in real-time.

Ensure you check out Pabbly Connect to create business automation workflows and reduce manual tasks. Pabbly Connect currently offer integration with 2,000+ applications.

Integrate Zoho CRM with MailerLite Using Pabbly Connect: A Step-by-Step Guide

Learn how to integrate Zoho CRM with MailerLite using Pabbly Connect. This step-by-step tutorial covers setup, API usage, and automation processes. Follow this definitive guide to creating powerful automated workflows with straightforward, efficiency-focused solutions that save valuable time.

Watch Step By Step Video Tutorial Below


1. Accessing Pabbly Connect for Integration

To start using Pabbly Connect, navigate to the Pabbly Connect dashboard. You can sign in if you’re an existing user or create a new account in just a few minutes. Upon signing up, you will receive 100 free tasks to get started.

Once on the dashboard, locate the ‘Create Workflow’ button on the right side. Click it to initiate your integration process. You will be prompted to name your workflow, so you can enter something descriptive like ‘Send Zoho CRM Lead to MailerLite’ and click on ‘Create’ to proceed.


2. Setting Up Zoho CRM as a Trigger in Pabbly Connect

In this section, we will set up Zoho CRM as the trigger application in Pabbly Connect. Click on the Zoho CRM option and select the trigger event, which will be ‘New Module Entry’. This event will activate whenever a new lead is created in Zoho CRM.

  • Click on ‘Connect’ to establish a connection with Zoho CRM.
  • Select ‘Add New Connection’ and enter your Zoho CRM domain, typically ‘zoho.com’.
  • Authorize the connection by clicking ‘Accept’ when prompted.

After setting up the connection, you will need to specify the module name. Choose ‘Leads’ as the module to capture the new lead information. Click on ‘Save and Send Test Request’ to test the connection and ensure everything is working correctly.


3. Creating a Subscriber in MailerLite Using API

Now that we have set up Zoho CRM as a trigger, the next step in Pabbly Connect is to create a subscriber in MailerLite using the API. For this, select the API by Pabbly as your action application.

Choose the action event as ‘Post’ to add a new subscriber. You will need to enter the endpoint URL for MailerLite. This can be found in the MailerLite API documentation under the ‘Create and Update Subscriber’ section. Copy the endpoint URL and paste it into Pabbly Connect.

  • Set the payload type to JSON, as this is the required format for MailerLite.
  • Select ‘No’ for the option to wrap the request in an array.
  • Use Bearer Token for authentication and paste the generated API token from your MailerLite account.

Next, you will need to configure the parameters for the subscriber, including the email address. Map the email address from the previous step to ensure new leads are added correctly. After setting everything up, click on ‘Save and Send Test Request’ to verify the subscriber is created in MailerLite.


4. Testing the Integration Between Zoho CRM and MailerLite

With the setup complete in Pabbly Connect, it’s time to test the integration. Go back to your Zoho CRM account and create a new lead using the form you previously set up. Fill in the necessary details, such as the first name, last name, email address, and company name, and submit the form.

Once the form is submitted, return to Pabbly Connect and check the response from the test request. You should see the lead details displayed, confirming that the integration is functioning correctly. Now, check your MailerLite account to ensure the new subscriber has been added successfully.

Verify that the subscriber’s status is set to active in MailerLite. Test with additional leads to ensure the integration works consistently.

By following these steps, you can automate the process of adding new leads from Zoho CRM to MailerLite using Pabbly Connect.


5. Conclusion: Automate Your Workflow with Pabbly Connect

In this tutorial, we demonstrated how to integrate Zoho CRM with MailerLite using Pabbly Connect. By setting up triggers and actions, you can automate the process of adding new leads as subscribers, saving time and improving efficiency.

Ensure you check out Pabbly Connect to create business automation workflows and reduce manual tasks. Pabbly Connect currently offer integration with 2,000+ applications.

Check out Pabbly Connect – Automate your business workflows effortlessly! Sign Up Free – Start your journey with ease! 10,000+ Video Tutorials – Learn step by step! Join Pabbly Facebook Group – Connect with 21,000+ like minded people!

Utilizing Pabbly Connect allows you to connect applications seamlessly, even when native integrations are not available. With just a few steps, you can enhance your marketing efforts and streamline your workflow.


Integrating Microsoft Excel with Pabbly Connect: A Step-by-Step Guide

Learn how to integrate Microsoft Excel with Pabbly Connect to automate your workflows. Follow this detailed tutorial for seamless application integration. This comprehensive guide reveals exactly how to connect your applications and automate repetitive tasks — accessible for professionals of all technical backgrounds.

Watch Step By Step Video Tutorial Below


1. Accessing Pabbly Connect for Integration

To start integrating Microsoft Excel with Pabbly Connect, first, log in to your Pabbly Connect account. If you don’t have an account, you can sign up for free and get access to 100 free tasks every month. Once logged in, navigate to the dashboard to begin creating your workflow. using Pabbly Connect

Click on the ‘Create Workflow’ button and name your workflow accordingly. For this integration, you might name it ‘Excel to Pabbly Connect Integration’. This naming helps in identifying the purpose of the workflow later on. Once named, click on ‘Create’ to proceed to the next step.


2. Setting Up the Trigger for Microsoft Excel

In the new workflow, you will see two sections: Trigger and Action. For the trigger, choose Microsoft Excel as your application. The trigger event will be set as ‘New Row in Worksheet’. This means that every time a new row is added in your Excel sheet, it will trigger the workflow. using Pabbly Connect

  • Select the ‘New Row in Worksheet’ trigger event.
  • Copy the provided webhook URL.
  • Log in to your Excel account and paste the URL into the appropriate field.

After setting this up, click on ‘Save and Send Test Request’ to verify that the connection works. If successful, you will receive a response indicating that the trigger is set up correctly.


3. Connecting Pabbly Connect with Microsoft Excel

Once the trigger is established, the next step is to connect Pabbly Connect with your Microsoft Excel account. Ensure that you are logged into your Microsoft account. Click on ‘Connect’ and allow Pabbly Connect to access your Excel sheets. using Pabbly Connect

After the connection is successful, select the specific workbook where you want to track the data. For example, choose ‘Invoice Data’ from your available workbooks. After selecting the workbook, choose the specific worksheet that contains the data you want to track.


4. Setting Up the Action to Create Invoices

Now, in the action section, select QuickBooks as your application. The action event will be set as ‘Create Invoice’. This means that every time a new row is added in Excel, an invoice will be created in QuickBooks with the data from that row. using Pabbly Connect

  • Select ‘Create Invoice’ as the action event.
  • Log in to your QuickBooks account and authorize the connection.
  • Map the necessary fields from your Excel data to the invoice fields in QuickBooks.

After mapping, click on ‘Save and Send Test Request’. If successful, the invoice will be created in QuickBooks, indicating that your integration is functioning as expected.


5. Finalizing and Testing the Integration

After setting up the action, it is crucial to test the entire workflow. Add a new row in your Excel sheet with the relevant invoice details. Ensure that all required fields are filled out correctly. using Pabbly Connect

Once the new row is added, wait for Pabbly Connect to capture the data and create the invoice in QuickBooks. This may take some time due to the polling nature of the trigger, which checks for new data every 8 hours.

After testing, make sure to save your workflow. This ensures that every time a new row is added in Excel, an invoice will be generated automatically in QuickBooks, streamlining your invoicing process.


Conclusion

This tutorial demonstrates how to seamlessly integrate Microsoft Excel with Pabbly Connect to automate invoice creation using QuickBooks. By following these steps, you can enhance productivity and ensure timely invoice management.

Ensure you check out Pabbly Connect to create business automation workflows and reduce manual tasks. Pabbly Connect currently offer integration with 2,000+ applications.

Integrating Guys with URL: A Step-by-Step Automation Guide

Learn how to integrate Guys with URL Using Pabbly Connect to automate updates in Google Sheets, Google, and YouTube. Follow this detailed tutorial for real results. with Pabbly Connect.

Watch Step By Step Video Tutorial Below


1. Setting Up Your Automation Workflow with Guys and URL

Automation starts with setting up your workflow using Guys. This integration allows you to update tags in your email marketing tool directly from Google Sheets, making the process seamless and efficient.

To begin, log into your Guys account and create a new workflow. Click on the ‘Create Workflow’ button, name your workflow, and click ‘Create’. This will take you to the workflow page where the trigger and action components are configured.


2. Choosing Google Sheets as Your Trigger Application

In this step, we will choose Google Sheets as the trigger application in our automation process. Select Google Sheets and set the trigger event to ‘New or Updated Spreadsheet Row’. This allows the automation to activate whenever a change is made in your specified Google Sheets. using Pabbly Connect

  • Select Google Sheets as the trigger application.
  • Choose ‘New or Updated Spreadsheet Row’ as the trigger event.
  • Copy the webhook URL provided to connect Google Sheets.

After copying the webhook URL, follow the instructions to set up the connection with Google Sheets. This involves pasting the URL into your Google Sheets setup, allowing it to receive data from the sheet.


3. Testing Data Reception from Google Sheets

Once the connection is established, it’s essential to test the data reception from Google Sheets. Perform a test submission to bring some data into the response section of your Guys workflow.

During this test, you will see the trigger column names and the updated tags from your spreadsheet. For example, if you updated a tag to ‘Social Media’, it should reflect in the response section. This confirms that your connection works correctly.

  • Ensure the tag updated is visible in the response.
  • Check that the spreadsheet name and contact details are accurately displayed.
  • Confirm the connection is live and receiving updates.

After confirming the data reception, you can proceed to update the tags in your email marketing tool, ensuring that your automation is functioning as intended.


4. Updating Tags in Active Campaigns

Now that you have successfully tested the data reception, the next step is to update the tags in Active Campaigns using the data received from Google Sheets. To do this, you will need to connect to Active Campaigns and select the action event ‘Add a Tag to Contact’. using Pabbly Connect

Before executing this action, ensure you have the necessary Contact ID and Tag ID. First, search for a contact by email ID to get the Contact ID, and then create a lookup table for the Tag IDs corresponding to the tags you are using.

Connect to Active Campaigns and select ‘Add a Tag to Contact’ as the action event. Search for the contact using their email address from the Google Sheets data. Create a lookup table for the Tag IDs based on the tags used in your campaign.

By completing these steps, you ensure that the correct tags are added to the right contacts in Active Campaigns, enhancing your marketing efforts.


5. Finalizing Your Automation for Real Results

To finalize your automation, ensure all connections and mappings are correctly set. Review the mapping for both the Contact ID and the Tag ID, and perform a test request to confirm that the tags are being updated as expected. using Pabbly Connect

Once you confirm the successful update, you can save your workflow. This automation will now run automatically, updating tags in Active Campaigns whenever changes are made in Google Sheets, providing you with real results without manual intervention.

Review your mappings for accuracy before finalizing. Test the automation to ensure it operates as intended. Save the workflow to activate the automation.

This setup will ensure that your marketing tags are always up to date, maximizing your efficiency and effectiveness in managing your audience.


Conclusion

Integrating Guys with URL Using Pabbly Connect allows you to automate updates in Google Sheets and Active Campaigns, streamlining your marketing processes. By following this tutorial, you can achieve real results efficiently.

Thanks for following along with this tutorial! Remember to subscribe to the channel for more helpful content like this.

If you found this guide useful, please consider giving it a thumbs up and sharing it with others who might benefit from it.

Integrate TidyCal with ActiveCampaign Using Pabbly Connect

Learn how to automate contact creation in ActiveCampaign from TidyCal bookings using Pabbly Connect. Step-by-step guide for seamless integration. Navigate the automation landscape confidently with clear, structured guidance suitable for professionals regardless of prior technical experience.

Watch Step By Step Video Tutorial Below


1. Introduction to Pabbly Connect for TidyCal and ActiveCampaign Integration

Pabbly Connect is a powerful automation tool that allows you to integrate different applications seamlessly. In this tutorial, we will focus on how to automate contact creation in ActiveCampaign from TidyCal bookings using Pabbly Connect. This integration eliminates the need for manual data entry, thus saving time and effort.

To get started, you need to sign up for a free account on Pabbly Connect. Once signed in, you can access the dashboard where you can create workflows. This integration will help you grow your email list directly from your booking application.


2. Creating a Workflow in Pabbly Connect

To create a workflow in Pabbly Connect, begin by clicking on the ‘Create Workflow’ button on the dashboard. You will be prompted to name your workflow. Choose a suitable name that reflects the integration purpose, such as ‘TidyCal to ActiveCampaign Integration’.

Once you name your workflow, click on the ‘Create’ button. This will take you to the workflow page where you will set the trigger and action for your automation. The trigger will be a new booking in TidyCal, and the action will be to create a contact in ActiveCampaign.


3. Setting Up the Trigger with TidyCal

In this section, we will set up the trigger for our automation using Pabbly Connect. Click on the trigger window and search for TidyCal. Select the trigger event as ‘New Booking’. After that, click on the ‘Connect’ button.

Choose ‘Add New Connection’ and log into your TidyCal account. If you are already logged in, the connection will be established automatically. Once connected, click on the ‘Save and Send Test Request’ button to fetch the details of the most recent booking. This step is crucial as it allows Pabbly Connect to capture the booking data needed for the next action.


4. Setting Up the Action with ActiveCampaign

Now that we have our trigger set up, we will configure the action to create a contact in ActiveCampaign. In the action window, search for ActiveCampaign and select the action event as ‘Create a Contact’. Click on the ‘Connect’ button and choose ‘Add New Connection’. using Pabbly Connect

You will need to enter the API key and API URL from your ActiveCampaign account. To find these, go to the settings page in ActiveCampaign, open the developer section, and copy the API key and URL. Make sure to remove the leading ‘HTTP’ from the URL as instructed. After entering these details, click on ‘Save’.

  • Enter the API key and API URL from ActiveCampaign.
  • Remove the leading ‘HTTP’ from the URL.
  • Click on ‘Save’ to establish the connection.

Once connected, map the fields from the TidyCal booking data to the contact fields in ActiveCampaign. This includes the email, first name, and last name. If you need to split the full name into first and last names, you can use the Text Formatter feature in Pabbly Connect to achieve this.


5. Testing the Integration and Finalizing

After mapping the fields, you can test the integration. Click on the ‘Save and Send Test Request’ button to check if the contact is created successfully in ActiveCampaign. Refresh your ActiveCampaign contacts section to see if the new contact appears.

If everything is set up correctly, you will see the newly created contact in your ActiveCampaign account. This confirms that your integration is working as expected. With this setup, every new booking in TidyCal will automatically create a contact in ActiveCampaign, streamlining your email marketing efforts.

  • Ensure all fields are correctly mapped.
  • Test the connection to confirm data flow.
  • Monitor your ActiveCampaign for new contacts.

Congratulations! You have successfully integrated TidyCal with ActiveCampaign using Pabbly Connect. This automation will save you time and enhance your email marketing strategy by ensuring that every booking leads to a new contact.


Conclusion

In this tutorial, we covered how to integrate TidyCal with ActiveCampaign using Pabbly Connect. This automation not only saves time but also ensures that your email marketing efforts are aligned with your booking activities. By following these steps, you can effortlessly grow your email list from your booking application.

Ensure you check out Pabbly Connect to create business automation workflows and reduce manual tasks. Pabbly Connect currently offer integration with 2,000+ applications.

Automate WooCommerce and MySQL Updates with Pabbly Connect

Learn how to automate product details updates between WooCommerce and MySQL using Pabbly Connect in this detailed tutorial. This comprehensive guide reveals exactly how to connect your applications and automate repetitive tasks — accessible for professionals of all technical backgrounds.

Watch Step By Step Video Tutorial Below


1. Setting Up Pabbly Connect for WooCommerce and MySQL Integration

To start the automation process, you need to access Pabbly Connect. This platform allows you to connect your WooCommerce store with your MySQL database seamlessly. First, sign up for a free account on Pabbly Connect if you haven’t already.

Once logged in, navigate to the dashboard and click on ‘Create Workflow’. Name your workflow something recognizable, like ‘WooCommerce to MySQL’. This will help you easily identify the automation later.


2. Triggering Updates from WooCommerce to Pabbly Connect

In this step, we will set up the trigger in Pabbly Connect to capture updates from WooCommerce. Click on the trigger window and select WooCommerce as the app. Choose the trigger event ‘Product Updated’ from the dropdown.

  • Select WooCommerce as the application.
  • Choose ‘Product Updated’ as the trigger event.
  • Copy the webhook URL provided by Pabbly Connect.

Next, go to your WooCommerce settings in your WordPress dashboard. Under the ‘Advanced’ tab, find the option for webhooks. Here, click on ‘Add Webhook’ to create a new webhook. Name it something like ‘Pabbly Connect Webhook’ and set the status to active.


3. Configuring the WooCommerce Webhook for Pabbly Connect

After creating the webhook, you need to configure it to work with Pabbly Connect. In the webhook settings, paste the copied webhook URL into the ‘Delivery URL’ field. Select ‘Product Updated’ as the topic and save the webhook.

Once saved, return to Pabbly Connect and click on the ‘Re-capture Webhook Response’ button. This will allow Pabbly Connect to listen for updates from your WooCommerce store. Now, update a product in WooCommerce to test the connection.


4. Updating MySQL Database with Product Details

Now that we have received a response from WooCommerce in Pabbly Connect, we can set up the action to update our MySQL database. In the action window, select MySQL as the app and choose ‘Update Rows’ as the action event.

Connect your MySQL account by entering the database username, password, hostname, and database name. Once connected, select the table where your WooCommerce product details are stored. Map the updated product details from WooCommerce to the respective fields in your MySQL table.

  • Map the product ID from WooCommerce to the product ID field in MySQL.
  • Map the updated product name, price, and stock quantity accordingly.
  • Set the condition to find the row to update using the product ID.

After mapping all necessary fields, click on ‘Save & Send Test Request’. This will send the updated details to your MySQL database, completing the integration process.


5. Testing the Automation Workflow

To ensure everything is working correctly, perform a test by updating a product in your WooCommerce store. Check the MySQL database to see if the updated details reflect correctly. If the product’s stock quantity was updated, it should now show the new value in the database.

Once you confirm that the updates are successful, your automation workflow is complete. With Pabbly Connect, you have automated the process of syncing product details between WooCommerce and your MySQL database. This means every time a product is updated in WooCommerce, the changes will be automatically reflected in your MySQL database.


Conclusion

In this tutorial, we demonstrated how to use Pabbly Connect to automate the integration between WooCommerce and MySQL. By setting up triggers and actions, you can ensure that product updates are reflected in real-time, enhancing your e-commerce operations.

Ensure you check out Pabbly Connect to create business automation workflows and reduce manual tasks. Pabbly Connect currently offer integration with 2,000+ applications.

Automate Microsoft Excel with Pabbly Connect and Contact Form 7

Learn how to automate Microsoft Excel with Pabbly Connect and Contact Form 7 submissions. Step-by-step tutorial for seamless integration. Explore systematic approaches to creating efficient automation solutions that convert technical concepts into practical, implementable instructions.

Watch Step By Step Video Tutorial Below


1. Introduction to Pabbly Connect for Integration

Pabbly Connect is a powerful integration platform that allows you to automate workflows between different applications. In this tutorial, we will focus on how to use Pabbly Connect to integrate Contact Form 7 with Microsoft Excel. This integration enables automatic data transfer from form submissions to your Excel sheets, saving you time and effort.

To get started, ensure that you have a Pabbly Connect account. If you don’t have one, you can create a free account in just a few minutes. Once logged in, you will access the dashboard where you can create workflows connecting various applications.


2. Creating a Workflow in Pabbly Connect

To create a workflow in Pabbly Connect, click on the ‘Create Workflow’ button on your dashboard. You will need to provide a name for your workflow, such as ‘Add Contact Form 7 Submissions to Microsoft Excel Automatically.’ This name will help you identify the workflow later.

Once you’ve named your workflow, you will see two boxes labeled Trigger and Action. The trigger is the event that starts the workflow, while the action is what happens as a result. In this case, the trigger will be a new form submission in Contact Form 7, and the action will be adding that data to Microsoft Excel.


3. Setting Up Contact Form 7 Integration with Pabbly Connect

In this step, we will set up the integration between Contact Form 7 and Pabbly Connect. First, select ‘Contact Form 7’ as your trigger application and choose the trigger event as ‘New Form Submission.’ After selecting this, you will receive a webhook URL from Pabbly Connect.

Now, go to your WordPress dashboard and navigate to the Contact Form 7 plugin. Edit the form you want to connect, and look for the ‘Webhook’ option. You need to paste the webhook URL you copied from Pabbly Connect into this field. Don’t forget to check the box to enable sending to the webhook. Save the form to establish the connection.


4. Mapping Data to Microsoft Excel

After setting up the webhook, it’s time to map the data to Microsoft Excel using Pabbly Connect. Select Microsoft Excel as your action application and choose the action event ‘Add Row to Worksheet.’ You will need to connect your Excel account to Pabbly Connect by granting the necessary permissions.

Once connected, select the specific workbook where you want to store the form submissions. The columns from your Excel sheet will automatically appear in Pabbly Connect. You can now map the fields from the form submission to the corresponding columns in Excel. This mapping tells Pabbly Connect how to transfer the data accurately.

  • Select the correct workbook and worksheet.
  • Map each form field to the corresponding Excel column.
  • Ensure all necessary fields are mapped correctly.

Finally, save the mapping and test the workflow by submitting a dummy form. Check your Excel sheet to confirm that the data appears as expected. This step ensures that your integration is functioning correctly.


5. Testing the Integration with Pabbly Connect

To ensure everything is working smoothly, it’s crucial to test the integration between Contact Form 7 and Microsoft Excel through Pabbly Connect. Submit a test entry through your form and monitor the response in Pabbly Connect’s dashboard. You should see the data being captured in real-time.

If the test submission is successful, check your Microsoft Excel sheet for the newly added row containing the form submission data. This confirms that the integration is functioning as intended, automating the process of data entry from your forms directly into Excel.

Once confirmed, you can relax knowing that every form submission will automatically update your Excel sheet without any manual intervention. This automation significantly enhances productivity and data management.


Conclusion

By using Pabbly Connect, you can seamlessly integrate Contact Form 7 with Microsoft Excel, automating the data transfer process. This tutorial covered the essential steps to set up this integration, allowing you to manage your form submissions efficiently.

Ensure you check out Pabbly Connect to create business automation workflows and reduce manual tasks. Pabbly Connect currently offer integration with 2,000+ applications.

Integrating Pabbly with Discord Using Pabbly Connect: A Step-by-Step Guide

Learn how to automate form responses from Pabbly to Discord using Pabbly Connect. Follow this detailed tutorial for seamless integration. Master proven automation processes with practical implementation examples and strategic recommendations you can apply immediately in your workflow.

Watch Step By Step Video Tutorial Below


1. Accessing Pabbly Connect for Integration

To start using Pabbly Connect for integrating Pabbly with Discord, first, log in to your Pabbly Connect account. If you don’t have an account, you can create one for free in just a few minutes. Once logged in, you will be directed to the dashboard where you can create new workflows for automation.

Click on the blue button labeled ‘Create Workflow’ to begin. You’ll need to name your workflow something descriptive, like ‘Send Form Responses to Discord’. After naming, click on the ‘Create’ button to proceed to the next step of setting up the integration.


2. Setting Up the Trigger in Pabbly Connect

The next step involves setting up the trigger event in Pabbly Connect. This trigger will activate whenever a new form submission is received in Pabbly. In the trigger section, select the application ‘Make Forms’ and choose the event ‘New Form Submission’ as your trigger event.

  • Select ‘Make Forms’ as the application.
  • Choose ‘New Form Submission’ as the trigger event.
  • Copy the webhook URL provided by Pabbly Connect.

Now, go back to your Make Forms application and navigate to the settings of your form. Here, you will find the integration option where you can add the webhook. Paste the copied URL and choose the method as POST. This establishes the connection between Make Forms and Pabbly Connect.


3. Testing the Connection with a Sample Submission

After setting up the webhook, it’s time to test the connection. Fill out the form with some sample data and submit it. This action will trigger the webhook, sending the data to Pabbly Connect.

  • Submit the form with test data.
  • Check Pabbly Connect for the received data.
  • Ensure the response indicates success.

If successful, you’ll see the form data captured in Pabbly Connect. This confirms that the connection between Make Forms and Pabbly Connect is working properly.


4. Setting Up the Discord Action in Pabbly Connect

The final step is to set up the action in Pabbly Connect to send the form responses to your Discord channel. Select Discord as the application and choose the action event ‘Send Channel Message’.

You’ll need to provide the webhook URL from Discord. To get this, go to your Discord channel, navigate to server settings, and create a new webhook. Copy this URL and paste it into Pabbly Connect along with the message format you want to send.


5. Conclusion: Automate Your Workflow with Pabbly Connect

In this tutorial, you’ve learned how to integrate Pabbly with Discord using Pabbly Connect. By following the steps outlined, you can automate the process of sending form responses directly to your team on Discord, ensuring timely communication and efficiency.

Ensure you check out Pabbly Connect to create business automation workflows and reduce manual tasks. Pabbly Connect currently offer integration with 2,000+ applications.

Check out Pabbly Connect – Automate your business workflows effortlessly! Sign Up Free – Start your journey with ease! 10,000+ Video Tutorials – Learn step by step! Join Pabbly Facebook Group – Connect with 21,000+ like minded people!

With Pabbly Connect, you can easily connect multiple applications and streamline your workflows. Start automating today to enhance your productivity and keep your team updated in real-time.

Integrate Active Campaign with Go High Level Using Pabbly Connect

Learn how to integrate Active Campaign with Go High Level using Pabbly Connect for seamless automation. Follow this step-by-step guide to set up your workflow effortlessly.

Watch Step By Step Video Tutorial Below


1. Accessing Pabbly Connect for Integration

To start integrating Active Campaign with Go High Level, first access Pabbly Connect. Open your browser and type in the URL for Pabbly Connect to reach the landing page.

On the landing page, you will see options to sign in or sign up for free. If you are a new user, click on ‘Sign up for free’ to create a new account. Existing users can simply sign in. Upon signing up, you will receive 100 free tasks to explore the platform.


2. Creating a Workflow in Pabbly Connect

Once logged into Pabbly Connect, navigate to the dashboard where you can create new workflows. Click on ‘Create Workflow’ in the top right corner.

  • Name your workflow, for example, ‘Create Contacts in Go High Level from Active Campaign’.
  • Select Active Campaign as your trigger application.
  • Set the trigger event to ‘Contact Added’.

After setting these parameters, click on ‘Connect’ to establish a connection between Active Campaign and Pabbly Connect.


3. Connecting Active Campaign to Pabbly Connect

To connect Active Campaign with Pabbly Connect, you will need your API key and URL. In your Active Campaign account, go to the settings section, then select ‘Developer’.

  • Copy the API key and paste it into Pabbly Connect.
  • Copy the URL, ensuring to omit ‘https’ before pasting it into Pabbly Connect.

After entering these details, click ‘Save’. You will see that your Active Campaign account is now successfully connected to Pabbly Connect.


4. Creating a Contact in Go High Level

With Active Campaign connected, the next step is to create a contact in Go High Level. Select Go High Level as your action application in Pabbly Connect.

Choose ‘Create Contact’ as the action event. Click on ‘Connect’ and add a new connection to Go High Level. Ensure you are logged into your Go High Level account for easier connection.

Once connected, you will need to map the data from Active Campaign to Go High Level by filling in the required fields such as first name, last name, email, and phone number.


5. Testing the Integration

To ensure that everything is working correctly, create a new contact in Active Campaign. Fill in the details and click ‘Add’. This action will trigger the workflow in Pabbly Connect.

Return to Pabbly Connect to check if the response from Active Campaign has been received. If successful, you will see the new contact details populated in Pabbly Connect. After confirming the data, check your Go High Level account.

Refresh the contact section to see if the new contact has been created with the same details. This confirms that your integration between Active Campaign and Go High Level via Pabbly Connect is successful.


Conclusion

In this tutorial, we learned how to integrate Active Campaign with Go High Level using Pabbly Connect. By following these steps, you can automate the contact creation process seamlessly.

Ensure you check out Pabbly Connect to create business automation workflows and reduce manual tasks. Pabbly Connect currently offer integration with 2,000+ applications.