How to Share Facebook Page Posts on Reddit with Pabbly Connect

Learn how to automate sharing Facebook page posts on Reddit using Pabbly Connect. Follow this detailed tutorial for step-by-step instructions. Implement the precise methodologies leading organizations use to automate repetitive tasks, illustrated with practical examples designed for immediate application.

Watch Step By Step Video Tutorial Below


1. Accessing Pabbly Connect for Integration

To share Facebook page posts on Reddit, the first step is accessing Pabbly Connect. You can reach the platform by entering Pabbly.com/connect in your browser. This powerful automation tool allows seamless integration between various applications.

Once on the homepage, you will see options to sign in or sign up for free. If you are a new user, click on ‘Sign up for free’ to create your account. Existing users can simply click on ‘Sign in’. After signing up, you will receive 100 free tasks monthly to explore the features of Pabbly Connect.


2. Creating a New Workflow in Pabbly Connect

After logging into Pabbly Connect, navigate to the dashboard where you can manage your workflows. To create a new workflow, click on the ‘Create Workflow’ button. A dialog box will appear asking for a name for your workflow.

  • Enter a name like ‘Share Facebook Page Post on Reddit’.
  • Select a folder to save the workflow, such as ‘Test Integrations’.
  • Click on ‘Create’ to proceed.

This action opens two windows: one for the trigger and another for the action. The trigger indicates the event that starts the automation, while the action defines what happens in response to that trigger.


3. Setting Up Trigger for Facebook Pages

In the trigger window, select ‘Facebook Pages’ as the application. Next, choose the trigger event as ‘New Post’. This ensures that whenever a new post is created on your Facebook page, the workflow will initiate.

Click on ‘Connect’ and select ‘Add New Connection’ to link your Facebook account with Pabbly Connect. After successful authorization, choose the specific Facebook page you want to monitor for new posts. For example, select ‘Lifeare Supplement Store’.


4. Testing the Facebook Connection

After selecting your Facebook page, click on ‘Save and Send Test Request’. This prompts Pabbly Connect to wait for a webhook response. To test this, create a new post on your selected Facebook page.

  • Create a post titled ‘Hacks to Healthy Life’.
  • Include some content in the post.
  • Click on ‘Post’ to publish it.

Once the post is published, return to Pabbly Connect, where you should see the details of the post captured successfully. This indicates that the Facebook trigger is functioning correctly.


5. Configuring the Action to Share on Reddit

Now, move to the action window and select ‘Reddit’ as your action application. Choose the action event as ‘Submit a Text Post’. This allows you to share the content of your Facebook post on Reddit.

Click on ‘Connect’ and select ‘Add New Connection’ to authorize your Reddit account. After successful authorization, enter the required details to create a new post on Reddit, mapping the title and text from the Facebook post response.

Map the title to the Facebook page name. Map the text to the content of the Facebook post. Specify the subreddit where you want to post.

After filling in these details, click on ‘Save and Send Test Request’. Check your Reddit community to confirm that the post has been created successfully. This completes the integration between Facebook and Reddit using Pabbly Connect.


Conclusion

In this tutorial, we demonstrated how to use Pabbly Connect to automate sharing Facebook page posts on Reddit. By following these steps, you can streamline your social media sharing process effectively.

Ensure you check out Pabbly Connect to create business automation workflows and reduce manual tasks. Pabbly Connect currently offer integration with 2,000+ applications.

How to Publish Your Posts from Blogger to WordPress Using Pabbly Connect

Learn how to automate publishing posts from Blogger to WordPress with Pabbly Connect. Follow our step-by-step tutorial for seamless integration. Explore systematic approaches to creating efficient automation solutions that convert technical concepts into practical, implementable instructions.

Watch Step By Step Video Tutorial Below


1. Accessing Pabbly Connect for Blogger to WordPress Integration

To publish your posts from Blogger to WordPress, you need to access Pabbly Connect. Start by visiting the Pabbly website and signing in or signing up for a free account. This process takes only a couple of minutes, and you will get access to numerous automation tasks monthly.

Once logged in, click on the ‘Access Now’ button under Pabbly Connect. You will be directed to the dashboard, where you can create a new workflow for your Blogger to WordPress integration.


2. Creating a New Workflow in Pabbly Connect

In your Pabbly Connect dashboard, click on the ‘Create Workflow’ button. Name your workflow something descriptive, like ‘Publish Posts from Blogger to WordPress’. After naming, select the folder where you want to save this workflow and click on ‘Create’.

  • Name your workflow appropriately.
  • Select the folder for better organization.
  • Click ‘Create’ to proceed.

Now you will see two boxes labeled Trigger and Action. The trigger is the event that starts the workflow, while the action is what happens as a result. Set up your trigger first by selecting Google Blogger as the application.


3. Setting Up the Trigger for Google Blogger

In the trigger section of Pabbly Connect, search for and select Google Blogger. Choose the trigger event ‘New Post Added’ to capture new posts. Then, click on ‘Connect’ to link your Google Blogger account to Pabbly Connect.

After clicking ‘Connect’, you will need to sign in with your Google account and grant the necessary permissions. Once connected, select your blog ID from Blogger and set the status to ‘Only Live’. This ensures that only published posts trigger the workflow.


4. Transforming Data Using Pabbly Connect

Next, we will use the Data Transformer feature in Pabbly Connect to clean up the content from Blogger. Add an action step and select ‘Data Transformer’ as your application. Choose the action event ‘Strip HTML Tags’ to remove any HTML formatting from the blog content.

Map the content from the previous step as the encoded string in the Data Transformer. Click ‘Save and Test Request’ to ensure that the content is stripped of HTML tags. This is crucial for ensuring clean content for your WordPress post.

  • Select ‘Data Transformer’ as the action application.
  • Choose ‘Strip HTML Tags’ as the action event.
  • Map the content and save the request.

Once you receive the response, you will see that the content is clean and ready to be published on WordPress. This step is essential to ensure that your blog looks professional and readable.


5. Creating a New Post in WordPress

Now, proceed to create a new post in WordPress as the final action step in your Pabbly Connect workflow. Add another action step and select ‘WordPress’ as the application. Choose the action event ‘Create a Post’.

Connect your WordPress account by entering your username, password, and the base URL of your WordPress site. Ensure the base URL is formatted correctly by removing any unnecessary parts and keeping it to the main URL path. After connecting, fill in the post title and content using the mapped data from the previous steps.

Finally, click ‘Save and Send Test Request’ to publish the post on your WordPress site. You will receive a response confirming the post ID of the newly created post, indicating that your integration has been successful.


Conclusion

In this tutorial, we demonstrated how to use Pabbly Connect to automate the process of publishing posts from Blogger to WordPress. By following the steps outlined, you can efficiently set up your integration and ensure that your blogging workflow is seamless and effective.

Ensure you check out Pabbly Connect to create business automation workflows and reduce manual tasks. Pabbly Connect currently offer integration with 2,000+ applications.

Create an Airtable Record from an Email with Pabbly Connect: A Step-by-Step Guide

Learn how to create an Airtable record from a Gmail email using Pabbly Connect with this detailed tutorial. Follow the exact steps for seamless integration.

Watch Step By Step Video Tutorial Below


1. Accessing Pabbly Connect for Gmail and Airtable Integration

To create an Airtable record from an email, you first need to access Pabbly Connect. This platform serves as the central hub for your integration process. Start by signing into your Pabbly Connect account. If you are new, you can sign up for free and receive 100 tasks each month.

Once logged in, navigate to the Pabbly Connect dashboard. Click on the ‘Create Workflow’ button to begin setting up your automation. In the dialog box that appears, give your workflow a name like ‘Create an Airtable Record from an Email’ and select a folder to save it in. Click ‘Create’ to proceed.


2. Setting Up the Trigger in Pabbly Connect

The next step is to set up the trigger for your workflow using Pabbly Connect. Here, you will use the Email Parser as your trigger application to fetch emails from your Gmail account. Select ‘Email Parser’ as your trigger application.

  • Choose ‘Email Parser’ from the list of applications.
  • Set the trigger event to capture new emails.
  • Connect your Gmail account to the Email Parser.

After setting up the trigger, you will receive a hook URL. Copy this address, as it will be used to configure your Gmail settings for forwarding emails.


3. Configuring Gmail for Email Forwarding

To ensure that new emails are forwarded to Pabbly Connect, you need to configure your Gmail settings. Open your Gmail account, go to Settings, and navigate to the ‘Forwarding and POP/IMAP’ tab.

  • Add the forwarding address provided by the Email Parser.
  • Confirm the forwarding address via the confirmation link sent to the Email Parser.
  • Set Gmail to forward a copy of incoming mail to the Email Parser.

Once you save these changes, any new email will be captured by Pabbly Connect automatically, starting the workflow execution in real-time.


4. Adding a Filter Step in Pabbly Connect

After setting up the trigger, it’s essential to filter the emails that will proceed to create a record in Airtable. In Pabbly Connect, click on ‘Add Action Step’ and choose ‘Filter’ to specify conditions for the emails.

Set the filter to only allow emails with specific subject lines, such as those containing ‘social media planning.’ This ensures that only relevant emails trigger the subsequent actions in your workflow.

Select the filter type as ‘Contains’. Enter ‘social media planning’ as the value to filter. Save and test the filter to ensure it works correctly.

Once the filter is set up successfully, only emails matching your criteria will move forward in the workflow.


5. Creating an Airtable Record Using Pabbly Connect

The final step is to create a record in Airtable using the details captured from the email via Pabbly Connect. Select Airtable as your action application and choose ‘Create Record’ as the action event.

To establish a connection between Airtable and Pabbly Connect, you will need an API token from your Airtable account. Go to your Airtable developer hub, create a new token with the necessary scopes, and copy it.

Paste the token into Pabbly Connect to establish the connection. Select the Airtable base where you want to create the record. Map the subject, body content, and sender email from the parsed email into the corresponding fields in Airtable.

After mapping the fields, click ‘Save and Send Test Request’ to create the record. If successful, you will see the new record created in your Airtable account.


Conclusion

Using Pabbly Connect, you can efficiently create an Airtable record from an email by following these detailed steps. This integration automates the process, ensuring that relevant emails are captured and recorded seamlessly. Enjoy the benefits of streamlined workflows with Pabbly Connect!

Ensure you check out Pabbly Connect to create business automation workflows and reduce manual tasks. Pabbly Connect currently offer integration with 2,000+ applications.

Automate WhatsApp Messages to Facebook Leads Using Pabbly Connect

Learn how to automate WhatsApp messages to your Facebook leads using Pabbly Connect. Follow this detailed tutorial for seamless integration. Explore efficient methods for automating routine tasks with clear, concise instructions suited for both newcomers and experienced professionals.

Watch Step By Step Video Tutorial Below


1. Accessing Pabbly Connect for Integration

To send automated WhatsApp messages to your Facebook leads, the first step is to access Pabbly Connect. Start by navigating to the Pabbly website and signing in or creating a new account if you don’t have one.

Once logged in, click on the Pabbly Connect option. Here, you can create a new workflow that will facilitate the integration of Facebook Lead Ads with WhatsApp messaging through Wati.


2. Creating a New Workflow in Pabbly Connect

In Pabbly Connect, click on the ‘Create Workflow’ button. You will be prompted to name your workflow. For this integration, name it ‘Send Automated WhatsApp Message to Sports Equipment Business Leads’. Select a folder to save the workflow, then click on ‘Create’.

  • Name the workflow according to its purpose.
  • Choose a folder for better organization.
  • Click on ‘Create’ to proceed.

After creation, you will see two sections: Trigger and Action. The trigger will be set to Facebook Lead Ads, and the action will be set to Wati for sending WhatsApp messages.


3. Setting Up the Trigger in Pabbly Connect

To set up the trigger, select Pabbly Connect and choose Facebook Lead Ads as the trigger application. The trigger event will be ‘New Lead Instant’. Click to connect your Facebook account with Pabbly Connect.

Once connected, you will be prompted to select the Facebook page and the lead generation form. Make sure to select your sports equipment business page, ‘Sports Gearhub’, and the form titled ‘New Lead Form’. This step ensures that every new lead captured will trigger the WhatsApp message.


4. Sending WhatsApp Messages Using Wati and Pabbly Connect

Now, set up the action step by selecting Wati as the action application in Pabbly Connect. Choose the action event ‘Send Template Message’. You will need to connect Wati by entering the API endpoint and access token.

  • Access your Wati account to retrieve the API endpoint and access token.
  • Paste these details into Pabbly Connect to establish the connection.
  • Map the WhatsApp number and template message as per your requirements.

After mapping, click on ‘Save and Continue’ to finalize the action setup. This will ensure that every new lead receives an automated WhatsApp message instantly.


5. Testing the Integration in Pabbly Connect

To test the integration, create a sample lead submission via Facebook. Fill out the form with dummy details to trigger the workflow in Pabbly Connect. Once submitted, check the WhatsApp number provided to ensure the automated message has been sent successfully.

After testing, you should see a confirmation message in WhatsApp stating, ‘Hello [Name], we are very glad to connect with you…’ This indicates that the integration between Facebook Lead Ads and WhatsApp messaging through Pabbly Connect is working effectively.


Conclusion

In this tutorial, we explored how to use Pabbly Connect to send automated WhatsApp messages to Facebook leads for your sports equipment business. By following the outlined steps, you can efficiently automate your lead communication process.

Ensure you check out Pabbly Connect to create business automation workflows and reduce manual tasks. Pabbly Connect currently offer integration with 2,000+ applications.

How to Send Automated WhatsApp Messages to Facebook Leads for Print Media Business Using Pabbly Connect

Learn how to send automated WhatsApp messages to Facebook leads for your print media business using Pabbly Connect. Step-by-step tutorial included. This comprehensive guide reveals exactly how to connect your applications and automate repetitive tasks — accessible for professionals of all technical backgrounds.

Watch Step By Step Video Tutorial Below


1. Accessing Pabbly Connect for Your Print Media Business

To send automated WhatsApp messages to Facebook leads for your print media business, you’ll first need to access Pabbly Connect. Sign in to your existing account or click on the ‘Sign Up for Free’ button if you’re a new user. This platform allows you to automate tasks seamlessly.

Once logged in, navigate to the dashboard and select Pabbly Connect from the applications page. From here, you can start creating your automation workflow. Click on the ‘Create Workflow’ button to begin the setup process.


2. Creating Your Workflow in Pabbly Connect

In this step, you will create a new workflow to automate sending WhatsApp messages. Name your workflow as ‘Send Automated WhatsApp Message to Facebook Leads’ and select the appropriate folder for organization. This is where Pabbly Connect shines by allowing you to manage multiple workflows efficiently.

  • Name your workflow appropriately.
  • Select a folder for organization.
  • Click on ‘Create’ to finalize your workflow.

Once the workflow is created, you will see the trigger and action setup. The trigger is set to Facebook Lead Ads, which will activate whenever a new lead is generated. This integration is facilitated by Pabbly Connect, ensuring that your automated WhatsApp message is sent instantly.


3. Setting Up the Trigger with Facebook Lead Ads

Now it’s time to set up the trigger in Pabbly Connect. Choose Facebook Lead Ads as your trigger application and select the event as ‘New Lead Instant’. This means every time a new lead comes in through your Facebook ads, the workflow will initiate automatically.

To connect your Facebook account, click on ‘Connect’ and authorize Pabbly Connect to access your Facebook account. Once connected, select the Facebook page and lead form associated with your print media business. This step is crucial for ensuring that the right leads are captured for your automated messaging.


4. Setting Up the Action to Send WhatsApp Messages

In this step, you will set the action to send WhatsApp messages using the WATI application within Pabbly Connect. Search for WATI and select the action event as ‘Send Template Message’. This setup allows you to send customized messages to your leads automatically.

  • Select WATI as your action application.
  • Choose ‘Send Template Message’ as the action event.
  • Map the lead’s phone number and other details accordingly.

Once you have configured the action settings, you can create a message template that includes personalized greetings and information about your print media services. This is where Pabbly Connect enhances your engagement with potential clients by automating the messaging process.


5. Testing the Integration for Automated Messaging

After setting up both the trigger and action, it’s essential to test the integration to ensure everything works smoothly. Use the Meta for Developers tool to create a test lead. This will simulate a lead submission and allow Pabbly Connect to capture the data accurately.

Once the test lead is created, return to Pabbly Connect and check for the response. If the lead details are captured successfully, the automated WhatsApp message will be sent to the lead’s phone number. This confirmation indicates that your integration is working as intended.

With this setup, every new lead generated from your Facebook ads will receive an automated WhatsApp message, enhancing your communication and marketing efforts in the print media business.


Conclusion

In conclusion, using Pabbly Connect to send automated WhatsApp messages to Facebook leads simplifies communication for your print media business. This integration not only saves time but also ensures that your leads receive timely responses, enhancing customer engagement and satisfaction.

Ensure you check out Pabbly Connect to create business automation workflows and reduce manual tasks. Pabbly Connect currently offer integration with 2,000+ applications.

Automatically Enroll Participants in GoToWebinar for New Sales in Pabbly Subscription Billing

Learn how to automatically enroll participants in GoToWebinar for new sales using Pabbly Subscription Billing and Pabbly Subscription Billing with this step-by-step tutorial. Master subscription management with practical techniques to handle free trials, coupon codes, and special offers that drive conversion and retention.

Watch Step By Step Video Tutorial Below


1. Setting Up Pabbly Subscription Billing for Integration

To automatically enroll participants in GoToWebinar for a new sale in Pabbly Subscription Billing, you first need to access Pabbly Subscription Billing. This platform enables you to manage subscriptions effectively. Start by signing in to your Pabbly account or creating a new one if you haven’t already.

Once logged in, you will see the dashboard where you can manage your products and subscriptions. Ensure you have at least one product set up in Pabbly Subscription Billing to proceed with the integration. Navigate to the settings to prepare for the webhook setup.


2. Creating the Integration Workflow with Pabbly Connect

Next, you will create a workflow in Pabbly Connect to connect Pabbly Subscription Billing with GoToWebinar. Click on the ‘Create Workflow’ button. Name your workflow appropriately, such as ‘Enroll Registrant in GoToWebinar for New Subscription.’ This name reflects the purpose of your integration.

  • Select the trigger application as Pabbly Subscription Billing.
  • Set the trigger event to ‘Subscription Activated’.
  • Connect Pabbly Subscription Billing with Pabbly Connect using the provided webhook URL.

After setting the trigger, you will need to configure the webhook in Pabbly Subscription Billing. Go to the settings, find the webhook settings, and add a new webhook using the URL generated by Pabbly Connect. This step is crucial as it links the two applications.


3. Activating a New Subscription in Pabbly Subscription Billing

Now that your workflow is set up, you need to activate a new subscription in Pabbly Subscription Billing. Navigate to the subscription section and click on the ‘Add Subscription’ button. Enter the customer’s email and select the product and plan you wish to activate.

  • Choose the customer email for the new subscription.
  • Select the product and plan from the dropdown.
  • Provide a subscription reason and save the subscription.

Once you save the subscription, the status will change to live, and this will trigger the webhook you set up earlier. This action will send the subscription details to Pabbly Connect, where they will be used to create a registrant in GoToWebinar.


4. Registering Participants in GoToWebinar

After the subscription is activated, you will proceed to register the participant in GoToWebinar. In your Pabbly Connect workflow, set the action application to GoToWebinar and select ‘Create Registrant’ as the action event. This step is where the integration comes full circle. using Pabbly Connect

Connect your GoToWebinar account to Pabbly Connect. You will need to specify the webinar details, including the date and time. Ensure you convert the time from IST to UTC if necessary, as GoToWebinar requires UTC format for scheduling.


5. Conclusion: Successfully Automating Enrollment

In conclusion, you have successfully set up an integration between Pabbly Subscription Billing and GoToWebinar using Pabbly Connect. This automation allows you to automatically enroll participants whenever a new subscription is activated. You have learned the precise steps to create a seamless workflow that enhances your subscription management and webinar registration process.

Ensure you check out Pabbly Connect to create business automation workflows and reduce manual tasks. Pabbly Connect currently offer integration with 2,000+ applications.

By following this tutorial, you can ensure that every new sale in Pabbly Subscription Billing translates into a new registrant in GoToWebinar, streamlining your processes and improving efficiency.

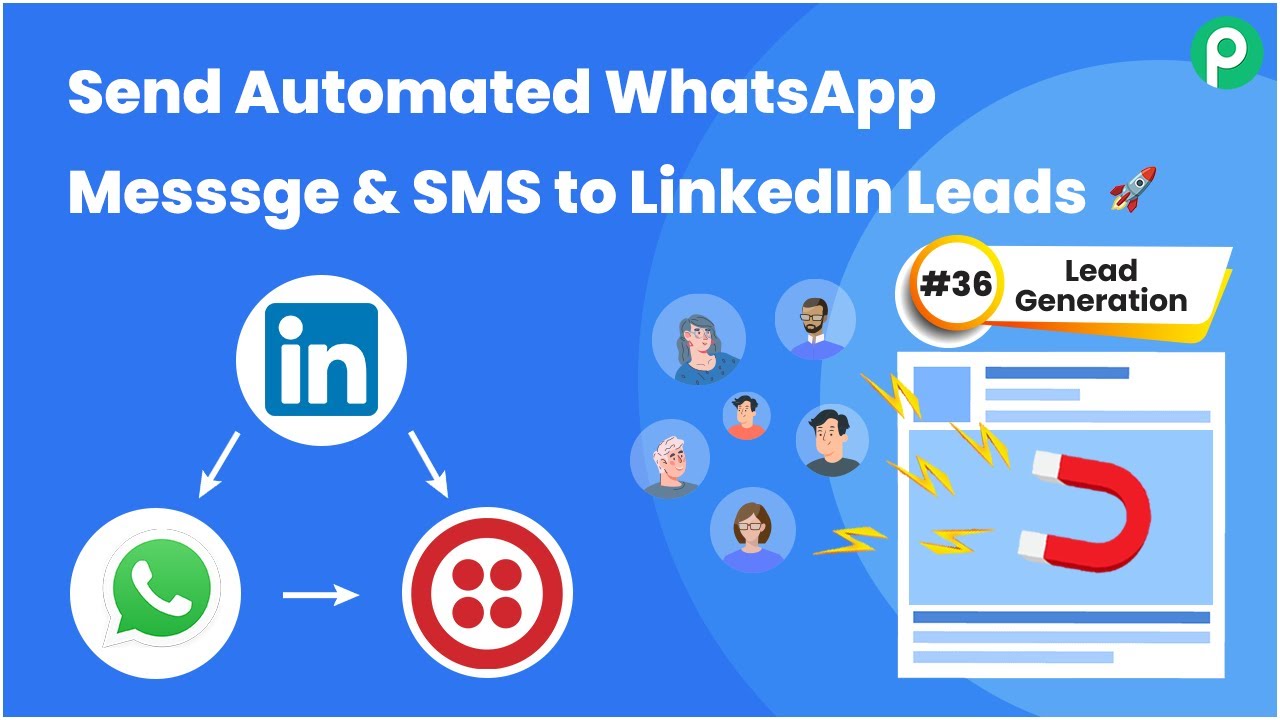
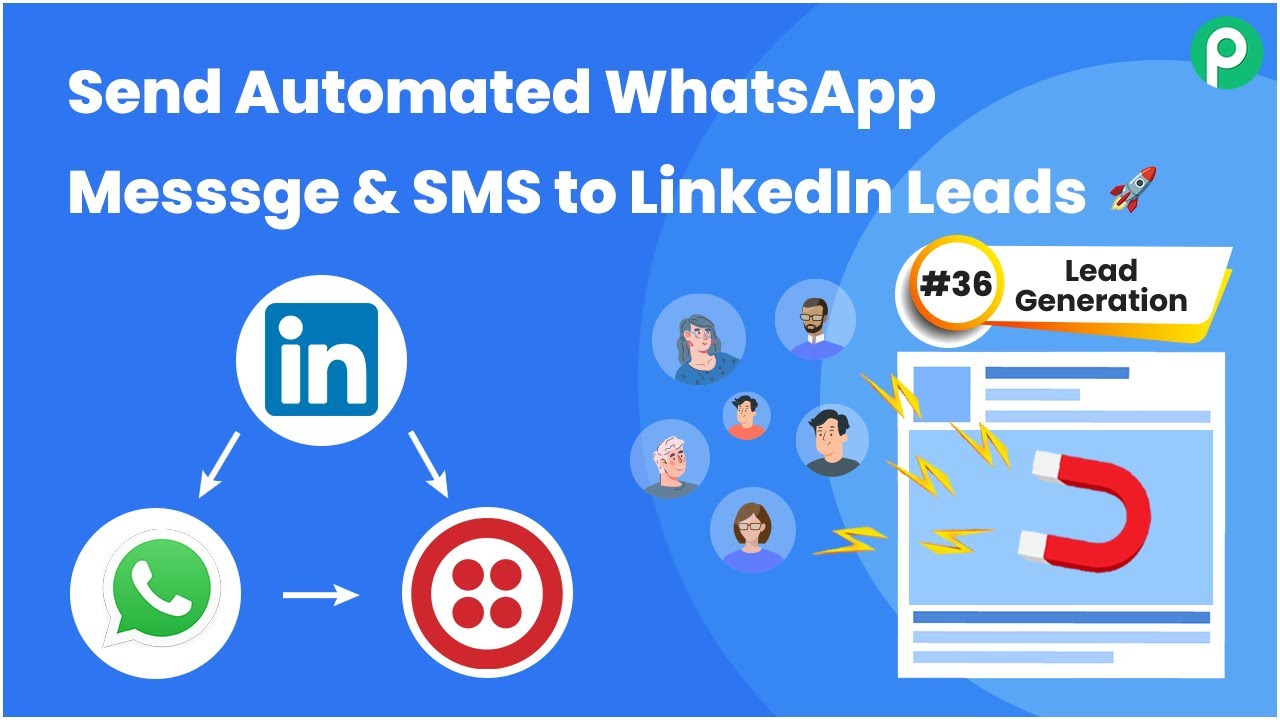
Automate WhatsApp Messages and SMS to LinkedIn Leads Using Pabbly Connect

Learn how to automate WhatsApp messages and SMS to LinkedIn leads using Pabbly Connect. This step-by-step tutorial covers the entire integration process. Navigate the automation landscape confidently with clear, structured guidance suitable for professionals regardless of prior technical experience.

Watch Step By Step Video Tutorial Below


1. Accessing Pabbly Connect for Automation

To start automating WhatsApp messages and SMS for LinkedIn leads, you need to access Pabbly Connect. First, create a free account on the platform, which can be done in just a couple of minutes. After signing up, log in to your Pabbly Connect dashboard to begin the automation process.

Once logged in, click on the blue button labeled ‘Create Workflow’ to initiate a new automation. You will then be prompted to name your workflow, such as ‘Send Automated WhatsApp Message and SMS for LinkedIn Leads’. Select the appropriate folder for your workflow and click on ‘Create’ to proceed.


2. Setting Up Trigger and Action in Pabbly Connect

In Pabbly Connect, the next step involves setting up the trigger and action for your automation. The trigger will capture new leads from the LinkedIn Lead Generation Form, while the actions will send WhatsApp messages via Vati and SMS via Twilio. This setup is crucial for ensuring that your leads receive timely communication.

  • Select ‘New Lead Generation Form Response’ as the trigger event.
  • Connect your LinkedIn account by clicking ‘Connect’ and then ‘Add New Connection’.
  • Choose the specific lead generation form you want to use.

After setting up the trigger, you will need to select the action applications. Choose Vati for WhatsApp messaging and Twilio for SMS. Click the plus icon to add these action steps, ensuring that both applications are connected through Pabbly Connect for seamless integration.


3. Configuring WhatsApp Messages with Vati

Now it’s time to configure the WhatsApp messages that will be sent through Vati. In Pabbly Connect, select the action event as ‘Send Template Message’. You will need to connect your Vati account by providing the API endpoint and access token, which can be found in the Vati API documentation. using Pabbly Connect

Once connected, you will configure the WhatsApp message details. Start by mapping the WhatsApp number from the lead data captured by Pabbly Connect, ensuring that it is formatted correctly without the plus sign. Next, select the template you want to use for your message, making sure it has been approved by WhatsApp.

In the message template, you can include variables that will automatically replace with lead-specific data when the message is sent. This personalization increases engagement and effectiveness. After filling in all necessary fields, click ‘Save and Send Test Request’ to verify that everything is working as expected.


4. Sending SMS Messages via Twilio

After configuring WhatsApp messages, the next step is to set up SMS messaging through Twilio. Select the action event as ‘Send SMS Message’ in Pabbly Connect. Similar to the previous step, connect your Twilio account by entering the Account SID and Authorization Token from your Twilio dashboard.

For the SMS body, you can copy the same message used for WhatsApp, but ensure that it is formatted correctly for SMS. Map the lead’s name and other relevant information to personalize the SMS. This ensures that each lead receives a tailored message that resonates with them.

Finally, provide the sender number and the recipient number, mapping the recipient number to ensure it is dynamically replaced with each lead’s phone number. Click ‘Save and Send Test Request’ to check if the SMS is sent successfully, confirming the integration works seamlessly with Pabbly Connect.


5. Conclusion: Automate Your Lead Communication with Pabbly Connect

In conclusion, using Pabbly Connect to automate WhatsApp messages and SMS for your LinkedIn leads is a powerful way to enhance your lead generation efforts. By carefully setting up triggers and actions, you can ensure that your leads receive timely and personalized communications, increasing your chances of conversion.

Ensure you check out Pabbly Connect to create business automation workflows and reduce manual tasks. Pabbly Connect currently offer integration with 2,000+ applications.

This automation not only saves time but also improves the overall efficiency of your lead management process. If you want to streamline your communication and boost engagement, integrating these applications through Pabbly Connect is the way to go.

Send Automated WhatsApp Message and SMS to LinkedIn Leads Using Pabbly Connect

Learn to automate WhatsApp messages and SMS for LinkedIn leads with Pabbly Connect. Step-by-step guide for seamless lead generation. Discover hidden automation capabilities within your existing tools. This guide shows you how to connect your essential applications and permanently eliminate redundant manual processes.

Watch Step By Step Video Tutorial Below


1. Accessing Pabbly Connect for Lead Generation

To start automating WhatsApp messages and SMS for LinkedIn leads, you need to access Pabbly Connect. This powerful tool allows seamless integration of various applications, enabling you to streamline your lead generation process.

First, create a free account on Pabbly Connect. Once logged in, you will be directed to the dashboard where you can create workflows for your automation tasks. This is essential for connecting LinkedIn with WhatsApp and SMS applications.


2. Creating a Workflow in Pabbly Connect

After logging into Pabbly Connect, click on the blue button labeled ‘Create Workflow’. You will be prompted to name your workflow. For this example, name it ‘Send Automated WhatsApp Message and SMS for LinkedIn Leads’. Select the main workflow folder and click ‘Create’.

  • Click the ‘Create Workflow’ button.
  • Name your workflow appropriately.
  • Select the folder for your workflow.

Now, you will see two boxes labeled as ‘Trigger’ and ‘Action’. The trigger is the event that starts the automation, while the action is what happens as a result. In this case, the trigger will be a new lead from the LinkedIn Lead Generation Form.


3. Connecting LinkedIn Lead Generation Form to Pabbly Connect

Next, select the LinkedIn Lead Generation Form as your trigger application in Pabbly Connect. Choose the trigger event as ‘New Lead Generation Form Response’. Click ‘Connect’ and then ‘Add New Connection’. You will need to authorize Pabbly Connect to access your LinkedIn account.

Once connected, select the specific lead generation form you wish to use. For this example, choose the ‘Sample Lead Generation Form’. After selecting the form, test the connection by submitting a test lead. This ensures that the data is being captured correctly by Pabbly Connect.


4. Sending WhatsApp Messages Using Pabbly Connect

To send WhatsApp messages, select the Wati application as your action application in Pabbly Connect. Choose the action event as ‘Send Template Message’. Connect to Wati by entering your API endpoint and access token.

  • Select Wati as the action application.
  • Enter your API endpoint and access token.
  • Map the WhatsApp number from the lead data.

After setting up the WhatsApp message, ensure to map the necessary variables in the message template. This allows for personalized messages to be sent to each lead. Once everything is set, test the action to confirm that messages are being sent correctly via WhatsApp.


5. Sending SMS Using Pabbly Connect

The final step is to send SMS messages using the Twilio application. In Pabbly Connect, select Twilio as your action application and choose ‘Send SMS Message’ as the action event. Connect to Twilio by entering your account SID and authorization token.

Map the recipient’s phone number and the SMS body. You can use the same message template used for WhatsApp but adjust it slightly for SMS. Once you have filled in the details, test the connection to ensure that SMS messages are being sent properly.


Conclusion

Using Pabbly Connect, you can effortlessly automate the process of sending WhatsApp messages and SMS to your LinkedIn leads. This integration not only streamlines your lead generation efforts but also enhances communication with potential clients. With just a few steps, you can set up a robust system for automated messaging.

Ensure you check out Pabbly Connect to create business automation workflows and reduce manual tasks. Pabbly Connect currently offer integration with 2,000+ applications.

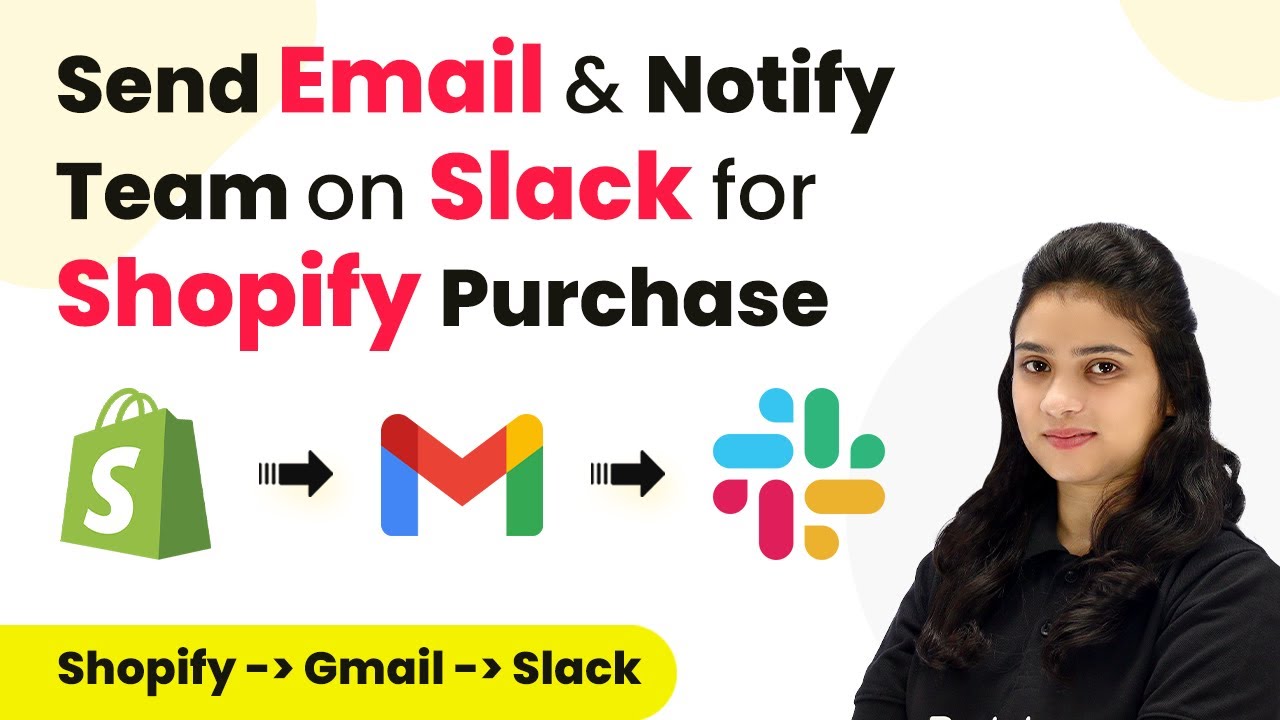
Automate Thank You Emails and Slack Notifications for Shopify Purchases Using Pabbly Connect

Learn how to automate thank you emails and Slack notifications for new Shopify purchases using Pabbly Connect. Step-by-step guide for seamless integration. Follow this definitive guide to creating powerful automated workflows with straightforward, efficiency-focused solutions that save valuable time.

Watch Step By Step Video Tutorial Below


1. Accessing Pabbly Connect for Integration

To automate the process of sending thank you emails and notifying your team on Slack for new Shopify purchases, you need to access Pabbly Connect. Start by navigating to the Pabbly Connect homepage by typing ‘Pabbly.com/connect’ in your browser.

Once on the homepage, you can either sign in if you are an existing user or click on the ‘Sign Up for Free’ button to create a new account. New users will receive 100 free tasks each month to explore and test various automations.


2. Creating a Workflow in Pabbly Connect

After signing in, you will be taken to the Pabbly Connect dashboard. Here, you can view your existing workflows or create a new one. To create a new workflow, click on the ‘Create Workflow’ button located in the top right corner. using Pabbly Connect

  • Name your workflow as ‘Send Thank You Mail and Notify Team on Slack for Shopify Purchase’.
  • Select a folder to save your workflow.
  • Click on ‘Create’ to proceed.

Once created, you will see two sections: Trigger and Action. The trigger will be Shopify, and the action will be Gmail and Slack. This setup ensures that when a new order is placed on Shopify, a thank you email is sent to the customer and a notification is sent to your team via Slack.


3. Setting Up Shopify Trigger in Pabbly Connect

In the trigger section, select Shopify as your application. Next, choose the trigger event as ‘New Order’. This event will initiate the workflow whenever a new order is placed in your Shopify store. using Pabbly Connect

Pabbly Connect will provide you with a webhook URL that you need to copy. This URL acts as a bridge to send data from Shopify to Pabbly Connect. You will then need to go to your Shopify account, navigate to Settings, and select Notifications.

  • Scroll down to find the Webhooks section and click on ‘Create Webhook’.
  • Select ‘Order Creation’ as the event and paste the copied webhook URL.
  • Choose JSON as the format and click ‘Save’.

After saving, return to Pabbly Connect, where it will show ‘Waiting for Webhook Response’. Now, to test the integration, create a test order in your Shopify store.


4. Sending Thank You Email via Pabbly Connect

After placing a test order, Pabbly Connect will capture the order details. To send a thank you email, select Gmail as the action application in Pabbly Connect. Choose ‘Send Email’ as the action event. using Pabbly Connect

Next, you will need to connect your Gmail account to Pabbly Connect. Click on ‘Connect Now’, select ‘Add New Connection’, and authorize Pabbly Connect to access your Gmail account.

Map the recipient email address to the customer’s email from the Shopify response. Set the sender name, subject, and email body. Click ‘Save and Send Test Request’ to send the email.

Once the email is sent, you can check the recipient’s inbox to confirm successful delivery of the thank you email.


5. Notifying Team on Slack Using Pabbly Connect

To notify your team on Slack about the new order, add another action step in Pabbly Connect and select Slack as the application. Choose ‘Send Channel Message’ as the action event. using Pabbly Connect

Connect your Slack account by selecting ‘Add New Connection’ and authorize Pabbly Connect to access your Slack account. Specify the channel where you want to send the notifications.

Compose your message including order details by mapping the order ID, product name, and status. Click ‘Save and Send Test Request’ to send the message to your Slack channel.

Once you receive a confirmation response in Pabbly Connect, check your Slack channel to ensure the message has been delivered successfully.


Conclusion

By following these steps, you can easily automate the process of sending thank you emails and notifying your team on Slack for new Shopify purchases using Pabbly Connect. This integration enhances customer communication and keeps your team informed in real-time.

Ensure you check out Pabbly Connect to create business automation workflows and reduce manual tasks. Pabbly Connect currently offer integration with 2,000+ applications.

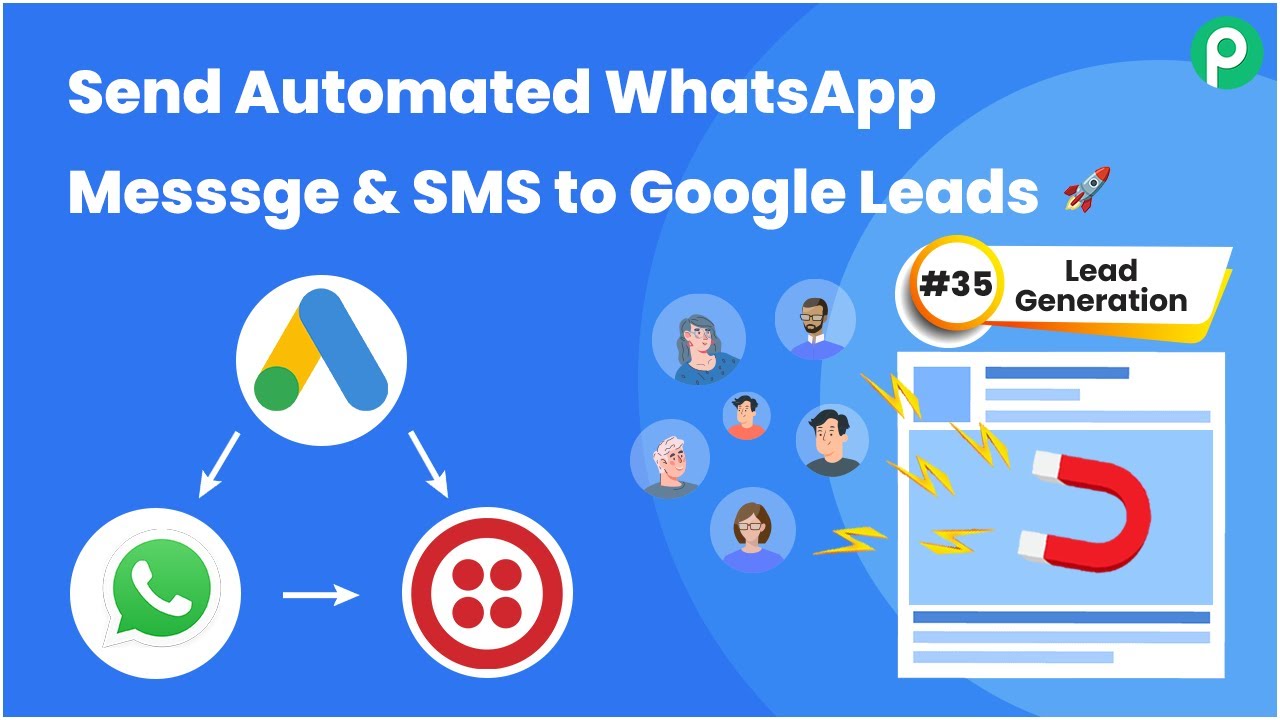
Automate WhatsApp and SMS Messages for Google Ads Leads Using Pabbly Connect

Learn how to automate WhatsApp and SMS messages for Google Ads leads using Pabbly Connect in this detailed tutorial. Discover how to seamlessly connect your essential tools through accessible instructions that make powerful automation available to professionals at every skill level.

Watch Step By Step Video Tutorial Below


1. Setting Up Pabbly Connect for Google Ads Leads

To send automated WhatsApp messages and SMS for Google Ads leads, you first need to access Pabbly Connect. Start by signing into your Pabbly Connect account. If you’re new, click on the ‘Sign up for free’ button to create an account, which allows you 100 free tasks each month.

Once logged in, navigate to the ‘All Applications’ page and click on ‘Access Now’ for Pabbly Connect. This will take you to the dashboard where you can create a new workflow. Click on the ‘Create Workflow’ button located in the top right corner.


2. Creating a Workflow to Handle Google Ads Leads

In the dialog box that appears, name your workflow ‘Send Automated WhatsApp Message and SMS to Google Leads’ and save it in the folder named ‘Google Ads’. After creating the workflow, you will see options for setting up triggers and actions. using Pabbly Connect

  • Select Google Ads as the trigger application.
  • Choose the trigger event as ‘New Lead Form Entry’.
  • This trigger will activate whenever a new lead is created.

With the trigger set, you can now move on to the action setup. Here, you will select Wati for sending WhatsApp messages and Twilio for sending SMS. Each of these applications will be set up to respond to the Google Ads lead trigger.


3. Connecting Google Ads to Pabbly Connect

To connect Google Ads with Pabbly Connect, you will see a webhook URL in the trigger window. Copy this URL as it will bridge your Google Ads account with Pabbly Connect. Open your Google Ads account and navigate to the lead form you have created.

In the lead form settings, locate the webhook integration section. Paste the copied webhook URL and add your key. You can find this key by pasting the URL into a new tab and copying the key from the response. After entering the webhook URL and key, click on ‘Send Test Data’ to ensure the connection is successful.


4. Sending WhatsApp and SMS Messages Using Pabbly Connect

Now that Google Ads is connected, return to Pabbly Connect to establish a connection with Wati for WhatsApp messaging. Click on connect and provide the API endpoint and access token from your Wati account. Copy the API endpoint and paste it into Pabbly Connect, then do the same for the access token.

Once connected, map the WhatsApp number you received from Google Ads to the corresponding field in Pabbly Connect. Select the template message you created in Wati and fill in the required fields, ensuring to include custom parameters such as the lead’s name.

  • Map the WhatsApp number from the Google Ads lead response.
  • Select your template message for WhatsApp.
  • Fill in custom parameters like the lead’s name.

After saving and sending a test request, check your WhatsApp for the automated message confirming successful integration.


5. Finalizing SMS Integration with Twilio

Next, you need to connect Twilio to Pabbly Connect for SMS messaging. Click on connect and enter your Twilio account SID and authorization token in the respective fields. This will allow Pabbly Connect to send SMS messages through Twilio.

After establishing the connection, map the SMS body to include the lead’s name from the previous response. Make sure to include the recipient’s phone number, which can also be mapped from the Google Ads lead response. Once everything is set, send a test request to confirm the SMS is sent successfully.

Once both WhatsApp and SMS integrations are confirmed, you have successfully automated the process of sending messages to new Google Ads leads using Pabbly Connect. This integration ensures that every new lead receives timely communication through both channels.


Conclusion

This tutorial provides a comprehensive guide on how to automate WhatsApp and SMS messages for Google Ads leads using Pabbly Connect. By following these steps, you can enhance your lead generation strategy effectively.

Ensure you check out Pabbly Connect to create business automation workflows and reduce manual tasks. Pabbly Connect currently offer integration with 2,000+ applications.