Real Estate Marketing Automation Ideas Using Pabbly Connect

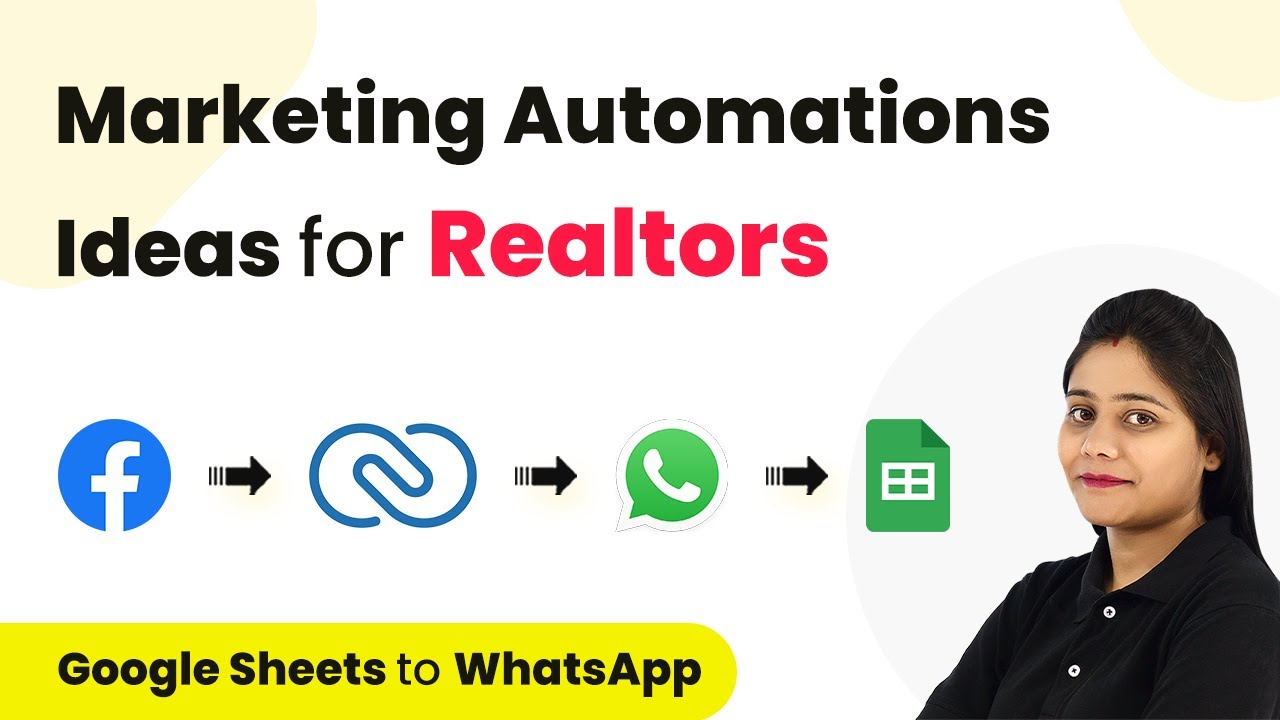
Discover how to automate real estate marketing using Pabbly Connect to integrate WhatsApp, CRM, Google Sheets, and more for lead management. Follow this definitive guide to creating powerful automated workflows with straightforward, efficiency-focused solutions that save valuable time.

Watch Step By Step Video Tutorial Below


1. Introduction to Pabbly Connect for Real Estate Marketing

In this section, we will explore how Pabbly Connect serves as the backbone for automating real estate marketing tasks. By integrating various applications, it streamlines lead management, enabling quick responses to potential clients. This setup allows for seamless communication and data management.

To begin, ensure you have an account with Pabbly Connect. You can create one quickly by clicking the ‘Sign Up Free’ button on the Pabbly Connect website. Once logged in, you will access the dashboard where all your workflows can be managed effectively.


2. Setting Up Facebook Lead Ads with Pabbly Connect

To automate your lead management process, we will set up a workflow in Pabbly Connect that captures leads from Facebook Lead Ads. This process will notify your team on Slack and send personalized WhatsApp messages to each lead.

Follow these steps to set up your workflow:

  • Log into Pabbly Connect and click on the blue button to create a new workflow.
  • Name your workflow (e.g., ‘Facebook Lead Ads to Slack and WhatsApp’).
  • Select Facebook Lead Ads as your trigger application.
  • Authorize your Facebook account to connect it with Pabbly Connect.

Once you have completed these steps, you will be able to capture lead details from your Facebook ads automatically. This integration ensures that your sales team is promptly notified, allowing for faster follow-ups.


3. Sending Notifications to Slack via Pabbly Connect

After integrating Facebook Lead Ads, the next step is to notify your team on Slack about new leads. Pabbly Connect facilitates this by connecting your Facebook Lead Ads with Slack, ensuring instant communication.

Here’s how to set it up:

  • Select Slack as your action application in the workflow.
  • Choose the action event ‘Send Channel Message’.
  • Authorize your Slack account and select the channel for notifications.
  • Compose a message that includes lead details using the mapped fields from Facebook.

With this setup, every time a new lead is generated, your team will receive a detailed notification in Slack, allowing them to act quickly and efficiently.


4. Automating WhatsApp Messages with Pabbly Connect

In addition to Slack notifications, you can also send automated WhatsApp messages to your leads using Pabbly Connect. This feature helps maintain direct communication with potential clients right after they express interest.

To set up WhatsApp messaging, follow these steps:

Choose WhatsApp via a third-party application like Vati for sending messages. Select ‘Send Template Message’ as the action event. Authorize your Vati account and input the necessary API credentials. Map the lead’s phone number and customize the message template.

This integration allows you to send personalized brochures or catalogs directly to new leads, enhancing engagement and improving the chances of conversion.


5. Syncing Leads with Google Sheets and Zoho CRM Using Pabbly Connect

The final step in this automation process is to sync the captured lead data with Google Sheets and Zoho CRM using Pabbly Connect. This ensures that all lead information is stored in one place for easy access and management.

To set this up, perform the following steps:

Select Google Sheets as your next action application and choose ‘Add New Row’. Authorize your Google Sheets account and select the spreadsheet you want to use. Map the fields from the lead data to the corresponding columns in your spreadsheet. Repeat the process for Zoho CRM by selecting ‘Create Contact’ as the action event.

This setup allows for a comprehensive database of leads that can be accessed anytime, facilitating better tracking and follow-up strategies for your real estate business.


Conclusion

By utilizing Pabbly Connect, real estate professionals can automate their marketing processes effectively. Integrating applications like WhatsApp, Slack, Google Sheets, and Zoho CRM streamlines lead management, enhances communication, and boosts overall efficiency. This automation not only saves time but also increases the chances of converting leads into clients.

Ensure you check out Pabbly Connect to create business automation workflows and reduce manual tasks. Pabbly Connect currently offer integration with 2,000+ applications.

Send WhatsApp Messages for Payments in Pabbly Subscription Billing

Learn how to send automated WhatsApp messages for payments using Pabbly Subscription Billing and Pabbly Subscription Billing. Step-by-step tutorial included. Discover how to streamline your subscription management while maintaining complete flexibility over billing cycles, trial periods, and payment processing.

Watch Step By Step Video Tutorial Below


1. Setting Up Pabbly Subscription Billing for WhatsApp Notifications

To send WhatsApp messages for payments, you first need to access Pabbly Subscription Billing. This platform allows you to manage your subscriptions and payments effectively. Start by signing into your Pabbly account, or sign up for free if you don’t have an account yet.

Once logged in, navigate to the dashboard where you can see all your applications. Click on the Pabbly Subscription Billing option to begin setting up your payment notifications.


2. Creating a New Workflow in Pabbly Connect

To automate WhatsApp messages, you need to create a workflow in Pabbly Connect. Click on the ‘Create Workflow’ button and name your workflow as ‘Send WhatsApp Message for Payments in Pabbly Subscription Billing’. This name reflects your objective clearly.

  • Select a folder to save your workflow.
  • Choose ‘Pabbly Subscription Billing’ as your trigger application.
  • Set the trigger event to ‘Successful Payment’.

After setting up the trigger, you will need to connect Pabbly Subscription Billing to Pabbly Connect using the webhook URL provided by Pabbly Connect. This URL acts as a bridge between the two applications.


3. Configuring the Webhook in Pabbly Subscription Billing

Next, you will configure the webhook in Pabbly Subscription Billing. Go to the settings section and find the webhook settings. Here, click on the ‘Add Webhook’ button.

  • Name your webhook (e.g., ‘Testing’).
  • Select ‘All Products’ for the product option.
  • Paste the copied webhook URL from Pabbly Connect.
  • Choose ‘Successful Payment’ under payment options.

Once you have filled in these details, click on ‘Save’. This completes the webhook configuration, allowing Pabbly Subscription Billing to communicate with Pabbly Connect when a payment is successful.


4. Sending WhatsApp Messages Using Pabbly Connect

After setting up the webhook, you will need to configure the action step in Pabbly Connect. Select ‘Vati’ as your action application and choose the ‘Send Template Message’ action event.

Connect Vati by providing the API endpoint and access token. Map the customer’s WhatsApp number from the previous step. Select the appropriate template for your message.

This setup will ensure that every time a successful payment is made in Pabbly Subscription Billing, an automated WhatsApp message is sent to the customer, confirming their payment and order details.


5. Testing and Verifying the Integration

Once everything is set up, it’s important to test the integration. Go to your checkout page and make a dummy payment to trigger the webhook. After the payment is successful, return to Pabbly Connect to see if you received the webhook response.

If successful, you should see the message sent to the customer’s WhatsApp confirming the payment. This verifies that your integration between Pabbly Subscription Billing and Vati is functioning correctly, allowing you to automate customer notifications.


Conclusion

In this tutorial, we explored how to send WhatsApp messages for payments using Pabbly Subscription Billing and Pabbly Connect. By following these steps, you can automate your payment notifications efficiently, enhancing customer communication.

Ensure you check out Pabbly Connect to create business automation workflows and reduce manual tasks. Pabbly Connect currently offer integration with 2,000+ applications.

How to Add Facebook Leads to Google Sheets Using Pabbly Connect

Learn how to automate the process of adding Facebook leads to Google Sheets for your Dance Academy using Pabbly Connect. Follow our step-by-step tutorial for seamless integration.

Watch Step By Step Video Tutorial Below


1. Accessing Pabbly Connect for Automation

To start the process of adding Facebook leads to Google Sheets, you first need to access Pabbly Connect. This powerful automation platform allows you to seamlessly integrate various applications, including Facebook Leads and Google Sheets.

Visit the Pabbly Connect homepage by typing ‘Pabbly.com/connect’ in your browser. Here, you will find options to sign in or sign up. If you are a new user, click on the ‘Sign Up for Free’ button to create an account. You will receive 100 free tasks each month to explore the platform and test out automations.


2. Creating a Workflow in Pabbly Connect

After logging into your Pabbly Connect account, navigate to the dashboard where you can create a new workflow. Click on the ‘Create Workflow’ option located at the top right corner of the screen. using Pabbly Connect

  • Provide a name for your workflow, such as ‘Add Facebook Leads to Google Sheets for Dance Academy’.
  • Select a folder to save your workflow, like ‘Test Integrations’.
  • Click on ‘Create’ to initiate the workflow setup.

Once created, you will see two windows: one for the trigger and one for the action. The trigger will be set to Facebook Lead Ads, while the action will be set to Google Sheets, allowing you to automate the process of capturing leads.


3. Setting Up the Trigger with Facebook Lead Ads

In this step, you will configure the trigger to capture new leads from Facebook Lead Ads. Select Facebook Lead Ads as your trigger application, then choose the trigger event as ‘New Lead Instant’. This event ensures that every time a new lead is generated, the workflow is activated.

Click on ‘Connect’ and choose ‘Add New Connection’ to link your Facebook Lead Ads account with Pabbly Connect. After successful authorization, select the Facebook page and lead gen form associated with your Dance Academy. For example, choose your page named ‘NRA Dance Academy’ and the corresponding lead form.


4. Testing the Integration with Pabbly Connect

After setting up the trigger, it’s time to test the integration to ensure everything is working correctly. Click on ‘Save and Send Test Request’ in Pabbly Connect. This action will wait for a webhook response, prompting you to submit a test lead through your Facebook lead form. using Pabbly Connect

  • Navigate to the Meta for Developers page and select the Lead Ads Testing Tool.
  • Choose your Facebook page and the corresponding form to test.
  • Fill in the form with test details, then submit it.

Upon submission, return to Pabbly Connect to check for the captured lead response. If successful, you will see the details of the test lead, confirming that the integration is operational.


5. Adding Leads to Google Sheets via Pabbly Connect

Now that the trigger is set up and tested, you can configure the action to add the captured leads to Google Sheets. Select Google Sheets as your action application and choose the action event as ‘Add New Row’.

Click on ‘Connect’ and select ‘Add New Connection’ to link your Google Sheets account with Pabbly Connect. After successful authorization, select the spreadsheet where you want to add the leads, such as ‘NRA Dance Academy Leads’. Map the fields from the test lead to the corresponding columns in your Google Sheets.

Once all fields are mapped, click on ‘Save and Send Test Request’. Check your Google Sheet to confirm that a new row has been added with the lead details. This completes the setup, allowing you to automatically create records of all Facebook leads in Google Sheets.


Conclusion

Using Pabbly Connect, you can efficiently automate the process of adding Facebook leads to Google Sheets. This integration allows for seamless data management, ensuring that your Dance Academy captures all potential leads effortlessly.

Ensure you check out Pabbly Connect to create business automation workflows and reduce manual tasks. Pabbly Connect currently offer integration with 2,000+ applications.

How to Send Automated WhatsApp Messages to Facebook Leads Using Pabbly Connect

Learn how to send automated WhatsApp messages to Facebook leads for your sanitaryware business using Pabbly Connect in this step-by-step tutorial. Build sophisticated automated workflows in less time than you think. This guide translates complex integrations into straightforward steps for immediate implementation.

Watch Step By Step Video Tutorial Below


Setting Up Pabbly Connect for WhatsApp and Facebook Integration

To send automated WhatsApp messages to Facebook leads, the first step is to access Pabbly Connect. This platform enables seamless integration between WhatsApp and Facebook. Start by going to the Pabbly Connect dashboard and clicking on the ‘Access Now’ button to reach your workspace.

Next, create a new workflow by navigating to the right-hand corner and clicking on the ‘Create Workflow’ button. You will be prompted to name your workflow; for this tutorial, we will name it ‘Send Automated WhatsApp Message.’ This setup is crucial for connecting your Facebook leads with WhatsApp through Pabbly Connect.


Setting Up the Trigger for Facebook Leads

The next step in this process is to set up the trigger application, which will be Facebook. In Pabbly Connect, triggers are the events that initiate the workflow. Select Facebook as your trigger application and choose the trigger event, which in this case will be ‘New Lead’ from the Facebook signup form.

Once you select the trigger, you will need to connect your Facebook account to Pabbly Connect. Click on ‘Connect’ and authorize Pabbly to access your Facebook account. After successful authorization, select the Facebook page associated with your sanitaryware business and the lead generation form you want to use.

  • Select your Facebook page.
  • Choose the lead generation form linked to your page.

After selecting these options, click on ‘Save and Test’ to ensure everything is working correctly. Pabbly Connect will now wait for a new lead to be captured from Facebook, allowing you to automate WhatsApp messages.


Configuring WhatsApp for Automated Messages

With the trigger set up, the next step is to configure WhatsApp to send automated messages. In Pabbly Connect, select WhatsApp as your action application. The action event will be ‘Send Template Message’ which allows you to send pre-defined messages to leads.

To connect your WhatsApp account, you will need to provide the API endpoint and access token. This information can be found in your WhatsApp account settings. Copy the access token and API endpoint, then paste them into the respective fields in Pabbly Connect.

  • Access token: Copy from your WhatsApp settings.
  • API endpoint: Paste it in the corresponding field.

After entering the required information, click on ‘Save and Send Test Request’ to verify if the connection is successful. If everything is set correctly, you will receive a confirmation message indicating that WhatsApp is now ready to send messages through Pabbly Connect.


Creating the Message Template for WhatsApp

Now that WhatsApp is configured, the next step involves creating the message template that will be sent to new leads. In Pabbly Connect, you can customize the message to include the lead’s name and other relevant details. Choose the template you want to use and define the message content.

The message can be structured as follows: ‘Hello, thank you for your response. Our team member will connect with you soon, and we will share exciting offers with you on the given contact details.’ This message can be customized further based on your business requirements.

Include a greeting to the lead. Mention the lead’s name as a custom parameter. Thank them for their inquiry.

After creating the message template, map the lead’s details, such as the phone number and name, to ensure that the message is personalized. Click on ‘Save’ to finalize the template setup, allowing Pabbly Connect to send out automated messages effectively.


Conclusion

In this tutorial, we demonstrated how to use Pabbly Connect to send automated WhatsApp messages to Facebook leads. By following these steps, you can efficiently connect your sanitaryware business with potential customers through WhatsApp, enhancing your communication and engagement.

Ensure you check out Pabbly Connect to create business automation workflows and reduce manual tasks. Pabbly Connect currently offer integration with 2,000+ applications.

Utilizing Pabbly Connect streamlines the process, ensuring that every new lead receives a timely and personalized message, ultimately driving better customer relationships.

Automatically Send Invitations on WhatsApp Using Pabbly Connect and Google Sheets

Learn how to automatically send invitations on WhatsApp using Pabbly Connect and Google Sheets. Follow this detailed tutorial for seamless integration. Build sophisticated automated workflows in less time than you think. This guide translates complex integrations into straightforward steps for immediate implementation.

Watch Step By Step Video Tutorial Below


1. Setting Up Google Sheets for WhatsApp Invitations

To send invitations on WhatsApp automatically, first, set up your Google Sheets. Start by creating a spreadsheet that includes the names and WhatsApp numbers of your guests. This is crucial as Pabbly Connect will use this data to send messages.

Ensure that your spreadsheet has the following columns:

  • Guest Name
  • WhatsApp Number

Once your data is organized, you are ready to connect Google Sheets with Pabbly Connect for automation.


2. Connecting Pabbly Connect to Google Sheets

Log in to your Pabbly Connect account and create a new workflow. You can do this by clicking on the ‘Create Workflow’ button on your dashboard. Name your workflow something descriptive, like ‘Send WhatsApp Invitations Automatically’.

Next, select Google Sheets as your trigger application. Choose the trigger event as ‘New or Updated Spreadsheet Row’. This means that every time a new row is added or updated in your Google Sheets, it will trigger the workflow in Pabbly Connect.


3. Setting Up the Webhook in Google Sheets

After selecting Google Sheets, Pabbly Connect will provide you with a webhook URL. Copy this URL, and you will need to paste it into your Google Sheets add-on. To do this, go to Extensions > Add-ons > Get Add-ons, and search for ‘Pabbly Connect Webhooks’.

Once the add-on is installed, open it and paste the webhook URL into the initial setup section. Specify the trigger column, which is the last column where data will be entered. This setup allows Pabbly Connect to know when to send data from Google Sheets.


4. Integrating WhatsApp with Pabbly Connect

Now that your Google Sheets is connected, it’s time to set up the WhatsApp integration using Pabbly Connect. Select WhatsApp as your action application and choose the action event as ‘Send Template Message’. This will enable you to send personalized messages to your guests.

You will need to connect your WhatsApp account through an API endpoint and access token. Make sure you have these credentials ready from your WhatsApp business API provider, such as Wati or AI Sensei. Once connected, you can map the WhatsApp number from your Google Sheets to the message template.


5. Sending Invitations Automatically

With everything connected, you can now send invitations automatically. Create a message template in your WhatsApp application. This template should include variables for guest names and any other personalized details you want to include.

Once your template is ready, go back to Pabbly Connect and map the variables to the corresponding fields from Google Sheets. For example, the guest’s name should be mapped to the variable in your message template. After mapping, test the workflow to ensure everything works correctly.

Once you are satisfied with the test, enable the option to send invitations to all guests automatically. This feature allows you to send the same invitation to multiple guests without manual effort.


Conclusion

Using Pabbly Connect, you can easily automate the process of sending invitations on WhatsApp from Google Sheets. This integration streamlines your invitation process, saving you time and effort while ensuring your guests receive their invites promptly.

Ensure you check out Pabbly Connect to create business automation workflows and reduce manual tasks. Pabbly Connect currently offer integration with 2,000+ applications.

Automate Email Replies with OpenAI and Pabbly Connect: A Step-by-Step Guide

Learn how to automate email replies using OpenAI and Pabbly Connect. This detailed tutorial walks you through the setup and integration process for Gmail automation.

Watch Step By Step Video Tutorial Below


1. Setting Up Pabbly Connect for Gmail Automation

To automate email replies using OpenAI, you first need to set up Pabbly Connect. This integration platform allows you to connect Gmail with OpenAI seamlessly. Start by creating a free account on Pabbly Connect, which takes just a few minutes.

Once logged in, navigate to the dashboard and click on the ‘Create Workflow’ button. Name your workflow, for example, ‘Auto Reply to Emails Using OpenAI’, and choose the folder for your workflow. Click ‘Create’ to proceed and set up your automation.


2. Connecting Gmail with Pabbly Connect

In this step, you will connect Gmail to Pabbly Connect using the Email Parser feature. This allows Pabbly Connect to capture incoming emails. Select the Email Parser as your trigger application.

  • Go to your Gmail settings and find the forwarding option.
  • Add the email address provided by Pabbly Connect for forwarding.
  • Verify the forwarding address by clicking the confirmation link sent to Pabbly Connect.

After setting up forwarding, return to Pabbly Connect and capture the email response. This ensures that every new email received in Gmail is processed by Pabbly Connect for automation.


3. Generating Automatic Replies with OpenAI

Now, you will set up OpenAI to generate replies to the emails captured by Pabbly Connect. Select OpenAI as your action application and choose the appropriate action event for generating replies.

Connect your OpenAI account by entering your API key. Choose the model you want to use, such as GPT-3.5, and set up the prompt for generating the email reply. For example, you can instruct it to generate a reply for the received email.

  • Map the sender’s name and email address to personalize the reply.
  • Specify the email content to ensure the reply is relevant.

Once the prompt is set, save the configuration and test the request to confirm that OpenAI generates a suitable reply. You should see the generated response in the Pabbly Connect dashboard.


4. Sending the Generated Reply via Gmail

After generating the reply, the next step is to send this reply using Gmail through Pabbly Connect. Select Gmail as your action application and choose the ‘Send Email’ action event.

Connect your Gmail account to Pabbly Connect, allowing it to send emails on your behalf. Map the recipient’s email address from the email parser response, and provide the subject and content of the email using the response generated by OpenAI.

Set the sender name to maintain professionalism. Use plain text or HTML format for the email content.

Once everything is configured, save and send the test request. Check your Gmail’s Sent folder to confirm that the email was successfully sent to the recipient.


5. Filtering Emails for Specific Replies

To refine your automation, you can add filters in Pabbly Connect to control which emails trigger a reply. This feature allows you to set conditions based on sender, subject, or content of the email.

Click on the plus icon to add a filter between the Email Parser and OpenAI steps. Set criteria such as the subject line containing specific keywords like ‘product delivered’ to ensure only relevant emails receive automated replies.

Define conditions using ‘equals’, ‘contains’, or ‘does not contain’ options. Use both ‘AND’ and ‘OR’ conditions to create complex filters.

This filtering process ensures that your automation is efficient and only responds to emails that meet your specified criteria, enhancing the overall effectiveness of your email automation.


Conclusion

Using Pabbly Connect, you can automate email replies effectively by integrating OpenAI with Gmail. This tutorial outlined the steps to set up the automation, generate replies, and send them based on specific criteria. Enjoy seamless email management with this powerful integration.

Ensure you check out Pabbly Connect to create business automation workflows and reduce manual tasks. Pabbly Connect currently offer integration with 2,000+ applications.

How to Instantly Share Course Material Using Pabbly Connect and Razorpay Payment

Learn how to automate sharing course material using Pabbly Connect with Razorpay payments. Follow this detailed tutorial for seamless integration. Transform complex automation concepts into accessible, actionable steps that eliminate unnecessary manual work while maximizing existing application capabilities.

Watch Step By Step Video Tutorial Below


1. Accessing Pabbly Connect for Course Material Sharing

To start automating the sharing of course material, you need to access Pabbly Connect. First, navigate to the Pabbly Connect homepage by typing ‘Pabbly.com/connect’ in your browser.

Once on the homepage, you will find options to sign in or create a new account. If you’re new, click on the ‘Sign Up for Free’ button to get started. Remember, new users receive 100 free tasks every month to explore the capabilities of Pabbly Connect.


2. Creating a Workflow in Pabbly Connect

After signing in, you’ll reach the Pabbly Connect dashboard. To create a new workflow, click on the ‘Create Workflow’ button. This action will prompt you to name your workflow, such as ‘Share Course Material for Razorpay Payment’. using Pabbly Connect

  • Name your workflow appropriately.
  • Select a folder for organizing your workflow.
  • Click on ‘Create’ to finalize the setup.

After creating the workflow, select Razorpay as your trigger application. This sets the stage for automating the sharing of course material once a payment is captured.


3. Setting Up Trigger with Razorpay

In this step, you will configure the trigger event in Pabbly Connect. Choose ‘Payment Captured’ as the trigger event. This selection will initiate the workflow whenever a payment is successfully processed through Razorpay.

Pabbly Connect will provide you with a webhook URL. This URL is essential as it acts as a bridge between Razorpay and Pabbly Connect. Copy this URL and proceed to your Razorpay account.

  • Navigate to Razorpay Dashboard.
  • Go to ‘Account and Settings’ and find the ‘Webhooks’ section.
  • Click ‘Add New Webhook’ and paste the copied URL.

In Razorpay, select ‘Payment Captured’ as the active event. This ensures that every time a payment is captured, a response is sent to Pabbly Connect.


4. Filtering Payments for Specific Courses

To ensure that only relevant payments trigger the sharing of course material, you can set up a filter in Pabbly Connect. This filter will check if the payment corresponds to the specific course, like the PHP programming course.

Select the action application as ‘Filter’ and set the condition based on the product name received from Razorpay. The filter will only allow the workflow to continue if the product name matches ‘PHP Programming Course’.

Choose ‘Filter’ as the action application. Set the condition: Product Name equals ‘PHP Programming Course’. Save the filter to validate the condition.

This step ensures that only payments for the PHP programming course will trigger the sharing of course materials, streamlining the process through Pabbly Connect.


5. Sharing Course Material via Google Drive

Once the payment is verified through the filter, the next step is to share the course material. Select Google Drive as your action application in Pabbly Connect. Choose the action event as ‘Share a File or Folder by ID’.

Connect your Google Drive account by authorizing Pabbly Connect to access your files. After establishing the connection, select the folder containing the course material you wish to share.

Select the folder ID for the course material. Map the email ID from the Razorpay response to send the folder to the user. Set the role permissions for the user (e.g., Viewer).

After configuring these settings, save and send a test request. If successful, the user will receive an email with access to the course material, demonstrating the seamless integration facilitated by Pabbly Connect.


Conclusion

This tutorial outlines how to use Pabbly Connect to automate the sharing of course material upon successful Razorpay payments. By following these steps, you can efficiently manage course access for users.

Ensure you check out Pabbly Connect to create business automation workflows and reduce manual tasks. Pabbly Connect currently offer integration with 2,000+ applications.

How to Share Reddit Posts on Facebook Pages Using Pabbly Connect

Learn how to automate sharing Reddit posts on Facebook pages using Pabbly Connect. Step-by-step guide to integrate Reddit and Facebook seamlessly. Navigate the automation landscape confidently with clear, structured guidance suitable for professionals regardless of prior technical experience.

Watch Step By Step Video Tutorial Below


1. Accessing Pabbly Connect for Reddit and Facebook Integration

To begin sharing Reddit posts on Facebook pages, you need to access Pabbly Connect. Start by navigating to the Pabbly Connect homepage by typing ‘Pabbly.com/connect’ in your browser.

Once on the homepage, you will see options to sign in or sign up for free. If you are a new user, click on the ‘Sign up for free’ button. Existing users can directly click ‘Sign in’. After signing in, you will have access to the dashboard of Pabbly Connect where you can create your automation workflows.


2. Creating a Workflow in Pabbly Connect

To create a new workflow in Pabbly Connect, click on the ‘Create Workflow’ option located at the top right corner of the dashboard. A dialog box will appear asking for a name for your workflow, such as ‘Share Reddit Post on Facebook Page’.

  • Select the folder to save your workflow.
  • Click on ‘Create’ to proceed.

After creating the workflow, you will see two windows for trigger and action. The trigger specifies when the automation starts, and the action defines what happens as a result. In this case, Reddit will be the trigger and Facebook Pages will be the action.


3. Setting Up the Trigger with Reddit

The next step involves setting up the trigger using Pabbly Connect. Select ‘Reddit’ as the trigger application and then choose ‘New Post’ as the trigger event. This means that whenever a new post is created in your Reddit community, it will trigger the workflow.

Click on ‘Connect’ and select ‘Add New Connection’ to link your Reddit account. Authorize Pabbly Connect to access your Reddit account by clicking ‘Allow’. After authorization, input the name of your subreddit, ensuring to exclude the ‘r/’ prefix. For example, if your subreddit is ‘r/history’, you would enter ‘history’.


4. Setting Up the Action with Facebook Pages

Now that the trigger is set, it’s time to configure the action in Pabbly Connect. Select ‘Facebook Pages’ as the action application and choose ‘Create Page Post’ as the action event. Click ‘Connect’ and authorize Pabbly Connect to access your Facebook account.

  • Select the Facebook page where you want to share the post.
  • Map the title and content of the Reddit post to the Facebook post.

After mapping the necessary fields, click on ‘Save and Send Test Request’. This action will create a post on your selected Facebook page with the content from your Reddit post. Verify that the post appears correctly on your Facebook page.


5. Testing the Automation Workflow

To ensure that the automation works correctly, create a new post in your Reddit community. For example, you might post about ‘History of 16th December’. After posting, wait for about 10 minutes, as Pabbly Connect checks for new data every 10 minutes.

After the waiting period, check your Facebook page. You should see the new Reddit post shared automatically. This confirms that your integration between Reddit and Facebook Pages via Pabbly Connect is functioning perfectly.

Repeat this process by creating additional posts in Reddit to further test the automation. Each new post should seamlessly appear on your Facebook page without manual intervention, showcasing the power of Pabbly Connect in automating your social media sharing.


Conclusion

In this tutorial, we explored how to use Pabbly Connect to automate sharing Reddit posts on Facebook pages. This integration enhances your community engagement effortlessly, allowing you to focus on content creation.

Ensure you check out Pabbly Connect to create business automation workflows and reduce manual tasks. Pabbly Connect currently offer integration with 2,000+ applications.

Integrating Facebook Leads to Google Sheets with Pabbly Connect

Learn how to automate adding sports equipment business leads from Facebook to Google Sheets using Pabbly Connect in this detailed tutorial. Develop expertise in application integration and learn how to design streamlined automation workflows using proven, simplified approaches.

Watch Step By Step Video Tutorial Below


1. Accessing Pabbly Connect for Facebook Leads Integration

To automate adding sports equipment business leads to Google Sheets, start by accessing Pabbly Connect. Navigate to the Pabbly website and either sign up for a new account or log in if you already have one.

Once logged in, click on the ‘Access Now’ button under Pabbly Connect. This will take you to the dashboard where you can create a new workflow to manage your Facebook leads effectively.


2. Creating a Workflow in Pabbly Connect

In this section, you will create a workflow to integrate Facebook lead ads with Google Sheets using Pabbly Connect. Click on the ‘Create Workflow’ button. Name your workflow based on your objective, such as ‘Add Sports Equipment Business Leads to Google Sheets’.

  • Select the folder where you want to save your workflow.
  • Click on the ‘Create’ button to proceed.

This will open the main workflow window where you can set up the trigger and action steps for the integration using Pabbly Connect.


3. Setting Up Trigger for Facebook Leads

Now it’s time to set up the trigger in your workflow using Pabbly Connect. Select ‘Facebook Lead Ads’ as your trigger application. Then, choose the trigger event as ‘New Lead Instant’.

Click on the ‘Connect’ button to establish a connection between Facebook Lead Ads and Pabbly Connect. You will need to add a new connection and grant access to your Facebook account. After a successful connection, select your Facebook page and lead form to proceed.


4. Setting Up Action to Add Leads to Google Sheets

After setting up the trigger, it’s time to configure the action step in Pabbly Connect. Select ‘Google Sheets’ as your action application. Choose ‘Add New Row’ as the action event.

Connect your Google Sheets account to Pabbly Connect by clicking on the ‘Connect’ button and granting access. Once connected, select the spreadsheet named ‘Facebook Leads’ and the appropriate sheet to map the lead details.

  • Map the fields: Full Name, Email, and Phone Number from the Facebook lead.
  • Click on ‘Save and Test Request’ to ensure data is added correctly.

This confirms that your integration is set up correctly, and you should see the new lead details reflected in your Google Sheets.


5. Testing the Integration with Pabbly Connect

To verify that the integration works, create a sample lead using your Facebook lead form. Fill out the form with dummy details and submit it. This action will trigger Pabbly Connect to automatically add the lead details to your Google Sheets.

Check your Google Sheets to confirm that the new row with the lead details appears. Repeat the process with different dummy leads to test the real-time functionality of the Pabbly Connect integration.

This seamless automation allows you to manage your sports equipment business leads efficiently without manual entry, ensuring you capture every lead instantly.


Conclusion

In this tutorial, we explored how to use Pabbly Connect to automate adding sports equipment business leads from Facebook to Google Sheets. By following the steps outlined, you can streamline your lead management process effectively.

Ensure you check out Pabbly Connect to create business automation workflows and reduce manual tasks. Pabbly Connect currently offer integration with 2,000+ applications.

How to Sync Calendly and Google Calendar Using Pabbly Connect

Learn how to sync Calendly and Google Calendar using Pabbly Connect. Follow this detailed guide for seamless integration and automation. Discover hidden automation capabilities within your existing tools. This guide shows you how to connect your essential applications and permanently eliminate redundant manual processes.

Watch Step By Step Video Tutorial Below


1. Accessing Pabbly Connect for Integration

To sync Calendly and Google Calendar, you first need to access Pabbly Connect. As an existing user, sign in to your account. If you are new, click on the ‘Sign up for free’ button to create an account and receive 100 free tasks monthly.

Once logged in, navigate to the applications page and select Pabbly Connect. Click on ‘Access Now’ to reach your dashboard. From there, you can begin creating your workflow for the integration.


2. Creating a New Workflow in Pabbly Connect

To create a new workflow in Pabbly Connect, click on the ‘Create Workflow’ button located in the top right corner. A dialog box will appear where you can name your workflow. For this integration, name it ‘Sync Calendly and Google Calendar’.

  • Select the folder where you want to save this workflow.
  • Click on ‘Create’ to proceed.

After creating the workflow, you will be directed to a screen where you can set up the trigger and action applications. This is crucial for the automation process.


3. Setting Up Trigger and Action Applications

In Pabbly Connect, the trigger application for this integration will be Calendly. Select Calendly as your trigger application and choose the event ‘Invite Created’ as the trigger event. This means that every time an invite is created in Calendly, it will trigger the workflow.

Next, set Google Calendar as your action application. Search for Google Calendar and select it. The action event will be ‘Create Event’, which allows you to create an event in Google Calendar whenever an invite is created in Calendly.


4. Connecting Calendly to Pabbly Connect

To establish a connection between Calendly and Pabbly Connect, click on the ‘Connect’ button. You will need to authorize the connection by logging into your Calendly account. Once authorized, you will see a confirmation indicating a successful connection.

After connecting, save and send a test request to capture a response from Calendly. This step is essential to ensure that the integration works properly and that you can retrieve the necessary data for the next steps.


5. Mapping Data to Google Calendar

Once you receive the response from Calendly, you can map the data to Google Calendar using Pabbly Connect. For instance, map the event title, start time, and end time. Make sure to format the time correctly using the Date Time Formatter by Pabbly.

  • Select the correct time zone for your event.
  • Add any additional details such as location or description if needed.

After mapping all required fields, click on ‘Save and Send Test Request’ to verify that the event is created in Google Calendar successfully. If everything is set up correctly, you will see the event listed in your Google Calendar.


Conclusion

In this tutorial, we explored how to sync Calendly and Google Calendar using Pabbly Connect. By following these steps, you can automate your scheduling process seamlessly and ensure that all your events are accurately reflected in both applications.

Ensure you check out Pabbly Connect to create business automation workflows and reduce manual tasks. Pabbly Connect currently offer integration with 2,000+ applications.