How to Use Pabbly Connect to Integrate WooCommerce with Flowdesk

Learn how to automate the process of adding WooCommerce customers as subscribers in Flowdesk using Pabbly Connect with this step-by-step tutorial. Revolutionize your productivity approach with just a few strategic clicks. Uncover professional methods for connecting applications and creating workflows that reclaim hours of your week.

Watch Step By Step Video Tutorial Below


1. Setting Up Pabbly Connect for WooCommerce and Flowdesk Integration

To begin using Pabbly Connect, first, access the platform by signing up for a free account. Once logged in, navigate to the dashboard and click on ‘Create Workflow.’ Name your workflow, for example, ‘WooCommerce to Flowdesk.’ This step is crucial as it establishes the connection between WooCommerce and Flowdesk through Pabbly Connect.

After creating your workflow, you will see two main windows: the trigger and action windows. The trigger window is where you will set up the event that initiates the workflow. In this case, select WooCommerce as the app and choose the trigger event ‘New Order Created.’ This setup allows Pabbly Connect to monitor new orders in WooCommerce.


2. Connecting WooCommerce to Pabbly Connect via Webhook

Next, you need to connect WooCommerce to Pabbly Connect using a webhook. After selecting the trigger event, Pabbly Connect will provide you with a webhook URL. Copy this URL and go to your WooCommerce account.

  • Navigate to WooCommerce settings.
  • Click on the ‘Advanced’ tab and select ‘Webhooks.’
  • Add a new webhook and paste the copied URL.
  • Set the status to active and select the topic ‘Order Created.’

Once this is done, save the webhook. Now, every time a new order is placed in WooCommerce, the details will be sent to Pabbly Connect, allowing for seamless integration.


3. Adding Subscribers to Flowdesk from WooCommerce Orders

With the connection established, it’s time to add the WooCommerce customer as a subscriber in Flowdesk. In the action window of your Pabbly Connect workflow, select Flowdesk as the app and choose the action event ‘Create/Update Subscriber.’ This action allows you to add new subscribers or update existing ones based on the order details.

Connect your Flowdesk account to Pabbly Connect and map the required fields. For instance, you will need to input the customer’s email address, first name, and last name. Ensure that you pull these details from the WooCommerce order data received in the trigger response. The mapping process is straightforward: simply select the relevant fields from the dropdown.


4. Segmenting Subscribers Based on Purchased Products

After successfully adding the customer as a subscriber, the next step is to segment them based on the product they purchased. This is where Pabbly Connect’s router feature comes into play. You can create different routes for different products, allowing you to add subscribers to specific segments in Flowdesk.

For example, if a customer buys a camera, you can set up a route that checks if the product name matches ‘camera’ and then adds the subscriber to the ‘Camera’ segment in Flowdesk. To do this, add a router action in your workflow, set the filter condition to check the product name, and then connect it to the appropriate Flowdesk segment.

  • Create a new route for each product.
  • Set filter conditions based on product names.
  • Map the subscriber email to the correct segment.

This segmentation allows you to tailor your email marketing efforts effectively, ensuring that subscribers receive relevant content based on their purchases.


5. Testing Your Pabbly Connect Workflow

Once your workflow is set up, it’s crucial to test it to ensure everything works as intended. Place a test order on your WooCommerce store and monitor the Pabbly Connect workflow for the incoming data. Check if the subscriber is added to Flowdesk and if they are placed in the correct segment.

If everything is functioning correctly, you should see the new subscriber in Flowdesk, complete with their order details and segment assignment. This testing phase is vital for confirming that your automation is set up correctly and will operate seamlessly in live scenarios.

By using Pabbly Connect, you can automate the entire process of adding customers from WooCommerce to Flowdesk, enhancing your email marketing efforts and improving customer engagement.


Conclusion

In conclusion, using Pabbly Connect to integrate WooCommerce with Flowdesk streamlines the process of adding subscribers based on new orders. This automation not only saves time but also enhances targeted marketing efforts.

Ensure you check out Pabbly Connect to create business automation workflows and reduce manual tasks. Pabbly Connect currently offer integration with 2,000+ applications.

Automate Google Sheets Messaging with Pabbly Connect: A Step-by-Step Guide

Learn how to automate messaging from Google Sheets to Telegram using Pabbly Connect. This tutorial covers all steps for seamless integration. Learn to create powerful connections between your critical applications without requiring specialized programming knowledge or extensive technical background.

Watch Step By Step Video Tutorial Below


1. Setting Up Pabbly Connect for Google Sheets Automation

To automate messaging from Google Sheets using Pabbly Connect, start by signing up for a free account. Once signed up, you can access the dashboard where you will create your workflow.

Click on the ‘Create Workflow’ button and give your workflow a suitable name. This is where you will set up the integration between Google Sheets and Telegram.


2. Configuring Google Sheets Trigger in Pabbly Connect

The first step is to set up the trigger in Pabbly Connect. Search for Google Sheets in the ‘Choose App’ field and select the trigger event as ‘New or Updated Spreadsheet Row.’ This will allow Pabbly Connect to monitor changes in your spreadsheet.

  • Open your spreadsheet in an incognito window to avoid account conflicts.
  • Click on Extensions, then on Add-ons, and search for Pabbly Connect Webhooks to install it.
  • After installing, refresh the spreadsheet and navigate to Extensions > Pabbly Connect Webhooks > Initial Setup.

In the Initial Setup window, paste the webhook URL provided by Pabbly Connect and set the trigger column (e.g., Column B) where your message data will be entered. This setup allows Pabbly Connect to automatically trigger when new data is added.


3. Sending Messages to Telegram Using Pabbly Connect

After setting up the trigger, the next step is to configure the action to send messages via Telegram. In this step, select Telegram as the action app and choose the event ‘Send a Text Message or Reply.’ This action will send your message to the specified Telegram chat. using Pabbly Connect

To connect your Telegram bot, you need the bot token, which you can obtain by creating a bot using the BotFather in Telegram. Once you have the token, enter it in Pabbly Connect to establish the connection.

  • Create a group in Telegram and add your bot as an admin.
  • Copy the chat ID from the group and paste it into Pabbly Connect.
  • Map the message data from your Google Sheets to the message field in Pabbly Connect.

After mapping your data, test the connection by sending a test message. If everything is set correctly, your message will be delivered to the specified Telegram chat.


4. Sending Photos Along with Messages via Pabbly Connect

To enhance your messages, you can also send photos along with the text. This requires adding another action in your Pabbly Connect workflow. Select Telegram again and this time choose the action event ‘Send Photo.’ This allows you to send images stored in your Google Sheets. using Pabbly Connect

Using the same connection established earlier, map the photo URL from your Google Sheets to the photo URL field in Pabbly Connect. This ensures that the image will accompany your text message when sent to Telegram.

Use the same chat ID as before for sending the photo. Leave the caption field blank if you don’t want to repeat the message. Test the action to ensure the photo is sent successfully along with the message.

Once tested successfully, your setup is complete. Now every time you add data to your Google Sheets, the corresponding message and photo will be sent to Telegram automatically.


5. Conclusion

In this tutorial, we explored how to automate messaging from Google Sheets to Telegram using Pabbly Connect. This integration not only saves time but also enhances productivity by allowing seamless communication without manual effort.

Ensure you check out Pabbly Connect to create business automation workflows and reduce manual tasks. Pabbly Connect currently offer integration with 2,000+ applications.

By following the steps outlined, you can easily set up a workflow that triggers messages and photos based on your Google Sheets entries. This powerful automation tool can significantly streamline your messaging processes.


Automate Stripe Payments to Flowdesk Subscribers Using Pabbly Connect

Learn how to integrate Stripe payments with Flowdesk subscribers using Pabbly Connect for seamless automation. Follow our detailed step-by-step guide. Navigate the automation landscape confidently with clear, structured guidance suitable for professionals regardless of prior technical experience.

Watch Step By Step Video Tutorial Below


1. Accessing Pabbly Connect for Automation

To begin automating your workflow, access Pabbly Connect. This platform enables seamless integration between Stripe and Flowdesk. First, create a free account on Pabbly Connect, which can be done in just two minutes.

Once logged into your Pabbly Connect dashboard, click on the blue ‘Create Workflow’ button. Name your workflow, such as ‘Create Subscriber in Flowdesk on Stripe Payment,’ and click on the ‘Create’ button to proceed.


2. Setting Up the Trigger in Pabbly Connect

In this step, you will set up the trigger for your integration using Pabbly Connect. The trigger is activated when a new payment is made in Stripe. Select the Stripe application and choose ‘New Charge’ as the trigger event.

  • Select Stripe as the application.
  • Choose ‘New Charge’ as the event.
  • Copy the webhook URL provided by Pabbly Connect.

Next, navigate to your Stripe dashboard and go to the Developer section. Click on ‘Webhooks’ and then ‘Add Endpoint.’ Paste the webhook URL you copied earlier, and select the event ‘Charge Succeeded.’ Save the endpoint to complete this part of the setup.


3. Making a Dummy Payment to Test the Connection

Now, to test the connection between Stripe and Pabbly Connect, you need to make a dummy payment. Open the payment link for a product in Stripe and enter the required details, such as email and card information.

Once the payment is successful, Pabbly Connect will receive the payment details through the webhook. Check the response in Pabbly Connect to ensure it captured the necessary customer information, including name and email.

This step confirms that the integration is working correctly. You should see the details populated in the Pabbly Connect interface, allowing you to proceed with creating a subscriber in Flowdesk.


4. Creating a Subscriber in Flowdesk

With the payment details captured, it’s time to create a subscriber in Flowdesk using Pabbly Connect. Select Flowdesk as the action application and choose ‘Create or Update Subscriber’ as the action event.

  • Connect to Flowdesk using your credentials.
  • Map the email field to the email captured from the Stripe payment.
  • Use the text formatter in Pabbly Connect to split the full name into first and last names if necessary.

After mapping the required fields, click on ‘Save and Send Test Request’ to create the subscriber. Refresh your Flowdesk dashboard to verify that the subscriber has been successfully created.


5. Adding Subscriber to a Specific Segment

Lastly, you can enhance your workflow by adding the newly created subscriber to a specific segment in Flowdesk using Pabbly Connect. Select Flowdesk again and choose ‘Add Existing Subscriber to Segment’ as the action event.

Map the subscriber’s email to the corresponding field and select the segment where you want to add the subscriber. Create a new segment if necessary, such as ‘All Stripe Customers,’ to keep your subscribers organized.

Click on ‘Save and Send Test Request’ to finalize this step. Once you refresh your Flowdesk account, you should see the subscriber added to the specified segment, completing the automation process.


Conclusion

By using Pabbly Connect, you can efficiently automate the process of integrating Stripe payments with Flowdesk subscribers. This integration allows you to manage your subscribers seamlessly without manual intervention, streamlining your email marketing efforts.

Ensure you check out Pabbly Connect to create business automation workflows and reduce manual tasks. Pabbly Connect currently offer integration with 2,000+ applications.

Integrate Stripe with Flodesk Using Pabbly Connect: A Step-by-Step Guide

Learn how to automate your Stripe payments with Flodesk email marketing using Pabbly Connect. Follow this detailed tutorial for seamless integration. Transform complex automation concepts into accessible, actionable steps that eliminate unnecessary manual work while maximizing existing application capabilities.

Watch Step By Step Video Tutorial Below


1. Setting Up Pabbly Connect for Stripe and Flodesk Integration

To begin, access Pabbly Connect and create a new workflow. This platform allows you to automate tasks between applications seamlessly. Start by logging into your Pabbly Connect account or create a free account if you are a new user.

After logging in, click on the blue button labeled ‘Create Workflow’. Name your workflow something descriptive, such as ‘Create Subscriber in Flodesk on Stripe Payment’. Then click on the ‘Create’ button to initiate your automation.


2. Connecting Stripe to Pabbly Connect

In this section, you will connect Stripe to Pabbly Connect. Select Stripe as your trigger application. The trigger event should be set to ‘New Charge’ which indicates that the automation will start when a new payment is received.

  • Choose ‘New Charge’ as the trigger event in Stripe.
  • Copy the webhook URL provided by Pabbly Connect.
  • Go to Stripe’s dashboard, under Developers, and select Webhooks.
  • Click ‘Add Endpoint’ and paste the webhook URL.
  • Select the event type ‘charge.succeeded’ for Stripe to listen for successful payments.

Once you have set this up, make a test payment in Stripe to ensure that data is received in Pabbly Connect. This confirms that the integration is working correctly.


3. Creating Subscribers in Flodesk via Pabbly Connect

Now that Stripe is connected to Pabbly Connect, you will set up Flodesk as the action application. Choose Flodesk and select the action event ‘Create or Update Subscriber’. This will allow you to add new customers to your email list automatically.

Connect your Flodesk account by providing the necessary access. Once connected, you will need to map the fields from the Stripe payment to the subscriber details in Flodesk. For example, map the email address from Stripe to the email field in Flodesk.

  • Map the email address from the Stripe response to the Flodesk email field.
  • Use the full name field to split into first and last names for Flodesk.
  • Ensure all required fields in Flodesk are filled with the corresponding Stripe data.

This step ensures that every time a payment is processed, the customer is automatically added as a subscriber in Flodesk.


4. Adding Subscribers to Segments in Flodesk Using Pabbly Connect

In this step, you will further enhance your automation by adding the newly created subscribers to specific segments in Flodesk. Return to Pabbly Connect and add another action step to connect to Flodesk again.

Choose the action event ‘Add Existing Subscriber to Segment’. Select the segment you want your new subscribers to join, such as ‘All Stripe Customers’. Map the email address from the previous step to ensure the subscriber is added correctly.

Select the segment you want to add subscribers to. Map the email address from the previous step to the subscriber email field. Test the integration to ensure subscribers are added to the segment.

This automation ensures that not only are your customers added as subscribers, but they are also categorized into segments for targeted email marketing.


5. Final Testing and Conclusion of the Integration Process

After completing all steps, it’s crucial to test the entire workflow. Make another test payment in Stripe and check if the subscriber is created in Flodesk and added to the specified segment. This confirms that Pabbly Connect is functioning as intended.

If everything works correctly, you will see the new subscriber in your Flodesk account along with the correct details and segment assignment. This automation saves you time and ensures your email marketing is always up to date with your latest customers.

By using Pabbly Connect, you can easily integrate multiple applications, automate your workflows, and focus on growing your business without manual data entry. This integration between Stripe and Flodesk showcases the power of automation in enhancing your marketing efforts.

Conclusion

This guide summarizes the key points and helps you understand the essential features and benefits of using this tool.

Ensure you check out Pabbly Connect to create business automation workflows and reduce manual tasks. Pabbly Connect currently offer integration with 2,000+ applications.


In summary, this tutorial demonstrates how to utilize Pabbly Connect to seamlessly integrate Stripe with Flodesk. By automating the process of adding subscribers and managing segments, you can enhance your email marketing efficiency.

Integrating Pabbly Subscription Billing with Google Sheets: A Step-by-Step Guide

Learn how to automate customer data transfer from Pabbly Subscription Billing to Google Sheets using Pabbly Subscription Billing with this detailed tutorial. Create professional recurring billing solutions for your business with point-and-click simplicity and complete control over your financial data.

Watch Step By Step Video Tutorial Below


1. Accessing Pabbly Subscription Billing for Integration

To start integrating Pabbly Subscription Billing with Google Sheets, first, log into your Pabbly Subscription Billing account. This platform is essential because it manages customer subscriptions and payments, which will be automatically transferred to Google Sheets. using Pabbly Connect

Once logged in, navigate to the dashboard where you can monitor customer transactions. This dashboard is crucial for tracking payments and customer details that will be sent to Google Sheets through automation.


2. Creating a Workflow in Pabbly Connect

To automate the data transfer process, you will need to create a workflow using Pabbly Subscription Billing and Pabbly Connect. Begin by logging into Pabbly Connect and clicking on the ‘Create Workflow’ button. Name your workflow, for example, ‘Add Customer Details from Pabbly Subscription Billing to Google Sheets’.

Next, you will set up the trigger and action. The trigger event will be when a new customer is created in Pabbly Subscription Billing, and the action will be to add that customer’s details to Google Sheets. The workflow will automatically execute these actions when a payment is made.

  • Log into Pabbly Connect.
  • Click on ‘Create Workflow’.
  • Name your workflow.
  • Set the trigger and action applications.

After setting up the workflow, you will see two boxes for the trigger and action. Select Pabbly Subscription Billing as the trigger application and Google Sheets as the action application. This setup ensures that every new customer payment is captured and recorded in Google Sheets.


3. Connecting Pabbly Subscription Billing with Webhook

To connect Pabbly Subscription Billing to Pabbly Connect, you will need to use a webhook URL. After selecting the trigger event, copy the provided webhook URL from Pabbly Connect. Then, return to your Pabbly Subscription Billing dashboard. using Pabbly Connect

In Pabbly Subscription Billing, click on the ‘Settings’ section and locate the ‘Webhooks’ option. Here, you will add a new webhook using the URL you copied earlier. This step is crucial as it establishes the connection for data transfer.

  • Navigate to the ‘Settings’ section in Pabbly Subscription Billing.
  • Select ‘Webhooks’ and add a new webhook.
  • Paste the copied webhook URL.

Once the webhook is successfully added, you will need to perform a test submission by creating a new customer in Pabbly Subscription Billing. This action will ensure that the webhook is functioning correctly and data is being sent to Pabbly Connect.


4. Mapping Customer Data to Google Sheets

After confirming that the webhook is working, you will proceed to map the customer data to Google Sheets. In Pabbly Connect, select Google Sheets as your action application and choose the appropriate action event, such as ‘Add Row’. using Pabbly Connect

Next, connect your Google Sheets account to Pabbly Connect. You will need to provide access to your Google account to allow Pabbly Connect to write data into your sheets. Once connected, select the spreadsheet where you want to store the customer details.

Select Google Sheets as the action application. Choose the action event for adding data. Connect your Google Sheets account. Select the target spreadsheet.

Finally, map the fields from Pabbly Subscription Billing to the corresponding columns in Google Sheets. This mapping ensures that every time a new customer is created, their details will be automatically added to the specified sheet.


5. Testing and Activating the Integration

Once you have completed the mapping, it is time to test the integration. Click on ‘Save and Send Test Request’ in Pabbly Connect to send a test row to Google Sheets. This action will help you confirm that the integration is working correctly.

If the test is successful, you will see the customer details appear in Google Sheets as specified. This means that your integration between Pabbly Subscription Billing and Google Sheets is now active and will automatically update with each new customer payment.

To finalize the integration, make sure to activate the workflow in Pabbly Connect. This step ensures that all future customer data will be sent to Google Sheets without any manual intervention.


Conclusion

Integrating Pabbly Subscription Billing with Google Sheets allows for seamless automation of customer data transfer. By following these steps, you can efficiently manage customer information and streamline your workflows.

Ensure you check out Pabbly Connect to create business automation workflows and reduce manual tasks. Pabbly Connect currently offer integration with 2,000+ applications.

Integrating Google Sheets with Pabbly Connect for Tag Management

Learn how to integrate Google Sheets with Pabbly Connect to automate adding rows when tags are added in Go High Level. Step-by-step guide included! Learn to create powerful connections between your critical applications without requiring specialized programming knowledge or extensive technical background.

Watch Step By Step Video Tutorial Below


1. Accessing Pabbly Connect for Google Sheets Integration

To start integrating Google Sheets with Pabbly Connect, first access your Pabbly Connect account. This platform will enable you to automate the process of adding rows in Google Sheets whenever a tag is added to a contact in Go High Level.

Once logged in, you will see a dashboard where you can manage your workflows. The first step is to create a new workflow that will handle the integration between Go High Level and Google Sheets using Pabbly Connect.


2. Creating a Workflow in Pabbly Connect

After accessing Pabbly Connect, click on the ‘Create Workflow’ button. Name your workflow something descriptive, such as ‘Add Google Sheets Row When Contact Tag is Added’. This helps in identifying the purpose of the workflow later.

Next, select the trigger application, which in this case is Go High Level (Lead Connector). Choose the event as ‘Contact Tag’ to initiate the workflow. This setup allows Pabbly Connect to listen for any changes in contact tags.

  • Click on ‘Create’ to finalize your workflow setup.
  • Ensure that you have both Go High Level and Google Sheets open for the next steps.

Once the trigger is set, you will receive a webhook URL from Pabbly Connect that acts as a bridge between Go High Level and Google Sheets. This URL must be used to capture data when tags are added or removed.


3. Setting Up the Trigger in Go High Level

To set up the trigger, go to your Go High Level account and navigate to the automation section. Create a new workflow that starts with the trigger ‘Contact Tag’. This will allow you to monitor when a tag is added or removed from a contact.

After naming your workflow, save the trigger settings. The next step is to configure the action that will send the data to Pabbly Connect. Choose the webhook action and paste the webhook URL you received earlier from Pabbly Connect.

  • Select ‘POST’ as the request method.
  • Save the action and publish your workflow to make it active.

This setup allows Pabbly Connect to receive data whenever a contact tag is modified, enabling seamless integration with Google Sheets.


4. Connecting Google Sheets to Pabbly Connect

Now that the trigger is set up, return to your Pabbly Connect workflow to add Google Sheets as the action application. Click on ‘Connect’ and select Google Sheets from the list of applications.

Authorize Pabbly Connect to access your Google Sheets account. Once connected, choose the specific spreadsheet and sheet where you want the data to be added. This is where all the tag-related information will be stored.

Select the correct spreadsheet from the dropdown menu. Map the fields from the trigger response to the appropriate columns in your Google Sheets.

By mapping the fields, you ensure that whenever a tag is added, the relevant contact details are automatically populated in Google Sheets via Pabbly Connect.


5. Testing the Integration

With everything set up, it’s time to test your integration. Go back to your Go High Level account and add a tag to an existing contact. This action should trigger the workflow you created using Pabbly Connect.

Check your Google Sheets to confirm that a new row has been added with the contact details and the tag information. If the setup is correct, you should see all the mapped fields populated automatically.

Repeat this process as needed to ensure that all tags added to contacts are reflected in Google Sheets. This integration allows for efficient tracking of contact tags without manual data entry, showcasing the power of Pabbly Connect.


Conclusion

In this tutorial, we explored how to use Pabbly Connect to automate the process of adding rows in Google Sheets whenever a tag is added in Go High Level. This integration streamlines your workflow and ensures accurate record-keeping of contact tags.

Ensure you check out Pabbly Connect to create business automation workflows and reduce manual tasks. Pabbly Connect currently offer integration with 2,000+ applications.

Automate Google Contacts Creation Using Pabbly Connect

Learn how to automate the creation of Google Contacts from emails using Pabbly Connect. This step-by-step tutorial covers all necessary integrations. Eliminate manual repetitive tasks from your workflow. Discover proven automation methods with intuitive steps designed for efficiency-minded professionals.

Watch Step By Step Video Tutorial Below


1. Accessing Pabbly Connect for Automation

To start automating the creation of Google Contacts, you first need to access Pabbly Connect. Sign in to your Pabbly account, which will take you to the dashboard where all Pabbly applications are listed.

Once logged in, click on the ‘Access Now’ button to enter the Pabbly Connect interface. Here, you will find a big blue button on the right side labeled ‘Create Workflow’. Click on this button to proceed with setting up your automation.


2. Setting Up the Trigger in Pabbly Connect

The next step in the process involves setting up the trigger for your automation. In Pabbly Connect, the trigger will be the Email Parser, which captures incoming emails. This allows you to use the email body to create Google Contacts.

  • Open your Gmail account and go to Settings.
  • Under the Forwarding and POP/IMAP tab, add the email address provided by Pabbly Connect.
  • Verify the forwarding address using the confirmation code sent to your Gmail.

After setting up the email forwarding, you will be ready to receive emails that will trigger the workflow in Pabbly Connect. This ensures that every email you receive can be processed for creating Google Contacts.


3. Filtering Emails for Contact Creation

Now that you have set up the trigger, it’s crucial to filter the emails to ensure that only relevant ones are processed. In Pabbly Connect, you will use the filter feature to check if the subject of the email contains the keyword ‘contact’.

  • Set the filter condition to check if the subject contains the word ‘contact’.
  • Click on ‘Save and Send Test Request’ to verify the filter.

If the condition is met, the workflow proceeds to create a Google Contact. This filtering step is essential to avoid creating contacts from unrelated emails, ensuring your Google Contacts remain organized and relevant.


4. Creating Google Contacts from Email Data

Once the email is filtered successfully, the next step is to create the Google Contact. In Pabbly Connect, select Google Contacts as your action application and choose the ‘Create Contact’ event.

You will need to connect your Google account to Pabbly Connect. Click on ‘Add New Connection’ and sign in with your Google account, allowing necessary permissions. After the connection is established, you can map the fields from the email data to the Google Contacts fields.


5. Finalizing and Testing the Integration

After mapping the necessary fields such as display name, email address, and phone number, you can finalize the setup. In Pabbly Connect, click on ‘Save and Send Test Request’ to create the contact in Google Contacts.

Once the test request is successful, refresh your Google Contacts to see the newly created contact. This ensures that your automation is working as intended. Every time you receive an email with the specified subject, a contact will be created automatically, streamlining your workflow.


Conclusion

In this tutorial, we explored how to automate the creation of Google Contacts using Pabbly Connect. By setting up triggers and filters, you can ensure that relevant email data is transformed into organized contacts seamlessly.

Ensure you check out Pabbly Connect to create business automation workflows and reduce manual tasks. Pabbly Connect currently offer integration with 2,000+ applications.

Integrate Gmail with Flowdesk Using Pabbly Connect for New Leads

Learn how to automate new lead creation in Flowdesk from Gmail using Pabbly Connect. Follow our step-by-step guide for seamless integration. Navigate the automation landscape confidently with clear, structured guidance suitable for professionals regardless of prior technical experience.

Watch Step By Step Video Tutorial Below


1. Setting Up Pabbly Connect for Gmail and Flowdesk Integration

To begin using Pabbly Connect, access the dashboard by signing in or creating a new account. This platform is essential for automating workflows between applications like Gmail and Flowdesk.

Once logged in, locate the ‘Create Workflow’ button on the right side. Click it to open a dialog box where you can name your workflow. For this integration, name it ‘Create Flowdesk Subscriber for Leads Received via Email’ and hit ‘Create’.


2. Setting Up Gmail Trigger in Pabbly Connect

The first step in this workflow is to set up a trigger using Pabbly Connect. Select Gmail as your trigger application. The event will be ‘Email Parser’ which extracts data from incoming emails. This is crucial for capturing lead information from emails.

  • Select ‘Email Parser’ as the trigger event.
  • Copy the email address provided by Pabbly Connect for forwarding.
  • Configure your Gmail settings to forward emails to this address.

After setting up the forwarding, send a test email to this address. Ensure the email follows the specified template to allow Pabbly Connect to extract the lead details accurately. This setup is essential for the automation process to function correctly.


3. Filtering New Leads for Flowdesk

Next, we will set a filter in Pabbly Connect to ensure that only relevant emails trigger the workflow. This step is critical to avoid processing unrelated emails.

  • Add a filter condition to check if the email subject contains ‘New Lead’.
  • Configure the filter to continue only if this condition is met.

By setting this filter, you ensure that the workflow only processes emails that are intended to create new leads, improving efficiency and accuracy in your lead management process.


4. Extracting Lead Details Using Pabbly Connect

After filtering, the next step involves extracting specific details from the email body. This is done using the Text Formatter feature within Pabbly Connect. You will need to extract the first name, last name, email address, phone number, and company name from the email content.

Use the ‘Text Parser’ action to extract required fields. Map the extracted values to the corresponding fields in Flowdesk.

This extraction process is vital for ensuring that all necessary lead information is captured and can be used for subsequent actions in the workflow.


5. Creating Subscribers in Flowdesk with Pabbly Connect

The final step is to create a subscriber in Flowdesk using the extracted lead details. In this step, select Flowdesk as your action application and choose the ‘Create or Update Subscriber’ action. using Pabbly Connect

Map the extracted fields from the previous step to the corresponding fields in Flowdesk, such as first name, last name, email, phone number, and company name. This mapping ensures that the correct data is sent to Flowdesk to create a new subscriber.

Once the mapping is complete, send a test request to verify that the subscriber has been created successfully. After confirmation, you can also add the subscriber to a specific segment in Flowdesk, enhancing your lead management capabilities.


Conclusion

In this tutorial, we detailed how to use Pabbly Connect to automate the integration of Gmail with Flowdesk for managing new leads. By following these steps, you can streamline your lead capture process and ensure efficient subscriber management.

Ensure you check out Pabbly Connect to create business automation workflows and reduce manual tasks. Pabbly Connect currently offer integration with 2,000+ applications.

Integrate MailerLite with Google Sheets Using Pabbly Connect

Learn how to integrate MailerLite with Google Sheets using Pabbly Connect to automate subscriber data updates effortlessly. Navigate the automation landscape confidently with clear, structured guidance suitable for professionals regardless of prior technical experience.

Watch Step By Step Video Tutorial Below


Accessing Pabbly Connect for Integration

To begin integrating MailerLite with Google Sheets, first access Pabbly Connect by navigating to the URL Pabbly.com/connect. Here, you can either sign in as an existing user or create a new account in just a couple of minutes. New users will receive 100 free tasks upon signing up, making it a great opportunity to explore the platform.

Once signed in, click on the ‘Access Now’ button for Pabbly Connect. You will be directed to the dashboard where you can create a new workflow. Click on ‘Create Workflow’ to start the integration process.


Creating a Workflow in Pabbly Connect

In this section, you will create a workflow to automate the process of adding subscriber details to Google Sheets whenever a new subscriber is added to a specific group in MailerLite. After clicking ‘Create Workflow’, name your workflow something relevant, such as ‘MailerLite to Google Sheets Integration’.

Next, you will define the trigger and action for your workflow. The trigger will be MailerLite, specifically the event ‘Subscriber Added to a Group’. This event will instantly capture new incoming data, ensuring real-time updates. To set this up, click on the ‘Connect’ button next to MailerLite and select ‘Add New Connection’.

  • Log into your MailerLite account.
  • Navigate to your profile picture and select ‘Integrations’.
  • Copy the API key provided and paste it into Pabbly Connect.

Once connected, click on ‘Save and Send Test Request’ to ensure the integration is functioning correctly. This setup allows Pabbly Connect to monitor your MailerLite account for new subscribers in real-time.


Setting Up Google Sheets in Pabbly Connect

After configuring your MailerLite connection, the next step is to set up Google Sheets as the action application. In this case, the action event will be to ‘Add New Row’ in your Google Sheets. Click on ‘Connect’ next to Google Sheets and select ‘Add New Connection’. using Pabbly Connect

Sign in with the Google account that has access to the Google Sheet you want to update. Once authorized, select the specific spreadsheet where you want to add subscriber details. Make sure to refresh the Google Sheets connection to capture the latest changes.

  • Choose the correct spreadsheet (e.g., MailerLite Subscribers).
  • Map the fields from MailerLite to the corresponding columns in Google Sheets (e.g., First Name, Last Name, Email).
  • Ensure the group name is also included in the mapping process.

After mapping all necessary fields, click on ‘Save and Send Test Request’. This action will update your Google Sheet with the subscriber’s information, confirming that the integration is successful.


Testing the Integration with Pabbly Connect

With your workflow set up, it’s time to test the integration. Go back to MailerLite and add a subscriber to the designated group. This action should trigger the workflow in Pabbly Connect and send the new subscriber’s details to your Google Sheet.

Once you’ve added a subscriber, return to Pabbly Connect to check if the test request was successful. You should see that the subscriber’s details have been captured correctly in your Google Sheet. This real-time update ensures that your data is always current and accurate.

If you wish to test further, you can change the group of an existing subscriber and observe how Pabbly Connect updates the Google Sheet accordingly. This showcases the efficiency and effectiveness of the integration process.


Conclusion

In this tutorial, we explored how to integrate MailerLite with Google Sheets using Pabbly Connect. This integration automates the process of updating subscriber details in real-time, enhancing efficiency and accuracy in your data management. With Pabbly Connect, you can streamline your workflows and focus more on growing your business.

Ensure you check out Pabbly Connect to create business automation workflows and reduce manual tasks. Pabbly Connect currently offer integration with 2,000+ applications.

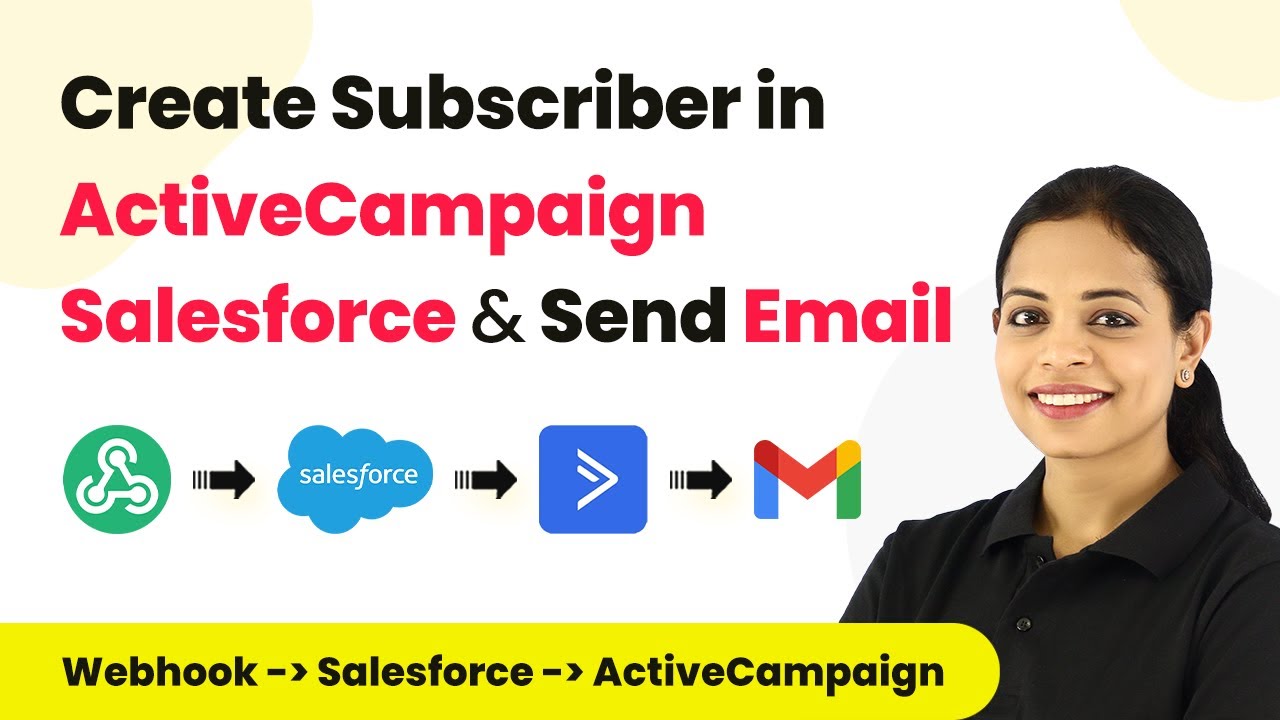
Integrating Salesforce and ActiveCampaign with Pabbly Connect: A Step-by-Step Guide

Learn how to integrate Salesforce and ActiveCampaign using Pabbly Connect to automate lead creation and email notifications. Eliminate manual repetitive tasks from your workflow. Discover proven automation methods with intuitive steps designed for efficiency-minded professionals.

Watch Step By Step Video Tutorial Below


1. Accessing Pabbly Connect for Integration

To begin with, access Pabbly Connect by navigating to the official website. You will need to either sign in or sign up for a new account. Existing users can sign in, while new users can create an account in under two minutes, receiving 100 free tasks during registration.

Once logged in, you will arrive at the dashboard of Pabbly Connect. From here, locate the ‘Create Workflow’ button on the right side. Clicking this will prompt you to name your workflow. For this tutorial, you can name it ‘Create Subscriber in Salesforce and ActiveCampaign’.


2. Setting Up the Webhook Trigger in Pabbly Connect

In this step, we will set up the webhook trigger in Pabbly Connect. After naming your workflow, you will see two sections: Trigger and Action. Select Webhook for the trigger application. This allows you to capture data from any application that supports webhooks.

  • Click on ‘Webhook’ as the trigger application.
  • Copy the generated webhook URL.
  • Integrate this URL into the form application you are using, such as Jotform.

After integrating the webhook URL, perform a test submission in your form application to capture the webhook response. This is crucial for ensuring that Pabbly Connect receives the data correctly.


3. Creating Leads in Salesforce Using Pabbly Connect

With the webhook set up, the next step involves creating a lead in Salesforce through Pabbly Connect. Select Salesforce as the action application and choose the ‘Create Lead’ action event. You will need to connect your Salesforce account to Pabbly Connect by allowing access.

Once connected, you will need to map the fields from the webhook response to the Salesforce lead fields. This includes mapping the first name, last name, email address, and phone number. Mapping ensures that the correct data is sent to Salesforce for each lead created.


4. Adding Contacts in ActiveCampaign via Pabbly Connect

After successfully creating a lead in Salesforce, the next action is to add a contact in ActiveCampaign using Pabbly Connect. Select ActiveCampaign as the action application and choose ‘Create or Update a Contact’ as the action event. Again, you will need to connect your ActiveCampaign account to Pabbly Connect.

Once connected, map the necessary fields such as email address, first name, and last name from the webhook response to the respective ActiveCampaign fields. This ensures that your contact list is updated with the latest information from your form submissions.


5. Sending Emails with Gmail via Pabbly Connect

The final step in this integration process is to send an email notification via Gmail using Pabbly Connect. Select Gmail as the action application and choose ‘Send Email’ as the action event. Connect your Gmail account to Pabbly Connect by granting the necessary permissions.

In the email setup, map the recipient’s email address from the webhook response and customize the email content. You can add a subject and body text, including dynamic fields like the recipient’s first name and the course they enrolled in. Once configured, send a test email to ensure everything is working correctly.


Conclusion

This tutorial covered how to integrate Salesforce and ActiveCampaign using Pabbly Connect to automate lead creation and email notifications. By following these steps, you can streamline your processes and enhance your communication with leads effectively.

Ensure you check out Pabbly Connect to create business automation workflows and reduce manual tasks. Pabbly Connect currently offer integration with 2,000+ applications.