How to Send Order Confirmation SMS for Multiple Items | Shopify to Twilio Integration Using Pabbly Connect

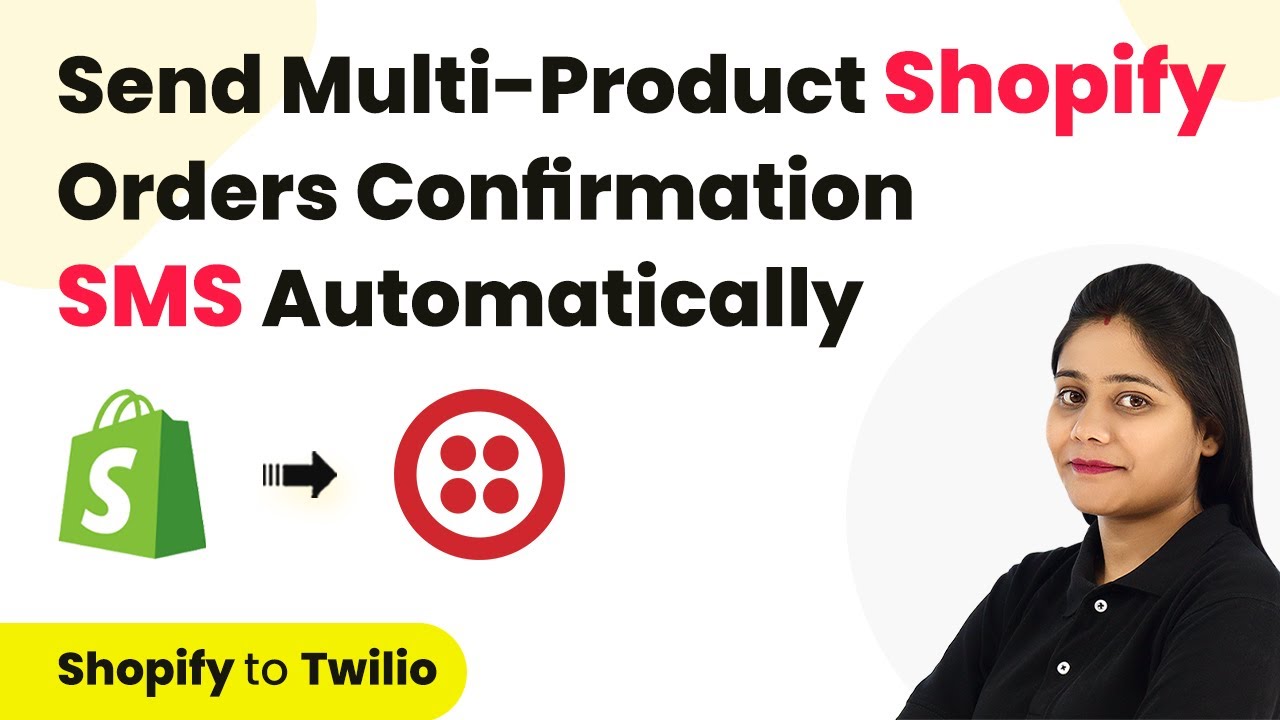
Learn how to automate order confirmation SMS for multiple items using Pabbly Connect, Shopify, and Twilio. Step-by-step tutorial included. Discover hidden automation capabilities within your existing tools. This guide shows you how to connect your essential applications and permanently eliminate redundant manual processes.

Watch Step By Step Video Tutorial Below


1. Setting Up Pabbly Connect for Order Confirmation SMS

To send order confirmation SMS for multiple items, you first need to set up Pabbly Connect. Start by creating a free account if you don’t have one. Once logged in, navigate to the dashboard and click the blue ‘Create Workflow’ button.

Here, give your workflow a name, such as ‘Send Order Confirmation SMS for Multiple Products’. Choose the folder where you want to save this workflow and click ‘Create’. This will initiate the setup process for integrating Shopify and Twilio through Pabbly Connect.


2. Connecting Shopify to Pabbly Connect

In this step, you will connect your Shopify store to Pabbly Connect. Select Shopify as your trigger application and choose the trigger event ‘New Order’. This event will activate whenever a new order is placed in your Shopify store.

  • Select the trigger event: New Order
  • Copy the generated webhook URL
  • Enable Advanced Response in Shopify settings

Go to your Shopify settings, navigate to Notifications, and create a new webhook. Paste the copied webhook URL and select the event ‘Order Created’. Ensure to select JSON format and the latest API version. This setup will ensure that every new order’s details are sent to Pabbly Connect.


3. Placing a Test Order in Shopify

Now that your Shopify store is connected to Pabbly Connect, you can place a test order. Add multiple products to your cart, such as an LED bulb, tube light, and beauty blender, and proceed to checkout. Use dummy details for this test order.

As you complete the checkout process, the order details will be captured by Pabbly Connect. You’ll see the response in Pabbly Connect’s dashboard, confirming that the integration is functioning correctly. The details captured will include product names, quantities, and customer information.


4. Formatting Order Data for SMS

After capturing the order details, the next step is to format this data into a readable SMS format using Pabbly Connect. Add a new step and select ‘Code by Pabbly’ to run JavaScript. This allows you to convert the array of line items into a simpler format.

  • Map the line items data to the JavaScript code
  • Use the provided JavaScript code to format the order details
  • Test the response to ensure data is formatted correctly

Once the data is formatted successfully, you can proceed to send this information as an SMS using Twilio, ensuring that the order confirmation SMS contains all relevant product details.


5. Sending Order Confirmation SMS via Twilio

In this final step, you will send the formatted order details as an SMS using Twilio through Pabbly Connect. Select Twilio as the action application and choose ‘Send SMS Message’ as the action event. Connect your Twilio account by entering your Account SID and Authorization Token.

Compose the SMS body with a friendly message, including the customer’s name and the product details formatted from the previous step. Ensure you map the customer’s phone number and your Twilio sender number correctly. Click on the send button, and the SMS will be dispatched automatically.


Conclusion

In conclusion, using Pabbly Connect to automate the process of sending order confirmation SMS for multiple items is efficient and effective. By following these steps, you can ensure that every customer receives timely updates about their orders, enhancing their shopping experience.

Ensure you check out Pabbly Connect to create business automation workflows and reduce manual tasks. Pabbly Connect currently offer integration with 2,000+ applications.

How to Create an AI Writer Using Google Forms, OpenAI, and Google Docs with Pabbly Connect

Learn how to create an AI writer using Google Forms, OpenAI, and Google Docs with Pabbly Connect. Follow this detailed tutorial for seamless integration. Revolutionize your productivity approach with just a few strategic clicks. Uncover professional methods for connecting applications and creating workflows that reclaim hours of your week.

Watch Step By Step Video Tutorial Below


1. Setting Up Pabbly Connect for Your AI Writer

To create an AI writer using Google Forms, OpenAI, and Google Docs, the first step is to set up Pabbly Connect. This integration platform allows seamless connection between these applications. Start by signing up for a free account on Pabbly Connect, which only takes a few minutes.

Once logged in, navigate to the dashboard and click on the blue button labeled ‘Create Workflow’. Name your workflow, such as ‘Build AI Writer Using Google Forms, OpenAI, and Google Docs’. Select the folder for your automation and click on ‘Create’. This sets the stage for the integration.


2. Connecting Google Forms with Pabbly Connect

Next, you will connect Google Forms to Pabbly Connect. This integration is crucial as it will allow the automation to trigger whenever a new response is submitted. Start by creating a dummy submission in your Google Form.

  • Open your Google Form and submit a new topic, such as ‘Write a story on a dog named Oreo’.
  • In Pabbly Connect, select Google Forms as your trigger application.
  • Choose the trigger event as ‘New Response Received’.

After selecting the trigger event, Pabbly Connect will provide a webhook URL. Copy this URL to set up the connection in your Google Form. Go to your associated Google Sheet, click on ‘Extensions’, then ‘Add-ons’, and search for the ‘Pabbly Connect Webhooks’ add-on. Install it and paste the webhook URL in the initial setup.


3. Integrating OpenAI with Pabbly Connect

With Google Forms connected, the next step is to integrate OpenAI using Pabbly Connect. This integration will generate content based on the submitted topic. In the action application, select OpenAI and choose the action event to create a completion.

To connect OpenAI, you need an API key. If you haven’t created one yet, follow the prompts in Pabbly Connect. Once connected, set the AI model to use, typically the latest version available. Map the prompt field to the response received from Google Forms. This allows the content generation to be dynamic based on user input.

  • Select the AI model you want to use (e.g., GPT-3.5).
  • Map the prompt field to the Google Form response.
  • Click on ‘Save and Send Test Request’ to ensure it’s working.

After testing, you should receive a response with the generated content, confirming that the integration with OpenAI via Pabbly Connect is successful.


4. Creating and Updating Google Docs with Pabbly Connect

Now that OpenAI is integrated, the next step is to create a Google Document where the generated content will be stored. In Pabbly Connect, add Google Drive as the next action application, and select the event to create a file in a specific folder.

Connect your Google Drive account and select the folder where you want to save the documents. For the file name, use the topic submitted through Google Forms. This ensures that each document is uniquely named based on the user input.

Choose the folder in Google Drive for document storage. Map the file name to the topic submitted in the form. Click ‘Save and Send Test Request’ to create the document.

After successfully creating the document, the next step is to update this document with the content generated by OpenAI. Use the same Google Drive connection and select the action event to update content in the file.


5. Finalizing the Integration in Pabbly Connect

To finalize the integration, ensure that the content generated by OpenAI is mapped to update the Google Document created earlier. Use the file ID from the previous step to ensure that the correct document is updated with new content each time a form is submitted.

After mapping the necessary fields, click ‘Save and Send Test Request’ to verify that the content updates correctly in Google Docs. Once everything is set up, enable the ‘Send on Event’ option in Pabbly Connect to ensure the automation runs seamlessly for every new submission.

With this setup, every time someone submits a topic through Google Forms, Pabbly Connect will automatically trigger the content generation and store it in Google Docs. This integration allows for a fully automated AI writing system that saves time and effort.


Conclusion

This tutorial demonstrated how to create an AI writer using Google Forms, OpenAI, and Google Docs with the help of Pabbly Connect. By following these steps, you can automate content creation efficiently and effectively.

Ensure you check out Pabbly Connect to create business automation workflows and reduce manual tasks. Pabbly Connect currently offer integration with 2,000+ applications.

Set Up WhatsApp Notifications for File Uploads on Slack Channel Using Pabbly Connect

Learn how to set up WhatsApp notifications for file uploads on Slack using Pabbly Connect. Follow this step-by-step tutorial to automate your workflow. Implement the precise methodologies leading organizations use to automate repetitive tasks, illustrated with practical examples designed for immediate application.

Watch Step By Step Video Tutorial Below


Access Pabbly Connect for WhatsApp Notifications

To set up WhatsApp notifications for file uploads on Slack, you first need to access Pabbly Connect. Visit the homepage by typing ‘Pabbly.com/connect’ in your browser. You will see options to sign in or sign up for free.

If you are new to Pabbly Connect, click on the ‘Sign Up for Free’ button to create your account. As a new user, you will receive 100 free tasks every month to explore the platform’s capabilities.


Create a Workflow in Pabbly Connect

Once logged in, navigate to the dashboard and click on ‘Create Workflow’ to start automating the WhatsApp notification process. Name your workflow, for example, ‘Set Up WhatsApp Notification for File Uploads on Slack Channel’, and choose a folder to save it. using Pabbly Connect

After naming your workflow, you will see two sections: Trigger and Action. In this case, select Slack as the trigger application. The trigger event will be set to ‘New Message’. Click on ‘Connect’ to build a connection with your Slack account.

  • Select ‘Add New Connection’ to set up a new connection.
  • Choose the token type as ‘User’ for receiving messages.
  • Click ‘Save’ and allow permissions for Pabbly Connect to access your Slack account.

After successful authorization, select the channel where file uploads will occur. For this example, choose the ‘General’ channel.


Test the Trigger in Pabbly Connect

To test the trigger, click ‘Save and Send Test Request’. Since Slack has a polling time of 10 minutes, you will need to upload a file in the selected channel to receive a response. Use an incognito window to upload a file from a user’s ID.

Once the file is uploaded, go back to Pabbly Connect and click ‘Save and Send Test Request’. You should receive a response with the details of the uploaded file, including the message and user information.

  • Ensure that the uploaded message contains the file ID.
  • Verify that the response includes all necessary details from Slack.

With this response, you have confirmed that the connection between Slack and Pabbly Connect is successful.


Set Up a Filter in Pabbly Connect

Next, you will set up a filter in Pabbly Connect to ensure that WhatsApp notifications are sent only when a file is uploaded. Click on ‘Add Action Step’ and select ‘Filter’ as your action application.

In the filter settings, select the file ID from the previous Slack response. This will ensure that the workflow continues only if a file ID exists in the message. Click ‘Save and Send Test Request’ to check the condition.

Set the filter to check if the file ID is present. If the condition is true, the workflow will proceed to the next action.

After confirming the filter condition is true, proceed to add another action step for retrieving user details.


Get User Details from Slack Using Pabbly Connect

To retrieve details about the user who uploaded the file, select Slack as the action application again and choose ‘Get User by ID’ as the action event. Click on ‘Connect’ and use the existing connection you created earlier. using Pabbly Connect

Map the user ID received from the previous Slack response to get the user’s details. This mapping ensures that the correct user information is dynamically retrieved each time a file is uploaded.

Click ‘Save and Send Test Request’ to fetch user details. Confirm that the response includes the user’s name and email.

With the user’s details retrieved, you can now set up the final action to send a WhatsApp notification.


Send WhatsApp Notification Using Pabbly Connect

For the final step, select Vati as your action application and choose ‘Send Template Message’ as the action event. Click on ‘Connect’ and create a new connection using the API endpoint and access token from your Vati account. using Pabbly Connect

After successfully connecting, fill in the required fields such as the WhatsApp number, template name, and message content. The message can include dynamic variables like the file ID and sender’s name to personalize the notification.

Enter the WhatsApp number where notifications should be sent. Select the template you created for notifications. Map the dynamic variables for message content.

Click ‘Save and Send Test Request’ to send the WhatsApp notification. Check your WhatsApp to confirm the message was received successfully, indicating that the integration is complete.


Conclusion

By following these steps, you can easily set up WhatsApp notifications for file uploads on Slack using Pabbly Connect. This automation streamlines communication and ensures you never miss important updates from your team.

Ensure you check out Pabbly Connect to create business automation workflows and reduce manual tasks. Pabbly Connect currently offer integration with 2,000+ applications.

Instantly Notify Subscribers for New WordPress Posts Using Pabbly Connect

Learn how to instantly notify subscribers for new WordPress posts using Pabbly Connect. Follow this step-by-step guide for seamless integration. Transform complex automation concepts into accessible, actionable steps that eliminate unnecessary manual work while maximizing existing application capabilities.

Watch Step By Step Video Tutorial Below


1. Accessing Pabbly Connect for Automation

To instantly notify subscribers for new WordPress posts, first, access Pabbly Connect. As an existing user, sign in to your account. If you’re new, click on the ‘Sign Up for Free’ button to start with 100 tasks monthly.

After signing in, navigate to the all applications page and click on Pabbly Connect to reach your dashboard. Here, you can create a new workflow to automate notifications for your subscribers.


2. Creating a Workflow in Pabbly Connect

In your Pabbly Connect dashboard, click on the ‘Create Workflow’ button. Name your workflow ‘Instantly Notify Subscribers for New WordPress Post’ and save it in the folder named ‘WordPress’. This workflow will help you automate notifications whenever a new post is published.

  • Click on ‘Create’ to proceed.
  • Select WordPress as the trigger application.
  • Choose ‘New Post Published’ as the trigger event.

By setting up this workflow correctly, you ensure that every time a new post is published, it triggers the automation process in Pabbly Connect.


3. Setting Up Google Sheets Integration

Next, integrate Google Sheets with Pabbly Connect to fetch subscriber data. After selecting your trigger, the first action application will be Google Sheets. Choose ‘Get Rows’ as the action event to retrieve subscriber information stored in your Google Sheet.

To connect Google Sheets, click on ‘Connect’ and authenticate your Google account. Select the spreadsheet named ‘Subscribers Data’ and choose the relevant sheet. Specify the range from A2 to B250 to include all your 250 subscribers.


4. Sending Email Notifications with Gmail

Once you have the subscriber data, the next step is to send notifications via Gmail using Pabbly Connect. Select Gmail as your action application and choose ‘Send Email’ as the action event. This step will enable you to notify subscribers about new posts.

  • Map the recipient email address from the Google Sheets data.
  • Set the email subject as ‘WordPress New Post Update’.
  • Include the WordPress post hyperlink in the email body.

This setup ensures that subscribers receive timely notifications with direct links to your new WordPress posts, all facilitated by Pabbly Connect.


5. Testing and Activating the Integration

After configuring the Gmail action, it’s crucial to test your workflow in Pabbly Connect. Publish a new post in WordPress to trigger the integration. Check the response in Pabbly Connect to confirm that the post details are captured correctly.

Once you receive a positive response, activate the workflow. This will ensure that every time a new post is published, your subscribers will automatically receive an email notification, making the process seamless and efficient.


Conclusion

In conclusion, using Pabbly Connect to instantly notify subscribers for new WordPress posts is an effective way to keep your audience engaged. By following these steps, you can automate the notification process, ensuring your subscribers are always updated with your latest content.

Ensure you check out Pabbly Connect to create business automation workflows and reduce manual tasks. Pabbly Connect currently offer integration with 2,000+ applications.

How to Add Facebook Leads to Google Sheets Using Pabbly Connect

Learn how to seamlessly integrate Facebook Leads with Google Sheets for your Dog Training Centre using Pabbly Connect. Step-by-step tutorial included. Discover hidden automation capabilities within your existing tools. This guide shows you how to connect your essential applications and permanently eliminate redundant manual processes.

Watch Step By Step Video Tutorial Below


1. Access Pabbly Connect for Integration

To add Facebook leads to Google Sheets, you first need to access Pabbly Connect. Start by visiting the Pabbly Connect website and signing in as an existing user or creating a new account. If you are new, you can sign up for free and receive 100 tasks each month.

Once logged in, navigate to the Pabbly Connect dashboard. This is where you will create a new workflow to automate the integration between Facebook and Google Sheets. Click on the ‘Create Workflow’ button located on the right-hand side of the dashboard.


2. Create a Workflow in Pabbly Connect

In the workflow creation dialog, name your workflow something descriptive like ‘Add Facebook Leads to Google Sheets’. Next, choose a folder for organization, such as ‘Facebook Lead Ads’. Click on ‘Create’ to proceed. using Pabbly Connect

  • Name your workflow appropriately.
  • Select a folder for easy access.
  • Click on ‘Create’ to finalize.

After creating your workflow, you will see options for setting up a trigger and an action. The trigger is the event that starts the workflow, and the action is what happens in response. For this integration, the trigger will be Facebook Lead Ads, and the action will be Google Sheets.


3. Set Trigger and Action for Facebook Leads

In the trigger section, select Facebook as your trigger application and choose the event ‘New Lead Instant’. This means that every time you receive a new lead from your Facebook ads, the workflow will activate.

Next, move to the action section and select Google Sheets as the action application. Choose the action event ‘Add New Row’ to ensure that the lead details are added to your Google Sheet. This setup allows for seamless data transfer from Facebook to Google Sheets.

  • Select Facebook as the trigger application.
  • Choose ‘New Lead Instant’ as the trigger event.
  • Select Google Sheets as the action application.
  • Choose ‘Add New Row’ as the action event.

With the trigger and action set, you can now establish connections between Facebook Lead Ads and Pabbly Connect to start receiving leads directly into your Google Sheet.


4. Connect Facebook Leads to Pabbly Connect

To connect Facebook Lead Ads to Pabbly Connect, click on the connect button in the trigger section. You will be prompted to log into your Facebook account. Once logged in, authorize the connection. This step is crucial as it allows Pabbly Connect to access your Facebook leads.

After successful authorization, select the Facebook page associated with your dog training center. Choose the lead generation form you created, such as ‘Dog Training Contact Form’. This form will be used to capture lead details. Remember to save your selections and send a test request to ensure everything is functioning correctly.


5. Test the Integration and Map Data to Google Sheets

After setting up the connection, you need to perform a test submission. Go to the Meta for Developers page and use the lead ads testing tool to create a test lead. Fill in the required fields and submit the form. This action will generate a test lead that Pabbly Connect should capture.

Once the test lead is submitted, return to Pabbly Connect to check for a successful response. If the lead details appear correctly, you can then proceed to connect Google Sheets. Click on the connect button for Google Sheets and sign in with your Google account. Authorize the connection and select the Google Sheet where you want to store the lead details.

Perform a test submission using the lead ads testing tool. Check for a successful response in Pabbly Connect. Sign in to Google Sheets and authorize the connection.

Finally, map the lead details such as name, email, and phone number to the corresponding columns in your Google Sheet. This mapping ensures that every new lead is recorded accurately in your spreadsheet.


Conclusion

By following this tutorial, you can seamlessly integrate Facebook leads with Google Sheets using Pabbly Connect. This automation not only saves time but ensures that all leads are captured accurately for your dog training center. Start using Pabbly Connect to enhance your business processes today!

Ensure you check out Pabbly Connect to create business automation workflows and reduce manual tasks. Pabbly Connect currently offer integration with 2,000+ applications.

Generate Invoices Automatically Using Stripe with Pabbly Connect and Google Sheets

Learn how to generate invoices automatically using Stripe and Google Sheets with Pabbly Connect. Follow our step-by-step tutorial for seamless integration. Explore systematic approaches to creating efficient automation solutions that convert technical concepts into practical, implementable instructions.

Watch Step By Step Video Tutorial Below


Accessing Pabbly Connect for Invoice Generation

To generate invoices automatically using Stripe, the first step is to access Pabbly Connect. This platform facilitates the integration between Google Sheets and Stripe, allowing you to automate invoice creation. Start by navigating to the Pabbly Connect website and either sign in or create a free account.

Once signed in, you will be directed to the Pabbly Connect dashboard. Here, you can create a new workflow specifically for generating invoices. Click on the ‘Create Workflow’ button and name it ‘Generate Invoices Automatically Using Stripe’. Select a folder to save your workflow and proceed to set up the trigger and action.


Setting Up Google Sheets Trigger in Pabbly Connect

In this section, you will set up the Google Sheets trigger within Pabbly Connect. The trigger event will be configured to activate whenever a new or updated spreadsheet row is detected. Select Google Sheets as your trigger application.

  • Choose the trigger event as ‘New or Updated Spreadsheet Row’.
  • Copy the webhook URL provided by Pabbly Connect.
  • Open your Google Sheet and go to Extensions > Add-ons > Get Add-ons to install the Pabbly Connect Webhook add-on.

After installing, access the Pabbly Connect Webhook settings in your Google Sheet. Paste the copied webhook URL into the designated field and specify the trigger column, which should be the final data column (e.g., Column F). Once configured, click on ‘Send Test’ to ensure the connection is established successfully.


Formatting Amount and Creating Invoice Item in Stripe

With the Google Sheets trigger set up, the next step involves formatting the amount and creating an invoice item using Pabbly Connect. First, add an action step to perform a math operation to format the amount for Stripe. Select the ‘Number Format’ action and set the operation to multiply the amount by 100.

  • Map the amount from the Google Sheets response.
  • Set the operation to ‘Multiply’.
  • Save the action and test the request to ensure it works correctly.

Next, add another action step to create an invoice item in Stripe. Select Stripe as the action application and choose the event ‘Create Invoice Item with Price Object’. Connect your Stripe account using the API key, which you can find in your Stripe developer settings under API keys.


Finalizing Invoice Creation in Stripe

In the final step, you will create the actual invoice in Stripe using the data processed through Pabbly Connect. After setting up the invoice item, add another action step and select ‘Create Invoice’ as the action event in Stripe. Ensure you are connected to your Stripe account.

Fill in the required fields using mapped data from your Google Sheet and the previous action steps. For the customer ID, product name, and amount, ensure that you are using the correct mapping to pull data from the Google Sheets response. Once all fields are filled, click on ‘Save and Send Test Request’ to generate the invoice.

Upon successful creation, you will receive a confirmation response from Stripe, indicating that the invoice has been created. You can then check your Stripe account to verify that the invoice has been generated correctly.


Conclusion

By following these steps, you can easily generate invoices automatically using Stripe and Google Sheets with Pabbly Connect. This integration streamlines your invoicing process, saving time and reducing manual errors. Automate your workflows with Pabbly Connect for efficient invoice management.

Ensure you check out Pabbly Connect to create business automation workflows and reduce manual tasks. Pabbly Connect currently offer integration with 2,000+ applications.

Automate WhatsApp Notifications for Refunds in Pabbly Subscription Billing

Learn how to automate WhatsApp notifications for refunds created in Pabbly Subscription Billing using a simple step-by-step guide. Learn how leading businesses accelerate growth with optimized subscription management and flexible billing options that enhance customer experience.

Watch Step By Step Video Tutorial Below


1. Setting Up Pabbly Subscription Billing for Integration

Pabbly Subscription Billing is essential for automating WhatsApp messages when refunds are created. To start, access Pabbly Subscription Billing by navigating to its website and signing in or creating a new account. Once logged in, you will have access to various features that facilitate the integration process. using Pabbly Connect

After logging in, go to the dashboard where you can manage your subscriptions. This platform allows you to create webhooks that will send refund notifications automatically. The integration with WhatsApp will be established through Pabbly Connect, ensuring that all refund details are communicated effectively to customers.


2. Creating a Webhook in Pabbly Subscription Billing

To automate WhatsApp notifications for refunds, you will need to create a webhook in Pabbly Subscription Billing. This webhook acts as a bridge between Pabbly Subscription Billing and Pabbly Connect. Start by navigating to the settings section of your Pabbly Subscription Billing account. using Pabbly Connect

  • Select the ‘Webhooks’ option from the left sidebar.
  • Click on the ‘Add Webhook’ button to create a new webhook.
  • Provide a name for the webhook, such as ‘Refund Notification’.
  • Paste the webhook URL provided by Pabbly Connect into the designated field.
  • Select the ‘Payment Refund’ event as the trigger for the webhook.

After saving the webhook, it will capture refund details whenever a refund is initiated in Pabbly Subscription Billing, allowing for seamless communication through WhatsApp.


3. Configuring Pabbly Connect for WhatsApp Notifications

Once the webhook is set up, the next step involves configuring Pabbly Connect to send WhatsApp notifications. In Pabbly Connect, create a new workflow that will be triggered by the webhook you just created in Pabbly Subscription Billing. using Pabbly Connect

Select Pabbly Subscription Billing as the trigger application and set the event to ‘Payment Refund’. This setup will ensure that every time a refund is processed, Pabbly Connect will activate and send a WhatsApp message. You will then need to connect to WhatsApp using a service like WATI.

  • Choose WATI as the action application for sending WhatsApp messages.
  • Select the action event as ‘Send Template Message’.
  • Connect your WATI account by providing the necessary API endpoint and access token.

With this configuration, you are setting up the automation that will send WhatsApp notifications to customers whenever a refund occurs, thus enhancing customer communication.


4. Testing the Integration for Refund Notifications

After configuring Pabbly Connect, it is crucial to test the integration to ensure everything is working correctly. To do this, initiate a test refund in Pabbly Subscription Billing. This will trigger the webhook and allow you to see if the WhatsApp message is sent as expected. using Pabbly Connect

Once you create a refund for a product, Pabbly Connect should capture the webhook response. Check the response data to ensure it includes all relevant details, such as customer name, product, and refund reason. If the response is captured correctly, you can proceed to verify the WhatsApp message.

Make sure the WhatsApp message template includes variables for dynamic content. Check if the message is received in the designated WhatsApp account.

Successful testing confirms that the integration is functioning as intended, allowing for automated notifications to be sent for each refund processed through Pabbly Subscription Billing.


5. Finalizing the Automation Workflow

With the integration tested and confirmed, the final step is to finalize the automation workflow in Pabbly Connect. Ensure all configurations are saved correctly, and the workflow is active. This means that any future refunds processed through Pabbly Subscription Billing will automatically trigger the WhatsApp notifications. using Pabbly Connect

This setup not only saves time but also improves customer satisfaction by providing immediate updates regarding their refunds. You can further customize the WhatsApp messages by adjusting the template used in WATI to fit your branding and communication style.

In conclusion, by using Pabbly Subscription Billing in conjunction with Pabbly Connect and WATI, you can create a seamless automation process that enhances customer communication. This integration ensures that customers are promptly informed about their refunds, streamlining the entire process.


Conclusion

In this tutorial, we explored how to automate WhatsApp notifications for refunds created in Pabbly Subscription Billing. By setting up webhooks and connecting to Pabbly Connect, you can enhance your customer communication effectively.

Ensure you check out Pabbly Connect to create business automation workflows and reduce manual tasks. Pabbly Connect currently offer integration with 2,000+ applications.

Sync Microsoft Outlook to Notion Automatically Using Pabbly Connect

Learn how to sync Microsoft Outlook to Notion automatically with Pabbly Connect. Follow this detailed tutorial to streamline your email management. Master proven automation processes with practical implementation examples and strategic recommendations you can apply immediately in your workflow.

Watch Step By Step Video Tutorial Below


1. Setting Up Pabbly Connect for Microsoft Outlook and Notion Integration

To sync Microsoft Outlook to Notion automatically, we will utilize Pabbly Connect. First, access the Pabbly Connect website and sign in or sign up for a free account. This process is quick and allows you to manage up to 100 tasks free every month.

Once logged in, navigate to the Pabbly Connect dashboard. Here, you’ll find options to create a new workflow. Click on the ‘Create Workflow’ button, name your workflow (for example, ‘Sync Microsoft Outlook to Notion’), and select a folder to save it. This sets the stage for your integration.


2. Configuring the Trigger Application: Microsoft Office 365

The first step in the integration is to configure the trigger application using Pabbly Connect. Choose Microsoft Office 365 as your trigger application. This allows you to capture new emails as they arrive in your Outlook account.

For the trigger event, select ‘New Mail’. This means that every time you receive a new email, it will trigger the workflow. You will need to connect your Microsoft Office 365 account by clicking on ‘Connect’ and then adding a new connection. Once you log in and grant access, your connection will be successful, enabling you to capture email details.


3. Setting Up the Action Application: Notion

After configuring the trigger, the next step in Pabbly Connect is to set up the action application. Select Notion as your action application. This allows you to send email details directly to your Notion database.

For the action event, choose ‘Create Database Item’. You will need to connect your Notion account by clicking on ‘Connect’ and adding a new connection. After successful connection, select the database in Notion where you want to store the email details. This is crucial for organizing your emails in a structured manner.

  • Select the Outlook emails database from your Notion account.
  • Map the fields such as sender name, email address, subject, and email body.
  • Click on ‘Save and Send Test Request’ to ensure everything is set up correctly.

After mapping the fields, you can test the integration by sending a new email to your Outlook account. This will help confirm that the details are being captured correctly in your Notion database.


4. Mapping Email Details from Outlook to Notion

Mapping email details is a crucial step in the integration process using Pabbly Connect. This involves taking the information from the new email and ensuring it is transferred to the correct fields in your Notion database.

In the mapping section, select the necessary fields from the response of your Microsoft Office 365 trigger. You will map the subject, sender’s email address, sender’s name, and email body to the corresponding fields in your Notion database. This ensures that every new email is logged accurately.

  • Map the subject of the email to the subject field in Notion.
  • Map the sender’s email address to the email address field.
  • Map the sender’s name and email body as needed.

After mapping, click on ‘Save and Send’ to test the integration. This will check if the email details are being added to your Notion database as intended.


5. Verifying Integration Success

Once you have set up the trigger and action in Pabbly Connect, it’s essential to verify that the integration works correctly. To do this, send a test email to your Outlook account and check your Notion database for the new entry.

If everything is configured correctly, you should see the new email details, including the sender’s name, email address, subject, and body, reflected in your Notion database. This confirms that the integration is functioning as expected and that you are syncing Microsoft Outlook to Notion automatically.

To summarize, you have successfully created a workflow in Pabbly Connect that captures new emails from Microsoft Outlook and adds them to your Notion database. This automation not only saves time but also helps maintain an organized record of your emails.


Conclusion

In this tutorial, we explored how to sync Microsoft Outlook to Notion automatically using Pabbly Connect. By following the specified steps, you can efficiently manage your emails and keep your Notion database updated without manual effort.

Ensure you check out Pabbly Connect to create business automation workflows and reduce manual tasks. Pabbly Connect currently offer integration with 2,000+ applications.

WhatsApp Business Automation Using Pabbly Connect: A Step-by-Step Tutorial

Learn how to automate WhatsApp messages using Pabbly Connect with this detailed tutorial. Perfect for businesses looking to enhance customer communication. Navigate the automation landscape confidently with clear, structured guidance suitable for professionals regardless of prior technical experience.

Watch Step By Step Video Tutorial Below


1. Introduction to WhatsApp Automation Using Pabbly Connect

WhatsApp is now a powerful tool for businesses, enabling WhatsApp automation through Pabbly Connect. This automation allows businesses to send messages automatically to customers, enhancing communication efficiency.

With Pabbly Connect, businesses can automate various processes, such as sending order confirmations or appointment reminders. For instance, a dental clinic can send reminders for appointments, improving customer satisfaction.


2. Setting Up Pabbly Connect for WhatsApp Automation

To start with WhatsApp automation, visit the Pabbly Connect website and sign up for a free account. This account gives access to automation features, allowing you to create workflows efficiently.

  • Go to Pabbly.com/connect and click on ‘Sign Up for Free.’
  • Once registered, log in to access your dashboard.
  • Click on the ‘Create Workflow’ button to start setting up your automation.

After logging in, you will be directed to the dashboard of Pabbly Connect. From here, you can create workflows that integrate WhatsApp with other applications, enhancing your business automation.


3. Creating a Workflow in Pabbly Connect

To create a workflow, select the applications you want to integrate. In this case, you will choose Google Forms as the trigger application and WhatsApp via WTI as the action application. This setup allows you to send WhatsApp messages automatically when a form is submitted. using Pabbly Connect

Start by naming your workflow, such as ‘Send WhatsApp Message on Form Submission.’ Next, set Google Forms as the trigger application and choose the event as ‘New Response Received.’ This action will initiate whenever a new form submission is captured.


4. Connecting Google Forms to Pabbly Connect

After selecting Google Forms, you will need to connect it to Pabbly Connect. Copy the webhook URL provided in the Pabbly dashboard and paste it into the Google Forms add-on to establish the connection.

  • Open your Google Form and navigate to Extensions > Add-ons > Pabbly Connect Webhooks.
  • In the add-on, select ‘Initial Setup’ and paste the copied webhook URL.
  • Set the trigger column to the last column of your form data, typically the final data field.

Once the setup is complete, every new form submission will be captured by Pabbly Connect, allowing it to trigger the WhatsApp message sending process seamlessly.


5. Sending WhatsApp Messages Automatically

To send WhatsApp messages automatically, set WTI as the action application in Pabbly Connect. Select ‘Send Template Message’ and connect your WTI account using the API endpoint and access token from your WTI account.

Map the required fields such as WhatsApp number and message content. The message can include dynamic data from the form submission, allowing for personalized communication with customers.

Once everything is set up, save your workflow. Now, every time a new form submission occurs, Pabbly Connect will automatically send a WhatsApp message to the specified number, including any necessary files or information.


Conclusion

In conclusion, using Pabbly Connect for WhatsApp automation can significantly enhance business communication. By automating message sending processes, businesses can improve response times and customer satisfaction effectively.

Ensure you check out Pabbly Connect to create business automation workflows and reduce manual tasks. Pabbly Connect currently offer integration with 2,000+ applications.

Send Telegram Group Invitation Link on Successful Razorpay Payment Using Pabbly Connect

Learn how to automate sending Telegram group invitation links after successful Razorpay payments using Pabbly Connect. Step-by-step guide for seamless integration. This comprehensive guide reveals exactly how to connect your applications and automate repetitive tasks — accessible for professionals of all technical backgrounds.

Watch Step By Step Video Tutorial Below


1. Accessing Pabbly Connect for Integration

To send a Telegram group invitation link on successful Razorpay payment, you first need to access Pabbly Connect. This platform facilitates the integration between Razorpay and Telegram, allowing you to automate the process seamlessly.

Begin by signing into your Pabbly Connect account. If you are a new user, you can sign up for free, which allows you to get 100 tasks every month. After signing in, navigate to the dashboard to start creating your workflow.


2. Creating a Workflow in Pabbly Connect

To set up your automation, click on the ‘Create Workflow’ button on the top right corner of the dashboard. You will need to name your workflow, for instance, ‘Send Chat Invitation Link for Razorpay Payments’. This name helps in identifying your workflow later.

  • Click ‘Create’ to proceed.
  • Select Razorpay as the trigger application.
  • Choose ‘Payment Captured’ as the trigger event.

This setup means that whenever a payment is successfully captured in Razorpay, it will trigger the subsequent actions defined in your workflow using Pabbly Connect.


3. Connecting Razorpay to Pabbly Connect

Next, you need to establish a connection between Razorpay and Pabbly Connect. In the trigger window, you will find a webhook URL provided by Pabbly Connect. Copy this URL to use it in your Razorpay account settings.

In your Razorpay account, navigate to the ‘Account Settings’ and then to ‘Webhooks’. Here, create a new webhook by pasting the copied URL. Set the event type to ‘Payment Captured’ and click on ‘Create Webhook’. This connection allows Razorpay to send payment data to Pabbly Connect whenever a payment is captured.


After setting up the Razorpay connection, the next step involves sending the Telegram group invitation link. In Pabbly Connect, add an action step and select Telegram as the action application. Choose ‘Create Chat Invite Link’ as the action event.

  • Connect your Telegram bot to Pabbly Connect by using the token generated from BotFather.
  • Specify the chat ID for the group where the invitation link will be sent.
  • Set the expiration time for the invitation link.

This setup ensures that each time a payment is captured, a new invitation link is generated and sent to the user via email.


5. Finalizing Email Integration with Pabbly Connect

Lastly, to send the invitation link via email, add another action step and select Gmail as the action application. Choose ‘Send Email’ as the action event. Connect your Gmail account to Pabbly Connect and configure the email details.

Map the recipient’s email address, subject, and body of the email. Ensure to include the mapped chat invitation link and the user’s name in the email content. Once everything is set, click on ‘Save and Send Test Request’ to verify that the email is sent successfully.


Conclusion

By following these steps, you can successfully automate the process of sending a Telegram group invitation link after a successful payment through Razorpay using Pabbly Connect. This integration streamlines your workflow, ensuring that users receive instant access to your Telegram group upon payment confirmation.

Ensure you check out Pabbly Connect to create business automation workflows and reduce manual tasks. Pabbly Connect currently offer integration with 2,000+ applications.