Automatically Convert Text to Speech using Pabbly Connect and Eden AI

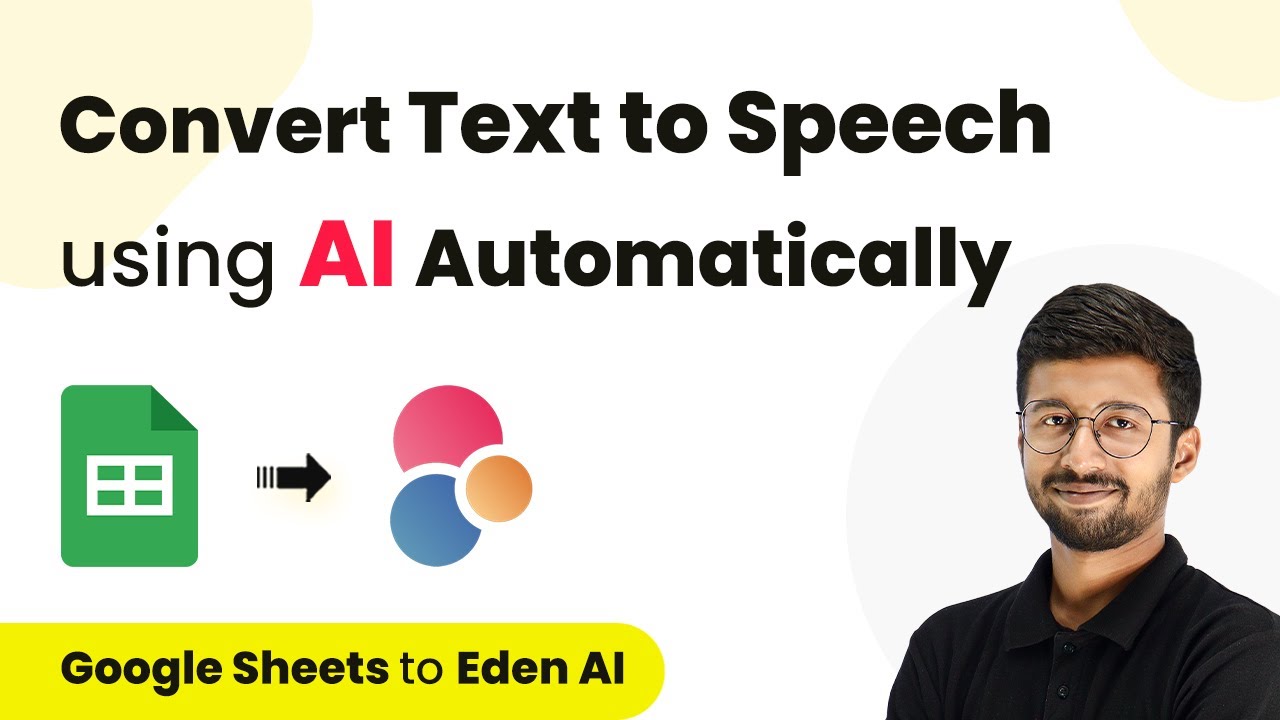
Learn how to automatically convert text to speech using Pabbly Connect and Eden AI. Step-by-step guide to integrating Google Sheets with Eden AI for seamless automation.

Watch Step By Step Video Tutorial Below


1. Setting Up Pabbly Connect for Text to Speech

To automatically convert text to speech using Pabbly Connect, start by accessing the Pabbly Connect dashboard. This is where you will create your automation workflow. If you don’t have an account, sign up for free to get started.

Once logged in, click on the ‘Create Workflow’ button. Name your workflow, for example, ‘Automatically Convert Text to Speech’. Choose a folder to save it, and then click ‘Create’. This will open the workflow interface where you can set up triggers and actions.


2. Trigger Setup: Google Sheets in Pabbly Connect

In this step, we will connect Google Sheets to Pabbly Connect. Begin by selecting Google Sheets as your trigger app. Choose the trigger event as ‘New or Updated Spreadsheet Row’. This will allow the automation to trigger whenever new data is added to your Google Sheet.

  • Select Google Sheets as the app.
  • Choose ‘New or Updated Spreadsheet Row’ as the trigger event.
  • Copy the provided webhook URL.

Next, go to your Google Sheets, click on ‘Extensions’, then ‘Add-ons’, and select ‘Get Add-ons’. Search for ‘Pabbly Connect Webhooks’ and install it. After installation, refresh your Google Sheets and navigate to ‘Extensions’, find ‘Pabbly Connect Webhooks’, and click on ‘Initial Setup’. Here, paste the webhook URL you copied earlier.


3. Configuring Eden AI in Pabbly Connect

After setting up the trigger, you need to configure the action step to convert text to speech using Pabbly Connect and Eden AI. Select Eden AI as the action app and choose the action event as ‘Convert Text to Speech’. This step will allow you to send the text data to Eden AI for conversion.

To connect your Eden AI account, you will need the API token from your Eden AI account settings. Paste this token into Pabbly Connect to establish the connection. Once connected, you will map the text you received from Google Sheets to the text field in Eden AI.

  • Select ‘Convert Text to Speech’ as the action event in Eden AI.
  • Map the text field to the text data from Google Sheets.
  • Choose the voice type and language options as needed.

After mapping all necessary fields, click ‘Save and Send Test Request’ to ensure that the integration works correctly. If successful, you will receive a response with the audio URL of the generated speech.


4. Updating Google Sheets with the Audio URL

Once you have received the audio URL from Eden AI, the next step is to update your Google Sheets with this URL using Pabbly Connect. Again, select Google Sheets as your action app and choose ‘Update Cell’ as the action event. This action will allow you to insert the audio URL into the appropriate row of your Google Sheet.

Connect your Google Sheets account again using the same method as before. Select the spreadsheet and sheet where you want to update the audio URL. Specify the cell range where the audio URL should be inserted, typically in a designated column for audio links.

Select the spreadsheet and sheet for the update. Enter the cell range for the audio URL (e.g., Column D). Map the audio URL from the previous step to the value field.

After completing these steps, click ‘Save and Send Test Request’. Check your Google Sheet to confirm that the audio URL has been successfully updated in the specified cell.


5. Testing the Automation Workflow

Now that your workflow is fully set up, it’s time to test the automation using Pabbly Connect. Go back to your Google Sheet and add a new row with the text you want to convert to speech. Make sure to select the platform and voice settings as specified in your setup.

After entering the details, wait a few seconds. The automation should trigger, and the audio URL will be populated in the designated cell of your Google Sheet. To verify, click on the audio URL to play the generated speech file.

This entire process demonstrates how Pabbly Connect seamlessly integrates Google Sheets with Eden AI to automate the text-to-speech conversion. You can now efficiently convert text entries into audio files with minimal effort.


Conclusion

In this tutorial, we explored how to use Pabbly Connect to automatically convert text to speech using Eden AI. By integrating Google Sheets, users can streamline their workflow and efficiently manage audio outputs for any text entries. This automation enhances productivity and simplifies the text-to-speech conversion process.

Ensure you check out Pabbly Connect to create business automation workflows and reduce manual tasks. Pabbly Connect currently offer integration with 2,000+ applications.

How to Create Tasks in Taskade from Google Forms Responses Using Pabbly Connect

Learn how to automate task creation in Taskade from Google Forms responses using Pabbly Connect. Follow our detailed step-by-step tutorial. Master proven automation processes with practical implementation examples and strategic recommendations you can apply immediately in your workflow.

Watch Step By Step Video Tutorial Below


1. Setting Up Pabbly Connect for Automation

To create tasks in Taskade from Google Forms responses, we start by setting up Pabbly Connect. First, visit the Pabbly Connect dashboard. If you don’t have an account, you can sign up for free in just a few minutes.

Once logged in, click on ‘Create Workflow’ and name your workflow, for example, ‘Google Forms to Taskade.’ Select a folder for your workflow and click ‘Create’. This opens the workflow where we will configure the trigger and action.


2. Configuring the Trigger in Pabbly Connect

The first step in our automation is to set up the trigger in Pabbly Connect. In the trigger window, search for Google Forms and select it. From the dropdown, choose the event ‘New Response Received’. This event will trigger the workflow whenever a new response is submitted.

  • Select ‘Google Forms’ as the app.
  • Choose ‘New Response Received’ as the trigger event.
  • Copy the webhook URL provided by Pabbly Connect.

Next, go to your Google Form and ensure that the last question is marked as required. Then, link your Google Form to a Google Sheet by clicking on the ‘Responses’ tab and selecting ‘Create a New Spreadsheet’. This allows responses to be stored in the spreadsheet.


3. Connecting Google Sheets to Pabbly Connect

In this step, we will connect Google Sheets to Pabbly Connect. After creating the Google Sheet, go to ‘Extensions’ in the menu, click on ‘Add-ons’, and then ‘Get Add-ons’. Search for ‘Pabbly Connect Webhooks’ and install it.

  • Install the Pabbly Connect Webhooks add-on.
  • Refresh your Google Sheet after installation.
  • Go to ‘Extensions’, select ‘Pabbly Connect Webhooks’, and click ‘Initial Setup’.

In the setup window, select the correct sheet, paste the webhook URL, and specify the trigger column (usually the last column). Click ‘Submit’ to save the configuration. This setup allows Google Sheets to send data to Pabbly Connect whenever a new response is received.


4. Creating a Task in Taskade via Pabbly Connect

Now that we have the trigger set up, it’s time to create a task in Taskade using Pabbly Connect. In the action window of your workflow, search for Taskade and select it. Choose ‘Create Task’ from the action event options.

Connect your Taskade account to Pabbly Connect. Select the workspace ID where you want to create the task. Map the task title and description from Google Forms responses.

After mapping the necessary fields, including the due date and other details, click ‘Save and Send Test Request’. This will create a task in your Taskade account using the information received from the Google Form.


5. Testing the Automation Workflow

To ensure everything is working, let’s test our automation setup in Pabbly Connect. Go back to your Google Form and fill it out with a test submission. After submitting, check your Google Sheet to confirm that the response appears there.

Then, return to Pabbly Connect and check the workflow. You should see that it has received the new form response. This indicates that the integration is functioning correctly. Finally, check your Taskade account to see if the task has been created with the provided details.

If everything looks good, you have successfully automated the task creation process from Google Forms responses to Taskade using Pabbly Connect. You can now repeat this process for any new submissions.


Conclusion

By following this tutorial, you can effectively use Pabbly Connect to automate task creation in Taskade from Google Forms responses. This integration streamlines your workflow and saves time by automatically transferring data between applications.

Ensure you check out Pabbly Connect to create business automation workflows and reduce manual tasks. Pabbly Connect currently offer integration with 2,000+ applications.

Generate Images with AI using Slack Automatically | Slack OpenAI

Learn how to automate image generation in Slack using Pabbly Connect and OpenAI with this step-by-step tutorial. Perfect for enhancing team communication! Discover hidden automation capabilities within your existing tools. This guide shows you how to connect your essential applications and permanently eliminate redundant manual processes.

Watch Step By Step Video Tutorial Below


1. Accessing Pabbly Connect for Automation

To generate images using OpenAI in Slack, you need to access Pabbly Connect. Start by visiting the Pabbly Connect homepage by typing ‘Pabbly.com/connect’ in your browser.

If you’re new, click on the ‘Sign Up for Free’ button to create your account. As an existing user, just click ‘Sign In’. Once logged in, you will receive 100 free tasks monthly to explore the platform’s capabilities.


2. Creating a Workflow in Pabbly Connect

After signing into Pabbly Connect, navigate to the dashboard. Here, you can see your existing workflows and create new ones. Click on the ‘Create Workflow’ option in the top right corner.

  • Provide a name for your workflow, such as ‘Generate Image Using OpenAI for Slack Message’.
  • Select a folder to save your workflow, like ‘Test Integrations’.
  • Click ‘Create’ to proceed.

Once created, you will see options for setting up triggers and actions. In this case, the trigger will be Slack, and the action will involve OpenAI for generating images.


3. Setting Up Slack as a Trigger in Pabbly Connect

In this section, you will set up Slack as the trigger application in Pabbly Connect. Select Slack and choose ‘New Message’ as the trigger event. This means that whenever a new message is posted in your Slack channel, it will trigger the workflow.

Click on ‘Connect’ and choose ‘Add New Connection’ to link your Slack account. Enter the token type as ‘User’ since messages will be received from a user, not a bot. Click ‘Save’ and allow the necessary permissions to connect your Slack account.


4. Generating Images with OpenAI

After successfully connecting Slack, the next step in Pabbly Connect is to generate images using OpenAI. Select OpenAI as the action application and choose ‘Generate Image by DALL·E Model’ as the action event.

  • Connect your OpenAI account by entering the API token from your OpenAI account.
  • Set the model to DALL·E 2 and provide a prompt for the image generation.
  • Map the title from the previous Slack message to generate the image accordingly.

After configuring the settings, click ‘Save and Send Test Request’ to generate the image. This will provide you with a URL for the generated image based on the prompt you provided.


5. Sending the Generated Image Back to Slack

Now that you have the image generated, it’s time to send it back to your Slack channel using Pabbly Connect. Add another action step by selecting Slack again and choose ‘Send Channel Message Using Block’ as the action event.

Select the same channel where the original message was received. In the message text field, write a response such as ‘Hello, here is the related image, please check.’ Map the URL of the generated image into the message.

Click ‘Save and Send Test Request’ to send the message. You will receive confirmation that the message has been sent successfully, and you can check your Slack channel for the image.


Conclusion

In this tutorial, we explored how to automate image generation in Slack using Pabbly Connect and OpenAI. By following these steps, you can enhance team communication and streamline workflows effectively.

Ensure you check out Pabbly Connect to create business automation workflows and reduce manual tasks. Pabbly Connect currently offer integration with 2,000+ applications.

Automate WhatsApp Messages for Dog Training Leads with Pabbly Connect

Learn how to use Pabbly Connect to automate WhatsApp messages for your dog training center leads from Facebook. Follow these detailed steps for seamless integration.

Watch Step By Step Video Tutorial Below


1. Setting Up Pabbly Connect for Automation

To start automating WhatsApp messages for your dog training center leads, you need to access Pabbly Connect. This platform allows seamless integration between various applications, including Facebook and WhatsApp. First, open your browser and navigate to Pabbly Connect’s website.

If you already have an account, simply sign in. If not, you can create a new account for free, which only takes a couple of minutes. Once logged in, you will see the option to create a new workflow.


2. Creating a New Workflow in Pabbly Connect

After signing into Pabbly Connect, click on the ‘Create Workflow’ button. This will prompt you to name your workflow. For this integration, name it ‘Send Automated WhatsApp Message to Dog Training Centre Leads’. You can choose to save it in a specific folder if desired.

  • Click on ‘Create’ to proceed to the workflow setup.
  • You will see two sections: Trigger and Action.
  • Select Facebook Lead Ads as your trigger application.

After selecting your trigger application, you need to choose the event that will start your workflow. Select ‘New Lead Instant’ as the trigger event. This will allow Pabbly Connect to capture new leads from your Facebook ads automatically.


3. Connecting Facebook Lead Ads to Pabbly Connect

In this step, you will connect your Facebook Lead Ads account to Pabbly Connect. Click on the connect button and then choose ‘Add New Connection’. A pop-up will appear asking for permission to access your Facebook account.

Once you grant permission, you will see options to select your Facebook page and the lead generation form. Choose your page, labeled ‘ABC Training Center for Dog’, and select the corresponding lead form. Make sure the lead generation form is live before testing the connection.


4. Sending Automated WhatsApp Messages Using Pabbly Connect

Now that your trigger is set up, it’s time to configure the action step to send WhatsApp messages. In the action section of Pabbly Connect, select WhatsApp as your action application. Choose the action event ‘Send Template Message’.

To connect WhatsApp to Pabbly Connect, you will need an API endpoint and an access token. Go to your WhatsApp account settings to retrieve these details. Paste the API endpoint and access token into the respective fields in Pabbly Connect.

  • Map the phone number from the Facebook lead response to ensure the message is sent to the correct recipient.
  • Select the message template you created in WhatsApp for your leads.
  • Fill in any custom parameters as required for your message.

After completing these steps, click on ‘Save and Send Test Request’ to send a test message. You should receive a confirmation that the message was sent successfully.


5. Testing the Integration and Final Steps

After setting up your workflow in Pabbly Connect, it’s essential to test the integration. Submit a test lead through your Facebook lead form to ensure everything is functioning correctly. Once the lead is submitted, check your WhatsApp to see if you received the automated message.

In the message, you should see a personalized greeting with the lead’s name, confirming the integration works as intended. This automation allows you to respond promptly to new leads, enhancing your customer service.

By following these steps, you have successfully integrated your Facebook Lead Ads with WhatsApp using Pabbly Connect. This setup ensures that every new lead is contacted automatically, saving you time and effort.


Conclusion

In summary, using Pabbly Connect to automate WhatsApp messages for your dog training center leads is a straightforward process. By setting up triggers and actions, you can ensure timely communication with potential clients, improving your lead management significantly.

Ensure you check out Pabbly Connect to create business automation workflows and reduce manual tasks. Pabbly Connect currently offer integration with 2,000+ applications.

How to Send SMS When Subscription is Cancelled in Pabbly Subscription Billing

Learn how to automate SMS notifications for cancelled subscriptions using Pabbly Subscription Billing and Twilio. Step-by-step guide included. Master subscription management with practical techniques to handle free trials, coupon codes, and special offers that drive conversion and retention.

Watch Step By Step Video Tutorial Below


1. Access Pabbly Subscription Billing for Automation

To start automating SMS notifications for cancelled subscriptions, access Pabbly Subscription Billing by navigating to the Pabbly website. Click on the ‘Sign In’ button if you are an existing user, or ‘Sign Up for Free’ if you are new. Upon signing up, you will receive 100 free tasks every month to explore the features of this powerful platform.

Once signed in, you will be directed to the dashboard of Pabbly Subscription Billing. Here, you can create workflows that connect various applications. Click on the ‘Access Now’ button to move to the dashboard where you can manage your workflows and integrations.


2. Creating a Workflow in Pabbly Subscription Billing

To create a new workflow in Pabbly Subscription Billing, click on the ‘Create Workflow’ option located in the top right corner. A dialog box will appear prompting you to name your workflow. Enter a descriptive name such as ‘Send SMS for Cancelled Subscription’.

  • Provide a name for your workflow.
  • Select a folder to save your workflow.
  • Click on ‘Create’ to proceed.

After creating the workflow, you will see options for setting up a trigger and an action. The trigger will be set to detect when a subscription is cancelled in Pabbly Subscription Billing, and the action will initiate the SMS sending process.


3. Setting Up the Trigger in Pabbly Subscription Billing

In this step, you will select Pabbly Subscription Billing as your trigger application. Choose the ‘Subscription Cancelled’ event as the trigger event. This means that whenever a subscription is cancelled, the workflow will activate.

After selecting the trigger event, a webhook URL will be generated. Copy this URL as it will be used to connect Pabbly Subscription Billing with the automation process. To set this up, navigate to your Pabbly Subscription Billing account settings, find the ‘Webhooks’ option, and click on ‘Add Webhook’.

  • Name the webhook, for example, ‘Cancelled Subscription’.
  • Select the products and plans applicable.
  • Paste the copied webhook URL.
  • Select the event ‘Subscription Cancelled’ and click ‘Save’.

Once saved, this webhook will trigger the workflow in Pabbly Subscription Billing whenever a subscription is cancelled, capturing the necessary customer details.


4. Setting Up the Action to Send SMS

Now that the trigger is set, the next step is to configure the action that sends the SMS. Search for ‘Twilio’ in the action application section and select it. Choose the action event as ‘Send SMS Message’. This will allow you to send SMS notifications through Twilio whenever a subscription is cancelled in Pabbly Subscription Billing.

After selecting Twilio, click on the ‘Connect’ button. You will need to provide your Twilio account credentials, including the Account SID and Authorization Token, to establish a connection. Once connected, you can customize the SMS message that will be sent to the customer.

Compose the SMS body, including dynamic fields like customer name and cancellation details. Map the necessary customer details from the trigger response. Specify the sender’s number from your Twilio account.

After entering all the required information, click on ‘Save and Send Test Request’ to ensure that the SMS is sent successfully. This completes the action setup in Pabbly Subscription Billing.


5. Testing the Automation in Pabbly Subscription Billing

To test the automation, go back to your Pabbly Subscription Billing account and cancel a subscription. Ensure that you provide a reason for cancellation. Once the subscription is cancelled, return to Pabbly Subscription Billing and check if the webhook response is captured successfully.

If everything is set up correctly, you will receive an SMS notification on the specified recipient number with the details about the cancellation. This confirms that the integration between Pabbly Subscription Billing and Twilio is working as intended.

In summary, by following these steps, you can automate SMS notifications for cancelled subscriptions using Pabbly Subscription Billing. This not only keeps your customers informed but also enhances customer service by promptly addressing subscription changes.


Conclusion

In this tutorial, we explored how to automate SMS notifications for cancelled subscriptions using Pabbly Subscription Billing and Twilio. By following the outlined steps, you can ensure effective communication with your customers regarding their subscription status.

Ensure you check out Pabbly Connect to create business automation workflows and reduce manual tasks. Pabbly Connect currently offer integration with 2,000+ applications.

Integrate Microsoft Outlook Calendar Events with Coda Docs Using Pabbly Connect

Learn how to use Pabbly Connect to integrate Microsoft Outlook Calendar events into Coda Docs seamlessly. Follow this step-by-step tutorial for automation. Explore efficient methods for automating routine tasks with clear, concise instructions suited for both newcomers and experienced professionals.

Watch Step By Step Video Tutorial Below


1. Overview of Pabbly Connect for Integration

Pabbly Connect is a powerful automation tool that allows you to integrate various applications seamlessly. In this tutorial, we will use Pabbly Connect to automate the process of adding Microsoft Outlook Calendar events as new rows in Coda Docs.

To get started, you need to access Pabbly Connect. If you don’t have an account, you can sign up for free, which gives you access to 100 tasks monthly. Once logged in, navigate to the dashboard where you can create new workflows.


2. Creating a New Workflow in Pabbly Connect

To create a new workflow in Pabbly Connect, click on the ‘Create Workflow’ button. You will then be prompted to name your workflow. For this integration, name it something descriptive like ‘Add Microsoft Outlook Events to Coda Docs’.

Next, you will see two main sections: Trigger and Action. The Trigger will be set to Microsoft Office 365, and the Action will be set to Coda. Follow these steps to set it up:

  • Select Microsoft Office 365 as the Trigger application.
  • Choose ‘New Calendar Event’ as the Trigger event.
  • Connect your Microsoft Office 365 account to Pabbly Connect.

After connecting, select the calendar from which you want to pull events. This is crucial for ensuring that your workflow functions correctly.


3. Setting Up the Trigger in Pabbly Connect

Once your workflow is created, the next step is to set up the Trigger in Pabbly Connect. This involves selecting the specific calendar you want to monitor for new events. Make sure you have your Outlook Calendar open to choose the correct one.

After selecting your calendar, create a test event in Outlook to ensure that Pabbly Connect captures the data correctly. Here’s how you can do it:

  • Create a new event titled ‘New Campaign’.
  • Add a description, such as ‘This campaign is for the new science experiment’.
  • Set the date and time for the event.

After saving the event, go back to Pabbly Connect and test the connection by clicking on ‘Save and Send Test Request’. This will allow you to verify that Pabbly Connect is receiving the data from your Outlook Calendar.


4. Formatting Date and Time with Pabbly Connect

After successfully setting up the Trigger, the next step is to format the date and time of the event. Since Microsoft Outlook typically sends time in UTC format, you’ll need to convert it to your local timezone using a feature in Pabbly Connect.

To format the date and time, follow these steps:

Add a new Action step and select ‘Date & Time Formatter’. Choose ‘Format Date with Time Zone’ as the action event. Map the date and time from the previous step and set your desired timezone.

Once you have formatted the date and time correctly, you can proceed to the next action step in your workflow.


5. Adding Data to Coda Docs Using Pabbly Connect

The final step in this integration process is to add the formatted event data into Coda Docs. To do this, you will again use Pabbly Connect to connect to Coda.

Here’s how to set it up:

Add another Action step and select Coda as the application. Choose ‘Create Row’ as the action event. Connect your Coda account using the API token.

After connecting, select the document and table where you want to add the new row. Map the event details such as title, description, and formatted date to the corresponding fields in Coda. Finally, click on ‘Save and Send Test Request’ to complete the integration.


Conclusion

In this tutorial, we demonstrated how to integrate Microsoft Outlook Calendar events into Coda Docs using Pabbly Connect. By following the steps outlined, you can automate the process of adding new events as rows in Coda Docs, enhancing your workflow efficiency.

Ensure you check out Pabbly Connect to create business automation workflows and reduce manual tasks. Pabbly Connect currently offer integration with 2,000+ applications.

Unlock WhatsApp Automation Secrets for Real Estate Marketing with Pabbly Connect

Learn how to automate your real estate marketing using WhatsApp integration with Pabbly Connect. Discover step-by-step instructions and optimize your lead management. Discover hidden automation capabilities within your existing tools. This guide shows you how to connect your essential applications and permanently eliminate redundant manual processes.

Watch Step By Step Video Tutorial Below


1. Accessing Pabbly Connect for WhatsApp Automation

To start automating your real estate marketing using WhatsApp, you need to access Pabbly Connect. First, create an account on the Pabbly website. Once logged in, navigate to the dashboard where you can begin creating workflows.

After logging into Pabbly Connect, click on the ‘Create Workflow’ button. You will be prompted to name your workflow, such as ‘WhatsApp Automation for Real Estate’. Select the appropriate folder to save your workflow and click on ‘Create’.


2. Setting Up Facebook Lead Ads with Pabbly Connect

In this step, you will connect Facebook Lead Ads to Pabbly Connect. Select Facebook Lead Ads as your trigger application. Choose the event ‘New Lead Instant’ to capture incoming leads.

  • Log in to your Facebook account through Pabbly Connect.
  • Select the Facebook page associated with your lead ad.
  • Choose the lead form you created for capturing leads.

Once these steps are completed, Pabbly Connect will automatically capture any new lead submissions from your Facebook Lead Ads, making it easier to manage your leads efficiently.


3. Receiving Lead Alerts on WhatsApp via Pabbly Connect

After setting up Facebook Lead Ads, the next step is to configure WhatsApp notifications. You will use the Vati application to send lead alerts to your WhatsApp number through Pabbly Connect.

Choose ‘Send Template Message’ as the action event in Vati. Connect your Vati account by entering your API endpoint and access token. Then, specify the WhatsApp number you want to receive alerts on and select the appropriate message template.

  • Create a WhatsApp message template that includes variables for dynamic content.
  • Map the lead details such as name, email, and phone number from the Facebook Lead Ads.

Upon successful configuration, every time a new lead is generated, Pabbly Connect will send an alert to your WhatsApp, ensuring you never miss a potential client.


4. Sending WhatsApp Messages to Leads Using Pabbly Connect

Once you receive lead alerts, you can also send WhatsApp messages to your leads. Again, use the Vati application through Pabbly Connect to automate this process.

Select ‘Send Template Message’ action for Vati and connect using the same credentials. This time, provide the lead’s WhatsApp number instead of your own. Choose a message template that thanks the lead for their interest and includes a property brochure.

Map the lead’s name and selected city in the message template. Attach the property brochure as a PDF file in the message.

With this setup, Pabbly Connect will automatically send a personalized message to each lead, enhancing communication and improving your chances of closing deals.


5. Conclusion

In conclusion, using Pabbly Connect for WhatsApp automation in real estate marketing streamlines your lead management process. By integrating Facebook Lead Ads and Vati, you can receive instant lead alerts and send personalized messages, ultimately boosting your business efficiency.

Ensure you check out Pabbly Connect to create business automation workflows and reduce manual tasks. Pabbly Connect currently offer integration with 2,000+ applications.

Integrate Academy LMS Course Enrollments into Google Sheets with Pabbly Connect

Learn how to seamlessly integrate Academy LMS course enrollments into Google Sheets using Pabbly Connect. Step-by-step tutorial for effective automation. Build sophisticated automated workflows in less time than you think. This guide translates complex integrations into straightforward steps for immediate implementation.

Watch Step By Step Video Tutorial Below


1. Accessing Pabbly Connect for Academy LMS Integration

To begin integrating Academy LMS course enrollments into Google Sheets, you need to access Pabbly Connect. Start by signing in to your existing account or create a new one if you are a first-time user. Pabbly Connect allows you to automate tasks seamlessly between different applications.

After signing in, navigate to the applications page. Here, you will find all the tools available for integration. Click on the Pabbly Connect option to reach your dashboard, where you can create a new workflow for your integration.


2. Creating a New Workflow in Pabbly Connect

To set up your integration, click on the Pabbly Connect dashboard and select the Create Workflow button in the top right corner. This will open a dialog box where you can name your workflow. Name it something descriptive, such as ‘Add Academy LMS Enrolled Students in Google Sheets’.

  • Choose a folder to save your workflow, for instance, the folder named Academy LMS.
  • Click on the Create button to proceed to the next step.

Now, you will see the trigger and action setup window. In this section, you will define the trigger application as Academy LMS and the action application as Google Sheets. This setup is crucial as it determines what happens when a new enrollment occurs.


3. Setting Up Trigger and Action Applications

In the trigger section, select Academy LMS as your trigger application and choose the trigger event as New Enrollment. This means that every time a student enrolls in a course, this trigger will activate.

Next, move to the action section and select Google Sheets as your action application. Here, the action event you want to choose is Add New Row. This configuration will ensure that the details of the enrolled student are automatically added to your Google Sheet whenever a new enrollment occurs.

  • Copy the webhook URL provided by Pabbly Connect for the integration.
  • This URL will be used to connect Academy LMS with Pabbly Connect.

Once you have configured the trigger and action, you can proceed to set up the webhook in your Academy LMS plugin on WordPress.


4. Setting Up Webhook in Academy LMS

To connect Academy LMS with Pabbly Connect, navigate to the add-ons section in your WordPress dashboard. Scroll down to find the webhooks option and click on it. Here, you will see an option to Add New Webhook.

In the webhook setup window, provide a title for your webhook, such as ‘New Enrollment’. Set the status to published and select the event as New Enroll. Then, paste the webhook URL you copied earlier from Pabbly Connect into the delivery URL field.

After completing these steps, click on the Add Webhook button. Your webhook is now created and is waiting for a response. This means that the next step is to test the webhook by creating a new enrollment in your Academy LMS.


5. Testing the Integration with a New Enrollment

To test the integration, open an incognito window and enroll a new student in one of your courses, such as ‘Core PHP’. Fill in the required details, including first name, last name, username, email, and password, and complete the registration process.

Once the enrollment is successful, go back to Pabbly Connect to check if the details are captured correctly. You should see the student’s name, email, and the course they enrolled in. This confirms that the trigger is working correctly and that the data is being captured in real-time.

Now, go back to Google Sheets and check if the new enrollment details have been added to the specified sheet. You should see a new row with the user ID, name, email, and course information.

This process demonstrates how Pabbly Connect effectively automates the task of adding enrollments from Academy LMS directly into Google Sheets, streamlining your workflow.


Conclusion

Integrating Academy LMS course enrollments into Google Sheets using Pabbly Connect simplifies data management. This step-by-step guide ensures that every new enrollment is automatically recorded, enhancing your operational efficiency.

Ensure you check out Pabbly Connect to create business automation workflows and reduce manual tasks. Pabbly Connect currently offer integration with 2,000+ applications.

How to Seamlessly Add Facebook Leads to Google Sheets Using Pabbly Connect

Learn how to integrate Facebook Leads with Google Sheets for your furniture business using Pabbly Connect. Follow our step-by-step tutorial for easy automation. Build sophisticated automated workflows in less time than you think. This guide translates complex integrations into straightforward steps for immediate implementation.

Watch Step By Step Video Tutorial Below


1. Accessing Pabbly Connect for Facebook Leads Integration

To add Facebook leads to Google Sheets, you first need to access Pabbly Connect. This platform serves as the central integration tool that connects your Facebook lead ads with Google Sheets for your furniture business.

As an existing user, you can simply sign in. If you are new to Pabbly Connect, click on the ‘Sign up for free’ button to create an account, which allows you to use 100 tasks for free each month. Once you are signed in, navigate to the ‘All Applications’ page and click on ‘Pabbly Connect’ to access your dashboard.


2. Creating a Workflow in Pabbly Connect

Next, you need to create a new workflow in Pabbly Connect. On the right-hand side of your dashboard, click on the ‘Create Workflow’ button. In the dialog box that appears, name your workflow, for example, ‘Add Facebook Leads to Google Sheets.’ You can save it in a folder named ‘Facebook Lead Ads.’

  • Click the ‘Create’ button to proceed.
  • You will see a window with trigger and action options.

In this window, set Facebook Lead Ads as your trigger application and choose ‘New Lead Instant’ as the trigger event. This setup ensures that every time you receive a new lead, the workflow will automatically run.


3. Connecting Facebook Lead Ads to Pabbly Connect

To connect Facebook Lead Ads with Pabbly Connect, click on the ‘Connect’ button in the trigger window. Since you are already logged into your Facebook account, simply authorize the connection. Once successful, select the Facebook page you created for your furniture business, such as ‘ARA Furniture Store.’

After selecting your page, choose the associated lead generation form, like ‘ARA Furniture Contact Form New.’ Click on ‘Save & Test Request’ to finalize this connection. At this point, Pabbly Connect is ready to capture leads from your Facebook ads.


4. Testing the Integration with Pabbly Connect

Now it’s time to test the integration you set up in Pabbly Connect. You will need to create a test lead to confirm the integration works correctly. Go to the Meta for Developers site and navigate to the Lead Ads Testing Tool.

  • Select your page ‘ARA Furniture Store’ from the dropdown.
  • Choose the form ‘ARA Furniture Contact New Form’ and fill in the required details.
  • Click on ‘Submit’ to send the test lead.

After submitting the test lead, return to Pabbly Connect to check if the lead details have been captured successfully. You should see the full name, phone number, email, and other details of the lead, confirming that the integration is working.


5. Adding Lead Details to Google Sheets via Pabbly Connect

The final step is to add the captured lead details to Google Sheets using Pabbly Connect. In the action window, select Google Sheets as your action application and choose ‘Add New Row’ as the action event.

Next, connect your Google account to Pabbly Connect by clicking ‘Connect’ and authorizing access. Once connected, select the Google Sheet you created for this purpose, named ‘Facebook Leads New.’ Ensure that the sheet has columns for email, name, and phone number.

Map the lead email, name, and phone number from the captured data. Click ‘Save & Send Test Request’ to send the data to Google Sheets.

Check your Google Sheet to confirm that the test lead details have been added successfully in a new row. This indicates that your integration is complete, and now every new lead from Facebook will automatically populate in your Google Sheets.


Conclusion

By following this tutorial, you learned how to integrate Facebook leads into Google Sheets using Pabbly Connect. This automation streamlines your workflow, ensuring that every lead generated from your furniture business is captured efficiently in your Google Sheets.

Ensure you check out Pabbly Connect to create business automation workflows and reduce manual tasks. Pabbly Connect currently offer integration with 2,000+ applications.

How to Add Academy LMS Registrations to Google Sheets Using Pabbly Connect

Learn how to integrate Academy LMS with Google Sheets using Pabbly Connect for automatic registration updates. Step-by-step tutorial included. Explore systematic approaches to creating efficient automation solutions that convert technical concepts into practical, implementable instructions.

Watch Step By Step Video Tutorial Below


1. Accessing Pabbly Connect for Integration

To add Academy LMS registrations to Google Sheets, you need to access Pabbly Connect. First, go to the Pabbly Connect homepage. If you are an existing user, sign in; otherwise, click on the ‘Sign Up for Free’ button to create a new account.

Once logged in, navigate to the applications page and click on ‘Access Now’ under Pabbly Connect. This will take you to your dashboard where you can create a new workflow.


2. Creating a New Workflow in Pabbly Connect

In your Pabbly Connect dashboard, click on the ‘Create Workflow’ button. Name your workflow something descriptive, like ‘Add Academy LMS Registrations to Google Sheets’. You can also organize your workflows into folders for easier management.

To set up the integration, you need to define a trigger and an action. The trigger will be from Academy LMS, and the action will be to add a new row in Google Sheets. This setup is crucial for automating the registration process.

  • Click on ‘Create Workflow’ and name it accordingly.
  • Define your trigger application as Academy LMS.
  • Set the action application to Google Sheets.

After setting the trigger and action, you are ready to establish the connection between Academy LMS and Pabbly Connect.


3. Connecting Academy LMS to Pabbly Connect

To connect Academy LMS, you will need a webhook URL provided by Pabbly Connect. This URL acts as a bridge between Academy LMS and Pabbly Connect. Copy the webhook URL and head to your Academy LMS plugin in WordPress.

In your WordPress dashboard, go to the add-ons section, scroll down to the webhooks option, and click on ‘Add Webhook’. Here, you will input the webhook title and set the status to published. Ensure the event is set to ‘New Student Registration’ and paste the webhook URL in the delivery URL field.

  • Go to the add-ons section in Academy LMS.
  • Click ‘Add Webhook’ and fill in the required fields.
  • Paste the webhook URL from Pabbly Connect.

After successfully adding the webhook, Pabbly Connect will wait for a response, indicating that your integration is now set up to capture new registrations.


4. Testing the Integration from Academy LMS

To verify that your integration works, you need to create a test registration in Academy LMS. Open your course in incognito mode and click on the ‘Enroll Now’ button. If you do not have an account, you will need to register.

Fill out the registration form with your details such as first name, last name, username, and email. Once you submit the registration, Pabbly Connect should capture the new registrant’s details. You will see a response indicating that the registration was successful.

Open your course in incognito mode. Click ‘Enroll Now’ and complete the registration form. Submit the form to test the integration.

After the test submission, check Pabbly Connect for the captured data, confirming that the integration is functioning correctly.


5. Adding Registrant Details to Google Sheets

Now that you have verified the integration, it’s time to add the captured registration details to Google Sheets. In Pabbly Connect, establish a connection to your Google account. Click on ‘Connect’ and authorize Pabbly Connect to access your Google Sheets.

Select the spreadsheet where you want to store the registrations. Use the mapping feature to insert the data from the previous step into the appropriate columns in Google Sheets. This ensures that every new registration is automatically added to your sheet.

Click ‘Connect’ to link your Google account. Select the spreadsheet and map the fields for ID, Name, and Email. Save and test the request to confirm data is added.

Upon successful mapping, you will see the new registrant’s details added to your Google Sheets, completing the integration process through Pabbly Connect.


Conclusion

Integrating Academy LMS with Google Sheets using Pabbly Connect allows for seamless automation of registration updates. This tutorial provided a detailed step-by-step guide to set up the integration effectively.

Ensure you check out Pabbly Connect to create business automation workflows and reduce manual tasks. Pabbly Connect currently offer integration with 2,000+ applications.