How to Send Automated WhatsApp Messages to Your Automobile Spare Parts Business Leads Using Pabbly Connect

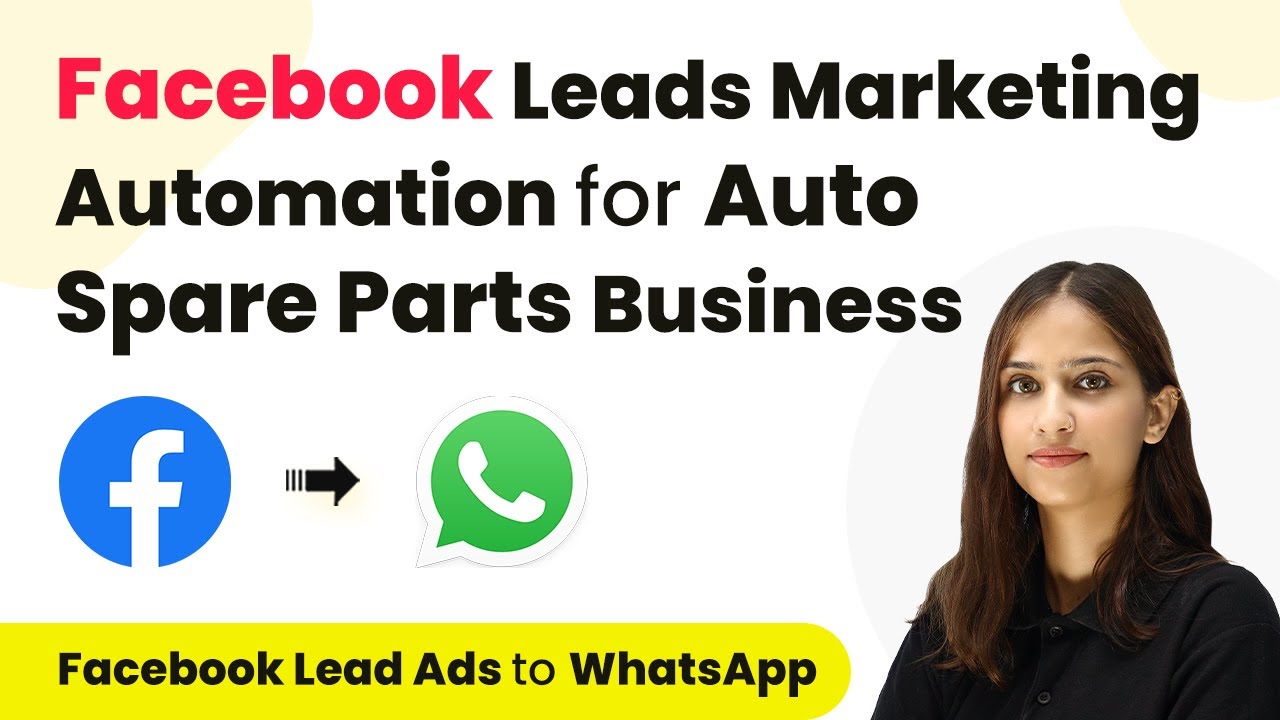
Learn how to send automated WhatsApp messages to your automobile spare parts business leads using Pabbly Connect. Follow this step-by-step tutorial for seamless integration. This comprehensive guide reveals exactly how to connect your applications and automate repetitive tasks — accessible for professionals of all technical backgrounds.

Watch Step By Step Video Tutorial Below


1. Accessing Pabbly Connect for Automation

To send automated WhatsApp messages to your automobile spare parts business leads, you first need to access Pabbly Connect. Start by signing in to your existing account or create a new one to utilize the free tasks available each month.

Once logged in, navigate to the dashboard. Click on the ‘Pabbly Connect’ option to access the workflow creation area. Here, you will set up the integration between Facebook Lead Ads and WhatsApp, which is crucial for automating your lead communication.


2. Creating a Workflow in Pabbly Connect

In this section, you will create a new workflow in Pabbly Connect. Click on the ‘Create Workflow’ button located in the top right corner of the dashboard. Name your workflow something like ‘Send Automated WhatsApp Message to Facebook Leads’ and choose a folder for organization.

  • Click on ‘Create’ to initiate your workflow.
  • Select ‘Facebook Lead Ads’ as your trigger application.
  • Set the trigger event to ‘New Lead Instant’.

After setting the trigger, you will now configure the action application. Select ‘Vati’ to send WhatsApp messages as your action application. The action event will be to send a template message, which is essential for communicating with your leads.


3. Connecting Facebook Lead Ads to Pabbly Connect

To establish a connection between Facebook Lead Ads and Pabbly Connect, click on the ‘Connect’ button in the trigger window. Ensure you are logged into your Facebook account in another tab for seamless integration.

Once connected, select your Facebook page associated with your automobile spare parts business. You will also need to select the lead generation form you created, such as the ‘Tire Store Contact Form’. This ensures that the leads captured will be correctly processed through the automation.

  • Choose the correct page from the dropdown menu.
  • Select your lead form to link it with your workflow.

After selecting the necessary options, click on ‘Save and Test Request’ to ensure the connection is working. This step is crucial to confirm that Pabbly Connect is receiving data from Facebook Lead Ads correctly.


4. Sending Automated WhatsApp Messages

Now that you have set up the trigger, the next step is to send automated WhatsApp messages using Pabbly Connect. You will need to connect Vati by clicking on the ‘Connect’ button in the action window. Input the API endpoint and access token from your Vati account.

Once you have established the connection, you will map the phone number of the lead captured from Facebook. This mapping is essential as it allows Pabbly Connect to dynamically insert the lead’s phone number into the WhatsApp message.

Select the template named ‘Facebook Lead Ads’ for your WhatsApp message. Input custom parameters such as the lead’s name to personalize the message.

After configuring the message, click ‘Save and Test Request’. This will send a test WhatsApp message to confirm that everything is set up correctly.


5. Conclusion

In this tutorial, you learned how to send automated WhatsApp messages to your automobile spare parts business leads using Pabbly Connect. By integrating Facebook Lead Ads with WhatsApp, you can streamline your communication and enhance customer engagement.

Ensure you check out Pabbly Connect to create business automation workflows and reduce manual tasks. Pabbly Connect currently offer integration with 2,000+ applications.

Utilizing Pabbly Connect for this automation not only saves time but also ensures that every lead receives timely and personalized messages. Start implementing this integration today to boost your business efficiency.

Auto-Post WordPress Posts to Telegram Using Pabbly Connect: A Step-by-Step Guide

Learn how to easily auto-post WordPress posts to Telegram in minutes using Pabbly Connect. Follow this detailed tutorial for seamless integration. Follow this definitive guide to creating powerful automated workflows with straightforward, efficiency-focused solutions that save valuable time.

Watch Step By Step Video Tutorial Below


1. Accessing Pabbly Connect for Integration

To auto-post WordPress posts to Telegram, the first step is accessing Pabbly Connect. As an existing user, you can sign in to your account. If you are new, click on the sign-up button to create an account and receive 100 free tasks each month.

Once signed in, navigate to the Pabbly Connect dashboard. Here, you will create a new workflow by clicking on the ‘Create Workflow’ button located at the right-hand corner. This is where you will set up the integration that will allow WordPress to communicate with Telegram.


2. Creating the Workflow in Pabbly Connect

In this section, you will set up the workflow to auto-post WordPress posts to Telegram using Pabbly Connect. After clicking ‘Create Workflow’, give your workflow a name, such as ‘Auto-post WordPress post to Telegram in minutes’. Select the folder where you want to save this workflow.

  • Name your workflow appropriately.
  • Select the folder for organization.

After naming your workflow, you will be directed to a window that consists of trigger and action settings. Pabbly Connect allows you to define a trigger, which in this case is WordPress, and the action, which will be Telegram. This setup is crucial for the automation to function correctly.


3. Setting Up Trigger and Action Applications

The next step in using Pabbly Connect is to set up the trigger and action applications. For the trigger application, select WordPress and choose the trigger event as ‘New Post Published’. This means that every time a new post is published on your WordPress site, it will initiate the automation.

For the action application, search for Telegram and select the action event as ‘Send a Text Message’. This configuration ensures that whenever a new post is published, a text message will be sent to your Telegram channel. Confirm that both the trigger and action events are correctly set up to proceed with the integration.


4. Connecting WordPress to Pabbly Connect

To connect WordPress to Pabbly Connect, you will need to establish a webhook. In your Pabbly Connect dashboard, a webhook URL will be provided. Copy this URL and navigate to your WordPress account.

  • Go to WordPress Settings and select WP Webhooks.
  • Select ‘Send Data’ and choose ‘Post Created’.
  • Paste the copied webhook URL and save your settings.

After saving, create a new post in WordPress to test the webhook connection. This action will send data to Pabbly Connect and allow you to verify that the integration is working correctly.


5. Finalizing the Integration with Telegram

After successfully connecting WordPress to Pabbly Connect, the final step involves configuring the Telegram bot. Create a bot using Telegram’s BotFather and obtain the token needed for the integration. Paste this token back into Pabbly Connect to establish the connection.

Next, you need to specify the chat ID of the Telegram group where you want the posts to be sent. Ensure your bot is added to the group and has admin permissions to send messages. Once everything is set up, you can send a test message to confirm that your WordPress posts are being sent automatically to Telegram.


Conclusion

By following this detailed tutorial, you can successfully auto-post WordPress posts to Telegram using Pabbly Connect. This integration streamlines your posting process, ensuring that your Telegram audience is updated instantly with new content. Automating this process saves time and enhances engagement on your Telegram channel.

Ensure you check out Pabbly Connect to create business automation workflows and reduce manual tasks. Pabbly Connect currently offer integration with 2,000+ applications.

Create Social Media Posts Using OpenAI with Pabbly Connect: A Step-by-Step Guide

Learn how to automate social media posts using OpenAI and Pabbly Connect with this detailed tutorial. Integrate Google Sheets, Facebook, and Instagram effortlessly. Develop expertise in application integration and learn how to design streamlined automation workflows using proven, simplified approaches.

Watch Step By Step Video Tutorial Below


1. Setting Up Pabbly Connect for Social Media Automation

To create social media posts using OpenAI, the first step is to set up Pabbly Connect. This integration platform allows you to automate the process seamlessly. Start by signing up for a free account on Pabbly Connect, which takes just two minutes.

Once logged into Pabbly Connect, navigate to the dashboard. Click on the blue button labeled ‘Create Workflow’ and give your workflow a name, such as ‘Create Social Media Post Using OpenAI’. Select the folder for your workflow and click on ‘Create’ to begin the automation process.


2. Integrating Google Sheets with Pabbly Connect

In this section, we will integrate Google Sheets as the trigger application in Pabbly Connect. This integration allows you to capture new topics and image URLs to generate posts automatically. Select Google Sheets as your trigger application and choose the event ‘New or Updated Spreadsheet Row’.

  • Choose the spreadsheet where you will add topics and image URLs.
  • Copy the webhook URL provided by Pabbly Connect.
  • Open Google Sheets, click on Extensions, then Add-ons, and search for the Pabbly Connect Webhooks add-on.

After installing the add-on, click on ‘Initial Setup’. Paste the webhook URL and specify the trigger column where data will be added. This setup ensures that every time new data is entered, it will be sent to Pabbly Connect for processing.


3. Using OpenAI to Generate Content via Pabbly Connect

After setting up Google Sheets, the next step is to use OpenAI to generate content based on the information captured. In Pabbly Connect, select OpenAI as your action application and choose the event ‘ChatGPT’. Connect your OpenAI account by providing the API key.

When configuring OpenAI, select the model you want to use, such as GPT-3.5 Turbo. For the prompt, map the topic and image URL from Google Sheets to dynamically generate captions. This mapping ensures that the content is generated automatically based on the input data from your spreadsheet.

  • Map the topic from Google Sheets to the prompt field in OpenAI.
  • Generate a caption for social media posts.
  • Test the action to ensure the content is generated correctly.

Once you receive a response from OpenAI, you will have the generated caption ready for posting on social media platforms.


4. Posting Generated Content to Facebook and Instagram via Pabbly Connect

With the content generated, the next step is to post it on Facebook and Instagram using Pabbly Connect. First, add Facebook as an action application and select ‘Create Page Photo Post’. Connect your Facebook account and choose the page where you want to post.

Map the caption and image URL generated from OpenAI to the respective fields in Facebook. After configuring the settings, click ‘Save and Send Test Request’ to post the content. You will see a confirmation response indicating that the post was successful.

Select the Facebook page for posting. Map the generated caption and image URL. Test the connection to ensure successful posting.

Repeat the same process for Instagram by selecting it as an action application and mapping the same caption and image URL to publish the post automatically.


5. Finalizing the Automation Process with Pabbly Connect

After successfully posting on both Facebook and Instagram, you can finalize the automation process in Pabbly Connect. Ensure that the workflow is active, allowing it to monitor Google Sheets for new entries continuously. This setup guarantees that every time a new topic and image URL are added, posts will be generated and published automatically.

To test the automation, add a new row in Google Sheets with a topic and image URL. Wait a few moments for Pabbly Connect to trigger the workflow, generate the content, and post it on your social media accounts. This automated process saves time and enhances your social media marketing efforts.

With Pabbly Connect, you can easily manage multiple integrations and workflows, allowing for more complex automation setups as needed. Explore additional applications you can connect to expand your automation capabilities.


Conclusion

In conclusion, using Pabbly Connect to automate social media posts with OpenAI simplifies the process of content creation and posting. By integrating Google Sheets, Facebook, and Instagram, you can streamline your social media marketing efforts efficiently.

Ensure you check out Pabbly Connect to create business automation workflows and reduce manual tasks. Pabbly Connect currently offer integration with 2,000+ applications.

Automate WooCommerce Product Descriptions with Pabbly Connect and OpenAI

Learn how to automate WooCommerce product descriptions using Pabbly Connect and OpenAI. Step-by-step guide to streamline your eCommerce workflow. Follow this definitive guide to creating powerful automated workflows with straightforward, efficiency-focused solutions that save valuable time.

Watch Step By Step Video Tutorial Below


1. Setting Up Pabbly Connect for WooCommerce Integration

To begin automating product descriptions for WooCommerce, first access Pabbly Connect. This integration platform allows you to connect WooCommerce with OpenAI seamlessly. After logging into your Pabbly Connect account, you can create a new workflow by clicking on the ‘Create Workflow’ button.

When prompted, give your workflow a name, such as ‘Generate Descriptions for WooCommerce Products using OpenAI.’ Select a folder for your workflow and click on ‘Create’ to proceed. This initiates the setup process where you define the trigger and action applications.


2. Defining Trigger and Action in Pabbly Connect

In this step, you will specify the trigger and action for your workflow in Pabbly Connect. The trigger will be set to ‘New Product Created’ from WooCommerce, which means that whenever a new product is added to your store, it will initiate the workflow. Select WooCommerce as the trigger application and choose the appropriate event.

  • Select ‘New Product Created’ as the trigger event.
  • Copy the webhook URL provided by Pabbly Connect.
  • Go to WooCommerce settings and navigate to the webhooks section.

Paste the copied webhook URL into the delivery URL field and give it a name, such as ‘Connection with Pabbly Connect.’ Ensure the status is set to active and the topic is set to ‘Product Created.’ Save the webhook to establish the connection between WooCommerce and Pabbly Connect.


3. Testing the Integration with WooCommerce

Once you have set up the webhook in WooCommerce, it’s time to test the integration. Go back to your Pabbly Connect dashboard and click on the ‘Recapture Webhook Response’ button. This allows you to see if the connection is successful. After clicking, create a test product in WooCommerce to trigger the webhook.

After creating the test product, you should see a response in Pabbly Connect indicating that the product details have been captured successfully. This confirms that the integration between WooCommerce and Pabbly Connect is working as intended. You will see details like product name, slug, and prices captured in the webhook response.


4. Generating Descriptions using OpenAI

With the trigger successfully set up, the next step is to integrate OpenAI to generate product descriptions. In the action step of your Pabbly Connect workflow, select OpenAI and set the action event to ‘ChatGPT’. You will need to connect your OpenAI account by providing your API key.

Once connected, you will configure the prompt for generating descriptions. For example, set the prompt to ‘Write a two-paragraph, 100-word product description for a product with the following details: [Product Name] and [Sales Price].’ Here, you will map the product name and sales price from the previous webhook response to automate the description generation.


5. Updating WooCommerce Product Descriptions Automatically

The final step is to ensure that the generated descriptions are updated back into WooCommerce. In your Pabbly Connect workflow, add another action step and select WooCommerce again, this time choosing ‘Update Product’ as the action event. Connect this action to your WooCommerce account using your consumer key and secret.

Map the product ID from the webhook response to identify which product to update. In the description field, map the generated description from OpenAI. Save the workflow, and you are set! Now, every time a new product is created, its description will be generated and updated automatically in WooCommerce without any manual effort.


Conclusion

This tutorial demonstrated how to automate WooCommerce product descriptions using Pabbly Connect and OpenAI. By following these steps, you can streamline your eCommerce operations and enhance productivity. Enjoy the benefits of automation!

Ensure you check out Pabbly Connect to create business automation workflows and reduce manual tasks. Pabbly Connect currently offer integration with 2,000+ applications.

Automate File Sharing from Gmail to WhatsApp with Pabbly Connect

Learn how to automate file sharing from Gmail to WhatsApp using Pabbly Connect. Step-by-step tutorial for seamless integration and automation. Explore efficient methods for automating routine tasks with clear, concise instructions suited for both newcomers and experienced professionals.

Watch Step By Step Video Tutorial Below


1. Setting Up Pabbly Connect for Automation

To automate file sharing from Gmail to WhatsApp, we will use Pabbly Connect. Start by creating a free account on Pabbly Connect. This process takes just a few minutes and allows you to access automation tasks.

Once logged in, navigate to the dashboard of Pabbly Connect and click on the blue button labeled ‘Create Workflow’. Name your workflow, for example, ‘Share File from Email to WhatsApp Automatically’. Select the folder where you want to save this workflow and click ‘Create’.


2. Defining Trigger and Action in Pabbly Connect

In Pabbly Connect, you will see two boxes labeled as Trigger and Action. The Trigger signifies the event that starts the automation, while the Action is what happens as a result. For this use case, select Gmail as your Trigger application and choose ‘New Email’ as the trigger event.

  • Select Gmail as the Trigger application.
  • Choose ‘New Email’ as the trigger event.
  • Connect Gmail with Pabbly Connect using the Email Parser.

After setting up the trigger, connect your Gmail account to Pabbly Connect using the Email Parser. This step is essential as it allows Pabbly Connect to receive emails from Gmail.


3. Forwarding Emails to Pabbly Connect

To ensure emails are forwarded to Pabbly Connect, you need to set up a forwarding address in your Gmail settings. Copy the email address provided by Pabbly Connect and go to your Gmail account.

  • Navigate to Gmail settings and select ‘Forwarding and POP/IMAP’.
  • Add the forwarding address copied from Pabbly Connect.
  • Confirm the forwarding address by following the verification link sent to Pabbly Connect.

Once the forwarding setup is complete, any new emails received will be sent to Pabbly Connect for processing.


4. Integrating WhatsApp with Pabbly Connect

Next, you will set up WhatsApp as the Action application in Pabbly Connect. Choose WhatsApp and select the action event as ‘Send Template Message’. Connect your WhatsApp account by entering the API endpoint and access token from your WhatsApp provider.

After connecting, specify the WhatsApp number to which you want to send the messages. Prepare a message template that includes variables for dynamic content, such as the sender’s name and email details. This ensures that the message sent via Pabbly Connect is personalized and informative.


5. Filtering Emails Before Sending to WhatsApp

To filter which emails get forwarded to WhatsApp, use the filtering feature in Pabbly Connect. You can set conditions based on the subject line or email content. For example, configure the filter to only forward emails with the words ‘receipt’ or ‘invoice’ in the subject line.

Select ‘Filter’ as the Action event in Pabbly Connect. Specify conditions for the subject line and body text. Choose the action to proceed if the conditions are met.

This filtering will ensure that only relevant emails are sent to WhatsApp, enhancing the efficiency of your automation process with Pabbly Connect.


Conclusion

In this tutorial, we explored how to automate file sharing from Gmail to WhatsApp using Pabbly Connect. This integration allows for efficient communication and file management, ensuring that important emails are forwarded promptly to WhatsApp. With the right setup, you can streamline your workflow and enhance productivity.

Ensure you check out Pabbly Connect to create business automation workflows and reduce manual tasks. Pabbly Connect currently offer integration with 2,000+ applications.

How to Send Slack Notifications for Elementor Form Responses Using Pabbly Connect

Learn how to automate sending Slack notifications for Elementor form responses using Pabbly Connect in this detailed tutorial. Implement the precise methodologies leading organizations use to automate repetitive tasks, illustrated with practical examples designed for immediate application.

Watch Step By Step Video Tutorial Below


1. Access Pabbly Connect to Set Up Automation

To send Slack notifications for Elementor form responses, the first step is to access Pabbly Connect. You can do this by visiting the Pabbly Connect homepage and signing in or signing up for a free account.

Once logged in, you will find the dashboard where you can create workflows. If you are a new user, you will receive 100 free tasks every month, allowing you to explore the features of Pabbly Connect.


2. Create a Workflow in Pabbly Connect

After accessing Pabbly Connect, you can create a new workflow to automate the process. Click on the ‘Create Workflow’ button, and a dialog box will appear. Name your workflow, such as ‘Send Slack Notification for Elementor Form Submission’.

  • Provide a name for your workflow.
  • Select a folder to save your workflow.
  • Click on ‘Create’ to proceed.

Now, you will see two sections: Trigger and Action. Select Elementor as your trigger application and Slack as the action application. This setup enables Pabbly Connect to listen for new form submissions in Elementor and send notifications via Slack.


3. Set Up Elementor as the Trigger in Pabbly Connect

In this section, you will configure Elementor as the trigger in Pabbly Connect. Select Elementor from the list of applications and choose the trigger event as ‘New Form Submission’. This event will initiate the workflow when a form is submitted.

After selecting the trigger event, Pabbly Connect will provide you with a webhook URL. Copy this URL, as it will be used to connect your Elementor form to Pabbly Connect.

  • Select ‘New Form Submission’ as your trigger event.
  • Copy the provided webhook URL for later use.
  • Proceed to your WordPress site to integrate the webhook.

This integration enables Pabbly Connect to capture form submissions from Elementor and initiate the workflow.


4. Configure Your Elementor Form

Now, navigate to your WordPress site and edit the Elementor form you want to connect. Add the webhook URL to the form settings under the ‘Actions After Submit’ section. This step is crucial to ensure that form submissions trigger the workflow in Pabbly Connect.

In the form settings, click on the plus sign to add a new action, then search for ‘Webhook’ and paste the copied URL. Save the changes, and your form is now connected to Pabbly Connect.

Edit your Elementor form and go to ‘Actions After Submit’. Add the Webhook action and paste the URL. Save the form settings to complete the integration.

Once this is done, Pabbly Connect will be ready to receive data from the Elementor form.


5. Set Up Slack as the Action in Pabbly Connect

In this final step, configure Slack as the action application in Pabbly Connect. Select Slack from the list and choose the action event as ‘Send Channel Message’. You will need to connect your Slack account by providing the necessary permissions.

Once connected, specify the channel where you want to send the notifications. You can customize the message to include the details captured from the Elementor form submission. This ensures that your team receives timely updates on new feedback submitted through the form.

Select ‘Send Channel Message’ as your action event. Connect your Slack account and authorize Pabbly Connect. Map the data fields from Elementor to customize the message.

With Slack configured, Pabbly Connect will automatically send messages to your selected channel whenever a new form submission occurs in Elementor.


Conclusion

In this tutorial, we demonstrated how to use Pabbly Connect to automate sending Slack notifications for Elementor form responses. By following these steps, you can efficiently keep your team informed about new submissions without any manual effort.

Ensure you check out Pabbly Connect to create business automation workflows and reduce manual tasks. Pabbly Connect currently offer integration with 2,000+ applications.

How to Send SMS When Refund is Created in Pabbly Subscription Billing

Learn how to send automated SMS notifications when a refund is created in Pabbly Subscription Billing using Pabbly Subscription Billing and Twilio. Follow our step-by-step guide!

Watch Step By Step Video Tutorial Below


1. Accessing Pabbly Subscription Billing for SMS Integration

To send SMS notifications when a refund is created in Pabbly Subscription Billing, first access the platform. Navigate to the Pabbly website and sign in or create a free account if you don’t have one. This will allow you to utilize Pabbly Subscription Billing for automating SMS notifications.

Once logged in, click on the Pabbly Connect option. This section is where you will create workflows to automate tasks. Make sure to familiarize yourself with the dashboard, as it will be essential for setting up your SMS integration.


2. Creating a New Workflow in Pabbly Connect

To create a workflow for sending SMS notifications, click on the Create Workflow button in Pabbly Connect. You will be prompted to name your workflow. For this integration, name it something relevant, like ‘Send SMS When Refund is Created in Pabbly Subscription Billing’.

  • Select the folder to save your workflow.
  • Click on Create.

This setup will prepare your workflow for the next steps, where you will define the trigger and action for sending SMS notifications when a refund occurs in Pabbly Subscription Billing.


3. Setting Up Trigger in Pabbly Subscription Billing

The first step in your workflow is to set up the trigger. Select Pabbly Subscription Billing as your trigger application. You will then need to choose the trigger event, which in this case is Payment Refund.

After selecting the trigger event, you will need to connect Pabbly Subscription Billing with Pabbly Connect. This requires a webhook URL, which acts as a bridge between the two applications. To get this URL:

  • Copy the webhook URL provided in Pabbly Connect.
  • Go to Pabbly Subscription Billing, navigate to Settings, then Webhook Settings.
  • Click on Add Webhook, name it, and paste the copied URL.

Once you save this webhook, it will allow Pabbly Subscription Billing to send data to Pabbly Connect whenever a refund is initiated.


4. Configuring SMS Sending Action with Twilio

After setting up the trigger, the next step is to configure the action to send an SMS using Twilio. In the actions tab, select Twilio as your action application and choose the action event as Send SMS Message.

To connect Twilio with Pabbly Connect, you will need your Account SID and Authorization Token from your Twilio account. Here’s how to do it:

Open your Twilio account and locate your Account SID and Authorization Token. Paste these credentials into Pabbly Connect to establish the connection.

Now, you can set the body of your SMS message. Use mapping to include the user’s name and refund details dynamically. This ensures that each SMS is personalized for the recipient.


5. Testing the Integration and Sending SMS

To test the integration, initiate a refund in Pabbly Subscription Billing. Go to the sales section, select an order, and click refund. Fill in the necessary details and submit the refund request.

Once the refund is processed, check Pabbly Connect for the webhook response. If successful, it will show the details of the refund, including the user’s information. Now, you can verify that the SMS was sent by checking the recipient’s phone. The message should confirm the refund details.

This entire process demonstrates how Pabbly Subscription Billing seamlessly integrates with Twilio to automate SMS notifications, enhancing customer communication regarding refunds.


Conclusion

In summary, using Pabbly Subscription Billing, you can effectively automate SMS notifications for refunds. This integration not only improves customer service but also streamlines communication. Follow the steps outlined to set up your own automated SMS alerts.

Ensure you check out Pabbly Connect to create business automation workflows and reduce manual tasks. Pabbly Connect currently offer integration with 2,000+ applications.

Integrate Facebook Leads with Google Sheets Using Pabbly Connect: A Step-by-Step Guide for Social Media Marketing Agencies

Learn how to seamlessly integrate Facebook leads into Google Sheets using Pabbly Connect. This guide is perfect for social media marketing agencies looking to automate lead management.

Watch Step By Step Video Tutorial Below


1. Accessing Pabbly Connect for Integration

To start integrating Facebook leads into Google Sheets, you must access Pabbly Connect. This platform serves as the backbone for your automation needs, streamlining the process of transferring data between applications.

Begin by signing into your Pabbly Connect account. If you’re a new user, click on the ‘Sign up for free’ button to create an account. Once logged in, navigate to the Pabbly Connect dashboard to proceed with your workflow setup.


2. Creating a Workflow in Pabbly Connect

Creating a workflow is essential for automating the lead capture process. In your Pabbly Connect dashboard, click on the ‘Create Workflow’ button located in the top right corner. Name your workflow something descriptive, like ‘Add Facebook Leads to Google Sheets’.

  • Select the appropriate folder for your workflow, such as ‘Facebook Lead Ads’.
  • Click the ‘Create’ button to initialize your new workflow.

After creating the workflow, you will see sections for triggers and actions. Here, you will set Facebook Lead Ads as the trigger application and Google Sheets as the action application.


3. Setting Up Facebook Lead Ads as the Trigger

In the trigger section of your Pabbly Connect workflow, select Facebook Lead Ads as your trigger application. The trigger event should be set to ‘New Lead Instant’ to ensure that every new lead captured will trigger the workflow.

Now, click on the ‘Connect’ button to establish a connection between Facebook Lead Ads and Pabbly Connect. Ensure you are logged into your Facebook account to authorize the connection, which will allow Pabbly Connect to access your leads.


4. Selecting Your Lead Form in Facebook

Once connected, you need to select the Facebook page associated with your social media marketing agency. In Pabbly Connect, search for your page, like ‘Sharks Media Agency’, and select it.

  • Choose the lead generation form associated with your Facebook page.
  • Click ‘Save and Test Request’ to ensure that Pabbly Connect can receive lead data correctly.

After saving, Pabbly Connect will wait for a webhook response, indicating that it is ready to receive data from Facebook.


5. Adding Facebook Leads to Google Sheets

With your trigger set up, the next step is to add the lead details into Google Sheets. In the action section of your Pabbly Connect workflow, select Google Sheets as your action application. The action event should be set to ‘Add New Row’.

Connect your Google account to Pabbly Connect by clicking ‘Connect’ and allowing necessary permissions. Then, select the spreadsheet you created for leads, named ‘Facebook Leads New’. Map the fields accordingly to ensure that the lead email, name, phone number, and city are correctly populated in your Google Sheet.

Finally, click on ‘Save and Send Test Request’ to verify that the lead data is added to your Google Sheet. Check your spreadsheet to confirm that the new lead’s details appear in a new row, indicating a successful integration.


Conclusion

By following this tutorial, you have successfully integrated Facebook leads into Google Sheets using Pabbly Connect. This automation streamlines lead management for social media marketing agencies, ensuring that no leads are missed and data is efficiently organized.

Ensure you check out Pabbly Connect to create business automation workflows and reduce manual tasks. Pabbly Connect currently offer integration with 2,000+ applications.

How to Get Real-Time Stock Alerts on WhatsApp from Google Sheets Using Pabbly Connect

Learn how to receive real-time stock alerts on WhatsApp through Google Sheets using Pabbly Connect. Follow our step-by-step guide for seamless integration. Explore efficient methods for automating routine tasks with clear, concise instructions suited for both newcomers and experienced professionals.

Watch Step By Step Video Tutorial Below


1. Setting Up Google Sheets for Stock Prices

To get real-time stock alerts on WhatsApp, you first need to set up Google Sheets. Using the Pabbly Connect integration, you can automate fetching stock prices from the National Stock Exchange.

Open Google Sheets and enter the following formula to fetch stock prices:

  • Type `=GOOGLEFINANCE(‘TATAMOTORS’, ‘price’)` to get the current price of Tata Motors.

Once you have this setup, you can easily update the stock symbols to fetch prices for other companies. Ensure the sheet is ready for integration with Pabbly Connect.


2. Creating a Workflow in Pabbly Connect

Now, let’s create a workflow in Pabbly Connect to automate the process. Start by logging into your Pabbly Connect account and clicking on the ‘Create Workflow’ button.

Provide a name for your workflow, such as ‘Get Real-Time Stock Price Alerts on WhatsApp’. Next, choose a trigger. In this case, select the ‘Schedule’ feature from Pabbly Connect, allowing you to run the workflow daily.

  • Select the time for the alert, e.g., 10:00 AM.
  • Click on ‘Save’ to schedule your workflow.

This setup ensures that your stock prices are fetched daily at the specified time using Pabbly Connect.


3. Fetching Data from Google Sheets

After setting the schedule, the next step involves fetching the stock data from Google Sheets using Pabbly Connect. Choose Google Sheets as the action application.

Select the action event as ‘Get Row’ and connect your Google Sheets account. After connecting, specify the spreadsheet name where your stock prices are stored.

Enter the range of data you want to fetch, e.g., A2:B5. Click on ‘Save and Send Test Request’ to confirm the connection.

This process enables Pabbly Connect to access your stock prices directly from Google Sheets, ready for the next step.


4. Sending Alerts to WhatsApp

Next, set up WhatsApp to receive the stock alerts. In Pabbly Connect, choose Interact as the action application and select ‘Send WhatsApp Template Message’ as the action event.

Connect your Interact account by providing the secret key. After connecting, fill in the required fields, including your phone number and a predefined message template.

Use a template name like ‘Leads Update’ to get approval from WhatsApp. Map the variables to include stock names and prices in your message.

This setup allows Pabbly Connect to send automated WhatsApp messages with real-time stock updates.


5. Testing and Optimizing the Workflow

Finally, after setting up everything, it’s crucial to test your workflow. Click on ‘Save and Send Test Request’ to verify that your WhatsApp receives the stock alerts correctly.

Make sure to replace any dummy phone numbers with your actual WhatsApp number. This step ensures that you will receive real-time stock alerts directly on your device.

Monitor the alerts to ensure they are sent at the scheduled time. Adjust the template or variables as needed for clarity and effectiveness.

With this final check, your integration using Pabbly Connect is complete, and you can enjoy automated stock alerts on WhatsApp.


Conclusion

Using Pabbly Connect, you can seamlessly integrate Google Sheets with WhatsApp for real-time stock alerts. This automation allows for efficient monitoring of stock prices without manual intervention, ensuring you stay updated effortlessly.

Ensure you check out Pabbly Connect to create business automation workflows and reduce manual tasks. Pabbly Connect currently offer integration with 2,000+ applications.

Automatically Capture Webpage Screenshots from Google Forms Responses & Save in Google Drive Using Pabbly Connect

Learn how to automatically capture webpage screenshots from Google Forms responses and save them in Google Drive using Pabbly Connect. Follow this detailed tutorial step-by-step!

Watch Step By Step Video Tutorial Below


1. Set Up Pabbly Connect for Automation

To start using Pabbly Connect for automation, first sign up for a free account. After logging in, navigate to the dashboard where you can create a new workflow. This workflow will automate the process of capturing screenshots from Google Forms responses.

Click on the ‘Create Workflow’ button, name your workflow (e.g., ‘Capture Website Screenshot Automatically’), and select the appropriate folder in your Pabbly account. Once created, you will see two windows: the trigger and action windows, essential for setting up your automation.


2. Integrate Google Forms with Pabbly Connect

In this step, we will set up Google Forms as the trigger in Pabbly Connect. Search for Google Forms in the trigger app section and select ‘New Response Received’ as the trigger event. This means every time a new response is submitted in your Google Form, the automation will be activated.

  • Select Google Forms as the app.
  • Choose ‘New Response Received’ as the trigger event.
  • Copy the webhook URL provided by Pabbly Connect.

Next, go to your Google Form, ensure the last question is marked as required, and link your form responses to a Google Sheet. From the responses tab, click on ‘Link to Sheets’ to create a new spreadsheet. After that, install the Pabbly Connect Webhook add-on in Google Sheets and input the copied webhook URL during the initial setup. This connects your Google Form with Pabbly Connect.


3. Capture Webpage Screenshots Using HTML to Image

Now that we have set up Google Forms, we will capture the webpage screenshots using the HTML to Image integration in Pabbly Connect. In the action window, search for ‘HTML to Image’ and select ‘Capture Website Screenshot’ as the action event. This action will allow you to take screenshots of the URLs submitted in your Google Form.

When prompted, connect your HTML to Image account by entering the API key from your HTML to Image account. After connecting, you will need to map the webpage URL from the Google Form responses to the HTML to Image action. Set the viewport width and height based on your preference, and specify whether you want a full-page screenshot.

  • Map the URL from the Google Form response to the HTML to Image action.
  • Set viewport dimensions (e.g., 1920×1080).
  • Choose to capture a full-page screenshot.

Click on ‘Save and Send Test Request’ to test the process. If successful, you will receive a URL link to the captured screenshot.


4. Upload Captured Screenshots to Google Drive

After capturing the screenshot, the next step is to upload the image to Google Drive using Pabbly Connect. In the action step, select Google Drive and choose ‘Upload a File’ as the action event. This will facilitate the transfer of the screenshot image to your specified Google Drive folder.

Connect your Google Drive account by signing in and authorizing access. Then, map the screenshot URL received from the HTML to Image action to the file upload URL field. Specify the folder ID where you want to store the screenshots and provide a file name, including the appropriate file extension (e.g., .png).

Select Google Drive as the action app. Map the screenshot URL to the upload action. Provide the folder ID and file name for the uploaded image.

Once you click ‘Save and Send Test Request,’ the image will be uploaded to your Google Drive folder, confirming the successful setup of your automation.


5. Testing the Automation Workflow

To ensure everything is working correctly, it’s essential to test the automation you set up using Pabbly Connect. Go back to your Google Form and submit a test response, including a valid webpage URL. Once submitted, the automation should trigger, capturing the screenshot and uploading it to your Google Drive.

Check your Google Drive folder to verify that the screenshot has been uploaded successfully. The file name should reflect the details you configured, like the name of the user and the webpage URL. If everything works as expected, your automation is set up correctly!

In summary, using Pabbly Connect allows you to automate the process of capturing webpage screenshots from Google Forms responses and saving them directly to Google Drive. This efficient workflow saves time and ensures you have a visual record of the submitted URLs.


Conclusion

In this tutorial, we explored how to use Pabbly Connect to automate the process of capturing webpage screenshots from Google Forms responses and saving them in Google Drive. This integration streamlines your workflow and enhances your data management capabilities.

Ensure you check out Pabbly Connect to create business automation workflows and reduce manual tasks. Pabbly Connect currently offer integration with 2,000+ applications.