How to Automatically Send Google Forms Responses to Multiple Email Addresses Using Pabbly Connect

Learn how to use Pabbly Connect to automate sending Google Forms responses to multiple email addresses. Step-by-step guide included. Revolutionize your productivity approach with just a few strategic clicks. Uncover professional methods for connecting applications and creating workflows that reclaim hours of your week.

Watch Step By Step Video Tutorial Below


1. Setting Up Pabbly Connect for Google Forms Automation

To send Google Forms responses to multiple email addresses, we will utilize Pabbly Connect. First, access your Pabbly Connect dashboard by signing up for a free account. Once logged in, click on the ‘Create Workflow’ button to start the automation process.

When creating your workflow, give it a descriptive name, like ‘Google Forms to Gmail’. Choose the appropriate folder from the dropdown to organize your workflow. Click on ‘Create’ to initiate the setup, where you will configure triggers and actions.


2. Connecting Google Forms with Pabbly Connect

In this step, you will connect Google Forms to Pabbly Connect to capture form responses. Start by selecting Google Forms as your app in the trigger window. Choose the trigger event as ‘New Response Received’.

  • Select Google Forms in Pabbly Connect.
  • Choose the trigger event ‘New Response Received’.
  • Copy the webhook URL provided by Pabbly Connect.

Next, direct yourself to your Google Forms account and ensure the last question is marked as required. Then, link your Google Form to a Google Sheet under the ‘Responses’ tab, which will store the responses. This sheet will be connected to Pabbly Connect using the webhook URL.


3. Setting Up Google Sheets for Pabbly Connect Integration

Now, you need to set up Google Sheets to work with Pabbly Connect. Open the Google Sheet linked to your Google Form, go to Extensions, and click on ‘Get Add-ons’. Search for ‘Pabbly Connect Webhooks’ and install it.

After installation, refresh the Google Sheet. Go back to Extensions, select Pabbly Connect Webhooks, and click on ‘Initial Setup’. In the dialog box, paste the webhook URL you copied earlier, select the correct sheet, and specify the trigger column (the last column with data).

  • Paste the webhook URL in the setup dialog.
  • Select the trigger column based on your sheet’s layout.
  • Confirm the setup to ensure successful integration.

After submitting the setup, you will receive a confirmation message. This means your Google Sheet is now ready to send data to Pabbly Connect whenever a new response is recorded.


4. Configuring Email Notifications Using Pabbly Connect

Once the Google Form and Sheets are connected to Pabbly Connect, the next step is to configure email notifications. In the action step of your workflow, select Gmail as the app and choose ‘Send Email’ as the action event.

Connect your Gmail account with Pabbly Connect by clicking on ‘Connect with Gmail’. Enter the recipient email addresses separated by commas for all departments that need to receive the notifications. You can also add CC and BCC as needed.

Enter recipient email addresses for all relevant departments. Map the employee name in the email subject line. Compose the email body using mapped responses from the Google Form.

After configuring these fields, click on ‘Save and Send Test Request’ to ensure that the email notifications work as intended. You should see a confirmation message indicating that the emails have been sent successfully.


5. Testing the Automation Workflow

Now that everything is set up, it’s time to test the automation using Pabbly Connect. Go to your Google Form and make a test submission. Fill in the necessary fields and click submit.

Once you submit the form, check your email inbox for notifications. You should receive an email containing all the details of the form submission sent to the multiple email addresses you configured. This confirms that the integration is working flawlessly.

By using Pabbly Connect, you can efficiently automate sending Google Form responses to multiple email addresses, ensuring that all relevant teams are informed promptly. This setup not only saves time but also enhances communication across departments.


Conclusion

In this tutorial, we explored how to use Pabbly Connect to send Google Forms responses to multiple email addresses. By automating this process, you can streamline communication and enhance workflow efficiency in your organization.

Ensure you check out Pabbly Connect to create business automation workflows and reduce manual tasks. Pabbly Connect currently offer integration with 2,000+ applications.

How to Send WhatsApp Messages to Facebook Leads for Your Language Teaching Academy Using Pabbly Connect

Learn how to automate WhatsApp messages to Facebook leads for your Language Teaching Academy by integrating with Pabbly Connect. Step-by-step tutorial included. Transform complex automation concepts into accessible, actionable steps that eliminate unnecessary manual work while maximizing existing application capabilities.

Watch Step By Step Video Tutorial Below


1. Accessing Pabbly Connect for WhatsApp Integration

To send automated WhatsApp messages to Facebook leads for your Language Teaching Academy, you need to access Pabbly Connect. First, sign in to your existing account or create a new one for free. Pabbly Connect offers 100 tasks monthly for free, making it accessible for small businesses.

Once logged in, navigate to the Pabbly Connect dashboard. From here, you can create a new workflow that integrates WhatsApp and Facebook Leads. This is crucial for automating your messaging process effectively.


2. Creating a New Workflow in Pabbly Connect

Creating a new workflow in Pabbly Connect is straightforward. Click on the ‘Create Workflow’ button located in the upper right corner of the dashboard. Name your workflow, for instance, ‘Send WhatsApp Messages to Facebook Leads,’ and select a folder to save it.

  • Click on the ‘Create’ button to initiate the workflow.
  • Set Facebook Lead Ads as the trigger application.
  • Select the trigger event as ‘New Lead Instant.’

With these steps, you have established the foundation of your automation. This setup ensures that every time a new lead is generated through Facebook, your workflow will execute automatically.


3. Connecting Facebook Lead Ads to Pabbly Connect

After setting up your workflow, the next step is to connect Facebook Lead Ads to Pabbly Connect. Click on the ‘Connect’ button within the trigger section. This action prompts a login window for Facebook, where you must authorize the connection.

Once authorized, select the Facebook page associated with your Language Teaching Academy. Choose the lead generation form you want to utilize, such as ‘Professional Institute Contact Form.’ This form will capture lead details for your WhatsApp messaging.


4. Testing the Integration with a Lead Submission

To ensure that the integration between Facebook Lead Ads and Pabbly Connect works, you must perform a test lead submission. Access the Meta for Developers platform and navigate to the Lead Ads Testing Tool.

  • Select the appropriate page and lead form.
  • Fill in the required fields such as email, full name, and phone number.
  • Click on ‘Submit’ to send the test lead.

Upon successful submission, Pabbly Connect will capture the lead details, confirming that the integration is functioning properly. You will see the lead’s information displayed in the Pabbly Connect dashboard.


5. Sending WhatsApp Messages to Leads

Now that you have captured the lead’s information, it’s time to send automated WhatsApp messages using Pabbly Connect. In the action section of your workflow, select WhatsApp as your action application. Choose the action event as ‘Send Template Message.’

Next, establish a connection to WhatsApp by entering the API endpoint and access token from your WhatsApp provider. Map the phone number from the lead details to ensure that the message is sent to the correct recipient. Finally, select your message template, which should include a customizable greeting for the lead.


Conclusion

In summary, using Pabbly Connect to send automated WhatsApp messages to Facebook leads for your Language Teaching Academy is efficient and straightforward. This integration allows you to engage with potential students promptly, enhancing your communication strategy.

Ensure you check out Pabbly Connect to create business automation workflows and reduce manual tasks. Pabbly Connect currently offer integration with 2,000+ applications.

How to Update Stripe Payment Details on Discord Channel Using Pabbly Connect

Learn how to update Stripe payment details on your Discord channel using Pabbly Connect. This step-by-step tutorial guides you through the integration process. Eliminate manual repetitive tasks from your workflow. Discover proven automation methods with intuitive steps designed for efficiency-minded professionals.

Watch Step By Step Video Tutorial Below


Accessing Pabbly Connect for Integration

To begin updating Stripe payment details on a Discord channel, you must first access Pabbly Connect. This platform serves as the integration hub for connecting Stripe and Discord seamlessly.

Log in to your existing Pabbly Connect account or sign up for a new account. Once logged in, navigate to the dashboard. Here, click on the ‘Create Workflow’ button located in the top right corner.


Creating a Workflow in Pabbly Connect

In this section, you will create a workflow specifically designed to update Stripe payment details on your Discord channel. Start by naming your workflow, such as ‘Update Stripe Payment Details on Discord Channel’. This title helps identify the workflow later.

Next, select a folder to save your workflow. For this example, choose the folder named ‘Stripe’. This organization helps keep your workflows tidy. Click on the ‘Create’ button to proceed, leading you to the trigger and action setup interface of Pabbly Connect.

  • Name your workflow appropriately.
  • Select the correct folder for organization.
  • Click ‘Create’ to proceed to the setup.

After clicking ‘Create’, you will see the trigger and action setup area. This is where you will define the integration between Stripe and Discord using Pabbly Connect.


Setting Up Triggers and Actions

In the trigger setup, search for ‘Stripe’ and select it as your trigger application. The event to choose is ‘New Charge’ since you want to notify your Discord channel whenever a payment is received.

Next, move to the action setup. Search for ‘Discord’ and select it as your action application. The action event should be set to ‘Send Channel Message’. This configuration ensures that every time a new payment is processed in Stripe, a notification will be sent to your designated Discord channel.

  • Select ‘Stripe’ as the trigger application.
  • Choose ‘New Charge’ as the trigger event.
  • Select ‘Discord’ as the action application.
  • Set the action event to ‘Send Channel Message’.

With this setup, Pabbly Connect will facilitate the communication between Stripe and Discord, enabling real-time updates on payment statuses.


Connecting Stripe and Discord

To connect Stripe with Pabbly Connect, you will need a webhook URL provided by Pabbly. Copy this URL and head to your Stripe account. Go to the ‘Developers’ section, then to ‘Webhooks’.

Click on ‘Add Endpoint’ and paste the copied webhook URL. Select the event ‘Charge Succeeded’ to ensure that notifications are sent only for successful payments. After adding the event, your Stripe account will be linked to Pabbly Connect.

Navigate to ‘Developers’ in Stripe. Select ‘Webhooks’ and click ‘Add Endpoint’. Paste the webhook URL and select ‘Charge Succeeded’.

This connection allows Pabbly Connect to receive updates from Stripe, ensuring that any new charges trigger the action to send messages to Discord.


Testing the Integration

To test the integration, create a dummy payment in Stripe. Go to the payment section and enter the payment details such as amount, customer name, and description. Submit the payment to simulate a real transaction.

Once the payment is processed, return to Pabbly Connect to see if the webhook response has been received. If successful, you will see the payment details, including the amount and customer information.

Create a test payment in Stripe. Check the webhook response in Pabbly Connect. Verify that payment details are correctly displayed.

Successfully receiving the webhook response confirms that the integration is functioning correctly. Now, whenever a payment is made, the details will be sent to your Discord channel automatically.


Conclusion

In conclusion, using Pabbly Connect to update Stripe payment details on a Discord channel is a straightforward process. By following the outlined steps, you can automate notifications for your team, ensuring they stay informed about payment activities.

Ensure you check out Pabbly Connect to create business automation workflows and reduce manual tasks. Pabbly Connect currently offer integration with 2,000+ applications.

This integration not only saves time but also enhances communication within your team. Start utilizing Pabbly Connect for your automation needs today!

Integrate Facebook Leads with Google Sheets Using Pabbly Connect

Learn how to seamlessly integrate Facebook leads with Google Sheets for your pest control business using Pabbly Connect. Step-by-step tutorial included. Explore systematic approaches to creating efficient automation solutions that convert technical concepts into practical, implementable instructions.

Watch Step By Step Video Tutorial Below


1. Accessing Pabbly Connect for Integration

To begin integrating Facebook leads into Google Sheets, first access Pabbly Connect. This platform allows you to automate tasks between different applications seamlessly.

Start by visiting the Pabbly website. If you don’t have an account, sign up for free to get started. Once logged in, navigate to the Pabbly Connect dashboard, where you can create new workflows for your automations.


2. Creating a New Workflow in Pabbly Connect

In this section, you will create a new workflow to capture Facebook leads automatically. Click on the ‘Create Workflow’ button in Pabbly Connect to initiate this process.

  • Name your workflow, for example, ‘Facebook Leads to Google Sheets’.
  • Select a folder to save your workflow.
  • Proceed to the workflow setup screen.

Here, you will see two main sections: Trigger and Action. The trigger will be Facebook Lead Ads, and the action will be Google Sheets. This setup allows you to specify what happens when a new lead is generated.


3. Setting Up the Trigger with Facebook Lead Ads

The next step is to set up the trigger in Pabbly Connect. Search for ‘Facebook Lead Ads’ and select it as the trigger application.

Choose the trigger event as ‘New Lead Instant’. Connect your Facebook account by clicking on ‘Connect’ and granting the necessary permissions. Once connected, select your Facebook page and the lead generation form you created for your pest control business.


4. Mapping Lead Details to Google Sheets

After setting up the trigger, you will now map the lead details into Google Sheets using Pabbly Connect. First, select Google Sheets as your action application and choose the action event as ‘Add New Row’.

  • Connect your Google account to allow access to your sheets.
  • Select the spreadsheet where you want the leads to be stored.
  • Map the fields: Full Name, Email, and Phone Number from Facebook to the corresponding columns in Google Sheets.

After mapping, click on ‘Save and Send Test Request’ to verify the integration. If successful, the lead details will be added to your Google Sheet.


5. Testing the Integration in Real-Time

To ensure everything is working correctly, test the integration by submitting a sample lead through your Facebook lead form. This action will trigger the workflow in Pabbly Connect.

Once the sample lead is submitted, check your Google Sheets to confirm that the new row with lead details has been added. This verification step ensures that your integration is functioning as intended.


Conclusion

In this tutorial, you learned how to integrate Facebook leads with Google Sheets using Pabbly Connect. By following the steps outlined, you can automate your lead management process effectively, ensuring you never miss a potential client for your pest control business.

Ensure you check out Pabbly Connect to create business automation workflows and reduce manual tasks. Pabbly Connect currently offer integration with 2,000+ applications.

How to Automatically Add Google Calendar Events to Coda Docs Using Pabbly Connect

Learn how to integrate Google Calendar with Coda Docs using Pabbly Connect to automatically add events. Step-by-step tutorial included. Implement the precise methodologies leading organizations use to automate repetitive tasks, illustrated with practical examples designed for immediate application.

Watch Step By Step Video Tutorial Below


1. Accessing Pabbly Connect for Integration

To automatically add Google Calendar events to Coda Docs, you first need to access Pabbly Connect. This platform serves as the integration hub for connecting Google Calendar with Coda Docs.

Start by visiting the Pabbly Connect website. If you don’t have an account, you can sign up for free, which provides you with 100 tasks monthly. Sign in to access your dashboard, where you can create new workflows.


2. Creating a New Workflow in Pabbly Connect

Once logged in, the next step is to create a new workflow in Pabbly Connect. Click on the ‘Create Workflow’ button, and a pop-up will appear.

  • Name your workflow, for example, ‘Automatically Add Google Calendar Events to Coda Docs.’
  • Choose a folder to save your workflow.

After naming and selecting a folder, you will see the workflow setup screen. This is where you will set up the trigger and action for your integration.


3. Setting Up the Trigger with Google Calendar

The next step in Pabbly Connect is to set up the trigger. For this integration, you will select Google Calendar as your trigger application.

Click on the trigger application box and search for Google Calendar. Select it, then choose the trigger event ‘New Event.’ After this, you will need to connect your Google Calendar account to Pabbly Connect. Click ‘Connect’ and follow the prompts to authorize access.


4. Configuring the Action with Coda Docs

After setting up the trigger, it’s time to configure the action. For this integration, select Coda as the action application in Pabbly Connect.

Choose the action event as ‘Create Row.’ You will need to connect your Coda account by entering the API token obtained from your Coda account settings. This token allows Pabbly Connect to add new rows in your selected Coda document.

  • Open your Coda account and navigate to account settings to generate a new API token.
  • Copy the token and paste it back in Pabbly Connect to establish the connection.

After connecting, you will need to specify which document and table in Coda you want to add the event details to.


5. Mapping Event Details to Coda Docs

The final step in this integration process is mapping the event details from Google Calendar to Coda Docs using Pabbly Connect. This involves selecting the specific fields you want to populate in your Coda table.

Map the event title, description, and date from the Google Calendar response to the corresponding fields in your Coda table. Click on ‘Save and Send Test Request’ to ensure everything is working correctly.

Select the appropriate Coda document and table where the data will be saved. Verify that the mapped data appears correctly in your Coda table after the test.

After successfully testing, you will see the new row added to your Coda table with the event details from Google Calendar.


Conclusion

By following these steps, you can easily set up an integration using Pabbly Connect to automatically add Google Calendar events to Coda Docs. This automation streamlines your workflow and enhances productivity by ensuring that all your event details are captured seamlessly.

Ensure you check out Pabbly Connect to create business automation workflows and reduce manual tasks. Pabbly Connect currently offer integration with 2,000+ applications.

Automate Business Email Responses with OpenAI and Pabbly Connect

Learn how to automate business email responses using Pabbly Connect and OpenAI. Follow our step-by-step guide for seamless integration. This comprehensive guide reveals exactly how to connect your applications and automate repetitive tasks — accessible for professionals of all technical backgrounds.

Watch Step By Step Video Tutorial Below


1. Accessing Pabbly Connect for Email Automation

To start automating business email responses, you will first need to access Pabbly Connect. This powerful integration platform allows you to connect various applications seamlessly. If you don’t have an account, you can create one in just two minutes by signing up for free.

Once logged into your Pabbly Connect dashboard, you can create a new workflow. Click on the blue button labeled ‘Create Workflow’ and give your workflow a name, such as ‘Automate Email Responses with OpenAI’. Choose the folder for your automation and click on ‘Create’ to proceed.


2. Setting Up Trigger and Action in Pabbly Connect

In this step, you will set up the trigger and action for your workflow using Pabbly Connect. The trigger will be the event that starts the automation, which in this case is receiving a new email in Gmail. However, since Gmail is not directly selectable, we will use the Email Parser feature in Pabbly Connect.

  • Select the Email Parser option in Pabbly Connect.
  • Copy the provided email address and add it to your Gmail account’s forwarding settings.
  • Verify the forwarding address by clicking the confirmation link sent to your Pabbly Connect email.

After confirming the forwarding address, go back to your Pabbly Connect dashboard and start capturing the email responses. This setup ensures that every new email received in your Gmail account will be forwarded to Pabbly Connect for automation.


3. Generating Email Replies Using OpenAI

Next, you will use Pabbly Connect to generate automated replies for incoming emails with OpenAI. Select OpenAI as the application in your workflow and choose the action event as ‘Chat GPD’. To connect OpenAI with Pabbly Connect, you will need an API key from your OpenAI account.

Once connected, you will set the prompt for generating replies. For instance, you can instruct OpenAI with a message like ‘Generate a reply for this email: [insert email content here].’ Mapping the incoming email data is crucial, as it allows the automation to use the actual email content without manual input.

  • Map the email body and sender’s name in the prompt.
  • Click on ‘Save and Send Request’ to generate the reply.
  • Check the response for the generated reply.

After the reply is generated, you can see the response in your Pabbly Connect dashboard, confirming that the integration is working correctly.


4. Sending Replies Back to Gmail

The final step in this automation process is to send the generated replies back to the original sender using Gmail through Pabbly Connect. Choose Gmail as the application and select the action event as ‘Send Email’. If you have previously connected Gmail, you can use the existing connection; otherwise, create a new connection.

In the email settings, map the recipient email address, subject line, and the content of the reply generated by OpenAI. This mapping ensures that the correct email address and content are used when sending the reply. After filling out the necessary fields, click on ‘Save and Send Request’ to send the email.

Confirm that the email was sent successfully by checking the sent items in Gmail. Ensure the reply matches the content generated by OpenAI. This completes the automation workflow.

This process allows you to automate responses efficiently, saving time and enhancing productivity. With Pabbly Connect, you can streamline your email management effortlessly.


5. Adding Filters to Your Automation Workflow

To refine your automation process, you can add filters within Pabbly Connect. Filters help you set conditions for when a reply should be generated. For instance, you can specify that replies should only be sent if the subject line contains certain keywords.

To set up a filter, add a new filter action in your Pabbly Connect workflow, select the subject line, and define the conditions. You can use options such as ‘contains’ to specify keywords like ‘startup’ or ‘investment’. This way, only relevant emails will trigger the automated replies.

Choose the filter type and set conditions based on your requirements. Test the filter to ensure it works as intended. This allows for more control over which emails receive automated responses.

By implementing filters, you enhance the efficiency of your email automation with Pabbly Connect, ensuring that only relevant communications receive automated replies.


Conclusion

In this tutorial, we explored how to automate business email responses using Pabbly Connect and OpenAI. By following these steps, you can streamline your email management, enhance productivity, and ensure timely responses to your clients.

Ensure you check out Pabbly Connect to create business automation workflows and reduce manual tasks. Pabbly Connect currently offer integration with 2,000+ applications.

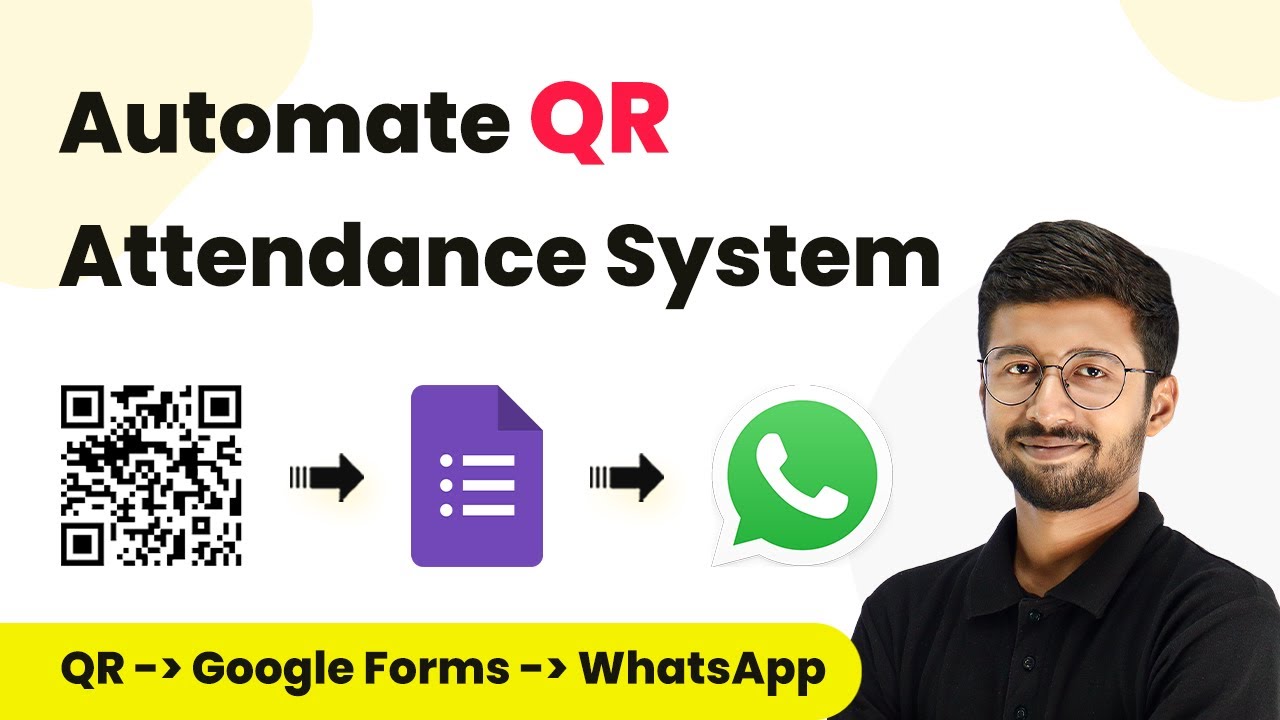
Automate QR Attendance System with Pabbly Connect: A Step-by-Step Guide

Learn how to automate a QR attendance system using Pabbly Connect. This detailed guide covers Google Forms integration and WhatsApp notifications. Develop expertise in application integration and learn how to design streamlined automation workflows using proven, simplified approaches.

Watch Step By Step Video Tutorial Below


1. Create Google Form for Attendance with Pabbly Connect

To automate the QR attendance system, we first need to create a Google Form for attendance. This form will collect essential details such as the employee’s name, department, and employee ID. Using Pabbly Connect, we will later integrate this form with WhatsApp notifications.

After creating the form, generate a QR code for easy access. You can use any QR code generator, such as qr. The QR code will link directly to the Google Form, allowing employees to scan and mark their attendance.


2. Set Up Pabbly Connect for Attendance Notifications

Next, we will set up Pabbly Connect to automate notifications based on form submissions. Start by logging into your Pabbly Connect account and creating a new workflow named ‘Automated Attendance Notification.’ This workflow will handle the attendance data and send notifications when necessary.

Once the workflow is created, you need to select Google Forms as the trigger app. Choose the event ‘New Response Received’ to capture form submissions. After this, Pabbly Connect will provide a webhook URL, which you will use to connect the Google Form to Pabbly Connect.

  • Log into Pabbly Connect.
  • Create a new workflow named ‘Automated Attendance Notification’.
  • Select Google Forms as the trigger app and choose ‘New Response Received’.
  • Copy the provided webhook URL for later use.

After setting up the trigger, you will connect the Google Form to Pabbly Connect using the webhook URL. This ensures that every time an employee submits their attendance, the data will flow into Pabbly Connect for further processing.


3. Connect Google Sheets to Pabbly Connect

Google Form responses are automatically stored in a Google Sheet. To connect this sheet to Pabbly Connect, go to the Google Form, click on the ‘Responses’ tab, and select ‘Link to Sheets’ to create a new spreadsheet. This sheet will hold all attendance records.

Next, install the Pabbly Connect Webhook add-on in your Google Sheet. This allows the sheet to send data directly to Pabbly Connect. After installing, go to the add-on, choose ‘Initial Setup,’ and paste the webhook URL you copied earlier. Set the trigger column to the last column where data will be entered.

  • Create a new Google Sheet linked to your Google Form.
  • Install the Pabbly Connect Webhook add-on in Google Sheets.
  • Paste the webhook URL and set the trigger column.

This connection ensures that whenever a new attendance record is added to the Google Sheet, it will trigger the workflow in Pabbly Connect.


4. Set Up WhatsApp Notifications with Pabbly Connect

Now that we have connected Google Sheets to Pabbly Connect, we will set up WhatsApp notifications. In the Pabbly Connect workflow, add an action step to check if the attendance was marked after a specified time, like 10:15 AM. If it was, a WhatsApp notification will be sent to the designated number.

To achieve this, add a ‘Filter’ action step to evaluate the time of the attendance submission. If the time is greater than 10:15 AM, proceed to send a WhatsApp message using the Wati application. You will need to connect your Wati account to Pabbly Connect by providing the API endpoint and access token.

Add a filter step to check if the submission time is after 10:15 AM. Set up WhatsApp using Wati as the action app. Connect your Wati account by entering the API endpoint and access token.

Once configured, the WhatsApp message will include details such as the employee’s name and the time they marked their attendance late. This automation ensures timely notifications for any late submissions.


5. Test Your Automated QR Attendance System

With everything set up, it’s time to test your automated QR attendance system using Pabbly Connect. Scan the generated QR code to access the Google Form and submit a test attendance entry. Ensure that you mark the attendance after the specified time to trigger the WhatsApp notification.

After submitting the form, check your WhatsApp account for the notification. You should receive a message indicating that the specific employee has marked their attendance late. This confirms that the entire automation process is functioning as intended and that Pabbly Connect is successfully managing the workflow.

By following these steps, you have automated the QR attendance system effectively. You can adjust the time settings and notifications as needed for your specific requirements.


Conclusion

Using Pabbly Connect, you can easily automate a QR attendance system that integrates Google Forms and WhatsApp notifications. This setup enhances attendance tracking and ensures timely communication for late submissions, improving overall efficiency.

Ensure you check out Pabbly Connect to create business automation workflows and reduce manual tasks. Pabbly Connect currently offer integration with 2,000+ applications.

Automate Ebook & Course Sales with Razorpay, Google Drive & Pabbly Connect

Learn how to automate ebook and course sales using Razorpay, Google Drive, and Pabbly Connect with this step-by-step tutorial. Streamline your sales process today! Transform complex automation concepts into accessible, actionable steps that eliminate unnecessary manual work while maximizing existing application capabilities.

Watch Step By Step Video Tutorial Below


1. Setting Up Pabbly Connect for Automation

To automate ebook and course sales, start by accessing Pabbly Connect. This integration platform allows you to connect Razorpay and Google Drive seamlessly. First, create a free account on Pabbly Connect and log in to the dashboard.

After logging in, click on ‘Create Workflow’ to set up your automation. Name your workflow, for example, ‘Razorpay to Google Drive’ and select the appropriate folder in Pabbly Connect where the workflow will be saved.


2. Trigger Setup with Razorpay

In this step, we will configure Razorpay as the trigger application in Pabbly Connect. Select Razorpay from the app list and choose the trigger event as ‘Payment Captured.’ This will allow Pabbly Connect to capture payment details automatically.

  • Select Razorpay as the trigger app.
  • Choose ‘Payment Captured’ as the trigger event.
  • Copy the webhook URL provided by Pabbly Connect.

Next, go to your Razorpay dashboard, navigate to ‘Account and Settings,’ and find the ‘Webhooks’ section. Here, add a new webhook using the URL you copied from Pabbly Connect. Set the event to ‘Payment Captured’ to ensure that Razorpay sends payment data to Pabbly Connect.


3. Testing the Integration with Dummy Data

After setting up the webhook in Razorpay, it’s time to test if the connection works. Go back to your Razorpay payment page and enter dummy customer details. This will help you verify that Pabbly Connect is receiving the payment data correctly. using Pabbly Connect

  • Fill in the dummy customer details such as name, email, and phone number.
  • Select the course or ebook for purchase.
  • Complete the payment process using a test card.

Once the payment is processed, return to Pabbly Connect and check if the payment details have been captured successfully. The workflow should now show that it is waiting for a webhook response, confirming that the integration is functioning as expected.


4. Adding a Filter Condition

To ensure that only customers purchasing a specific course receive the ebook, you need to add a filter condition in Pabbly Connect. This filter will check the course name from the payment data received from Razorpay.

Select ‘Filter’ as the action step in Pabbly Connect. Choose the product name from the Razorpay response to filter. Set the condition to ‘equals to’ and enter the exact product name.

This filter ensures that only those customers who purchased the specific course will proceed to receive the ebook from Google Drive. If the condition is not met, the automation will stop.


5. Sharing Files from Google Drive

Now that the filter is set up, the final step is to share the ebook file from Google Drive using Pabbly Connect. Select Google Drive as the action app and choose the action event as ‘Share a File.’ This action will allow you to share the ebook automatically with the customer.

Connect your Google Drive account by clicking on ‘Sign in with Google’ and allowing Pabbly Connect access. Next, select the file you want to share from the dropdown, which includes all files in your Google Drive.

Finally, map the customer’s email address from the Razorpay payment data to the email field in the Google Drive action. Set the sharing permissions to ‘Can View’ and save the workflow. This will ensure that the customer receives the ebook immediately after payment.


Conclusion

In this tutorial, we explored how to automate ebook and course sales using Razorpay, Google Drive, and Pabbly Connect. By following the steps outlined, you can streamline your sales process and ensure timely delivery of your digital products to customers.

Ensure you check out Pabbly Connect to create business automation workflows and reduce manual tasks. Pabbly Connect currently offer integration with 2,000+ applications.

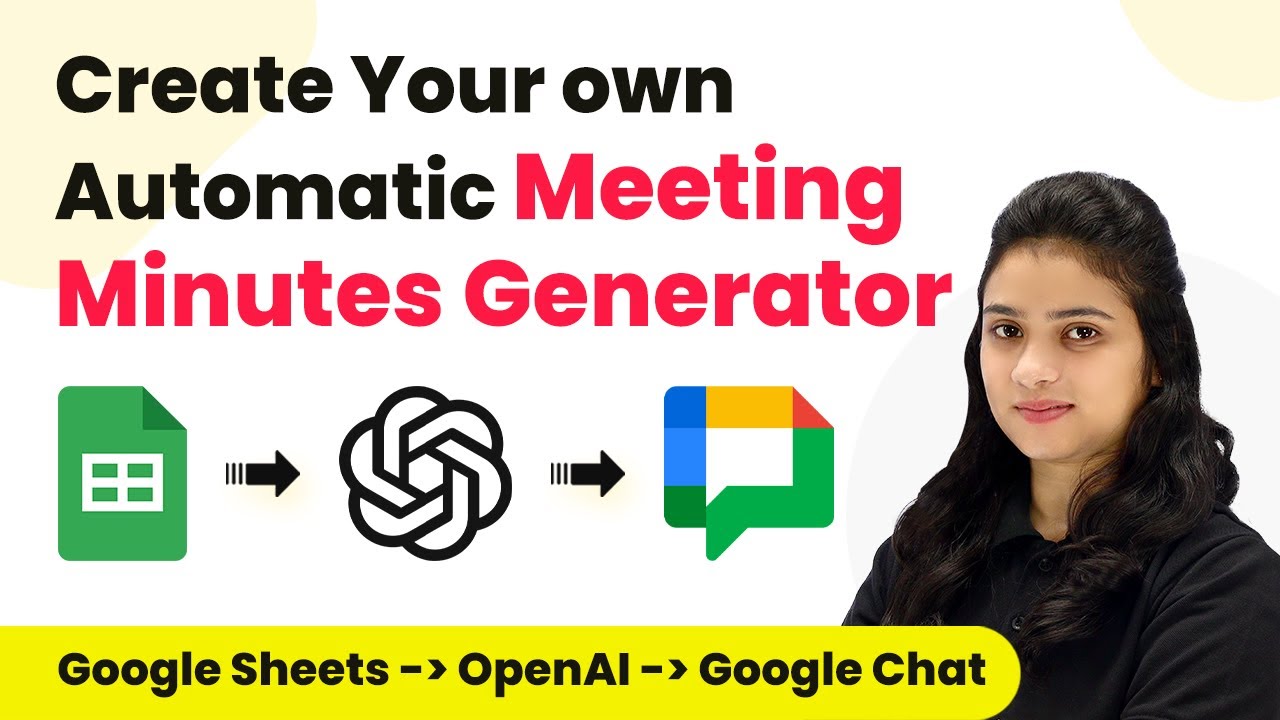
Create Your Own Automatic Meeting Minutes Generator Using Pabbly Connect and OpenAI

Learn how to automate meeting minutes generation using Pabbly Connect, Google Sheets, and OpenAI in this detailed tutorial. Navigate the automation landscape confidently with clear, structured guidance suitable for professionals regardless of prior technical experience.

Watch Step By Step Video Tutorial Below


1. Accessing Pabbly Connect for Automation

To create your own automatic meeting minutes generator, first, access Pabbly Connect. This platform allows you to integrate various applications seamlessly. Simply visit the Pabbly website and navigate to the Connect section.

Once on the homepage, you’ll see options to sign in or sign up. If you’re a new user, click on the ‘Sign up for free’ button. After creating your account, you will receive 100 free tasks every month to explore the features of Pabbly Connect.


2. Creating a New Workflow in Pabbly Connect

After logging into Pabbly Connect, you will arrive at the dashboard. To create a new automation, click on the ‘Create Workflow’ button located at the top right corner. A dialog box will prompt you to name your workflow.

  • Enter a name for your workflow, such as ‘Generate Meeting Minutes Using OpenAI’.
  • Select the appropriate folder for your workflow.
  • Click on the ‘Create’ button to proceed.

Once created, you will see options for setting up a trigger and actions. In this case, the trigger will be Google Sheets, and the actions will involve OpenAI and Google Chat.


3. Setting Up Google Sheets as a Trigger in Pabbly Connect

To begin, select Google Sheets as your trigger application in Pabbly Connect. The trigger event you need is ‘New or Updated Spreadsheet Row’. This means the automation will activate whenever a new row is added to your Google Sheet.

After selecting the trigger event, you will be provided with a webhook URL. This URL is essential for connecting Google Sheets with Pabbly Connect. Copy this URL and navigate to your Google Sheet. In the extensions menu, find the Pabbly Connect Webhooks add-on and paste the copied URL into the setup section.


4. Integrating OpenAI for Content Generation

Once Google Sheets is set up, the next step is to add OpenAI as an action in Pabbly Connect. Select OpenAI and choose the action event ‘Generate Content’. This will allow you to create meeting minutes based on the titles entered in your Google Sheet.

In this section, you will need to provide details such as the AI model, prompt, and other parameters. For instance, the prompt might be ‘Generate meeting minutes for the meeting title and date’. Ensure to map the title and date fields from the previous step, which were captured from Google Sheets.

  • Select the AI model (e.g., text-davinci-003).
  • Set the maximum tokens for the content generated.
  • Adjust the temperature for randomness in the content.

After configuring these settings, click on ‘Save and Send Test Request’ to verify that OpenAI generates the meeting minutes correctly.


5. Sending Meeting Minutes to Google Chat

The final step involves sending the generated meeting minutes to your team via Google Chat. In Pabbly Connect, add Google Chat as a new action. Choose the action event ‘Create Message’ and connect your Google Chat account.

For this integration, you will need the webhook URL for your Google Chat space. Follow the instructions to create a webhook in Google Chat and paste this URL into Pabbly Connect. Then, map the message field to include the meeting minutes generated by OpenAI.

Finally, click on ‘Save’ and test the integration. You should see the meeting minutes appear in your Google Chat space, confirming that the workflow is functioning as intended.


Conclusion

In this tutorial, we explored how to create an automatic meeting minutes generator using Pabbly Connect and OpenAI. By integrating Google Sheets, OpenAI, and Google Chat, you can automate the entire process of generating and sharing meeting minutes efficiently.

Ensure you check out Pabbly Connect to create business automation workflows and reduce manual tasks. Pabbly Connect currently offer integration with 2,000+ applications.

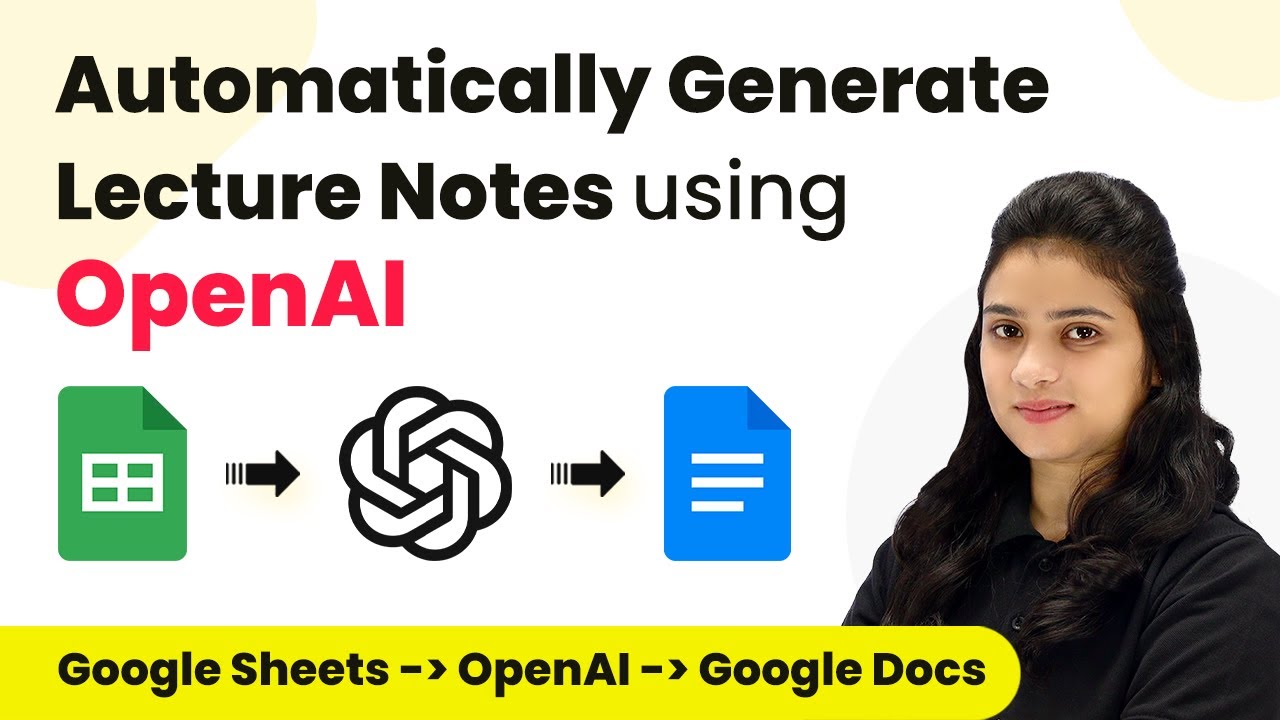
How to Generate Lecture Notes Using OpenAI with Pabbly Connect

Learn how to automate lecture note generation using OpenAI, Google Sheets, and Google Docs through Pabbly Connect. Step-by-step tutorial included. Explore efficient methods for automating routine tasks with clear, concise instructions suited for both newcomers and experienced professionals.

Watch Step By Step Video Tutorial Below


1. Accessing Pabbly Connect for Automation

To start generating lecture notes using OpenAI, you need to access Pabbly Connect. This powerful automation tool allows you to integrate various applications seamlessly. Begin by visiting the Pabbly Connect website and signing up for a free account if you’re a new user.

Once registered, log in to your Pabbly Connect dashboard. Here, you can create workflows that connect Google Sheets, OpenAI, and Google Docs. Pabbly Connect simplifies this process, enabling you to automate tasks without any coding skills.


2. Creating a Workflow in Pabbly Connect

After accessing your Pabbly Connect dashboard, click on the ‘Create Workflow’ button. Here, you will name your workflow, such as ‘Generate Class Lecture Notes using OpenAI.’ This workflow will automate the process of creating notes based on titles added in Google Sheets. using Pabbly Connect

  • Click on the ‘Create Workflow’ button.
  • Provide a name for your workflow.
  • Select the appropriate folder for saving the workflow.

Once your workflow is created, you will set up the trigger and actions. The trigger will be Google Sheets, and the actions will include OpenAI and Google Docs. This setup ensures that whenever a new title is added to Google Sheets, Pabbly Connect will automatically generate lecture notes using OpenAI.


3. Setting Up Google Sheets with Pabbly Connect

In this step, select Google Sheets as your trigger application in Pabbly Connect. Choose the trigger event ‘New or Updated Spreadsheet Row.’ This event will initiate the workflow whenever a new topic is added to your Google Sheets.

Copy the webhook URL provided by Pabbly Connect. Next, go to your Google Sheets, click on Extensions, then Add-ons, and find Pabbly Connect Webhooks. Set up the initial configuration by pasting the webhook URL and specifying the trigger column, which in this case is column B for the date.

  • Paste the webhook URL into the Pabbly Connect Webhooks add-on.
  • Set the trigger column to column B.
  • Send test data to ensure the connection is successful.

After setting up, make sure to click on ‘Send on Event’ in the Pabbly Connect Webhooks add-on. This ensures that every time you add a new title in Google Sheets, the information will be sent to Pabbly Connect for processing.


4. Integrating OpenAI for Note Generation

Now, it’s time to set up OpenAI as the action application in Pabbly Connect. Select OpenAI and choose the action event ‘Generate Content.’ This action will create notes based on the topic you input in Google Sheets.

Connect your OpenAI account by selecting an existing connection or creating a new one using your API key. Once connected, you will specify the AI model and prompt for generating notes. For example, you can use the prompt ‘Generate class notes for the topic’ followed by mapping the topic from Google Sheets.

Select the AI model (e.g., text-davinci-003). Set the maximum tokens to 800 for note length. Configure sampling types and penalties as needed.

After entering all necessary details, click on ‘Save and Send Test Request’ to generate notes. Pabbly Connect will handle the communication with OpenAI and return the generated content, confirming that the integration works successfully.


5. Creating Google Docs for Lecture Notes

The final step involves integrating Google Docs into your workflow using Pabbly Connect. Select Google Docs as the next action application and choose the action event ‘Create a Blank Document.’ This will create a new document for each topic.

Connect your Google Docs account and provide the document name, which can be mapped from the topic generated in the previous step. This ensures that each document is named according to the topic from Google Sheets, making it easy to organize.

Map the document name to the topic from OpenAI. Click ‘Save and Send Test Request’ to create the document. Verify the document is created successfully in Google Docs.

After creating the document, you will append the generated notes into it by adding another action step for Google Docs. Select ‘Append a Paragraph to a Document’ and map the document ID and the notes generated. This ensures that your lecture notes are automatically inserted into the corresponding document.


Conclusion

In this tutorial, we demonstrated how to use Pabbly Connect to automate the generation of lecture notes using OpenAI, Google Sheets, and Google Docs. By following these steps, you can easily create a workflow that generates notes automatically whenever you add a new topic in Google Sheets.

Ensure you check out Pabbly Connect to create business automation workflows and reduce manual tasks. Pabbly Connect currently offer integration with 2,000+ applications.

This integration not only saves time but also enhances your productivity by organizing lecture materials efficiently. Start using Pabbly Connect today to streamline your note-taking process!