How to Auto-Send Messages from Google Sheets to Telegram Using Pabbly Connect

Learn how to automate sending messages from Google Sheets to Telegram using Pabbly Connect. Follow this step-by-step guide for seamless integration. Build sophisticated automated workflows in less time than you think. This guide translates complex integrations into straightforward steps for immediate implementation.

Watch Step By Step Video Tutorial Below


1. Setting Up Pabbly Connect for Google Sheets to Telegram Integration

To start the integration process, access Pabbly Connect by signing up on their dashboard. This platform allows you to automate tasks seamlessly. Once logged in, click on ‘Create Workflow’ to begin setting up your automation.

After creating a new workflow, name it ‘Google Sheets to Telegram’. Select the folder where you want to save this workflow and click ‘Create’. This sets the stage for connecting Google Sheets to Telegram via Pabbly Connect.


2. Trigger Setup in Google Sheets Using Pabbly Connect

In the newly created workflow, you’ll see two main sections: the trigger window and the action window. The trigger will initiate the automation when a new row is added to Google Sheets. Select ‘Google Sheets’ as the app in the trigger window.

  • Choose the trigger event as ‘New or Updated Spreadsheet Row’.
  • Copy the webhook URL provided by Pabbly Connect.
  • Go to your Google Sheets, navigate to Extensions, and then select Add-ons to get the Pabbly Connect Webhooks add-on.

After installing the add-on, refresh your Google Sheets. Under Extensions, find Pabbly Connect, and click on ‘Initial Setup’. Here, paste the webhook URL and specify the trigger column, which is the last column where you will enter data. This setup ensures that every new entry triggers the automation through Pabbly Connect.


3. Connecting Your Telegram Bot with Pabbly Connect

Next, you need to connect your Telegram bot to Pabbly Connect. Search for ‘Telegram’ in the action window and select it. Choose ‘Send a Text Message’ as the action event. Click on ‘Connect’ and select ‘Add New Connection’.

To create a Telegram bot, search for ‘BotFather’ in Telegram, start a chat, and send the command ‘/newbot’. Follow the prompts to name your bot and set a unique username. After creating the bot, copy the API token provided by BotFather and paste it into Pabbly Connect.

After saving the connection, add your bot to the Telegram group or channel where you want to send messages. Make sure to promote the bot to admin to allow it to send messages on your behalf. This step is crucial for the automation to work effectively through Pabbly Connect.


4. Configuring Message Sending in Pabbly Connect

Now that your Telegram bot is connected, you need to configure the message that will be sent. In the action step of Pabbly Connect, enter the chat ID of your Telegram group. You can find the chat ID in the URL of your group when accessed via a web browser.

  • Compose the message you want to send, including dynamic data from Google Sheets.
  • Map the fields from the Google Sheets data to your message, such as name, email, and mobile number.
  • Select HTML as the parse mode to format your message correctly.

Once everything is set up, click on ‘Save and Send Test Request’ to check if the message is sent successfully to your Telegram group. This step confirms that the integration is functioning as intended through Pabbly Connect.


5. Testing the Integration Between Google Sheets and Telegram

To finalize the setup, it’s essential to test the integration. Go back to your Google Sheets and add a new row with lead details. As soon as you enter the data and hit enter, Pabbly Connect will automatically trigger the message to be sent to your Telegram group.

Check your Telegram group for the message. It should display the details you entered in Google Sheets, confirming that the automation is working successfully. This real-time update is the power of using Pabbly Connect for automation.

If the message appears correctly, you have successfully set up the integration. You can now enjoy automated notifications for new entries in your Google Sheets without manual intervention, showcasing the efficiency of Pabbly Connect.


Conclusion

Using Pabbly Connect, you can easily automate the process of sending messages from Google Sheets to Telegram. This integration enhances communication and saves time, allowing for efficient lead management.

Ensure you check out Pabbly Connect to create business automation workflows and reduce manual tasks. Pabbly Connect currently offer integration with 2,000+ applications.

How to Create WordPress Post from Notion Database Using Pabbly Connect

Learn how to automate WordPress post creation from Notion database using Pabbly Connect. Step-by-step guide with detailed instructions. This comprehensive guide reveals exactly how to connect your applications and automate repetitive tasks — accessible for professionals of all technical backgrounds.

Watch Step By Step Video Tutorial Below


1. Accessing Pabbly Connect for Integration

To create a WordPress post from a Notion database, you need to access Pabbly Connect. Start by signing in as an existing user or create a new account if you are a new user. Pabbly Connect allows you to automate tasks between different applications seamlessly.

Once you are logged in, navigate to the Pabbly Connect dashboard. Here, you can create a new workflow by clicking on the ‘Create Workflow’ button. This will enable you to set up the integration between Notion and WordPress.


2. Creating a New Workflow in Pabbly Connect

In this section, you will create a workflow named ‘Create WordPress Post from Notion Database’. After clicking on the ‘Create Workflow’ button, you will be prompted to name your workflow and choose a folder to save it in. Select the folder named ‘WordPress’ to keep your integrations organized.

  • Click on the ‘Create’ button to proceed.
  • You will see a screen with options for trigger and action applications.

Now, select Notion as your trigger application and set the trigger event to ‘New Database Item’. This means that whenever a new item is added to your Notion database, it will trigger the action to create a post in WordPress through Pabbly Connect.


3. Setting Up Notion as the Trigger Application

To set up Notion as the trigger application, click on the connect button next to Notion. You will be prompted to log into your Notion account. After logging in, allow Pabbly Connect to access your Notion account.

Once connected, select the database ID that you want to use for this integration. For this example, choose the ‘WordPress Post’ database. This allows Pabbly Connect to monitor the database for any new entries that will trigger the subsequent action.


4. Connecting WordPress as the Action Application

Next, you need to set up WordPress as the action application. In Pabbly Connect, select WordPress and choose the action event as ‘Create a New Post’. This specifies that once a new item is detected in Notion, a new post will be created in WordPress.

  • Enter your WordPress username or email, password, and the base URL of your WordPress site.
  • Click on the connect button to establish the connection.

Once the connection is established, you will need to map the post title and content from Notion to the corresponding fields in WordPress. This mapping ensures that the data flows correctly between the two applications using Pabbly Connect.


5. Testing the Integration

After setting up the connections, it’s time to test the integration. Go back to your Notion database and add a new post title and content. Once you have added the information, return to Pabbly Connect and click on ‘Save and Send Test Request’.

If everything is set up correctly, you will receive a response indicating that the new post has been successfully created in WordPress. You can verify this by checking your WordPress dashboard to see the new post listed.


Conclusion

In this tutorial, you learned how to create a WordPress post from a Notion database using Pabbly Connect. This integration automates the process of transferring data between applications, saving you time and effort. By following these steps, you can streamline your content creation workflow effectively.

Ensure you check out Pabbly Connect to create business automation workflows and reduce manual tasks. Pabbly Connect currently offer integration with 2,000+ applications.

Automate WhatsApp Messages to Facebook Leads for Digital Flex Printing Business Using Pabbly Connect

Learn how to send automated WhatsApp messages to Facebook leads for your digital flex printing business using Pabbly Connect. Step-by-step tutorial included. Discover how to seamlessly connect your essential tools through accessible instructions that make powerful automation available to professionals at every skill level.

Watch Step By Step Video Tutorial Below


1. Accessing Pabbly Connect for Automation

To send automated WhatsApp messages to Facebook leads for your digital flex printing business, the first step is accessing Pabbly Connect. If you’re a new user, you can sign up for a free account, which offers 100 tasks each month. Existing users can simply log in to their account.

Once logged in, navigate to the dashboard where you can create a new workflow. Click on the ‘Create Workflow’ button located at the top right corner. Name your workflow appropriately, such as ‘Automated WhatsApp Messages for Facebook Leads’, and save it in a suitable folder for easy access.


2. Setting Up Facebook as Trigger Application

In this step, you will set Facebook Lead Ads as the trigger application in Pabbly Connect. This integration allows you to initiate actions based on new leads received through Facebook ads. Select Facebook as your trigger app and choose the event ‘New Lead Instant’ to capture leads as they come in.

  • Select Facebook as the trigger application.
  • Choose the trigger event ‘New Lead Instant’.
  • Connect your Facebook account to Pabbly Connect.

After connecting, select the Facebook page and the lead generation form associated with your digital flex printing business. Save the configuration and send a test request to ensure everything is set up correctly.


3. Testing Integration with Facebook Leads

Once the trigger is set up, it’s time to test the integration. You will use the Meta for Developers tool to simulate a lead submission. This allows you to verify that Pabbly Connect correctly captures the lead data.

In the Meta for Developers tool, select your Facebook page and the lead form. Fill in the required fields such as email, full name, and phone number, then submit the form. This action sends a test lead to Pabbly Connect, which should capture the data successfully.

  • Navigate to the Meta for Developers tool.
  • Select your page and lead form.
  • Submit the test lead.

Check Pabbly Connect to ensure the lead details have been recorded correctly. This confirms that the trigger setup is functional and ready for automation.


4. Configuring WhatsApp Message Sending

After confirming the trigger, the next step is to set WhatsApp as the action application in Pabbly Connect. You will use Wati to send the automated WhatsApp message to the captured leads. Select Wati as your action app and the event ‘Send Template Message’.

To connect Wati with Pabbly Connect, you need to provide the API endpoint and access token from your Wati account. Once connected, map the phone number from the lead data captured earlier to ensure the message is sent to the right contact.

Select Wati as the action application. Choose the action event ‘Send Template Message’. Map the phone number from the lead data.

Next, choose the template you have created for the WhatsApp message. This template should include a welcome message for your leads. After configuring all settings, save and send a test request to verify that the automated WhatsApp message is sent successfully.


5. Finalizing the Integration Process

With the WhatsApp message configuration complete, it’s time to finalize the integration process in Pabbly Connect. You should verify that the automated WhatsApp message is sent whenever a new lead is captured through Facebook Lead Ads. This ensures that your digital flex printing business can engage leads instantly.

After sending a test message, check the recipient’s WhatsApp to confirm receipt. The message should include personalized elements, such as the lead’s name, enhancing customer engagement. This successful integration allows you to automate communications efficiently.

In summary, using Pabbly Connect, you can seamlessly integrate Facebook Lead Ads with WhatsApp to send automated messages to your leads. This automation not only saves time but also improves customer interaction for your digital flex printing business.


Conclusion

In this tutorial, we explored how to use Pabbly Connect to send automated WhatsApp messages to Facebook leads for your digital flex printing business. By following the steps outlined, you can streamline your lead engagement process effectively.

Ensure you check out Pabbly Connect to create business automation workflows and reduce manual tasks. Pabbly Connect currently offer integration with 2,000+ applications.

How to Add Facebook Leads to Google Sheets for Dry Fruits Business Using Pabbly Connect

Learn how to integrate Facebook Leads with Google Sheets for your Dry Fruits business using Pabbly Connect. Follow this step-by-step tutorial. Discover hidden automation capabilities within your existing tools. This guide shows you how to connect your essential applications and permanently eliminate redundant manual processes.

Watch Step By Step Video Tutorial Below


1. Accessing Pabbly Connect for Integration

To add Facebook leads to Google Sheets for your dry fruits business, you will first need to access Pabbly Connect. Begin by opening a new tab in your browser and searching for Pabbly Connect. If you don’t have an account, you can sign up for free, which takes only a couple of minutes.

Once you have logged in, you will be directed to the Pabbly Connect dashboard. Here, you can view all your workflows. Click on the ‘Access Now’ button under Pabbly Connect to start creating your integration workflow.


2. Creating a New Workflow in Pabbly Connect

In this step, you will create a new workflow to integrate Facebook leads with Google Sheets using Pabbly Connect. Click on the ‘Create Workflow’ button. A pop-up window will appear where you can name your workflow. Name it something descriptive, like ‘Add Facebook Leads to Google Sheets for Dry Fruits Business’.

  • Select the folder to save your workflow.
  • Click on ‘Create’ to proceed.
  • You will now see the trigger and action setup boxes.

In this section, you will set up the trigger application, which is Facebook Lead Ads. Select this application and choose the trigger event as ‘New Lead Instant’. This will initiate the workflow whenever a new lead is generated.


3. Connecting Facebook Lead Ads to Pabbly Connect

Next, you will connect your Facebook Lead Ads account to Pabbly Connect. Click on ‘Connect’ and then ‘Add New Connection’. After successful connection, you will need to grant access to your Facebook account.

Once connected, you will see two tabs: one for the page and one for the lead generation form. Select the page associated with your dry fruits business, which is ‘Tara Dry Fruit Company’. Then, select the lead generation form named ‘Lead Form for Dry Fruit Business’. This form contains the details you want to capture.

  • Ensure your lead generation form is live.
  • Click on ‘Save and Send Test Request’ to fetch lead details.

After clicking the save button, you need to create a sample lead submission to test the connection. Use the Meta for Developers tool to fill out the form with sample data.


4. Adding Lead Details to Google Sheets

Now that you have set up Facebook Lead Ads in Pabbly Connect, it’s time to configure the action application, which is Google Sheets. Select Google Sheets as your action application and choose ‘Add New Row’ as the action event.

Click on ‘Connect’ and then ‘Add New Connection’ to link your Google Sheets account. Allow access to your account, and then select the spreadsheet named ‘Facebook Leads’. You will see the columns in your sheet, which should match the lead details you want to add.

Map the lead details such as full name, email, and phone number. Use the mapping feature to ensure data is retrieved correctly.

After mapping all the necessary details, click on ‘Save and Send’ to test if the lead details are successfully added to your Google Sheet. You should see the new entry appear in your spreadsheet.


5. Testing and Verifying the Integration

To ensure everything is working perfectly, you need to perform a test submission. Go back to the Meta for Developers tool and delete the previous sample lead. Fill the form with new details and submit it. This will create a new lead.

After submitting the form, return to Pabbly Connect and check if the new lead details have been captured. You should see the updated information in your Google Sheets. This confirms that your integration is working as intended.

Repeat this process to verify that your leads are consistently added to Google Sheets in real-time. This setup allows you to manage your leads efficiently for your dry fruits business.


Conclusion

In this tutorial, we have successfully demonstrated how to use Pabbly Connect to integrate Facebook leads with Google Sheets for your dry fruits business. By following these steps, you can automate the process of adding lead details to your Google Sheets, saving time and improving your business operations.

Ensure you check out Pabbly Connect to create business automation workflows and reduce manual tasks. Pabbly Connect currently offer integration with 2,000+ applications.

How to Add Facebook Leads to Google Sheets for Dry Fruits Business Using Pabbly Connect

Learn how to automate adding Facebook leads to Google Sheets for your dry fruits business using Pabbly Connect. Follow this step-by-step guide for seamless integration.

Watch Step By Step Video Tutorial Below


1. Accessing Pabbly Connect for Integration

To begin, accessing Pabbly Connect is essential for integrating Facebook leads into Google Sheets. Open a new tab and search for Pabbly Connect. You will see options to either sign in or sign up for free. If you don’t have an account, signing up is straightforward and takes just a couple of minutes.

Once logged in, you will be directed to the dashboard of Pabbly Connect. Here, you can see all your workflows. To create a new workflow, click on the ‘Create Workflow’ button. This action will prompt you to name your workflow, which should reflect your objective, such as ‘Add Facebook Leads to Google Sheets for Dry Fruits Business’.


2. Setting Up the Trigger in Pabbly Connect

The next step involves setting up the trigger in Pabbly Connect. In the workflow interface, you will see two boxes labeled Trigger and Action. For the trigger application, select Facebook Lead Ads. The trigger event you need to choose is ‘New Lead Instant’.

  • Select Facebook Lead Ads as the trigger application.
  • Choose ‘New Lead Instant’ as the trigger event.
  • Connect your Facebook account to Pabbly Connect.

After selecting the trigger event, click on ‘Connect’ and then ‘Add New Connection’. Follow the prompts to authorize Pabbly Connect to access your Facebook account. Once connected, you will need to select your Facebook page and the lead generation form that you are using.


3. Mapping Lead Details from Facebook to Pabbly Connect

After successfully connecting your Facebook account, the next step is to map the lead details. In Pabbly Connect, you will see fields to select your Facebook page and lead generation form. Ensure that you select the correct page, which in this case is ‘Tara Dry Fruit Company’.

Once the page is selected, you will also need to choose the lead generation form. This form contains fields like full name, email, and phone number. Make sure these fields are correctly mapped in Pabbly Connect to capture the lead details accurately.

  • Select ‘Tara Dry Fruit Company’ as the page.
  • Choose the lead form for your dry fruit business.
  • Map the fields for full name, email, and phone number.

Once you have mapped these details, you will need to test the connection by submitting a sample lead. Ensure that your lead generation form is live before proceeding with this step.


4. Adding Leads to Google Sheets with Pabbly Connect

With the lead details mapped, the next step is to set up the action in Pabbly Connect to add these leads to Google Sheets. For this, you will select Google Sheets as your action application. The action event you need to choose is ‘Add New Row’.

Click on ‘Connect’ to link your Google Sheets account to Pabbly Connect. You will need to sign in and grant access to your Google account. After connecting, select the specific spreadsheet where you want to store your leads.

Choose Google Sheets as the action application. Select ‘Add New Row’ as the action event. Map the lead details to the respective columns in your Google Sheet.

After mapping the details, click on ‘Save and Send Test Request’ to confirm that the integration works. Check your Google Sheet to see if the new lead has been added successfully.


5. Finalizing the Integration and Testing

With everything set up, the final step is to test the entire integration. Go back to your lead generation form and create a new lead. Fill in the required details and submit the form. This action should trigger the workflow in Pabbly Connect and automatically add the lead details to your Google Sheet.

After submitting the lead, check your Google Sheet to confirm that the new entry has appeared. If everything is set up correctly, you will see the lead’s full name, email, and phone number in the respective columns.

Create a new lead in your Facebook lead form. Submit the form to trigger the integration. Verify the lead details in your Google Sheet.

By following these steps, you have successfully created an integration between Facebook Lead Ads and Google Sheets using Pabbly Connect. This automation will save you time and help you efficiently manage your leads for your dry fruits business.


Conclusion

In this tutorial, we explored how to use Pabbly Connect to automatically add Facebook leads to Google Sheets for a dry fruits business. This integration streamlines lead management and enhances productivity.

Ensure you check out Pabbly Connect to create business automation workflows and reduce manual tasks. Pabbly Connect currently offer integration with 2,000+ applications.

How to Add Facebook Leads to Google Sheets for Dry Fruits Business Using Pabbly Connect

Learn how to integrate Facebook Leads with Google Sheets for your Dry Fruits Business using Pabbly Connect. Follow our step-by-step tutorial for seamless automation. Discover hidden automation capabilities within your existing tools. This guide shows you how to connect your essential applications and permanently eliminate redundant manual processes.

Watch Step By Step Video Tutorial Below


1. Accessing Pabbly Connect for Integration

To begin the integration process, you need to access Pabbly Connect. Start by opening your web browser and navigating to Pabbly’s website. If you don’t have an account, you can sign up for free, which allows you to utilize 100 tasks monthly at no cost.

Once logged in, click on the ‘Access Now’ button under Pabbly Connect. This will direct you to the dashboard, where you can create workflows that facilitate the integration of Facebook Leads into Google Sheets.


2. Creating a Workflow in Pabbly Connect

In this section, you will create a new workflow in Pabbly Connect. Click on the ‘Create Workflow’ button and name your workflow, such as ‘Add Facebook Leads to Google Sheets for Dry Fruits Business.’ Select the folder where you want to save this workflow.

  • Click on ‘Create’ to proceed.
  • You will see two sections: Trigger and Action.

In the Trigger section, choose ‘Facebook Lead Ads’ as your application. The trigger event will be ‘New Lead Instant.’ This setup ensures that whenever a new lead is generated on Facebook, the workflow will be initiated.


3. Connecting Facebook Lead Ads to Pabbly Connect

After setting up the trigger, you need to connect your Facebook Lead Ads to Pabbly Connect. Click on ‘Connect’ and then ‘Add New Connection.’ You will be prompted to log into your Facebook account and grant permission for Pabbly Connect to access your lead data.

Once connected, select your Facebook page, which in this case is ‘Tara Dry Fruit Company,’ and choose the lead generation form you want to use. This form should contain the necessary fields like full name, email, and phone number.

  • Ensure your lead generation form is live before proceeding.
  • Click on ‘Save and Send Test Request’ to confirm the connection.

After saving, you will need to create a sample lead submission to test if the connection works correctly. Use the Meta for Developers tool to fill in the form and submit a lead.


4. Setting Up Google Sheets Action in Pabbly Connect

With the trigger set up, you now need to configure the Action step in Pabbly Connect. Select ‘Google Sheets’ as your action application and choose ‘Add New Row’ as the action event. This action will allow you to automatically add new leads to your spreadsheet.

Next, connect your Google Sheets account by clicking ‘Connect’ and allowing Pabbly Connect to access your Google Sheets. After a successful connection, select the spreadsheet titled ‘Facebook Leads’ and the sheet where you want to add the data.

Map the fields from Facebook Lead Ads to the corresponding columns in Google Sheets. Ensure that full name, email, and phone number are correctly mapped.

Once mapping is complete, click on ‘Save and Send Test Request’ to verify that the data is being added correctly to your Google Sheets.


5. Verifying Integration Success

To confirm that your integration between Facebook Lead Ads and Google Sheets via Pabbly Connect is successful, check your Google Sheets for the new lead entry. You should see the details of the lead you submitted earlier reflected in the sheet.

To further test, you can delete the previous lead and submit a new one through the Facebook lead form. Refresh your Google Sheets, and you should see the new entry appear instantly, demonstrating the seamless automation.

This integration allows you to manage and track leads efficiently, ensuring that your dry fruits business can respond to potential customers promptly. With Pabbly Connect, you can automate many more processes, enhancing your business operations.


Conclusion

In this tutorial, we explored how to use Pabbly Connect to integrate Facebook Leads into Google Sheets for your dry fruits business. By following the exact steps outlined, you can automate lead management and ensure that your leads are recorded accurately and efficiently.

Ensure you check out Pabbly Connect to create business automation workflows and reduce manual tasks. Pabbly Connect currently offer integration with 2,000+ applications.

Utilizing Pabbly Connect not only saves time but also enhances your ability to respond quickly to new leads, making your business more competitive and organized.

Schedule Google Business Profile Posts from Google Sheets Using Pabbly Connect

Learn how to automate Google Business Profile posts from Google Sheets using Pabbly Connect and OpenAI. Step-by-step guide for seamless integration. Implement the precise methodologies leading organizations use to automate repetitive tasks, illustrated with practical examples designed for immediate application.

Watch Step By Step Video Tutorial Below


1. Setting Up Pabbly Connect for Automation

To schedule Google Business Profile posts from Google Sheets using Pabbly Connect, start by creating an account on the platform. Once logged in, navigate to the dashboard and click on the ‘Create Workflow’ button. This is where you will build your automation workflow.

Next, provide a suitable name for your workflow, such as ‘Schedule Google Business Profile Post from Google Sheets Using OpenAI’. Select the folder for your workflow and click on ‘Create’. This is the first step in utilizing Pabbly Connect to automate your posting process.


2. Scheduling the Automation with Pabbly Connect

In this step, you will set up the trigger for your automation. Select the ‘Schedule’ option in Pabbly Connect, which allows you to run your workflow at a specific time. Choose the frequency of execution; for this example, select ‘Every Day’ to schedule daily posts.

  • Choose the time for automation execution, e.g., 10:40 AM.
  • Confirm the scheduling by clicking ‘Save’.

By using the scheduling feature of Pabbly Connect, you ensure that your Google Business Profile is updated daily with new content, keeping your audience engaged.


3. Fetching Data from Google Sheets

After scheduling, the next step involves fetching the content details from Google Sheets. In Pabbly Connect, select Google Sheets as your application and choose the action event ‘Get Row’. This allows you to retrieve the specific row of data needed for your post.

Connect your Google Sheets account with Pabbly Connect by adding a new connection. Once connected, select the spreadsheet containing your post data. Specify the range as ‘A2 to C’ to ensure all relevant information is captured, including topics, image URLs, and target URLs. Click ‘Save and Send Test Request’ to verify the connection.


4. Generating Content Using OpenAI

In this part of the automation, you will utilize OpenAI to generate content based on the topic fetched from Google Sheets. Select OpenAI as your application in Pabbly Connect and choose the action event ‘Chat GPT’. Connect your OpenAI account by providing the necessary API token.

Set up the prompt for OpenAI to generate content. For example, instruct it to create content not exceeding 1,500 characters on the specified topic. Map the topic from the previous step to ensure the content is relevant. Click ‘Save and Send Test Request’ to generate the content.


5. Posting to Google Business Profile

The final step is to post the generated content to your Google Business Profile. Select Google Business Profile as your application in Pabbly Connect and choose the action event ‘Create Call to Action Post’. Connect your Google Business Profile account as you did in previous steps.

Map the content generated by OpenAI to the summary field in the Google Business Profile post. Specify the call to action type, such as ‘Learn More’, and provide the target URL for users to visit. Click ‘Save and Send Test Request’ to publish the post. This integration allows you to automate your business profile updates seamlessly.


Conclusion

By following this tutorial, you can effectively schedule Google Business Profile posts from Google Sheets using Pabbly Connect. This automation saves time and ensures consistent engagement with your audience through regular updates.

Ensure you check out Pabbly Connect to create business automation workflows and reduce manual tasks. Pabbly Connect currently offer integration with 2,000+ applications.

Automate RSS Feed Posting to Discord with Pabbly Connect

Learn how to automate posting RSS feeds to Discord using Pabbly Connect. Follow our step-by-step tutorial to streamline your Discord community updates. Master proven automation processes with practical implementation examples and strategic recommendations you can apply immediately in your workflow.

Watch Step By Step Video Tutorial Below


1. Introduction to Pabbly Connect for RSS and Discord Integration

In this section, we will explore how to use Pabbly Connect to automate the process of sharing RSS feeds to a Discord channel. This integration is particularly useful for E-Magazines or news channels that want to keep their community updated effortlessly. With Pabbly Connect, you can link various applications without any coding skills.

To get started, simply navigate to the Pabbly Connect homepage by typing Pabbly.com/connect in your browser. Here, you will find options to sign in or sign up for free. New users can enjoy 100 free tasks each month, allowing them to explore the platform and test various automations.


2. Creating a New Workflow in Pabbly Connect

To create a new workflow in Pabbly Connect, click on the ‘Create Workflow’ button on your dashboard. You will be prompted to name your workflow; for this example, we will name it ‘Share RSS Feeds to Discord.’ Select a folder to save your workflow, and then click ‘Create’ to proceed.

  • Name your workflow appropriately for easy identification.
  • Choose a folder to organize your workflows.
  • Click on ‘Create’ to finalize the workflow setup.

After creating the workflow, you will see two sections: Trigger and Action. The Trigger defines when the automation starts, while the Action specifies what happens next. In this case, we will set RSS by Pabbly as our trigger and Discord as our action.


3. Setting Up RSS as the Trigger in Pabbly Connect

To set up the RSS trigger, select ‘RSS by Pabbly’ from the available trigger applications. Choose the trigger event as ‘New Item in Feed.’ This means that whenever a new item is added to your specified RSS feed, Pabbly Connect will capture this event.

Next, you will need to enter the feed URL from which you want to pull data. For this tutorial, we will use the NDTV Sports RSS feed. Copy the URL of the feed and paste it into the designated field in Pabbly Connect. Click ‘Save and Send Test Request’ to confirm that the connection works and to fetch the latest feed item.


4. Configuring Discord as the Action in Pabbly Connect

Now that we have set up the RSS trigger, it is time to configure Discord as the action. Select Discord from the action applications and choose the action event ‘Send Channel Message HTML.’ This action will allow Pabbly Connect to send messages to your Discord channel automatically.

To connect Discord, you will need a webhook URL. Navigate to your Discord server settings, go to Integrations, and create a new webhook. Name your webhook, select the channel where you want the messages sent, and copy the webhook URL.

  • Navigate to Discord server settings.
  • Create a new webhook and name it appropriately.
  • Select the channel for posting messages.

Paste the copied webhook URL back into Pabbly Connect and set up the message format. You can include a static message along with the dynamic RSS feed URL that will be sent to Discord.


5. Testing the Integration Between RSS and Discord

With everything set up, it’s time to test the integration. After configuring the message content in Pabbly Connect, click on ‘Save and Send Test Request.’ This will send a test message to your designated Discord channel. Check your Discord channel to confirm that the message appears as expected.

If successful, you will see the message with the RSS feed link posted in your Discord channel. This confirms that Pabbly Connect is effectively automating the process of sharing RSS feeds to Discord. From now on, any new RSS feed item will be automatically posted in your channel without any manual intervention.


Conclusion

In this tutorial, we demonstrated how to use Pabbly Connect to automate posting RSS feeds to a Discord channel. This integration allows you to keep your community updated effortlessly by automatically sharing new content. With Pabbly Connect, you can streamline your workflow and enhance community engagement.

Ensure you check out Pabbly Connect to create business automation workflows and reduce manual tasks. Pabbly Connect currently offer integration with 2,000+ applications.

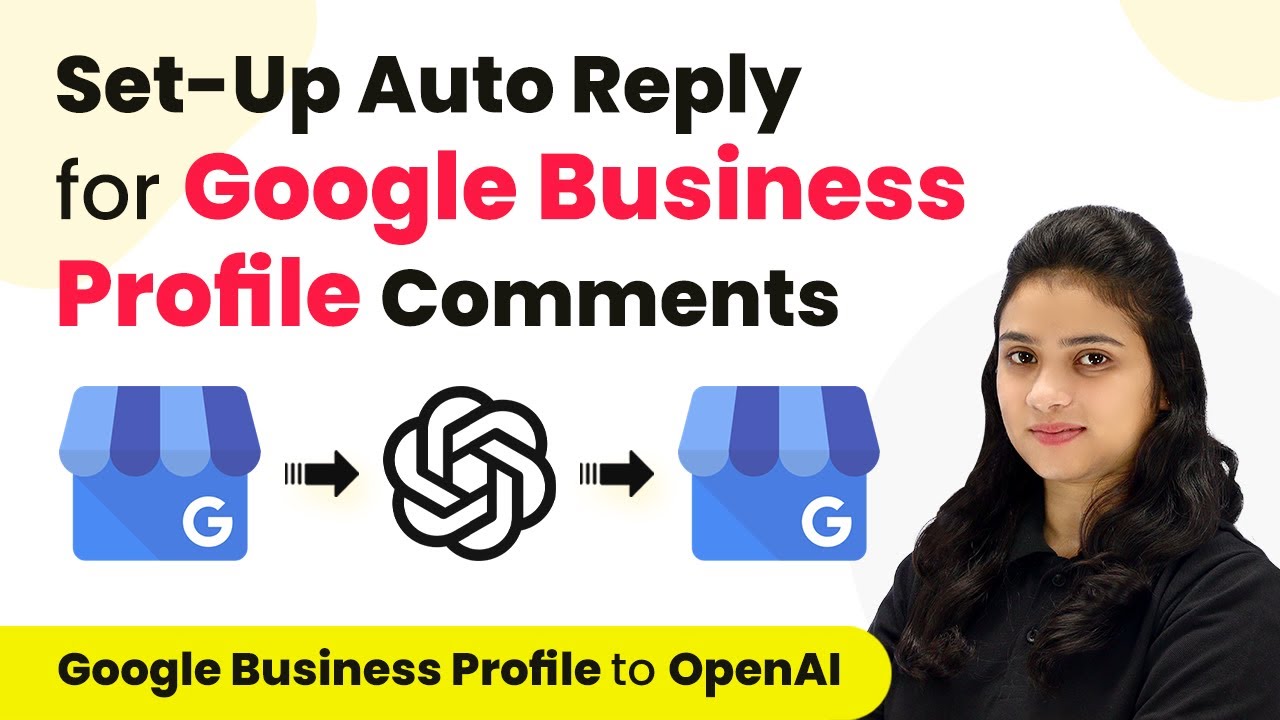
Automate Replies to Google Business Profile Comments with Pabbly Connect and OpenAI

Learn how to automate replies to Google Business Profile comments using Pabbly Connect and OpenAI with this step-by-step tutorial. Discover hidden automation capabilities within your existing tools. This guide shows you how to connect your essential applications and permanently eliminate redundant manual processes.

Watch Step By Step Video Tutorial Below


1. Accessing Pabbly Connect for Automation

To start automating replies to Google Business Profile comments, access Pabbly Connect by visiting its homepage. You can sign in if you are an existing user or sign up for free if you are new. Upon signing up, you receive 100 free tasks monthly to explore the platform.

Once logged in, navigate to the ‘All Apps’ section, where you can find various products offered by Pabbly. Click on ‘Access Now’ under Pabbly Connect to reach the dashboard, where you can manage your workflows.


2. Creating a New Workflow in Pabbly Connect

To automate responses, click on the ‘Create Workflow’ button located at the top right of the dashboard. A dialog will prompt you to name your workflow. Enter a name such as ‘Auto Reply to Google Business Profile Comments using OpenAI’ and choose a folder to save it. using Pabbly Connect

  • Click on ‘Create’ to initiate the workflow.
  • You will see two windows for Trigger and Action.

In this workflow, the trigger will be Google Business Profile and the action will be OpenAI. This setup allows the automation to respond to comments whenever a new review is created on your Google Business Profile.


3. Setting Up Google Business Profile as Trigger

In the trigger section, select Google Business Profile as the application. For the trigger event, choose ‘New Review’. This event will initiate the workflow whenever a new review appears on your profile.

Click on ‘Connect’ and choose to use an existing connection if you have already set one up. If not, click on ‘Add New Connection’ and sign in with your Google account to connect Google Business Profile with Pabbly Connect.

  • Select your account and the location for the business.
  • Click on ‘Save and Send Test Request’ to capture the last review response.

Once the response is captured, you can proceed to the next step, confirming that the integration between Google Business Profile and Pabbly Connect is successful.


4. Generating Replies Using OpenAI

Next, you will set OpenAI as the action application to generate a reply for the captured review. Search for OpenAI in the action application section and select it. For the action event, choose ‘Generate Content’.

Click on ‘Connect’ and select your existing connection with OpenAI. If you need a new connection, you will need to provide an API token from your OpenAI account. After connecting, enter the required details in the fields provided.

Select the AI model, preferably ‘text-davinci-003’. In the prompt field, input ‘Generate a response for Google Business Profile review’ and map the review comment from the previous step. Set the maximum tokens to 100 for the reply.

Click on ‘Save and Send Test Request’ to generate the reply, confirming that OpenAI is successfully integrated with Pabbly Connect.


5. Posting the Reply Back to Google Business Profile

Finally, add another action step to post the generated reply back to Google Business Profile. Select Google Business Profile again as the action application and choose the action event ‘Create Reply’. using Pabbly Connect

Connect using your existing connection and proceed to map the review ID and the generated reply from OpenAI. This will ensure that the reply is posted to the correct review.

Map the review ID from the previous response. Map the reply generated by OpenAI.

Click on ‘Save and Send Test Request’ to confirm that the reply is successfully posted. You can verify this by checking your Google Business Profile to see the automated reply.


Conclusion

Using Pabbly Connect, you can effectively automate replies to Google Business Profile comments by integrating OpenAI. This setup enhances customer engagement and saves time by automatically responding to reviews.

Ensure you check out Pabbly Connect to create business automation workflows and reduce manual tasks. Pabbly Connect currently offer integration with 2,000+ applications.

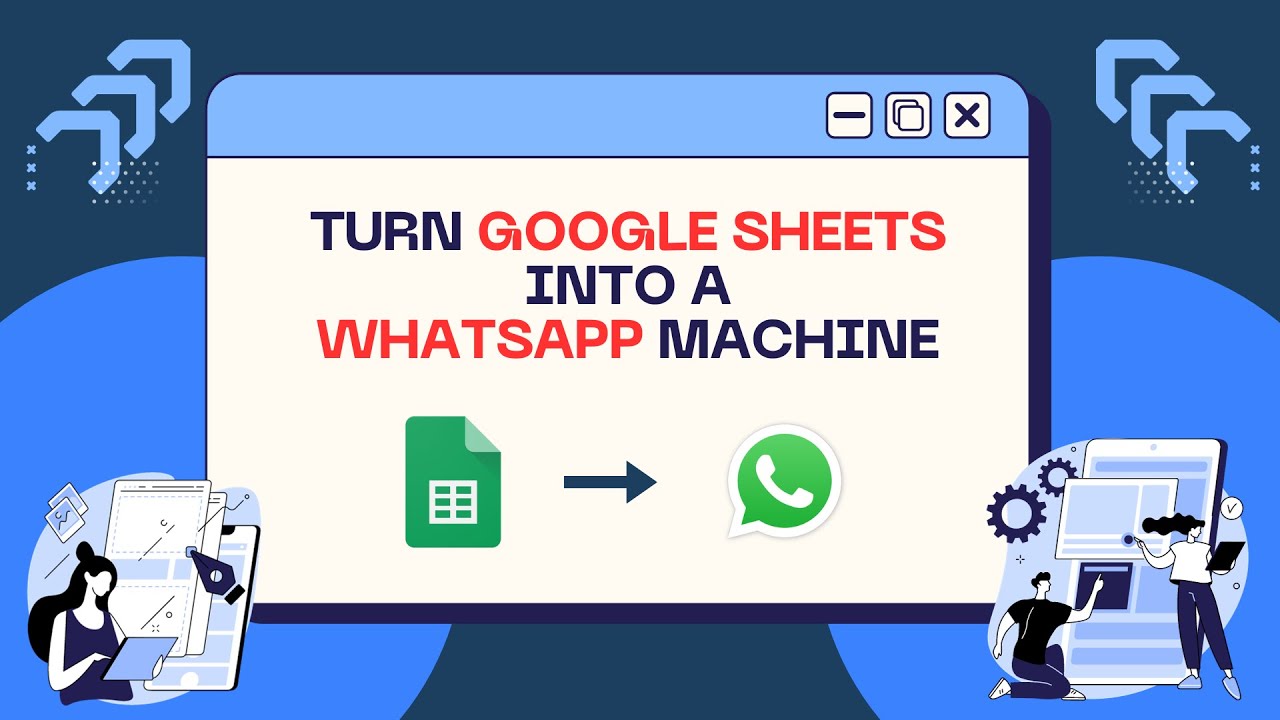
Turn Google Sheets into a WhatsApp Machine with Pabbly Connect

Learn how to automate WhatsApp messaging from Google Sheets using Pabbly Connect. Step-by-step guide to integrate seamlessly and boost your communication. Learn to create powerful connections between your critical applications without requiring specialized programming knowledge or extensive technical background.

Watch Step By Step Video Tutorial Below


1. Getting Started with Pabbly Connect

To turn your Google Sheets into a WhatsApp machine, the first step is to access Pabbly Connect. This integration platform allows you to automate the process of sending WhatsApp messages directly from your Google Sheets.

Begin by signing up for a free account on Pabbly Connect. Once you have access, navigate to the dashboard where you can create a new workflow. This will allow you to set up the automation that connects Google Sheets with WhatsApp API services.


2. Creating a Workflow in Pabbly Connect

After logging into Pabbly Connect, click on the ‘Create Workflow’ button to start your automation. Name your workflow something descriptive, such as ‘Google Sheets to WhatsApp’. This helps in identifying the automation later.

  • Select Google Sheets as your trigger application.
  • Choose the trigger event as ‘New or Updated Spreadsheet Row’.
  • Copy the webhook URL provided by Pabbly Connect.

These steps will initiate the connection between your Google Sheets and Pabbly Connect, enabling the automation to function effectively.


3. Setting Up Google Sheets with Pabbly Connect

Next, you need to configure your Google Sheets to work with Pabbly Connect. Go to your Google Sheet, click on Extensions, then Add-ons, and select ‘Get Add-ons’. Search for ‘Pabbly Connect Webhooks’ and install it.

After installation, refresh your Google Sheet. Then, navigate back to Extensions, find Pabbly Connect Webhooks, and select ‘Initial Setup’. Here, you will paste the webhook URL you copied earlier and select the trigger column, which should be the last column with data.

  • Enter the last column where data entries are made.
  • Click on ‘Send Test’ to confirm the setup.

This setup ensures that each time a new row is added or updated, the data is sent to Pabbly Connect for processing.


4. Connecting WhatsApp API with Pabbly Connect

Once your Google Sheets are set up, the next step involves connecting a WhatsApp API service, like Wati, through Pabbly Connect. In the action step of your workflow, search for Wati and select it.

Choose the action event as ‘Send Template Message’ and click on connect. You will need to enter your WhatsApp API endpoint and access token from your Wati account. This allows Pabbly Connect to send messages on your behalf.

Map the WhatsApp number from the Google Sheets data. Select the template message you created in Wati.

By mapping these fields, you ensure that each customer receives a personalized message based on the data from Google Sheets.


5. Sending Messages Using Pabbly Connect

To send WhatsApp messages to all customers listed in your Google Sheets, go back to the Extensions menu in your Google Sheet, select Pabbly Connect Webhooks, and click on ‘Send All Data’. This triggers the automation you set up in Pabbly Connect.

As a result, all customer data will be processed, and WhatsApp messages will be sent one by one. You can verify this by checking the WhatsApp account linked to the phone numbers provided in your Google Sheets.

Ensure your templates are properly set up in Wati. Monitor the responses to confirm successful message delivery.

This completes the process of turning your Google Sheets into a WhatsApp machine using Pabbly Connect. The automation is now fully operational, allowing you to communicate efficiently with your customers.


Conclusion

In this tutorial, we explored how to use Pabbly Connect to automate WhatsApp messaging directly from Google Sheets. By following these steps, you can efficiently connect your applications and enhance customer communication.

Ensure you check out Pabbly Connect to create business automation workflows and reduce manual tasks. Pabbly Connect currently offer integration with 2,000+ applications.